Probably every resident of a country house has at least once encountered the problem of clearing snow from the area. It often happens that there is either not enough time or energy for this process. A snow blower made from a saw or other tool can make your work much easier, because you only need to walk and operate the structure.
If you look at a photo of a snow blower with your own hands, at first it may seem that its structure is quite complicated and it is almost impossible to make it yourself.
Actually this is not true. This article will discuss exactly how to make a snow blower. Let's not languish, let's go!
Drawings and diagrams
To assemble snow blowers, you can use drawings that are easy to find on the Internet, or start developing your own version based on local conditions.
There are four types of snowblowers:
- Bulldozer. Wheels with a blade mounted at the front.
- Auger. In it, snow is gradually captured by rotating belts and moved to a pipe through which it is thrown out.
- Fan-blade. Using special blades, the sticky snowflakes are directed to the fan, lifted by the blades to the pipe and flew out.
- In air-fan . It works like a vacuum cleaner. The snow mass is drawn in by a strong stream of air and thrown out into the street.
In cities, all these types of cleaning equipment are used, but in rural areas it is difficult to make the air-fan type, since a very powerful engine is needed to suck up snow. Therefore, the article discusses the creation of only the first three options.
Useful tips
- It is better to place the gas tank on top, and it is not recommended to make its volume larger than 2.5 liters.
- Walk-behind tractors not intended for winter use are filled with synthetic oil.
- Solid particles (branches, stones) thrown along with snow can ricochet and injure others. Wear safety glasses when operating the snow blower, and do not wear loose clothing that could get caught in moving parts of the machine.
- To prevent the engine from jamming due to large foreign objects, the augers and rotor are secured to the drive shaft with shear bolts and bushings. Under excessive loads, these “fuses” will break, but the engine will remain intact.
- Do not open the fuel tank , do not refuel the equipment when the engine is hot, let it cool down for a couple of minutes. It is recommended to take a break from work every half hour or hour to avoid engine overheating.
Some people buy factory-made equipment because of the warranty and service provided for it. Others value the physical pleasure of working with a traditional shovel.
And for those who like to design their own equipment and have relevant experience in this field, it is quite possible to create their own snow blower , armed with suitable instructions and expert advice.
“>
- Author: Maria Sukhorukikh
Rate this article:
- 5
- 4
- 3
- 2
- 1
(0 votes, average: 0 out of 5)
Share with your friends!
Required tools and materials
Before choosing materials and making the device, you should remember that the chainsaw engine has little power. You should not use the unit to clear ice or heavily frozen snow to avoid damage.
First you need to think about what to make the cleaner from and what devices to use. It is not difficult to guess that different types of work will require different materials. They will be indicated in the instructions for the manufacture of a particular design.
What tools should you use:
- welding machine;
- hammer, pliers, screwdriver;
- different keys;
- file;
- grinder and drill;
- hacksaw;
- vice.
Operating principle of a two-stage machine
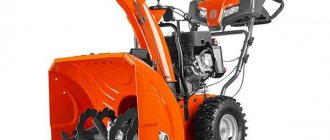
A two-stage (rotary auger) snow blower works as follows: the auger rake in the snow, and the rotor throws it out through a special chute. The augers in these snow blowers can be smooth or serrated. It is permissible to make them from metal or from other materials, for example, reinforced rubber. This equipment can be either self-propelled or manual. The rotor impeller can have from three to six blades. Polymers or metals are used for their manufacture.
Two stage snow blower
The given snow blower diagrams are not very technically complex, and it is quite possible to make them yourself.
Snow blower with blade
The easiest thing is to assemble a motorized snow blower from an already finished product, slightly altering it. But you can do it differently and do it yourself.
In the first case, the basis of this unit is a conventional industrial-style manual cleaner with two or four wheels. In the second, all the parts are obtained or made by hand.
Materials for assembling a snow blower
- metal sheets 2, 3 or 4 mm;
- pipes with a caliber of 50-70 mm;
- bearings (local);
- frame squares;
- wheels;
- axles;
- washing machine tank, boiler or pan;
- sprockets or gears;
- chains or belts;
- bolts, nuts;
- electrodes.
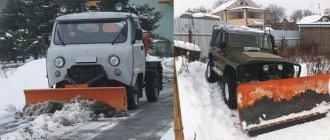
Snow blowers from industrial designs
The unit is made from mobile rather than hand-held devices. There are two options for such devices. The first of them has a stationary axis, and the second has a rotating axis. Both devices (or the rotating rod) have a fixed blade.
It is better to choose an option with one or two axles that rotate, and the wheels are rigidly fixed to them. Then minimal modification will be required.
Step-by-step instruction:
- One or two wheels are removed (front ones if the snowplow is biaxial).
- A sprocket, for example, from a motorcycle, is welded (or otherwise strengthened) onto the freed axle. It is advisable to install it closer to the hub of one of the wheels.
- The structure is being put back together.
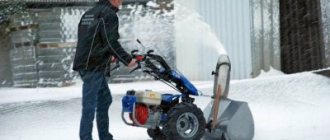
- A plate is screwed to the handle (if the option is single-axis) or to the frame. A chainsaw is attached to it so that the chain draped over the welded sprocket is properly tensioned.
If the axle is welded tightly, you need to do the following:
- Remove the wheels.
- Choose an axle or a thick rod for them.
- Grind the hubs or cups so that the wheels “sit” tightly.
- Weld metal corners with holes for the new axle to the frame.
- Strengthen the driven sprocket (from a motorcycle, for example).
- Assemble the structure - insert the axle into the corners (you don’t have to cut off the old one if it doesn’t interfere) and install the wheels.
- Attach the chainsaw to the frame or handle.
When operating such a unit, you will not need to waste a lot of energy. The saw motor will create the required force.
Homemade bulldozer type cleaner
This option repeats the previous two. The difference is that most of the parts and components are made independently.
To make it you need to get the wheels. You can borrow them from an old bicycle. Or remove one or two complete wheelsets from a wheelbarrow or any end-of-life vehicle. Then select an axis for them on which they will be permanently mounted.
The whole job is as follows:
- A single or biaxial frame is welded from ordinary or profile pipes.
- Corners with holes are welded to it.
- An axle with a pre-fixed sprocket is inserted into them.
- The wheels are being put on.
- Weld stationary pipes or a rotating mechanism for the blade.
- Install the plate with a chainsaw.
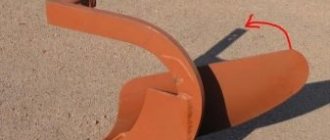
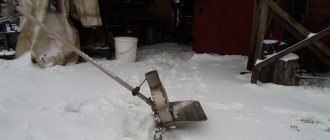
Making a homemade blade
This part of the purifier is made of metal sheets, a barrel, a large-diameter pipe or some kind of tank (from an electric heater, for example).
The main dimensions are selected independently depending on the power of the chainsaw. It is not recommended to make a blade more than a meter long, since the engine may not be able to withstand such a load.
When making a dump from sheets, they are pre-lined. Then the parts are cut out and welded together. This snowblower assembly can have any shape.
When making a blade from a cylindrical blank, it is cut as shown in the figure. If the unit is made from a pipe, then sides are installed on the sides. At the bottom (for rigidity) a knife made of a long, pointed strip of metal is riveted.
Types of snow removal machines
Snow removal equipment differs in two main ways:
- by type of management;
- by type of energy carrier.
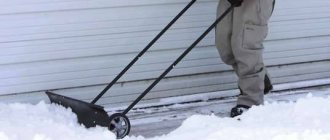
Based on the type of control, the machines are divided into non-self-propelled and self-propelled. Non-self-propelled ones have an affordable price, compact dimensions and low weight, up to 35 kilograms. Such devices do not require a hangar for storage and can be transported in the trunk of a car.
Light snow blowers do not damage paving slabs. Note! Non-self-propelled snow blowers throw snow no further than 5 meters. They cannot cope with compacted snow and ice crust.
Self-propelled devices are much more expensive, but they also have great capabilities. The operator does not need to make any effort to control such equipment. Such a machine throws snow further, and the dimensions of the bucket allow it to clear large areas. Such devices can overcome dense snow. The size of the equipment requires the use of special premises for storage, and such a unit can only be transported in a truck or on a trailer.
The weight of a self-propelled vehicle starts at 70 kilograms
Depending on the type of energy carrier, cleaners can be electric or gasoline.
Let's look at them in comparison.
Comparison of gasoline and electric self-propelled snowblowers
| Gasoline | Electric |
| Maneuverability | |
| Snow removal with a gasoline walk-behind tractor does not depend on the power source; it can be used in any area away from home | The range of the device depends on the length of the “leash”. The electrical cord does not allow you to move away from the power source. In addition, the wire does not tolerate low temperatures well and may simply burst due to frost. |
| Ease of management | |
| The design of a gasoline unit is much more complex; to control it, you need to understand the ignition system. Among other things, gasoline models are much heavier, which causes certain difficulties in driving. | Electric units are extremely easy to operate. Due to their low weight, they are very mobile and easy to use. |
| Maintainability | |
| The design of the gasoline engine in snow blowers is the same as in other gasoline units. A common cause of breakdown is the use of a low-quality fuel mixture. All spare parts are interchangeable. You can repair the engine yourself. | Electric motors are more likely to fail under heavy loads. Their repair requires thorough knowledge and can only be carried out in specialized workshops. |
| Power | |
| Gasoline engines of snow blowers can develop power of 11 hp or more. This allows them to cope well with large snowdrifts and hard crust. | The power of the electric motors is limited to five hp. Such characteristics do not allow the device to cope with dense snow and ice crust. |
| Price | |
| Gasoline devices are almost twice as expensive and their operation and maintenance will cost you a lot. | The price of a snow blower is relatively low. In addition, such devices have low operating costs. |
Screw option
A device with a blade has drawbacks, and the main one is the waste of time and effort to remove the layer of snow picked up by the blade. Often it is left right next to the road, creating high snowdrifts, which is not always acceptable.
The version of the snow blower with an auger will allow you to get rid of even roadside sediment, because its design provides for the throwing of the captured mass over a distance of several meters. This will help clear the yard or street completely, leaving the piles next to the fence.
This option is welded or screwed from the front to a frame with wheels, which can be removed from an old wheelbarrow, for example.
Another design is a wheelless version, controlled by a tube. The body is mounted on a frame made of angles, from the bottom of which skis are screwed.
Main components and materials of both options:
- box - welded from sheets of metal;
- central shaft - is a ¾-2 inch pipe;
- gripper (scapula) - iron plates or pieces of channel;
- supporting elements;
- auger - made of rings or tape;
- motorcycle sprocket;
- ski made of plates or pipes;
- frame made of corners;
- bearings;
- a pipe for throwing out snow - you can take it from the stove.
Screw assembly sequence:
- 4 rings and 6 support plates are cut from roofing sheets or other metal.
- Six strips are placed on the shaft and welded to it at an angle of 90°. Then the sprocket is strengthened and the bearings are pressed in.
- Two blades made of plates are inserted between the middle guides. They are welded to the shaft and to the supporting elements. If pieces of channel bars are used as gripper blades, they are rotated 180° relative to each other.
- The rings are cut, bent and welded so that two intersecting spirals are obtained.
You can straighten them in two ways:
- Clamp the middle part in a vice, grab one edge with pliers and pull it to the side. Do the same with the other end.
- Weld one edge to the support element at the blade and stretch it.
If the rings are made of thick material and it is difficult to grasp them with pliers, then you can use two clamping devices, such as a vice.
After making the auger, a sheet of metal is laid out and the box is welded. A hole is cut out in its middle part for a pipe to throw out snow. You can make it yourself or use one already prepared from an iron stove. Some craftsmen use plastic ones.
Then a rectangular hole is cut in the body opposite the sprocket to allow the chain to pass through. The box is installed on a frame with runners or wheels and the chainsaw is strengthened.
Construction of Electrical Assembly
The electric design of the snow collector is most suitable for summer cottages where snow needs to be removed rarely and in small quantities. Most often, instead of a screw, such machines are equipped with one rotor running on a fan. After capturing the snow with special blades, the fan blades begin to mix the snow with air, and then, under pressure, throw it in a certain direction using a hose. A rotary snow blower can only cope with loose and newly fallen snow.
This rotor design is simple, so anyone can make it following the main drawings. Creating a device:
- A special metal disk is used for the impeller; steel strips are welded onto it onto the blades. Their number can vary from 2 to 5 pieces. The shaft is turned on a lathe from a steel rod. Along with the hubs, several bearings are placed on it.
- For the snail body, a part of a metal barrel with a height of 150 mm is cut off. On the side you need to cut a small hole where the pipe for mounting the sleeve will be placed. A hole is drilled in the center of the bottom, and a special rotor shaft is inserted into it so that it moves inside the cochlea. A special impeller is put on it. The bearing hubs are attached to the bottom with bolts from the outer surface of the volute. On the back side of the structure body, two rectangular sheets are welded. The guide vanes will efficiently capture excess snow, the fan will suck in, grind and throw it to the sides, thereby cleaning the area.
- The finished device with a rotor is placed on a frame, combined with a belt drive by an electric motor, and special wheels from a wheelbarrow are used as the running gear.
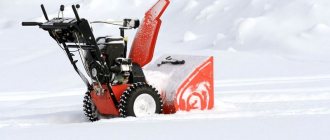
Fan unit
An industrial version of this type (Blizzard) has long been used on the farm by many people. But you can assemble it yourself.
This snow blower is very reliable and does a great job.
It consists of a small number of parts:
- The knives perform two functions: they cut the snow and direct them to the fan.
- A rotor with blades captures layers of stuck together snowflakes, spins them and pushes them out at high speed through a hole in the body.
- The pipe serves as a guide for the flow of thrown snow.
To manufacture such a unit, the following materials are required:
- sheet iron 1-3 mm for the body and blades and 5-10 mm thick for the blades;
- shaft for rotor;
- star;
- squares for the ski option or wheelset;
- pipes for making handles.
The procedure for manufacturing the structure
First, they make a body with knives. To do this you need:
- Determine the diameter of the fan and calculate the circumference using the well-known formula L=πD.
- To the resulting value, add an allowance of 1 cm if using a welding machine and 2 cm when connecting the edges with bolts or rivets.
- Then you need to cut a strip of length L+ (1 or 2 cm) of the required width (for example, 10-15 cm) from the sheet.
- Bend the workpiece on a mandrel and weld it. Or drill holes in the overlap area and connect in another way.
- Draw on a sheet of paper a circle with diameter D for the back wall of the case and triangular-shaped knives with a rounding at one corner.
- Weld all the workpieces in place.
Execution of a rotating assembly:
- A 20-30 cm long shaft is placed on the bearing so that 5-6 cm peeks out on one side. To manufacture it, the services of a turner may be required. If the farm has the necessary part with a bearing, then you can use it.
- Determine the center of the circle (back wall) and drill it with a drill whose caliber is 3-5 mm larger than the diameter of the shaft.
- Measure the external dimensions of the bearing and cut out a cup for it from iron. It should have tabs in order to drill them and secure this part with screws.
- A glass is placed on the bearing, and a pipe of suitable diameter is pressed onto the shaft or mounted and clamped with screws.
- Blades are welded to it - plates made of thick iron.
- The rotating assembly is fixed from the inside of the housing so that 5-6 cm remains outside.
- An asterisk is welded onto this “tail”.
At the very end, a drawing of the pipe is made and a blank is cut out, which is bent and welded. A hole is made on top of the body (in the center or slightly to the side). Then the pipe is strengthened. It is advisable to make its top rotating so that you can direct the flow of snow where needed.
The entire structure is mounted on a frame (front) with skis or wheels. The chainsaw is strengthened, as in the previous ones.
Types of snow removal equipment for the home with your own hands
Snow removal machines are designed for mechanical removal of snow cover in the required area. Their functions include collecting snow mass and throwing it back to the collection point. The engine that powers the car can be electric or gasoline. And the snow removal machine itself is divided into self-propelled (with tracked or wheel drive), manually controlled, single-stage and two-stage. To independently assemble such garden equipment, you can use a chainsaw engine, an electric motor or a walk-behind tractor, as well as various improvised materials that everyone probably has on their farm. Before you make a snow blower with your own hands, you should familiarize yourself with the types of such equipment and choose an acceptable option for yourself. The choice of snow blower design depends on many factors, one of which is the area of the area that is supposed to be processed. Electric snow blowers are capable of clearing small areas near the house, for example, a porch or narrow paths. Such a unit is not suitable for clearing large areas of snow cover. In addition, its operation is not effective if there is ice or significant snowdrifts. On the other hand, such equipment is quite compact, easy to operate and convenient to store. Gasoline-powered self-propelled snowblowers do an excellent job of removing large amounts of snow from large areas. Moving independently, these vehicles have excellent maneuverability and a long ejection range. The equipment is quite large in size, but does not require any physical effort during operation.
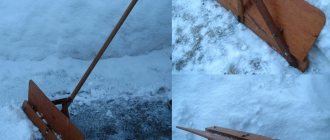
Before you make a manual snow blower with your own hands, you need to keep in mind that non-self-propelled models are designed for cleaning small areas of freshly fallen snow up to 25-30 cm thick. They are mainly used for daily cleaning of sidewalks, garden paths and flat roofs. Such devices are quite maneuverable, however, when removing a dense layer, it will be difficult to control the equipment, since you will have to push not only the device, but also the thickness of the snow in front of it. Helpful advice! When assembling a non-self-propelled snow blower for your home with your own hands, you should use the lightest possible parts, since the equipment will work due to human efforts.
Making a homemade snow blower for your home with your own hands is an excellent opportunity not to spend money on purchasing expensive models from leading manufacturers and at the same time avoid labor-intensive clearing of snow from the area with a shovel. In addition, home-made equipment will become a source of pride for any owner of a country house or dacha. Assembling a homemade snow blower will not be difficult if you have an idea of the operating principle of such equipment and its structure. To clear snow from the surface of paths and the yard of your own home, it will be enough to assemble an auger or rotary model. These are simple machines and anyone can make them. Making a combined homemade snow blower with your own hands is somewhat more difficult, but you can do it if you want.
Snowplows can be either self-propelled - on wheels or tracks, or non-self-propelled, the movement of which requires operator effort. Before you make a snowplow with your own hands, you need to decide on the type of engine. When equipping it with an internal combustion engine, you should take into account that it will be a fairly powerful unit that can operate on any surface of your site. However, the components and fuel for it are quite expensive. In addition, the disadvantages include the complex technical content of such equipment. As for a do-it-yourself snowblower with an electric motor, in this case you can use any motor from relatively powerful electrical equipment. A motor from a trimmer or electric saw will do. The advantages of such technology include the availability of electricity, and the disadvantages are the short range of action. To cover the entire area, you will need an extension cord or street wiring with several outlets.
Precautionary measures
The main danger is the puppy, which is capable of not only wrapping clothes around itself, but also hitting or even injuring an arm or leg. When clearing snow, a number of rules should be followed:
- Wear warm clothes and non-slip shoes.
- Wear ear protection, gloves and goggles.
- Do not direct the flow of snow towards people or cars.
- If the snow blower is electric, then do not forget about the cable.
You should also remember the dangers when refueling the unit, because mistakes made can lead to a fire or explosion of the fuel.
A snow blower can work not only in winter, but also in other seasons. The fan version (if placed with the opening facing up) can be used for threshing corn. Or supplement it with pipes and use it as a forced ventilation device.
Mounting on the engine block
The easiest snow collector to create is considered to be mounted on a walk-behind tractor. If there is a traction device in the yard, then why make another machine with a drive in the structure. To do this, you need to create a special auger mechanism with special blades for throwing snow as a hitch . The snow receiver body is placed on the frame, and skis are attached to the bottom. Special fasteners are installed on the back of the frame, with the help of which the coupling will occur with the walk-behind tractor and attachments.
The drive is carried out using a belt drive. You can set the rotation speed of the auger yourself by selecting pulleys of different diameters. If this cannot be done, then a special intermediate gearbox can be created between the auger nozzle and the walk-behind tractor. It will reduce the speed to the desired frequency.
A self-made snow blower will hardly differ in performance from its factory-made counterparts, and will cost the user much less than a purchased model. The auger-rotor unit is much more difficult to create, but has a high performance indicator. This device should be used by residents of regions where there is a large amount of precipitation.