Homemade blade for the MTZ-82 tractor.
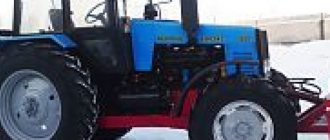
MTZ tractors are widely used in public utilities and agriculture due to their relatively low cost, ease of operation, and good performance characteristics. Many owners of these units seek to modernize them and significantly expand their functionality. One of these improvements is a front or rear blade, which is indispensable when carrying out certain types of agricultural work, as well as when clearing snow drifts.
A homemade blade for the MTZ-82 tractor can become an indispensable assistant for any farmer when carrying out various types of work. There are a variety of types of this attachment on sale, but you can do it yourself, especially since there is nothing complicated about it. To make a blade, you will need drawings, appropriate materials and ability to handle the tool.
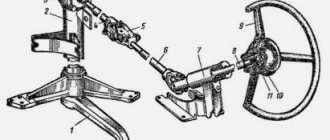
Tractor blade design
Blade design for a tractor.
The blade installed on the MTZ-82 tractor consists of the following components:
- working shovel;
- push-type frame;
- auxiliary frames;
- hanging system;
- hydraulic cylinder;
- spacer beam;
- shock-absorbing system.
The equipment is installed on the front part of the power unit with direct attachment to the frame. The rotating mechanism of the blade is designed in such a way that it is at an angle of no more than 30˚ relative to the tractor axis. Depending on the design, the front shovel can be made with either a hydraulic or mechanical rotating device. Raising and lowering a homemade snow plow is carried out using the MTZ-82 hydraulic system, and as an addition, the shovel can be equipped with a reinforced frame hitch or a rubber pad on the working edge.
Attaching the bucket to the walk-behind tractor
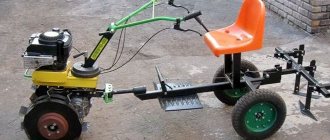
As a rule, all motor cultivators have a standard bracket for attaching attachments. It is quite suitable for attaching a front blade. If necessary, an adapter is made to allow the bucket to be rotated to the right or left.
The fastening is made in this way:
- A profile pipe is welded from the back of the bucket. To ensure secure fixation, it is advisable to duplicate the welding seam with several bolts.
- A semicircle with a diameter of 20-25 cm is cut out of sheet metal 10 mm thick. The workpiece is welded to the profile pipe. Holes are made along the edge at intervals of 20 mm to adjust the angle of the bucket.
- A holder in the shape of the letter “L” is made from a square pipe. The short side of the holder is fixed to the rotary sector, the second end is rigidly fixed to the bracket of the walk-behind tractor. To adjust the height of the knife, bolts screwed into the adapter are used.
A simpler connection method is a system of lugs and clamps made of thick sheet steel.
Types of blades for the MTZ tractor
Utility blade for MTZ tractor.
Taking a closer look at the attachments on the market, tractor blades can be classified as follows:
- Communal. The equipment has a lightweight design and is mainly used for waste collection in areas and hard-surfaced areas, as well as for the improvement of grain drains and livestock farms.
- Bulldozer. The device installed on the MTZ-82 tractor is used for road, construction and planning work, as well as for cleaning industrial areas.
- Snow removal. The lower working part of the blade is equipped with a rubberized technical plate to prevent damage to the road surface. Such equipment is used for snow removal, as well as for minor site leveling work.
Design features of the device
Snow shovels can be easily attached to any type of equipment and greatly speed up and simplify the snow clearing procedure. Any snow removal equipment for a multifunctional unit includes 3 basic parts: a snow shovel, a mechanism for adjusting the angle of rotation of the snow plow, and a fastening module that holds the snow plow to the frame of the unit.
There are a number of designs of factory shovels that are part of the attachments, however, you can build a similar device for a walk-behind tractor with your own hands, especially since there is a lot of different information and drawings on this problem on the global network.
A blade is an integral part of attachments used together with a motor cultivator. With its support, you can facilitate such routine work on your own plot of land as collecting garbage in summer, clearing snow in winter, in addition, leveling the surface layer of the earth and transporting it from one plot to another. Snow dumps come in various variations, but in general they are endowed with one principle of operation and design. Basically they have a number of standard work positions.
It is almost always the following 3 provisions:
- directly;
- to the left (with a rotation of 30°);
- to the right (with a rotation of 30°).
Homemade blade for MTZ-82
Do-it-yourself blade for the MTZ-82 tractor.
With a competent approach to creating a snow shovel with your own hands and following all the instructions, homemade equipment has a large number of advantages:
- with independent selection of materials and parts, subsequently such a device can be easily maintained and repaired, and, if necessary, improved;
- the ability to select optimal sizes for the blade;
- using scrap materials and parts, you can make a blade that will cost much less than the factory version;
- A large number of attachments offered on the Internet are manufactured independently, and therefore, with a minimum of tools, drawings and materials, you can make a blade no worse than factory products.
Photo No. 1 Finished blade Photo No. 2 Front view Photo No. 3 Side view Photo No. 4 attaching the blade to the bracket Photo No. 5 attaching the bracket to the tractor Photo No. 6 Dimensions of the bridgehead Photo No. 7 Dimensions of the blade platform Photo No. 8 Fastening the shovel bridge Photo No. 9 dimensions of the bracket Photo No. 10
However, such a shovel also has some disadvantages:
- if the MTZ-82 tractor or home-made attachments break down, warranty service is not provided and you will have to solve the problem yourself;
- If there is an error in choosing the dimensions for a homemade blade, significant overload of the tractor is possible, which will lead to serious damage to the unit.
How to make a shovel blade for a mini tractor with your own hands (video)
/ Special equipment /
The mini tractor is a universal unit when using various attachments. Among the popular canopies is the blade. Its task is to clear the territory of snow drifts. The cost of such a device is quite high, so it is worth considering the option of making a blade yourself.
Features and purpose
A blade for a mini-tractor is a necessary piece of equipment, the use of which is aimed at removing snow and cleaning the area during the cold season. And also with the help of a blade you can transport bulk materials without much effort. By connecting this equipment to the unit, the work can be completed within a few minutes.
Procedures without dumps take several hours. A shovel for a mini-tractor can not only be purchased, but also made with your own hands, which helps save money, as well as convenient and comfortable work. You simply cannot do without a blade in the winter season, when it is impossible to leave the yard due to snow cover.
In order not to waste time manually cleaning the road, you can use this attachment for the unit.
Snow dumps have the following components:
- shovel;
- grader fixation unit;
- a device that is designed to turn an angle.
Thanks to its rigid design, the blade can cope not only with snow of a loose consistency, but also with compacted cover and ice. Models equipped with a mechanical swing do not require a hydraulic line on the loader.
The equipment is protected from collision thanks to an additional rotation axis with a spring block. Thus, when hitting an obstacle, the blade deviates and jumps over it.
Advantages and disadvantages
A mini-tractor blade is a type of equipment that is characterized by the following advantages:
- high-quality manufacturing material, which contributes to a long period of operation;
- speed and ease of operation;
- ease of use;
- no need for your own efforts during the process.
The attachment has practically no disadvantages, except that it is expensive, but this disadvantage quickly pays for itself.
Tools
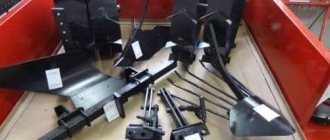
To make a blade, in addition to drawings, you will need the following tools and materials:
- Bulgarian;
- electric hand drill;
- pliers;
- Screwdriver Set;
- a set of keys;
- welding machine;
- bolts or screws;
- rivets;
- nuts;
- steel pipe, old barrel or boiler;
- steel and rubber strips.
How to use?
People who have become owners of a mini-tractor and a blade should know how to use it correctly. The front and rear type blades are characterized by certain features, as well as operational features.
After purchasing a blade, it should be installed on the machine, using specially designed fasteners. After this, it is necessary to set the angle of work. If you need to clean roads, it is worth installing an acute angle.
When removing snow cover over a large area, it is necessary to establish a right angle. After all the above activities, you can start removing snow.
Important! A purchased blade, just like a homemade one, requires some knowledge and skills when using it. For the attachment to function properly, it is necessary to use it responsibly, otherwise user injury or damage to the device may occur.
It is worth paying attention to the following safety rules when using a mini-tractor with a blade:
- the use of attachments must be carried out in accordance with its intended purpose;
- During operation, it is necessary to monitor the functioning of the blade;
- If the blade is filled with snow while driving, it must be kept lowered.
Required materials and tools
Before you begin selecting materials and creating a blade for the MTZ-82 tractor shown in the photo, you should first draw up a plan and drawings that can easily be found on the Internet. To select the optimal dimensions and weight of the equipment, you should take into account what materials you decide to use, as well as the power and weight of the power unit.
Important! To avoid mistakes, it is best to look at the equipment on the market and simply copy the blade with the optimal parameters.
To make a snow shovel for the MTZ-82 tractor with your own hands, you need a minimum set of tools, namely:
- measuring instruments;
- hand-held electric drill;
- welding machine;
- set of drills;
- bolts;
- steel beams or pipes with a diameter of more than 70 mm;
- shock absorbers;
- set of wrenches;
- hydraulic cylinders;
- metal cutter or scissors;
- Bulgarian;
- steel sheet with a thickness of at least 8 mm;
- rubber strip.
However, in addition to tools, certain skills in working with metal and welding are required.
As for materials, the most basic is sheet metal, which will be used for the frame of the unit and the blade itself. Dimensions should be calculated in accordance with the likely maximum loads, or dimensions can be copied from existing factory models.
Manufacturing of attachments
Buying canopies for a walk-behind tractor will be very inconvenient for a small summer resident. A summer resident or farmer can make all the equipment himself at home, using a little ingenuity. Most of the equipment is quite simple and can be made from almost whatever is on hand.
Before you make a plow for a mini tractor with your own hands, you need to carefully study the drawings and dimensions and choose the most optimal one. It will be easier to make equipment if you have a ready-made factory circuit.
Making a hiller
To do this, you need to take 2 metal disks with a thickness of 2 mm and position them so that they open outward. When the angle is selected, they are secured with bolts or simply welded. Then it is simply secured to the hitch.
Potato planter
The structure of this unit resembles a hiller. It has a bowl on top into which potato tubers are poured. From a special hole they fall into the ground.
To make a homemade potato planter, you need to assemble wheels, an axle, pins, a hopper, sprockets, and an adjustment mechanism. All this is attached to the frame.
The wheels are covered with a metal plate at the front, otherwise the potatoes will fall out of the hopper at times when this is not needed. The bottom of the hopper is covered with rubber so that the potatoes do not fall out.
How to make a bucket for a mini tractor? For this you need tin and internal racks. 2 side and internal racks form a bucket. The rods are screwed to them.
Mills, plow
This is one of the most important equipment. Milling cutters are used for processing soft and constantly cultivated soil. A homemade plow for a mini tractor is more suitable for working with hard soils. To make a homemade plow, you need to take a plate with a thickness of 3 to 5 mm and a pipe with five-millimeter walls.
The plate is sharpened with a knife, like a scythe. Next, the blade is turned out using a grinder. The cutting part is the working element of the scythe, which is beaten on the anvil.
Milling cutters are used for processing soft and constantly cultivated soil
All parts are glued together with obligatory observance of corners. The ploughshare is placed on a steel sheet. These elements must be spot welded on both sides.
Important! The ploughshare and shaft must be joined very tightly. There should be no gaps between them
Making a trailer adapter
The design of this device includes:
- metal frame;
- hitch;
- cross bar;
- braces;
- racks, axle, wheels;
- management tools;
- trailer or cart;
- space for the operator and connection of additional mechanisms.
The frame is made of pipe (length - from 1.5 to 1.7 m). A hitch is welded at one end and a rod at the other. Wheel racks and a brace are attached to the rod.
Levers are used to control devices. By switching them, you can set the optimal position of the attachment. An additional lever is installed to adjust the applied force.
The length of the drawbar depends on the power of the walk-behind tractor. Engine power affects wheel size. Additionally, hydraulics are installed.
The hitch for an internal combustion engine mini tractor and other units can be easily done independently. It fits almost all agricultural equipment, greatly facilitates and reduces the cost of all work in the country or on the farm. Proper use of the equipment extends the service life of the walk-behind tractor.
Assembly of the structure
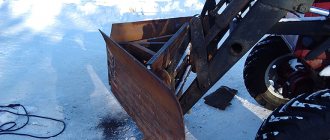
To create a grader on the MTZ-82, as shown in the photo, you will need steel about 8 mm thick and metal pipes with a diameter of at least 70 mm. The steel sheet is cut lengthwise closer to the edge, approximately 1/3 from the center. This will give the blade the optimal shape.
As for the width of the shovel, everyone is guided by their own preferences. Although there is one requirement - the blade should not protrude beyond the outer limits of the tractor by more than 400 mm on each side.
In order to install a tractor blade with your own hands, you must follow the following instructions:
- First you need to create two supports that will be connected by a metal cross member. This structure will be secured to the side members by means of a bolted connection. It is also necessary to weld plates with a stiffener and a hinge joint at the bottom to the supports.
- A triangular link is installed at the point where the hinges are attached by means of a welded joint, which is fixed at the bottom of the tractor frame. This will significantly increase the stability of the shovel. A hinge must be welded in front to the transverse beam that connects the supports, which is subsequently connected to the hydraulic cylinder.
- Afterwards, a semi-frame in the shape of a triangle is welded from two beams, and the lifting hydraulic cylinder of the tractor blade is attached to the top of it. One hinge is installed in the middle of both beams on the outer side.
- The grader is installed and fixed on the semi-frame using two hinges. The first hinge should be located at the level of the hydraulic cylinder mounting, and the second should be on a special support located 20 cm higher.
- Now you need to install and secure the hydraulic cylinders, which should preferably be positioned parallel to the subframe, since the maximum load will fall on the lower part of the blade. The blade is divided into two parts with the center on hinges located on the semi-frame. On each half, a mount for hydraulic cylinders is installed 1/3 from the center.
Peculiarities
A blade is a type of attachment for any walk-behind tractor, which is designed to perform the following functions:
- clearing snow debris near highways and roads;
- cleaning the yard area;
- soil leveling;
- sidewalk cleaning;
- raking-raking of garbage.
If the blade is made in the form of a bucket, then in addition to all of the above, it carries out loading operations.
The dumps have a simple design and are lightweight. Depending on the characteristics of the walk-behind tractor, the blade can be fixed to the front of the mechanism or at the rear if the steering column of the walk-behind tractor can rotate 180 degrees.
Blades can be adjustable or non-adjustable. The first ones are considered universal. They allow you to set any angle of attack: tilt to the right, tilt to the left. Direct installation is also possible. In the second case, the canopies can be fixed in only one position. It is not subject to further change.
As a rule, dumps are equipped with a wide variety of attachments and accessories:
- knives-nozzles, which are designed for leveling the ground;
- rubber parts that are used for effective snow removal.
For the production of dumps, springs and rotary-lifting mechanisms are not used, so the cost of the equipment is affordable for most homeowners. In areas where the snow usually lies in a thick layer, you can use lugs instead of conventional wheels. In this case, moving around the snowy area will be easier and freer.
Factory models
Any company that manufactures walk-behind tractors can also offer a range of snow plows. There are popular models on sale from such manufacturers as Centaur, Neva, Zirka, etc. The only big advantage of a factory design over a home-made one is that they are made of high-quality steel and are more difficult to damage. Moreover, such models last longer than homemade ones. But, on the other hand, they cost a lot.
There are a lot of options for factory dumps, so you should check before purchasing whether this model is suitable for your existing walk-behind tractor. At the factory, snow plows are not equipped with spring mechanisms due to the low speed of movement. If the speed of the walk-behind tractor is low, then the protective mechanisms for contact with the ground lose their meaning. Moreover, the factory models do not have mechanisms for lifting and turning the unit. In this regard, the price of the factory design is reduced.
For higher performance, it is recommended to replace conventional rubber wheels with factory or homemade lugs. This will speed up the work process.
The principle of working with a snow plow for a walk-behind tractor
The mouldboard shovel of a walk-behind tractor must be installed correctly before performing its functions. She turns with her hands to the right or to the left at an angle of up to 30°. The process of adjusting the position ends with setting a suitable angle and fixing the shovel in the chosen location using cotter pins. The gripping area of a snow plow for a mobile power unit is usually one meter (individual modifications may have other values) with a shovel material thickness of 2 to 3 mm. In industrial conditions, these devices are made from high quality steel.
Installing a snow blower on a walk-behind tractor - installation in detail
The blade must be attached to the walk-behind tractor using a system of brackets that should be welded to the supporting structure of the walk-behind tractor. As additional clamps, use two rods that will be inoperative. The rods will serve to reduce the load on the brackets used.
It is not recommended to use bolts without brackets for fastening for a number of reasons. Firstly, they may freeze to the structure, which is why you will not be able to remove the blade from the walk-behind tractor. Secondly, the bolts, even anchor ones, will be subject to strong vibration when operating a walk-behind tractor with a blade, which will lead to their deformation or loss right during harvesting. Third, the bolts will not be able to hold a bucket full of snow. As a result, the fasteners will break sooner or later.