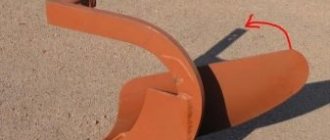
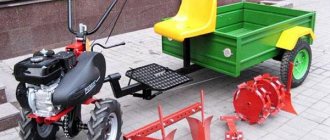
Adjustment of the arable unit on MTZ 82(80).
Plowing is one of the most energy-intensive agrotechnical activities when cultivating soils in agriculture. At enterprises with large areas of land, the arable units include machines that, with their power, allow them to be aggregated with plows from 4 to 9 buildings with high productivity. The traditional use of crawler tractors provides low surface pressure and efficient operation on soils with high humidity. Powerful wheeled tractors in wide-cut plowing units with trailed plows are justified by their high productivity and plowing speed.
The use of the MTZ-80(82) tractor for plowing is determined by small processing areas with small turning lanes, which do not allow the use of wide-cut units. Despite its low productivity, up to 5-6 hectares per shift, the tractor is indispensable for cultivating garden plots, plowing the edges of irregularly shaped fields, plowing firebreaks when harvesting grain and in forestry. Also, an arable unit with MTZ 80-82 is popular in small farms. enterprises with a limited fleet of tractors and small areas of arable land. The wheelbase and mounted plow are convenient for their maneuverability during frequent travel to processing sites.
Chisel units
Chisel plows come in quite a wide range these days, making it a little difficult to choose. Let's get acquainted with the technical characteristics of the most popular models compatible with MTZ 80 and 82 tractors.
PCH-4.5 "Almaz"
Plow from the Almaz line - PCH-4.5
This model weighs 1,640 kg, and with an additional roller - 2,540 kg. Its dimensions (DShV) are 2,830x4,500x1,950 mm. Productivity reaches up to 3.5 ha/h with a processing depth of 450 mm and a speed of 8 km/h. The unit is compatible with almost all tractors of domestic and foreign production and having a power of 300-400 hp.
PCH-2.5 "Almaz"
The unit weighs 780 kg, and with a roller 1,245 kg with the same dimensions as the previous model. The tillage depth is 450 mm, and the width is 4.4-4.5 m. With 11 working elements, the productivity of the unit is 3.2 ha/h. Compatible with traction units with a power of 300-390 hp.
PCH-6 "Almaz"
The PCh-6 chisel plow weighs 5,748 kg without a roller and 5,920 with a roller with dimensions of 8,300x6,100x1,600 mm. The productivity of the unit is impressive - 4.3 ha/h, and the processing depth is 450 mm with a soil working width of 6,000 mm. The plow has 16 working parts and operates at speeds of up to 8 km/h. The unit is compatible with tractors with a power of 450-480 hp.
You can see the plow in more detail in the video:
The video shows an example of plowing with a chisel plow.
Which Almaz model is best to purchase for cultivating a 2-hectare plot? You can take a small plow PCH 2.5. Its size is enough to process a small field. What is the maximum tillage depth for the Almaz plow? The maximum tillage depth is 45 cm. Is the PCH 4.5 plow suitable for the Belarus mini tractor? No, it will not work, since the power of the tractor should be 300-400 hp.
Technical condition
In the classic composition of an arable unit with MTZ 80, a plow of the PLN 3-35 brand is used (Plowshare Mounted Plow 3 x body with a working width of 35 cm each) with cultivated, screw and semi-screw moldboard bodies with skimmers or angle skimmers. PLN 3-35 are widely used in old arable areas with a plowing depth of 20 to 32 cm. The effective operation of the MTZ is determined by the technical condition of the tractor and plow, as well as the correct setting of the unit.
Frame
The edge of the ploughshare blade should be no higher than 1 mm. The surfaces of the body and fastenings must be free of dents, burrs, and cracks. Countersunk bolt heads should not protrude above the surface, and the recessing of the heads should not exceed 1 mm. The blade should not protrude above the surface of the ploughshare. The ploughshare should extend no more than 2 mm onto the blade. The field board is attached to the housing post from the rear side at an angle of 2-3 degrees to the wall of the furrow. To reduce resistance forces, the working surface of the blade is polished.
Coulter
The skimmer is installed at a distance of 30-35 cm from the toe of the skimmer share to the toe of the body 5 . If the skimmer extension is insufficient, the formation will become clogged between the body and the skimmer. The excess layer cut off by the skimmer will rest against the post of the body in front. The depth of the organ should correspond to a layer cut of 8..12 cm with a working width of 2/3 of the width of the body. The position of the skimmer operating depth is selected in accordance with the set plowing depth. Excessive depth of the skimmer will create additional traction resistance and poor turf coverage. Check the condition of the plowshares and skimmer blade, the tightness and integrity of the fasteners.
Field knife
The disc blade 6 of the plow is placed in front of the last body with its center of rotation above the toe of the skimmer 4 or in front of it at a distance of up to 130 mm. The lower edge of the disk hub should be 1-2 cm above the field plane. The blade rotation plane is set 1-3 cm on the field side from the field edge.
plow wheel
The lubricated screw mechanism for changing the stroke level and the axle bearing will ensure comfortable adjustment and operation of the plow. An adjustable support wheel, equipped with a scraper, will eliminate the reduction in depth when wet soil sticks and free the driver from constantly stopping to clean the wheel.
1 Types of plows for mini tractors
Among the main types there are:
- plowshare-dump;
- rotary;
- disc plow.
The plowshare-moldboard type is currently considered obsolete. It uses the traction force of the tractor to loosen the soil with wedge-shaped plowshares. It works exclusively along a straight path, 2-4 blades are attached to the frame.
A mini tractor with a plow of a similar design is suitable for plowing already developed and tested land in order to reduce the cost of expensive equipment.
Tractor with reversible plow
The disc plow is used exclusively for difficult soil: rocky, clayey, clogged, as well as virgin soil. The sharp discs are attached to a single frame by movable spindles. While the tractor is moving, this mount helps the discs move and cut through hard soil.
The main difference between imported models and Russian ones is that domestic ones are not afraid of moderately contaminated soil, which is common among the main areas for farming in Russia. Difficulties in operation for imported ones lie in problems with the delivery of spare parts. Among the well-known brands, LS plowshare and moldboard is a model for working on a medium-power tractor, RT rotary is for a mini tractor.
1.1 Rotary plow for tractor
A rotary plow for a mini tractor is the most common and convenient type. Its blades are created in such a way that they balance each other. Two blades of workers plow the ground, the other two level it. When moving back, they change places, the plow turns independently.
This allows you not to turn the tractor and plow around and save time and fuel. Since the ground is simultaneously leveled by the same working blades, there is no need to use a milling machine in the field. Further sowing and creation of furrows for seeds is simplified.
Unlike other modifications, where the plow is driven by the movement of the machine, the rotary one rotates using a power take-off shaft (PTO). The soil processed by this type is more crushed and loosened, so the rotary is ideal for cultivating rice fields.
Rotary plow for tractor
It is capable of loosening the soil to a maximum depth of up to 50 cm, which is twice as much as other types. Also, rotary plows for modern mini tractors are used in conjunction with disk plows for cultivating virgin soil; adjusting the plow to a mini tractor allows you to do this without problems.
1.2 Plow at MTZ
The Belarusian Tractor Plant is very popular these days, so plows for MTZ 80 and 82 tractors, with an average power of 80 horsepower, have become widespread. Any mechanisms with a rear PTO connection are suitable for these tractors. Among them, the PLN and PSK (PSKu) series are distinguished.
The plow for MTZ 82 from the PLN series is used to perform work with heavy and light soil, due to the difference in modifications. These plows are created specifically for the MTZ tractor. The simplest, 3-hull 3-35 plow for MTZ 80. It is suitable for clean land of no more than 1-2 hectares, it is afraid and breaks from strong roots and large stones. The depth of the furrow is 20-30 cm.
PLN 4-35 has a double configuration: disc knives on the skimmer and side grooves. It is capable of cultivating soil at a speed of 8 km/h. It is 4-hull, the coulter width is 260 mm, the depth is 25 cm. It can cultivate fields of up to 10 hectares without loss of productivity. The next modification, rotary model PLN 4-80, 3-hull, also does not like clogged soil, depth 18 cm.
For unclogged soil with a moisture content of no more than 30% and a resistance of 0.09 MA, use MTZ 82 with a PSK plow. This is a modern and universal three-furrow plow for the MTZ minitractor and MTZ 80, capable of working as a chisel or rotary-reversible plow. It has only positive reviews. The chisel option involves simple deep plowing in straight lines without turning or mixing the soil.
Important Motoblock Kutaisi Super 610: technical specifications, operating instructions
Important Popular homemade products that can be assembled from a Ural chainsaw and available parts
Mounted reversible plow PNO- (3+1) -42
Unlike the PLN, the PSKu plow (universal modification) does not lose adhesion to the ground during sudden compaction of the rock thanks to the chisel design. The productivity of the PSK is 50% higher than that of the PLN, with a fuel consumption of 8 liters less per hectare.
The PSKu-3 model is suitable for clean soil for sowing crops to a depth of 15-35 cm. It has two working blades, and the width of the layer of soil being processed with a ploughshare is 600 mm. It is possible to install an additional blade to loosen the soil. 5 buildings, total plowing width 3 meters, maximum speed during operation 10 km/h, which is even higher than that of PLN 4-35. This is the optimal PSKu option for the average farmer; it allows you to install a lot of additional equipment.
Setting up the plow
The productivity, quality of plowing and subsequent tillage operations, consumption of fuel and lubricants and, as a consequence, the cost of production depend on the correct adjustment of the arable unit. Before starting the adjustment, the integrity of the structure, serviceability and placement of all working parts are checked.
Hitch setup
Before connecting the plow to the tractor, the left brace of the hitch is installed so that its length from the center of the axis of attachment of the upper hinge to the center of the axis of the lower one is 515 mm, the length of the right brace is preliminarily set less than half the depth of the intended tillage. Successful quick setup of the unit also depends on the technical condition of the tractor hitch: the degree of wear of the hinge joints, rotary shaft, levers and brackets. When adjusting, you have to deviate from the standard parameters, setting the length of the braces, taking into account the increased play in the joints of the structure.
Setting the working depth and working width
After connecting to the tractor, tighten the hitch brace ties until there is slight sagging, ensuring up to 20 mm of play on the hinges of the attachment bars to the plow. Then, on a level area, the position of the equipment is adjusted taking into account the depth of tillage. Under the left wheels of the tractor and under the adjustable support wheel of the plow, place pads equal to the plowing depth minus 15-20 mm to compensate for soil loading. By changing the length of the upper central link of the hitch, we achieve a parallel position of the plow in the longitudinal plane, relative to the platform, and by adjusting the right brace of the hitch, a parallel position in the transverse plane. The plowshares of the housings should evenly touch the surface of the platform.
When working with the power positioner, the plow support wheel is raised as much as possible or removed completely. The processing depth is selected by the position of the regulator control handle. The rigid three-point hitch of the MTZ 80 plow provides a stable working depth with a power position regulator only on fields with flat terrain.
The productivity and quality of processing depends on the installation of the first housing. The normal working width of the front body is adjusted by lateral displacement of the plow frame along its suspension beam, changing the length of the hitch couplers, and the alignment of the tractor wheels.
With a reduced working width of the body, productivity decreases. When enlarged, unplowed stripes appear between the buildings.
When the plow is positioned correctly, the imaginary line of resistance force should coincide with the center line of the tractor. This will ensure stability in the furrow. Evidence of an incorrectly selected position of the plow will be the constant pulling of the machine away from the furrow, forcing the driver to constantly adjust the tractor's progress. The position of the plow relative to the track is set so that the line from the point of the upper edge of the heel of the plowshare of the front body coincides with the inner line of the track of the right rear wheel of the tractor. For stable balance of the unit, the track should be 1500 mm. The wheels are installed asymmetrically on the axle, shifting the left wheel by 700 mm and the right wheel by 800 mm from the axle.
How to attach a plow to a walk-behind tractor
Before installing the plow, you will need to replace the wheels with special ones with lugs to increase plowing ability. Then attach the plow to the walk-behind tractor attachment. During installation, fasteners must not be fully tightened to achieve adjustment. The unit is fixed to the mounting bracket of the walk-behind tractor using two steel rods.
The plow must be adjusted in compliance with all the rules, which affects the quality of plowing. The wheels of the walk-behind tractor are installed on special supports and adjusted. The height of the supports is equal to the plowing depth and is 15-20 cm when working in the spring on wet soil, or 20-25 cm. Using the adjusting bolts, the “heel” of the plow is aligned parallel to the ground.
Now you can remove the plow from the supports to the ground; the control handles are adjusted to the height of the worker’s belt. Then the setting is checked by test plowing several furrows. They measure the depth of plowing, the quality of the soil dump and the distance between adjacent furrows. If the distance is more or less than 10 cm, the adjustment must be repeated.
The MTZ 80-82 tractor can make the work of any farmer easier only if attachments are used. To cultivate the land with the highest quality, a plow is used, which you can easily make with your own hands. To make the plow as correctly as possible, it is necessary to use drawings.
Recommendations from practitioners
- To cultivate unplowed, turfed and bushy areas, the plow bodies are modernized by installing reinforced, wide field boards for work in harsh conditions. The use of an extended field board on the last body increases the stability of the unit in the furrow.
- If wear is acceptable, the ploughshare is restored using a blacksmith's drawbar, followed by sharpening the blade. The thickness of the cutting organ body allows up to 4 similar restorations.
- Electric arc welding with T-590, T-620 electrodes of the cutting edges of the plowshares and the most easily abraded surfaces of the field boards significantly increases the service life of the parts. Electrodes of this brand provide an alloyed, carbide protective layer. Surfacing is carried out in a maximum of two layers. In case of significant wear, in order to restore the geometric dimensions of the part, welding is carried out using “F” type electrodes with fluorine-calcium coating UONI 13/45, 13/55, 13/65, which provide high impact strength and a fine-grained structure without cracks in the deposited layer. After surfacing the body of the part, the restored area is covered with subsequent surfacing of a protective layer using T-590.620 electrodes.
- When a field is clogged with large crop residues and weeds, machine operators often encounter clogging of the plow. This happens especially often on Soviet-made PLN 3-35 plows with low body posts with a gap of 600 mm from the field board to the frame. To increase the level, you can reinstall the working element by moving the vertical fastening of the housing to the rack one mounting hole down. In this case, the housing is installed with only three bolts, instead of four. Thus, the clearance between the frame and the lower stroke of the body will increase by 50 mm and clogging of the plow will be significantly reduced.
- When storing the plow, to prevent corrosion of the mirrors of the ground working surfaces - the body can be coated with a thin layer of lubricant.
The use of MTZ 82(80) tractors with other arable machines is determined by the power of the tractor. Advanced land cultivation technologies involve working with chisel plows for moldless deep loosening. Unfortunately, the smallest modification of such a machine with a gripper in FC 2.5 requires a power of at least 130 hp and is aggregated with the new brands MT3 1221, 1523, 2022.
In private conditions, machine operators construct chisel plows for MTZ 82(80) using powerful parts of the frames of old heavy BDT disc harrows or KPS cultivators by attaching a pair of adjustable support wheels. Working bodies are purchased from agricultural manufacturers. machines providing a working width of up to 1.5 m.
Plow PLN 5-35: description, characteristics and use
PLN 5-35 is a five-furrow mounted plowshare plow, whose task is to plow soil that is not littered with flagstones, stones and other debris for grain and industrial varieties. The second number in the name, “35,” means the width of the soil plowed with one body. With a ground coverage width of 350 mm per body, the plow plows to a depth of up to 300 mm.
The plow is rated for resistivity up to 0.12 MPa and ground hardness up to 4 MPa with absolute humidity up to 25 percent or so. Works at a slope of 8 degrees. The depth of entry into the ground is set by a screw on the support wheel. The support wheel forms part of the plow along with the bodies, frame, skimmers and braces.
Productivity of the Plow PLN 5-35
The productivity of such a unit is up to 1.57 ha/h per 1 hour of main time. Plows of this brand are equipped by manufacturers with high-speed bodies. Operating speed - from 8 to 12 km/h. PLN 3-35 is mounted on tractors with a power of 30 kN, such as T-150K and T-150.
As an option, we can consider the image and description of the PLN 5-35 plow produced.
Plow frame PLN 5-35
The plow frame consists of a main and additional (longitudinal) beams, cut in the shape of a pipe. The plow body holders are attached to these beams. The working parts of the plow are the bodies and skimmers.
Operating principle: skimmers dig into the ground, lift the soil, tip it over and throw it onto the bottom of the previously plowed furrow. It is possible that the client can agree on the manufacture of skimmers to order.
If the plow bodies work with the help of angles, and not with skimmers, as in the previous version, the anglers cut off a ball of earth, which lifts the body, and drops it to the bottom of the previous furrow. The body places a layer of soil on top of the existing layer, and therefore, thanks to the use of weeds, weeds are completely removed, plant residues are covered, and the soil crushing we need is achieved.
When operating it, it is necessary to reduce the central thrust so that the gap under the first body is at least 250 mm. After this, adjust the length of the hinged limiter chains so that the ends of the lower links dangle no more than 20 mm to the right and left sides.
How to properly adjust a plow on MTZ?
What components does a plow consist of? What do you need to know to adjust it correctly?
The range of attachments, including plows, for MTZ tractors is growing every year. New models are becoming more and more advanced, and their use can significantly increase the efficiency of using tractor equipment. What this device is, what it consists of and how to adjust it will be discussed within the framework of this material.
Principle of operation
The job of any plow, including the do-it-yourself walk-behind plow and the PSK plow, is to loosen the ground with its working elements. Typically, these elements look like the teeth on a shovel, but with this technique you can get more work done in an hour than with shovels in a day.
A distinctive feature of the plow is also its compatibility with other equipment. After all, for the loosening process to take place, it is necessary to transport this agricultural equipment across the entire field so that it leaves furrows.
As a rule, it is pulled by tractors or walk-behind tractors, because this equipment has excellent maneuverability and is often used for work on the farm. Tractors MTZ 80, MTZ 82 are used (also see new MTZ). You can also use different types of walk-behind tractors: Cayman, Patriot, Texas and Foreman.
The greater the compatibility of the plow with tractors and walk-behind tractors, the better for the plow.
For more information about the operation of the PSK plow, watch the video:
Product design - main components
The basis of the plow consists of the following parts:
- Frame – the base on which all its components are fixed;
- The body is a solid cast stand with a blade, a plowshare and a field board attached to it;
- Skimmer - a small casing with a working surface used for the final embedding of plant residues;
- Support wheel - used for precise regulation of plowing depth, and its adjustment is possible due to a system of special marks printed on the stand;
- Hitch – provides connection between the tractor and the plow;
- Harrow hitch – is responsible for harrowing the surface, which takes place simultaneously with plowing.
Blueprints
When planning to make a plow with your own hands, you need to have some kind of role model. If you have an old plow, you can make new ones in its likeness. And if this is not the case, drawings will come in handy. Just take into account the parameters of your equipment on which you will hang it.
General purpose plow for tractor (single-body)
Detailing of some sizes.
Assembly drawing of a single-body plow
Plow drawing with dimensions
Preliminary adjustments of the plow - points that must be taken into account when working
Preliminary adjustments must be made before the tractor leaves the field, observing the following sequence of actions:
- Place spacers under the support wheel on the plow and the left tractor wheels (their height is equal to the plowing depth, with a difference of about 2-5 cm) and lower the plow down so that the plowshares touch the surface;
- By means of a screw mechanism on the support wheel, it is slightly lowered down until it comes into contact with the gasket;
- The plow is leveled along the transverse plane by means of a right brace mounted on a tractor hitch, and along its longitudinal plane - due to a central type of traction. The main requirement is that the frame must be parallel to the base along both planes;
- The hitch braces are adjusted in accordance with the front holes in the longitudinal links, while the upper link is attached to the automatic clutch frame exclusively through the hole. Connection through a groove is unacceptable, as this causes some problems and unstable movement of the plow when moving at depth;
- Restrictive type chains installed on the hinge are adjusted by rotating the screw ties until they slightly sag. This makes it possible to achieve a small swing of the plow in the transport position - about 20 mm, no more;
- Install the left brace on the hinged kit so that the gap between the hinge axles is 515 mm. During operation, it is not permissible to change the length of the left brace; this value must be fixed.
Preparing the tractor
The arable unit can be equipped on the basis of various tractors. They have their own settings for working with the plow:
- On the Kirovets tractor, the fingers of the linkage mechanism connecting the brace cups are fixed into round holes. They need to adjust the length of the top link (120 cm), the length of the vertical braces (86.5 cm), the gap between the hinges (86.5 cm) and check the tire pressure (the norm is 1.4 kgf/cm²).
- Preparing the DT-75 (Agromash 90TG) tracked tractors for working with trailed plows involves installing a trailing bracket (on loose ones - in the lower position, on heavy ones - in the upper position). When assembling mounted plows, determine the correct location of the central head of the lower links relative to the axis of the linkage mechanism. This ensures stability of the tractor when moving with a buried plow.
- On the MTZ "Belarus -1221" tractor, it is necessary to adjust the track width in accordance with the working width of the plow (1400 mm with a working width of 90 cm, 1500 mm with a working width of 105 cm), as well as the length of the left brace (51.5 cm).
Important The wheeled karakat Sarmat 1500 is capable of moving on land and water
The plow can be mounted on a tractor:
- according to a two-point scheme - to the front end of the upper link and on the central head of the lower links;
- at three points - at one upper point and on two (left and right) heads of the lower links.
Hitch of the DT-75 tractor, assembled according to a two-point scheme.
Setting up the two-point linkage mechanism is performed in the following order:
- The bushing fixed to the lower axle is shifted relative to the longitudinal axis of the tractor frame to the right by 14 cm.
- The lower link forks are disconnected from the side hinges and secured to the bushing bracket, forming a common central head.
- The front ends of the limiting chains are connected to the yokes, and the rear ends are connected to the longitudinal lower rods.
- Adjust the position of the upper link bushing and secure it to the shaft with special stops. It should be in the same plane as the bushing on the lower axis.
- Install vertical braces (left and right).
Final adjustment – adjustment under operating conditions
Well, the adjustment is completed in the field.
After the first two passes, check the width and depth of the treatment. If the first body plows deeper than the rear one, lengthen the central link; otherwise, shorten it slightly. Distortions in the transverse plane are adjusted by adjusting the braces, and the grip width is adjusted by moving the suspension axis to the left or right along the guides. They also pay attention to the correct position of the central link - it should be in a parallel position with respect to the longitudinal axis of the tractor, with the limit chains freely lowered. When turning the plow in the direction of the arable field, move the axis forward along the left bracket, but if it moves to the left, move it back.
Design and operation of the plow
The main working parts of the plow are the knife, skimmer and body. If we look at the structure and operation of the plow in more detail, we can add that sometimes an angle bar and a subsoiler are installed on the plow. The auxiliary parts of the plow are a frame with a mounted or trailed device, deepening and deepening mechanisms, support wheels.
The quality of plow work depends on the shape of the body (working surface) formed by the moldboard and ploughshare.
- field board
- sidewalls with heel
- dump
- rack
- ploughshare
The work process consists of cutting off part of the soil from below, lifting it and sending it to the dump. The blade, shifting the layer to the side, partially crumbles it and turns it over, throwing it into the furrow. The layer moves due to the shape of the plowshare-moldboard surface, with the plowshare and mouldboard installed at an angle to the furrow wall and bottom.
Plow bodies differ in the shape of the working surface on
- cultural
- cylindrical rukhadlovye
- screw
- semi screw
- universal
The most common are semi-screw and cultural cases. Good crumbling and wrapping of the formation is ensured by bodies with a cultural surface. Such buildings are used for plowing fallow and virgin lands and old arable soils.
However, in the case of fallow and virgin lands, half-screw bodies are more effective; they wrap the sod layer better, since this type of blade has a wing more bent towards the layer that is being wrapped. When the plow moves, with soil pressure on the body, due to its lateral pressure, the plow tends to move towards the plowed part of the field.
Against this, a field board is attached to each body, to the bottom of the stand, increasing the supporting surface of the plow, which in turn prevents the plow from moving. A plow for non-mouldboard plowing lifts the layer cut by the ploughshare and then it goes to the expander. In this case, the formation crumbles and the soil loosens.
Do-it-yourself plow - Homemade machines and.
Some home-made people try to make a plow by copying it from. Some home-made people try to make a plow with their own hands, copying it from.
For those who own a small plot of land (20-40 acres) and are actively engaged in farming, for example, growing potatoes or other crops, a walk-behind tractor is a serious assistant in their work. Equipped with a set of attachments, it can be used for plowing and loosening the soil, planting and harvesting potatoes, carrots, etc. Using a walk-behind tractor, you can mow grass, remove snow, and transport small loads. Attachments can be purchased at the store, but a home craftsman with available tools in his arsenal will be able to make some equipment himself, including a plow. If you decide to make a plow for a walk-behind tractor with your own hands, let’s look at their designs, as well as which ones you can make yourself.
Read also: How to grind grain at home
Plow diagram
The plow is divided into main parts (plow diagram):
- skimmer 1
- Pavilion 2
- knife 4
- frame 3
- support wheel adjustment screw 6
- support wheel 5
- tow hitch 7
Sometimes a hydropneumatic fuse is installed on plows; this is done for processing old arable soils that are clogged with stones of various shapes and sizes, partially protruding to the surface or hidden in the thickness of the layer. Its main components are: a hydraulic cylinder, a pneumatic hydraulic accumulator (PHA) with a piston and fitting, a valve, a pressure gauge, and oil lines.
Each plow body is controlled by articulated supports and a beam. For better wrapping and crushing of the formation, a chisel, a feather and an angle are installed on the body.
An organization that will help
Like any equipment, a plow can fail. What parts to change - this question should be entrusted to specialists, and where to get them - the answer is in Belagro. At any time you have the opportunity to study the company catalog, which presents:
- springs;
- rear wheel mechanisms;
- hydraulic cylinders;
- ploughshare;
- dumps of different types;
- shoes;
- plow bodies and much more.
“Belagro” enjoys well-deserved popularity, because there you can find everything that is necessary for the tractor and the equipment that is used on it, right down to the bolts and nuts that correspond to the technical characteristics of the device. The company presents spare parts for plows of the MZSh, PLN, Almaz, Lemken, Kuhn, Kverneland, and Minoytovsky repair plant brands. All of them are used in conjunction with MTZ tractors.
Cooperation with Belagro is beneficial. The company sells goods at retail and wholesale. The equipment is guaranteed. In case of malfunctions, a repair team goes to the operation site to eliminate them. Prices for parts and components at Belagro are lower than those of competitors. This is achieved through direct supplies from the manufacturer.
How to adjust a plow for plowing
1. Adjustment of the plow for plowing should begin with its working parts. The main working element of the plow is the ploughshare; when plowing, more than half of the load falls on it. The plowshare must be sharpened accordingly. Otherwise, fuel consumption will increase by 20%, productivity will decrease by almost 20%, and the processing depth may decrease by more than a third.
2. The blades of the plowshares must have attachments with a cutting edge of up to 1 mm, a sharpening angle of 25 - 400. These attachments must be made of hard alloys and of the same size. Deviations should not exceed: blade length 15 mm, back length 10 mm, and width 5 mm. Make sure that all bolt heads are recessed to 1 mm or flush. At the junction of the share and the blade there should be no gap exceeding a millimeter, and the blade itself should not protrude more than two millimeters.
3. It is important that the plowshare and blade are on the same line on the field side. The permissible protrusion of the ploughshare is no more than half a centimeter. It is unacceptable for the body stand to protrude beyond the field edge of the blade and ploughshare. The permissible gaps are: between the stand and the plowshare 3 mm, and between the stand and the blade 6 mm.
4. It is necessary to check the field boards on the plow; they must be level. Their back part should be in the same plane with the edge of the ploughshare. The permissible deviation is no more than half a centimeter.
5.The blade of the ploughshare must be installed parallel to the installation site. Elevation of the rear part is permissible no more than a centimeter. Installation of bent beams and/or skewed frames is not permitted. Otherwise, the correct overall position of the plow body is disrupted. The correct installation of the plowshares can be checked as follows: pull the cord along the heels and toes of the rear and front housings. The permissible deviation of the heels and toes should not exceed plus or minus from the tensioned cord.
Plow assembly
When starting assembly, it is recommended to first make a layout using thick cardboard, gluing individual parts at certain angles. In the presented drawings, the alpha angle in various areas is 25-30°, the gamma angle is 42-50°. Having assessed the resulting cardboard sample, we begin manufacturing it from metal. The material for the housing is made of sheet steel with a thickness of 3.0 mm.
Read also: Body-centered crystal lattice of metal
To complete the assembly, we will use a welding machine. You will need a steel sheet 2-3 mm thick with dimensions of 0.5x0.5 m. Using wedges installed at an angle of 25°, place a ploughshare on the sheet and weld it to the sheet in two places. We vertically join the side shield to the plowshare, overlapping it by 5-8 mm. The shield must be positioned 0.6-1.0 cm above the ploughshare blade (leaf plane) in order to freely cut the soil. We attach the shield with tacks to the ploughshare and the auxiliary sheet. We attach the blade to the plowshare so that we get a solid structure. The angle between the plowshare blade and the edge of the blade must be set to 6-8°.
Share attachment
The plow mounting diagram is shown in the drawing.
If any of the corners or surfaces do not coincide or do not meet the recommended ones, the part will need to be corrected with a hammer. Having adjusted the blade and the ploughshare, we weld them, after which we fasten the blade with tacks to the side shield. We first weld the side shield with the spacer bar, then with the plate located at the base, now we weld the thrust corner of the ploughshare to it. We inspect the entire unit, and now we need to carefully weld the seams, then separate them from the auxiliary sheet. After completing the assembly, the seams must be thoroughly cleaned with a grinder, and the surfaces that will be in contact with the ground must be sanded.
Plow moldboard and its applications
The moldboard of the plow - its working part of the body is designed to lift a layer of soil that is cut by a ploughshare. The plow moldboard deforms the soil layer, turns the top layer down and dumps it into the furrow. Based on the shape of the working surface, plow moldboards are divided into semi-screw, screw, cultivated and cylindrical.
According to their design, they are divided into composite (two parts), roller, rod, plate, etc. Blades are made of 2 or 3-layer hardened steel. There are plows for plowing speeds of up to 12 km/h (high-speed plowing); they use moldboards with a special shape of the working surface, which ensures good plowing, normal formation turnover and a continuous plowing surface.
Types of plows
When completing walk-behind tractors, three types of plows are used, all of which have their own area of application:
- single-hull and double-hull;
- rotary or reversible;
- rotary.
Single-hull models
Single-body units are the simplest in design. They have only one share and are used for plowing light soils in ordinary garden plots, which make up the majority of the land. Such a plow is not suitable for plowing heavy soils and virgin lands; a more powerful design will be required.
A double-furrow plow consists of two fastened frames with plowshares. It is used for cultivating various types of soils and for primary plowing of virgin lands. It can simultaneously perform plowing and harrowing, ensuring the best quality of soil cultivation.
Reversible plows
Reversible plows are distinguished by the shape of the plowshare, which resembles a feather. A plowshare with a curved upper part turns over the soil. Recommended for plowing hard, hard soil. Plows of this type are compatible with walk-behind tractors of medium and heavy classes, for example MTZ. They got their name from a device that rotates the ploughshare when changing the direction of plowing, which is convenient for long areas. The direction of the soil dump is maintained.
Rotary plows
Rotary models differ from other designs: the unit consists of a set of curved shares that loosen the soil, placed on an axis driven by the power take-off shaft of the unit. The depth of plowing the soil with a rotary plow is 25-30 cm, and does not require significant effort from workers.
A rotary plow allows plowing to change directions, which is important for processing areas with complex shapes. This design is popular among summer residents for cultivating soil with a layer of turf or saturated with roots. Rotary plows are compatible with medium and heavy walk-behind tractors.
Dumpboard and non-dumpboard
Based on the presence of a moldboard, plows can be divided into two more types:
- moldboard: the design of such plows allows you to plow the soil, turn over the plowed layer and loosen it;
- non-mouldboard: intended for loosening the soil in regions with dry and windy weather.
Working parts of the plow
The working parts of plows are cutting or disk knives, skimmers and main bodies.
A disc blade is a disc that rotates on two ball bearings. It is usually installed in front of the rear body, used on general-purpose plows, as well as for soils not clogged with tree roots and stones on bush-marsh plows. A cutting knife is a handle that goes into a knife and is a dihedral wedge. These are used when plowing stone-clogged, soddy soils.
Special plows, including shrub-marsh ones, are equipped with cutting knives. When working, the plow uses knives to separate the layer of soil vertically, creating an even wall, while also creating the bottom of the furrow. This helps maintain a given plowing depth, because usually the support wheels of a tractor or plow run along the bottom of the furrow.
The skimmer is the part of the plow that removes the top layer of soil, placing it at the bottom of the furrow.
How to make a plow
When cultivating land, one of the most tedious operations is plowing it and preparing it for sowing. If you have equipment - a walk-behind tractor or a mini tractor - everything can be transferred to them, but for plowing you need a plow. Buying a ready-made one is too expensive. The prices for finished products are considerable. To save money, you can make a plow yourself. And there are two ways. First: do everything yourself completely. This is a difficult path - the shape of the plow parts is nonlinear, with bends of a certain radius, and bending thick metal at home is very difficult. The second way is to buy ready-made cases, and assemble the frame and all other auxiliary parts yourself. This is a simpler option that is relatively easy to handle.
Making and adjusting a plow on MTZ-82 with your own hands
Farmers are interested in how the plow is adjusted on the MTZ-82. The main function of the Minsk plant Belarus MTZ-82 tractor is to plow the soil in personal plots. An ordinary shovel will not be suitable for efficiently processing several hectares of territory. Therefore, in order to carry out plowing, additional soil-cultivating equipment is attached to the tractor, in particular, an active plow for MTZ. The tractor driver’s task is to control the unit, which turns over layers of earth, cutting to a certain depth.
Preparing special equipment for sowing
One of the main types of agricultural equipment working in conjunction with the Belarus tractor is the plow.
Its design is extremely simple, its purpose is trivial - to increase the rate of plowing. Nevertheless, without it, not a single sowing campaign is possible. For smooth operation, plows must be properly and timely maintained. In this direction, it will be a reliable partner. In its catalog you will find a wide range of spare parts for plows used on MTZ - the most popular tractor among Russian farmers. Call and the company’s specialists will help you select the necessary part. Belagro operates in the format of an online store, so delivery is carried out to any city in Russia.
How to adjust the plow at MTZ
A properly configured and adjusted plow plows the ground to a depth of 35 cm. Its poor assembly or improper adjustment can lead to the soil being processed poorly and the equipment quickly becoming unusable.
The device consists of several components:
- a knife designed to cut soil vertically;
- skimmer - designed to remove the top layer of soil along with weed roots (optional element);
- ploughshare (or flat cutter) - a knife to cut the soil horizontally;
- dump - loosens and turns over a layer of earth;
- support wheel - allows you to get support in a horizontal plane;
- field board - sets the direction of movement vertically.
There are several categories of plows, differing in the method of attachment to the MTZ-82 tractor. Among them:
- Trailed is a frame-trailer standing on 3 wheels.
- The semi-mounted one is connected to the MTZ-82 hitch on one side, the other side is equipped with a support wheel on which it rests.
- The mounted one is completely connected to the mounted system and can be controlled using hydraulics.
Setting up the PLN-3 plow (this is exactly the type of equipment found on Belarusian tractors) does not take much time. Setting up the MTZ-80 plow should be carried out in a specially designated place. In order to adjust the plow on the MTZ, it is necessary to install underlays under the left and support wheels of the tractor and plow, the width of which will be equal to the size of the future plowing. After this, the device and its shares should be lowered onto the platform. Using the support wheel screw, it is tightened until it comes into contact with the lining. A diagram of how to properly adjust the plow on a tractor can be found on the Internet.
Next, we set up the plow itself: it must be leveled using the tractor hitch brace and the central link. The main thing is to place it parallel to the site on which it is located. The frame must be connected to the top link when using an automatic coupler through a special hole.
Between the hinges you need to install a left brace equal to 51 cm - this value cannot be changed during operation. Next, the required depth of soil loosening is set on the stand - 2/3 of the specified depth.
When plowing the first row, you need to make sure that the rear housing is working at the correct depth and the front housing is working at half that depth.
The movement of the plow must be smooth and stable. If the frame warps and is at an angle to the ground, it means the adjustment is incorrect. The plow on the MTZ-1221 is adjusted in the same way.
Small special equipment, tractor T-25. | Topic author: Igor
Anyone who has dealt with the T-25 tractor or other mini-equipment is welcome.
Igor (Giorgia) A new website for the T-25 tractor has appeared https://www.traktor25.ru/
Petrukha (Bayani) I have my own T-25A.
Igor (Giorgia) The T-25 tractor is generally a unique piece of equipment on its farm. And who is interested in how to adapt various mounted and trailed implements to the T-25 tractor, here is a link to a good forum on the T-25 tractor
Igor (Giorgia) https://fermer.ru/forum/minitekhnika-i-selskokhozyaistvennaya-tekhnika-dlya-lichnogo-po-0″ This link to the forum, many photos.
Artem (Alethia) Good afternoon. I agree with previous comments. The technique is truly unique. I'm more satisfied with the fact that it's an air engine. can be disassembled and assembled directly in the field. By the way, if there are problems with spare parts, I can help (only the original) a relative works at the factory..
Aleksey (Channing) recently bought himself a T-25A, it’s a cool tractor. easy to operate, everything can be done by the flesh before plowing the soil. I bought a plow for it.
Vladimir (Mahyar) how much does a T-25 cost in good condition?
Vladimir (Mahyar) what working width can the cultivator carry? And what kind of grain seeder can be attached?
Aleksey (Channing) from 100 to 150 thousand rubles in good condition.
LEONID (Aibreann) Good afternoon colleagues. I have a cool T-25A, even though I live in the mountains. I jokingly call him a goat, he can drive where the UAZ cannot pass!
LEONID (Aibreann) Friends, help with advice! T-25a I changed the steel rings, everything is as it should be. Now the engine has started to pass oil through the muffler. What are the best rings to put on?
Artem (Alethia) whose production of rings!? they are made by Russia, Poland, China, etc.
LEONID (Aibreann) Russian rings, more precisely made in the USSR.
Artem (Alethia) did you change the cylinder with pistons? ! If not, what year is the tractor!?
LEONID (Aibreann) I bought it in 96. Issue '88 They changed the rings before me, they were different. The tractor worked little. The engine clock was still half ticking.
Artem (Alethia) simply, if the piston group was changed. then USSR rings will not suit you. try buying new rings.
Oleksandr (Enya) T-25 is a good tractor (I have both a Vladimir and a Kharkov one), but I’m afraid even with the cab removed and at the lowest landing it won’t fit within your 2 meters, and besides, you also need to sit somewhere.
Tags: How to make a homemade plow for an MTZ tractor
Homemade tractor plow
Buying a unit can be quite expensive, so the opportunity to make a plow for MTZ-82 (or MTZ-1221) with your own hands comes to the rescue.
There is a simpler design that, in principle, performs the same tasks as a plow - a homemade cultivator on the MTZ-80. The difference between them is that a plow plows the soil, turning over layers of earth, while a cultivator simply plows the soil. However, a homemade cultivator for the MTZ tractor is a popular device, as it is easier to make than a homemade plow.
To properly manufacture a plow, a tractor driver will have to use good drawings from qualified specialists, so it’s better to search. A poor-quality drawing will negatively affect the subsequent design and quality of plowing of the soil, and hence the yield. When constructing a homemade cultivator, on the contrary, a schematic drawing will do.
Once the drawing is ready, you need to transfer it to a hard cardboard sheet and cut out the template. To make a plow, you need to use materials made of stainless steel or another, harder metal. So, you can use an old spring from a domestic car or even a circular saw blade.
Let's look at the process of making a plow. Even a master with minimal experience in designing such equipment can create the simplest mounted plow - single-body, using rotary mechanisms. Such additional tractor equipment includes a ploughshare and a blade at MTZ. To manufacture the presented elements, only steel sheets are required. In this case, the homemade product is constructed according to a specific algorithm.
- Production of a ploughshare from a disk element removed from a circular saw. To sharpen the cutting part, you need to beat it on an anvil, just like a regular scythe or flat cutter.
- The next stage is the manufacture of the blade. The process is quite simple and requires minimal skills. You will need a metal pipe.
- The final stage is the manufacture of other structural elements. This modification is not particularly difficult.
In order to assemble a high-quality homemade reversible plow, you need to use special wedges with an angle of 25°. After installing the wedges, a plowshare is installed on the auxiliary metal sheet, which in turn is fixed to the blade using a welding seam.
The shields located on the sides are mounted on the ploughshare in a vertical position; for this you need to perform an arc verification. It is necessary to ensure that the side shield extends 8 mm beyond the ploughshare and is located 10 mm above the blade. At the end of the process, you need to create a continuous surface by welding the ploughshare and blade together.
Preparing tools and materials for work
Designing a plow with your own hands requires a clear plan of action and selection of the necessary tools and materials. It is advisable to familiarize yourself with the finished product drawings in advance. In addition, a homemade product for cultivating land should be simple in design and efficient in use.
To make a standard version of a hand-made plow you will need the following:
- ploughshare or steel billet;
- perforator;
- steel material for the manufacture of blades and field boards;
- welding inverter;
- angle grinder;
- fasteners, in the form of a set of bolts and nuts;
- metal stand for making a plow base.
When gripping a layer of soil over 25 cm, the surface and material of the plow are subjected to heavy loads, which can result in rapid wear of the product. It is best to choose carbon steel 9ХС or hardened steel 45 with a thickness of 4-5 mm as the workpiece material.
Next, we begin manufacturing the working part of the plow body, which is responsible for lifting the soil and turning it into the furrow. There are several ways to make the dump part. The contact surface of the dump side has the shape of a cylinder. Using bending equipment, producing such a workpiece will not be very difficult.
Another option involves the presence of a finished pipe with a diameter of 0.55-0.6 m and a wall thickness of 3-5 mm. A template is made from ordinary cardboard to cover the required area of the pipe, along the contour of which the required shape is cut out using electric gas welding equipment.
To eliminate bulges and burrs, use a hammer and file. The most difficult method of manufacturing a plow is considered to be the production of a blank in a metallurgical furnace, followed by straightening with the finished matrix (sometimes a tractor plow blade is used).
The blank for the product body is a sheet of steel with a carbon content of 0.03 to 0.1%, with a thickness of at least 3 mm. To maintain the dimensions, it is recommended to first assemble the model from cardboard, and then take on the metal base.
Homemade attachments
Almost any attachment for a tractor can be made independently. This could be a homemade potato digger, a homemade rotary mower (or haymaker), a rotary plow, a cultivator, or a hiller. Sometimes you can remodel some equipment to make it more functional.
The most popular queries in the search engine remain the design of an active plow on MTZ or DT and the question of how to make a cultivator with your own hands. After all, cultivators are faithful assistants to agricultural workers. The most complex element on MTZ or DT is the rotary cutter. A converted cultivator with a high-quality cutter can carry out hilling for a long time.
It is not difficult to understand how to install attachments, be it plows for tractors, a homemade cultivator, a potato digger for a tractor, or other homemade products. The main thing is to act according to the given algorithms and check the diagrams and drawings. In the same way, you can easily understand how to adjust the chisel plow of a wheeled tractor without any extra effort. Installing chisels on a wheeled tractor is a labor-intensive process, which can nevertheless be done by the tractor driver himself.
Advantages of homemade plows
Making a homemade plow with your own hands has a number of advantages over using purchased ones. Its design better meets the requirements corresponding to the cultivated soil: the angle of the oval, the depth of the plowed layer, the width of the plowed area in one pass, as well as the loosening effect.
A plow made by yourself, taking into account engine power, will not create additional load on the walk-behind tractor, will eliminate wheel slipping and will provide optimal plowing effect. The use of high-quality material and adherence to technology will significantly increase the service life. When making a plow, it is possible to provide for the possibility of attaching additional equipment for tillage.