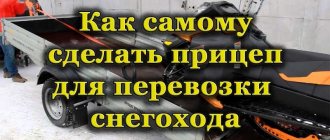
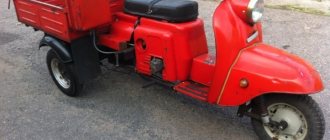
A snowmobile sled is a must-have attribute for comfortable long-distance winter travel. Having loaded all the necessary luggage into them, you can go hunting or fishing or on any other trip.
A sled is a great addition to a pannier that can hold all the essentials but cannot pack large, heavy items. Thanks to their use, the capabilities of the snowmobile owner are significantly expanded.
If you want to become the happy owner of such a design, you don’t have to buy them at all - you can make it quite easily with your own hands.
Snowmobile sleds - types of structures and the principle of their operation
There are several main types of snowmobile sleds, and each has advantages and disadvantages. The sled is very versatile in its design. They easily attach to all types of snowmobiles. For example, for a Yamaha snowmobile, Russian Mechanics, Ermak, Viking 540, Dingo 150, BRP and Varyag 550.
In order to choose the type that suits you, you need to consider several factors:
- the routes and trails you need to navigate, features of snow cover and terrain;
- type of cargo transported;
- driving style.
Volokushi - description and dimensions of plastic snowmobile sleds
Sleigh drags are the easiest option.
They have several advantages:
- compactness and low weight;
- simplicity and speed of loading and unloading luggage;
- The drag body body does not freeze.
However, drags have a serious drawback - due to the design features, their front part is often damaged. This type of sled is inexpensive, and making it yourself is impractical.
Passenger
Passenger sleds are rarely seen. They usually consist of a housing made of plastic or plywood mounted on skids.
For greater passenger comfort, the design of the passenger sleigh can be sprung, and lighting and heating can be installed in the cabin.
They are not easy to find on sale, but such designs are sometimes made by winter fishermen and other outdoor recreation enthusiasts during the cold season.
A passenger sleigh can carry one or even several passengers, therefore, having only one snowmobile, the owner of this design can take a large company out into the snowy nature.
The main disadvantages are the large dimensions and weight of the structure. Because of this, passenger sleds can only be attached to powerful, high-powered snowmobiles.
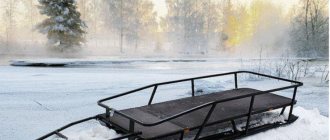
Freight
Cargo sleds are the most versatile and practical option. They are designed more complexly than drags, but at the same time much simpler than passenger ones. These sleds have a large load capacity with small dimensions.
Due to the relatively small contact area with the surface, cargo sleds have a smoother ride than drag sleds - such structures easily slide on their runners, easily overcoming obstacles.
The luggage in them is protected much better. Below are photos of a homemade snowmobile sled.
Due to the fact that their skis are located at a great distance from each other, cargo sleds can also boast much greater stability than drag sleds.
A standard cargo sled consists of three main elements:
- frame;
- runners;
- flooring
The frame is the basis of the entire structure. The runners are attached to the bottom of the frame using racks. There is a flooring on top, on which the loads will be placed.
For greater convenience and functionality, the frame of the cargo trolley must be equipped with railings and a covered structure placed on it.
Peculiarities
There is a wide range of snowmobile skis on the market, but before you buy, you need to study their features and the suspension design of your model. Suspension mechanics and travel, strut and shock height, ski size and other components all affect the stability and handling feel of your snowmobile.
Snowmobile suspensions most often come in three types:
- lever (DSA, ADSA, RAS);
- telescopic (candle);
- spring
Most imported models are equipped with a wishbone front suspension with an A- or V-shaped link, ensuring a smooth ride and maneuverability. The disadvantages are that the dimensions of the levers have a large track width (almost equal to the body), which means that the sled can easily run into hidden obstacles in the form of stumps, sharp boulders, reinforcement, and the like. Skis run the risk of bending even from a small impact, which can be very difficult to avoid in wooded areas.
But “telescopes” are much more difficult to damage, and they are much narrower (not so wide). That is, in fact, the spark plug design travels well in a straight line, easily overcoming small obstacles and bushes - for those who like extreme sports and a lot of steering, it is not suitable.
Important: the levers, unlike the telescopic suspension, are completely repairable even with the use of non-original spare parts and can be adjusted to your own taste. Particularly pleasing is the opportunity to make the necessary part yourself using a simple tool (grinder and welding)
Its second function is to protect the plastic toe from cracks under high loads and collisions with obstacles. The skate is located under the ski and has a particularly strong pobedit soldering for moving on asphalt, ice and other hard surfaces. Its fastening is held on by bolts and is also subject to replacement.
Generally speaking, skis are designed strictly to suit their application. This is where their size and shape come from. Depending on the type of terrain in which you plan to ride, you can choose snowmobiles for sports, mountain, tourism, children's and utilitarian purposes (for sleds and cargo).
According to the type of design, they are divided into single-track with two skis (all imported manufacturers, such as Yamaha, Polaris, Arctic Cat, Ski-Doo and others) or two-track with one (domestic brands “Buran”, “Ermak”, “Eger”, "Freezing"). Thus, formally they all stand on 3 points of support, but the physics of driving has its own characteristic features.
Preparation
Before we start creating our winter structure, we need to decide what material it should be made of. Wood is perfect as a starting material if you want to make a sled like a sled or entirely made of plastic or metal with plastic parts. There are a lot of homemade models you can assemble. Sleds, thanks to their design solutions, are a very universal item; they can be easily attached to all models of snowmobiles. To optimally select sled models, consider these factors.
Travel route and terrain features. The factor must be taken into account when using drag-type structures.
- Type of transportation. Taking into account the fact that not only heavy things are transported on sleds, but also people, this factor must be taken seriously.
- Your driving style. This factor must be taken into account, since the service life of all equipment, and not just sled runners, depends on the riding style.
- Amount of snow cover. This factor affects the maneuverability of equipment in difficult natural and weather conditions.
The best option would be to make a sled on a steel frame, as it will be more durable than plastic ones. The main disadvantage of such equipment is considered weight, however, this pays off with a significant margin of safety and a long service life.
In such devices, it will be necessary to change the plastic slides as they wear out, but at least once every three years.
What are they?
In the good old days, metal skis were churned out by the thousands and fitted to virtually every model, and on spring sleds the design of the skis was not particularly important. For many years now, manufacturers have partnered with various snowmobile parts suppliers, who are constantly developing new models of plastic skis with improved performance. The use of high-tech plastic options allows the skis to flex to stay on track.
Some are suitable only for one specific model with the corresponding marking, while others have a more universal device for wide use. Efficient winter driving depends on proper design and provides improved handling in all conditions.
The weight of each plastic ski is about 2 kg, width from 130 mm, length from 1 meter. At the same time, the supporting area is about 1 m2, which makes it possible to demonstrate surprisingly high cross-country ability in powder. The thermoplastic from which they are made has unique properties, great flexibility and the ability to take on most of the load upon impact.
Dimensions and drawings
Before preparing your masterpiece, you need to make a design for it, in which you need to constructively decide what size the sled will be. We have prepared a rough drawing of the sled, which we will describe later. As you can see, the dimensions of the structure are a little more than two meters in length, the height of the product is 98.5 cm, the width in the front part is 75 cm, and in the back it narrows to 74 cm. The drawing is very detailed in the height of all parts. Drawings can be found on the Internet, but it is better to come up with your own based on your technical considerations and calculations.
Tools and materials
To make a snowmobile sled yourself, you need to stock up on the following materials:
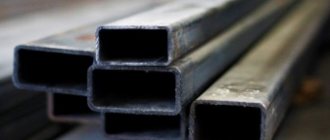
- steel sheet;
- metal tubes with a cross section of 20 by 20 mm;
- PVC pipe;
- sheet of plywood 1.0-1.5 cm thick;
- welding machine;
- milling machine;
- hacksaw;
- grinding machine and other necessary tools.
Snowmobile sleds are made from any available materials, not just those purchased specifically for this purpose. Craftsmen can make a sled from a motorcycle carriage or a sled from wood, and some craftsmen even make sleds from barrels.
Manufacturing instructions
As we noted above, our sleds require plastic pipes. They are necessary for the runners, given that the runners must be flat and the pipes round, they must first be heated so that they straighten. They heat it either with a special heater or a hair dryer, but with the latter very carefully and carefully monitoring the heating. Otherwise, the pipe may be damaged.
- After heating, the future runners are placed on a flat place under pressure until they cool completely. And only after that they mark the front side and bend it at an angle of 30 degrees. A strong frame base is welded from a profile metal pipe, on which the runners are subsequently placed. A drawbar is installed in front of our sleds, reinforced with a steel sheet, and a bushing is placed in it. Then the plywood flooring is fixed, welded and the connection at the welding points is checked for strength.
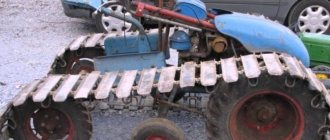
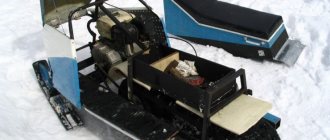
- Considering that we make snowmobile sleds with our own hands, many technical solutions cannot always be implemented. A motorized stroller will make an excellent sled, just put it on runners. True, this design is only suitable for powerful snowmobiles, since its weight is still significant.
- You can also use the sleigh principle to make a do-it-yourself cart with wheels for an all-terrain vehicle or ATV.
Volokushi
This device is a lightweight, often wooden structure, similar in type to a sled. Although sleds are typically used for dog or reindeer sleds, they can also be easily retrofitted for a snow machine. Drags are valued for their small weight and size, ease of operation and the speed with which the drags can be loaded and unloaded. Their body does not freeze.
However, this equipment has a big drawback - due to its design features, the front is subject to deformation. The purchased version is presented in the form of a plastic trough on skids.
Passenger
Passenger snowmobile sleds are not much different from cargo sleds. Only the basic design of cargo sleds is made of a strong base, skis and a low platform, and passenger models are designed for one or two people. In Russia, even in specialized stores it is very difficult to find them. To use such designs, the snowmobile must be very powerful, such as the Yamaha, Buran, Yarmak, Russian Mechanics, Viking, Stealth and other machines.
To increase passenger comfort, the design of the sled can be supplemented with shock absorbers.
The housing is made as a cabin, which also additionally contains lighting and heating elements. The booth itself is created from plywood sheet, plastic sheet or other similar materials. For skis, both sewer PVC pipes and thin HDPE pipes are used, but in this case, to create runners you need to use several pipes for each ski.
Price issue
For my motorized towing vehicle with a 6.5 hp engine. and with the 380th caterpillar I didn’t see the need to buy large drags. Their purpose was to transport the driver and maybe a small load, nothing more. For more massive loads, homemade metal sleds will be used.
So, on the local market I found a suitable option costing only 1000 rubles. The dimensions of the drags are approximately one meter by half a meter. No reinforcement, just a plastic trough. The price of exactly the same trough, but with piping, was already about 3 thousand rubles. It takes a couple of hours to weld a harness from a steel profile, so I bought these plastic drags without reinforcement for, as it seems to me, an adequate price of 1000 rubles. In any case, I couldn't find it cheaper anywhere.
Tying plastic drags
The drag sleds will experience a relatively small load, so I don’t see any point in strengthening them thoroughly. This will only make the structure heavier, which is undesirable. Therefore, it was decided to just run runners from a 20x20mm profile under the bottom and connect them to each other at the front and rear.
At the front, 2 eyes from the same profile were welded into which the towing device was passed. And at the back there was a ring welded for coupling with more drags.
Recommendations
The optimal type of homemade sled for constant use will be cargo models, and to increase the rational use of the design of such a base, it is equipped with railings and a closed box is made. At the same time, the skeleton is reliably sheltered from any unfavorable conditions. The selection of materials for homemade sleds must be carefully approached; the service life of your product depends on them and components. It must be remembered that the sled is used in winter, therefore, it must be resistant to low temperatures.
It should also be taken into account that during operation the structure is subject to impacts from protruding tree roots or small stones, and therefore must have an impact-resistant surface.
If you dream of creating a passenger sled model, then safety should be a priority, and this applies not only to the selection of materials and components for them, but also to all welded assemblies and parts. Since the speed of transportation on a snowmobile can be significant, and obstacles can be invisible, it is necessary to equip the sled with additional elements for reliable transportation. Making your own sled is much cheaper than buying it.
There is no sled that is perfect for all situations, and we would recommend several different models that will be useful for different situations.
When modeling the design, you must first focus on the power of your snowmobile, and then on the weight characteristics of the sled, since with low power the snowmobile may not be able to carry a heavy sled. It is best to make runners with an additional rigidity system; the distance from the bottom of the sleigh to the runners themselves should be at least 10 cm.
Thus, your structure will not touch the bottom of the snow, and the wide runners will allow you to safely drive even through freshly fallen loose snow.
Don't forget about the guides for your runners, because they help maneuver while riding. A sled with flat runners at high speed without guides can tip over if it turns poorly. A self-made sleigh, with the proper approach to the selection of materials and the creative process, will become an excellent assistant and will last for many years.
Advice from professionals
Experienced snowmobile owners say that there is no universal sled. In the snowy northern regions, this transport is used to perform various tasks. If you need to frequently transport cargo, want to go on vacation, give rides to guests, it’s best to get several sleds.
In the snowy northern regions, a snowmobile with a sleigh is a popular means of transportation.
The material for the sled is chosen taking into account the terrain on which it is intended to be ridden. Plastic is good for deep snow. To ride over bumps, you need a sled with wide metal skis. Passenger models are equipped with shock absorbers.
When transporting cargo, it is important to stow it correctly to achieve load balance. To protect luggage from getting wet, it is optimal for such transportation to have sleigh boxes.
Sleigh dragging with your own hands
Due to the simplicity of the design, the range of materials for the sled is enormous.
You can use everything that is lying around in the garage or at the dacha.
Below we will show you the simplest and most interesting homemade solutions collected by craftsmen from all over the world.
- Wood is a universal and inexpensive material for making sleds. Quite a heavy design, but universal and repairable in almost any conditions.
- Due to the simple design, there is no point in providing drawings, because It’s easier to make from what you have on hand. The size and model of the sled should also be taken into account according to your snowmobile. A snowball may not be able to handle a trailer that is too heavy.
- An interesting version of a sled with a flat bottom can be made using small-diameter sewer pipes as a basis. We fasten the pipes together and get a very strong bottom with guides. This version of the sled behaves well in motion and is not afraid of tree roots and stumps found under the snow cover.
Why choose a self-made self-propelled gun?
Factory-made snowmobiles are indispensable for some professions: rescuers, foresters, geologists, surveyors. Wherever the quality of work performed and sometimes the value of human life depend on moving over rough terrain, a snowmobile becomes a vital means of transportation.
Homemade snowmobiles are used in households, when hunting or fishing, at festivals and just for fun, walking, playing with children.
This is a convenient, economical, practical winter means of transportation, which is successfully created by craftsmen in different parts of the country.
How to assemble a homemade snowmobile, see below.
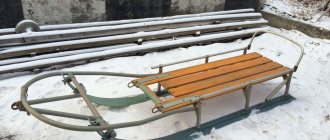
Snowmobile sled with skis
This is a more complex option in terms of design. But it's worth it. Thanks to the use of skis, the sled becomes more stable and behaves more consistently at high speed. Also, when using skis, the body of the sled itself does not come into contact with the snow cover, which means it will last much longer.
Option 1 - steel frame and skis.
Durable and voluminous sleds for snowmobiles.
- A square pipe with a diameter of 20mm x 20mm is used for the frame.
- The pipe is cut with a grinder and connected by welding.
- Front sheet of metal 2mm thick. Serves to protect against snow and small obstacles. It is welded to the frame.
- The skis are made of sheet metal, with additional stiffening ribs along the edges (made using a sheet bender)
- The rigid hitch (drawbar) is welded from a 20x20mm profile, as is the main frame of the sled.
- The end uses a spring to provide shock absorption during acceleration and braking. Without a spring, you risk rapid wear and tear on the towbar and its attachment to the snowmobile.
Sleigh drawing:
This version of the sled has one flaw - there are not enough guides on the skis.
Guides are needed for normal controllability of the sled, because... on flat skis the sled skids a lot when turning.
If you do it yourself, you can weld a small corner or a steel rod of small cross-section to a metal ski (about 10mm for a 20cm wide ski).
What else do you need to know?
Some necessary tools can always be replaced with cheaper and disposable ones. You can avoid unnecessary expenses, for example, on a sanding machine just for the sake of one sled. It will be replaced by sandpaper.
It is also not necessary to purchase wooden blocks separately; it is enough to use leftover wood from other buildings or repair work.
Screws can be replaced with nails and a hammer drill. You just need to buy good stainless steel nails.
There are a lot of options for sled designs. They can differ both in design (with a back, with a seat, with carvings, with boards, with additional runners) and in design.
After you can make a sled with your own hands, even for children, winter will become an even more long-awaited and fun time for you. Good luck!
Sources
- https://MachinSpec.com/spec-naznacheniya/snegoxod/sani-svoimi-rukami.html
- https://allremont59.ru/stroeniya/kak-sdelat-sanki.html
- https://SdelaySam-SvoimiRukami.ru/4095-sanki-iz-podruchnyh-materialov.html
- https://rubankom.com/materialy/proizvodnye/fanera/1787-sani-iz-fanery
- https://chudo-lobzik.ru/chertezh-podelki-sani/
- https://stroy-podskazka.ru/snegohody/sani-svoimi-rukami/
- https://o-krohe.ru/pokupki/zimnie-tovary/derevyannye-sanki/
Snowmobile sled made of plastic pipes
An interesting and affordable option for a snowman sled made of PP pipes. These pipes are used for water supply and sewerage.
- To make the frame, 25-30mm water pipes are suitable.
- For cutting, you can use special scissors, or a knife and a hammer (if you don’t have a lot of special tools)
- To connect the parts we use a soldering iron for PP pipes. By the way, you can also use homemade devices based on an iron or even simply by heating a tip from a piece of metal pipe on a gas stove. The main thing is not to overheat the tip, since the special soldering iron does not have a high temperature.
How to make skis for a sled
To make runners, it is convenient to use a sewer pipe with a diameter of 100 mm.
How to straighten a snowmobile ski tube:
Carefully cut lengthwise and heat with an industrial hair dryer or burner (you need to be very careful with an open fire so as not to melt the pipe).
- We straighten it using two boards (pieces of plywood) placed on the floor and pressed down with a foot or a heavy object. You can also use a vice or a press machine.
- It will not be possible to heat the entire length of the pipe at once, so we warm it up and bend it in small sections of 30-40 cm. This way you won't need much effort.
- There is one simple trick to secure the pipe to the runners.
- The mounting method is suitable for any type and material of skis.
- We push the heated pipe from above, thanks to this it fits tightly into place and immediately fasten it with self-tapping screws.
- This option is ideal if you need to sheathe metal skis with a plastic pipe.
PP tube skis
You can also make skis from several water pipes with a diameter of 25mm
We lay it parallel and fasten it with long bolts or studs:
This design is less strong, but has a significant advantage over a solid HDPE pipe.
The tubes act as guides, making the skis more stable when turning.
I also use a combined option, when a supporting frame is made from PP tubes, and only then a large pipe is hemmed:
Required tools and materials
- Plywood. FSF plywood is suitable for sleds that you often use, but at the same time store outside the apartment - in the country house or in the garage. This material has good resistance to moisture, but contains phenol that is harmful to health. For children's sleds, it is better to choose FC plywood - a less moisture-resistant, but environmentally friendly material. In addition, pay attention to the type of plywood: to ensure the product has a neat appearance, buy 2/4 sheets with a sanded face without visible defects.
- Metal tape. The frame and runners in a snowmobile sled are made from metal strips. It can be steel or aluminum alloy. The first option is more durable, but the second is easy to use.
- PVC pipes. A lightweight sled model can be made from plastic pipes. This is an elastic and frost-resistant material, which, however, is not very durable. To strengthen the connections of plastic parts, use metal corners.
- Tools. To make a sled yourself, you will need a circular saw, a drill-driver and self-tapping screws. For metal sleds, a welding inverter, a vice and a hammer will also be useful. For plastic sleds - a soldering iron and a hair dryer.
Preparation (taking into account various factors)
The choice of material and design of the sled depends on several important factors.
- Terrain. If you expect to navigate uneven terrain, add more cushioning to the drawbar and seat. This can be done using a damper, padding and an inflatable layer.
- Type of snow cover. It determines the ideal shape of the runners. Wide skis move better on loose snow, while narrow skis move better on ice. The greater the bend of the runners, the less they burrow into deep snow. On the fastest sleds, the ends of the skis rise to the frame and are attached to its front part.
- Load. The required strength of the material depends on this. Plastic sleds can support a child or adult weighing up to 70 kg. For full-fledged passenger sleds, an aluminum alloy is suitable, and for cargo sleds, steel or wood. The height of the sides is also important. Usually it is 30 cm, but you can make it larger to make the sled roomy and safe for passengers.
- Driving style. Remember that sleds with a low center of gravity are less likely to tip over. If you plan to do extreme racing with sharp turns, give preference to a squat design. In this case, the seat should be at a height of about 20 cm.
DIY snowmobile sled. Instructions
Find a suitable drawing. The design of the sled must meet your requirements for strength, capacity and maneuverability.
- A homemade snowmobile sled consists of a frame, runners and flooring. A metal pipe 20×20 mm with a wall thickness of about 2 mm is suitable for the frame. For runners - steel strips 20 mm wide. For flooring - plywood with a thickness of 15 mm.
- Using a welding inverter, make a frame by welding 4 metal pipes. To make the sled gain more speed, the front part of the frame can be rounded. The larger the width of the frame, the more stable the product: usually it is 70-80 cm. The length affects cross-country ability and maneuverability: long sleds overcome obstacles more smoothly, but are less controlled when cornering. The average length of the frame is 170 cm.
- To give the frame strength, weld several cross members to it.
- In the same way, attach vertical posts to the bottom of the structure to which the runners will be attached. The number of racks depends on the length of the sled: usually 2-5 on each side are enough. The length of the parts should not be too long: the lower the center of gravity, the more stable the structure. The optimal height is 20-30 cm.
- Take the metal strips that will serve as the runners and bend them. Use a pencil to draw a fold line on the part, place the strip in a vice so that the clamps are exactly along the line, and bend the strip with light blows of a hammer. To avoid leaving marks on the surface, use a copper or brass pad. The bending angle should be about 60° or more.
- Weld the skids to the posts.
- Attach a drawbar to the front of the structure. You can make it yourself from the same pipe that you used for the frame. However, it is better to take a finished product with a damper: it will dampen jerks during fast driving. To strengthen the fastening, weld a steel sheet into the place of the hitch, then cut a sleeve of a suitable diameter into it.
- Transfer the dimensions of the frame onto the plywood. Cut the sheet with a hacksaw or circular saw, then sand with sandpaper or a sander. Attach the decking with self-tapping screws.
- Calculate the height of the side. Weld posts of the required height to the top of the frame. The number of racks depends on the length of the sled. There can be at least 7 of them: 4 are installed in the corners, and the rest - between them. The fourth side in this case is not closed by the side.
- Weld the crossbars that form the side to the posts and check the quality of all welds.
Results
Since a homemade sled for a snowmobile with your own hands will be used in winter, you need to carefully select materials and components that should withstand the lowest temperatures well. In addition, it is necessary to take into account that the structure will be subject to shock quite often, therefore, they must also be very durable. If you choose materials and components not carefully enough, the sled may simply fall apart on the move after a few months of use, or even earlier.
If you decide to make a passenger sled rather than a cargo sled, you need to approach the issue very carefully. Safety must come first - this applies both to the choice of materials and to the care with which all parts must be connected.
Types of adapters for walk-behind tractors
From the outside, the adapter looks like a two-wheel trailer with a driver's seat. When installing such a trailer, virtually all work performed is automated. The walk-behind tractor itself actually becomes a mini-tractor. In addition, several models have a special lever that allows you to raise and lower the seat, making work even more comfortable.
Adapters for walk-behind tractors can be of several types. To make the unit yourself, you need to decide which type will be more convenient and comfortable for the owner. Depending on the type of clutch, they come with a control control and a movable joint. Depending on how the main power plant is located, there are two types: front and rear adapters.
Adapter with steering
This type is on a rigid joint with a walk-behind tractor. The steering is represented by a separate unit, with all this possible options with both rear and front wheels. The walk-behind tractor actually becomes a self-propelled machine, which is quite simple and easy to operate, and is virtually no different from bikes or cars.
Front and rear adapters
The name itself determines the meaning of the type: front – it is located in front of the walk-behind tractor, rear – at the back. Which one is better is impossible to find, since everything depends on personal preferences, as well as the purpose of using the walk-behind tractor.
For loosening and digging up an area, a front adapter will be more comfortable, since here, mainly, the power of a walk-behind tractor is needed; it is not necessary to create the area. But for hilling beds, etc., the rear adapter will be more comfortable, since you need to closely monitor the work going on.
It is recommended to create an adapter closer to the drive axle, since the driver’s weight will put additional weight on the walk-behind tractor, pressing it even more tightly to the ground. In this case, the wheels will not slip.