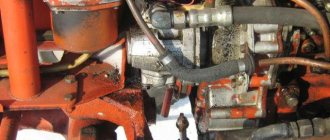
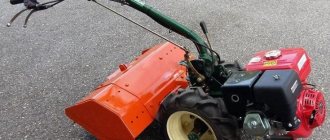
A walk-behind tractor is a worthy replacement for mini tractors in small farms and household plots. Equipped with a diesel or gasoline engine, depending on the power, in one work shift it is capable of processing an impressive area, plowing it manually would take many times longer.
Homemade assembly of a power unit (motoblock) is impractical due to the high cost and complexity of the process. But its main working body - the plow - is a simple matter to make and assemble with your own hands, as we will see in this article.
Plow design
The following types of plows are popular today:
- single-hull;
- rotary;
- negotiable.
The first type is the most widespread. On the Internet you can easily find many diagrams and drawings of a single-body plow. This is the most preferable solution for those who do not have experience in making such structures on their own.
To create it you do not need any special tools. A standard set that can be found in any garage or outbuilding will be sufficient.
The difference between a reversible plow is the presence of a curved feather in the upper part of the structure, which allows you to immediately turn over the earthen layer when it is lifted. This is the best choice if you have to work on hard ground. Due to the complex design solution, only a specialist can make it.
The most labor-intensive is the rotary plow. Its design is similar to that of a cultivator, since it is equipped with several plowshares mounted on one axis. During plowing, the axis rotates, which causes the soil layer to turn over.
Distinctive features
Equipment from the MTZ plant is produced on the basis of Belarus tractors. The devices are produced in auxiliary workshops. Today it is a large complex that produces a wide range of high-quality equipment.
The first walk-behind tractor went on sale in 1978. It was called a walking tractor. It was quickly appreciated, noting the excellent quality of land cultivation.
IMPORTANT!
The main distinctive feature of walk-behind tractors is the presence of a tractor chassis, due to which it can be used to transport trailers with large cargo.
The devices are capable of reaching speeds of up to 10 kilometers per hour thanks to four forward gears. For simpler work, a speed of 2.5 km/h is provided. Control is carried out by a convenient steering column. Elements that control movement are located at the top of the structure.
There are three modifications of the cutter measuring 42, 60 and 70 centimeters. The walk-behind tractors are equipped with four-stroke carburetor engines with a three-liter fuel tank.
Power ranges from 5 to 8 horsepower depending on the model. By adjusting the power, you can use not only attachments, but also mills and circular grinders.
Mechanical gear and closed-type multi-disc friction gearbox provide high-quality transmission.
Efficient operation is maintained by the constant presence of oil in the clutch. The equipment can be supplemented with quick-change additional parts.
The machine easily copes with plowing the land, processing potatoes, mowing grass and other tasks. Locking wheel blocks and an internal power take-off shaft ensure comfortable operation.
When developing the machine, engineers took into account the specifics of the Russian terrain, as well as different types of soil. Thanks to this, the device is equipped with a gearbox that allows it to work on heavy soils.
A durable multi-tooth differential increases the reliability of the cultivator, and a comfortable steering column and wide wheels improve cross-country ability and controllability.
Advantages
Making your own plow for a walk-behind tractor has certain advantages. The parameters of the plowshare and blade will meet all the requirements for processing a specific type of soil. These parameters include:
- blade angle;
- quality and depth of plowing;
- grip area;
- efficiency.
Taking into account the power of the walk-behind tractor, it is possible to make a plow that will not cause excessive loads on the engine and slipping, but at the same time will have maximum grip. It is necessary to use only high-quality materials, which will significantly increase the service life of the plow. It is also possible to provide for mounting various attachments, which will significantly expand the functionality, making a full range of land cultivation possible.
Choosing a plow arable implement for the region and soil
It seems that there is nothing easier - to plow the land. And in Babylon there was a plow, and the ancient Egyptians used it, and the Chinese a thousand years before the new era. It's not all that easy. The ancients made do with a plow. And so - on wheels, and with a metal tip - this was invented in Rome.
A tool for a walk-behind tractor is an even more tricky matter. Everyone knows about Gone with the Wind. How America almost got swept away into the ocean. Well, all - not all, but millions of tons of fertile earth were temporarily blocked from the sun, and sank into the salty waters. And all because of a plow for a walk-behind tractor and a tractor.
It was a foreign land, Indian. The newcomers did not know about its properties. Then they realized. We went to beg for wisdom from the wizard of the city of Emerald. They returned with understanding: when there is little moisture, large open spaces, and strong winds, a different approach to the land is needed. Do not turn all the insides up - but loosen them carefully. A plow is not suitable for a walk-behind tractor - take a flat cutter.
If you don’t know what the earth likes, look around. What does the neighbor plow, whose harvest is the richest in the area? What do farmers who have been in business for many years buy? What kind of devices do homemade blacksmiths use for their native land?
You need to know and love your land - then it will not be lost in the blue sea, but, grateful, will repay the farmer’s affection a hundredfold.
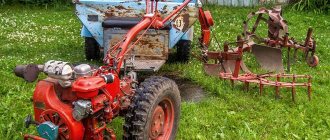
How to remake a walk-behind tractor
Many owners want to improve their walk-behind tractor to improve comfort during work. The most common modifications are the manufacture of adapters and trailers. This upgrade allows you to expand the functionality of the walk-behind tractor, because the adapter allows you not only to transport various loads, but also to use the walk-behind tractor as a vehicle.
Improving the walk-behind tractor will allow you to create a whole mini-tractor. Adapters and trailers can have their own steering, which is much more convenient than using a steering wheel from a walk-behind tractor. There are many step-by-step photo instructions and videos showing how to create a trailer. One of the most important elements of such a device is the frame, which is made of channel or pipes. Wheels can be taken from any car; the ideal option is wheels from an ATV. Bridges can be taken from VAZ 21-09, they need to be shortened. The steering column can be taken from the same car. The driver's seat will allow you to work with maximum comfort.
In addition, a mini-excavator can be made from a walk-behind tractor, the creation of which requires a hydraulic system. Such an excavator is very convenient for construction on a personal plot, because it is compact and can go where heavy equipment cannot.
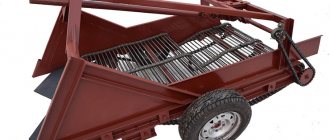
Hillers
Hillers allow you to cut furrows for planting crops, but their main use is hilling up potatoes to get a larger yield.
There are several types of hillers:
- Negotiable. This is the simplest type of hiller, which works using two plows.
- Disk. This option is more effective. It works using two rotating disks. Which rotate and loosen the soil.
- Active. This is a special type of hiller that works using propellers. If disk and revolving hillers simply turn over the top layer of soil onto the potatoes, then this one first chops it up and only then discards it.
From the manufacturer
The official manufacturer offers one version of the hiller - the universal reversible hiller OU-00.000-01.
Universal hiller
It looks like two connected plows. It is possible to adjust the width of the rows by rearranging the plows at different distances from 45 to 70 cm. The plow is immersed in the ground to a depth of 10 cm. The average speed of movement of Belarus with a reversible hiller is 4 km/h. The structure weighs 20 kg.
Analogs
The best analogue for any factory-made attachments for MTZ is Lida products. Including hillers.
Okuchnik OK-2
The OK-2 hiller is presented by a Lida company and has similar parameters to the universal hiller, except for the immersion depth. The maximum immersion of this unit is 12 cm. Accordingly, the speed in this case drops to 3 km/h.
You can always choose a universal option for a walk-behind tractor that will work successfully on it. The main thing is to choose a hitch.
Ukrainian offers a large amount of universal equipment, including disc hillers. Disc sizes can vary from 18 to 36 cm. Their maximum immersion level can be half the diameter. The disadvantage is that they are designed to process only 1 row, while reversible hillers work with two rows at once.
Homemade option
Making a disk hiller is problematic; a reversible hiller is much simpler in its design. To make it, it is enough to have two plows on hand, which are connected with bolts not to the Belarus, but to the frame. And the frame itself is already connected to MTZ.
Homemade hiller diagram
The frame should be made from a square tube in the shape of the letter “T”. This design is simple but effective and has been known since Soviet times.
Video reviews
Review of the universal hiller OU-00.000-01 for the MTZ walk-behind tractor
Setting up hiller discs on a MTZ walk-behind tractor
An example of hilling with a Belarus MTZ-09 walk-behind tractor
Here are some reviews from people who have already used this unit:
Gennady:
“When choosing between a disk and a reversible hiller, it is better to take a disk one. It is a little more expensive, but it works more stably and does not cut potato tubers. Based on practice, the rows are not always planted equally, and sooner or later you will hit some bush. But if you plant through a potato planter, I think there shouldn’t be any problems.”
Dmitriy:
“If you look at which hiller is better, then there is no definite answer, each is good in its own way. It is better to use the disk one until the potatoes have sprouted, or in the early stages of growth. It makes small lumps of soil, thereby saturating it with oxygen. After this, active growth of tubers occurs, and usually the next day sprouts are already visible from the ground. And with the current climate: plus 30 °C and no rain, this is what is needed. And the return one can already be used when the potatoes have grown and gained strength, without fear of damaging them.”
Do-it-yourself plow for a walk-behind tractor (drawings)
Based on the experience of people who made a plow for a walk-behind tractor with their own hands and drawings, you need to make the plow share removable in order to sharpen it before plowing.
The best material for making the cutting part of a plow for a walk-behind tractor is alloy steel 9ХС, which is used for circular saw blades.
45 steel, which is hardened to HRC 50-55 by hardening, will also work. If you only have ordinary steel, for example carbon steel St.5, which is not subject to heat treatment, then it can also be adapted for cutting a layer of earth by beating the cutting edge of a cold plowshare on an anvil and then sharpening it.
Plow blade for walk-behind tractor
Blade manufacturing method No. 1. The working surface of the blade must be given a cylindrical shape. If you have sheet bending rollers, then it is not difficult to give the workpiece the required shape.
To achieve this, a blade blank, cut by gas or electric welding (or scissors) from a steel sheet 3-4 mm thick, is fed to the rollers at an angle of 20°-23°, bent, and then given the required shape using a template using a hammer.
Drawing of a plow blade made of 3 mm steel sheet
Method number 2. The blank for the dump can be a steel pipe with a diameter of 550-600 mm and a wall thickness of 4-5 mm. First, a blade template is made from thick cardboard, then the template is applied to the pipe so that the lower generatrix of the blade template makes an angle of 20-23° with the generatrix of the cylindrical pipe.
The outline of the blade is drawn with chalk, then it is cut out by gas welding and sanded. If necessary, the shape of the blade is adjusted with a hammer according to the existing template.
The shape of a plow blade made of a pipe with a diameter of 550-600 mm and a wall thickness of 4-5 mm
Method No. 3. The most labor-intensive way to obtain a dump is to place the workpiece in a forge for heating (or heating it in another way). Then the workpiece is bent according to a matrix, which can be used as a moldboard from another plow.
The material of the plow body is steel sheet grade St.3-St.10 with a thickness of 3 mm.
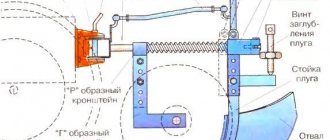
Plow parts drawing:
- a – ploughshare made of alloy steel;
- b — side shield of the rack, St3;
- c — spacer plate, St3;
- g — plow base plate, St3;
- d - field board, corner 30x30 mm;
- e - stand, pipe with a diameter of 42 mm
We recommend that you first make the parts of the plow from thick cardboard and connect them together by gluing, maintaining the appropriate angles. Thus, the values of the alpha angle on different parts of the plow body will be from 25° to 130°, the values of the gamma angle will be from 42° to 50°. If your homemade cardboard plow model suits you in all respects, feel free to start working with metal.
When the steel parts of the plow are made, to assemble its body you will need an auxiliary sheet of steel 2-3 mm thick with dimensions 500x500 mm, and you will also need a welding machine. The angle γ0 is laid out on the auxiliary sheet with a distance of 40 mm from the edges.
Plow assembly
- 1 - ploughshare;
- 2 — side shield of the rack;
- 3 – auxiliary sheet 2-3 mm
Using wedges with an angle α0=25°, a plowshare is installed on the auxiliary sheet and welded to the sheet pointwise on both sides.
The side shield of the rack is connected to the ploughshare in a vertical position so that its edge extends beyond the edge of the ploughshare by 5-8 mm, while the side shield is raised higher than the blade of the ploughshare (that is, higher than the auxiliary sheet) by 6-10 mm, so that do not interfere with the plowshare cutting the ground. The shield is also lightly welded to the share and to the auxiliary sheet.
Then the blade is applied to the ploughshare as closely as possible and without gaps so that their surfaces are one whole. The angle between the upper edge of the blade and the ploughshare blade is equal to (γmax − γ0) = 6-8°.
Mounting the plow share
- - ploughshare;
- — countersunk head screw M8;
- - dump;
- — base plate;
- — corner 30x30x90 mm;
- - M8 nut
If it is found that the corners and/or surfaces do not match, the blade is reworked with a hammer. After adjusting the blade to the ploughshare, it is welded from behind to both the ploughshare and the side shield. Then the side shield is welded to the spacer bar and the base plate; the thrust corners for the ploughshare are attached to the latter by welding.
The plow is once again inspected and thoroughly welded, while the auxiliary sheet used to assemble the plow is separated from its body with a chisel or “grinder” with a cutting disc. The thrust corners of the ploughshare are thoroughly welded to the base plate. Then all welds are cleaned, and the surfaces of the blade and plowshare are sanded.
Types of plowing implements
To increase the efficiency of the work performed, it is extremely important to carefully consider the question: which agricultural implements are best to choose for motor vehicles. There are the following types of implements for plowing the soil:
There are the following types of implements for plowing the soil:
- double-body (2-sided);
- negotiable;
- disk;
- rotary (active);
- turning.
There are also several options for fixing them:
- trailed;
- mounted;
- semi-mounted.
Let's look at some soil cultivation devices in more detail.
Rotary (active)
A rotary plowing tool for motor vehicles is compared to an iron comb, which makes it possible to plow the soil. These types of agricultural implements of various modifications can have a variety of configurations. But these modifications are connected by the fact that their design becomes wider at the top, which makes it possible for these devices to pour soil to the side of the furrow.
An active plow actually has the same field of application as an ordinary implement for plowing the soil, with the only difference being that it functions faster and is more productive. However, there are certain features of its use. Thus, with a rotary device it is much easier to cultivate uncultivated lands that are abundantly overgrown with wild plants. The soil thrown away by the plowshares of this agricultural implement is better crushed and mixed, which becomes a plus when cultivating certain types of soil.
Reversible (rotary)
A tool for plowing soil of the reversible type is collapsible; this is probably the best option, since sharpening or rotation of the knife is possible.
You should decide what size the plow will be - which directly depends on what modification of motor vehicle you are using.
For more effective use of the implement for plowing the soil, it is necessary to adjust the tool; for this it is advisable to use a coupling device (it is possible without it).
To make adjustments more accurately, it is worth taking into account a number of basic provisions:
- it is necessary that the longitudinal axes of the unit and the regulator are aligned;
- vertical position of the beam.
Such an installation will make it possible to carry out agricultural work more productively. But it is also necessary to use extensions on the axle shafts and iron wheels with weights for all kinds of tasks.
With a drawing and certain skills, you can create a rotary plow yourself from steel with high structural strength. Therefore, it costs nothing for such a homemade device to withstand heavy loads while working on a plot of land.
When using this equipment for motorcycles, you must adhere to several recommendations:
- the device should not have a thin stand, a shortened blade, or a small thickness of the body sheet;
- An instruction manual must be present.
Double-body (2-sided)
Double-sided agricultural implements (hiller, also known as tiller, double-winged plow, tiller) are used to loosen the soil around plants, rolling it to the base of the stems of various crops. Additionally, weeds are eliminated between the rows. With such tools, you can cultivate the ground, cut furrows for planting plants, and then fill them up by turning on the reverse gear of the unit. Such designs are distinguished only by the width of the working grip - variable and constant. The difference between them is solely in the moving wings, which adjust the width of the working grip.
A device that, with a constant working width, operates with light motor vehicles (up to 30 kilograms), with a motor power of up to 3.5 horsepower. Their distinctive feature is 12 mm racks (protect the unit from overloads).
The most common types of hillers are devices with variable working width. Their only drawback is that soil falls into the furrow after passing. Such equipment comes with units weighing more than 30 kilograms, with motors with a resource of 4 liters. With. and more.
Original equipment
The manufacturer presents a multifunctional modification of the PU-00.000-01 reversible implement for plowing land, which is adapted for the heavy Belarus MTZ 09 N walk-behind tractor, but is not suitable for every MTZ. It can handle plowing soil of any density, including virgin soil. As a distinctive feature, you can focus on the small mass of the device, which is only 16 kilograms.
Plow on a walk-behind tractor: review of popular models and their characteristics
Although industrial modifications are inferior to home-made analogues in terms of costs, they are highly reliable and durable. There are many different models on the modern market, which differ not only in requirements for soil quality, but also in the technical parameters of the power plant itself.
Plows for the Salyut walk-behind tractor
"Salut" is a well-known brand of cultivators and walk-behind tractors. Thanks to the plow, the soil is plowed to a depth of up to 25 cm. They function with the following types of plows:
- reversible, suitable for dense soil - the heaviest of those considered;
- single-hull without coupling, the weight of which is 9.55 kg with a plowing depth of up to 200 mm;
- a Zykov rotary plow weighing 9 kg, which loosens 20-25 cm of the top layer of soil.
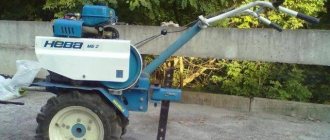
Plows on the Mole walk-behind tractor
The Krot motor cultivator is known in several modifications - MK-1 and Mk-2. Both are perfectly compatible with universal reversible plows. For better adhesion to the surface, it is necessary to purchase additional lugs.
Technical characteristics of the "Mole" plow:
- Processing width – 20 cm;
- Plowing depth – 20 cm;
- Weight – 8 kg.
Plows for the Neva walk-behind tractor
The Neva walk-behind tractor has several basic modifications, including MB-1 and MB-2. They differ in power and transmission. Therefore, they are equipped with different adapters.
MB-1 is compatible with a universal single-body plow without a hitch, as well as the P1 20/3 model. The latter covers a row 22 cm wide and is adapted to over-compacted soils.
MB-2 works with:
- plow “Mole” (1-furrow), weighing 8.5 kg;
- 2-turn with 15 kg weight and 20 cm processing;
- single-furrow plow P1-20/2 (8.5 kg).
Plow for MTZ walk-behind tractors
The following plows can work with the MTZ-09N motor cultivator and other modifications of the manufacturer:
- universal reversible PU-00.000-01, made of steel and having a specific ridge shape;
- P1-20/3, smaller in size than the previous one;
- reversible double-sided with feather-shaped ploughshare. Together with such a plow, the walk-behind tractor can be operated at a speed of 2-5 km/h.
The universal plow of the PU series has gained great popularity. Its features are:
- light weight;
- ease of transportation;
- fastening with a conventional hitch;
- track width 30 cm;
- adjustability of plowing depth, which is max. can be 25 cm.
In addition to those mentioned above, plows for walk-behind tractors with a support wheel, which are adjusted by a screw mechanism, have become extremely popular among consumers.
Aggregation with mini tractors
Mini-tractors are usually called models of tractor equipment with a power plant with a power of up to 30 horsepower, the main application of which is soil cultivation in areas with a small area.
The traction characteristics of these tractors allow them to be combined with reversible single- and double-furrow plows, as well as disc and rotary plow mechanisms with low productivity.
Among the compact tractors produced today by MTZ-Holding, the most famous are the models produced by the Smargon aggregate plant MTZ-132N and 152, aggregated with plows from various manufacturers, including PU-00.000, 1L-230, 1LF-225, LS-225, LS-125 and other.
How to make adjustments
Precise adjustment of the plow for a walk-behind tractor is based on three parameters:
width;
depth of entry;
angle of inclination.
To independently adjust the plow, the width is set at its edges. For better crushing and easy cutting of the soil, its edge should be attached at the same height as the soil hook, focusing on the inner side.
In this article you will learn how to make a hiller for a walk-behind tractor with your own hands.
Read here what is better to use a walk-behind tractor or a cultivator at the dacha.
The depth is built up after the walk-behind tractor is placed on the stands. Installed stably, without displacement towards the plow.
The height of the stands should be adjusted depending on the depth to which you plan to plow the soil. If this is plowing before the winter season, then the depth is chosen to be approximately 25 cm. In spring, the depth is up to 20 cm.
After installation and selection of depth, the plow mount is adjusted. The ideal option is when it is adjacent to the soil.
If this is your first experience in plowing the ground with a walk-behind tractor, then use the tension rope as a guide, since the first row should be straight in order to further build on it.
You can also use a support wheel, it is located to the left of the plow, and runs on uncultivated ground, thereby preventing too deep penetration and adjusting the depth.
After installation, the walk-behind tractor is adjusted with special bolts so that the rear part of the plow is parallel to the soil.
The last step in the adjustment is to remove the walk-behind tractor from the stand and adjust the steering wheel to the height of your lower back. This is done to reduce stress on the hands during prolonged work.
Setting up the plow before plowing
When starting arable work, it is necessary to correctly configure and adjust the position of the plow relative to the ground. This procedure is carried out in several stages: before the start of plowing and during the plowing of the first rut.
Read also: Thermoelectric Peltier cooler what is it
We invite you to watch a video that describes in detail how the plow is configured for the Oka walk-behind tractor:
Algorithm of actions when setting up a plow for an Oka walk-behind tractor:
- Prepare the necessary hand tools (wrenches), walk-behind tractor, hitch and plow.
- Replace pneumatic wheels with lug wheels.
- Attach the hitch to the walk-behind tractor using bolted connections.
- Attach the plow to the hitch by aligning the holes on the plow stand with the holes on the hitch, and secure the position of the plow using cotter pins.
Setting up the plow is not enough; it also needs to be adjusted correctly:
- Set the plowing depth, which for Oka walk-behind tractors is 15-18 cm.
- We move on to adjusting the angle of attack, which directly determines the depth of immersion of the nozzle into the soil. We tighten the bolt on the hitch, which is responsible for the height of the plow heel (the higher the heel, the deeper the depth). The optimal size is 3-5 cm from heel to ground.
- We proceed to test plowing of the soil. During the first pass, parameters such as the depth of the furrow to be cut and the smooth running of the Oka walk-behind tractor with a load are checked.
- If during the first pass we find any shortcomings, we reconfigure the system.
Equipment setup
Quite often, owners of walk-behind tractors have a question about how to adjust attachments on the Neva or Farmer models. Setting up the plow is necessary to ensure that the processing of the area is of the highest quality. If you follow simple recommendations, this procedure is quite simple. In addition, there are a large number of videos showing the setup procedure.
After the walk-behind tractor is delivered to the place of work, it is necessary to replace the wheels on it with lugs. To make the change easy and quick, a stand is installed under the hitch. Next, the lugs are directly attached, and it is necessary that the narrowed part of the tread “looks” in the direction of movement. After installing the lugs, it is necessary to proceed to preparing the equipment for operation.
For high-quality plowing, the plow must be well secured to the Neva MB-2 walk-behind tractor. To do this, you need to remove the adjusting screw from the hitch and install the attachment. The stand has holes through which the furrow depth can be adjusted.
After installing the equipment, you need to adjust it. To do this, place the plow heel parallel to the ground and secure it with the adjustment bolt. The steering wheel of the walk-behind tractor should be located in the center of the adjustment screw.
Plowing the site
After the first strip is made, it is necessary to turn the walk-behind tractor and install the right lug opposite the test furrow. It is necessary to plow along the right edge of the furrow, then the soil will be laid in even ridges. When working, there is no need to exert additional effort and push the unit, but you should hold the walk-behind tractor in relation to the plow at an angle of 10˚.
After you have obtained an even furrow and you have become comfortable with the control of the walk-behind tractor, you can increase the speed. In this case, the soil dump is stronger and, therefore, more even and high-quality furrows are obtained.
Rotary plow on a walk-behind tractor: advantages of the unit
It has the most advanced form for plowing virgin soil and areas overgrown with weeds to a depth of about 30 cm. A homemade rotary plow includes:
The walk-behind tractor on which such a tool is mounted must have a working power take-off shaft. It is he who drives the axle, and she – the plowshares.
Homemade rotary plows for walk-behind tractors are most often found with disk mechanisms. But drum, blade and auger plows are also known. Indispensable for applying fertilizers and controlling weeds.
Rotary plows
Rotary models differ from other designs: the unit consists of a set of curved shares that loosen the soil, placed on an axis driven by the power take-off shaft of the unit. The depth of plowing the soil with a rotary plow is 25-30 cm, and does not require significant effort from workers.
A rotary plow allows plowing to change directions, which is important for processing areas with complex shapes. This design is popular among summer residents for cultivating soil with a layer of turf or saturated with roots.
Rotary plows are compatible with medium and heavy walk-behind tractors.
Installing a plow on a walk-behind tractor
The design of any plow, regardless of its size and shape, contains a hitch through which the device is attached to the walk-behind tractor. The hitch can be stationary or universal. The second type of element is considered the most optimal option, since it provides more opportunities for adjusting the plow.
Regardless of the type of hitch, installation of the structure on the walk-behind tractor is always performed in the same order. To attach a plow to a walk-behind tractor, proceed in the following sequence:
- First, install the walk-behind tractor on stands - you can use bricks or logs for this;
- Attach the plow hitch to the towbar of the walk-behind tractor so that the holes on both elements coincide with each other;
- Secure the hitch to the tow bar with bolts.
Many beginners believe that the more securely the plow is attached to the walk-behind tractor, the more efficient the work of the attachment will be. However, practice shows that too rigid a connection will only worsen the quality of plowing. The fact is that when operating a plow, forces act on it that go perpendicular to the plane of the blade. Because of this, resistance arises, which pushes the plow away from the walk-behind tractor. To eliminate this, when installing the plow, you need to leave a horizontal play of about 5 degrees.
Setup and adjustment
Whatever design features the plows have, they are all fixed to the walk-behind tractor using the coupling of two models - universal and stationary. The first hitch model is the best option due to the breadth of tool customization options. When mounting a plow to a walk-behind tractor, the type of hitch does not affect the fastening technique. You can secure the equipment as follows.
- The plow is located on an elevated surface in relation to the walk-behind tractor. Natural elevations, hummocks, and a mound of bricks are used as a pedestal.
- The hitch is made in the tow bar area. All holes must coincide with each other, forming a single ring.
- The coupling is performed using a bolt.
When fixing attachments, the bolt should not be clamped with increased force. Rigid fixation of the elements affects the quality of cultivation of arable land; the plow will dangle from side to side. To prevent this from happening, a horizontal gap of 50 degrees must remain at the mounting location. Next, the canopy is adjusted:
- plowing depth is selected;
- board tilt level;
- blade angle.
The depth determines how far the working parts of the plow will be immersed. Most often, the value is equal to the height of the blade. With shallow plowing, weeds are not uprooted from the ground. If the cultivation depth is excessive, the fertile layer, when mixed with the lower layers, will lose the nutrients necessary for the development of the sown crop. To adjust the depth level, three bolts must be locked in the desired lock position while raising and lowering the plow. The tilt is controlled by a screw handle; adjustment is made according to the following scheme:
- the walk-behind tractor is placed on a hill;
- the handles are rotated until the board comes into contact with the ground;
- the handle is twisted in the opposite direction, the board should be located at a height of several centimeters from the ground level (2-3 cm).
If the angle is too large, the tool will slip due to the plow clinging to the ground. If the level is insufficient, the unit will not be able to process all layers of soil with the set depth. The blade angle is adjusted according to the listed rules.
- The walk-behind tractor is positioned at the edge of the treated area and the first furrow is made. Then the resulting depth of the arable land is determined.
- The passage must be strictly in a straight line.
- Next, the walk-behind tractor wheel is driven into the furrow, and the plow is positioned perpendicular to the ground. You can use a square.
All these methods will lead to high-quality tuning of the plow and provide protection against possible tool breakage.
Manufacturing and fastening of working elements of the plow
The main elements of the single-hull design are the blade and the ploughshare, the creation of which requires durable sheet steel 3-5 mm thick. First of all, a ploughshare is made, for which it is worth using an old disk from a circular saw, since it is made from high-strength steel. To sharpen the cutting edge of the ploughshare, it should be beaten on an anvil.
Next, you need to make a blade from a metal pipe with a diameter of 50-60 cm and a wall thickness of about 5 mm. A template is created from cardboard or thick paper, which is applied to the metal and traced along the entire contour with chalk. Afterwards, along the resulting lines, a workpiece is cut out using gas welding, which is brought to the required dimensions using a grinder or a hammer and emery.
Do-it-yourself plow for a walk-behind tractor from a horse-drawn one - how to make it yourself?
Unlike other types of implements, a horse plow can be made almost entirely from wood. The only metal part is the ploughshare, since the wooden element will quickly become unusable due to regular processing of the soil. The plow manufacturing algorithm is as follows:
- First, take 2 wooden beams, about 10 cm thick - they will be used to make handles. Rubber pads must be put on the upper part of the handles;
- Connect the handles to each other at right angles so that when plowing you can firmly grasp them with both hands;
- Connect the lower parts of the parts using self-tapping screws;
- Take another beam, 20 cm thick. It should be curved so that its upper and lower ends are parallel to each other;
- Attach the ploughshare to the lower end;
- At the upper end, install a hitch, which can also be made from small wooden blocks;
- Secure the double part of the handles in the middle.
Despite the simplicity of the design, the horse plow shows quite high efficiency. True, using it to plow wet soil is quite dangerous, since wooden elements can simply break from the weight of the soil.
Regardless of the method you choose for making a plow, each of the homemade structures can be used to work with motoblocks Krot, MTZ, Salyut, as well as Neva MB-1 and MB-2.
A walk-behind tractor is a worthy replacement for mini tractors in small farms and household plots. Equipped with a diesel or gasoline engine, depending on the power, in one work shift it is capable of processing an impressive area, plowing it manually would take many times longer.
Homemade assembly of a power unit (motoblock) is impractical due to the high cost and complexity of the process. But its main working body - the plow - is a simple matter to make and assemble with your own hands, as we will see in this article.
How to adjust a plow on a walk-behind tractor?
Adjustment is an extremely important point on which the performance of not only a homemade or factory plow, but also a walk-behind tractor depends.
To correctly set up a plow on a walk-behind tractor, you need to pay attention to three key parameters:
- width;
- plowing depth;
- incline.
Work progress:
- set the width along the edges, for which the edge should not move above or below the soil hook;
- Place the walk-behind tractor stably on stands to set the depth required for plowing. It must be remembered that it varies by season (in winter up to 0.25 m, and in spring about 0.2 m);
- adjust the attachment of the plow to the walk-behind tractor;
- make bolt fastenings so that the rear of the plow is in the same plane with the soil;
- remove the walk-behind tractor from the stand.
The setting is considered complete if the steering wheel is located at the level of the operator’s waist.
Tips for use
It happens that a walk-behind tractor with a plow slips or simply does not want to work - in this case, it is worth familiarizing yourself with the operating rules in more detail. It is worth choosing a product based on the type of soil and the size of the area that you plan to process. If this is a small cottage, then you won’t find a better device than a simple cutter.
When work is carried out on hard, heavy soil, then adjusting the position of the plow is of particular importance. In this case, it is recommended to use “crow’s feet”, which are made from special strength steel.
If we talk about the features of this attachment, it is equipped with a cutting surface in the shape of a triangle. Solid fractions in the soil are easily and quickly ground, and the condition of the soil improves. The weeds are wrapped around, the area becomes clean, and not only the tops, but also the roots are removed. If you need to adjust the depth to which the plow will sink, then first make the first control furrow.
Then the process looks step by step as follows:
- the lug is placed in the furrow, the walk-behind tractor is turned on and a slow forward movement begins;
- the walk-behind tractor is turned 180 degrees and the equipment is directed in the opposite direction;
- The position of the bracket bolts changes, but they do it so that the lug remains inside the furrow.
How to do it?
Modern models of walk-behind tractors can be equipped with a reliable plow made by yourself. Varieties of this element: double-turn, reversible, two-body, rotary or Zykov’s product. There are quite a lot of design options. There are even options in which the body is made of a gas cylinder. It’s not difficult to make a high-quality plow for motorcycles yourself if you follow certain rules.
Rotary
The manufacturing of the structure can be divided into several main stages.
Prepare a good dump in the shape of a cylinder. This must be done exclusively in accordance with the drawing. The part is made of alloy metal
It is important to follow the drawing when making the structure yourself. They put out the ploughshare. The wedges are inserted into the iron sheet (3 mm) at an angle of 45 degrees. Connect the ploughshare to the shield on the side. Be sure to ensure that the blade of the ploughshare is located just below the shield itself (1 cm, no more). Attach the blade to the ploughshare. The working half with the plowshare is welded to the metal tube, which serves as the base, using a welding machine.
On the opposite side - fasteners for motorcycles. When the plow is ready, you can weld an axle with wheels in its lower half.
Be sure to ensure that the blade of the ploughshare is located just below the shield itself (1 cm, no more). Attach the blade to the ploughshare. The working half with the ploughshare is welded to the metal tube, which serves as the base, using a welding machine. On the opposite side - fasteners for motorcycles. When the plow is ready, you can weld an axle with wheels in its lower half.
Turning
The rotating type of plow is rightfully recognized as one of the most functional and practical. This design is an excellent assistant for plowing land on a site, because it can cover a fairly large area. The plow is also good because you don’t have to waste time with it after each approach. You will only need to turn the plow and move in the opposite direction. The productivity of equipment will increase significantly. The main actions are performed in the same way as in the case of a rotary mechanism, but in this case the cutting elements must be below the skid (at least 2 cm).
Disk
It is possible to assemble a disc plow for machinery with your own hands. A similar model is assembled from the following parts:
- disks;
- fist;
- axles;
- bracket;
- scraper;
- drive beam;
- pens;
- screeds.
The disks for the device can be taken from an old “seeder”, if you have one in your arsenal. These elements are installed at an angle to increase work productivity. The hiller is hung on the equipment through the coupling bracket. The T-shaped leash from the plow is screwed to it using bolts and a stopper. At impressive speeds, the hiller may begin to slip, so you will have to work exclusively at low speeds or with twin wheels.
Snow removal design for walk-behind tractor
If we are talking only about a walk-behind tractor as a power unit, then the snow removal “gadget” for it will also have its own characteristics.
First, it should be noted that the structure will consist of the following parts:
- vertical blade;
- 4 racks to provide the structure with great rigidity;
- horizontal dump;
- ladle knife;
- rubber gasket;
- tires for fastening rods.
A walk-behind tractor with a snow blade is very often used in private households. To install the same equipment on a walk-behind tractor, you will need the following tools:
- steel sheet 800x650x3 millimeters;
- steel plates (440x220x4 millimeters, 4 pieces);
- iron strips (800x100x4 millimeters);
- springs for attaching rods (2 jokes);
- profiled square pipe 40x40 millimeters, 1 meter;
- a set of washers, nuts and bolts;
- rods (520 millimeters in length, 2 pieces);
- metal drills;
- a set of keys;
- pliers;
- thick rubber sheet;
- grinder and a set of cutting discs for it;
- welding;
- drill.
To install the blade, you need brackets that are used on the walk-behind tractor frame. Also, the structure is attached to the walk-behind tractor using two non-working rods, with the help of which the walk-behind tractor brackets will be unloaded. The snow blade is attached to the blade using steel bolts on the lower edge of the bucket.
Once the blade is ready, you can attach it to the walk-behind tractor and begin clearing the area of snow, debris, leveling the ground and other necessary actions, which with the help of a snow blower will be performed faster and with minimal labor costs. Such a device can rightfully be considered universal, since it can perform a variety of tasks. And self-assembly allows you to create equipment specifically for the needs of a specific owner. In addition, its price will be several times lower than the factory models.
For long-term operation of the structure, it is recommended to treat it with a special primer to avoid the formation of corrosion. Before this, all welding points must be carefully processed with a grinder. After priming the structure can be painted
It is also important that the rubber protection strip should extend beyond the edge to avoid damage to the surface of the area
As it turns out, anyone can independently assemble a snow blower for a walk-behind tractor and other equipment. You just need to have minimal experience working with welding machines and a desire to work. This process is not complicated, there are many plans online for creating a snow blower, and the materials and tools can be found at any hardware store if you don't have them. In addition, this will significantly save money.
Often, in just a few winter days, so much snow falls that it can be quite difficult to remove it with just a shovel. In this case, a walk-behind tractor will come to the rescue, which can be equipped with a homemade blade. This will help clear the area, saving your energy and time.
How to set up a plow
In addition, you need to set up the plow correctly: the working part of the edge should be inclined by about 40 degrees, because it is this inclination that allows you to make the work as efficient as possible even on difficult soil.
A harrow for a walk-behind tractor will simplify your work, save time and your energy. With it you will perfectly prepare your site.
Handmade homemade cultivators have now become very popular. If you click on the link, you can see a video on how to make it.
If you make the angle smaller, then the cutting part may simply fly out of the ground, and with a large slope, the edge simply will not overcome heavy soil. The blade angles usually vary from 30 to 140 degrees.
Assembly
If everything was done correctly in the previous steps, assembly should not cause significant difficulties. To do this, you will need a sheet of steel with an area of at least 25 cm². All parts are welded to it, including the side shield.
Such work requires special care, since parts of the future agricultural implements must fit well and the angles must match. The side shield, which ensures stability and reliability of the assembly, is connected to other elements by spot welding. If a discrepancy in the geometric configuration is noticed, the shape of the blade can be easily corrected with a hammer.
Types of plows
When completing walk-behind tractors, three types of plows are used, all of which have their own area of application:
- single-hull and double-hull;
- rotary or reversible;
- rotary.
Single-hull models
Single-body units are the simplest in design. They have only one share and are used for plowing light soils in ordinary garden plots, which make up the majority of the land. Such a plow is not suitable for plowing heavy soils and virgin lands; a more powerful design will be required.
A double-furrow plow consists of two fastened frames with plowshares. It is used for cultivating various types of soils and for primary plowing of virgin lands. It can simultaneously perform plowing and harrowing, ensuring the best quality of soil cultivation.
Dimensions
The dimensions of different types of plows may vary. You can see the characteristics of the parts using the example of a rotary specimen. It is taken into account that the rotary type of such a device is assembled from the following bases:
- side vertical part of the runner;
- horizontal plane below the skid;
- front dump part.
The most productive is considered to be a plow in which the cutting edge at the bottom of the fixed coulter is 20 mm below the bottom of the skid, placed horizontally. The next properly aligned part of the plow is to compare the cutting edge on the side of the fixed opener with the cutting edge on the side of the moldboard. The opener and blade should not protrude more than 10 mm beyond the boundaries of the vertical plane on the side of the skid.
There is another fundamental aspect - fastening the front plane of the blade opener without visible cracks and gaps, and in a similar plane. If we look at these parts in more detail, they should be highly polished and, like a mirror, reflect any surface. There should be no protruding parts of the fastener under any circumstances. As the plow returns from excavation work, it is better to clean it of settled soil and foreign particles. Elements that have been polished should be poured with oil or coated with grease. Next, the mechanisms need to be rubbed using a rag. In this way, it will be possible to protect the structure from brutal external influences, which can lead to the formation of corrosion on the surface of the plow.
As for the 4th correctly constructed structure, it includes the flat front surface of the coulter, which makes an angle of 20 degrees with the flat part of the plow structure. It will be equal to the angle located at the rear of the exposed opener. The cutting sidewalls-edges of the opener and blade will also have 20-degree angles with bases on the side of the furrow. Moreover, the edge located on the side of the blade may be slightly rounded.
Assembly diagram
If the plow is made independently, then after all the elements are available, they must be correctly assembled into a single structure. The opener will need to be placed on an additional sheet, using wedges with an angle of 25 and 42 degrees. The element needs to be welded, but this is done pointwise and certainly on both sides.
The side shield is attached to the opener so that it is placed in a vertical plane, but protrudes by 7 mm. In turn, the shield must be 8 mm higher than the coulter blade - if this requirement is not met, then the plow will not be able to complete the task assigned to it. The shield is also welded. The blade is attached to the coulter, and this must be done in such a way that there is not even a small gap.
If it is found that there is no compliance with the required characteristics, then the blade should be brought to the desired position with a hammer.
Only then do they work again by welding and attach the shield from the side to the spacer bar and the plate at the base. Using a chisel, the additional sheet is separated, and the seams are perfectly sanded.
How to convert a horse-drawn plow for a walk-behind tractor
Single-body and double-body
Single-body ones are perfectly suitable only for soft soil; their design does not include more than 1 coulter. The advantage of such equipment is that it is easy to assemble and has a small mass.
A double-furrow plow is suitable for working on any type of soil, the main thing is that there are no stones. Using such hanging equipment, you can create furrows, hill up plants, and clear the area of weeds.
It is better that the walk-behind tractor on which you plan to install the equipment shows a power of up to 3-5 horses.
The working width on such equipment can be adjustable or fixed.
Dumpboard and non-dumpboard
Among the varieties of plows there are moldless and moldboard ones. The latter are more popular as a means of cultivating a small plot of land.
They have their own systematization:
- furrow;
- without grooves;
- plowing smoothly.
Those products that do not leave furrows are used in situations where the land needs to be processed into a dump; For a reverse effect, a plow is used, which leaves furrows.
On the moldboard structure, the opener is at a special angle of inclination, so the soil layer does not just turn over - the earth becomes loose.
This device is best used in areas where there is not a huge amount of rainfall, but there is erosion on the soil.
Rotary
Blades are installed on a rotary or rotary plow, and if you associate this unit with the others, then, from a design point of view, it is very different. From time to time he is associated with cultivators.
The design contains several plowshares, which are specially given a curved shape. They are mounted on a common axis, it is set in motion when the equipment is turned on, and then turns over the soil. This very feature distinguishes a rotary plow from a cultivator.
Field processing depth is up to 300 mm.
Even a novice operator can easily operate similar attachments. The walk-behind tractor simply moves along a given line of movement; it may not necessarily be flat, as in other cases. Summer residents in most cases use a rotary type when treating the garden and the area from weed.
How to make a plow for a walk-behind tractor with your own hands from a horse-drawn one?
A horse plow, compared to other types of attachments, can be made entirely of wood. The only metal element can be the ploughshare.
Step-by-step instructions for making your own horse plow for plowing the land are given below:
- The handles are made of two wooden beams, the thickness of which is about 10 centimeters. The upper part of the handles is complemented by rubberized pads;
- The handles are connected at right angles, so it will be more convenient to hold them with both hands;
- The lower parts of the elements are connected with self-tapping screws;
- A beam 20 centimeters thick must be bent so that its ends are parallel;
- The lower end of the beam is attached to the ploughshare;
- At the upper end, the plow is attached to the walk-behind tractor. For manufacturing, you can use small wooden blocks;
- A double handle is installed in the middle of the mount.
The structure of a horse plow is very simple, but highly efficient. It cannot be used when processing wet soil, so as not to break the wooden parts.
The method of making a plow for a walk-behind tractor can be chosen to suit you. Each homemade canopy can be used with units of the popular brands Neva, MB-1 and MB-2, MTZ, Krot, Salyut.
Price and characteristics
To compare all the walk-behind tractors from the rating and choose the best one for your dacha in terms of price-quality ratio, you need to compare their technical characteristics and price.
| Model | Engine power, hp | Tank volume, l | Number of forward/reverse gears | Weight, kg | Average price, rub. |
| Mobile K MKM-3 PRO | 6,5 | 3,6 | 2/1 | 69 | 42 990 |
| BISON MTB-300 | 7 | 78 | 24 670 | ||
| PATRIOT Samara | 95 | 29 990 | |||
| Hyundai T 1300 | 93 | 39 990 | |||
| Aurora COUNTRY 1000 | 4,35 | 3,2 | 105 | 37 900 | |
| Daewoo Power Products DATM 80110 | 8 | 4,5 | 86 | 39 990 | |
| Huter MK-9500 | 9,5 | 6 | 130 | 38 430 | |
| CHAMPION BC1193 | 9 | 132 | 45 200 | ||
| Neva MB-23B-10.0 | 10,06 | n/a | 4/2 | 105 | 58 750 |
| CaimanVARIO 60STWK+ | 6 | 3,4 | 2/1 | 72 | 59 990 |
How to make a disc plow on a walk-behind tractor?
A disc plow-hiller is a very useful device that allows you to prepare even furrows for planting potatoes and other tuber crops. Before you start making such a plow, study the drawings. Using them you will be able to control the progress of the assembly and avoid mistakes.
The procedure for manufacturing a disc plow for a walk-behind tractor is as follows:
- The support corner acts as the basis of the plow. To make it, use an equilateral corner, the shelves of which, when cold, should be brought together at an angle of 70 °;
- Weld a sock to the corner. After this, weld the heel through the thrust bar;
- Secure the cheeks to the support corner using loops. The distance between the corner and the cheeks should be such that when the cheeks are opened, their end sides do not rest against each other;
- Weld the rotating mechanism to the thrust angle so that the supporting part of the mechanism is perpendicular to the angle.
Finally, adjust the plow cheeks. To do this, fix each of them with a vice and adjust so that in the end they are bent in the opposite direction from each other.
Installation
The quality of its work with the walk-behind tractor depends on how correctly the plow is assembled.
- • To begin with, a ploughshare is welded to the metal plate that will become the blade.
- • Next, the side pillar shield is attached.
- • Then the spacer bar, base and stop corners are attached to it.
It is important that all parts fit together, otherwise the plow for the walk-behind tractor will not cope with its purpose.
In order to clearly see how various plows for walk-behind tractors work, it is worth finding a thematic video on the Internet. In this case, it will become clear how different plows function, and this will help you choose the optimal design for yourself. Only by using high-quality equipment can you count on good results.