Carburetors K-151d and K-151s are considered one of the most reliable devices. When used correctly, they work properly for a long time and do not require special maintenance. However, for optimal performance, this device must be adjusted correctly. The performance of the power unit depends on this process. Carburetor K-151s adjustment allows you to improve efficiency, increase power and increase engine efficiency.
Adjusting the fuel level in the float chamber
An incorrectly set gasoline level in the PC is an imbalance in engine operation.
If it is too high, the mixture will be enriched, and one of the most noticeable consequences of this state of affairs will be increased fuel consumption. At a level below the norm, the fuel assembly will be lean, which is even worse for the engine, since it can lead to serious damage requiring expensive repairs. Thus, the fuel level in the float valve is a critical indicator for any carburetor, regardless of the brand and model.
To accurately adjust the float in the K-151 chamber, we will need a ruler and a drill with a diameter of up to 2 mm.
Float chamber of carburetor K-151
we install the machine on a flat horizontal platform (this is important since we will be working with liquid); dismantle the air filter housing located on the power unit; we start the engine, let it run at XX for about 5-7 minutes; unscrew and remove the top carburetor cover; measure the fuel level in the float chamber in millimeters. This operation should be carried out promptly, since gasoline is characterized by a high volatility rate, especially in the heat, which will also be facilitated by engine heating
By delaying, we risk getting distorted results; for K-151, measurements should give about 215 millimeters - this is an indicator considered normal for efficient engine operation; if the level does not correspond to the standard level, we perform an adjustment, which consists of changing the position of the float; To do this, we need to use something that allows us to measure the position of the float during adjustment work - the drill suggested at the very beginning, or a piece of wire, or any similar cylindrical object will come in handy. The main thing is that its diameter does not exceed two millimeters; turn the K-151 cover over and place it on a flat horizontal surface - only in this position will the measurements be accurate; Using a ruler, measure the distance from the carburetor cover (choose a cardboard gasket as a reference point) to the lower edge of the float. This distance should be no more than two mm; if this is not the case, you should bend the tongue of the float lever in such a way as to achieve the standard clearance.
The same operation can be performed using a caliper, but in this case you need to measure the distance from the cardboard spacer to the top edge of the float. The correct result is 30 millimeters. If there is a discrepancy, we again bend the lever tongue, achieving the required value.
Removing the K-151S carburetor cover
Please note that when making all the settings described above, there is a possibility of errors, especially if this is done by an inexperienced car owner. Therefore, after making the adjustment, you must check its correctness. This is done like this:
- move the K-151 cover to a vertical position;
- we monitor the tongue that we bent (or did not touch if the level was normal);
- If everything is done without errors, the tongue should lightly press and press the damping ball located on the IR. In this case, the lever tongue should be located at a level running strictly parallel to the needle valve;
- We also look at the float stamping axis, which should be located at a level coinciding with the carburetor cover.
If at least one of these conditions is not met, the procedure for adjusting the fuel level in the PC will have to be repeated. Many drivers limit themselves to two iterations, even if the situation requires otherwise. We recommend that you complete the setup properly, regardless of the time spent - the experience gained will definitely be useful to us!
From the very beginning of production, the Gazelle was equipped only with the ZMZ 402 engine, but since 1996, the ZMZ 406 engine began to be installed on the car as a series. The internal combustion engine was equipped with an electronic ignition system, but unlike the Volga, which already had an injector, the Gazelle had an injector. decided to leave the carburetor.
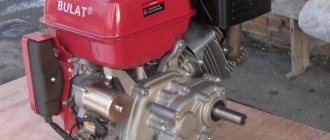
Engine installed on Gazelle 406
ZMZ-406: technical characteristics
The ZMZ 406 engine is a four-cylinder and in-line with a microprocessor ignition system. ZMZ 406 equipped with a carburetor has a power of 110 hp. s., and with an injector - 145 liters. With. In addition, injection modifications have different environmental standards. For example, ZMZ 4062.10 is class 0, and ZMZ 40621.10 is Euro class 2. An oil cooler is considered an extra part in ZMZ 406, because the 6th engine does not heat up. In the ZMZ 405 the oil cooler does not perform its functions, and the engine overheats in hot weather and naturally the ZMZ 406 carburetor does not start.
The ZMZ 406 carburetor began production in 1996 and since then has managed to establish itself with good reliability and simplicity. Its reliability is significantly superior to the outdated ZMZ 402 gas engine, which is difficult to start after a breakdown.
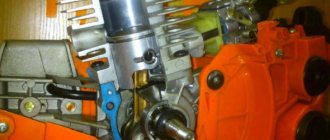
Engine ZMZ 406 series
Disassembling the carburetor K-151, K-151D
It is not recommended to unscrew the screws securing the throttle valves on the axles and remove the valves unless absolutely necessary, since their displacement can lead to jamming of the valves in the channels.
The brass connecting tubes of the channels pressed into the body should not be removed in order to avoid disturbing the tightness of their fit.
The carburetor should be disassembled only as a last resort if washing and blowing with compressed air without disassembly does not eliminate sticking of the throttle and air valves and does not lead to complete cleaning of the jets and channels from deposits.
1. Disconnect rod 1 of the air damper drive from the profile lever by removing cotter pin 2 from the hole at its curved end.
2. Remove the seven screws securing the cover to the body and remove the carburetor cover.
3. Unscrew the two screws securing the throttle body and, disengaging the connecting link, remove the body.
4. Unscrew the three fastening screws 1 and remove the cover 2 of the vacuum diaphragm of the carburetor starting device.
5. On the back side of the carburetor cover, remove the bent end of the carburetor trigger diaphragm rod from engagement with the trigger lever. Remove diaphragm 1 from the carburetor cover.
6. Disconnect tension spring 1 of the air damper from the cover pin. Unscrew the two fastening screws 2 and remove the cover 3 of the ventilation channel of the float chamber. Unscrew the fastening screw 4 and remove the econostat sprayer 5.
7. Unscrew the mounting screws and remove the starter drive levers.
General characteristics
The ZMZ 406 engine is a carburetor, four-cylinder, and also in-line with a microprocessor ignition system. ZMZ 406 equipped with a carburetor has a power of 110 hp. s., and with an injector - 145 liters. With. In addition, injection modifications have different environmental standards. For example, ZMZ 4062.10 is class 0, and ZMZ 40621.10 is Euro class 2. An oil cooler is considered an extra part in ZMZ 406, because the 6th engine does not heat up. In the ZMZ 405, the oil cooler does not perform its functions, and the engine overheats in hot weather and naturally does not start.
With a carburetor, the ZMZ 406 does not require so much expense when equipped with gas equipment. Moreover, this advantage applies to propane and methane, but with an increase in the class of environmental standards, the cost of gas equipment will also increase.
The cost of gasoline for a ZMZ 406 carburetor directly depends on the conditions and driving style, as well as the time of year. The ignition system of the ZMZ 406 carburetor is considered quite reliable. The engine will be able to reach speeds of up to 500 thousand kilometers using high-quality oil and gasoline, as well as careful handling of the pedal.
Setting up the K-151 carburetor
Complex adjustment of the K-151d carburetor includes the following activities:
- adjustment of the float chamber (PC);
- adjustment of the starting device (PU);
- adjustment of the idle speed system (idle speed).
PC adjustment
First you need to remove the carburetor cover. At least a quarter of the fuel is sucked out of the float chamber using a rubber bulb. Then set the engine crankshaft to a position that blocks the movement of the fuel pump diaphragm. Start pumping the fuel mixture manually. Once the level stabilizes, stop the operation. The liquid mirror should be at a height of 3 cm from the upper edge of the middle part of the carburetor. To increase the fuel level to the required level, use a screwdriver to slightly bend the float tongue upward without removing it. To reduce the level, the tongue must be bent down. In this case, you need to hold the float so that it does not rise.
After making the adjustment, perform a secondary fuel level check. It must match the parameters recommended by the manufacturer. This setting does not need to be done regularly. The cause of the violation may be natural wear and tear of the device elements or unqualified intervention.
PU adjustment
The adjustment can be performed both on a removed carburetor and on the device located in its standard place in the car.
Adjusting the PU on a previously removed carburetor. First, you need to slightly open the throttle by turning it all the way and locking the trigger control lever. Then we release the shutter and, using a drill or other tool, check the gap between the edge of the damper and the chamber wall. It should be within 1.65 ± 1.5 mm. To correct this gap, first unscrew the lock nut and then rotate the stop screw. It must be remembered that for correct operation of the mechanism, the plane of the screw head must always be in a position perpendicular to the plane of the cam. In other words, the screw should be rotated in multiples of half a turn.
Following this, we adjust the thrust, which connects the air damper axis to the PU control lever. When the damper is fully closed, the gap between the levers should be 0.5 ± 0.3 mm. If necessary, increase or decrease the length of the rod by rotating its head.
At the next stage, we check the gap if there is a vacuum. Without releasing the PU control lever, use a screwdriver to recess the rod and measure the gap at the lower edge of the damper. Its value should be within 6.5 ±0.5 mm. If necessary, adjust the gap by rotating the screw, which tightens the halves of the PU lever.
Adjusting the PU on a car. First, remove the air filter and start the engine. Then gently press the gas pedal and pull the throttle control lever towards you as far as possible. At maximum opening of the air damper, the engine speed should be within 2600 ±1000 rpm. If the rotation speed goes beyond these limits, unscrew the locknut and turn the stop screw of the first chamber remote control lever in one direction or another until the required speed is reached. After this, tighten the locknut.
Note. Due to the difficult access to the screw, experienced drivers perform this adjustment by carefully bending the PU control lever.
Ways to reduce the amount of fuel consumed
Having considered all the points that in one way or another affect the fuel consumption of the Gazelle 406 carburetor, we should highlight some methods by using which you can reduce the amount of fuel consumed. Necessary:
- adhere to the maximum permissible driving speed;
- in addition to the gasoline engine, install an LPG, which will allow you to alternately use two types of fuel;
- always maintain the car in technically sound condition;
- avoid malfunctions, check all components and parts of the fuel supply system for cracks and breaks;
- check the fuel tank for integrity, prevent leakage of fuel and lubricants;
- carry out tuning of the Gazelle after a certain number of kilometers stated in the technical passport.
Source
K-151 D
For Gazelle cars with a ZMZ-406 engine, the manufacturer has provided a separate carburetor. It differs from the element for the Volga with a 402 engine. Carburetors also had different markings. For the Volga the marking was K-151 C, and for the Gazelles it was K-151 D. Externally, both models of carburetors had no differences. There is a slight difference in the design, the rating of the jets and other technical nuances.
In the Gazelle carburetor, the accelerator pump nozzles supply fuel to two chambers, while for the Volga the accelerator pump operates only in the first chamber.
What are the disadvantages of this mechanism? The problem with this carburetor with the 406 engine is the huge fuel consumption. This is especially noticeable when the car is loaded (which is important for Gazelles) and moves at a speed of more than 60 kilometers per hour. This problem exists, and it is widespread. Owners of commercial vehicles are trying to solve it in any possible way.
Among the owners it is believed that this model is very capricious. The unit is not suitable for everyone; many often abandon this device in favor of other models.
Causes of malfunctions
Among the causes of malfunctions are clogging of the jets, as well as air and fuel channels inside the carburetor. The carburetor itself is made of a special alloy; if it overheats excessively, the body can become deformed, which can cause foreign air to leak into the system. Often the locking mechanism in the float chamber stops working properly.
Some people struggle with fuel consumption by changing jets. Actually this is wrong. You can reduce the jets, but the engine will run on a lean mixture, which is also not very good. Wear of the jets themselves is a very rare situation. A common cause of most problems with the carburetor is blockages, dust, and dirt. Basic maintenance comes down to cleaning and adjustment.
Connecting hoses
The complex structure of the K-151 is also evident when it is connected to the engine. It provides for the use of a whole range of hoses, but only two different sizes are used, so it is quite possible to confuse them, and the motor will malfunction in certain modes. The order of connecting the hoses to the carburetor:
Fuel is supplied through the fuel pipe to a fitting located under the float chamber on the engine side; the return hose is put on the lower fitting - it looks in the direction opposite from the power unit and is located below the inlet; two small cross-section hoses are connected to the solenoid valve, the other end of one of them is connected to the economizer valve; the second end of the thin hose is put on the fitting located in the lower part of the K-151 on the back side of the DZ body (there are two of them standing next to each other, we use the lower one); onto the upper fitting of this pair we pull the hose that goes to the vacuum ignition advancer (it is located on the distributor); a large diameter fitting on the DZ housing is used to connect the forced crankcase ventilation pipe, a device usually located on the valve cover; a small diameter fitting located in the middle part of the K-151 is used to connect a thermal vacuum switch, however, this pipe is used only if the engine has an exhaust gas recirculation system. If such a system is not provided for a specific modification of the motor, simply install a plug on this fitting
True, such a precaution is unnecessary - there is no air leak through this fitting.
If you lack experience, these connections should be made by consulting the instructions for the device.
Connecting carburetor hoses K-151D
Solex 21073
At one time it was fashionable to install the DAAZ Solex 21073 carburetor on the Gazelle. The carburetor was sold in car shops even with an adapter included for a GAZ air filter; it was originally intended for installation on a Volga with a ZMZ 402 engine. But this fashion, however, passed quickly enough. Designed to save fuel, the Solex quickly became clogged.
Instead of saving money, it consumed even more fuel than the K151D, and the car did not want to drive normally. A typical problem in the “carba” model 21073 was the clogging of the idle jet on the solenoid valve, and when it was dirty, the engine generally refused to idle - it constantly stalled and did not develop power.
Problems with the carburetor when installing HBO
Most car owners with carburetor engines in their cars convert them to use gas equipment. For example, you can take Gazelle. But there is a big disadvantage of using gas equipment - when gas is frequently used at the carburetor, unexpected situations begin to occur. And the most famous cold start problem. On most cars, a spacer is made in the HBO for it on the K-151. It is placed between the main and throttle valves. This increases the space between the top and bottom of the carburetor. In this case, disturbances occur in the starting system when the engine is not preheated. In this case, the driver has to continuously hold down the gas pedal and the choke with his foot. Gas equipment has no relation or influence on the operation of the engine and a poorly functioning choke.
The fact is that in winter a cold start of the engine must be done on gasoline. It is difficult to start an internal combustion engine with the air damper not tightened tightly. When strong vibration is created, the axial fastening sometimes becomes unscrewed.
How to resolve identified problems
Solution methods:
- Weld an additional strip onto the air damper rod. This will help compensate for the difference in thickness of the conventional gasket between the body and the gas spacer;
- Making a strip from a microcircuit (electrode) 2 mm thick.
“Indestructible”: the success story of the ZMZ-406 engine
I have written a lot about our Russian engines, and some of my readers may get the wrong impression that they don’t know how to make engines in Russia. Yes, there are problems with diesel engines, but I will tell you about one gasoline engine that can travel 500 or more thousand kilometers without problems - this is the ZMZ-406
. I’ll make a reservation right away that a lot depends on the assembly curve and the banal defects of components, and we will leave this out of the equation.
Story
ZMZ-406
The history of the 406 engine begins in the late 80s, when ZMZ began designing a promising line of 4-cylinder engines, which included both gasoline and diesel units. The engine was created taking into account the latest trends in engine building: a 16-valve cylinder head, a microprocessor control unit, and an injection power system were included in the design from the very beginning. As well as the resource for which a cast-iron cylinder block, timing chain drive and hydraulic valve lifters were used. Moreover, the block could be bored into 2 repair sizes, and the crankshaft could be ground into 3 sizes.
The first prototype, called ZMZ-406.10, was created in 1989. In those days, ZMZ and GAZ collaborated closely and the Gorky Plant expected to receive the 406th in its promising GAZelle and Volga 3105.
Cross section of ZMZ-406
By 1991, the engine passed the necessary tests and was ready for industrial production, but the collapse of the country prevented it. In new, increasingly deteriorating economic conditions, in 1992 the plant still managed to send the first installation batch of engines to the OPP.
In 1993, small-scale assembly of engines began. A year later, ZMZ-406 is registered under the hood of the Volga GAZ-3102, and in 1995 the Gazelle. Moreover, initially the engines were equipped with a carburetor, not injection. In the same year, ZMZ created several modifications of the engine, differing in the power supply system and boost.
In 1996, production of ZMZ-406 was carried out on the main conveyor. In parallel, work is underway to modernize engines, which will then lead to the appearance of ZMZ-405
And
409
.
Copy
SAAB B234i engine
In the history of the 406, one cannot fail to mention a funny bike that appeared out of nowhere and eventually became an irrefutable fact. It lies in the fact that the ZMZ-406 is supposedly a complete copy of the Swedish SAAB B234i
. So, this is complete nonsense. Apart from an approximately equal displacement of 2.3 liters, a 16-valve cylinder head and a spark plug located exactly in the center of the cylinder, there is nothing in common between these engines. The structure of the cylinder head, piston stroke, compression ratio, implementation of the oil system and many other things differ. Moreover, ZMZ designers initially included the possibility of increasing the working volume by placing the cylinders at a considerable distance from each other.
The ZMZ-406 can be called a reliable engine; there are no serious design flaws in it, but there is a considerable margin of safety. With proper operation, engines can cover more than 500 thousand km, and some owners claim that even 1 million without major repairs. More than once it was possible to observe how a Gazelle with a ZMZ-406 went to a scrap metal collection point under its own power.
Gazelle
Model ZMZ 40524.10 is a gazelle carburetor known to everyone. The car brand “Gazelle” is one of the most popular and affordable trucks in Russia, which were originally intended for transporting not very large loads. Due to the huge number of such machines, we will consider several nuances of different gazelle systems. For example, a microprocessor ignition system, which is installed on the 406 model.
If the driver claims that his car makes some popping noises, jerking noises and loses its power. In this case, the power system, engine and ignition system should be checked. We checked the carburetor with a gas analyzer not during the operation of the 1st and 2nd chambers, cutoff, enrichment and during idling and did not find any violations. Next they check the engine. When checking the compression, no problems were identified, but the next time deviations from the norm were detected. It was concluded that the jerks and pops that the driver did not like were due to the jumping of the teeth of the upper chain.
Carburetor ZMZ 406 series
What to do if a gazelle loses power?
From the very beginning, you need to check how the diagnostic circuit and the on-board diagnostic system function, because when the travel image mode is activated, a malfunction code of 12 should be obtained. To read the code, the 10th and 12th contacts of the diagnostic block must be closed. Using a diagnostic toaster, engine sensor parameters are measured and then compared with typical values for average engines. The most common reason for a decrease in car power is contamination of the tube that connects the intake manifold and the pressure sensor.
Gazelle ignition system
The microprocessor ignition system ignites the working fluid in the cylinders and sets the required vehicle ignition timing for all engine modes. The ignition system performs the function of regulating the operation of the forced idle economizer. Thanks to the ignition system, engine operation becomes more economical, compliance with all exhaust gas toxicity standards is monitored, detonation is eliminated and the vehicle's power is increased. If we compare the classic system with this one, then this ignition system is much more reliable and durable. Here only the spark plugs can wear out.
Standard diseases 406
Overheat
The engine is very sensitive to overheating. During a long trip on a boiling engine, the cylinder head drives. The problem with overheating is associated with poor quality of the pump and the condition of the cooling radiator. The materials used in the water pump have certain design tolerances that cannot guarantee the volumetric flow rate and pressure in the cooling system.
The design of the impeller allows for the possibility of cavitation destruction of the blades, which reduces efficiency. In addition, the question remains regarding the corrosion resistance of the pump shafts.
The inefficiency of the pump affects the condition of the internal radiator channels. When the surface is externally clean, the channels narrow and heat transfer decreases.
Another reason for overheating is a poor-quality thermostat. Incorrect trigger setting or jamming of structural elements during operation.
The design features of the coolant channels and the lower location of the radiator can provoke the creation of blocking air pockets that prevent fluid circulation.
Oil consumption
During operation, increased oil consumption of up to 1.5 liters per 1000 km is recorded. Oil consumption can occur without visible leaks. The problem is caused by poor-quality seals, clogging of the labyrinth seals under the cylinder head cover, and insufficient durability of the sealing rings. Associated with poor quality assembly and can be modified independently during operation.
Oil consumption is affected by the condition of the valve stem seals. Requires monitoring and replacement as necessary.
Oil loss through sweating of the block is less common and cannot be corrected on its own, since the problem is related to the porosity of the cast iron used to cast the block.
Traction characteristics
Poor idle performance and sudden loss of power while driving are caused by a failed ignition coil.
Ignition system
Malfunction of the engine ignition system “triple” is caused by problems with the ECM software, spark plugs, and ignition coil. A simultaneous failure of several system elements may be detected.
Engine knock
When using low-quality oil or insignificant mileage before changing the oil, the operation of the hydraulic compensators is disrupted. The knocking sound is clearly audible even after the engine reaches normal temperature conditions.
Basically, all malfunctions that appear during operation are due to poor-quality components, as well as the low level of assembly culture of units at the plant, which was typical at the beginning of production of the engine of this family.
Adjusting the K-151 carburetor
The adjustment procedure is not particularly difficult, but if you have no experience, it is better to study the adjustment of the K-151 carburetor in the video:
The old Soviet school of carburetor construction ensures that the K-151 or K-151E can be repaired and adjusted using a simple or Phillips screwdriver.
Monitoring the level of imbalance of the float chamber K-151
For normal operation, a properly functioning valve is required to compensate for the air pressure in the float chamber. If problems arise with the operation of the balancing valve, fuel consumption jumps sharply, and it is useless to adjust it. At the same time, the click of the drive does not at all indicate pressure balancing; before repair, it is better to check by replacing it with a known-good version. For further adjustments of the K-151, you should first clarify and adjust the fuel level in the float chamber.
Setting idle speed K-151
We carry out a simple procedure for setting idle speed in the following order:
- warm up the engine to operating temperature;
- Using a screwdriver, we display on the tachometer the position of idle speed 550-650 (for a three-liter 700-750). the large screw is easy to see on the rear wall of the carburetor;
- Use the screw to set the air-fuel mixture composition - turn the engine speed up to maximum;
- use the idle speed adjustment screw to raise the idle speed by a hundred more than necessary;
- Use the mixture quality screw to set the required idle speed K-151.
Let's work with the throttle position screw
The carburetor design uses a thrust screw for adjustment and repair, which limits the extreme position of the damper. The thing is very useful, but there is a nuance. The screw tends to self-tighten, thereby leaving the damper suspended. The damper begins to rub against the walls of the chamber and after a certain period of time wedges in the extreme position.
To prevent this situation, after adjustment, the screw should be secured with a drop of paint.
If you have good mechanic repair skills and a desire to “sharpen” and adjust the K-151 carburetor to suit your car, choose K-151S. Otherwise, the old, reliable K-126G, or for vehicles with off-road properties with the GU index, will do.
Additional analogue features
Setting up a VAZ-2109 carburetor with your own hands
The K151s carburetor also has:
- New small diffuser device. The mass production market is characterized by more stable performance. Promotes high vacuum.
- Acceleration pump. Its peculiarity is the output of nozzles into both chambers.
- The starting drive mechanism is stepless type. In start-up and warm-up mode, it promotes more flexible engine control. Eliminates the need to press the gas pedal before starting a cold engine.
- Modernized adjustment of dosing elements. Responsible for ensuring the best driving performance of the car, subject to compliance with exhaust gas toxicity standards.
Description of design
The K-151D carburetor, installed on a car with a ZMZ-4063 engine, has two adjacent vertical channels (chambers) for the passage of air, in the lower part of each of which a rotary throttle valve is installed.
The throttle valve drive is designed in such a way that as you press the accelerator pedal, first one valve and then the other opens. The chamber in which the throttle valve opens earlier is called the first, the other is called the second. In the middle part of each of the main air channels there are cone-shaped constrictions-diffusers, which create a vacuum in the air flow necessary for sucking fuel from a special container located in the carburetor body - the float chamber. The fuel level in the float chamber required for normal operation of the carburetor is maintained using a mechanism with a float and a needle valve. The carburetor float mechanism is completely located (together with the needle and float) in the carburetor body and is accessible for visual inspection after removing the cover (the fuel level in the float chamber can be measured without removing the float). The carburetor consists of three main parts: the top - the housing cover, with a flange and studs for fastening the air filter housing, with a float chamber ventilation device and starting device parts. The cover is attached with seven screws to the carburetor body through a cardboard gasket; the middle one - the carburetor body, with a float chamber and float mechanism, fuel supply fitting and fuel metering systems; the bottom - the throttle body, with the throttle valves and their drive mechanism, as well as an idle device attached to the carburetor body from below with two screws through three gaskets (two thin - cardboard and one thick - plastic). The carburetor has the following systems, devices and mechanisms: float mechanism; fuel metering systems; main dosing systems of the first and second chambers; idle system; transition system of the second chamber; econostat; accelerator pump; starting device economizer valve for shutting off fuel supply in forced idling mode (EFH); crankcase ventilation system; float chamber ventilation system; throttle valve control mechanism. The idle system is autonomous, with adjustment of the mixture composition. In the second chamber of the carburetor there is a transition system with fuel supply directly from the float chamber, which comes into operation when the throttle valve of the second chamber is opened. A diaphragm-type accelerator pump, which comes into operation when the accelerator pedal is sharply pressed. To enrich the combustible mixture at full load, an econostat is provided in the second chamber. The starting device is a semi-automatic type, consisting of a pneumatic corrector, a system of levers and an air damper, which is closed before starting a cold engine using a manual drive. At the moment of starting the engine, the pneumatic corrector, under the influence of vacuum arising in the intake manifold, automatically opens the air damper to the required angle, ensuring stable operation of the engine when warming up. The fuel supply cut-off system (forced idle economizer) comes into operation in forced idle mode when the vehicle is braking by the engine, when there is no need to supply fuel to the engine. This ensures fuel savings and reduces the emission of toxic substances into the atmosphere. Calibration data for carburetor K-151D
| Options | First camera | Second camera | |
| Main fuel jet* | 225±3,0 | 340±4,5 | |
| Main air jet* | 330±4,5 | 330±4,5 | |
| Idle system jet block with emulsion tube*: | fuel jet | 95±1,5 | – |
| air jet | 85±1,5 | – | |
| Idle air jet | 425±6 | – | |
| Emulsion jet of idle system* | 280±3,5 | – | |
| Transition system fuel jet* | – | 150±2,0 | |
| Air jet of transition system* | – | 270±3,5 | |
| Diameter of the hole in the screw holder of the econostat atomizer, mm | – | 2+0,06 | |
| Diameter of the fuel bypass hole into the tank, mm | 1,1+0,06 | – | |
| Fuel valve seat diameter, mm | 2,2+0,06 | – | |
| Diffuser diameter, mm: | small | 10,5+0,1 | 10,5+0,1 |
| large | 23+0,045 | 26+0,045 | |
| Accelerator pump performance for 10 full strokes, cm3 | 10±2 | ||
| Fuel level from the top edge of the housing, mm | 21,5+1,5 | ||
| * The table shows the markings on the jets indicating the error in measuring their throughput. |
Characteristics of the ZMZ-406 engine: the best oil
ZMZ-406 is a line of in-line 4-cylinder 16-valve gasoline automobile internal combustion engines produced by Zavolzhsky Motor Plant OJSC.
The ZMZ-406 engine was originally designed for installation on the promising GAZ-3105 model. The first engine prototypes appeared in 1993, small-scale assembly began in 1996, and entered the main assembly line in 1997. The engine was originally designed for modern microprocessor-controlled power and ignition systems; carburetor versions appeared later (injection version - ZMZ-4062.10, carburetor versions - ZMZ-4061.10 and 4063.10). For the first time in the Russian engine industry, the following were used in the design of the ZMZ-406: 4 valves per cylinder, hydraulic pushers, a 2-stage chain drive of 2 camshafts, an electronic fuel injection and ignition control system.
Specifications
| Production | ZMZ |
| Engine make | ZMZ-406 |
| Years of manufacture | 1997-2008 |
| Cylinder block material | cast iron |
| Supply system | injector/carburetor |
| Type | in-line |
| Number of cylinders | 4 |
| Valves per cylinder | 4 |
| Piston stroke, mm | 86 |
| Cylinder diameter, mm | 92 |
| Compression ratio | 9.3 8* |
| Engine capacity, cc | 2286 |
| Engine power, hp/rpm | 100/4500* 110/4500** 145/5200 |
| Torque, Nm/rpm | 177/3500* 186/3500** 201/4000 |
| Fuel | 92 76* |
| Environmental standards | Euro 3 |
| Engine weight, kg | 185* 185** 187 |
| Fuel consumption, l/100 km - city - highway - mixed. | 13.5 — — |
| Oil consumption, g/1000 km | up to 100 |
| Engine oil | 5W-30 / 5W-40 / 10W-30 / 10W-40 / 15W-40 / 20W-40 |
| How much oil is in the engine | 6 |
| When replacing, pour, l | 5.4 |
| Oil change carried out, km | 7000 |
| Engine operating temperature, degrees. | ~90 |
| Engine life, thousand km - according to the plant - in practice | 150 200+ |
* - for engine ZMZ 4061.10 ** - for engine ZMZ 4063.10
Modifications of internal combustion engine 3M3-406
- 3M3-4062.10 – injection engine for AI-92 gasoline. It has a compression ratio of 9.3. Power – 150 hp For cars and minibuses GAZ 31054 Luxe configuration; GAZ 3102 (1996 – 2008).
- 3M3-40621.10 is a modification of the 3M3-4062.10 engine that meets the Euro-2 environmental standard.
- 3M3-4063.10 is a carburetor version of the engine, designed for installation on light commercial trucks and minibuses GAZ 3302, 33023, 2705, 3221, 32213, 322132, 32214, SemAR 3234, Ruta, Bogdan and Dolphin. The compression ratio was reduced to 8 for A-76 gasoline. Power – 110 hp
- 3M3-4061.10 – carburetor engine for light commercial vehicles GAZ 3302, 33023, 2705, 3221. The compression ratio is reduced to 8 for A-76 gasoline. Power - 100 hp
Common faults and operation
- Most often, owners complain about capricious carburetor versions;
- The timing chain has low reliability (it does not bend if the valve breaks);
- The ignition system causes many problems, most often the coils;
- Hydraulic compensators usually last no more than 50,000 km, and then start knocking;
- The oil scraper rings quickly become stuck and the oil burn begins.
The carburetor 406 engine is less economical due to the impossibility of accurately adjusting the gasoline supply. It is almost impossible to more accurately regulate the amount of fuel, which affects power and fuel consumption.
The injector is noticeably superior to its carburetor counterpart in terms of reliability, efficiency and power. One of the main positive qualities of injectors is the absence of the need to make mandatory engine adjustments. The power supply system here is not subject to clogging, there are no jets, and the exact amount of fuel flows directly into the cylinders.
Engines models ZMZ-4061.10 and 4063.10 (left view): 1 - drain plug; 2 - oil sump; 3 — exhaust manifold; 4 — engine support bracket; 5 — coolant drain valve; 6 - water pump; 7 — emergency coolant temperature sensor; 8 — coolant temperature indicator sensor; 9 — engine temperature sensor; 10 — thermostat housing; 11 — emergency oil pressure sensor; 12 — oil pressure indicator sensor; 13 — oil level indicator (dipstick); 14 - ignition coil.
Engines model ZMZ-4061.10 and 4063.10 (right view): 1 - synchronization disk; 2 — synchronization sensor; 3 - oil filter; 4 - starter; 5 — knock sensor; 6 — pipe for draining coolant from the heater; 7 — inlet pipe; 8 — hydraulic chain tensioner; 9 - generator; 10 — generator belt; 11 — water pump pulley; 12 — tension roller; 13 - fuel pump.
Cross section of ZMZ-4061.10 and 4063.10: 1 - oil sump; 2 — oil pump receiver; 3 - oil pump; 4 — oil pump drive; 5 — intermediate shaft gear; 6 — cylinder block; 7 — inlet pipe; 8 — ventilation pipes; 9 — intake camshaft; 10 — inlet valve; 11 — valve cover; 12 — exhaust camshaft; 13 — oil level indicator (dipstick); 14 — hydraulic valve pusher; 15 — outer valve spring; 16 — valve guide; 17 — exhaust valve; 18 — cylinder head; 19 — exhaust manifold; 20 - piston; 21 — piston pin; 22 — connecting rod; 23 - crankshaft; 24 — connecting rod cover; 25 — main bearing cover; 26 — drain plug; 27 — pusher body; 28 — guide sleeve; 29 — compensator body; 30 — retaining ring; 31 — compensator piston; 32 - ball valve; 33 — ball valve spring; 34 — ball valve body; 35 — expansion spring.
Fuel consumption – according to factory standards and real
According to technical passport data, fuel consumption at a speed of 60 km/h with the ZMZ 4063 and ZMZ 4061 engines is 10.5 liters, at a speed of 80 km/h – 13 liters. But during control measurements many factors are not taken into account:
- Car load;
- Weather;
- Road conditions;
- Technical condition of the car.
These standards can be met if the car is operated in the summer on a dry road, without a load and in fully working order. Much still depends on driving style. The harder the driver presses the gas, the more fuel is consumed. Gasoline consumption also depends on its quality. It has been noticed that fuel with a higher octane number is consumed less. Therefore, for the Gazelle it is preferable to fill with AI-95 fuel instead of AI-92.
Comparison table for fuel consumption in various modifications of the Gazelle car
Fuel system
The engine had two versions, which made it possible to use 76 and 92 gasoline. Due to the transition to international environmental requirements, gasoline with an octane rating of 76 is no longer produced. For normal operation of the engine with index 4061.10, it is necessary to modify it.
Fuel is supplied by a diaphragm fuel pump driven by the intake camshaft.
How to remove the K 151 Pekar carburetor on an UAZ?
To do this, you need to go into the car's interior in the driver's or passenger's seat in the front and open the engine compartment hatch. The next step is to remove the air filter. To do this, first unscrew the upper fastening nuts, after which the filter element itself is removed. Be careful not to drop the nuts into the diffuser!
Now unscrew the nuts securing the filter housing. Lift it up, disconnect the thin hose and set the housing aside. Now disconnect all the linkages associated with the throttle valve. To avoid breaking the plastic elements, it is recommended to use a flat-head screwdriver.
Unscrew the fastenings of all hoses holding the unit and remove them. There will be four nuts that hold the carburetor to the manifold. Unscrew them and remove the unit.
Still have questions about withdrawal? Let's watch this video:
This is interesting: How to bleed a clutch: let’s break it down point by point
Assembly of the unit
Assembly is carried out in the same way, only the actions are carried out strictly according to the reverse dismantling scheme. It is necessary to replace the gaskets if their condition raises questions. Clean everything thoroughly using a special carburetor fluid or a rag soaked in gasoline.
Here are some important assembly tips:
- The primary chamber can be immediately identified by the direction of the fuel spout towards it. The fuel spout is always directed towards the primary chamber
- An emulsion nozzle with 5 rows of holes is installed in the primary chamber. An emulsion nozzle with 5 rows of holes is placed in the first chamber
- All jets must be pulled through with a thick and long screwdriver so that the contact area is wider and there are no nicks left. Tubes that are recessed must be screwed in with a smaller screwdriver.
- The accelerator pump diaphragm must have a metal spout. If for some reason it is plastic, it needs to be replaced. This means that the part is not original, but the “left” one. The membrane must have an iron tip
- During the pump assembly process, the gasket is first placed on the drive mechanism, then the membrane itself. Then a spring is inserted and everything is tightened. The pump spring must be placed under the cover
Now important recommendations for installing hoses:
- A hose from the idle speed solenoid valve is attached to the lower carburetor fitting, number 6.
- A hose is placed from the valve onto the idle speed economizer into fitting 3. Otherwise it is called a vacuum intake tube.
- A hose from a distributor or vacuum regulator is mounted in output 7.
- K 5 - small crankcase ventilation hose.
The K-151 carburetor is considered a reliable device. However, it needs adjustment, disassembly and cleaning from time to time.
Source
Existing modifications
As mentioned above, the K-151 carburetor has many varieties. The K151C carburetor is equipped with the smallest fuel jet. Otherwise, there is practically no difference between the models, except for the presence or absence of a special outlet for gases. For example, the K151D model is not equipped with such a fitting.
The difference also concerns the type of chokes. This can be a cable or traction version of the mechanism. Some modifications of the K-151 are equipped with two versions of the suction system. There are devices with a plastic-smooth and metal-step sector.
For more information about the difference between the modifications, see the table.