A petrol mower or trimmer with an internal combustion engine requires not only constant refueling of the fuel mixture of gasoline and oil, but also periodic adjustment of the supply of this fuel. The carburetor is responsible for supplying fuel to the cylinder of the lawn mower, and the efficiency and performance of the tool depends on its proper operation. If during operation a faulty (abnormal) engine operation is detected, the first step is to adjust the carburetor of the lawn mower. Before adjusting the carburetor of a gasoline trimmer, let's first understand its design.
How to find out if your lawn mower's carburetor needs adjustment
Many craftsmen use lawn mowers for a long time, and do not think about the need to adjust the carburetor of the tool. When is it necessary to adjust the carburetor on a lawn mower or brush cutter? If you are asking this question, then you are probably seeing changes in the operation of the engine that are not for the better. In order not to guess and not to miss the moment when it is necessary to adjust the carburetor, you should adhere to the following recommendations on the need for adjustment measures:
- After the engine has been run-in. Typically, running-in lasts for the duration of burning 4-5 liters of fuel.
- When a fuel mixture of a different composition is poured into the tank, that is, the type of oil (even its color) and the brand of gasoline change
- When weather conditions change, however, this is more relevant for chainsaws, gas generators and motor pumps, which are used not only in summer, but also in winter.
- If the lawn mower has not been used for a long time. The reason for the need for adjustment may be the winter break.
- When fuel consumption increases
- If black carbon deposits are detected on the spark plug electrodes
- If there is no gasoline entering the cylinder or the engine starts poorly
- If a large amount of exhaust gas is detected
- Unstable engine operation, as well as difficult starting and “sluggish” speed gain
As you can see, there are enough reasons to adjust the carburetor of a lawn mower. Typically, craftsmen who have been working with a tool for a long time can hear changes in the operation of the motor, which indicates the need for an adjustment process. Even if you are not sure about the need to carry out adjustment work, then performing it out of turn will definitely not be superfluous.
When is it necessary to adjust the carburetor of a household trimmer?
You need to adjust the trimmer's built-in carburetor when:
- Do-it-yourself carburetor adjustment for VAZ 2107
- running-in of the new engine, during which 4 to 5 liters of the fuel mixture were used;
- sudden changes in weather;
- changes in air rarefaction - for example, when a brush cutter is often used in mountainous areas;
- prolonged downtime of the trimmer;
- intensive increase in loads on the power unit of the lawn mower;
- arbitrary unscrewing of the built-in carburetor adjustment screws - this causes increased vibration of the internal combustion engine;
- changes in the quality of fuel mixture components;
- overfilling the carburetor with fuel, resulting in increased fuel consumption;
- the regular appearance of a thick layer of resinous deposits and carbon deposits on the surface of the electrodes of the standard trimmer spark plug;
- starting the engine and turning it off randomly or slowly picking up speed;
- lack of fuel flow into the cylinder of the power unit;
- increasing the volume of exhaust gases emitted.
Failure to timely adjust the carburetor threatens serious damage to the trimmer, up to and including complete failure of its factory engine.
Starting the engine
The engine is started at a distance of 3 m or more from the place where the device is refueled. This work cannot be carried out indoors. Before you need to take a stable, reliable position. At the same time, the motorcycle device is held very tightly. The cutting tool should not come into contact with the ground or objects, because it may spin when started.
The unit is serviced by only one person; however, there should be no third parties in the area with a radius of up to 15 m. Otherwise, you may be injured by thrown objects. Starting the motor of the Shtil FS 55 lawn mower, the properties of which are presented in the article, should not be done by hand. After releasing the gas lever, the cutting tool will move for some time by inertia. Flammable materials should be kept away from the hot flow of gases and the surface of the hot muffler, because this may cause a fire.
Principle of operation
The procedure for pumping and filtering fuel into the lawn mower engine is as follows.
- The throttle valve controls the amount of air supplied to the diffuser. The more air supplied, the more oxygen the gasoline needs to burn, and the more power is released in the form of heat. The heat energy is further converted into mechanical energy.
- The diaphragm pump pumps the required amount of gasoline.
- Next, gasoline passes through the engine fitting.
- Fuel passes through the intake and exhaust valves.
- Fuel is filtered using a mesh filter.
- Through the needle valve, it enters the chamber with the membrane.
The stages of operation of the carburetor are as follows.
- The air enters the pipe with an air damper. The damper sets the desired air flow intensity.
- In the gasoline injection unit, the diffuser is narrowed - this is necessary to give greater air flow speed.
- The fuel passes through the compartment with the float and bypasses the nozzle and enters this narrowing of the tube. The float compartment meters the supply of gasoline. In this compartment the pressure is in a state of equilibrium. In a narrowed tube it decreases. Due to the difference between both pressure values, gasoline passes through the nozzle.
- The accelerated flow atomizes gasoline, converting it into aerosol vapor. The resulting gasoline-air mixture is ready for ignition in the combustion chamber.
- After passing through the fuel pipeline, this mixture ends up in the carburetor cylinder.
Conclusion: To set the required power, you will first adjust the rate of fuel combustion using the choke. If the gap is too small and the oxygen in such a mixture is less than 10%, the fuel does not burn, therefore, the engine will not start or will stall immediately.
If you buy a Chinese trimmer, it is worth considering that it differs little from European ones - the same 2- or 4-stroke engine and drive.
From personal experience
Petrol mower or trimmer
A trimmer is a broader concept than a lawn mower, since it can also be electric. A gasoline trimmer and a gas trimmer are one and the same.
Some authors claim that a trimmer is a weaker tool, in contrast to a more powerful lawn mower, which can be used for mowing bushes. Personally, I have a tool with a maximum power of 1.7 kW and, as stated in the instructions, capable of mowing small bushes up to 10 mm thick. The user manual is called “Gasoline trimmer...”.
Fuel mixture proportion
I read somewhere that if the operating manual for the lawn mower and the oil canister indicate different proportions for preparing the fuel mixture, you should use the proportion indicated in the manual.
For a long time I did this - excess oil flowed from the engine onto the gas tank and carbon deposits constantly formed on the spark plug, since the manual indicated the proportion for a run-in engine was 1:25, and on the canister - 1:50. After switching to a ratio of 1:50, the appearance of oil drips stopped. The spark plug continued to burn, but with less intensity (the carburetor was not yet adjusted).
Until now, some users of gas-powered tools determine the proportion of the fuel mixture “by eye.” If the amount of oil is underestimated when preparing the mixture, after some time an extraneous sound may appear immediately after starting the engine, which gradually disappears during warm-up, and the engine stops with a sharp jerk. Continuing to operate the trimmer in this mode will result in its failure.
Cleaning the spark plug
During the worst times of running a trimmer with an unadjusted carburetor, the engine would stop starting after using each tank of fuel. And only after cleaning the spark plug from carbon deposits could work continue.
Fine sandpaper was used to clean the electrodes, and a thin paper clip with a bent end was used to clean the space between the insulator and the housing. First, the electrodes were wiped from large dirt with a rag, then cleaned with sandpaper. After this, the candle was lowered into diesel fuel and the moistened carbon deposits were scraped off with a paper clip from the surfaces of the insulator, the inside of the body and between them. Next, the candle was dipped into diesel fuel several times, which was then shaken off along with the dirt. Sometimes the paperclip cleaning and rinsing procedure was repeated. After this, the candle was wiped dry and was ready for further use.
Incredibly, one tank of fuel mixture with an unadjusted carburetor can be used up in less than 10 minutes - tested in practice when the trimmer was started and operated at high speeds with maximum fuel supply (the adjusting screw was unscrewed much more than normal).
Other articles:
Lubricating the shaft of a lawn mower, trimmer Malfunctions of a lawn mower (trimmer)Adjusting the valves of a diesel walk-behind tractorHeavy diesel walk-behind tractor (starting, storage)Moto-drill Maxcut MC 55 – drilling holes for polesAligning a concreted metal pole
Online store
AgroSemFond
– seeds, planting material and other goods for the garden and vegetable garden by mail from Nizhny Novgorod.
How to adjust the carburetor on a lawn mower
Before adjustment, the filters must be thoroughly cleaned according to the maintenance instructions.
Further adjustment of the lawn mower carburetor is done with your own hands using adjusting screws. There are three in total:
- right;
- left;
- lower.
Right (L) – adjusting the fuel mixture for low speeds.
You need to find the maximum idle speed. To do this, slowly turn the screw (L) to the right and left.
To adjust, turn the screw a quarter turn counterclockwise.
Lower (T) – is responsible for adjusting the engine at idle.
- clockwise – increase;
- counterclockwise – decrease.
For correct adjustment of idle speed it is typical:
- stable operation of a cold engine;
- not over-revving a hot engine;
- there is a large reserve of revolutions for the trimmer head;
- stable operation of the engine when changing position (sharp raising or lowering of the knife).
Left (H) – mixture adjustment at high speeds. (The screw is adjusted last).
Setting up the carburetor of a lawn mower with the last screw is done as follows:
- Open the throttle to full, while releasing full throttle. Turn the screw clockwise until the speed drops (in this case, use your ear).
- Turn the screw as slowly as possible counterclockwise until the engine runs rough.
- Then turn back just a little, barely hearing stable, smooth operation.
- For a more visual application of skills, it is more convenient to consider the work of an experienced user:
It is interesting that from the point of view of the author of the video, the setting (its correctness) is determined by the color of the spark plug, and not just by the engine speed and stability.
Correctly adjusting the carburetor with your own hands in this case means combustion of the fuel mixture without residue; the color of the spark plug should be light brown.
How to make the adjustment correctly
Before you start adjusting the trimmer carburetor, you must do the following:
- flush the engine;
- replace or clean the spark plug;
- replace or clean the air filter (it is recommended to wash it in warm, soapy water, wring it out and let it dry thoroughly).
It is also necessary to install a cord of a suitable diameter in the trimmer reel or install knives - this is done so that during the tuning process the engine has at least some load. After installing the cutting tool and starting the gasoline engine, let it warm up for 10 minutes.
If at idle engine speed you notice that the cutting tool is rotating, then you need to reduce engine speed. This is done using the lower idle speed control, often marked with the letter “T”. The picture below shows the placement of the controls on a Husqvarna trimmer.
But, for example, on a Stihl trimmer this screw may be marked “LA”.
So, turn the idle speed control to the left until the trimmer head comes to a complete stop.
To adjust the carburetor, 3 regulators (screws) are used.
- The right control L adjusts the level of enrichment of the fuel mixture at low speeds. It needs to be adjusted first. Achieve maximum idle speed. This is done using the L control, turning it left and right. After finding the maximum speed point, return the regulator half a turn to the left (counterclockwise).
- The lower adjuster T (LA) is used to adjust the idle speed. By turning it to the left, the engine speed will begin to decrease, and when turning the regulator to the right, the engine speed will increase.
- The left regulator H is responsible for enriching the fuel mixture at high speeds. The enrichment setting completes the carburetor adjustment. Also, using this regulator, you can adjust the maximum speed, fuel consumption and engine power.
Important! If the engine is allowed to operate at full speed for more than 10 seconds, it may fail.
To eliminate this nuisance, adjustment will be required. With the engine running, give full throttle, then turn the “H” control to the right until the speed begins to decrease. After this, the “H” regulator must be slowly turned to the left until you hear uneven engine operation. Then turn the “H” control to the right until you hear the motor running smoothly.
After carrying out the above steps, the carburetor adjustment can be considered completed. After correct adjustment, the engine should confidently pick up speed, quadruple slightly at maximum speed, and when idling, the cutting tool should not turn. This manual is suitable for adjusting carburetors on Huter, Patriot and other lawn mowers.
There are also carburetors without a screw, which is responsible for enriching the combustible mixture at low speeds. That is, they have only 2 adjusting screws: the idle speed regulator and the fuel mixture quality regulator at high speeds. You can learn how to set up a carburetor of this type from this video.
The principle of operation of a lawn mower carburetor
The throttle valve determines the amount of air supplied, and the engine power directly depends on this.
Correct carburetor
determined by the operation of the motor and the color of the spark plug. Adjusted
Self-adjustment of the carburetor
on a Chinese trimmer, quickly and easily adjust
the carburetor
to
Fuel is sucked into the carburetor system by a pump (its membrane). Then it passes through the fitting in the carburetor. The liquid then moves through the inlet and outlet valves of the pump. Filtered with a mesh. It moves through the needle valve into the membrane chamber.
Step-by-step operation of the device:
- Air supply into a tube with an air baffle (damper). The partition regulates the intensity of the air flow.
- The fuel supply system is certainly narrowed by the mixer to speed up the flow.
- Gasoline through the float chamber and the nozzle tube with a narrowing. A chamber with a float regulates the temporary volume of gasoline. In the float chamber the pressure level is neutral, but in the tube with a narrowing it is already small. Due to the pressure difference, fuel leaks through the nozzle.
- Acceleration of the air flow promotes the transfer of fuel (gasoline) and its atomization. Ultimately, an air-fuel mixture of the required proportion or density appears.
- The air-fuel mixture seeps into the engine cylinder through the fuel pipe.
The level of air density in the system depends on the area of the open air damper. The wider the damper is open, the greater the fuel consumption and power.
Simply put, adjusting the carburetor on a lawn mower is creating a good fuel consistency due to the correct air supply.
Signs of imbalance
The carburetor must be debugged during the manufacture of the device. As a rule, owners learn about the need to adjust the fuel supply with their own hands only after quite serious breakdowns, during the process of correcting which the module was removed and, for example, cleaned.
Signs of a settings failure include the following:
- starts, but the engine immediately stalls - since the engine can only work when a certain amount of gasoline is supplied, if the fuel is too “lean”, that is, the supply channel is blocked, the engine will stop;
- too much fuel consumption, a lot of exhaust gases - the result of incomplete combustion of the mixture. In this case, on the contrary, there is too much fuel and the mixture turns out to be excessively dense.
Adjusting the carburetor of a Chinese lawn mower. Practice.
Correct carburetor settings
determined by engine operation and spark plug color. Adjusted.
Insidious malfunction of the carburetor of a Chinese lawn mower.
Carburetor repair and adjustment
brush cutters.
The carburetor of Stihl, Makita, Husqvarna and other lawn mowers is adjusted using adjusting screws. Sometimes the cause of malfunction is a violation of fixation - due to vibration or damage to the protective cap. Such a breakdown can be detected by simply trying to slightly turn the screw: if the fixation is not tight, it is worth checking the setting.
Do-it-yourself trimmer carburetor adjustment
Settings
The module does not apply to repairs and replacement of spare parts is not required. In this case, the lawnmower carburetor repair kit will not be needed.
There are three screws for debugging:
- L – is regulated first, since it is responsible for fuel supply at low speeds;
- H – it is responsible for the supply of gasoline at high speeds, as well as fuel consumption and temperature;
- T – it is used to debug the idle speed.
There are options, as a rule, this is the carburetor of a Chinese lawn mower, when for debugging there is only one screw left on the body - for adjusting the idle speed. This does not mean that the module is configured automatically - it means that even such a type of repair as debugging will be difficult. The photo shows the adjustment of the carburetor of a Chinese lawn mower.
- The module is configured only when the engine is warm: to do this, the device is first turned on for 10 minutes. If the mowing head rotates at idle, then begin debugging immediately: turn screw T counterclockwise
until rotation stops. - The adjustment begins with screw L. The screw is turned to the right and left until a position is found at which the idle speed does not become maximum.
- Then the screw is turned ¼ turn counterclockwise. This will be his working position.
- The idle speed must be adjusted by turning counterclockwise to increase the speed and clockwise to decrease it. Its debugging consists in achieving a mode in which a sufficient number of revolutions are made before the mowing head begins to rotate. In this case, the engine must operate stably in different positions.
- The position of screw L is determined last - at maximum speed the trimmer should not operate for more than 10 seconds. The throttle opens, the screw is turned clockwise, very slowly, until a decrease in the number of revolutions is heard by ear.
- Then the screw rotates slowly counterclockwise until the motor begins to malfunction. After which the screw is turned back clockwise until the engine starts working normally again.
How to adjust the carburetor on a lawn mower
The upcoming adjustment of the lawn mower carburetor is done with your own hands using adjusting screws. There are three in total:
Right (L) – adjusting the fuel consistency for low speeds.
It is necessary to find the highest idle speed. To do this, slowly unscrew the screw (L) to the right and to the left.
To adjust, turn the screw a quarter turn, always counterclockwise.
Bottom (T) – is responsible for adjusting the engine at idle.
- clockwise – increase;
- counterclockwise – decrease.
For correct adjustment of idle speed specifically:
- stable operation of a cold engine;
- not over-revving a hot engine;
- there is a large reserve of revolutions for the trimmer head;
- stable operation of the engine when changing position (sharp raising or lowering of the knife).
Left (H) – mixture adjustment at high speeds. (The screw is adjusted last).
The overall adjustment of maximum speed, engine power, temperature and gasoline consumption depends on the left screw (H).
Setting up the carburetor of a lawn mower with the last screw is done as follows:
- Open the throttle to full, while releasing full throttle. Turn the screw clockwise until the speed drops (in this case, use your ear).
- Turn the screw as slowly as possible counterclockwise until the engine runs rough.
- Then turn back just a little, barely hearing stable, smooth operation.
- For a more visual application of skills, it is more convenient to consider the work of an experienced user:
It is interesting that from the point of view of the author of the video, the setting (its correctness) is determined by the color of the spark plug, and not just by the engine speed and stability.
with your own hands
Post Views: 10
The spring may interfere
My first attempt to adjust the carburetor of the lawn mower did not yield anything, since the spring of the fuel mixture adjustment screw was in the way. The factory spring turned out to be too thick when compressed and did not make it possible to reduce the fuel supply to the required level. I had to pick up another spring and continue the adjustment after replacing it.
Fuel mixture supply adjusting screw with spring
In the photo above there is a factory spring, below there is an adjusting screw with a selected spring. I’m writing about this because I’m not sure that this is an isolated case and that someone else may encounter the same situation.
Sources:
https://vremya-ne-zhdet.ru/sad-i-ogorod/regulirovka-karbyuratora-benzokosy-trimmera/
How does a lawn mower carburetor work or its operating principle?
Adjusting the carburetor of a Chinese lawn mower is completely identical to the adjustment of lawn mowers from European, Russian and other manufacturers. To cope with the task of adjusting the carburetor on lawn mowers and gas trimmers, you need to understand the principle of their operation. How a carburetor works on a lawn mower is described step by step and in an accessible manner below.
- The operation of the lawn mower carburetor begins with the supply of fuel through the channel, as shown in the diagram
- Fuel is sucked into the carburetor using a pulse channel connected to the engine crankcase. Due to rarefaction of air, the flexible membrane at number 4 in the diagram above moves
- Fuel is supplied through valves 3 and 5. Valve 3 is an inlet valve, due to which fuel is supplied to the sub-membrane space, and valve 5 is an outlet valve
- Next, the fuel moves along the channel and, passing through a fine filter, reaches the needle valve 14
- The needle valve is connected via a lever to the control diaphragm 18
- The needle valve is activated by pressure on the membrane. When it is necessary to pump up fuel to start the engine, it is necessary to operate the soft cover of the hand pump. When exposed, the needle opens and the chamber is filled with the fuel mixture
- When the engine starts (cold), the needle opens due to vacuum when the air damper is closed. This vacuum acts through the idle and high speed jets on the membrane 18
- The membrane acts through a lever on the needle valve, thereby filling the chamber
- After starting the engine, the air damper opens, causing the engine to run lean as fuel mixes with air.
- When the chamber is full, the fuel mixture is supplied (sucked in) through the idle and medium speed jets (when the engine is running)
- The throttle valve is shifted from its original position by 10-15 degrees
- When work is carried out under load, fuel begins to flow into the chamber through the high-speed nozzle, and at the same time the throttle valve rotates at an angle of up to 90 degrees (depending on the force of pressing the gas). In all operating modes, the air damper must be open, through which the fuel is mixed with air, thereby igniting the mixture in the cylinder
Below is a diagram of the operating principle of a lawn mower carburetor. Based on the diagram, you can not only understand the principle of operation, but also identify breakdowns and other malfunctions of the mechanism.
When operating the tool, it is necessary to take into account the presence of another jet. This jet is located between the idle and full power passages. It is necessary in order to avoid severe leaning of the mixture, which occurs when the engine operates at partial load. In such a situation, the occurrence of a bullying couple cannot be ruled out. Through an additional channel (nozzle), fuel is sucked into the chamber, thereby enriching the fuel-air mixture. The diagram below shows an additional jet, which is designated by the number 1.
Having an idea of the design of the diaphragm carburetor of a brush cutter and the principle of operation, it will not be difficult to configure it yourself. To adjust the carburetor of a lawn mower, adjusting screws are used. The diagram above shows two screws for adjustment, however, most modern models of gasoline trimmers are equipped with three screws. The presence of three adjustment screws allows for more precise adjustment, while achieving stable and uninterrupted operation of the internal combustion engine.
This is interesting!
What is the difference between a trimmer and a lawn mower? Many people think that trimmers are low-power electric lawn mowers. However, trimmer is a generic name for gas trimmers, walk-behind trimmers and electric mowers as they are designed for a common purpose.
The design of a gas trimmer carburetor and its purpose
Petrol mowers are equipped with two-stroke internal combustion engines. A carburetor is used to supply the air-fuel mixture to the engine cylinder. In the design of gasoline units, this is a key element, without which the operation of the internal combustion engine is impossible. Moreover, this carburetor differs from a car device not only in size, but also in its operating principle. In particular, this difference lies in the presence of a membrane, which plays the role of a fuel pump. It is due to the presence of a membrane that the devices under consideration in the design of two-stroke internal combustion engines are called membrane ones.
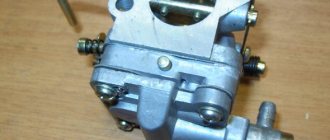
Structurally, the entire mechanism is a small part, inside of which there are channels, valves and membranes. The carburetor body is made of aluminum, and the internal structure is shown in the photo below.
Before you adjust the carburetor of a lawn mower with your own hands, you need to understand all the components of the device in question. The carburetor of a lawn mower and trimmer consists of the following parts:
- Diffuser or Venturi nozzle - air is sucked into the system through this nozzle
- Air damper - opens and closes the filtered air supply
- Maximum speed fuel channel
- Fuel channels (nozzles) for idle speed and medium speed
- Throttle valve - the opening value is adjusted by pressing the gas
- Pulse channel fitting - connects to the internal channel of the engine crankcase
- Fuel inlet channel (fitting) (2) - provides fuel supply from the gas tank
- Membrane (4) - responsible for sucking fuel from the gas tank
- Tank fuel suction valve (3)
- Fuel supply valve to the carburetor channel (5)
- Filter element (6) or fine fuel filter
- Fuel channel (10)
- Needle valve needle (14) - responsible for supplying fuel to the control membrane chamber
- Chamber - the fuel mixture, which is supplied through the jets and throttle valve into the cylinder
- Control membrane (18) - ensures manual fuel suction using a primer
- Lever connected to membrane (17)
- Idle speed screw(15)
- Screw for adjusting the amount of fuel supplied to the diffuser (13)
Having an idea of how the carburetor works inside, you have to understand the principle of its operation. A detailed description of how a carburetor works on a two-stroke internal combustion engine using the example of a chainsaw is described in this material.
The principle of operation of a lawn mower carburetor
The throttle valve determines the amount of air supplied, and engine power directly depends on this.
Fuel is sucked into the carburetor system by a pump (its membrane). Then it passes through the fitting in the carburetor. The liquid then moves through the inlet and outlet valves of the pump. Filtered with a mesh. It moves along the needle valve into the membrane chamber.
Step-by-step operation of the device:
- Air supply into a tube with an air baffle (damper). The partition regulates the intensity of the air flow.
- The fuel supply system is necessarily narrowed with a diffuser to increase the flow rate.
- Gasoline through the float chamber and the nozzle tube with a narrowing. A chamber with a float regulates the temporary volume of gasoline. In the float chamber the pressure level is neutral, and in the tube with a narrowing it is already low. Due to the pressure difference, fuel penetrates through the nozzle.
- Accelerating air flow promotes the transfer of fuel (gasoline) and its atomization. As a result, an air-fuel mixture of the required proportion or density is formed.
- The air-fuel mixture enters the engine cylinder through the fuel pipe.
The level of air density in the system depends on the area of the open air damper. The wider the throttle is open, the greater the fuel consumption and power.
Simply put, carburetor adjustment
on a lawn mower – creating an optimal fuel mixture due to the correct air supply.
How does a gas trimmer carburetor work?
It is almost impossible to cover all types of carburetors produced by gas trimmer manufacturers. But, since the design of this module, as well as its operating principle, is largely similar between different models, it is possible to make a generalized description of the processes occurring in the carburetor. This information will allow the user to understand the principles of operation of the device, troubleshoot problems and operate it correctly.
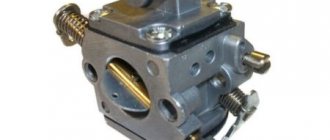
The basis of the trimmer carburetor is a solid aluminum body. Below is a diagram of this block.
At the bottom there is a diffuser, which is also called a Venturi nozzle (18). Air is sucked through this nozzle by a motor.
The smaller this hole is, the faster the air flows, and the higher the level of its rarefaction will be in the area with the smallest diameter.
In the upper part of the diffuser there are fuel channels (11,12). Air flows through these channels and draws in gasoline. The fuel pump itself, the jets and the system used to regulate the flow of the fuel-air mixture can be built-in or installed externally.
The throttle valve (9) regulates the amount of air drawn into the carburetor. Its amount affects the power that the engine develops. The flap (7) is used for cold starting. It must be closed if you are going to start the unit. After the engine has started, it must be opened, otherwise the engine will immediately stall.
The impulse channel (1) connects the impulse chamber of the pump with the engine crankcase, namely, with its internal volume. The piston located in the cylinder, performing reciprocating movements, consistently changes the pressure in the crankcase (vacuum or increase in pressure). Pressure differences cause the membrane (4) to move. Therefore, the operation of the pump is synchronized with the operation of the engine.
The suction of gasoline from the tank occurs precisely with the participation of the membrane (4). Gasoline enters the carburetor through fitting (2). Further, its path lies through the inlet valve (3), exhaust valve (5), through the mesh filter (6), fuel channel (10), passes the needle (14) and fills the chamber (16), which has a control membrane (18) .
The valve (14) is connected to the membrane (18) via a lever (17). The cavity, which is located below the membrane, is connected to atmospheric air through the hole (19).
The device operates as follows.
- A vacuum is created in the diffuser during the suction stroke. This fact causes air leaks. The position of the throttle valve (9) determines the amount of air entering the carburetor chamber, as well as the engine power and the number of revolutions.
- At this time, fuel is sucked from the chamber (16) through the jets (11,12), after which it is mixed with the flowing air. Gasoline, mixing with air, begins to atomize. This creates an air-fuel mixture.
- The finished mixture enters the cylinder, where it is compressed by a rising piston and ignites at its top point from a spark generated by the spark plugs.
- Since the volume under the control membrane (18) is connected to atmospheric air through the channel (19), the membrane goes up, opening the valve (14) through the lever (17). After opening the valve (14), a new portion of fuel enters the chamber (16).
- Once the chamber (16) is filled, the membrane (18) returns to its original position and the valve (14) closes.
Further, when the motor is running, all the above processes are repeated. To adjust the amount of fuel entering the diffuser through the jets, a screw (13) is used. A screw (15) is also used to adjust the idle speed. When the regulators are unscrewed, the fuel mixture becomes richer, and when the regulators are tightened, the mixture becomes leaner. Also, in some carburetor models, you can adjust the engine idle speed using a quantity regulator. It is usually located on the outside and, when tightened, rests against a lever mounted on the throttle valve axis.
Thus, using 3 adjusting screws, you can achieve maximum engine performance, as well as configure its uninterrupted operation at any ambient temperature, and even in mountainous areas.
Basic problems
Malfunctions of the carburetor of a lawn mower or trimmer, despite the relative ease of their elimination, sometimes require a long search by elimination. The main reasons are:
- unsatisfactory quality of gasoline purification;
- air filter clogged;
- accumulation of deposits and carbon deposits in the compartments and passages of the carburetor.
Each of the problems has its own reasons.
Fuel injector malfunction
The most recurring failure is wear and tear of the membrane. As a result, its non-adherence. Fuel passages are not sealed at certain stages of the engine cycle. The reasons here are:
- you work for too long on a lawn mower or trimmer without a break;
- low-quality fuel was filled;
- exhaust gases enter the pulse channel.
A deformed membrane has several bad consequences:
- there is not enough gasoline or oxygen in the created combustible mixture;
- the engine starts after 10 or more unsuccessful attempts;
- the engine knocks, clatters during operation, etc.;
- the working piston is deformed.
Strainer clogged
The reasons for a clogged strainer are poor fuel cleaning, damage to the hose and/or injection head.
Failure of the adjustment lever
Wear of the contact edge of the lever is a consequence of incompletely purified fuel, which contains grains of sand or particles of clay, metal, or other inclusions that are insoluble in liquid hydrocarbons. A problem appears with fuel injection; the engine operates intermittently without load.
Inlet needle is damaged
The inlet needle breaks due to the presence of metal and stone particles in gasoline. As a result, the intake needle seat does not fit tightly to it, and the fuel mixture flows. There is too much air in the combustible mixture created by the carburetor, which can cause the engine to “sneeze” during operation. Finally, the needle may become stuck due to low-quality gasoline, or the unit has been idle for a long time.
Clogging of the adjustment space
Deposits may accumulate in the adjustment compartment. The needle does not close the hole completely, and a lot of gasoline enters the fuel chamber - the engine overflows it, possibly flooding the spark plugs. Because of this, the gasoline-air mixture contains an increased amount of gasoline vapor. The efficiency drops noticeably.
The adjustment membrane is damaged
The membrane often becomes deformed (and sometimes breaks) due to the continuous operation of a lawn mower or trimmer for several hours. If you abuse this “impact” mode of operation, damage to the membrane occurs more often. New breakdowns will rain down like from a cornucopia:
- the piston breaks;
- the number of attempts to unsuccessfully start the engine will increase sharply;
- the fuel mixture will contain too little gasoline;
- The useful (thermal) power will drop sharply.
Intake control lever sticks
Sticking of the adjustment lever is a consequence of its incorrect installation or accidental bending. The contacting edge will be in the wrong position. This will disrupt the additional injection of gasoline.
The valve is worn out
The throttle and air dampers become unusable due to the entry of dust, metal particles, etc. with the air flow. Damaged dampers look like parts that have been sand blasted. Due to wear on the dampers, the efficiency of the motor decreases and breakdowns are detected. The piston and cylinder wear out.
In some cases, this filter is simply not suitable for your model of lawn mower or trimmer. Ultimately, the motor shaft will suffer - pieces of it will fall into the engine channels, causing the piston to break.
Carburetor cannot be adjusted
The springs on the adjusting screws are to blame for the fact that the adjustment is too rough (it is not possible to set the parameters accurately). The manufacturer of a brush cutter or trimmer may supply excessively thick and stiff springs. You can find others either in workshops where similar equipment is repaired, or purchased from any dealer or official representative of the company that produced the motor for your trimmer or mechanical scythe.
The primer is broken
Primer is a manual mini-pump for forced pumping of fuel into the carburetor. To successfully start the engine, you may need to pump 20 ml of gasoline manually.
Step-by-step instructions for repairing a lawn mower carburetor
Disassembling the carburetor
A visual inspection of the carburetor will help identify fuel leaks and air intake, but the main reasons for device failure lie internally. Therefore, in order to determine and, most importantly, correct the breakdown, the carburetor must be disassembled.
It doesn’t take much effort to disassemble the carburetor of a lawn mower.
Just unscrew the four screws on one side
and two on the other. This can be done using a regular Phillips screwdriver. Carefully unscrew the screws and put them aside. They may be needed during assembly. It is advisable to cover the table with a white cloth before disassembling so that everything can be seen, even the smallest parts that may fall out during disassembly.
Step #1
We begin disassembly from the side of the fuel supply system.
We remove the primer - the pumping bottle, which is noteworthy; during assembly it is simply impossible to install the carburetor parts incorrectly. The products have characteristic ebbs and holes.
Step #2
Remove the pump cover.
Step #3
Now remove the membrane. It is she who performs the function of pumping fuel into the carburetor.
When the membrane vibrates, the other side exerts pressure on the rocker arm of the mechanism and the needle rises, which, in turn, opens the hole and fuel is supplied.
Step #4
Remove the carburetor cover with the injection mechanism.
Step #5
Next, another membrane was installed. We carefully remove it.
Step #6
There is another gasket under the membrane. We also carefully remove it, without damaging it in any way.
Step #7
Next we move on to dismantling the parts on the back of the carburetor. As mentioned earlier, unscrew the two bolts. This is already an air supply system.
There is a valve here, which, when adding gas, opens and increases the flow of air into the engine.
After removing it, you are left with a bare body in your hands. The carburetor is disassembled.
Troubleshooting and Troubleshooting
Now it’s worth paying attention to the problems that occur during carburetor operation and how to fix them.
Problem 1: Clogged holes, channels and jets with dirt
The first thing that happens is that the holes and jets in the fuel supply system become clogged with dirt. Filters installed in the tank and directly in the carburetor do not help. They still allow small particles to pass through, which cause the mower to fail.
Step #8
Now we need to get the needle.
To do this, unscrew the bolt on the mechanism, holding it with your finger. The fact is, there is a spring there and careless action will lead to it being lost.
We take out the needle (see photo) and the spring.
Step #9
What to do with purging. The most effective way is to use an ultrasonic bath.
It is filled with either a special liquid or gasoline, a carburetor is placed there and under the influence of ultrasound, the so-called cavitation effect, the channels are cleared of contaminants.
The second cleaning option is compressed air.
You can use a compressor available on the farm and clean the carburetor channels. However, this method is effective if the contamination is not very large.
If there is neither an ultrasonic bath nor a compressor at hand, then cleaning can be done in a third way using a special cylinder for cleaning the carburetor. They are sold in almost all auto stores and supermarkets. The price is low and is approximately 2-3 $. This cylinder is enough for 4 or 5 purges.
Step #10
Now we need to blow out the channels in the carburetor body and cover. See photo.
Step #11
Another particle of dirt may get stuck under the needle. See photo. This will also lead to failure of the brush cutter.
Important! When cleaning the carburetor, under no circumstances should you use needles, pins or wires. Even the slightest scratch will damage the carburetor. It will have to be changed entirely.
Problem 2: clogged fine filter
It is located on the carburetor cover and is a fine metal mesh. Its contamination occurs very often. This is due to the deposition of oil, additives, and dirt on it.
Step #12
Sometimes, when disassembling into meshes, a certain film is discovered. This carburetor does not have enough fuel and the brush cutter either does not start or works intermittently. The cleaning methods are identical to the first reason: an ultrasonic bath, a compressor, or a can of a special solution. In addition, if the mesh is thoroughly clogged, you need to take a soft brush for watercolor paints, dip it in gasoline and carefully rinse it without damaging it.
Problem 3: membrane failure
Step #13
They have the ability to wear out during use. From prolonged use, they become deformed, stretch, lose elasticity, low-quality fuel corrodes them, and can no longer perform their functions well. This also applies to the needle itself. The fact is that it is covered with a thin layer of rubber, which wears out during operation and can no longer fit tightly into the hole. The lawn mower begins to work intermittently. To eliminate such a breakdown, it is necessary to replace all worn parts. Where can I get them?
Specialized garden equipment stores sell a repair kit for the carburetor of a certain model of brush cutter. The cost of such a repair kit ranges from 40 to 60 hryvnia.
It includes two diaphragms, a gasket, a needle valve and a spring.
All carburetor wear parts can be replaced. Therefore, you should not rush and buy a new one, and you also don’t need to run to the workshop; repairs can be done by any user of a brush cutter. Professionals claim that the quality of the components in the repair kit even exceeds the characteristics of the original carburetor parts. Therefore, a high-quality repaired unit will work better than a new one.
Problem 4: the bubble button for manual fuel pumping is worn out
Step#14
In addition, the bubble button for manually pumping fuel may fail. Exposure to gasoline leads to the fact that during long-term use, the rubber is corroded and it begins to stick together or, under the influence of low temperatures, for example, during storage, it bursts. The button should also be replaced if necessary. In addition, its cost is small and will not affect the size of the repair budget.
Based on the above, we can conclude that there are only three main carburetor malfunctions: clogged channels, contamination of the fine filter and failure of components. In the first two cases, cleaning is enough, and in the third, a repair kit will help.
Carburetor assembly
Assembling the carburetor of a brush cutter is not difficult at all. You must perform all the steps in reverse order:
Step #15
Install a spring and a needle valve in the carburetor cover. Holding the spring with your finger, tighten the fastening bolt.
Step #16
Screw the air supply system valve to the product body with two screws.
Step #17
Turn the carburetor over and proceed to the fuel system assembly. First you need to install the gasket.
Step #18
Step #19
Place the carburetor cap.
Step #20
Install the main membrane.
Step #21
Place the pump cover.
Carburetor design
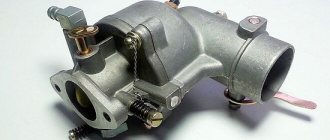
A petrol mower (motor mower) contains a base - an aluminum body, which houses the remaining parts that work harmoniously as a single whole. The carburetor body has a diffuser - a passage with internal channels through which air is pumped.
Channels branching from the diffuser deliver fuel, with which the injected air is mixed, carrying gasoline vapor with it. Outside the main compartment of the carburetor are located:
- jets;
- mini fuel pump;
- a unit that regulates the mixing of fuel with air.
The latter forms that very explosive mixture that ignites in the combustion chamber of the carburetor.
Video: Setting up the Carburetor of a Chinese Petrol Mower
If you have a blood pressure monitor, and if the recommended speed is indicated in the product data sheet, the correction can be made more accurate, focusing not on the ear, but on the readings of the device.
Adjusting the brush cutter carburetor in the video is done by ear.
to the post “Adjusting and repairing a gasoline brush carburetor”
- Dmitry Pavlovich 07/04/2016
Please explain. In section 5, adjust screw L. Error? Should screw A be read? Thank you
Tell me the starting position of the HL LA screws
PLEASE PREVIOUS POSITION
Tell me the starting position of the HL LA screws
Thank you very much for the video about the accelerator, and I don’t know, but the defect is very important and creates a huge problem that almost everyone is silent about. BRAVO….
Possibly the tachometer. This is a speedometer, not a blood pressure monitor. Blood pressure meter.
And I have L, H, LA, is that LA instead of T?
The heart of any chainsaw is a two-stroke internal combustion engine.
The trimmer is not used for complex appliances, so most of them are floor.
Reliable and accurate mechanical instructions must be purchased.
Gone are the days of Soviet agro-industrial gigantism. They did a concert.
Motoblock. This is an economical tractor option for small jobs.
In order to make a harrow type attachment with your own hands, in addition to the bodies.
Source
Gas cutters, like all gas-powered gardening tools, are not easy to maintain. You can and should repair and adjust yourself. For example, self-control of a carburetor using a homemade brush. It's a matter of five minutes.
The brush cutter carburetor is a component in the power system. In it, as in any carburetors, the process of mixing air and fuel (gasoline) takes place for subsequent supply to the engine cylinders.
Adjusting the Husqvarna carburetor
Before adjusting the Husqvarna, do maintenance on the trimmer (wash the trimmer and engine, replace the spark plug, eliminate minor defects).
Be sure to wash the foam air filter element. Wash the element in warm water and soap, then wring out and dry (or replace if it is old or damaged).
Note: If you adjust a Husqvarna carburetor with a dirty air filter, the fuel mixture will become much leaner after cleaning the air filter (which can lead to poor performance or even engine failure). Install a trimmer head with the maximum permissible diameter and standard length of cord (up to the cutting blade in the additional protection) to create a load on the engine when adjusting the high speed screw of the Husqvarna carburetor. Start the trimmer according to the Husqvarna Manual and warm it up for 10 minutes (if the trimmer head rotates at idle speed, then the idle speed screw, i.e.
the bottom one must be turned counterclockwise until the rotation of the trimmer head stops). Carefully turn both needles (right and left) to the middle position between fully unscrewed and fully screwed in (do not turn by the stopper!, this may cause damage to the Husqvarna engine)
There are three adjusting screws for adjusting the Husqvarna carburetor: right, left and bottom.
1) Right screw L - adjusts the enrichment of the low speed mixture (adjusted first): Find the maximum idle speed by slowly turning the right screw to the right and left. Then turn this screw ¼ turn counterclockwise. Note: From the Husqvarna factory the right hand screw was turned out completely (0.5 turn). Now he is looking at 11 o'clock. 2) Lower screw T - adjusting the idle speed of the Husqvarna engine (if necessary): turning the screw clockwise increases the idle speed, counterclockwise decreases it.
The idle speed adjustment is considered correct when:
- A cold engine idles steadily.
- A hot engine does not idle too high.
- Before the trimmer head starts rotating, there is a sufficient reserve of revolutions.
- The engine operates stably in any position (for example, when the knife is sharply lowered).
Note: From the factory (Husqvarna), the idle screw was turned from fully tightened to 8 full turns and “2 o’clock” (now it remains so). The recommended idle speed of the Husqvarna lawn mower engine is 2,900 rpm. 3) Left screw H – regulates the enrichment of the mixture at high speeds (adjusted last). It regulates maximum speed, engine power, temperature and fuel consumption.
Note: The Husqvarna engine should not be run at full speed for more than 10 seconds!
- Open the throttle fully (full throttle) and slowly turn the left screw clockwise until the Husqvarna engine speed is reduced (audibly).
- Then turn the left screw very slowly counterclockwise until the engine starts to run rough.
- After this, turn the screw slowly back a small distance clockwise until the Husqvarna engine starts to run smoothly.
This completes the Husqvarna adjustment.
Note: The recommended maximum speed of the Husqvarna engine is 11,500 rpm. The maximum engine power output of the Husqvarna 333R trimmer is 1.6 kW (2.1 hp) at 8,400 rpm.
Note: On a new Husqvarna trimmer from the manufacturer (Husqvarna), the left screw was completely unscrewed (0.5 turn) and blocked (filled) with hard plastic, which I drilled out after the warranty expired. Now the left propeller (like the right) is pointing at approximately 11 o'clock.
Checking the correct settings of the Husqvarna carburetor
The engine revs quickly, smoothly and confidently, and revs a little at maximum speed; the T-35 trim head should not rotate at idle.
How to choose a grass clipper for your dacha
The most important useful function of a lawn mower is, of course, to make work easier. After all, the ideal beauty of a parterre French lawn or the resistance to trampling of an English lawn can only be achieved by constant mowing. Some landscape designers consider this statement only a historical cliche, others actually recommend cutting the grass every few days - there can be a lot of disputes here, the soil is fertile. But now we’re not talking about that, but about those useful functions that can make a haircut more enjoyable. So, let's begin.
“Why change the cutting height of the grass at all?” is the first question that arises for a buyer who carefully studies the technical characteristics of his future assistant. But why... There are different types of lawns, for example, sports lawns are usually cut very short (30 mm) so that they create a hard covering that is resistant to trampling.
Each lawn requires an individual approach
- manual. To do this, you will need to unscrew each wheel and reinstall it in a different hole. This type of adjustment is usually done on affordable household models. It requires stopping the car and turning it over. Also, models with manually adjustable wheel axle level have a limited choice of height options - most often there are less than 3 of them.
- mechanical. This is done by turning the lever. The position can be changed on all four wheels at once or on each one separately. The operation does not take much time and can be performed without stopping the engine, literally on the go. Professional devices and premium models are equipped with this function. As a rule, units with this method of height adjustment have a greater number of variations in cutting height - in the range from 20 to 120 mm. The Denzel 1400 W electric lawn mower allows you to set the cutting height of the grass in five positions: 20, 30, 40, 50 and 60 mm.
On drum mowers, the cutting height is also adjustable, but to a lesser extent. They can cut the grass lower than rotary ones, and that is why they are used for sports fields - very short haircuts (up to 30 mm) are in fashion there. But such models are not suitable for those who cannot constantly control the height of the grass and periodically allow the lawn to “overgrow”.
Reel lawn mowers can cut grass lower than rotary mowers.
Mowers can deal with cut grass in different ways. The first option is to simply spread it out: the grass flies out through the pipe to the side or back. This is not very convenient, since after mowing you will have to thoroughly use the rake.
We invite you to familiarize yourself with the TOP 10 best gasoline self-propelled lawn mowers: rating, characteristics, which is better, price, reviews
In the second case, the mowed grass ends up in a special container - a grass catcher. Its capacity will determine how often you have to interrupt your work to throw out the contents. Hence the simple rule: the larger the grass catcher, the better. Its volume is indicated in liters: a 30-40 liter grass collector (Denzel GC-1500 lawn mower) is quite enough for an average garden of six hundred square meters with a small lawn.
Removable lawn mower grass catcher. The photo shows a Denzel GC-1500 mower with a 40 l grass catcher
The grass catcher can be made of plastic, fabric or fine mesh. The latter is convenient because through the transparent material you can monitor the filling and make timely “pit stops” during the mowing process.
This function is very simple, but it can be extremely useful when different family members take turns mowing the lawn. Adjust handle height (
) can be very useful in such cases. A trifle, it would seem, but nice! And if the handle also folds, then such a lawn mower will not have a price. Models with folding handles are more convenient to transport and store - they take up less space.
Models with folding handles take up less space during storage and transportation. The photo shows a Denzel GC-1100 mower
Reference. Read to understand what you are doing!
The required composition (quality) of the air-fuel mixture is adjusted (changed) by turning the screws for adjusting the fuel supply to the intake air flow (right and left). The amount of mixture entering the cylinder is dosed by the throttle valve. If they are turned clockwise, the mixture sucked into the cylinder becomes leaner (less fuel in the air/fuel ratio) and the engine speed increases, while the Husqvarna engine runs softer (weakly picks up speed) and the power drops significantly. In addition, at higher speeds, less oil and gasoline enter the cylinder with a lean mixture (worse lubrication), and this can cause the engine to spoil. Well, the trimmer will have trouble starting. If the screws are turned counterclockwise, the mixture sucked into the cylinder becomes richer (more fuel in the air/fuel ratio) and the engine speed decreases, while at low speeds more gasoline and oil enter the cylinder (better traction, better lubrication), but the Husqvarna engine “spins up” poorly (does not pick up speed well) and more carbon deposits form in the cylinder!
When to make adjustments
Carburetor adjustment is necessary in the following cases:
- the new engine was run-in (4-5 liters of fuel mixture was used);
- the composition of the fuel has changed (brand of oil and gasoline);
- the weather changed (it became hot, cold);
- air rarefaction has changed (applies to mountainous areas);
- after long-term storage;
- the load on the engine has increased (after changing tools, etc.);
- due to vibration, the adjustment screws spontaneously unscrewed;
- Fuel consumption has increased, the carburetor is overflowing with fuel;
- carbon deposits quickly appear on the electrodes of the spark plug (even though the fuel mixture is prepared correctly);
- the engine starts and immediately stalls or picks up speed poorly;
- no gasoline enters the cylinder;
- a large amount of exhaust gases.
Tips for repairing a gas trimmer carburetor
Regardless of the manufacturer, there are factory defects in trimmer carburetor parts.
For example, the adjustment method described above may not give positive results if the number of turns of the mixture supply screw spring is too large and, as a result, it is impossible to optimally reduce the level of gasoline supplied. To eliminate this, you can shorten the spring yourself a little or purchase a new one in accordance with the instruction manual.
When purchasing oil, many owners of lawn mowers follow the recommendations for preparing the fuel mixture indicated there.
So, often the information on mixing gasoline and oil indicated on the can differs from the instructions in the trimmer's passport. As a result, black carbon deposits can quickly form on the spark plug, which leads to a drop in power and increased fuel consumption. Therefore, when preparing the working mixture, you should follow the recommendations specified in the instruction manual. In most cases, the proportion for a run-in internal combustion engine is 1:25. It is worth noting that many tool owners prefer to prepare fuel “by eye,” which will certainly lead to rapid wear of the piston scythe if the oil portion is reduced and the formation of soot on the spark plug with an increased amount of lubricant.
Correctly performed above tips for setting up the trimmer carburetor will help to avoid not only engine overheating and increased fuel consumption, but will also significantly increase the service life of other parts and components of the tool
Pay attention to the operation of the lawn mower in all modes and carry out scheduled maintenance and repair of the tool on time.
In what cases is it necessary to adjust the carburetor?
The stable operation of a lawn mower's carburetor largely depends on its correct settings.
Node adjustment is required in the following cases:
- after running in a new trimmer, when 4–5 full tanks of fuel were consumed during operation;
- when the operator frequently changes the brand of gasoline used for refueling;
- as a result of sudden changes in weather;
- due to prolonged storage of the trimmer;
- as a result of arbitrary unscrewing of the adjusting bolts of the brush cutter caused by strong vibration of its motor;
- due to a sharp increase in the amount of fuel consumed by the trimmer.
It will also be necessary to adjust the mower's carburetor in cases where carbon deposits quickly appear on the tool's spark plug, as well as when there is a sharp increase in the volume of exhaust gases emitted by the trimmer.
Model description
The above-mentioned equipment option costs RUB 13,490. It is a premium device. With its help, you can take care of the territory on a large suburban site. The equipment can handle young and old grass, reeds and weeds, as well as young bushes.
The petrol mower "Stil FS 55", reviews of which you can read below, has a powerful 1 liter engine. With. The device is ideal for use in a suburban area or country house. In one pass you can mow 420 mm of grass in width. This device is suitable for hardware processing of the lawn, mowing grass and allows you to even walk along fences, process narrow areas and areas near flower beds. The tank holds 0.33 liters of fuel, which will be enough for uninterrupted operation for half an hour.
Elimination methods
The list of upcoming work on the engine may be as follows:
- replacing the fuel pump;
- disassembling and washing the strainer;
- replacing the adjustment lever;
- it is also necessary to clean the adjustment space;
- replacing the membrane (or the entire block where this membrane is located);
- adjusting intake, exhaust and needle valves;
- replacing dampers;
- cleaning fuel channels and diffuser;
- replacing screw springs;
- change of primer.
Not all of these jobs can be completed. It often turns out that many of them are not needed if a specific malfunction is immediately detected.
Main problems and malfunctions of the carburetor.
Mesh filter. There are usually only two problems with this element:
- Blockage.
- Breaking.
In order to find out the cause of the breakdown, unscrew the fuel filter cap to remove the strainer. If dirt has simply accumulated on it, then washing it in gasoline or blowing it out will help.
If there is visible damage to the mesh filter, be sure to install a new one. There may also be damage to the fuel supply pipe (during repairs, it is practiced to check this element).
In most cases, the carburetor starter does not function due to blockages. Acetone or the same gasoline should be used for washing.
Blowing clogged carburetor parts with compressed air is an acceptable and convenient repair practice.
The throttle body, carburetor parts, intake or exhaust pipes - all of these parts are subject to depressurization. You can definitely check it in a primitive way - spread soap foam on the problem area.
Petrol mower device
The structure of the Shtil FS 55 lawn mower should be clear to you if you plan to operate the equipment, and even more so to repair it. The internal combustion engine in this unit is almost the same as in a chainsaw. But the last tire is fixed to the motor gearbox with a long tubular rod. Inside there is a shaft that transmits torque from the motor to the working tool. This design is suspended on a belt that is thrown over the shoulder. This allows you to hold the tool suspended, which is important when the weight of the chainsaw is sensitive.
A handle is fixed to the rod of the unit, with the help of which you can move the end of the rod with working equipment. The petrol mower "Stil FS 55", a repair manual for which is presented in the article, has a protective shield on the human side in the form of a casing, which prevents injuries during operation. The instrument itself is a round drum with a thick fishing line coming out of holes on both sides of it. Adjusting the carburetor and chainsaw repairing lawn mowers Stihl fs55 fs 38 carburetor. When the drum spins, the line is pulled under the influence of centrifugal force and hits the grass, cutting it.
The Shtil FS 55 petrol mower, the technical properties of which will be presented to your attention below, has a fast-wearing nylon line. Features of the Stihl fs 38 lawn mower, adjusting the carburetor of the Stihl fs 38 lawn mower. It is sometimes updated by the method of unwinding the coil, which is located inside the drum.
Carburetor for trimmer - setting, do-it-yourself adjustment
The carburetor for the trimmer is one of the most important components of the unit, which is responsible for the fuel mixture. If the equipment is handled incorrectly, the element may be damaged, making it impossible to operate the lawn mower without repair. To repair a garden tool, you need to know about its structure, operating principle and adjustment rules.
Design features and principle of operation of the lawn mower carburetor
The design of carburetors is practically no different from well-known brands and Chinese manufacturers.
The carburetor structure of a brush cutter consists of the following elements:
- Booster pump;
- Atmospheric membrane tuning systems;
- A primer that makes it easier to start the engine;
- Cold running systems;
- Elastic two-valve plate;
- Dosing system with a rotating rotor;
- Throttle valve.
The model functions as follows:
- From the air damper, the air passes into a tube, which increases or decreases its flow;
- In the area with a hole for the fuel mixture, the narrowed zone is a diffuser. In this zone, air moves faster;
- The fuel mixture from the float compartment enters the tube through the nozzle. The amount of fuel is determined by the float;
- The fuel is picked up and atomized by the increased air flow. An air-fuel mixture with sufficient density is created;
- Sucks the mixture with a cylinder through a pipeline.
The concentration of the air flow depends on how slightly the air damper is opened; accordingly, more fuel is supplied to the cylinder. Adjusting the carburetor of a lawn mower involves setting the correct ratio of the flaps to achieve the optimal consistency of the fuel mixture.
When is carburetor adjustment required?
The operator needs to adjust the operation of the working unit in certain cases:
- The new engine was run in using 4-5 liters of fuel;
- Changed the composition of the fuel - the brand of motor oil and gasoline;
- Weather conditions have changed (in winter, summer);
- The level of air rarefaction has changed;
- The load on the power plant has increased;
- After prolonged storage of the unit;
- Formation of persistent carbon deposits on the spark plug;
- The engine immediately stalls after starting or does not develop the required speed;
- When vibrating, the adjustment screws became loose;
- The amount of fuel consumed has increased;
- Gasoline is not pumped into the cylinder;
- There's a lot of exhaust coming out.
How to adjust the carburetor of a lawn mower with your own hands?
Before setting up the carburetor unit, a certain algorithm of actions is performed:
- The motor is washed;
- The spark plug is replaced or cleaned;
- The air filter is replaced or cleaned. It can be dipped in warm soapy water, after which the filter is completely dried;
- A cord or knives are installed in the trimmer reel to increase the load on the power unit during tuning. The gasoline engine must idle for at least ten minutes.
If the cutting head continues to rotate at idle, it is worth reducing the speed of the power unit. The operation is adjusted using the T screw; on some models it is marked LA. The idle speed control is unscrewed counterclockwise until the cutting element stops moving.
Adjustment of the trimmer carburetor depends on three screws:
- L is responsible for the level of pumping of the fuel mixture at low speeds. It is set up first. You need to achieve maximum speed by unscrewing the screw to the desired point. Then the regulator turns a quarter turn to the left;
- T (LA) – sets the operation to idle. When turning the screw to the left, the engine speed decreases, and to the right, it increases;
- H allows you to enrich the fuel at maximum speed. The screw adjusts high speeds, fuel efficiency and the power level of the power plant.
The motor should not be operated at full speed for more than 10 seconds, as it may break.
Correct tuning eliminates engine damage:
- With the engine running, give full throttle;
- Screw H is unscrewed clockwise until the unit begins to reduce speed;
- The H regulator scrolls to the left until the motor operates stable.
If you follow all the instructions, the carburetor for the lawn mower is considered adjusted: the engine runs at the required speed, quadruples a little at higher speeds, the cutting elements do not rotate without load.
Source: https://pro-traktor.ru/trimmery/karbyurator-regulirovka.html