How to adjust the belt tension on a motor cultivator?
Tell me how to adjust the tension of the belts on a motor cultivator.
Please indicate the K1 model of the motor cultivator if you did not find it in the forum search.
1- move the engine away from the gearbox (usually the engine is attached to the frame through longitudinal holes) 2- pull the clutch cable (usually in two places) on the steering wheel or clutch housing; 3- install a smaller belt size; but all these operations are only when the clutch slips - i.e. on the MK, even when the clutch is engaged, the belt should not be a string - the main thing is that it does not lead or slip.
I would start differently.
- Completely release the cable tension and tighten the pin until it stops.
- Loosen the engine fasteners and move it until the belts turn, but there is no movement. Tighten, making sure the pulleys are aligned.
- Make final adjustments to the cable tension. He lets go of the object, stands there, presses it, and starts moving in 1/3 of the move. And the question
Source
Technical diagnostics
| No. | Job title | Cost, rub. |
| 1 | 4-stroke engines | 450.00 rub. |
| 2 | Petrol mowers | 450.00 rub. |
| 3 | Chainsaws | 450.00 rub. |
| 4 | Petrol lawn mowers | 450.00 rub. |
| 5 | Generators | 800.00 rub. |
| 6 | Motor cultivators | 800.00 rub. |
| 7 | Riders | RUB 2,000.00 |
| 8 | Snow blowers | 800.00 rub. |
| 9 | Email Lawnmowers | RUB 300.00 |
| 10 | Email Trimmers | RUB 300.00 |
| 11 | Electric cultivators | RUB 300.00 |
| 12 | Electric saws | RUB 300.00 |
How to make a clutch mechanism with your own hands?
- input shaft of the gearbox and flywheel of the Moskvich car;
- hub and steering knuckle from Tavria;
- B-profile;
- Double groove driven pulley;
- Crankshaft from GAZ-69.
Subsequent work on assembling the mechanism looks like this:
- First, you will need to grind the crankshaft so that it does not interfere with other elements of the walk-behind tractor;
- We place the standard walk-behind tractor hub on the shaft;
- Next, you need to machine a place on the shaft for the bearing. This operation should be performed as accurately as possible so that the bearing fits perfectly on the shaft. As a result, the hub should fit without any gaps, and the pulley should rotate;
- Then turn the crankshaft over and do the same on the other side;
- Next, use a drill with a 5mm drill bit to make 6 holes in the pulley. The distance between them should be the same. Since 10mm bolts will be used, holes will also need to be drilled on the back of the wheel that drives the drive belt;
- Next, install the pulley on the flywheel and tighten both parts with a bolt. After this, mark the drill spots on the flywheel so that they coincide with the 6 holes in the pulley;
- Remove the pulley and drill holes in the flywheel;
- After this, put the pulley back on and securely tighten the structure with bolts;
- Grind the inner surface of the crankshaft and flywheel so that they do not hit each other.
The finished structure can be installed in a regular place in the walk-behind tractor. Do not forget to connect the cables, leading them as far as possible from the friction elements.
"Wet" type
There is also a so-called wet clutch type. How is it different from the first option? It contains torque converter oil between the two discs. Also, on a “wet” unit there is no such rigid clutch between the driven and driving disks.
Compared to its analogues, it has a number of advantages. Among them, it is necessary to note the good protection of the car from overheating, as well as the high reliability of the mechanisms. However, the “wet” element also has its disadvantages. Its main disadvantage is its high cost, so most budget cars do not use such a system.
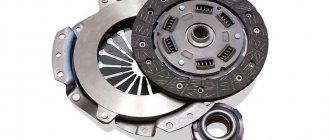
Purpose and varieties
The clutch carries out inertial transmission of torque from the crankshaft to the transmission gearbox, ensures a smooth start of movement and gear shifting, and regulates the contact of the gearbox with the motor of the walk-behind tractor. If we consider the design features, the clutch mechanisms can be divided into:
- friction;
- hydraulic;
- electromagnetic;
- centrifugal;
- single, double or multi-disc;
- belt
Based on the operating environment, a distinction is made between wet (in an oil bath) and dry mechanisms. According to the switching mode, the device is divided into permanently closed and non-permanently closed devices. Depending on how the torque is transmitted - one flow or two, one- and two-flow systems are distinguished. The design of any clutch mechanism includes the following elements:
- control node;
- leading parts;
- driven components.
The friction clutch is the most popular among farmers who own walk-behind tractors, because it is easy to maintain, highly efficient and lasts for a long period of continuous operation. The principle of operation is the use of friction forces that arise between the contacting edges of the driven and driving parts. The driving components work in rigid connection with the engine crankshaft, and the driven components work with the main shaft of the gearbox or (if it is absent) with the next transmission unit. The elements of the friction system are usually flat discs, but some models of walk-behind tractors have a different shape - shoe or cone.
In a hydraulic system, the moment of motion is transmitted through a fluid, the pressure on which is provided by a piston. The piston returns to its original position using springs. In the electromagnetic type of clutch, a different principle is implemented - the movement of the system elements occurs under the influence of electromagnetism forces.
This type is permanently open. The centrifugal clutch type is used in gearboxes that automatically change gears. Not very common due to rapid wear of parts and long duration of slipping. The disk type, regardless of the number of disks, is based on one principle. It is reliable and ensures smooth startup/shutdown of the unit.
Belt clutches are characterized by low reliability, low efficiency and rapid wear, especially when used with high-power motors.
Product replacement
Changing this device is the most expensive process by financial standards. Although it is not necessary to change all components, experts recommend doing this at the same time. Let's look at how the procedure is performed:
- First of all, parts are purchased.
- Next, you need to completely dismantle the old product.
- All clamps are completely removed and the tension cable is removed.
- After this, you need to clean the landing site.
- Next, the new parts are assembled into a single mechanism.
- The device is mounted on the seat.
- The tensioner is connected to the release bearing through a spring.
- The entire structure is fixed using fasteners.
At first glance, there is nothing complicated about this, but the process is complicated by the fact that it is necessary to remove the clamps, which also partially hold the transmission.
Important! Experts recommend replacing the entire device based on practice, since over time the parts wear in and grind down, which makes it quite difficult to combine the new disk and the old basket, or vice versa.
Purpose
What functions does a car's clutch perform? First of all, this unit is necessary for the car to move away smoothly, as we said at the beginning of the article. If the motor and gearbox are rigidly connected, then after engaging the gear the car jerks forward sharply, since all the power from the engine is transferred to the gearbox at once. Improper use of the clutch causes mechanical damage to parts and also leads to frequent engine stalls when starting off.
Thanks to the operation of the clutch, namely the sliding of the drive and driven discs, the torque increases gradually. The driving forces do not increase immediately, and therefore the car starts off very smoothly and softly.
Also, a clutch box is necessary for easy gear shifting while the vehicle is moving. When a car is traveling at a certain speed, which is steadily increasing or decreasing, there is a need to shift to an upshift or downshift, which is facilitated by the timely separation of the shafts of the assembly between the transmission and the engine. Otherwise, higher efforts would be required to change gears, which would further provoke rapid wear of the gearbox and its other mechanisms. In particular, when the speed is forced, the load on the gear teeth increases. Thus, the clutch also serves the function of reducing the load that acts on the surface of the gearbox parts, which makes it easier to switch from one gear to another. In this case, the gearbox (a photo of this mechanism is presented below) suffers minimal loads from the engine. And this significantly increases the service life of gearbox parts, the price of which is sometimes too high.
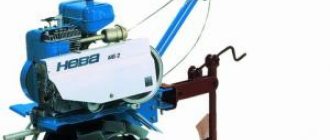
Operation and maintenance of Neva MB-2
Changing the engine oil
At temperatures above 4 degrees Celsius, using thickened types of oils (for example, 10W30 brand) will lead to increased consumption of this type of fuel, so in the cold season it is recommended to check the engine oil level more often, preventing its level from dropping below normal.
The oil change is carried out after the walk-behind tractor has recently been in operation, while the engine has not yet completely cooled down. It should be warm, but not hot. The remaining oil is completely drained from the tank, after which new oil is added until the oil level reaches a special mark. The drain plug is then tightened tightly and wiped dry.
First launch and testing of the Neva MB-2 walk-behind tractor
The first start must be carried out according to the following scheme:
- make sure that the walk-behind tractor is in complete condition (the height of the steering bar and handles must correspond to the user’s height);
- You can start the engine only if the walk-behind tractor is located on a flat surface;
- check the oil and fuel levels in the tank;
- also check the places of threaded connections;
- then you can start the engine by smoothly turning the ignition knob;
- The idle time (without load and movement) should be about 10 minutes, then you can move and operate the walk-behind tractor.
The break-in period is considered to be the first 20 hours of operation of the walk-behind tractor, after which it is necessary to change the oil
During this period it is most important:
- do not operate at full throttle;
- work only on pre-prepared soils (not virgin soil);
- for cultivation, use only the number of cutters that are included in the kit;
- The Neva MB-2 walk-behind tractor can only be loaded at ¾ power during the run-in period;
- gear shifting in the gearbox can only be done when the rotation of the drive pulley has completely stopped;
After the first 20 hours of operation after the first start, the engine oil should be changed.
Motoblock Ugra NMB-1N2 throttle cable, clutch
Hi all. "> here is my last year's topic. Problems have appeared. The gas, clutch and gear cables of the mower of this walk-behind tractor broke one by one. Everything is near the control knobs. Where can you buy these cables in Moscow and how to crimp the cable? The problem is that the defect was a factory defect; at all ends near the handles of the walk-behind tractor, the cables stupidly came off from the fastenings. And another question, do I need to lubricate the cable? And another question about the clutch. Can the wheels spin when the gear is in gear and the clutch is engaged? In theory no? Or will it still spin a little? And another question, is it possible to manually engage the clutch without using the clutch lever? Or is it very tight? I tried it manually, you need to apply excessive force, but it still didn’t work out completely - I can’t change gear - the sprockets grind when shifting. Thanks for your answer in advance!
This is something new, never happened before
How is it without a lever?
I have a question for you: can you drive on an “agro” walk-behind tractor with 92-grade gasoline? Will there be anything terrible? thank you in advance!)
expressed incorrectly, power take-off shaft clutch cable
I don't understand about this. Good or bad? Does this mean the walk-behind tractor has a problem with the clutch? Could this be related to the type of clutch used?
Bad, problem
When I was setting up the clutch, I put a pipe on the N7a lever, without a cable, and set it up. then the cable
The cables come from motorcycles are much cheaper than original ones, choose the length you need, it is advisable to lubricate the cables if you are not too lazy, it won’t make things worse, pour oil into the box just above the level. Regarding the clutch: your clutch most likely moves when you tilt the engine towards the ground, and when there are no problems at the same time (I had such a problem - I added oil and everything was OK), do not overtighten the cable, the handle should “dangle” 2-3mm and not try to engage the gears without the clutch, all the gears will fail. GOOD LUCK.
Does the cable break at the handle itself? I also tore there. Probably due to soldering it is weakened. It was in vain to buy a new one. Find a nut with an internal diameter twice the diameter of the cable, pass the cable into the nut, then the end back into the nut, tighten well - a loop is formed. Hit the nut with a hammer and you can install it. The clutch lever travel is a few millimeters, it is enough to turn it on and off. I don't seem to be very strong, but I'm not at all tight. It might work out.
I’ll add that it’s a good idea to flatten the threads inside the nut with a beard or something similar before doing this. The thread sometimes cuts individual threads of the cable.
As I wrote earlier, I have had a cable from a motorcycle for two years now, with the original tip, the clutch is squeezed out normally, you can say it’s easy, I’m sorry, but I didn’t understand something about adding oil to the gearbox and to the top, why do you do this, do you want the seals leaked, don’t do this again, there is a control hole through which you need to pour oil (screwdriver bolt, read the instructions a little). Regarding “it grunts when changing gears,” what position is your walk-behind tractor (engine) in? If it is pointing steeply down (towards the ground) or up (towards the sky), then there will be a grinding noise and the walk-behind tractor will move when the gear is engaged, although the clutch will be squeezed out (this is for the future), the reason is banal i.e. The oil in the gearbox flows in the direction of engine tilt, thereby “exposing” the gears, etc. BUT I repeat, DO NOT POUR OIL ABOVE THE CONTROL POINT (you can, if you really want, no more than 5 mm.) Try to keep the walk-behind tractor (engine) parallel to the ground when turning on the speeds, but if this is not possible, then when turning on the speed, help it, i.e. push it with your foot and everything will be fine. And also, do not tighten the cable too much when adjusting, this will not help you, the clutch lever should dangle 2-3 mm. Post a video of your problem.
Source
Topic author: 5
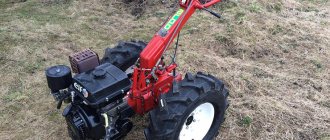
Diesel walk-behind tractor Sadko MD-1050 (6 hp).
— The presence of two power take-off shafts on the walk-behind tractor (one splined shaft, and the second smooth with a key) makes it a universal unit.
You can connect any attachments to these shafts, for example, a rotary lawn mower, a pump, or many agricultural implements.
— If you buy a walk-behind tractor with such attachments as a plow, hiller, trailer, potato digger, hitch, potato planter, rotary mower, lugs, motor pump, etc., your capabilities in terms of performing various agricultural tasks increase significantly.
— The walk-behind tractor can travel almost anywhere, thanks to its large pneumatic wheels.
— And the 6 hp diesel engine installed on the walk-behind tractor. will provide high power and traction at low speeds. At the same time, a diesel engine consumes fuel more economically than a gasoline engine, thereby saving you money.
— The steering wheel of this walk-behind tractor can be rotated 360 degrees, its angle of inclination can be changed for more comfortable work with various attachments; this can be done quickly and easily using special levers.
— Everyone knows how important it is for the walk-behind tractor to work reliably during the season and not let you down. Sadko MD-1050 is one of the highest quality diesel walk-behind tractors on the Ukrainian market.
Diesel walk-behind tractor Sadko MD-1050, reviews:
Nikolay, Chuguev:
I purchased a Sadko MD-1050 walk-behind tractor. No problems so far. Autumn has already worked. At first I didn’t put any stress on it - I ran it in. And then he worked for 6 and 7 hours. It works for up to three hours without a break and doesn’t get hot. My brother has a Forte walk-behind tractor, it’s a good walk-behind tractor, but it gets hot, but mine doesn’t. In terms of fuel consumption, the average was about 700 grams per 1 hour of work. So far I've only used cutters. I'm thinking of making lugs for it from Zhiguli-kopek wheels. The walk-behind tractor was sent already assembled. When hot, it starts the first time, but when it starts cold, it starts abruptly on the 3rd try; there is probably still an error due to the quality of the fuel. It does not smoke during operation. The steering wheel turns perfectly on one side, on the other it turns, but the cables get twisted and start to accelerate on their own, so you have to make sure that the cables don’t twist and turn the steering wheel on one side.
Victor, Kovel:
I purchased a Sadko MD-1050 walk-behind tractor. The season has ended and a positive opinion has formed about the walk-behind tractor. Everything is working. Worked with attachments: a rotary mower and a potato digger. It started up for me the first time. Based on fuel consumption, I can say that approximately a tank is enough for two days of work, but it depends on the mode of operation: if with a mower, then one, if driving on a trailer, then another. It is convenient to adjust the steering wheel.
Vladislav, Kirovograd:
I bought a Sadko MD-900L walk-behind tractor. I haven’t used it much yet, so I bought a trailer for it. There are no questions about working on the ground, it does an excellent job. I used the plow. I don't like the placement of the reverse gear. Starting when cold is a bit difficult. And it smokes a little. You probably need good diesel fuel. I liked cultivating it, we tried it after winter, the soil was hard, so I took it. It would be nice if there was a propeller-type hiller for it.
Principle of operation
The centrifugal clutch has undeniable advantages such as reliability and long service life. This design is used in automatic transmissions. This device consists of a standard set of components:
- flywheel;
- pulley;
- a hub equipped with a stopper groove and a key;
- flange;
- sleeve;
- casing;
- bearing;
- retaining ring.
Due to the connection of the differential with the centrifugal clutch, control of the unit is facilitated, its maneuverability and smooth turns are improved. In addition, the differential regulates the speed of rotation of the wheels and participates in their blocking. Some models of walk-behind tractors use special blockers that allow you to stop one wheel independently of the other.
Modern units can be equipped with mechanisms of various designs. There are several types of these mechanisms:
- frictional - easy to maintain and capable of working for a long time without pauses with high efficiency;
- centrifugal - has the disadvantage of rapid wear of parts of industrial mechanisms;
- belt - does not have high reliability and performance, quickly breaks down on powerful power plants;
- hydraulic - by pressing the pedal, it sets into motion a piston, the rotation of which imparts movement to the lubricating fluid; the force is transmitted from the piston to the connecting rod, and the springs return it to its original position;
- disk - characterized by high reliability of parts and smooth start-up; There are single-disc and multi-disc mechanisms that operate on the same principle.
The important role of the differential
Since this mechanism is part of the transmission, it means it is connected to the clutch. The differential has a difficult purpose - making smooth turns, as well as improving the maneuverability of heavy walk-behind tractors. The purpose of the clutch for the walk-behind tractor and the differential is to regulate the rotation of both wheels at different speeds. In addition, power transmission mechanisms can be equipped with wheel locking functions. However, instead of a differential, a special device can be installed that allows you to disable one wheel while driving.
Centrifugal clutch - design and advantages
This kind of element is worth highlighting among other designs due to its reliability and durability. It is used in automatic transmissions. Its design consists of the following elements:
- Flywheel;
- Pulley;
- Hubs with locking groove and key;
- Flange;
- Bushings;
- casing;
- Bearing;
- Retaining ring.
One of the most important roles is played by the differential device associated with the centrifugal clutch. It helps improve vehicle maneuverability and ensure smooth cornering.
Together with the clutch, the differential regulates the rotation of the walk-behind tractor wheels at different speeds. Moreover, the mechanisms that transmit power together act as wheel lockers. In some models of equipment, instead of a differential, a special device is installed that blocks one of the wheels of the walk-behind tractor at the command of the driver.
More modern models of equipment are equipped with a friction clutch. It is mounted between the engine and gearbox. In this design, the driven parts are closely connected to the gearbox input shaft, and the driving parts are closely connected to the engine crankshaft. In most cases, both the driving and driven elements are made in the form of flat round disks, or in the form of a cone. Just like a centrifugal clutch, a friction clutch is activated by manipulating a separate handle.
What types exist
Depending on the design features of the walk-behind tractor, the mechanism in question can be of the following types:
- friction;
- hydraulic;
- electromagnetic;
- centrifugal;
- single-disc;
- two-disc;
- multi-disc;
- belt
A centrifugal clutch is used to solve various problems, one of which is to make it easier to control a walk-behind tractor. The clutch ensures a smooth start of movement, since pressing against the clutch disc occurs automatically.
It includes the following components:
- clutch cable;
- flywheel;
- release bearing;
- power lever;
- clutch lever mounted on a walk-behind tractor;
- transmission input shaft;
- driven disk;
- pen;
- lock washer;
- stem fungus;
- shutdown plug.
How to adjust the clutch of a walk-behind tractor
For the smooth operation of the clutch system and the entire walk-behind tractor as a whole, it is important to follow the care recommendations and regularly carry out maintenance of the unit. This will avoid premature breakdowns and extend the life of the agricultural unit.
- The clutch lever should be pressed and released smoothly, without jerking, otherwise the sudden impact transmitted to the crankshaft may cause the engine to stop during operation.
- If the walk-behind tractor begins to accelerate sharply when the clutch is depressed, it is necessary to make adjustments by tightening the adjustment screw. To do this, you will need 2 wrenches: 10 and 12. You need to loosen the lock nut and unscrew the adjusting screw. After adjustment, you need to see if there is a gap, and if there is, the screw is clamped and secured with a locknut.
- If the machine drives very slowly or stops with the clutch released, the screw is loosened slightly, after which the movement of the cultivator is tested.
- If extraneous noise occurs from the gearbox of an agricultural machinery, you must immediately stop the engine and check the oil level in the gearbox housing. If there is not enough transmission oil, add it, and then start the walk-behind tractor. If noise persists, disassemble the mechanism and replace worn or damaged elements.
- If problems occur with gear shifting, you must first adjust the clutch. If this does not help, you need to inspect the gearbox and check the shafts - the splines may have worn out. Worn parts need to be replaced.
About the Motor Sich walk-behind tractor
HOW TO CORRECTLY ADJUST THE CLUTCH LEVER?
When the clutch and its drive are in good working order, then only the lever itself can interfere with this if, under the action of the cable, it sticks into the bracket with the stop for the shell. Consequently, here it is necessary either to “lengthen” the cable (on some motorcycles the design allows this), or to “shorten” its shell, which is usually simpler, since its stop is adjustable. The latter should not be taken literally: most coupling designs include special adjusting screws that act on the mechanism in the same way as when simply changing the length of the cable and sheath. In any case, it is important that the lever on the steering wheel when released must have noticeable free play
When adjusted correctly, a working clutch begins to engage when the lever is released a third or half of its full stroke. If this happens later, slipping is possible under heavy loads. When the lever has no free play at all, you can be sure that part of the force of the springs in the clutch is wasted on stretching the cable, and not on compressing the disk pack. Consequently, in difficult road conditions, where maximum traction force is required, the clutch may fail.
Replacing disks
The discs are replaced after draining the transmission oil and removing the left engine cover. Unscrew 5 M6 screws and remove them along with washers and pressure springs. The clutch has 5 discs with friction linings and 4 metal pressure discs. Lightly lubricate new discs with oil before installation. When replacing discs, the clutch must be adjusted .
What causes malfunctions in the ignition system of Mole walk-behind tractors?
If we analyze the situation using the example of walk-behind tractors from the Krot office, malfunctions may occur due to the fact that the spark plug insulators turned out to be faulty. If such a situation arises, any of the systems must be replaced; if this is not done, the ignition on the Mole walk-behind tractor will constantly suffer from problems of varying degrees of difficulty.
The unit is equipped with a “Stop” button; a short circuit to ground may occur in order for the engine to start; this problem must be eliminated. Other violations may be associated with the contacts of the spark plugs, in which case they need to be put in order. In some cases, the engine may not start if the gap between the magnetic boot and the starter is not provided, as indicated in the instructions. If the starter is not working properly, it will also have to be replaced.
Several circumstances of the failure of the ignition system in this walk-behind tractor
Checking the ignition coil
Before you check the ignition coil of your own unit for possible problems, you need to be aware of exactly how it looks in a broken state. At first, the farmer should conduct a visual inspection. Often breakdowns are caused by cracks, dents or similar mechanical damage appearing on the spare part. If there are no such problems, the coil is intact, without visible flaws, it will be necessary to carry out some additional checks of this element.
To do this, you should know how to disassemble a walk-behind tractor and at the same time learn methods for eliminating problems and their circumstances. The test is to change the resistance characteristics of the coil.
This technique is not the most popular today, because not every peasant has information about what the best winding resistance parameter on an existing unit should be. Another difficulty in checking may be due to the fact that the resistance indicator contains semiconductor elements used to generate the required high-voltage pulse. Against the background of this situation, when trying to ring the coil of a motor cultivator through a high-voltage or negative wire, a person will receive a very high resistance value, unless a circuit break occurs earlier.
Another method of checking ignition system parts is to use a spark plug. To do this, unscrew it and attach it to the cylinder. Next you need to pull the starter cable and see if a spark appears between the contacts. With all this, the master must be aware that such a technique will not allow him to accurately determine which part is the cause of the breakdown.
This is due to the fact that during the test the spark plug is under a certain pressure, due to which the flywheel is able to spin faster than usual. Any of the methods listed above should be used exclusively in cases where the farmer does not have the ability to contact a highly qualified specialist. To do this, a person must have the ability to work with electricity, because otherwise there is a risk of electric shock.
Sources:
https://svistun.info/pro-texniku/kak-otregulirovat-stseplenie-na-motobloke-zubr.php https://uvlechenie.info/tehnika-v-voprosah-i-otvetah/kak-otregulirovat-stseplenie-na -motobloke-kentavr.php https://garden-shop.ru/kak-pravilno-otregulirovat-i-nastroit-plug-na-motobloke.html https://promotoblok.ru/regulirovka-scepleniya-motobloka-2/ https http://vsemotobloki.com/motobloki/regulirovka-zazhiganija-na-motobloke.html
How to replace a clutch cable
If the cable breaks, the movement of the machine becomes impossible. This problem can be solved by replacing this device. Before removing the unusable element, it is necessary to inspect and take appropriate measurements of the loose part of the lower end cable located next to the gearbox. Then check it visually between the mounting point and the clutch block or gearbox (type of gearbox). Next, we look for the place where it connects and carefully unhook it from the block or gearbox, pulling it into the car interior through the engine compartment.
If the need arises, you should remove the part of the floor that is located under the pedal to make replacement more convenient. Finally, disconnect the pedal and cable. After this, we remove the damper from the bracket located on the box. To install a new element, you need to perform all the steps in reverse order.
We first connect the new cable to the pedal. Then we tighten it back to the clutch block or gearbox and secure it. The last step is to install the floor under the pedals.
The clutch cable has been replaced. Next, adjustment is needed. Professionals recommend performing these actions not only when a replacement has been made, but also every 15–17 thousand km. This advice is explained simply: the linings located on the clutch disc wear out over time and contribute to loosening of the pedal. As a result, adjustment of this element is simply necessary as a safety measure during operation of the machine.
Adjustment
During long-term use, this mechanism gradually wears out, which requires adjustment. Let's take a closer look at how this procedure is performed:
- first of all, you should choose a comfortable and spacious place;
- it is necessary to disconnect the clamps;
- it is necessary to release the tension cable;
- Next, you need to lubricate everything with a special substance;
- after this, the cable is tightened and the spring is shortened;
- the bearing needs to be turned to a more suitable position.
During the adjustment process, it is necessary to adjust the length of the cable so that squeezing the handle does not require much effort.
Important! When adjusting (adjusting) the clutch of a walk-behind tractor, it is necessary to lubricate the elements, otherwise there is a risk that the tensioner will break or will not be pressed well again.
Soil type
When answering the question of how to choose a walk-behind tractor, the first thing you need to pay attention to is the density of the soil that you have to cultivate. The heavier the earth, the more powerful and heavy the mechanism will be required. A walk-behind tractor weighing up to 70 kg will pull a hiller or plow only on light ground without slipping
For virgin lands and heavy soils, its weight should start at 95 kg
A walk-behind tractor weighing up to 70 kg will pull a hiller or plow only on light ground without slipping. For virgin lands and heavy soils, its weight should start at 95 kg.
Speaking about the power plant of the walk-behind tractor, it should be noted that a diesel engine is better than a gasoline engine for cultivating heavy soil. It has a higher traction force, longer service life and low fuel consumption. The disadvantage of such a motor is that it is difficult to start at air temperatures below +2C.
Walk-behind tractors weighing less than 150 kg when working with a hiller, plow or potato digger must be equipped with lugs - metal wheels.
Do-it-yourself clutch for a walk-behind tractor
Regular operation of the clutch system involves constant friction of its parts, which is why even the most reliable mechanism sooner or later becomes unusable. After this, you can buy a new device, or try to make a homemade clutch for an agricultural machine.
Before making a clutch for a walk-behind tractor, you will need to prepare certain parts. To work you will need:
- Flywheel and input shaft taken from a gearbox from a Soviet Moskvich;
- Steering knuckle and serviceable hub from Tavria car;
- Driven pulley equipped with two handles;
- Crankshaft from a GAZ-69 car;
- B-profile.
- First, grind the used crankshaft so that it does not touch other internal elements of the device;
- Next, place the standard hub of your walk-behind tractor on the shaft;
- Make a hole in the surface of the shaft to install the bearing. As a result, the hub should be installed without the slightest gap, and the pulley itself should rotate freely around its axis;
- After this, turn the crankshaft over and do the above steps on the reverse side;
- Then make 6 holes in the pulley using a drill with a 5mm bit. There should be the same distance between the holes. Keep in mind that 10mm bolts will be screwed into the holes, so you also need to drill holes on the back side of the pulley;
- Place the pulley on top of the flywheel and bolt the two parts together. Next, mark the places where you need to drill holes. Please note that they must line up with the holes previously drilled in the pulley;
- Pull out the pulley and drill small holes in the flywheel;
- Grind the surface inside the flywheel and shaft so that the parts do not touch each other;
- The mechanism should include the clutch handle on the walk-behind tractor. To make it, take a pipe 30 mm long and about 10 mm in diameter, and fasten it to the pulley;
- You can take the walk-behind tractor clutch cable from an old chainsaw, or buy a new cord and wind it on a reel.
The self-made clutch is suitable for installation on Agro, Neva MB-2 walk-behind tractors and other brands of agricultural machines.
The clutch is tightly interconnected with the gearbox. It performs quite important functions. Namely, it transmits torque from the crankshaft to the gearbox located in the transmission, disconnects the gearbox and the crankshaft (this is done when changing gears). This mechanism also ensures smooth running of the walk-behind tractor from a standstill. Thanks to it, it is possible to stop the equipment without turning off the engine (this is possible through the clutch lever, cable and the entire system as a whole).
Extensive functionality
The grip on the walk-behind tractor is of great importance when driving. Without it, it’s difficult to get going, although it’s possible. If it fails, it is better to immediately begin repairing it. A malfunctioning clutch for a walk-behind tractor in a manual transmission leads to damage to the entire transmission. In this sense, the centrifugal clutch has proven itself better, since it has found application in automatic transmissions. If it fails, the walk-behind tractor will not budge at all, which means it will not cause other damage.
The centrifugal clutch for a light walk-behind tractor includes:
- flywheel;
- hub with locking groove and key;
- pulley;
- flange;
- bearing;
- sleeve;
- retaining ring;
- casing
Making a clutch for a heavy or light walk-behind tractor with your own hands requires certain knowledge and experience. If you have them, then get started right now. For reliable operation of the centrifugal type, it is necessary to reduce the weight of the pads to 110 grams. Initially, each of them weighs 134 grams. It is necessary to remove the rubber rings from under the pads and install rigid springs in their place.