Guide to covering doors and installing locks on a gazelle business: we present it in detail
Most minibuses produced today are equipped with a sliding passenger door. In a regular car, even if central locking is not initially provided, it will always be easy to install actuators and connect them to the lock rods. Installing a central lock on a Gazelle, if we are talking about a sliding door, looks a little more complicated. But still, this task is completely solvable, even for beginners. The main thing is that when installing the actuator, the door itself does not need to be removed. Further, all operations are considered in more detail.
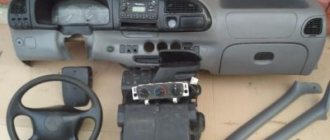
Salon
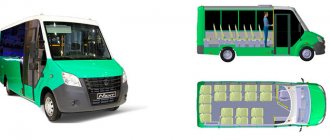
The cabin of the car is designed to accommodate three people. But during long hauls, passengers feel cramped. It is advisable to remove the driver's seat and sofa, installing instead spacious and comfortable pneumatic furniture with armrests and settings. The space between the seats can be filled with a console or subwoofer. If funds do not allow, the chairs are upholstered with white upholstery material.
Tuning the GAZelle interior includes the following improvements:
- installation of electric glass lifts in the cabin doors;
- securing a shelf with sliding doors above the windshield;
- installation of a new steering wheel with an adjustable column;
- finishing of all surfaces with soundproofing materials and leather;
- installation of a monitor and radio with powerful speakers;
- replacing the heater with a more efficient and compact device, installing an air conditioner;
- covering the dashboard with film or fabric;
- arrangement of night and emergency lighting using LED lamps and strips.
Installation of doors and locks
GAZelle sliding
has the following device:
- Side windows.
- Upholstery.
- Glass.
- Edge of the opening.
- External and internal handle.
- Lock.
Door lock device:
- A locking mechanism that closes the lock and secures it.
- Lever mechanism - for opening the lock from the outside or from the inside and locking it.
- Retainer tires, which are used to hold the system in an emergency situation.
Automatic rear door lock. It complies with safety standards. Locking mechanism
comprises:
- mechanism base;
- rotor with finger;
- fist with finger;
- return springs;
- buffers;
- base cladding;
- spacer bushings.
Locks are used to avoid theft of objects from inside the car and unauthorized access to the vehicle. If there is rattling or sagging, the following repairs are possible:
The lock has internal and external drives. Structure of the lock and its drives:
- Tractions.
- Clamps.
- Stopper lock drive.
- Stopper body.
- Stopper latches.
- Adjusting gaskets.
- Power off button.
- Lever arm.
- Lever mechanism.
- Locking mechanism.
- External handle rosette.
- Latch.
- Tips.
- Stopper slider.
How the central lock works
Mechanical door locks are equipped with a so-called “pawl” or button. There is a rod from the button to the main mechanism; it is made in the form of a wire rod. If this rod is moved by a motor, the state of the lock (open/locked) can be controlled. This is what is done in practice if you install the actuator:
Electric central locking drive in the doors
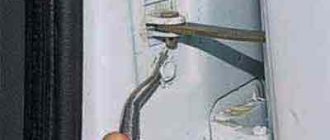
For a sliding door, as is easy to understand, the task becomes more complicated: it will not be easy to connect the wires to the electric motor. Typically, a detachable contact is used, which is designed specifically for buses.
Sliding door contact group
The kit shown in the picture costs about 300 rubles.
Now we can talk about what types of actuators there are. The contacts on the door are connected to two wires, which means you can only install a two-wire actuator and not any other. Such a device, of course, contains an electric motor inside. According to reviews, not the most powerful electric drive is suitable for the Gazelle sliding door. The force of 6 kg developed by it can be considered sufficient. The current strength for such devices does not exceed 4 Amperes. You can also buy three-amp actuators that develop less force (4-5 kg).
Actuator Kit, 4 Amps
Installation of doors and locks
The GAZelle sliding door has the following device:
- Side windows.
- Upholstery.
- Glass.
- Edge of the opening.
- External and internal handle.
- Lock.
Door lock device:
- A locking mechanism that closes the lock and secures it.
- Lever mechanism - for opening the lock from the outside or inside and locking it.
- Retainer tires that hold the system in place in an emergency.
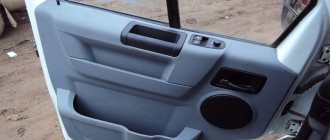
Card making
To install the card, you need to disassemble the right or left door, depending on where you plan to install the cards. Let's look at how to make the part yourself:
- Cut rings from 10 mm plywood.
- Make a fitting from the inside and cover it with Lycra.
- Treat the workpieces with resin, glass mat, cut off excess pieces, wait until dry.
- Try on the speakers, level the shape using putty and fiberglass, carry out final putty, and try on.
- Stretch the material over the card, screw it around the perimeter, make sure that the casing is firmly seated on the pistons and screws, and secure it.
Malfunctions and repairs
In case of rattling and sagging, the following repairs are possible:
- replacement of seals;
- fake the hinges so that there are no backlashes.
The sliding door in a GAZelle may open and close poorly or jam. With strong claps, all adjustments may be disrupted. If the door does not open, you can try to fix the problem yourself.
To do this, you need to insert the rod from the handle into the slot of the plank using a nail with a head. Pull the handle from the interior towards you as much as possible and carefully guide the rod into the slot.
How to remove the trim
- Use a thin screwdriver to pry off the 2 handle plugs.
- Using a socket or a 10 mm tubular wrench, unscrew the 2 bolts and remove the handle.
- Unscrew the screw securing the lock handle socket.
- When removing the socket, pull the handle towards you.
- Having pressed out the rubber socket of the window lifter handle, use a needle to press out the locking pin and remove it from the hole.
- The handle with the socket is removed.
- Using a screwdriver, remove the 8 plastic upholstery clips.
- The door trim is removed.
- Carefully remove the soundproofing gasket, which is glued to the sealant.
You can replace the old trim with the same one as the door trim on GAZelle Next.
Adjustment
Adjusting GAZelle doors:
- Fastenings become loose.
- By adjusting the upper support roller, the correct position of the gap is established.
- You need to adjust the middle rail carriage bracket until all the gaps are parallel. To do this, you need to remove the casing and loosen the carriage fastening. Lift the edge of the door until the gaps are parallel and tighten the fasteners.
- The rear edge is adjusted with a bolt.
- The thorn should not go all the way into the socket. If it fits, then you need to put a gasket under the tenon socket on the rack.
- The bolts on the tenon socket on the stand are loosened so that they can be moved with force. The nests are placed in the right places, they should be fixed. When approaching the post, the centers of the spikes should be above the centers of the sockets.
- The bottom guide should not touch or scratch anything, and the bearing should roll along the guide.
This adjustment can be difficult if you cannot get even gaps.
Next style skins
Good time everyone!
A small number of improvements have accumulated during the time that Gazelle has been under my ass, so to speak. In general, I always deal with gazelles myself. Oil change, syringe, every two years (approximately) painting of the frame, muffler, etc. Like, so that you won’t be ashamed of your car. Basically, I do all this on weekends, because the car works during the week. Over the weekend, I serviced the car, it’s fine and ok... But when it’s next to me now, I want to do a little more than that. Idk, my hands are itching or something... Today I’ll tell you about my experience in replacing door trims with plastic ones, the “luxury” type. The entry was already on the blog, but I think it belongs here. The first thing I want to note! Don't expect it to be fast. You'll have to tinker with matching the trim to the door. Trim in places, sand in others. I didn't go into much detail about these skins. They seem to be for “business”, but at the same time they are not suitable! But not from next! Interesting point. I had several goals. Beautiful, convenient, lots of pockets, refresh the look of the interior, larger speakers and without any protruding podiums, power window unit at the top, within reach. So. We remove the old casings, use a marker to mark the places that will have to be cut out and bent. Otherwise, the casing, stupidly, will not stand up.
Great, nothing complicated. I sawed with a grinder. Next you need to fit the trim to the door. Doesn't fit in corners at all. I did this with an electric Dremel. I sharpened/attached... and so on quite a few times until I was satisfied with the result.
Source
Removing the sliding door trim
Using a 12mm socket, unscrew the two bolts securing the door stop.
Using a screwdriver, unscrew the two screws securing the socket of the inner handle of the lock
Using a thin screwdriver, we remove 15 plastic mushrooms from the upholstery fasteners. The caps of the mushrooms are fragile, so if you cannot remove the mushrooms from the fasteners, we bite off the caps of the fasteners with side cutters
Remove the upholstery along with the clips.
We remove the fasteners with the bitten off caps using pliers. Carefully, so as not to tear, remove the thermal and noise insulating layer from the door
Install the upholstery in reverse order
Removing the sliding door lock
In the inner cavity of the door, using a “10” key, unscrew the locking switch lock bolt 2-3 turns.
We take out the switch from the outside of the door.
Using a screwdriver, “unsnap” the rod of the inner handle from the lock.
Using a screwdriver, unscrew the two screws securing the handle.
Replacement of cabin glass for GAZelle Next 4.6t.
To glue the glass of the wind window to the opening, the following materials are used:
The following adhesive compositions may be used in combination with original primers:
- glue EFBOND DA 280 (brand “D-plast Eftec” Switzerland); universal primer EFBOND DA 930 (brand “D-plast Eftec” Switzerland);
- glue Sika Tack go4it (F. “Sika”, Switzerland); primer Sika Primer 206 G+P (brand “Sika”, Switzerland)
- Betaseal 1230 glue (DOW Europe GmbH, Switzerland); universal primer Betaprime 5061 (DOW Europe GmbH, Switzerland).
Primers are black liquids based on polyurethane containing a solvent.
To replace glass you need:
- remove the windshield wiper arms with blades, air intake cover, hood, A-pillar upholstery, instrument panel and front fenders from the cab;
- pierce a hole in an accessible place in the seal and adhesive layer between the glass being replaced and the opening, pass a steel string through the hole. Using a stretched string, cut off the glue around the perimeter of the glass, protecting the paintwork of the body from damage, and remove the defective glass. The operation must be performed by two people;
- remove dirt and remnants of the old seal, use a sharp knife to smooth out the glue remaining on the window opening, leaving a layer of at least 1 mm thick on it. The adhesive left on the opening provides an ideal basis for adhesion to liquid polyurethane adhesive;
- install a new seal 3 around the perimeter of the glass;
Window glass installation.
*Dimensions are constant along the contour.
1 – glass; 2 – adhesive layer; 3 – seal.
- degrease with a cloth moistened with Nefras the surfaces of the opening of the cabin wind window and the glass with sealant to be glued. Drying time 0.5-1 min;
- Apply an applicator or soft brush evenly, in a thin layer, without gaps, a strip of universal primer or original primer for metal 23-25 mm wide onto the opening of the wind window (to those areas where there is no hardened glue left). Allow at least 5 minutes before gluing. Do not allow the applied primer to touch with your hands or cleaning material;
- Apply an applicator or soft brush evenly, in a thin layer, without gaps, to the glass surface along the edge of the seal, a strip of universal primer or glass primer 11-13 mm wide. Allow at least 5 minutes before gluing. Do not allow the applied primer to touch with your hands or cleaning material;
Applying primer to the glass surface to be bonded.
1 – glass; 2 – primer; 3 – seal.
- Unscrew the nozzle from the cartouche with glue and make a cutout in it;
Nozzle for applying glue.
- Use a knife to separate the bottom of the cartouche with glue, pour in desiccant powder;
- pierce a hole for the glue to exit from the cartouche, screw on the nozzle;
- install the cartouche with glue in the device and apply glue along the perimeter of the glass in the form of a continuous strand of triangular profile with a height of at least 10 mm. The joint of the glue bundle must be located at the bottom of the glass, the overlap length of the joint of the glue bundle (lock) is at least 15 mm;
A device for squeezing glue out of a cartouche.
Applying glue.
1 – seal; 2 – glue; 3 – nozzle; 4 – device for squeezing out glue; 5 – primer; 6 – glass.
- no later than 15 minutes after applying the glue, using holders (suction cups) attached to the outside of the glass, install the glass in the window opening (perform the operation together), ensuring uniform gaps with the mating panels of the cabin, and press the glass to the flanges of the opening.
The adhesive should not protrude beyond the dimensions of the glass outside the cabin and onto the flange of the opening inside the cabin.
The lip of the seal must be adjacent to the flange of the opening;
- fix the glass for 2 hours with rubber bands, threading them around the pillars inside the cabin (with the doors open);
- After 5-6 hours, check the tightness of the connections between the glass and the metal by pouring water from the outside with a hose around the perimeter of the glass. If necessary, coat the leakage areas with polyurethane glue and sealant;
- install the removed parts on the cabin.
Replacement glass for fixed side window and rear door.
To remove the glass, you need to hold the glass from the outside and push it out from inside the cabin, starting from the top corner of the glass.
To install new glass you need:
Removing sliding and fixed glass doors.
Removal of damaged sliding and fixed glass doors must be performed in the following order:
- remove the outside rear view mirror (see subsection “Exterior rear view mirrors”);
- remove the door trim (see subsection “Removing and installing the door trim”);
- remove the fixed glass with the seal by squeezing it out from inside the cabin;
- remove the door handle bracket;
- lower the window regulator slider with the fixed sliding glass to the mounting window, loosen the two screws securing the glass on the slider;
- remove the rear race of the groove;
- remove the power window (see subsection “Replacing the power window”);
- lower the glass down and remove it through the mounting window.
Install new glass in the reverse order of removal. The tightening torque of the door handle bracket mounting screws is 7-10 Nm (0.7-1.0 kgfm).
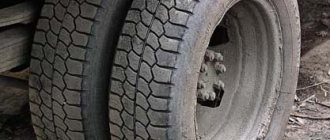
What to do if the side door on a Gazelle does not open
When a Gazelle's side door is jammed, opening it will cause problems, since motorists do not want to damage the internal mechanism. GAZ 2705, 3302 and similar models have almost the same door card design. The upper guide carriage may jump in them or a malfunction may occur in the closing device. To decide what to do when it is impossible to open the door, you need to identify the cause of the breakdown, and then select the optimal algorithm of action.
Main reasons
A Gazelle is a car that is mainly purchased for business. In Russia it is used as a minibus for personal purposes or transporting a large number of people in the form of a private cab. To open the structure without damaging the door leaf when the Gazelle side door guide is jammed, you need to choose the appropriate method of procedure. It is calculated depending on the situation and the nature of the fault. Causes:
- Damage to hardware. The door may stick. Sometimes the pawl flies off, which creates a smooth motion of the carriage.
- The middle or rear pin, which is responsible for fixing the blade during opening, sinks.
- One of the passenger door electronics has burned out. It may short out due to frequent vehicle washing or climatic conditions.
- Careless handling of the structure. Passengers often slam the door forcefully when leaving the vehicle.
- Lack of maintenance of the sliding canvas. The door may jam. Diagnostics, prevention, lubrication and adjustment work should be carried out regularly.
Options
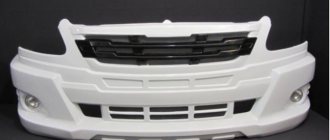
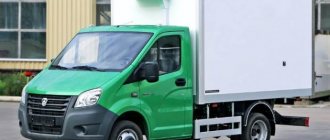
The topic of vans is vast; a separate article could be written for each type. The reason for this is the many design nuances. It is impossible to list everything, but some need to be mentioned.
- Elongation. A long van requires a long wheelbase. Extending the car will cost from 15 to 60 thousand rubles. The longer, the more expensive.
- Doors and partitions. The “layout” of the van can be anything. A partition divides the van into two sections, for example, one for frozen meat, the other for groceries. The partitions are movable. They are several times more expensive, but they allow you to change the size of the sections. Doors and gates can be placed on any side in any quantity.
- Floor covering. This is usually bakelite plywood or galvanized steel. If liquid will drain onto the floor of the van, it is better to order a completely sealed aluminum floor with flanging and welded seams. There are other options - poured floor, reinforced plastic.
- Sheathing. Choose the material you need. If the cargo in a manufactured goods van will stain the walls, you can sheathe them with galvanized sheets. Isotherms for non-food cargo do not need to be sheathed with galvanization; sometimes plywood is better suited.
- Frame/frameless. The metal of the frame conducts heat, which means it worsens the thermal insulation. It is also believed that without a frame the van weighs less. Opponents of frameless construction argue that to achieve sufficient strength, the walls need to be strengthened and there will be no gain in weight. And if the van does start to fall apart, it will be impossible to repair it. Manufacturers, however, do not agree with this; they position frameless vans as premium and sell them 2–3 times more expensive than frame vans.
- Euro tent options. Only for Euro vans are available: an awning covering the sides, a light-transmitting roof, a sliding awning sheet on rollers, replacing steel sides with plywood, aluminum or plastic, an awning of any color or with an advertising image.
- Accessories. These are locking mechanisms, latches, hinges, handles, slats and rings for securing cargo, ventilation hatches, folding steps, etc. External fittings, especially locking mechanisms, are usually galvanized or stainless steel.
Opening methods
If the Gazelle Next does not open, or the side sliding door is jammed, then professional and homemade methods for repairing the door leaf are used. When the lock is blocked and it is not possible to get inside, you can choose any of the options listed below to correct the situation. To work, you will need some tools that are in every driver’s car.
It will not be possible to open the door itself from the outside without a key without damaging the structure. First you need to get into the salon.
Screwdriver and seal
If the side door on a new Gazelle is jammed in winter, you can still try to open the door without a key; for this you need:
- Use a flat-head screwdriver to pry out the glass seal.
- Manually lower the element.
- Enter the car through the passenger door next to the driver.
Using a screwdriver, you can unscrew the side door bumper; the round fasteners on the Gazelle are hidden under plastic plugs.
If you have a strong wooden stick or an iron rod with a hook at the end at hand, you can try using them to unlock the mechanism. The wedge needs to rest between the frame and the stand. It is important to act carefully so as not to damage the paintwork. When a gap appears between the glass and the seal, you can lower the window or press the lock.
A loop
To get into Gazelle Next when the sliding door is jammed, use a wire. Its length should allow you to reach the locking button. You need to make a loop at the end of the metal cord. In size it should be slightly larger than the opening button. Lowering the glass a little, the wire is lowered into the target and placed on the blocker button.
Manual method
The door operates by an electric drive, so before starting, you should press the “emergency opening” button on the on-board panel. To unlock the Gazelle Farmer, if the door does not open from the outside, you need to do the following from the inside:
- Place your foot on the footrest.
- Place your knee on the door.
- Pull the handle towards you and push. The door leaf should slide out.
You can always call specialists for help or use barbaric methods. You can drill out the lock cylinder with an electric drill, knock out the locking mechanism with a hammer, or call the emergency service.
Next style skins
Good time everyone! A small number of improvements have accumulated during the time that Gazelle has been under my ass, so to speak. In general, I always deal with gazelles myself. Oil change, syringe, every two years (approximately) painting of the frame, muffler, etc. Like, so that you won’t be ashamed of your car. Basically, I do all this on weekends, because the car works during the week. Over the weekend, I serviced the car, it’s fine and ok... But when it’s next to me now, I want to do a little more than that. Idk, my hands are itching or something... Today I’ll tell you about my experience in replacing door trims with plastic ones, the “luxury” type. The entry was already on the blog, but I think it belongs here. The first thing I want to note! Don't expect it to be fast. You'll have to tinker with matching the trim to the door. Trim in places, sand in others. I didn't go into much detail about these skins. They seem to be for “business”, but at the same time they are not suitable! But not from next! Interesting point. I had several goals. Beautiful, convenient, lots of pockets, refresh the look of the interior, larger speakers and without any protruding podiums, power window unit at the top, within reach. So.
We remove the old casings, use a marker to mark the places that will have to be cut out and bent. Otherwise, the casing, stupidly, will not stand up.
Great, nothing complicated. I sawed with a grinder. Next you need to fit the trim to the door. Doesn't fit in corners at all. I did this with an electric Dremel. I sharpened/attached... and so on quite a few times until I was satisfied with the result.
Source
Removing the right rear door lock
When the driver was able to get inside, it is necessary to open the lock. If this cannot be done using the standard method, you will have to disassemble the door card. To do this you will need a set of screwdrivers, a socket wrench number 10, 8, and pliers. Algorithm:
- Remove the plugs to unscrew the handle fasteners.
- Unscrew the bolts with a wrench.
- Remove the screws that hold the limiter clamp.
- Remove the limiter bracket.
- Remove the inner handle rosette.
- Unfasten the top row of clips that secure the trim.
- Turn off the switch rod.
- Remove the cotter pin securing the leash.
- Loosen the lock switch fastenings with a 8 key.
- Unfasten the bottom row of clips. Remove the panel.
Once access to the lock is gained, it can be removed or the lock removed without dismantling.
Measures to prevent blocking
To ensure that the door can close correctly even after long-term use, it is important to timely adjust individual elements and take care of the car. Basic rules and actions:
- You should open the Gazelle door carefully to avoid slamming.
- Carry out lubricating actions, additionally use an anti-corrosion substance.
- It is good to dry the Gazelle after washing in winter.
- Adjust the door, lock, handle using special bolts on the stand.
- Periodically check the operation of the drive.
You should also remember to promptly change accessories that have worn out. The price of the sliding door kit is 1000 – 2000 rubles, depending on the manufacturer.
With trailer
A GAZelle with a trailer requires the driver to have a license of different categories depending on the characteristics of the vehicle. With a maximum permissible vehicle weight of up to 3500 kg:
- Category B allows the use of a light towed mechanism weighing up to 750 kg.
- A certificate with the BE mark is required for a structure whose weight exceeds 750 kg, and the amount with the car is more than 3500 kg.
With a maximum permissible machine weight of more than 3500 kg, the worker needs category C:
- A license with classification C for driving a vehicle with a light trailer whose weight does not exceed 0.75 tons.
- A certificate with the CE mark is required for a structure whose weight exceeds 0.75t, and the amount with the car is more than 3500 kg.
On passenger modifications, installation of a trailer is possible if you have a category certificate:
- D and D1 - in case of using a light trailer up to 0.75 t;
- DE or D1E - in case of using a heavy structure whose weight exceeds 0.75 tons.
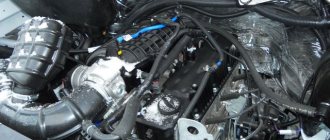
The production of this brand of cars began in 1994. After restyling the van, the GAZelle Business model was launched into mass production. The next stage of development is GAZelle Next. It formed the basis for numerous modifications: trucks and light-duty vans began to appear (Barguzin, Valdai and Sobol).
In accordance with the law, a person with the necessary category of rights is allowed to drive a GAZelle. To obtain them, you will need to complete a theoretical and practical training program. Upon completion of the course, you will pass an exam.
GAZelle categories can be re-registered from one to another. To do this, it is enough to remove or install additional passenger seats, dismantle or change the trailer, or carry out other measures, then register the changes with government authorities. Exact information about the maximum permitted weight, carrying capacity and other characteristics of the car model are contained in the vehicle passport.