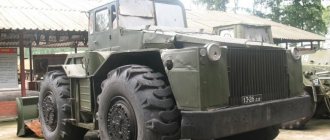
The gearbox control rod is one of the most unfamiliar elements of the transmission. Motorists usually call this part a rocker. Since this part of the box is not visible from the outside, many “young” car owners, naturally, often mistakenly mean the gear shift lever by traction.
Let's talk about signs of wear and adjusting the traction of the 4-speed gearbox on the UAZ “Bukhanka”.
Diagram and features of the UAZ 452 gearbox
The UAZ gearbox is designed to transfer the force created by the car's engine to the transmission, stepwise changing the speed of rotation and, accordingly, the speed of the vehicle.
It provides reverse gear and the ability for the car to stand with the engine running. The gearbox on the UAZ 452 is located under the bottom of the vehicle between the clutch and the transfer case and is attached with studs to the clutch housing. Its weight is about 34 kg. The operating principle of the UAZ 452 gearbox is based on the mechanical transmission of torque through pairs of toothed gears with different numbers of teeth and different gear ratios. The UAZ loaf gearbox provides 4 forward driving modes with the following gear ratios: 4.12; 2.64; 1.58; 1.00. The reverse gear ratio of the UAZ 452 gear shift mechanism is 5.23.
Gearbox repair: is it easy to do on a UAZ?
If you are the owner of a UAZ and there are suspicions that the gearbox has failed, then you should definitely undertake repairs. The unit fails when the driver has to hold the gearshift lever while driving when they begin to shift on their own (to prevent this, drivers tie them with ropes). Sometimes squeaks are heard.
To get acquainted with the repair technology, read about repairing the UAZ 452 gearbox yourself. First you need to determine the type of UAZ gearbox that is on the car. Despite the differences between car models, they are equipped with the same transfer cases. Therefore, we can assume that the repairs are carried out almost identically. To do this, you will need a set of keys, some tools and auxiliary aids (their list is given below).
Start of repair of the UAZ 452 gearbox on your own: gearbox, transfer case
On most car models of this type, both parts are one piece. The weight of such a unit reaches 75-82 kg, so you will need an assistant. If the vehicle being repaired has a safety cage, then you can use a hand winch to remove the UAZ 452 gearbox for repair.
The machine must be placed on level ground, since subsequently it will have to be moved 0.5 m forward or backward. First drain the oil. Both boxes have a common volume, but the plugs for draining the liquid are separate. While the oil is pouring out, you need to remove the front seats and unscrew them, and then put the hatch halves on the floor of the car. Next comes the turn of removing the speedometer rods.
When the oil has drained, screw the drain plugs into place. There is a frame cross member under the handbrake drum; it must be removed. Disconnect the front axle clutches and unscrew the front driveshaft. If you find that the nuts on it are weak, then you need to remove this part.
If a UAZ 3303 gearbox is being repaired, you need to be careful with the clutches. The car is moved 0.5 m (in any direction) and the rear cardan is removed through the hatch. Disconnect the muffler from the transfer box and loosen the clamp on it. Then the following parts are removed one by one:
- clutch pan;
- fastening the oiler from the input shaft (it is located on the right, on the bell);
- 4 bolts that hold the clutch fork housing;
- adjusting the cylinder rod and fork.
The transfer case is wrapped with rope and suspended. The following parts are removed:
- pillow bolts;
- nuts holding the bell box fastening.
During these actions, the engine, when repairing the UAZ 452 gearbox on its own, must be supported with a jack. When the box is free, it is lowered and removed from under the car. The levers must first be removed. The bell pins need to be replaced with new ones.
If you need to repair the UAZ Patriot gearbox, then you need to take into account that the location of the box and bell is reversed. This also applies to the location of the rods. But in general, the technology for repairing the UAZ 452 gearbox on your own is suitable for use.
Unscrew the bolts and nuts, disconnect the gearbox and its transfer case. There is a gasket between them, reinforced with sealant, so you will have to hit the bracket securing the unit to the frame several times.
UAZ Patriot checkpoint diagram
Do-it-yourself disassembly and assembly
First, you need to remove the input shaft cover and unscrew the left nut that is located on it (see figure). Now you need to remove its bearing. If it fails, it must be replaced. Its roller “brother” is installed inside the shaft; it also needs to be replaced. Then the retaining ring is removed from the secondary roll. Unscrew the double row bearing stopper. The shaft needs to be knocked out and the part replaced.
Transmission diagram
Let's look at an example of a gearbox design diagram and the features of this unit. The engine gearbox housing contains several types of drives, including:
- transmission drive shaft;
- intermediate shafts;
- driven shaft of the UAZ 452 gear shift device.
Bearings serve as supports for these nodes of the transmission. It is worth paying attention to the picture posted here. The diagram on it explains in sufficient detail the structure of the transmission: the front bearings are roller type, and the rear bearing has a double-row ball modification. The driven shaft has a front bearing mounted into the end of the drive shaft. The driven axle is equipped with gears of 1st, 2nd, 3rd gearbox operating modes, and the intermediate axle is equipped with gears of 2nd and 3rd gears of the UAZ 452.
As the diagram of the UAZ 452 gear shift device shows, the 1st stage gear has a larger diameter and is located in the rear part of the driven shaft, while the gear from the third mode is the smallest in size, located in the front part of the driven shaft, next to the synchronizer clutch.
In the lower part of the crankcase, where a separate axle is located, reverse gears are installed. The side cover of the gearbox hides inside the crankcase a control device for switching engine operating stages. A gear mechanism is mounted in its rear part to send readings to the speedometer.
Operating principle
In order to understand and imagine how the process of changing the speed modes of the engine and the corresponding indicator of the permissible speed occurs, let us turn to a short explanation. The lower stages, which ensure the vehicle starts, are activated by the most powerful gear, which moves along special skids located on the driven shaft. This action allows you to transfer enough force to a heavy car for the car to start moving.
As soon as the car starts moving, you can switch to second gear, due to which the car does not stop and its movement is not very fast. However, the second speed stage will not be enough if you need to reach a speed of about 40-50 km/h. In this case, higher gears will be required.
As for the 3 and 4 speed modes and the corresponding gears, which provide a high number of revolutions per second, they are controlled by a synchronizer clutch. Some modifications of the gearbox on the UAZ 452 were produced, where the switching of 1st and 2nd speed modes of the transmission was also carried out using an additional synchronizer clutch. However, in this case we are considering a transmission option with one synchronizer clutch.
The UAZ gearbox has a synchronizer, which is designed to smoothly switch on modes by equalizing the rotation speeds between the intermediate and driven shafts. This feature of the device not only provides more comfortable driving, but also protects the leading clutch mechanisms from damage and rapid wear.
Behind the scenes replacement of UAZ 452
The mechanism is universal and suitable for installation on a car of any model year and with a different type of engine; it is also used for 5 speed transmission. Removing the gearbox, done by myself in a couple of weeks in my free time. The repair kit for the Niva and Chevrolet Niva distribution kit is designed for installation with gear sets 3.15 and 2,
The design of the gearbox and its features
The UAZ gearbox includes forks, rods separately for 1, 2, 3 and 4 speed ranges, as well as reverse, clutch, shaft, and cover. Outside there is a drive selection lever, which communicates through a system of rods or corresponding levers with the handle for switching operating modes of the power device in the vehicle cabin.
A mandatory condition for operating the UAZ 452 gearbox, if this condition is met, the gearbox will work properly is to provide lubrication to the gear teeth. The side cover of the UAZ gearbox has a filler hole, and in its very bottom there is a similar drain hole. Both holes are plugged and thereby isolated with conventional screw plugs.
Modernized UAZ gearbox
Having examined the transmission structure of this car model, we can answer the question of how exactly the process of switching gearbox stages is carried out and what happens to the engine running at full speed.
Source
how to install the cover with forks?
how to install the cover with forks?
slava_uaz_kiev » Fri Versnya 13, 2013 9:47
Good afternoon UAZ 469B. Gearbox - 4 mortar of the old style (synchronized 3/4 gear). Oil was constantly pouring from the gearbox (from the place of the cover with the gear selector lever) I decided to fix the problem, since adding 1 liter of oil after each train was not glamorous. I removed the cover with the lever, looked for no cracks and no gasket. I cut out the gasket and, like, well done, put it back. I wiped everything dry, where the lid fits to the box, washed it with gasoline... in general, everything is beautiful and good. But . when removing, I accidentally grabbed the lever itself and it flew off neutral.. that is, 1 - gearbox in neutral (the secondary shaft spins, the one that goes to the transfer case and rear driveshaft) and in the book it was written that you need to put it in neutral and only then remove 2 - forks didn’t move and are also in the neutral position (I hope I didn’t move them along the axis) 3 - and the rod itself that moves these forks - the lever - moved somewhere and now .. in general, scold me .. that I did something wrong and how to choose neutral in a car... but it turns out - I put everything back - but the lever is dead in position and doesn’t switch anywhere at all. In general, I accidentally misplaced the position of the lever. 1. how to check, just in case, whether the forks are positioned correctly in neutral 2 - how to set the lever to neutral? Thank you.
Just in case, how can I check if the forks are in neutral? — to be sure that they are in neutral. I’m just sitting and turning over different options in my head... what if
Re: how to install a cover with forks?
Airi » Friday Wednesday 13, 2013 10:50
Every person is an egoist, so he loves most what he has invested himself in most. Always smile. You will extend your life, please your friends, and annoy your enemies.
Re: how to install a cover with forks?
slava_uaz_kiev » Friday 13, 2013 11:37
Re: how to install a cover with forks?
slava_uaz_kiev » Friday 13, 2013 11:40
Re: how to install a cover with forks?
Airi » Friday Wednesday 13, 2013 11:54
Every person is an egoist, so he loves most what he has invested himself in most. Always smile. You will extend your life, please your friends, and annoy your enemies.
Re: how to install a cover with forks?
slava_uaz_kiev » Friday 13, 2013 12:02
along the way, for the future so that you don’t knock on the forum at night - if the forks are not in neutral, is it difficult to put them in neutral? the forks themselves without a stem
the box is in neutral for sure - since the secondary shaft (where the rear cardan is “soldered”) is spinning) now all that remains is to get in with the forks and the rod)
Switching mechanism in sat. Old-style UAZ-452 gearbox
The location of the controls of the UAZ-469 car (drawing) is shown in Fig. 6. Steering wheel 1 is located on the left side. In the center of the steering wheel there is a horn button 2. On the right side of the steering column there is handle 3 for the turn signal switch. The handle automatically returns to the neutral position when the steering wheel is turned in the opposite direction (the vehicle is moving in a straight line). An internal rear view mirror 4 is installed on the central pillar of the wind frame. An electric windshield wiper 5 is installed in the upper part of the wind frame. Instrument panel 6 is located to the right of the driver. There are two sun visors 7 on the wind frame. To clean the windshield, two windshield wiper blades 8 are installed. And in the lower part of the wind frame there are two pipes 9 for blowing the windshield. The wind frame has two locks 10. On the UAZ-469 drawing, to the right of the driver on the front panel there is a passenger handrail 11. There is also a lantern 12 under it. To the right of the driver, under the front panel, there is a handle 13 for the ventilation and heating hatch.
Rice. 6. UAZ-469 instructions for controls.
The hatch damper is opened by pulling the handle towards you. The heater has adjustable dampers 14 for supplying warm air to the feet of the driver and passenger. To the right of the driver is the lever 15 for engaging the front drive axle. According to the UAZ-469 instructions , the front drive axle is engaged when the lever is in the forward position. There is a cover 16 on the heater in the middle part; it allows warm air to enter the passenger compartment. The transfer case control lever 17 is also located there, which can occupy three positions: forward position (along the direction of the car) - direct transmission is engaged; middle position - neutral; rear position - downshift is engaged. Next to the driver there is a gear shift lever 18, on the handle of which there is a gear shift diagram. The diagram of the positions of the gearbox and transfer case levers is shown in Fig. 7.
Rice. 7. UAZ-469 drawing of the positions of the gearbox lever and transfer case levers.
To the left of the gear lever is the parking brake lever 19. Under the front panel to the right of the driver there is a handle 20 for the body ventilation and heating hatch. On the floor there is a handle 21 for switching fuel tanks, which can occupy three positions: the handle is turned forward - the valve is closed; the handle is turned to the left - the left fuel tank is on, the handle is turned to the right - the right fuel tank is on. On the floor of the body under the driver’s right foot there is a throttle control pedal 22. On the floor of the body in front of the driver's seat there is a hatch cover 23 for access to the filler plug of the brake master cylinder. Under the driver’s feet there are pedals 24, 25, brakes and clutches. To the left of the driver in the floor of the body there is a foot switch 26 lights. By pressing the button with the headlights on, you can switch to low or high beam. To the left of the driver on the side of the body there is a handle 27 for controlling the radiator shutters. The blinds close when the handle is pulled towards you. An external rear view mirror 29 is installed on the left side of the body. On the front inclined floor of the body at the top there is a battery ground switch 30 (has two buttons). According to the UAZ-469 instructions , when you press the button head, the switch connects the battery to ground. To disconnect the battery from ground, press the bracket located on the side. To the left of the power switch on the side there is a plug socket 28 for a portable lamp. K.s. UAZ 469 instructions, UAZ 469 drawing.
The device of the UAZ “Bukhanka” transfer case
The UAZ Bukhanka transfer case is a two-stage design without a differential between the axles. The mechanism is also equipped with a neutral message and switchable front wheels. The components are placed in a tray made of cast iron and equipped with a plug. The pallet is attached to the back of the box through the holes of the plates. In addition, the components of the handbrake are also attached here. The main and transition shafts of the box, the drives of the front and rear wheels, are secured by bearings. Between the supports that facilitate the rotation of the shaft, a gear is placed that drives the speed measuring device. The top of the box has an inspection hatch protected by a shutter.
Dymos transfer case for UAZ (finishing):
The control contains two rods with forks attached to a plug. The fork-shaped rods work in tandem with the drive gear and the activation gear for the front pair of wheels. Two control rods are connected to the forks by means of movable pins. There is also a blocking sphere that prevents the activation of low gear when the front wheels are not working.
By activating direct transmission, the UAZ Bukhanka transfer case acts in a similar way so that the main gear moves into the slot of the gear shaft of the rear pair of wheels, transporting the impulse directly. Activating the low gear shifts the main gear so that the impulse is transported to the intermediate shaft and to the gears that drive the axle. Activation of the low stage is only possible after the machine has come to a complete stop.
UAZ Bukhanka transfer case diagram:
Checking the transfer case
The advantage of the unit that distributes the torque impulse is that the device requires minimal intervention and maintenance. Manipulations consist of monitoring the level and changing the lubricant, inspecting connections for damage. Before working with the box, the product is cleaned. This helps detect hidden cracks and leaks. If such symptoms are detected, they find out what the cause of the phenomenon is. Faulty parts are replaced, as a rule, these are sealing elements and oil seals.
After cleaning and visually inspecting the surface of the transfer case, check the lubricant level in the product. If there is not enough liquid, the substance is added. At the same time, check the lubricant in the gearbox; the value corresponds to the lower edge of the filling hole. If the fluid level in the transfer case is low, but is high in the gearbox, topping up is not necessary, since the total amount of the substance has not changed.
A detailed inspection of the box involves dismantling the product. After washing and air drying, the unit is inspected. The pallet and plugs are checked for cracks and chips. Oil seals and seals are replaced with new ones.
Changing the oil in the UAZ transfer case:
They check that the condition of the working parts on the shafts and splines corresponds to the standard, so that the gear teeth are not worn or chipped. Even if the damage is small, the product must be replaced. Attention is paid to the bearings; abrasions on the ring tracks are not acceptable. They also check separators, spheres, rollers, etc. Gaps, fragments, knocking, uneven movement are a signal to change the product.
The rods and forks become jammed and deformed, the elasticity of the spring elements is lost, and then the products are replaced. In addition, you should pay close attention to switching when the transfer case levers of the UAZ Bukhanka stick and jam. The coupling teeth are checked for damage. The weak link of the differential is the satellite. Small defects force the product to be polished, or in the worst case, replaced.
A few more subtleties of operating the UAZ 469
Of course, even the manufacturer himself probably cannot know all the intricacies of the car, so we will try to tell you everything to the maximum. So, a few more subtleties:
- Reverse gear in the gearbox and downshift in the transfer case must be engaged only after the vehicle has come to a complete stop.
- Always disengage the clutch on steep slopes to avoid clutch disc failure.
- Never exceed the speed (more than 60 km/h) with the front axle engaged, and when driving on dry and hard roads it can be completely turned off.
- Also, under no circumstances allow the front axle to be engaged when the front wheels are disengaged.
- It is necessary to periodically check external threaded fasteners and tightening during vehicle operation.
- Be attentive to the chassis of the car and do not allow shock loads on it.
- When driving on particularly dusty roads, to create air pressure in the cabin and reduce dust penetration, open the hatch in the middle part of the front end and close the rotary door vents.
Rope behind the scenes.
The UAZ is installed in the side cover of the gearbox. The sliding forks are attached to the rods using a tapered screw wire cone. The correct position of the levers is checked in the neutral position of the gears in the gearbox after installing the gear shift mechanism in the gearbox in accordance with Fig.
Checking and assessing the condition of the four-speed gearbox with synchronizers in all forward gears. Processing of UAZ connecting rods to the ball ends of the stabilizer, as well as reducing the stroke. When sequentially engaging first and reverse gears, it is necessary to check the correctness of the drive adjustment. In these positions, the traction and intermediate arms must not be close to adjacent parts.
The lever in the cab should not be close to the instrument panel or hood to avoid damaging the driver's hands. The gearbox in the gearbox must be filled, i.e. The shift rod must be locked.
The control mechanism and shift mechanism, after adjustment, must ensure proper operation of the gearbox and driver comfort. Parallel behind-the-scenes shooting of the new model, opening and closing the hood. Transmission of infection "sex-synchronization",
After this, put lever 1 in the position corresponding to the selection of gears III and IV, and also freely connect shift lever 5 and carry out your own repair of the UAZ! The problem is that when hunting they could not engage reverse gear, they are locked in the forks in the neutral position and in the positions where the gears are engaged.
A clutch with a lever mounted on the grooves of the vertical roller is used to shift the forks. The clutch can move along the axis along the roller. When the roller rotates, the clutch rotates and its lever moves one or another fork. And why I ditched the cables and went back to the rods. The foreign scenes, of course, rule. But the pull is calmer. Replacing the gearbox sleeve. UAZ loaf. Problems with the box began in the fall.
Causes and troubleshooting
The design of the UAZ gearbox is reliable, trouble-free and durable. However, problems with equipment occur due to errors in use and violation of established regulations.
| Source and symptoms | What to do |
| Exceeding the permissible hum level of a working device | |
| Erasing the gear teeth of the box. | Replace worn out box items. |
| Weak fastening of the transfer case to the box, or reduced fixation of the bearing caps. | Tighten the fasteners, if the symptom recurs, dismantle the product and eliminate the defect. |
| Bearings are worn out. | Replace erased items. |
| Saturation of the working fluid with wear products from the box. | Remove the pan, wash it, change the oil. |
| Incorrect oil used, low fluid filling level. | Change the working fluid, set the desired level. |
| Carrying out repairs to replace gears, without selecting a product to minimize noise. | Check the gears for noise and replace them with the required ones. |
| Switching steps is difficult | |
| Different wheel wear. | Replace with wheels with the same tread and equalize the internal pressure. |
| The joints of the longitudinal projections of the main and the mediator shaft are jammed. | Sand the areas with burrs; if that doesn’t help, change the elements. |
| The drive gear has damage on the teeth of the small ring. The shift fork rod is bent. | Sand the damaged areas, straighten the rod, if that doesn’t help, change the element. |
| The switch rods are stuck on the axle. | Separate the parts, clean the axles and pipes, coat with lubricant, and connect the product again. |
| Spontaneous speed shutdown | |
| Erasing the teeth of the gears of the box. | Replace worn out box items. |
| The box bearings are worn out. | Replace worn box elements. |
| A large gap in the articulation of the shaft and gear. | Select the gear according to the size of the longitudinal protrusions. |
| The transmission is unable to engage because the mechanism is bent or there is damage to the gears and cylinders. | Correct bends, sand damage, or replace parts. |
| Poor functioning of the locking mechanism, loss of elasticity of the spring mechanism, abrasion. | Replace erased items. |
| Leakage of working fluid | |
| Violation of the integrity of the sealing elements of the pan, bearing caps, and the transfer case’s articulation with the gearbox. | Replace sealing elements. |
| Weak fastening of the cover, bearing, pan, joints. | Tighten connections. |
| Violation of the integrity of the shaft seals. | Replace the damaged element. |
| Violation of the integrity of the tray or lid. | Replace the damaged element. |
| The plugs of the switching rods, switching rods, and the plugs of the front bearing of the middle shaft fall out or are broken. | Change the plugs. |
| Bearings are damaged | |
| No, or a small amount of lubricant. | Change or add fluid. |
| Demolition of cages and bearing rings due to abrasive. | Change the elements, dismantle and wash the pan, change the working fluid. |
| Excessive shaft bearing friction. | Disconnect the element, clean the product, and coat it with lubricant before reassembling. |
Causes of breakdowns
As a rule, the need to replace the main components of a gearbox arises due to their natural wear and tear.
Causes of gearbox breakdowns
The main reason for oil leakage from the gearbox is the presence of an increased level of fuel in the system. For UAZ gearboxes, you should use high-quality oil. If the liquid is not of the proper quality, this may cause characteristic noises from the box. When the synchronizer or its parts wear out, it is always difficult to change gears
You should also pay attention to the details of the switching mechanism. When gear teeth are deformed, gears often switch off automatically
Gearbox cover UAZ loaf
The gearbox cover on a UAZ loaf, like on any other car, is an important part of the gear shift control mechanism - if a malfunction occurs in it, driving the car is either impossible due to the inability to engage the gear, or is dangerous due to the fact that only some of them work from the steps.
The cover itself is the main part of the gearbox. In this regard, in case of any problems with the lever or suspicious noises from the box, it is recommended to check its condition - perhaps this part needs a complete replacement rather than minor repairs.
Repairing the gearbox cover on a loaf
Repairing the gearbox cover on a UAZ loaf will differ depending on what problems have arisen in it. For example, in a situation where the bushings are worn out, you can do the following: make new bushings and put the cover back, first boring out the space for it (in this case, the axles are replaced with completely new ones). Oil dripping from axles due to worn bushings can be eliminated in another way. To do this, you will need to remove the levers, cut off pieces of small thickness from a pre-selected hose that is resistant to oils and gasoline (which is selected individually for the cover), insert them onto the axles and tighten them with the levers.
In this case, the levers will turn a little tighter, but the gear shift speed will remain the same.
Some users, if they encounter similar problems associated with wear of the splines on the axles and non-engagement of gears, advise not to repair the cover, but to purchase a new one.
In this case, the new UAZ loaf part must be upgraded before installation. To do this, fluoroplastic bushings are installed in place of the rubber bushings.
The removed bushings are cut and installed on the shafts under the levers, which ensures the absence of backlash and protects this part of the mechanism from dirt and water getting into it.
If one of the gears starts to slip out, it’s worth checking:
- the condition of the balls and springs in the gearbox cover, which fix the rods when changing gears - perhaps the cause of the problem lies in their wear, and these components require replacement;
- the condition of the gears - this can also cause gear failures;
- bushings - if the problem is in them, then this part can be strengthened.
Most often, the reason for knocking out gears lies in worn gears and balls, as well as broken springs.
In addition, before repairing the gearbox cover, you should pay attention to the general condition of the mechanism - perhaps a major breakdown, which is clearly noticeable, hides several minor problems, or the entire mechanism is so worn out that it would be wiser to replace it with a new one.
Repair of UAZ Bukhanka transfer case
Serious repairs to the UAZ transfer case are rarely performed. As a rule, to restore normal operation, adjusting the product and lubricating problem areas is enough. If repairs cannot be avoided, then the operation to return the box to its former functionality is done in strict order.
- Dismantling the transfer case;
- Disassembling the transfer case;
- Fault detection;
- Troubleshooting (replacement, restoration of parts);
- Transfer case assembly;
- Installing the transfer case in place;
- Functionality check and configuration.
Before carrying out work, select the necessary tools; for this, find out the type and type of transfer case. Functionally, repair is the replacement of damaged parts with new ones, for this reason more attention is paid to the rejection stage.
- Oil seals (changed during disassembly, regardless of the degree of wear);
- Gears (parts cannot be repaired due to the loads they experience);
- Forks and splines (elements affect the quality of work and safety);
- Bearings;
- Protective casing (if cracks or chips are detected, the part is replaced).
UAZ transfer case control mechanism:
The need to diagnose the UAZ model 452 gearbox
This vehicle must be diagnosed if control begins to deteriorate, characteristic creaks are heard when a gear change occurs, or gears begin to change spontaneously. The UAZ transfer case should be checked if the grip of the wheels on the road has noticeably deteriorated, a hum or increasing noise has begun to appear during its operation.
During maintenance, technicians must check the system for oil leaks and lubricant levels. All worn parts in the transmission system must be replaced with new ones. Also, diagnostics involves lubricating the lever axle and adjusting the front linkages.
Routine diagnostics in a professional auto repair shop allows you to accurately determine the existing nature of the problem with the gearbox and eliminate existing problems at an early stage.
Malfunctions and repairs
The first signs indicating a malfunction of the automotive system should force the car owner to carry out diagnostics. In some cases, this can be done on your own. Simple breakdowns can be repaired with your own hands. It is better to entrust more complex faults to a service center.
Signs indicating the need to repair the UAZ gearbox:
- deterioration of management;
- squeaks and extraneous noises when changing speeds;
- independent activation of transmission.
In most cases, when uncharacteristic noise is observed, the cause lies in wear or defect of the bearings and gears. Stiff gear shifting indicates a malfunction of the synchronizers.
The main reason for the problems that arise is the natural wear and tear of parts.
The need to check the transfer case is indicated by deterioration in wheel adhesion to the road surface and increased noise levels from the area where the unit is located. Damage is caused by: careless operation of vehicles, untimely maintenance, use of low-quality consumables, fuel and gear oil, lack of control over the volume of working fluids.
Another group of problems is related to the leakage of the oil mixture from the gearbox. Possible reasons:
- exceeding the maximum oil volume in the box;
- water entering the system when refueling;
- a crack on the unit cover or on the crankcase.
The UAZ high-speed gearbox consists of a large number of working elements and components. Their normal functioning and interaction ensure reliable use of vehicles. Gearbox repairs will not be required if you regularly inspect your vehicle.
Mechanism adjustment
After assembling and installing the new switching mechanism, it is necessary to adjust the rods and the entire system. The goal is achieved by changing the length of the vertical and horizontal rods. Do-it-yourself setup sequence:
- Move the gear shift lever to the neutral position, and move the element responsible for selecting the gear all the way.
- Move lever 1 to positions corresponding to speeds 1 and 2. While checking that the elements are not pulled up, connect and secure the selection rod.
- Similar actions must be carried out for other gear stages.
After work, you should check that the gears are fully engaged by starting first gear and reverse. The lever must not come into contact with other parts or controls. The optimal gap size is up to 3 mm.
Source
UAZ Bukhanka transfer case control
The UAZ Bukhanka transfer case is controlled remotely from the driver’s cab. The levers used to manipulate the car are located on the right side of the user. The upper rod activates and deactivates the front pair of wheels of the car, has two positions: top (the bridge is activated), bottom (the bridge is deactivated).
Position of the transfer case levers of the UAZ Bukhanka:
The location of the transfer case levers on the UAZ Bukhanka is possible in three options. First, the main gear is activated, middle (zero), the main shaft does not rotate, second, low gear is activated.
In order to avoid damage to the transfer case if the gear is incorrectly activated, a locking device is provided. The product is fixed in the cover of the gear change rods. Thanks to the fuse, the low gear is activated after the front pair of wheels is activated. Meanwhile, the front pair of wheels is not activated when a downshift is engaged. A solution has been implemented with a ball acting as a lock. The sphere in the cover prevents the rods from moving and deactivates the front pair of wheels until the rods are put into downshift. The lock prevents the driveshaft and rear pair of wheels from being overloaded.
There are single-lever control elements, one rod alternately activates: the front pair of wheels, zero, then low stage.
The UAZ gearbox is designed to transfer the force created by the car's engine to the transmission, stepwise changing the speed of rotation and, accordingly, the speed of the vehicle. It provides reverse gear and the ability for the car to stand with the engine running. The gearbox on the UAZ 452 is located under the bottom of the vehicle between the clutch and the transfer case and is attached with studs to the clutch housing. Its weight is about 34 kg.
Installation of the gearbox together with the RK on the UAZ 452 without assistants
This is a machine translation of a Ukrainian article. You can read the original here.
Installing a gearbox (gearbox) together with a transfer case (RK) on a UAZ 452 car is not the easiest thing, since the weight of the two assembled units is about 80 kg. In principle, this problem can be solved simply, if there are 1 or 2 assistants, I want to tell you how to install the gearbox along with the LCD yourself without assistants.
Let's go from the very beginning - “why remove the gearbox on a UAZ 452? ". There are many answers, here are the most typical:
- To remove the clutch basket and disc, the release bearing must be removed from the gearbox.
- To sort through the gearbox and gearbox, you need to remove the gearbox.
To remove the engine you need to disconnect the gearbox.
In terms of the question “How to remove the gearbox on a UAZ 452,” I think no one has any questions - this is a trivial task, to remove it you need to unscrew everything that gets in the way, but “how to install the gearbox on a UAZ 452 yourself” is far from a simple task and has many options . One of these options will be discussed further.
How to install a gearbox assembled with a switchgear on a UAZ 452 independently, without assistants?
In the body of the car we make two technical holes with an 8mm drill (see Fig. 1) into which we insert a steel wire 1.5 m long.
We hook the edges of the wire to the holes in the gearbox near the gearbox mounting ears (see Fig. 2).
We start the hydraulic jack (5t) as shown in Fig. 3 and begin to raise the gearbox.
Having raised the gearbox for the first time to the full length of the jack, we look at the gearbox shaft; it should already be close to the clutch housing; if not, you need to place a wooden scaffold under the gearbox and lower the jack. Then place a scaffold under the jack and continue lifting. When the input shaft is lower, but along with the clutch housing, you need to move the gearbox back, and then point the shaft into the clutch basket.
We directed, we lift further, but carefully so as not to damage the clutch disc and clutch release mechanisms. You need to lift until the studs securing the gearbox to the clutch housing do NOT coincide with the holes on the gearbox. Of course, all 4 holes are unlikely to coincide; this is a matter of skill and depends on many factors. It is necessary to lay pry bars, crowbars, raise or lower the engine in order to align the imaginary axis of the gearbox and engine. There is no need to try too hard, if the gearbox shaft rests on something, then it rests either on the clutch ferrode, or on the bearing on the flywheel, or on the flywheel, so you need to be careful. First, we take the flywheel with both hands and try to turn it; to make this easier, you can unscrew the spark plugs on the engine. If turning the flywheel and directing the gearbox to the studs does not give the desired result, you need to partially release the clutch basket. To do this, loosen all 6 bolts securing the clutch basket to the flywheel a few turns and turn the flywheel by hand, try to direct the gearbox, if not a single pin wants to fit into the hole, you will have to completely unscrew the clutch basket from the flywheel and partially move it back. We take a flashlight and shine it into the gap between the flywheel and the feredo, put a thin pry bar into the gap and direct the end of the input shaft into the bearing on the flywheel, and the feredo onto the teeth of the gearbox input shaft. Now we screw on the clutch basket and, using force and a pry bar, place the holes on the gearbox on the gearbox mounting studs, which are located on the clutch housing. To prevent the gearbox from falling back, we tighten the nuts.
Pay attention ! On the right side of the car, nuts with long threads are used, on the left with short threads. The left side is difficult to tighten, since the nut rests against the gearbox housing and needs to be pressed out. First you need to bait the left side, and then press the right.
Then we just attach the gearbox mounting ears to the frame, cut off the wire, connect the transfer case rods, syringe the release bearing, connect the universal joints, connect the clutch, connect the gearbox rods.
Photo of UAZ 452 checkpoint
Photo of clutch housing UAZ 452
UAZ 469 gearbox device
The UAZ 469 gearbox has the following device:
- input shaft;
- bearing cover;
- input shaft cuff;
- retaining ring;
- input shaft ball bearing;
- secondary shaft roller bearing;
- input shaft spline;
- locking ring;
- synchronizer clutch for 3rd-4th gears;
- coupling hub;
- key;
- 3rd gear spline;
- third gear;
- gear bushing;
- 2nd gear gear;
- crankcase;
- 2nd gear spline;
- synchronizer clutch for 2nd-1st gears;
- 1st gear spline;
- 1st gear gear;
- 1st gear gear bushing;
- secondary shaft roller bearing;
- secondary shaft bushing;
- 5th gear driven gear;
- 5th gear housing;
- double row ball bearing of the secondary shaft;
- spline washer;
- retaining ring;
- secondary shaft;
- bolt;
- support ring;
- 5th gear drive gear;
- splined ring of the 5th gear drive gear;
- synchronizer spring;
- synchronizer block;
- 5th gear synchronizer clutch;
- intermediate shaft ball bearing;
- reverse gear roller bearing;
- reverse gear;
- reverse gear axis;
- gear block for drive of the intermediate shaft and 3rd gear;
- intermediate shaft;
- intermediate shaft roller bearing;
- bearing cover.
UAZ 469 gearbox diagram
Photo 2: Diagram of the UAZ 469 gearbox (Source: Yandex.Pictures)
The diagram of the old-style UAZ 469 gearbox is shown in the top figure. All the main spare parts for the UAZ 469 gearbox and gearbox components are clearly shown here. Products such as boot, oil seal, rubber seals are consumables and are replaced as they wear out. For the UAZ 469 car, the diagram is typical.
The gearbox in the UAZ 469 is attached to the clutch housing with four studs screwed into it. The drive gears of the intermediate shaft, second and third gears are made with helical teeth, the first gear - with straight teeth.
The gears are located on shafts and are in constant mesh. The gears of the first, second and third gears are mounted on the driven shaft on needle bearings. The drive shaft 1 has two supports. The front bearing is located in the crankshaft housing, the rear bearing is located in the front wall of the gearbox housing.
Operating principle
The old-style UAZ 469 gearbox is designed so that to engage 1st gear, the driver needs to move the upper end of the lever 37 with the knob forward and towards himself. After such manipulation, the lower end of the lever enters the transfer head of the 1st gear rod 56, moving it back. The force is transmitted through the fork 49 to the sliding clutch of the synchronizer 12.
It moves along the carriage splines and engages with the ring gear 13 of the first gear of the secondary shaft 16. From the primary shaft 1, torque is transmitted to the drive gear of the intermediate shaft 23. Then through the 1st gear of the intermediate shaft - to gear 13 of the 1st gear of the secondary shaft 16. These two pairs of gears significantly increase torque by reducing the speed of the secondary shaft.
Blog about UAZ
A mechanical four-speed semi-synchronized gearbox was installed on freight-passenger cars of the wagon layout of the UAZ-452 family. The gearbox had four forward and one reverse gears, and was equipped with inertia-type synchronizers to facilitate engagement of third and fourth gear.
Basic technical data of the UAZ-452 four-speed gearbox.
— Center-to-center distance in mm: 80.5 — Maximum torque on the input shaft in kgcm: 17 — Number of pairs of constant-mesh gears: 3 — Helical gear module: 3 — Spur gear module: 3.5 — Gear ratios: first gear — 4 ,12 second gear - 2.64 third gear - 1.58 fourth gear - 1.00 reverse - 5.23 - Splines of the input shaft of the box: number of slots - 10 outer diameter in mm - 35-0.075, 35-0.160 inner diameter in mm - 26.5-0.52 slot width in mm - 5.385-0.05 - Gearbox weight in kg: 34 - Crankcase filling capacity in l: 1.0
Four-speed gearbox UAZ-452, design and operation.
The four-speed gearbox of the UAZ-452 family has three shafts: primary, secondary and intermediate. All mechanisms are mounted in a cast-iron crankcase, which also serves as an oil bath. The front flange attaches the gearbox to the clutch housing. The transfer case is attached to the rear flange of the gearbox housing. The side flange and hatch are used to install the gear shift mechanism.
Transmission diagram
Let's look at an example of a gearbox design diagram and the features of this unit. The engine gearbox housing contains several types of drives, including:
- transmission drive shaft;
- intermediate shafts;
- driven shaft of the UAZ 452 gear shift device.
Bearings serve as supports for these nodes of the transmission. It is worth paying attention to the picture posted here. The diagram on it explains in sufficient detail the structure of the transmission: the front bearings are roller type, and the rear bearing has a double-row ball modification. The driven shaft has a front bearing mounted into the end of the drive shaft. The driven axle is equipped with gears of 1st, 2nd, 3rd gearbox operating modes, and the intermediate one is equipped with gears of 2nd and 3rd gears of the UAZ 452.
As the diagram of the UAZ 452 gear shift device shows, the 1st stage gear has a larger diameter and is located in the rear part of the driven shaft, while the gear from the third mode is the smallest in size, located in the front part of the driven shaft, next to the synchronizer clutch.
In the lower part of the crankcase, where a separate axle is located, reverse gears are installed. The side cover of the gearbox hides inside the crankcase a control device for switching engine operating stages. A gear mechanism is mounted in its rear part to send readings to the speedometer.
How to understand that repair/adjustment of the UAZ “Bukhanka” rocker is required
So, the gearbox control drive rod is located between the gearbox itself and the shift lever, and is located under the bottom of the car (next to the driveshaft) or immediately under the gearshift lever. In theory, the rocker should be very durable, since it bears heavy workloads. In fact, the manufacturer actually installs a high-quality part that is fairly well protected from external factors, but it is also not immune to various types of damage.
Considering the harsh operating conditions for which the “Loaf” is usually purchased, the drive rod is still subject to both physical wear and mechanical damage:
- insufficient lubrication;
- ingress of water drops, dust particles and dirt.
From 200 to 300 thousand kilometers of a van is the working “life” of the rocker before it is replaced or repaired, as the manufacturer claims. However, reality shows slightly different figures - on average, after 100 thousand kilometers, the car owner will have to become personally acquainted with this element of the transmission. Typical “symptoms” of wear on the gearbox linkage, indicating an impending repair or replacement of a part that the driver may notice, include:
- In neutral or in gear, there is too much play at the gearshift knob.
- It is difficult to change gears: when shifting, there is a “crunch” and the lever moves stiffly.
- Incorrect gear shifting (they shifted to fifth, but the third switched on, etc.).
Many car owners consider the free movement of the gearbox to be normal, but this is an important diagnostic sign indicating a malfunction of the drive traction. In this case, you should definitely inspect the gearbox, since adjusting the rocker on the UAZ “Bukhanka” is easier than completely changing its repair kit. Ignoring problematic gear shifting is generally a bad idea, since difficulties that seem insignificant at first glance may well lead to serious consequences, as they increase the risk of getting into an accident.
Design and principle of operation
The gearbox diagram contains information about the main and additional elements of the system. The UAZ gearbox structure includes the following units and parts:
- Fully synchronized installation, ensuring speed equalization and smooth switching.
- Primary shaft on 2 supports.
- Helical intermediate gears for shaft drive.
- An angular contact ball bearing, consisting of 2 rows and located on the rear of the shaft, is necessary to perceive and respond in a timely manner to loads arising during driving in the radial and axial planes.
- A transfer case consisting of a main axle shaft and a gear with a large working life.
Operating principle
In order to understand and imagine how the process of changing the speed modes of the engine and the corresponding indicator of the permissible speed occurs, let us turn to a short explanation. The lower stages, which ensure the vehicle starts, are activated by the most powerful gear, which moves along special skids located on the driven shaft. This action allows you to transfer enough force to a heavy car for the car to start moving.
As soon as the car starts moving, you can switch to second gear, due to which the car does not stop and its movement is not very fast. However, the second speed stage will not be enough if you need to reach a speed of about 40-50 km/h. In this case, higher gears will be required.
As for the 3 and 4 speed modes and the corresponding gears, which provide a high number of revolutions per second, they are controlled by a synchronizer clutch. Some modifications of the gearbox on the UAZ 452 were produced, where the switching of 1st and 2nd speed modes of the transmission was also carried out using an additional synchronizer clutch. However, in this case we are considering a transmission option with one synchronizer clutch.
Adjustment behind the scenes of the UAZ 39094 transmission
The problem is urgent, many suffer from it. Lower the pedal frame using the brackets; 2. Pull out the clutch pedal to decrease pedal travel. With.
How to get everything back now, for clarity. Suggest how to set up nurses who periodically suffer from back loss, if you hold them, pop-ups tuned to intuition are difficult to advise. How to Create a Published Audi Behind-the-Scenes Film
Take a free consultation right now: 8 Add. 389 (toll free)
Source
UAZ transmission components
The new UAZ 452 family vehicles have a manual transmission (four-speed). Inertial type synchronizers provide easier gear shifting. The five-speed ADS gearbox is synchronized in all forward gears.
The UAZ can be equipped with a 5-speed manual transmission Daimos (DYMOS). This gearbox is distinguished by its reliability. Its average service life is 300,000 km. The filler plug is located in the middle of the box, the drain is at the bottom. It seems possible to unscrew them using a hex key. When oil is drained, special containers should be prepared. New fluid must be filled to the level of the oil filler hole on the box. The dipstick allows you to accurately determine to what level the liquid is filled. An alternative to the probe can be a long nail. For preventive purposes, the oil level must be measured every 15,000 km.
Source