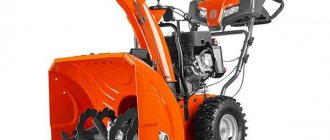
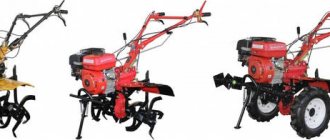
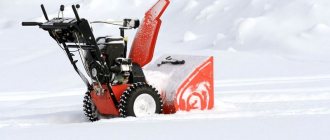
A walk-behind tractor is a universal technique that, thanks to its mobility, is capable of performing many functions.
It is used to cultivate the soil and carry out agricultural work, but with the onset of cold weather it sits idle.
In fact, you can find use for a walk-behind tractor in winter if you transform it into a snow blower with your own hands.
Read the article about how to make a snow blower for a walk-behind tractor with your own hands, what tools and materials you will need, and how to use the equipment.
What will you need?
To assemble the snow blower you will need the following tools:
- drill for drilling holes;
- manual riveter for metal;
- welding machine;
- grinding machine - it is used for cutting metal and cleaning welds;
- hand scissors for metal;
- tape measure for taking measurements;
- vice;
- jigsaw;
- pliers;
- screwdrivers;
- washers;
- bolts;
- screws.
Materials needed to make a snow blower:
metal sheets or base for making a box;- pipes that will serve as the base of the shaft and as a trench;
- bearings;
- conveyor belt - an auger is cut out of it;
- chains or belts for drive;
- steel corners for fastening the frame;
- pulleys and sprockets;
- dye.
Design and diagram of a snow blower
Before you start designing a machine, you need to prepare calculations and drawings. It will be easier to prepare if you have a clear idea of the visual image, the operating principle of the unit and its functioning in your head.
How does a snow blower with an auger attachment work:
Scheme 1
The front part of the cleaner consists of a huge bucket with a funnel that collects a large amount of snow. Inside there are two conveyor screws - this is an auger (see here how to make it yourself), moving the accumulated mass into the pump. Each screw consists of blades that rotate around the screw.
Once the motor is running, the blades begin to rotate. Each rotation cuts sharp jagged edges into the snow, then is replaced by a second sharp blade.
Rotating conveyors and screws perform the following main functions:
- snow crushing;
- add it to the pump.
The conveyors have a trick - they are located at an angle to the pump, which allows snow to be brought to the pump. With the help of rapid rotation of the screw, the snow mass breaks out at high speed and is carried by air pressure over a long distance.
A scoring plate is attached to the bottom of the “shovel”.
If the structure of a universal device includes an air-cooled electric motor, then the air intake must be protected from accidental contact of the electrical part with wet snow.
Scheme 2
Simulation preparation scheme:
- Buy, or use an existing walk-behind tractor engine. For example, Honda brands (requirements: 6.5 liters per second; auto transmission; gear ratio);
- Prepare a plastic pipe, mainly sewer, with a diameter of 16 cm;
- You will need roofing iron;
- Plywood (10 mm thick) will come in handy;
- Half-inch pipe;
- Steel corner;
- Take a pipe measuring ½ inch;
- The steel plate should be equal to 120*270 mm;
- Jig for drilling holes;
- Rear wheel axle.
- Check the plain bearings according to the pipe size. If the pipe is wider than the inner ring, then it can be turned on a machine.
The total width of the homemade machine is approximately 65 cm (the working width is 50 cm), which is convenient for storage.
The compact size of the motorcycle snow blower allows you to increase maneuverability and clear snow from even the narrowest paths.
More information in the following videos:
Preparation
Preparation for assembling a snow blower is carried out in several stages:
- Select the type of snow removal attachment. The simplest, but less functional, is the blade shovel. An air-rotary snow blower is more difficult to manufacture and install, but its productivity is much higher.
- Prepare drawings that will serve as the basis for the work. You can develop them yourself or find them on the Internet.
- Prepare tools and materials that will be used during the assembly process.
- Clear the work area. It is most convenient to assemble a snow blower in an equipped garage.
What other options are there for snow removal plows?
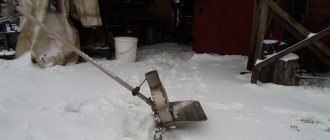
Manual modifications involve grabbing and throwing masses of snow to the side. The labor-intensive task of clearing snow debris can be sped up by using hand-held wheeled bulldozers with shovels made of plywood, plastic or metal. The dimensions and material of the equipment are selected to eliminate the consequences of specific types of precipitation of varying densities - ice, loose snow, compacted snow masses.
Wheeled snow shovel Bulldozer
There are also models of shovels with a snow-grinding auger built into the bucket. The advantage of this type of blade is the light weight of the plastic from which it is usually made.
To further facilitate manual work, snow plows, in addition to walk-behind tractors, are also attached to the following automated devices:
- ATV;
- mini tractor;
- off-road vehicle, etc.
Read also: Scope of application of automatic submerged arc welding
SUV plow
You can install a shovel on an ATV:
On the front frame (applicable for cars with low ground clearance);
Front blade for ATV
On the central frame (provides high ground clearance and stability when performing snow removal work).
Central blade for ATV
Installing snow plows on a mini-tractor or SUV is convenient due to simple installation and the ability to store them in a garage or car trunk. The design is equipped with an electric winch, which can be controlled directly from inside the car. The angle of rotation of the blade is set depending on the density and amount of precipitation.
How to do it?
The simplest design is a mounted shovel blade. With its help, snow masses are simply moved to the side. When moving forward, it is lowered down, raking up snow, and when moving back, it is raised. This option is suitable for clearing light snow cover.
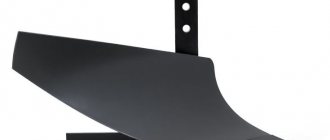
The shovel itself is either purchased ready-made or made from a barrel (gas cylinder) cut into 2 halves, to which a frame is welded for mounting on a walk-behind tractor.
A rotary auger snow blower is complex from the point of view of manufacturing technology. Manufacturing instructions:
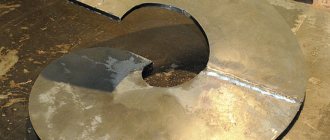
- A box is made from a sheet of tin by cutting out its side parts and base. Bend the sheets using a cylinder. Weld the prefabricated parts of the body.
- A shaft is made from a pipe. Its thickness should not be less than 50 mm.
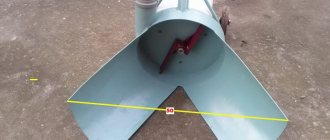
- Segments for the auger are cut out and blades are formed from them. Weld them to the shaft so that they converge to the outlet, which will be located in the center of the box. Perform balancing.
- Install the bearings, attach them to the side parts of the snow blower, and assemble the auger. When assembled correctly, it will feed snow onto the rotor.
- A hole is cut out in the casing and a pipe is installed in it, which will serve as a chute for throwing out snow. It is fixed with metal holders.
- The rotor housing is cut out of sheet steel; you can also use an aluminum boiler with a volume of 20 liters. it is attached to the front wall of the case.
- If the engine has a pulley, then a belt can be used as a drive. It will transmit torque from the walk-behind tractor engine to its shaft, which is connected to the snow blower shaft.
- The working unit of the snow blower is assembled and the transmission elements are installed.
- An asterisk is welded at the end of the shaft, with the help of which the speed will be changed.
If necessary, a flashlight is installed on the equipment. All metal elements are coated with durable paint, which will protect the equipment from corrosion.
Video instructions for making a snow blower for a walk-behind tractor:
Types of snow removal equipment
In specialized stores today you can purchase various mechanisms that make working in the field easier. Snow removal equipment is also becoming increasingly popular. There are currently four main types of snow blowers:
- Bulldozer type - located in front of the walk-behind tractor.
- Auger - snow is captured using an auger, which moves it to the pipe opening.
- Fan-bladed - snowflakes are delivered into an inclined pipe using a fan and then thrown out.
- Air-fan - snowflakes are drawn in by a strong stream of air and removed in the opposite direction.
If snow removal equipment is purchased in a store, then all four types do an excellent job. But if you are interested in the question of how to make a snow blower with your own hands on a walk-behind tractor, then you should pay attention only to the first three types. To make an air-fan snow blower, you will need a powerful power plant, and finding one may be problematic.
How to use homemade equipment?
Rules for using a snow blower with a walk-behind tractor:
- Fill the engine with gasoline, move the choke lever to the “Start” position, open the tap and pull the starter cord several times;
- after this you can turn on the ignition;
- Before starting work, the engine must be warmed up;
- the equipment should be moved slowly, taking part of the already cleared path, so that snow does not clog the chute and the engine does not overload;
- the stream of snow coming out of the chute should be directed in the direction opposite from people, the worker himself, and nearby buildings;
- Do not clear snow from steep slopes and hills;
- After completing the cleaning, the engine is not immediately turned off; it is allowed to run for some time to evaporate the moisture.
After each use, the snow blower is cleaned of adhered snow and dirt.
Combined snow blower
There is no point in considering in detail how to make a snow blower of the auger type with your own hands. This design consists of two connected nozzles. An auger snow blower for a walk-behind tractor is taken as a basis, after which it is further developed. According to the instructions discussed above, a fan nozzle is made, only the guide blades on the front of the housing are not welded. At this point it is connected to the back of the auger snow blower bucket.
During operation, the auger crushes the snow and delivers it to the fan nozzle housing. Here, a powerful air flow is formed by the impeller blades, which pushes the mass through the outlet sleeve.
The video shows a homemade snow blower:
Helpful information
Tips for making and operating a snow blower:
Before starting work, it is necessary to check each time the reliability of all fasteners, the tightness of the fuel tank, etc.- Smoking is prohibited while refueling the engine with gasoline.
- Construction glasses can be used to protect your eyesight.
- It is recommended to lubricate the seat on the walk-behind tractor with silicone to avoid friction and rust.
- The engine of the walk-behind tractor should be filled with synthetic oil designed to operate at sub-zero temperatures.
Making a shovel without a lifting mechanism
The design of attachments will be much simpler if the blade frame is fixed in one position, but the mini tractor blade can rotate left and right.
Fixing the hitch is done as follows:
- An iron disk with a diameter of 15 centimeters is welded to the shovel;
- Several holes are drilled on the disk for convenient use. Optimally - three holes;
- To fix the shovel, an L-shaped pin is inserted into the holes to hold the entire structure;
- An extended handle is attached to the bucket;
- The bolts on the structure are tightened and fixed;
- The finished structure is painted.
A ready-made homemade canopy can not only remove snow. In summer, a mini tractor with a blade can be used as a bulldozer to level the soil. The shovel can be replaced with a brush for cleaning the area. The operating principle of factory shovel blades is the same, but their design is not reinforced, and therefore cannot boast of reliability and durability.
Factory models
Any company that manufactures walk-behind tractors can also offer a range of snow plows. There are popular models on sale from such manufacturers as Centaur, Neva, Zirka, etc. The only big advantage of a factory design over a home-made one is that they are made of high-quality steel and are more difficult to damage. Moreover, such models last longer than homemade ones. But, on the other hand, they cost a lot.
There are a lot of options for factory dumps, so you should check before purchasing whether this model is suitable for your existing walk-behind tractor. At the factory, snow plows are not equipped with spring mechanisms due to the low speed of movement. If the speed of the walk-behind tractor is low, then the protective mechanisms for contact with the ground lose their meaning. Moreover, the factory models do not have mechanisms for lifting and turning the unit. In this regard, the price of the factory design is reduced.
For higher performance, it is recommended to replace conventional rubber wheels with factory or homemade lugs. This will speed up the work process.
Prices for snow blowers may vary. Basically, the cost of these varies from 4 thousand to 6 thousand rubles.
