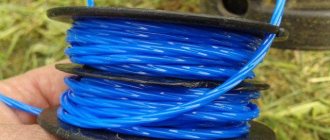
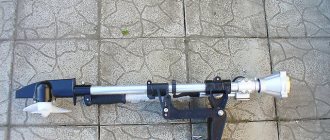
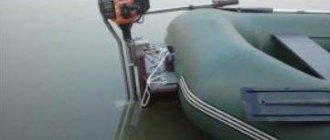
Method 1 - how to properly wind the fishing line or put it on a reel and select the required length
To implement this method, you will need to first prepare a fishing line of the required length (usually up to 4 meters). It all depends on the thickness of the equipment used, as well as the design of the reel. There is a simple way to find out the required amount of fishing line that will be needed to charge the reel. To do this, wind the equipment inside the reel until it is level with the side protrusions. In this case, the equipment should not extend beyond these extreme protrusions.
The thicker the equipment used, the shorter its length will be needed, and vice versa, the thinner it is, the longer the segment will be needed.
Instructions on how to properly insert the equipment into the tip of a trimmer or brush cutter are as follows:
- To begin, the piece of fishing line that was prepared to be installed in the reel must be folded in half. In this case, one edge should protrude 10-15 cm more than the second
- After this, take the second end from the other side and bend it in half. Move towards it so that the measured protrusion of 15 cm is preserved
- There is a slot in the inner partition of the coil into which the resulting loop should be inserted. The slot in the wall is shown in the photo below
- Next, we find out the direction of winding the fishing line. If you wind the rig in the wrong direction, it will not function correctly and the job will need to be redone. To insert the fishing line and wind it in the correct direction, you should inspect the surface of the reel. It should indicate the direction of winding (in 99% of cases this direction is indicated). What the direction indicator on the reel looks like is shown in the photo below.
- This arrow-shaped indicator may also have a designation, as in the example above “WIND LINE”, which indicates the winding direction. If there is no pointer on the reel, then you need to look at the head. The head has the direction of its rotation, and in order to wind the fishing line correctly, you should wind it on the drum in the opposite direction to the indication of the arrow pointer. So, if the arrow is on the pointing, then you need to wind it in the indicated direction, and if it is not there, then you should wind it against the direction of the arrow on the surface of the head
- Having decided on the direction of rotation, you should begin winding. Each end should be guided in its own groove. If there is no separator, then the equipment must be laid out in the appropriate distribution order
- When almost all the fishing line is wound on the reel, you will need to do the following - place a short part in the hole in the side wall of the aiming line, the protrusion of which should be up to 10-15 cm, and then do the same procedure with the other end, placing it in the hole on the parallel side
- We insert the reel into the head, first passing the ends of the fishing line into the holes of the drum
- We put the drum in place and, by pulling the ends of the fishing line, remove them from engagement with the temporary clamps in the wall of the reel. After this, you can put the lid on until the latch is activated.
- At this point, the process of how to replace the fishing line on a trimmer is completed, and if necessary, you can trim only the ends (if their length is not satisfactory) and install the assembled drum on the tool
There are no difficulties with putting the drum in place. There is a second way to load mowing equipment into a brush cutter. Let’s find out in detail what the difference is and how the second method of threading fishing line onto the reel of a lawn mower is carried out.
Instructions
In order to change the fishing line, you need to remove the old one (if there was one).
The reel is part of the trimmer structure, which is located inside the head of the brush cutter, drum or reel. Depending on the manufacturer, the heads may vary. But this article only covers Patriot, although their mechanism is used by many other companies.
Instructions on how to unscrew the manual head on a trimmer are described below.
- First of all, you need to clean the head of dirt and adhering grass if it is dirty. To do this, you need to lift the lawn mower head up and, holding the casing, remove the special protective cover placed on the drum.
- The next step is to remove the coil from the drum. The reel can be easily removed even with one hand, because it is not secured inside the drum in any way.
- The drum itself is secured in the trimmer with a bolt. This bolt must be unscrewed, after which the drum can be easily pulled out. To do this carefully, you should support the drum with the spool while unscrewing the screw counterclockwise.
- Now you can pull the coil out. As mentioned above, it is not secured by anything except a hook with a metal shaft, so it does not need to be pulled out with force. Carefully, in a circular motion, pull the spool out of the drum.
- Now all that remains is to remove the old fishing line and follow the following instructions.
Installing the coil and drum in their original place is performed using the reverse algorithm.
Before threading the fishing line, you should make sure that you have purchased a thread suitable for the trimmer. If the thread does not fit, fuel or energy consumption increases, as well as the load on the lawn mower engine.
In order to replace the thread itself, you need to prepare a piece of thread of the required size. Most often this requires about 4 m of fishing line. The specific figure will depend on the parameters of the thread, for example, its thickness, as well as on the parameters of the spool itself. If you can’t accurately determine the length, you can do the following: insert and wind the thread until the reel is fully charged (the line level is comparable to the protrusions on the sides of the reel). It is necessary to ensure that the fishing line sits evenly in the reel.
Instructions for threading fishing line into the reel are described below.
You need to take the prepared thread and fold it in half. You should ensure that one edge is 0.1-0.15 m longer than the other. Now you need to take the ends in different hands. The smaller one needs to be pulled up to the larger one so that it becomes 2 times shorter. When bending, maintain a distance of 0.15 m. Locate the slot inside the coil baffle. Carefully thread the loop you made earlier into this slot. To continue working, you need to determine the direction of winding the thread in the spool. To do this, just inspect the coil - there should be an arrow on it. If the indicator arrow could not be found, then it is quite possible that there is a written designation. An example is shown in the photo below. The coil head needs to be inspected. There is a direction indicator on it. However, this is the direction of movement of the coil. To get the winding direction, you need to wind in the opposite direction. Now you need to fill the reel with fishing line
It is worth noting that there are special guide grooves inside the coil. When winding the thread, you must follow these grooves, otherwise you may damage the trimmer.
At this stage, you need to charge the coil very carefully. When the user has wound almost the entire thread, he should take the short end (do not forget about the 0.15 m protrusion) and pull it into the hole located in the wall of the spool. Now you need to repeat this action in the same way with the other end (on the other side). Place the reel itself in the reel head, first threading the fishing line through the holes inside the reel. Now is the time to return the drum to its place. After this, you need to take the ends of the fishing line with both hands and pull them to the sides. Then you need to put the lid back in place (here you can safely apply force until a characteristic click is heard). All that remains is to do some “cosmetic work”. You need to see if the thread is too long. You can start the trimmer and check in practice whether everything is comfortable. If the thread is a little long, you can trim it with scissors.
Method 2 - how to properly put fishing line on the reel of a lawn mower with photo description and video
The second method differs from the first in that the coil is charged not with a single piece of equipment, but with pieces of two parts. Manufacturers use this method, and it is also suitable for those who have leftover material. The principle of how to insert two pieces of fishing line into the tip of a lawn mower is the same as the first method, and to make sure of this, below are detailed instructions:
- There are two equal length pieces of material that can be used
- One piece is taken and the edge is bent in the form of a clamping bracket or hook, with the help of which the fishing line will be secured
- Inside the coil there are holes in the form of a bracket for fixing, which are there for a reason. If they are not there, then the second option will not work. The appearance of these brackets is shown in the photo below. Each bracket is on its own half
- The fishing line should be hooked onto the bracket and reeled in in accordance with the direction of the arrow.
- The equipment is wound until a 10-15 cm segment remains, which is fixed in the corresponding hole on the side of the aiming
- Manipulations with the second end of the fishing line are carried out in a similar way.
- The protrusions are inserted into the holes of the head, and then, removing the equipment from the temporary fasteners in the reel, the cover with clamps is installed
The above instructions on how to install a fishing line in a lawn mower will help not only correctly, but also quickly carry out the replacement procedure. Assembling the trimmer coil, as mentioned above, can be done without removing the head, but in this case you will need to conveniently fix the tool. Video instructions are presented below.
Reel with one working antenna
The simplest option and simple sequence of actions:
- The dimensions of the reel and the length of the original factory winding determine the recommended length of fishing line for winding - 2...5 m.
- One end of the fishing line is inserted into the fixing technological hole located inside the spool.
- The fishing line is wound onto the drum in the opposite direction to the rotation of the spool on the trimmer product - as a rule, on the inside of the reel an arrow indicates which direction the winding is going.
- A small section of the fishing line is left free to be brought out - it is fixed in a specialized groove on the inside of the bobbin, designed to hold the winding when assembling the spool into working condition.
- The remaining end of the line is passed through the hole in the outer part of the reel.
- The reel halves are assembled and put on the trimmer rod.
Reel with two working antennae
In this type of spool, you should determine the number of grooves for winding line lying on the inside of the reel:
- one groove - both tendrils are wound together along one groove;
- two grooves - each tendril is wound along an individual groove.
For both cases a fishing line 2-3 m long is taken. In single-groove reels, the fishing line is pulled into a through hole, its ends (tendrils) are folded together and aligned, after which they are wound in the direction opposite to the direction of rotation of the reel on the rod - the inside arrow usually indicates the correct winding direction. If there are locking grooves, the ends of the fishing line are threaded into them or held with the fingers of your free hand, threaded through the through hole of the outer half of the reel, the spool is closed and attached to the trimmer rod.
READ How to Properly Wind Line in a Trimmer
The difference between winding line in two-groove reels is that initially a piece of line 2-5 m long is folded in half (to determine the middle fold), and the fold loop is inserted into a special groove between the grooves. Both antennae of the fishing line are wound each along their own groove; fixing the antennae and assembling the reel is similar to the option discussed above with one groove.
The first implementation of this procedure may seem lengthy and quite labor-intensive, but with time and experience this task will be solved much faster and easier.
The video below will clearly show how to thread the fishing line into the trimmer reel and wind it correctly - this operation is not difficult and, with some patience, will definitely be successful:
Removing and disassembling the starter, replacing broken parts
To repair the trimmer starter, you will need to first disassemble it and then reassemble it. This process is not particularly difficult. To work, you will need a screwdriver with a tip of the desired shape.
Everything should be done carefully, observing safety precautions, mainly so that the spring does not injure the technician if it accidentally flies out.
Assembling and installing the starter
To assemble the starter and install it in its original place, you must:
- turn the pulley with the spring down and place it inside the housing so that the spring bend falls exactly into the groove of the housing;
- install the washer, then the spring, and the second washer on top of it;
- Place a cup with antennae on top of the washer and screw in the screw.
When assembling, be sure to install both washers, otherwise the plastic cup will be damaged by the spring after some time, and when pulling the cord, the user will notice that it is jammed. It will look like a spring has fallen off. To fix such a breakdown, you will need to install a larger screw or another washer. If it is not possible to find the required parts, just loosen the screw a little, after which the starter will stop jamming. However, you need to understand that these are temporary measures and the problem should be fixed as soon as possible.
Spring winding
Winding a spring is not an easy procedure. Not everyone succeeds in installing the part in place the first time, so you should not be upset if you fail. It is necessary to repeat attempts until the actions are successful. If you wish, you can watch a video on the Internet, where craftsmen tell in detail and show how to easily and quickly perform this operation.
Important! When winding and installing the spring, you need to remember that it is hardened, which means it can burst if you apply too much force. A new part is inexpensive, but you will have to spend time searching for it, which means that the work of mowing the grass will be postponed indefinitely
To wind the spring, you need to place the bend in the groove, and then, turning the coil, carefully lay the part along the inner diameter of the bobbin. In this case, the spring must be constantly held with your hands - if it is not fixed, the part slips and jumps out, then the winding has to be done again. When done correctly, the spring is held tightly in its seat.
Preliminary preparation
First of all, to wind the fishing line, you need to remove the reel (spool, spool) from the trimmer - specific actions will depend on the complexity of the configuration and the type of the product itself:
- small electric trimmers with a working arrangement of the motor and coil in the lower part, as a rule, have side keys on both sides of the reel. By pressing them simultaneously, the upper part of the reel, along with the internal contents for winding the fishing line, is disconnected, while the lower part remains on the trimmer. It is advisable to disassemble the bobbin on a flat, smooth place so that the spring included in the structure does not jump out and get lost;
- electric and gasoline trimmers with a curved rod without the ability to install a knife, as a rule, have reels with a special wing: in such designs, you should hold the spool in a stationary position with one hand, and with the other, rotate the wing nut that secures the reel on the rod counterclockwise. After disconnecting the nut, the entire reel is removed.
- electric and gasoline trimmers with the ability to install a knife on a straight rod (for example, STIHL trimmers) have a hole under the reel. To keep the rod stationary, a screwdriver or other suitable object is inserted into this hole and, with slow rotation, such a relative position is achieved when the screwdriver enters the hole and the reel is fixed. After this, the coil body is rotated clockwise (with a left-hand thread) and removed from the trimmer .
For the second and third cases, the coils, depending on the design, are disassembled in different ways. In bobbins with a wing, the wing is unscrewed; in bobbins with latches, the latches are pressed and one part of the bobbin is released from the other. If the halves of the spool are connected by thread, then it is enough to turn them by hand in opposite directions until they are completely unscrewed.
Tools
Features of the Patriot PT 3055 trimmer
- Modern materials and assembly technologies were used in the production of the device.
- The latest anti-vibration system is provided.
- High performance is achieved through a chrome-plated engine with wear-resistant and precisely fitted parts.
- Simple and mobile control system. On the bicycle-shaped handle, within reach, there is a start button and a gas lock, which allows you to carry out work with precise calculations and mobile control.
- A line of unique motor oils has been developed to lubricate drives.
- The ease of assembly and use of the tool is designed for the average person without special technical knowledge and work experience.
- Safe operation. The protective cover protects the operator’s hands from injury.
How to assemble a Patriot PT 3055 gasoline trimmer
- The handle of the main rod is installed and secured so that the open part is located on the right side of the handle.
- The handle is not fully bolted on, but takes into account subsequent adjustments.
- The control handle is installed by the gas trigger to the trimmer head.
- The fastening screw is tightened with a little force. The cable clips are attached to the handle.
- The shoulder strap is snapped with a carabiner onto a special mount on the main rod of the unit.
- An iron casing is screwed to the bottom of the rod at the base onto the protective housing of the gearbox, and a plastic casing is attached to the top to enhance protection.
- A protective flange is installed on the splined shaft of the gearbox so that the technical grooves on the gearbox coincide with the flange ones.
- A locking rod or hexagon is inserted between the gearbox and the flange.
- The trimmer head is screwed in counterclockwise until it stops.
- The cutting knife is installed on the protective flange.
- Press the knife with a washer and tighten the nut until it stops against the clock.
If the knife is dull on one side, then turn it over and use the second sharpened side.
- Both parts of the rod are connected using the locking lever of the fastening system.
- Checking for correct assembly: it cannot be opened without pressing the fixing fastener.
- The additional fastening of the connection coupling is tightened until it stops. This gives an advantage when using the unit to perform various tasks: the lower rod is installed at fixed angles of 90 and 180 degrees.
Description of the Patriot PT 3055 petrol trimmer model
- Thanks to the high-quality design of the two-stroke engine and its upper position in the structure, a low noise level of up to 70 dB stands out.
- Fuel tank made of transparent material resistant to aggressive environments.
- Semi-automatic line feed.
- The cutting width of the strip with a knife is up to 220 mm.
- The excess length of the fishing line is cut off with a special knife in a protective casing.
- The air filter is multi-stage, captures large, medium and small fractions of suspended dust and solid particles.
- The rod is detachable, convenient for transportation and storage.
Automatic winding of line onto reel
There is a type of reel in which an automatic mechanism produces winding on its own - the user only needs to thread the line correctly. The fishing line is passed through a hole on the inside of the body, its tendrils are threaded through the hole on the outer body without winding, the bobbin is assembled, and when the winding button is rotated, the fishing line inside is wound on its own. In such a spool it is impossible to wind incorrectly: the mechanism itself will determine the correct direction, since it can only spin in one direction.
Owners of private homes know how necessary this type of tool, such as a trimmer, is. It can be gasoline or electric, but they differ in the design of the power units. To cut grass in areas where there are stones, trees and other obstructing objects, a fishing line is used as a cutting device. This consumable material wears out during use, so we will consider in detail how to wind the trimmer coil in the material.
Handle shape
Manufacturers offer 2 handle options:
- T-shaped (in the form of a bicycle handlebar);
- D-shaped;
- in a "J" shape.
The handle in the shape of the letter “T” is installed on models with automatic line winding. The work is carried out with 2 hands located on both sides of the bar. This position is convenient for mowing large areas of vegetation. The cut is carried out according to the scythe principle - from one side to the other. This option is not maneuverable and does not work well on difficult terrain. The bicycle handlebar can be equipped with control buttons. In household types of trimmer, the start buttons are installed on the rod.
Classic trimmer model with a double-sided handle with control buttons
A gasoline trimmer with a D-shaped handle is more maneuverable; it is convenient for cutting grass in areas with difficult terrain. In such an instrument, the hands are located one above the other. The disadvantage of the handle is that it is difficult to hold; control of such a device is more complex.
Trimmer handle in the shape of the letter "D"
The handle in the form of the English letter “J” is the most inconvenient, so it is rare.
How to wind fishing line on a reel
Fishing is a truly exciting and exciting activity. Beginner spinning players, of course, want to get involved in it as soon as possible and finally get a good result. The reservoir where you are planning to go fishing has been selected and all the necessary supplies have been purchased. There are rods, reels with baits and fishing lines, too. However... already directly on the shore, a minor, but still noticeable, nuisance can await you, which sometimes completely disrupts the entire fishing trip.
Its name is winding fishing line on a reel. Each reel is equipped, it seems, with instructions with a basic circuit. But the fact is that with such an attitude you won’t be able to catch much. If the winding is incorrect, the loop may be thrown off, and instead of removing the fish from the hook, you will then have to fiddle with unraveling the lump of fishing line with your own hands.
People most often start using spinning with gear that is shorter (both reels and rods). The caliber of the bobbin in them is two to three thousand (that is, a hundred-meter fishing line is no more than a third of a millimeter thick, in this case the limit). Winding structures can also be very different: this is chaotic winding in the disorderly laying of Chinese samples (more or less suitable for monofilament, but completely inappropriate with braided fishing line), and such more professional formats as straight cylinder, straight and inverted cone. And from the very beginning it is better to get used to those types of styling that are more serious, because this is not a whim, but higher efficiency. Having fleetingly saved a few hundred rubles, you will then begin to curse everything in the world when, instead of casting and biting (or just casting and waiting), fishing turns into a continuous struggle with “beards” and other line overlaps. Such fishing has never brought joy to anyone.
How to quickly wind fishing line onto a spinning reel
The main, fundamental rule is that the equipped fishing line must be as straight as a ruler. For cylindrical winding, a straight line is optimal, and if you choose a cone, then an inclined line. But in any case, remember firmly, only the fishing line without bends.
How to ensure such leveling in practice? First of all, we attach the reel to a stationary rod-shaped object, on which it should scroll easily and freely. The rod can be pencils and knitting needles, fountain pens and screwdrivers, small metal tubes without sharp edges, or even a smooth and well-polished stick. As a last resort, find someone who agrees to hold it.
Thread the line through every single ring of the rod. Tie a knot at the extended end. Now you can start threading the fishing line onto the surface of the reel. First, we fasten it on top of the bobbin in a circle, having first raised the arc of the line guide, and when another “Arbor” knot is tied and tightened, the arc can be lowered.
Braided fishing line loves to slip. This can be avoided if you place a piece of rubber under the attachment point (for example, cut from an unusable fingertip or a worn glove), or, as a last resort, support it with an adhesive plaster if there is no rubber.
And now comes the turn of winding the fishing line. Turn the handle on the reel carefully and evenly. Make sure that the line is kept tight all the time. It is necessary to support it, but only with tight gloves.
READ The handle on the gas trimmer is broken
When winding, avoid as much as possible ending it at the bobbin edges. If you do not follow this rule, then self-resetting of loops or their terrible entanglement becomes very likely. To avoid this outcome, make sure that at least a millimeter or two up to the side remains unwound with fishing line. On the other hand, exceeding a gap of five millimeters can make long casting impossible. Prevention is backing (essentially, winding up an auxiliary line from below the main line, no thicker than three tenths of a millimeter, otherwise even laying will become unattainable). Please note that almost all threads work well in backing, except for cotton and nylon that take a long time to dry.
Check out this useful tutorial on how to properly wind fishing line onto a reel.
Determining how much fishing line to throw on backing is possible only through experiments; there are no ready-made formulas or theoretical provisions in this regard. You will need another bobbin. We wind the main line onto it, then the backing (don’t forget about the gap from the side). Next we attach the main mount, onto which we insert the fishing lines in the reverse order. Visit our website and read more useful tips for fishermen.
Winding fishing line onto the trimmer
Measured and careful removal of the spool from the braid reel makes it possible to proceed directly to winding the fishing line.
The design features of the head, the number and location of the fixing holes dictate the sequence of actions when performing this operation, and also determine the methods used.
Today there are several types of reels, depending on the number of tendrils of the fishing line and the methods for threading it:
- Trimmer head with one working tendril;
- A reel with two tendrils of fishing line;
- Reel with automatic winding.
Preparing to wind the fishing line
Before the winding process, you must first remove the reel with fishing line from the housing. Depending on the manufacturer, power and type (electric or gasoline), there are three design types of trimmers:
- Compact trimmers with electric drive. Electric trimmer spool This type of tool has a bottom-mounted motor and head, which in turn has two side buttons for removing the bobbin. When they are pressed simultaneously, the upper part of the reel with fishing line is disconnected, and the lower part remains rigidly attached to the braid. Experts recommend disassembling on a level surface to prevent the spring from jumping out.
- Motor- and electric scythes with a curved duralumin rod, not intended for working with a knife. As a rule, reels of such models are equipped with a special wing nut. Removing the spool should be done by holding the reel body with one hand and unscrewing the wing counterclockwise with the other.
- Powerful gas trimmers and electric scythes with a straight bar. Trimmer with a straight rod This model provides the ability to install a knife. Removing the coil in such models is done using two keys recessed into the coil body. To install the trimmer knife, you need to align the hole of the reel and the rod, and then insert a device in the form of a steel pin (screwdriver, iron rod). After fixing the coil, the housing can be easily unscrewed clockwise by hand.
More than 200 types of trimmers in one place at the lowest prices. Click and watch
Now, having removed and disassembled the coil, we actually begin winding.
On a reel with one antenna
to wind the line onto a reel with one tendril. In such structures, depending on the brand of trimmer, from two to five meters of cord are placed. The edge of the fishing line in the spool must be tucked into a special hole or groove, after which the string is wound in the direction opposite to the rotation of the reel during operation.
Advice! To understand which way to wind the thread, you should look at the body of the bobbin - usually there are marks on it indicating the direction of movement of the reel during operation.
After the fishing line is wound, you need to leave a small piece (15-30 cm), thread it through the outlet hole of the spool and reassemble the head.
The string does not extend
In automatic and semi-automatic reels, the cord is fed without stopping the trimmer. If this does not happen, it means:
- the line in the head is wound incorrectly, so the reel does not spin;
- the fishing line is wound unevenly, so the cord gets stuck between the turns and does not come out - to prevent this from happening, you need to wind the thread carefully, avoiding distortions, turn to turn;
- the ends of the cord coming out of the holes are very short, the centrifugal force is not enough to remove them, so the line is not fed - before turning on the trimmer, it is important to adjust the length of the thread and lengthen it a little, if necessary;
- the cord stuck together.
Trimmer head with two antennae
After removing the spool from the reel body, we determine the number of streams for winding the fishing line (1 or 2).
There is no fundamental difference between reels with one and two grooves, but if carelessly threaded into a double groove, problems with operation may occur.
How to wind line on the reel of Huter GET series trimmers
Due to the possibility of intertwining of adjacent tool lines, a situation may arise when, after wear of the working antennae, it is impossible to remove new ones.
a fishing line with a length of 1.5 to 3 meters is taken for refueling Winding must be done in the direction opposite to the rotation of the head, since winding in the direction of movement will lead to the fact that the fishing line will not be removed from the reel.
After the fishing line is tucked into the trimmer , we thread the free ends (15-30 cm) into special holes. Next, we assemble the head in the reverse order of disassembly and check its functionality.
Trimmer head HUTER_in-place threading of fishing line
Don’t worry if the ends of the two antennae are very different in size, because when you start the trimmer , the knife installed on the guard will cut off the excess.
How to properly wind fishing line onto a trimmer reel
Many people, having used up the factory line on a recently purchased trimmer, try to wind a new one, but cannot, because they do not know how to properly wind the line onto the trimmer's reel (spool). It seems like there are instructions, but it still doesn’t work. Let's try to deal with this issue in this article.
So, to wind the line, you first need to remove the reel from the trimmer - it will be more convenient. The method of removal will depend on the type of trimmer.
More than 200 types of trimmers in one place at the lowest prices. Click and watch
Now, having removed and disassembled the coil, we begin to actually wind it.
Common mistakes
Although winding line is a very simple task, many beginners may wind the line incorrectly. Below are the most common mistakes.
- Many people, when measuring thread, think that 4 m is a lot. Because of this, people often measure out less and therefore end up running out of line. Don't be afraid to measure out too much, because you can always cut off the excess.
- In a hurry, some people do not follow the threading grooves inside the spool and wind the thread at random. This leads to the line flying out of the reel and can even cause injury.
- For winding, you should use only the appropriate fishing line. This error is the most common. You need to monitor not only the thickness and volume of the fishing line, but also its type. You should not use the first line you come across for winding, which will not meet your goals. For example, you do not need to use a thread on young grass if you need to mow dead wood.
- Do not turn on the device until it is completely wound and assembled. Although this is obvious, some people do this to check if everything is done correctly.
- In no case should you confuse the direction of refueling, as this will overload the engine, and it will soon fail.
It is common for beginners to make mistakes, so you must follow the tips given in this article.
To learn how to replace the line on your Patriot trimmer, see below.
Remove the coil from the trimmer
On small electric trimmers with a bottom-mounted motor (where the motor is located near the ground when operating), the coil usually has two buttons on the sides. We press on them and disconnect one half of the coil body from the second, which remains on the trimmer. the fishing line is directly wound . When disassembling, be careful: there is a spring inside that can fly out and get lost.
On electric and gasoline trimmers with a curved rod (such trimmers do not yet have the ability to install a knife), you need to grab the coil body itself with one hand, and with the other hand you need to start rotating the thumb on it counterclockwise. It is he who attaches the reel to the trimmer rod. Having unscrewed the thumb, carefully remove the entire coil, trying not to lose the spring inside.
On electric and gasoline trimmers with a straight rod and a gearbox at its end (on such trimmers, in addition to fishing line, you can also install a knife), look for a hole under the coil, insert, for example, a screwdriver into it, quietly rotate the coil until the screwdriver goes even deeper, and the coil will lock. Now we twist the entire coil clockwise (since the thread is left-handed) and remove it from the trimmer. Next we disassemble the coil. It can be assembled using latches or twisted with a lamb. If the coil is on latches, then press on the sides on the base of the latches so that they bend and release one half of the coil body from the other. We just twist the lamb. There may also be a third type of connection of the two halves of such a coil: with it you need to grab the lower part with one hand, and the upper part with the other, and begin to turn them in opposite directions. When disassembling such a coil, you also need to make sure that the spring inside is not lost.
READ How to reduce fuel consumption on a Champion trimmer
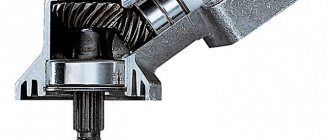
Checking the correct application of lubricant to the angle grinder gearbox
The last step when servicing an angle grinder is to ensure that the lubricant is properly applied and distributed inside the gearbox. To do this, after the gear unit has been assembled, turn on the power tool without load for several minutes, while ensuring that there are no extraneous sounds, smells, etc. If they occur, you must immediately disconnect the angle grinder from the network. The heating of the gear unit is also checked. The lubricant must distribute heat evenly and the temperature of the gear unit should not be very high.
After some work, unscrew the 4 screws, then remove the cover from the gearbox. The helical gears should be visually inspected for the presence of lubricant. If it is missing, it means that too little lubricant was used and should be reported. If during work it is squeezed out of the cracks, then it means that there is too much of it and the excess should be removed. After making any changes, check the operation of the angle grinder again without load.
Winding process
If your reel is designed to work with only one antenna, then everything is simple. You need to unwind 2-4 m of fishing line (depending on the size of the reel), find a hole on the inside of the reel that fixes the fishing line, insert one end of the fishing line there and start winding the fishing line in the direction opposite to the direction of rotation of the reel on the trimmer. On the inside of the reel there is usually an arrow indicating which direction to wind the line. Having wound the fishing line, we leave a small piece of it unwound in order to expose it outside. We fix this piece in a special groove located on the inside of the reel and designed to prevent the line from unwinding when the reel is assembled. If there is no such groove, then you will have to hold the line with your finger to prevent it from unwinding during further assembly of the reel. Next, we take the outer part of the reel and thread the outer piece of fishing line into the existing hole, assemble and put the reel back on the trimmer.
If the coil is designed to work with two antennae, then do the following. On the inside of the reel we look at how many grooves there are for winding fishing line. There may be one or two. If there is only one groove, then both tendrils are wound along this one groove. If there are two grooves, then each tendril is wound along its own groove. A single-groove reel must have a through hole through which the line is threaded. We unwind 2-4 m of fishing line, thread it through this hole so that the fishing line sticks out equally on each side. And we simultaneously wind both tendrils of the fishing line in the same direction, opposite to the direction of rotation of the reel on the trimmer and coinciding with the direction indicated by the arrow on the inside of the reel. We leave a little of the fishing line unwound, fix the resulting ends in special grooves, and if there are none, hold them with your fingers. We thread both ends into the existing holes on the outer body of the coil. We assemble the coil and attach it to the trimmer.
If there are two grooves, fold a piece of fishing line 2-4 m long in half, insert the resulting loop at the bend into the groove between the two grooves, and simultaneously wind both ends of the fishing line, each along its own groove. Further actions are similar to the previous option.
There are also reels in which the line is threaded through a through hole on the inside. After this, the ends of the fishing line, without winding, are threaded completely through the holes on the outer body of the reel, the reel is assembled and they begin to rotate the button, which is usually pressed, in order to release the fishing line during operation as it wears out. You turn the button and the fishing line winds itself inside. However, you won’t be able to twist it in the “wrong” direction, since it can only spin in one direction. If you get the hang of it, you can wind fishing line onto such a reel without even disassembling it - you just need to align the through hole in the inner drum with the holes on the outer body of the reel, and then thread the fishing line into them.
That's all on this issue. Happy winding!
A few tips on how to properly thread the string into the trimmer
If the reel allows you to wind fifteen meters of thread, then you shouldn’t wind so much, ten will be enough, that is, if you fold it in two layers, you will get five meters each. With a different fishing line capacity, you should use the same rule.
In the case when an ordinary round thread is used, it is better that it has a diameter of 3.3 mm. If it is a figured fishing line, then its thickness should be less, for example 3 mm.
It is better to wind both pieces of fishing line onto the spool at once, and you need to start from its bend
It is important to avoid overlap in the direction of the arrow. It is also important to be able to perfectly tension the thread
If the thread is overtightened, it may overlap. If it is not tightened enough, it may twist. To avoid cutting your hands on the figured thread, you should wear gloves when winding it.
There is no need to leave the ends of the fishing line long. This may cause it to curl.
How to properly wind the fishing line onto the trimmer reel?
Despite the fact that gardening equipment has been used for quite a long time, for some owners of private houses it is still new. That’s why questions often arise about how to properly wind fishing line on an electric or gasoline trimmer.
This is essentially a simple operation, but all its stages must be performed correctly in order to achieve the desired result. Moreover, only a few manufacturers provide an answer to this pressing question in their operating instructions. Study the article and find out how the line is wound on the trimmer reel.
The procedure for winding fishing line onto the trimmer reel
First of all, you should know that trimmers have different working attachments. The reel can be designed for different lengths and thicknesses of fishing line - this point should be taken into account when purchasing consumables.
So, how do you load line into the trimmer reel? All work is divided into several stages:
- First you need to disassemble the trimmer head.
- Unscrew the nozzle by rotating the drum to the right.
- Press the two latches located on different sides of the tap holes with your fingers and remove the top cover of the nozzle. You can pry the cover off with a screwdriver. This should be done carefully: reels with automatic line feed have a spring that can forcefully throw off the cover along with the entire contents of the reel.
- Remove the pieces of old fishing line.
- Now you need to find the middle of the fishing line. To do this, unwind it to the required length (for example, 10 m), cut it and fold it in half.
- Hook the middle of the fishing line into the existing recess or insert it into a hole specially designed for this purpose. And start winding. The direction is indicated by an arrow, which is usually marked on the body of the trimmer reel (usually against the rotation of the drum). Some models have a double-sided reel: in this case, the fishing line should be wound in different directions: one end - in one direction, the other - in the other, the loop of the fishing line must be inserted into the dividing slot located in the middle.
- Leave free ends of the fishing line about 20 cm long each. Later they will need to be fixed in the recesses.
- And finally, the last step will be assembling the drum. Reinstall the washers and spring. On the top ring of the reel there are two recesses where you need to tuck the tendrils of the fishing line. Thread them through the holes and install the reel into the drum, trying to tighten the line without displacing the spring.
- Place the drum cover on top and close it with your fingers. The latches will click into place with a characteristic click.
When you turn on the trimmer, the blade will automatically cut off the excess line.
As you can see, winding fishing line onto a trimmer reel is not difficult: the main thing is to do everything correctly. Here are a few more tips that will be useful to you when choosing a fishing line, winding it and subsequent work:
- The fishing line comes in different thicknesses and with different sections. The best option for winding is the “native” fishing line for this model;
- Never use fishing line or metal cables the trimmer This replacement may seem effective, but it is very dangerous. If the cable jumps off a working trimmer, it can seriously injure not only the lawnmower himself, but also those around him;
- the line is cut off when the trimmer is running and comes into contact with hard objects. Try not to allow this, otherwise you will have to stop every time, turn off the device and wind the line onto the reel again;
- For cutting lawn grass, use a regular line, and for tough weeds, use a pigtail line. It is more durable and will not be constantly cut.
Sources:
https://www.svoimi-rukamy.com/kak_namotat_lesku_na_katushku.html https://regionvtormet.ru/metally/kak-pomenyat-ili-namotat-lesku-na-katushku-trimmera-sposoby-i-nyuansy-namatyvaniya-namotka -svoimi-rukami.html https://instrument-tehnika.ru/kak-pravilno-namotaty-lesku-na-katushku-trimmera/ https://womanadvice.ru/kak-pravilno-namotat-lesku-na-katushku- trimmera
Husqvarna trimmer 135R – parameters and applications
This Husqvarna household brush cutter offers high power, low noise and vibration levels, and is easy to use and maintain. The trimmer is designed for caring for small and medium-sized gardens and local areas. The long-lasting rotary mechanism of the lawn mower successfully copes with mowing tall dry grass, cutting thick weeds and large shrubs.
The main characteristics of the braid include:
- built-in motor power – 1.9 liters. With.;
- capacity of the standard fuel tank – 600 ml;
- the maximum permissible cutting width with fishing line is 40 cm;
- knife cutting diameter – 25.5 cm;
- generated sound pressure – 98 dB;
- working weight – 6.9 kg.
The drive shaft of the model is protected by a reliable, non-separable metal rod, coated with an alloy that protects it from corrosion.
