When manufacturing a mini tractor based on a VAZ, craftsmen are faced with the need to shorten the rear beam. But few people know how to do it correctly. Now we will help you understand this problem and give some tips on how to shorten the bridge from the VAZ.
When creating a homemade mini tractor, we are faced with the fact that it is necessary to trim the rear axle of the VAZ in order to change the track width. Since most often the gearbox is located in the center, the beam has to be shortened on both sides. But before starting such work, you should definitely have a drawing and diagram of the future structure. In it we indicate all the dimensions of each part, all measurements. Using this diagram, you can easily and efficiently make the desired mechanism.
Stages of work:
- First of all, you need to cut off the cup for the spring and remove the end flange.
- Using a grinder, we cut off part of the removed axle shaft. At the end we make a comb, where we make a groove for the “dad”.
- Now you need to drill a hole inside the cup.
- We make a joint between the axle shafts and weld them according to the marks in the drawing.
- We drive the finished welded axle shaft into the bridge.
- We weld everything on both sides.
In addition to the problem of this common problem, many are also faced with the problem of how to calculate the front axle and how to make a driving front axle on a mini tractor.
To make the front beam with your own hands, you can use the diagram, which will be an excellent assistant for creating this design. You can take the drawing below as an example.
Mini tractor front beam
it’s possible, but it turned out that it’s too high for my MT and I
If this is the front axle of a tractor, then the steering knuckle must be mounted at the top and bottom. In general, go to the topic of homemade mini tractors, everyone there is homemade.
If this is the front axle of a tractor, then the steering knuckle cannot be attached at the top and bottom. In general, go to the topic of homemade mini tractors, everyone there is homemade.
At the bottom where the pillow was there will be a slope for strength. I do it with minimal (for now) costs, I did it all in literally two hours. GAZ-24 hubs.
At the bottom where the pillow was there will be a slope for strength. I do it with minimal (for now) costs, I did it all in literally two hours.
Go to the topic of homemade mini tractors in the homemade agricultural machinery section, and you will see the designs of homemade products and you will receive competent advice.
Go to the topic of homemade mini tractors
I also go there periodically, I just can’t look through all the topics, and the men there discuss more serious topics. and here I decided to post it, so to speak, for people like me (dummies), maybe it will be useful to someone.
Vasily Vasilievich! I don’t want to offend you in any way, it’s just that people who build mini tractors themselves constantly communicate there. I go there quite often myself (I’m interested), but I’m mostly here. We are more operators who modernize our factory mini tractors and make homemade attachments for them.
Do-it-yourselfers also come here, but let's say not all the time, but they discuss more serious topics or not - how to say everything in this life seriously (since there is no other).
And their experience will be very useful to you, and will protect you from unnecessary mistakes and save time and money.
And their experience will be very useful to you, and will protect you from unnecessary mistakes and save time and money.
Beam/bridge for mini tractor
A beam or bridge for a mini tractor serves as the basis to which the systems and elements of the machine are attached.
The front beam on a motor tractor serves as a support for various components, and the wheels are also attached to it. Often, craftsmen encounter a beam during the conversion of a walk-behind tractor, when they have to make the front beam of a mini tractor with their own hands. The rear axle of a mini tractor is the same system to which the wheels and some elements of the overall system are attached. When designing a mini tractor, many people take the front and rear axles from old cars. As a result, the design is strong and reliable. If you have the necessary tools and materials, as well as knowledge on the subject of equipment, then you can make these parts yourself from what you have in your garage.
How to make a bridge for a mini tractor?
A mini tractor is a technique that helps a person in the process of cultivating land, transporting goods, planting plants, caring for them, and much more. Factory equipment today is quite expensive, not everyone is ready or has the opportunity to spend such money. But in villages you can often find old cars that are already out of order, but there is still hope to give them a second life. It is from them that craftsmen take various parts to construct a homemade mini tractor.
Creating a mini tractor includes designing the chassis. First of all, bridges need to be installed. It is better to make the rear axle for a mini tractor with your own hands the same as the front one. This will save you from selecting a subordinate number, which is impossible to do without the proper experience and knowledge.
The chassis can be taken from a Zhiguli, but it will need to be shortened. You do not have to additionally look for a gearbox that is already on the rear axle. How to make a beam for a mini tractor? The cross beam can be made from a square pipe or from metal corners.
A driven front axle differs from a non-driven one in that it transmits torque from the cardoon transmission to the wheels. With its help, the machine turns, the steered wheels are stabilized, and pushing forces are transmitted from the drive wheels to the tractor frame. How to make a driving front axle for a mini tractor? You will need:
- Beam;
- Main gear. Consists of bevel gears. Serves to increase torque and transmit it to the differential;
- Differential. Serves to transmit power;
- Wheel reducers. Necessary to increase torque, which is transmitted from the main gear to the wheels. They are also needed to make a turn.
Pros of installing hydraulics
Hydraulics are installed on a minitractor in order to ensure the operation of some of its mechanisms and facilitate the control of this unit. A unit with installed hydraulics has its advantages.
- The car becomes easy to control. The steering wheel can be turned with virtually no effort, with one hand.
- Hydraulics makes it possible to use various attachments.
- The use of hydraulics allows you to modernize the brake system. Thanks to the hydraulic cylinders installed on the unit, the unit brakes instantly.
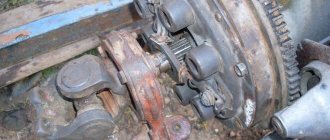
How to shorten the bridge from a VAZ?
Sometimes, in order to construct a homemade mini tractor, it is necessary to shorten the building bridge. Let's consider this process using the example of a rear axle from a VAZ. A shortened axle is necessary in order to reduce the width of the wheelbase, thereby making the car more compact and maneuverable.
First you need to carefully prepare for the process. You need the rear axle itself, as well as tools such as a welding machine, grinder, vice, screwdrivers, and more.
You need to trim the rear axle of a VAZ as follows:
- You need to cut off the cup for the spring;
- The end flange must be pulled out;
- The removed axle must be measured, compared with the drawing, and cut to size with a grinder;
- At the tip of the segment, place a notch, which will serve as a mark for the “male” groove;
- Drill a hole inside the cup;
- After this, the axle shaft is joined together and welded;
- The last stage - the finished axle shaft is inserted into the bridge. Welding is done on both sides.
Features of manufacturing bridges for mini tractors
A beam for a mini tractor is one of the main elements of a business machine. The front axle on a mini tractor is the basis for mounting many important mechanisms and wheels. The same function is assigned to the rear axle. When assembling homemade mini tractors, many farmers use parts from old cars as beams. This design turns out to be quite strong and reliable. But in order to make high-quality mechanisms, you need to carefully familiarize yourself with their structure and follow the correct procedure when assembling these structures.
A mini tractor is a type of equipment designed to help a person process soil faster and better, transport luggage, plant plants, care for them and perform many other jobs. Nowadays, modern technology is quite expensive, and not everyone is ready to spend money on buying it. Therefore, in order to get a mini tractor and save money, many farmers assemble mini tractors from old cars.
Manufacturing a mini tractor usually includes designing the chassis. The driven and driven axles should be installed first. In this case, the rear axle on a mini tractor should be assembled according to the same principle as the front axle. Thus, the farmer will not need to select the gear ratio, which is extremely difficult to do without the necessary experience.
You can make a front axle for a homemade mini tractor from a beam from an old Zhiguli car. In this case, there will be no need to look for and install a gearbox. This element is already provided in the basic chassis. To make a cross beam for a mini tractor, metal corners or a piece of pipe with a square cross-section are suitable.
The driving axle differs from the driven axle in that during operation it transmits engine torque to the wheels. The intermediate link is the cardan transmission. With the help of the drive axle of the minitractor, turns are carried out, wheels are stabilized, and pushing forces are transferred from the drive wheels to the vehicle frame.
To make a front axle for a mini tractor with your own hands, you should study its design in more detail.
A homemade front beam for a mini tractor should consist of the following elements:
- strong cross beam;
- axle bushings;
- bushings for rotary support axles;
- wheel axles;
- roller and ball bearings;
- bolted fastenings.
The front beam on a mini tractor is assembled with your own hands in the following order:
- It is best to use a steel angle or a piece of profiled pipe as a cross beam. Axle bushings can be made from structural steel;
- For the manufacture of rotary support bushings, it is necessary to use a profiled pipe. It will need to be modified to install bearings, and covered with metal covers made of ST3 steel;
- The front beam assembly, which includes roller bearings and a cylindrical cage, must be welded to the central part of the cross beam;
- Using powerful bolts, the bridge device will need to be attached to the bushings located in the transverse beam of the frame. The play of the front axle in relation to the overall design of the mini tractor depends on how tightly the bolts are screwed in. Both loose and too tight tightening of the bolts will have a bad effect on the ease of operation of the equipment. In this regard, it will be necessary to calculate in advance the optimal backlash of the bolted connection.
The rear axle is manufactured in a similar manner. If there is no time to assemble the beams, finished parts can be taken from old domestic cars. VAZ and UAZ cars are suitable for this.
There will be no problems with installing ready-made bridges. The only thing required is to cut the bridge. This will allow you to use standard short axle shafts. The rear axle of the minitractor will also need to be protected from impacts during operation of the minitractor. As protection, you can use a caliper - a steel corner, which should be laid along the welds of a homemade bridge.
The nuances of making a caterpillar tractor
Homemade tracked mini tractors are a technique whose main feature is high maneuverability and good cross-country ability. Also, a tractor on tracks creates minimal pressure on the soil, which cannot be said about its wheeled counterpart.
To make a mini tractor on caterpillar tracks, you will need the following structural elements.
- Frame. It is made from a profile pipe or channel.
- Engine. For a caterpillar mini tractor, it is better to use a diesel engine.
- Main bridge. As in the manufacture of a wheeled tractor, for a tracked unit you can also use a ready-made axle from an old car, which should be shortened.
- Transmission. The ideal option would be a box from GAZ-53.
- Clutch. A clutch block from a GAZ-52 will do.
- Caterpillars. They are made from tires from the wheels of large equipment, for example, from a tractor.
To make tracks, you need to take 2 tractor tires and cut off the side parts of them. These tires are then put on the wheels mounted on the frame, as shown in the following photo.
In order for the tractor to turn, a differential must be installed on the rear axle, which will disconnect the right or left wheel from the drive. Also, each wheel must be equipped with a brake that can be controlled separately. When you press the brake pedal and shift the differential, one wheel of the drive axle stops, while the opposite wheel continues to rotate. Due to this, the tractor turns in the desired direction.
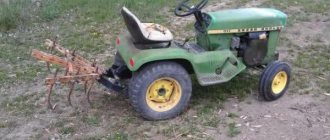
Making a mini tractor for households and farms can greatly facilitate the performance of many types of work, and also makes it possible to use it as a vehicle. The article describes in detail how to make a homemade mini tractor and everything for it.
Making a homemade mini tractor
In a private house, on a plot of land and in a field, the owners have a large amount of work to do. The use of small-scale mechanization can provide significant assistance. Usually we are talking about using:
- simple homemade mechanical devices;
- devices powered by an electric motor;
- walk-behind tractor;
- mini tractor.
Although, at first glance, it may seem that making a tractor yourself is a very difficult task, in fact, making a mini tractor is quite possible. To do this, you need to choose a suitable design and use not only home-made parts and assemblies, but also purchased ones.
Note! When creating such equipment, skills in working with metal, in particular welding, will be of significant benefit.
The following describes in detail the process of independently creating such a machine.
Mini tractor design
In order to design and assemble a simple and reliable mini tractor, the first thing you need to think about is the motor that will ensure its operation. It is important to take into account here that the power plant is needed not only for moving the tractor, it will become an important help in ensuring the operation of attachments.
The basis on which the structure should rest will be a metal frame. The tractor chassis consists of four wheels on two axles.
On a note. Installing hydraulics is not mandatory, but it will make working on the tractor much more comfortable.
A large number of useful attachments on the farm is one of the most important reasons for owning a mini tractor. The design must necessarily provide for the use of a three-point hitch, which is necessary for the reliable connection of additional devices.
Further work
The next stage of designing a mini-tractor includes upgrading the frame. First of all, move the racks to the specified distance. Then a bridge is installed into the structure of the unit and its parameters are tested.
For the first 5-7 days, you need to limit yourself to driving on a flat road surface in order to grind the chassis parts into each other. After running-in, the unit can be used in off-road conditions.
To prevent increased friction of structural parts, it is necessary to change the oil regularly. It is best to use the brand recommended by the gearbox manufacturer.
What is a mini tractor made of?
The following is a description of the main mini-tractor systems for a farmer or private home owner.
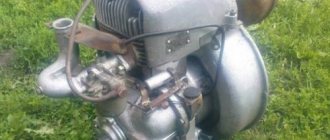
Engine selection
You can use an engine from an old car. It could be a VAZ, GAZ, Oka or Zhiguli. If the farm has a walk-behind tractor, its engine can also be used for this purpose. In order to reduce noise during operation, use a homemade muffler for a mini tractor. A hydraulic device can also be used.
When creating a frame, you need to use a profile pipe. From it you can weld a rectangular structure using a cross member, it will become the basis for the tractor. The dimensions of the minitractor frame are selected in accordance with its design.
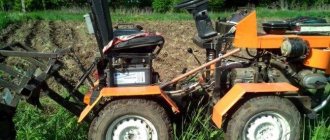
There is another manufacturing option called a “breakable frame”. It consists of two smaller frames, which are connected by an adapter.
It is advantageous to use such a frame with all-wheel drive tractors that have a homemade front drive axle for a mini tractor in addition to the rear one.
When choosing how to make a frame for a mini tractor, you need to take into account its dimensions and design features.
Chassis
When installing the chassis system, you need to install wheels, transmission, front and rear axles with hubs.
When choosing wheels, it is necessary to take into account the tasks for which the tractor is being manufactured. If this is done to solve transport problems, wheels with a diameter of about 40 cm are suitable. If you need to work in the field, then it makes sense to use larger wheels to increase maneuverability.
Usually only the rear axle is driven. It is taken ready-made from a passenger car, for example, from a UAZ or Moskvich. In this case, the front beam for the mini tractor is made by hand.
If there is such a need, a homemade gearbox for a mini tractor can be made.
How to resolve legal issues
The owner of the designed mini-tractor needs to study a number of legal nuances:
- a VAZ car, the bridge of which is used to create equipment, must be re-registered to the farmer upon purchase;
- when carrying out the re-registration procedure, it is mandatory to inform the employees of the territorial traffic police department about plans to remodel the car;
- After completing the assembly process, you must register the mini-tractor and obtain license plates.
Failure to comply may result in a large monetary fine. Repeated violation leads to confiscation of the mini-tractor.
If the agricultural implement is planned to be used only in a certain area, then registration is carried out in a simplified manner.