Causes and solutions to problems with equipment being buried in the ground
There are several reasons why a motor cultivator buries itself in the ground. Let's list the main ones:
- Often the immersion of equipment is associated with its configuration. Most mini cultivators are equipped with four cutters. They, provided the manufacturer uses high-quality material, are heavy. So they literally pull the cultivator into the soil;
- Another common reason is switching the unit to second speed where it is inappropriate. For example, when cultivating soft, loose soil;
- Equipment often gets buried in the ground due to improperly installed cutters. If they are attached to the hitch at an angle greater than indicated in the instructions, this will also cause the cultivator to sink.
Having figured out why the cultivator buries itself in the ground, you should list options for solving this problem.
The owner should immediately do the following:
- Remove the outer knives from the cutters. This will reduce the weight of the equipment. To more effectively get rid of immersion, you need to install any weight somewhere in the rear of the cultivator - this will balance the weight of the working unit. It is important to securely secure the load so that it does not fall due to motor vibration;
- To pull the cultivator out of the ground, use reverse gear. If it is not there, then the unit will have to be pulled out of the ground manually.
- Always be careful when adjusting the position of the cutters. Make sure the blades are facing forward each time.
If the cultivator buries itself in the ground, inspecting the transmission will help you determine what to do in such a situation.
She should not change gears on her own. If this happens, then it is likely that the node's channels are interfering with the gears of other nodes. In this case, you will have to adjust the distance between nearby gears and transmission channels.
Characteristics and photos
I was able to get rid of ARTHROSIS AND OSTEOCHONDROSIS IN A MONTH! No surgery needed.
There are two types of hand cultivators:
Let's consider their description and methods of application.
Rotary (star)
Also called a disc cultivator, this is a device for cultivating soft soil. What does the mechanism consist of?
- The cutting mechanism is a shaft on which discs with teeth, similar to stars, are located.
- The working width of the cultivator depends on the number of such discs.
- It is placed on the handle, adjusted to the height of the person who will work with it, so as not to bend over.
It's easy to use this type:
- it should be installed vertically in the ground;
- stars should be located between the rows;
- the connecting arc will be located above the bed;
- The cultivator moves using physical effort.
- the unit, with its sharp teeth, cuts into the ground and, grabbing it, lifts it and turns it inside out;
- In this way, the cultivator loosens the ground and at the same time cuts the weeds.
This type of cultivator is well suited for a summer residence; it is practical for:
- hilling potatoes;
- planting cucumbers;
- It loosens the soil well in flower beds.
And, although you have to apply effort to get the cultivator to move, it is still more practical and easier than doing it manually. Its main drawback is that it cannot break lumps of clay. treat heavy, crusty soil.
Cultivator-ripper
A ripper is a mechanism consisting of a metal rod on which there are several sharp curved teeth, thanks to which hard ground can be processed. This cultivator is designed to remove weeds. There is an arched handle at the top of the unit.
How the process works:
- The cultivator is swung strongly and lowered so that the teeth cut deeper into the ground.
- Then make a clockwise turn.
- Next you should pull it towards yourself.
Thanks to this cultivation, the soil is loosened and weeds are cut off. This type of cultivator is widely used to prepare the land before sowing.
Its advantages are that the load is removed from the spine and evenly distributed to the muscles of the legs, arms and back.
Root remover
Another variety of hand cultivators for use in the garden. On the central rod there are spiral-shaped teeth directed to the sides. When used, the teeth can cut into the ground to a depth of 20 cm and not injure the plantings. This view is easy to use:
- it must be driven into the ground;
- press;
- turn the handle clockwise.
With these actions, the cultivator goes deeper, grabs the soil and cuts off the roots of the weeds so that they can be easily pulled out.
This type of cultivator has disadvantages. One of them is that people with weak hands will not be able to use it. If the ground is dense, then you will need to press harder on the handle.
Potato digger
The potato digger is familiar to many gardeners who grow potatoes. It serves as a good assistant during harvesting. The unit is convenient and greatly facilitates the digging process. When a shovel is used to harvest the crop, it can injure potato tubers and injure the spine.
This potato harvesting assistant resembles a pitchfork, only with a turning function. The structure too:
- steel teeth at the bottom;
- pointed metal rod;
- handle and sharp elongated steel teeth at the bottom
- The handle is comfortable and can be adjusted to suit a person’s height.
How to use it:
- A weapon is placed on the surface of the ground, near a bush, with the tip down.
- it is necessary to rotate the handle around the axis so that the teeth go deeper into the ground,
- Continuing the turn, you need to lift the unit up.
The forks of the implement will grab the tubers and lift them, carefully, without damaging them, to the surface.
This method is faster than digging with a shovel, and also easier, because the load is removed from the lower back, there is no need to bend over. This mechanism is also used to loosen the soil to prepare it for planting.
This tool also has a drawback: you often have to repeat this process several times, because at a time you only get a few tubers from the bush.
How to prevent the cultivator from getting buried - expert advice
There are a number of measures that will help prevent the unit from sinking into the soil. Experts advise:
- Do not treat the soil immediately after rainfall. The soil will be too soft, causing the equipment to sink into it;
- Correctly adjust the coulter;
- Set the cultivator gas regulator to the maximum possible value and check the gear shift;
- Cultivate the soil at least 2 times. The first time the coulter is set to the minimum depth level, and the second time – to the depth required for processing.
A thorough inspection of the unit and equipment will prevent it from digging into the ground and save you time.
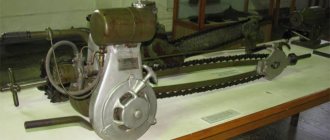
Why do cutters burrow into the ground?
Motor cultivators are universal equipment for solving various agricultural problems. But you need to know how to properly operate the unit.
Often the cultivator gets buried when plowing. This problem is caused by the following reasons:
- Specifics of the configuration . Most models have four cutters. If high-quality material is used in their manufacture, they are quite heavy. Therefore, the cultivator literally sinks into the ground;
- Changing speed when not necessary. For example, when plowing soft, loose soil;
- The cutters are installed incorrectly. If they are attached to the hitch at too great an angle, the cultivator will sink;
- Soil that is too wet will clog the knives;
- The coulter is too deep into the ground and needs to be adjusted;
- RPM too low;
- The soil density is high , so the area needs to be cultivated twice.
Operating a cultivator - rules and tips for beginners
Before plowing with a cultivator, you should prepare the area to be treated.
To do this, you will need to remove debris, clear the area of large stones and anything unnecessary that could damage the cutters. After this, the plowing algorithm looks like this:
- Check the unit for damage, screw in all fasteners securely, fill in gasoline and oil;
- To reduce the width of the covered strip, you need to remove the side knives;
- Start the engine and begin to slowly dig the cutters into the soil;
- Start a smooth movement without jerking;
- When processing, do not use the forward and reverse handles at the same time, as this may damage the transmission;
- Take short breaks if the weather is hot;
- After plowing, slowly pull the cutters out;
- At the end of the work, clean the unit from dirt and the cutters from wound weeds;
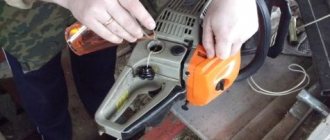
- If necessary, apply oil to the transmission device using a syringe.
There are a number of recommendations that should be followed when cultivating the soil.
Experts advise:
- Rectangular plots should be cultivated in a circle, and square gardens are best plowed in a zigzag direction;
- There is no need to plow the entire area if it is not necessary. It is best to cultivate the land in parts as you plant;
- Experienced farmers recommend making beds along the long side of the plot, placing them parallel to each other;
- If the garden is located on hills, then it is best to make beds along the rise;
- When preparing beds, leave a small strip of soil untouched so that at the right time you can leave the rows and move on to tilling the soil in another bed.
Compliance with all these rules and recommendations will allow you to properly plow the soil and prepare the land for growing crops.
It is often difficult for new farmers to figure out how to plow with a cultivator right away. The most common problem is that the unit sinks deep into the ground and cannot be manipulated by the operator.
What to do if the cultivator gets buried?
If the motor cultivator is buried in the ground, you need to perform the following steps:
- The outer knives are removed from the cutters. In this way, the weight of the unit can be reduced. To achieve maximum effect, a weight should be installed at the rear of the unit to balance the weight of the cultivator. The load must be securely secured;
- The motor cultivator can be pulled out of the ground by using the reverse gear. If it is not there, you will have to make an effort;
- Before each use of the equipment, check the position of the cutters. Knives should be pointing forward;
- It is necessary to adjust the position of the wheels;
- Inspect the transmission. Speeds should not be switched arbitrarily. Often the distance between gears and transmission channels needs to be adjusted.
How to avoid burying: current tips
It is worth considering other options for solving the problem of burying a motor cultivator.
What nuances should you pay attention to?
- The soil should not be processed immediately after heavy rain. If the soil is too soft, the unit will sink due to its rather large weight. The knives will also become clogged. You need to wait until the soil dries a little;
- Correctly adjust the coulter. It is important to adjust the element for optimal immersion in the soil;
- Set the gas regulator to maximum and check the proper operation of the gearbox;
- Too hard soil needs to be tilled twice. First you need to set the minimum depth level, then set the coulter to the depth required for processing.
Thanks to simple tips, you can not only protect your motor cultivator from getting buried, but also prevent various problems:
- It is worth purchasing a device with reverse gear. This way you can not only solve the problem (no need to pull the cultivator out of the ground manually), but also protect spare parts from wear;
- It is better to cultivate soil with moderate moisture to prevent the blades from being forgotten when the soil is too wet and the need to till the soil twice in hard soil;
- The most thorough machining is performed at low speed with high rpm of the cutters.
If you carefully check the cultivator and attachments before starting work, you can prevent it from getting buried and save your time. It is important to timely maintenance and adherence to safety regulations so that there are no injuries or breakdowns of the device during operation of the unit.
Reasons for burying a cultivator in the soil
The most common reasons for the frequent burying of agricultural implements in the ground include:
- A feature of the factory configuration of a motor cultivator is that most often the standard equipment of cultivators includes 2 pairs of cutters. For their production, durable materials are often used, which are relatively heavy. This unbalances the structure and causes the front of the cultivator to regularly sink into the ground, especially if it is used in an area with loose soil;
- Incorrectly installed cutters - the angle of inclination of the working parts plays an important role for the normal operation of the equipment. If the cutters are installed at a slope greater than required by operating conditions, this leads to frequent burying of the cultivator into the ground;
- the speed of the agricultural implement is too high - often the motor cultivator buries itself in the ground due to the operator turning on the second speed in areas with loose soft soil. In areas with this type of soil, it is best to use the equipment at first speed.
Often the reason for the cultivator to bury itself is wet soil accumulated on the surface of the cutters. The already massive working parts of the agricultural unit become even heavier, which is why the equipment constantly tilts forward.
Hand cultivator Tornado
This type of cultivator has no disadvantages. The cultivator consists of:
- metal rod;
- on top of the rod, a handle with curved handles is installed perpendicularly;
- At the bottom of the rod there are sharp teeth of a special curved shape.
By turning the cultivator, the teeth enter the ground and loosen it. Simplicity and ease of use are ensured by conveniently curved teeth of a certain length and diameter, their sharpness and special hardening. Use the Tornado manual cultivator for:
- loosening the soil;
- digging up the earth;
- weed control.
The Tornado cultivator is used on small and medium-sized areas, on various types of soil.
It can be used for flower beds, beds, row spacing and tree trunk areas.
It can be used constantly: to loosen the soil to a depth of 20 cm after fertilizing or rain, or for preparation before planting.
This tool can also be used as a root remover. During its operation, weeds are destroyed and their roots are removed.
Advantages of the Tornado cultivator:
- Increases labor productivity. Use will help speed up the soil cultivation process by 2-3 times. Its special design allows you to cover more territory and faster, compared to other types of manual cultivators.
- Reducing the load on the lower back. The design is created in such a way that all muscle groups are involved: abs, arms, legs, back.
- Adjustable to suit human height. This makes working with the tool more convenient, does not put strain on the back and improves ergonomics.
- Light weight of the tool. The weight of the device is 2 kg, which simplifies its use;
- The Tornado is disassembled into 3 parts. This makes it more convenient to store and transport.
- There are no additional costs, no refueling or electricity required. The work is carried out using physical strength, so traditional types of energy are not consumed.
- Improves soil condition. When cultivating with a manual cultivator Tornado, the soil is not turned over, but loosened. As a result, the soil is saturated with oxygen, and beneficial microorganisms are preserved. In this case, weeds are removed by the roots, rather than cut off.
What to do if the cultivator buries itself in the ground?
The procedure for removing a stuck agricultural implement, regardless of its weight and size, is quite simple.
To do this, the operator must:
- Remove the cutters located on the sides of the axis. Thanks to this, the user will be able to reduce the weight of the motor cultivator and prevent it from getting buried in the future. To improve the balance of the structure, a weight will need to be installed at the rear of it. It must be securely fixed to the motor cultivator, otherwise there will be a risk of it falling on the operator’s feet due to engine vibrations;
- Engage reverse gear on the agricultural implement's gearbox. This will allow you to smoothly remove the structure from the viscous soil;
- Check and, if necessary, adjust the position of the cutters. They should always be pointed straight ahead.
To avoid further burying of the cultivator, it is important to ensure that its transmission is in good working order. It is a set of gears on which, as a result of gradual wear, the teeth are worn out. Because of this, as well as as a result of constant exposure to vibration, the gear shift lever can randomly change its operating position. This way the cultivator will independently switch speeds, which will lead to it regularly burying itself in the soil.
How to avoid the cultivator getting buried - practical advice
To simplify the tillage process and increase the efficiency of the agricultural implement, you need to adhere to the following recommendations from equipment manufacturers:
- avoid plowing the ground immediately after rain - thanks to this, the user will reduce the risk of wet soil and weeds accumulating on the cutter blades;
- regular inspection of the gearbox and throttle lever of the cultivator. The accelerator must be installed in the extreme position, which means “Full throttle”;
- timely adjustment of the coulter - its angle of inclination must be set in accordance with the instructions in the operating instructions;
- tillage of the soil on the site at least 2 times. In this case, the first time the coulter must be set to the minimum depth, and when plowing again - to the depth required for work.
If necessary, before plowing the soil, you need to install a load on the agricultural implement, securing it securely with clamps or homemade bolts.
Why do cultivator cutters dig into the ground?
Beginning farmers often encounter problems caused by improper use of the cultivator. Often the motor cultivator is buried in the ground and cannot be manipulated by the operator. To solve this problem, first of all, you need to understand the reasons for its occurrence.
If the cultivator buries itself during plowing, this is due to several reasons.
These include:
- This is often related to the configuration of the equipment. Most often, mini-cultivators are equipped with four cutters. Provided the manufacturer uses high-quality metal for their manufacture, they will have a lot of weight. Because of this, the working elements will pull the cultivator into the soil;
- sharp knives of cutters - if the cutting elements are sharpened, the cultivator will not move forward, but, on the contrary, will bury itself in the ground;
- heavy load on the engine - in this case, the engine will create strong vibrations, which will upset the balance. Because of this, the cultivator will go deeper into the soil on the spot, instead of moving around the garden;
- the second common reason is untimely switching of the cultivator to second speed. This cannot be done when plowing loose soil and in conditions of high humidity;
- The cultivator is often buried due to improperly installed cutters. If you select an angle for attaching them to the coupling mechanism that is greater than that required by the instructions for use, this will also cause the equipment to bury.
Very often, equipment burrows into the ground due to overzealous pushing on the part of the operator. The owner must remember that he only needs to push the equipment slightly in the right direction. If you apply too much force, it will upset the balance of the cultivator, and it will bury itself in the soil all the time.
1. Preparation and installation of cutters.
The configuration of cutters for a walk-behind tractor is as follows: 16, 24 or 32 cutting plates. Which kit to choose depends entirely on the type of soil on the site, as well as the area of the cultivated area. If you have to cultivate a small area, it is not recommended to use more than 16 cutting blades for this. The optimal set is considered to have 8 plates on one side and 8 plates on the other side. If you decide to use sets of 24 or 32 plates for small areas, this will significantly increase the load on the walk-behind tractor engine, and, as a result, will greatly tire the operator.
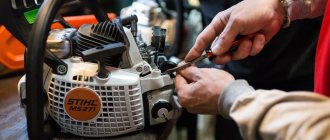
The cutter preparation stage involves the correct assembly of sets of cutting inserts. You must be completely sure that their cutting part is located in the same direction.
Under no circumstances should the cutting parts of the cutter be sharpened. If you sharpen them, the weed roots will not rise to the surface of the treated soil. The root system will simply be cut off with a pointed cutter and remain in the ground. After some time, the weeds will grow again in the same place, and cultivation will be absolutely pointless.
It is also worth mentioning that sharpened cutters significantly increase the load on the walk-behind tractor engine.
Also, sharpening the cutters negatively affects the specified depth of processing of the area. If you sharpen the cutters, the walk-behind tractor will bury itself in the soil from time to time when moving forward. This is due to the fact that sharpened cutters do not grab the ground, but cut it. This leads to the fact that they begin to burrow deeply into the ground to a depth of more than 30 centimeters.
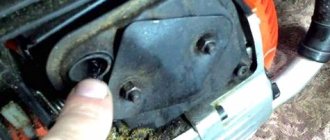
So, you have finished assembling the cutter set. Now you can move on to the next stage of preparing the walk-behind tractor - installing the cutters on it. You must carefully ensure that the direction of the cutting part of the plates is placed in the direction of movement of the walk-behind tractor forward. It is very important not to confuse the left-hand and right-hand cutters and install them in their places.
What to do if the cultivator gets buried?
If the cultivator is buried in the soil, the operator should take a number of measures.
The farmer will need:
- Remove the outer cutting knives from the cutters - this will reduce the weight of the equipment. Another way is to improve the balance of the equipment by installing any small weight at its rear. It is very important to secure the counterweight firmly, otherwise it will fall under the influence of engine vibration;
- To quickly pull the equipment out of the soil, you should switch the cultivator to reverse mode. If it is not provided for in the design, then the equipment will have to be pulled out of the ground yourself;
- During operation, the operator must correctly adjust the position of the cutters. Their cutting knives should always be directed directly in the direction of movement of the equipment.
What needs to be done to prevent the cultivator from digging into the soil?
To eliminate the risk of the cultivator burying itself in the ground, the farmer must adhere to a list of certain rules.
These include:
- do not rush to cultivate the soil immediately after precipitation. The equipment will quickly sink into too soft, wet soil. In addition, high soil moisture will lead to the formation of rust on cutters and other metal elements of the cultivator;
- adjust the coulter correctly before each use of the cultivator;
- set the equipment gas regulator to the maximum permissible value and always check the gear shift mechanism;
- Cultivate the soil at least twice. When first processing, the opener should be set to the minimum depth position. The second treatment should be done with the opener set to the farmer's desired depth.
When using a cultivator, you must remember that careful checking and adjustment of the equipment are the main ways to help prevent the equipment from being buried.
Cultivating a plot using a walk-behind tractor
Step one
To obtain high quality tillage with milling cutters, it is necessary to select the correct speed mode. Typically, there are two gears to move the walk-behind tractor forward:
- Low is first gear.
- Overdrive is the second gear.
Unlike plowing, when cultivating the soil, the walk-behind tractor must operate at increased speed, so in this case it is necessary to select a higher gear to increase the rotation speed of the cutters.
Selecting a higher gear reduces the load on the walk-behind tractor engine, and with an increase in the rotation speed of the cutters, the quality of loosening the soil significantly improves.
Step two
After passing the first strip, we check the depth of tillage. If the depth is satisfactory, then you can continue cultivating the land. The passage of the second strip must be done so that the cutters follow the line left by the coulter, since an untreated area of soil remains between the cutters of the walk-behind tractor.
Note:
When performing work on cultivating a vegetable garden, you do not need to press the steering wheel down, you should not push the walk-behind tractor forward - all this can lead to the walk-behind tractor starting to bury itself in the ground.
How to properly set up a cultivator?
In order to prevent the cultivator from getting buried and a number of other common problems, the owner of the equipment needs to perform a number of steps to prepare and configure it.
These include:
- First, the cultivator must be installed on a thick board and the factory wheels removed from it. Instead, you need to attach one set of cutters on the left and right sides. One set of cutters includes 8 cutting knives - this number of elements gives the best result when processing soil;
- When installing cutters, you need to pay attention to the position of the knives. They should only point forward. The working part of each knife should not be sharp. Otherwise, the cultivator will not move forward, but will begin to bury itself in the ground. In addition, sharp cutters will cut weed stems rather than winding and pulling them along with the roots;
- Next, you will need to install an earring on the equipment, which is necessary for mounting the opener;
- The opener is a bar with holes made in it. It is necessary for precise adjustment of the position of the cutters when cultivating an area;
- To fix the opener, it must be installed in the shackle and secured with cotter pins and a bushing. To do this, select a second hole. The count is taken from the bottom of the opener. Thus, the cultivation depth will be 20 cm. This is quite enough for high-quality soil cultivation and the elimination of large weeds;
- To increase the depth of cultivation, the coulter must be lowered down and attached to the shackle through the upper hole of the element;
- To reduce the plowing depth, the coulter should be raised up and fixed to the shackle through its lower hole.
Having installed and configured the working equipment, you can begin operating the cultivator. To accurately determine the plowing depth, you should make a control run of the equipment across the site. At this time, you need to pay attention to the operation of the cultivator. If its engine vibrates strongly and smokes, it means that the equipment is subject to excessive loads. In this case, you will need to set the coulter to a shallower depth and check the operation of the cultivator again.
After the first tillage has been completed, the opener should be switched to deeper plowing mode. This arrangement will allow you to properly process the area without harming the working mechanisms of the cultivator.
How to regulate plowing depth?
The depth of tillage usually varies from 10 to 25 centimeters. Adjustment and configuration of this indicator is based on the following factors:
- the increased weight of the device will lead to more intense effects; for this, for example, it is worth attaching additional soil to the wheels;
- It will be possible to increase the elaboration if you repeat this or that operation several times, each time going deeper.
It will be possible to adjust the impact with the help of an opener fixed in the shackle, using bushings and cotter pins; in this case, to increase the depth of penetration, the lowered opener is fixed on the shackle through the upper holes, and to reduce it, everything happens the other way around.
After winter, in order to ensure maximum processing, you must first plow the ground to a depth of approximately 10 centimeters, and then go through it again, increasing the depth of the cutters from 15 to 25 centimeters.