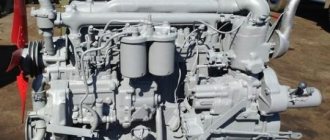
Thermal clearances of differential valves on the YaMZ 238 are required for a hermetically sealed fit of the pistons on the seat when the drive elements expand during operation of the power unit. The correct amount of play is the key to normal engine operation. If the thermal gap is increased or decreased, this will cause a malfunction of the unit.
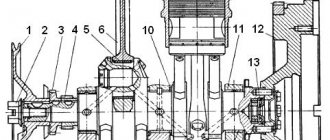
Before manipulating the valves on the YaMZ 238, it is important to understand how the timing belt works. Its features:
- overhead valve design;
- the camshaft is located at the bottom of the block camber;
- connection of the piston and shaft by the “roller pusher-rod-rocker arm” system;
- there is a pre-adjustment device for the transmitting lever.
The valve play of the 238 engine from the Yaroslavl Motor Plant varies within 0.25 - 0.30 mm. However, changes are likely during repeated analysis after rotating the crankshaft within the range of 0.25 - 0.35 mm. This error is considered acceptable.
Reasons for adjusting crankshaft valve play
All elements of the YaMZ 238 power unit are subject to heating, and therefore expansion. The adjustment procedure is performed at this moment to ensure a tight fit of the valve to the seat.
During work, two main points should be taken into account:
- large valve clearance on YaMZ causes malfunction of the combustion chambers, due to this, the main timing elements wear out more actively;
- an opening that is too small cannot ensure complete tightness of the connections; this causes deterioration in the parameters of the power unit and the occurrence of burnout.
Measuring gaps of thermal expansion joints
As mentioned earlier, gaps on YaMZ vary within 0.25 - 0.30 mm.
If these values deviate from the norm, then adjustments will be required. However, the size of the gap is initially determined. And the most accurate determination of this size is carried out exclusively at the moment of compression:
- Focus on cylinder No. 1 and turn the crankshaft from left to right until the intake valve is completely closed;
- then turn the crankshaft another 1/3 turn.
Reference! You can determine the cylinder number like this:
- look at the engine fan;
- the one closest to the left is the first, and the one on the right is the fifth;
- subsequent numbering is sequential: the one on the left is the fourth, and the one on the right is the eighth.
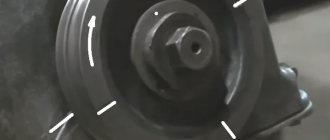
There are several ways to rotate the crankshaft. Simple - in front. Using a spanner, rotate the pulley lock.
If you carry out manipulations from behind, then using a knob, perform the action on the flywheel.
Summarize
Before carrying out work on adjusting the timing belt, fuel should not enter the engine. The pump is shut off using a special lever. Next, you should make sure that the rocker arm axes are firmly fixed. After this, we carry out the configuration according to the existing rules:
- The crankshaft rotates behind the flywheel. The adjustment is made at the moment of compression for each cylinder.
- The feeler gauge should be the appropriate size and fit between the parts without effort.
- To obtain the required clearance, turn the screw.
- Having reached the optimal clearance, tighten the nut.
- We repeat the operation to control the gaps using the same method.
- To finally make sure that the mechanism is adjusted accurately, you need to crank the crankshaft and check the clearances on several cylinders.
- We open the fuel pump to supply fuel to the cylinders.
- We start the engine and listen to its operation. The absence of extraneous noise indicates that the settings are correct.
- Reinstall the cylinder head cover.
Guide to adjusting pistons on YaMZ 238
Before making adjustments, the engine should be prepared. To do this, you need to cool the engine to 30 °C and stop the fuel supply.
In addition, the rocker arm transmission levers should be clamped:
- fix the exhaust elements of the cylinders from the first to the fourth on the right to the end of the axle, and the intake elements to the thrust washer;
- the rest are pressed in the opposite direction.
Further independent work is as follows:
- Disconnect the clamps and remove the YaMZ 238 valve covers.
- Assess the degree of tightening of the bolts, the norm is 120 – 150 Nm.
- By rotating the crankshaft from left to right, you need to catch the moment when the intake piston of the cylinder is fully raised.
- Using a rod, evaluate the play between the end of the valve and the toe of the rocker arm at the intake and exhaust piston of the first cylinder.
- To adjust the backlash, unscrew the nut of the adjusting screw, install the rod and, turning the screw with a screwdriver, select the backlash within 0.25 - 0.30 mm.
- Tighten the nut and evaluate the size of the play. If everything is done correctly, then a rod with a thickness of 0.25 mm should fit in easily, and with dimensions of 0.30 mm - with force.
How to install the piston of the first cylinder
The most important. It is necessary to set the piston of the first cylinder to TDC at the moment of fuel compression. That is, determine the position of the piston of the first cylinder at which it is necessary to begin adjusting the valves. It's very simple. The marks on the injection pump are aligned.
This position will be sufficient to begin adjusting the valves. True, the piston will not be perfectly at TDC. Lower by the ignition timing. That is, it will not reach TDC a little, but this will not affect the adjustment in any way. The valves are closed, and they can be adjusted.
The crankshaft also has marks. And if you put them out. The piston of the first cylinder will be at TDC. But the crankshaft makes two revolutions and the fuel injection pump makes one revolution for a full cycle of engine operation. Therefore, in one of the positions of the crankshaft marks, the piston of the first cylinder may not rise at the moment of compression. Therefore, it is safe to navigate by the position of the fuel pump. Or on the valves, if the fuel pump is removed. At the moment of compression, when the piston approaches TDC. The exhaust valve of the first cylinder is closed and the intake valve is closed. With further rotation of the crankshaft, until the piston reaches TDC. The valves are closed and the rocker arms are motionless. In the second position of the crankshaft marks, one valve closes before TDC, and after the piston passes TDC, the second valve immediately opens. This position of the piston is not satisfactory. After the piston of the first cylinder is set, the valves of the first cylinder can be adjusted.
How to crank the crankshaft
The next question is how much to crank the crankshaft. and in which direction to adjust the fifth cylinder. According to the operating order of the engine. As mentioned above, the crankshaft makes two revolutions. That is, one revolution is 360 degrees, two revolutions are 720 degrees. 8 cylinders divided 720 by 8 gives 90 degrees. That is, from adjusting the first cylinder until adjusting the 5th cylinder, the shaft must be turned 90 degrees, that is, ¼ turn. To make it easier to navigate, you can put chalk marks on the pulley. Divide the pulley into 4 parts.
Great precision is not required. And each time rotate the shaft until the mark on the pulley aligns with the “0” mark on the front cover. So from the first to the fifth 90 degrees, from the fifth to the fourth 90 degrees from the fourth to the second 90 degrees and so on until the eighth cylinder. The crankshaft must be turned clockwise when looking at the end of the engine from the front. The method is very simple but not convenient. When the engine is on the car, it is difficult to get to the pulley. Moreover, mark it. And then it’s even more difficult to combine these marks. Soviet designers were far from stupid people. All aspects were taken into account in the calculations. Therefore, the instruction manual suggests a simple method that does not require much knowledge and memorization.
Reasons for adjusting valves
When should valves be adjusted? A knock in the gas distribution mechanism immediately comes to mind. It is clear that with such symptoms, first of all, the thermal gaps are checked and adjusted.
It is also worth making adjustments if the first thousand kilometers have been passed after the repair or if the cylinder head has been pulled.
It is necessary to monitor the mileage of the car and the condition of the entire gas distribution mechanism. If necessary, adjust valve clearances after 10-20 thousand km and always remember that increased thermal clearances lead to increased fuel consumption.
The need to adjust the valve mechanism and the essence of preparation
Parts of the YaMZ 238 engine, like components of any other engines, are subject to heating and, as a result, elastic expansion. The operation is carried out in order to ensure a tight fit of the valve to the seat in a warm operating state.
During operation, it is worth taking into account that:
- an increased thermal gap leads to deterioration of the combustion chamber, reducing the life of the timing actuators;
- a small gap does not provide a tight connection between the valve and the cylinder head seat, which not only leads to a deterioration in engine performance, but also leads to burnout.
The initial task of the preparatory process is to turn off the fuel supply. You can de-energize the injection pump by turning the rocker bracket located in the speed controller housing downwards.
The level of activities of the preparatory plan also includes:
- cooling the engine to a temperature of 20-30 degrees;
- dismantling the valve cover;
- checking the tightening force of the timing rocker arm axles (the manufacturer prescribed a range of 120-150 Nm).
Summary
Having turned off the fuel supply, dismantled the valve cover and checked the tightness of the timing rocker arm axles, proceed to adjust the exhaust and intake valves of the YaMZ 238 according to the established range (0.25-0.3 mm):
- by rotating the crankshaft by the pulley or flywheel, set the valves of the cylinder under study to the compression stroke;
- check the gap by inserting a feeler gauge between the rocker arm and the end of the valve;
- loosen the nut of the adjustment screw;
- remount the dipstick;
- Rotate the screw to achieve the recommended thermal compensation value;
- tighten the nut;
- check the controlled value again with a probe, repeat if necessary;
- make further adjustments in the order 5-4-2-6-3-7-8;
- turn the crankshaft and re-identify the distance (0.20...0.35 mm is allowed);
- start the engine and make sure there are no knocks;
- install cylinder head covers.
Check and adjust the thermal clearances of the valve mechanism before and after the break-in, but not earlier than 15 minutes after stopping the YaMZ-238 D, DE, AK, M2, B, ND engine.
Before adjusting the valve clearances, turn on the fuel supply with the adjuster bracket, remove the cylinder head covers, check the tightness of the rocker arm axle nuts using a torque wrench with Mkr 118–147 Nm (12 to 15 kg/cm).
Technical requirements for tightening according to OST 37.001.031-72.
When adjusting the valve clearances and checking them again, press the rocker arms:
- on the head of the right row of cylinders: exhaust valves - to the end of the axle; intake valves - to the retaining ring.
- on the head of the left cylinder bank: exhaust valves - to the retaining ring; intake valves - to the end of the axle.
The exhaust valves of the right bank of cylinders are located closer to the fan, and the opposite is true for the left bank of cylinders.
To adjust the gap, loosen the lock nut of the adjusting screw, insert a feeler gauge into the gap and, turning the screw with a screwdriver, set the gap within 0.25-0.30 mm.
The need to adjust the valve mechanism and the essence of preparation
Parts of the YaMZ 238 engine, like components of any other engines, are subject to heating and, as a result, elastic expansion. The operation is carried out in order to ensure a tight fit of the valve to the seat in a warm operating state.
During operation, it is worth taking into account that:
- an increased thermal gap leads to deterioration of the combustion chamber, reducing the life of the timing actuators;
- a small gap does not provide a tight connection between the valve and the cylinder head seat, which not only leads to a deterioration in engine performance, but also leads to burnout.
The initial task of the preparatory process is to turn off the fuel supply. You can de-energize the injection pump by turning the rocker bracket located in the speed controller housing downwards.
The level of activities of the preparatory plan also includes:
- cooling the engine to a temperature of 20-30 degrees;
- dismantling the valve cover;
- checking the tightening force of the timing rocker arm axles (the manufacturer prescribed a range of 120-150 Nm).
Summary
Having turned off the fuel supply, dismantled the valve cover and checked the tightness of the timing rocker arm axles, proceed to adjust the exhaust and intake valves of the YaMZ 238 according to the established range (0.25-0.3 mm):
- by rotating the crankshaft by the pulley or flywheel, set the valves of the cylinder under study to the compression stroke;
- check the gap by inserting a feeler gauge between the rocker arm and the end of the valve;
- loosen the nut of the adjustment screw;
- remount the dipstick;
- Rotate the screw to achieve the recommended thermal compensation value;
- tighten the nut;
- check the controlled value again with a probe, repeat if necessary;
- make further adjustments in the order 5-4-2-6-3-7-8;
- turn the crankshaft and re-identify the distance (0.20...0.35 mm is allowed);
- start the engine and make sure there are no knocks;
- install cylinder head covers.
