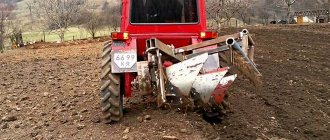
A small model plow is suitable for MTZ 80.
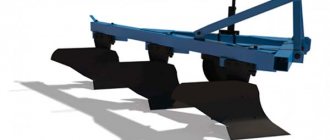
The plow for the MTZ 80 tractor is suitable for PLN-3-35. Used to flash any type of soil across a variety of crops. Flash depth up to 30 cm, on soil with a resistance of no more than 0.09 kg/cm². But incorrect assembly and adjustment of the plow will lead to poor-quality tillage and rapid wear of the equipment. How to set up a plow on MTZ 80 video and photos will help the reader understand and find answers. Which plow is best for MTZ 80?
Plow design features
The PLN 3-35 plow is lightweight and suitable for MTZ 80.
The PLN-3-35 is aggregated with tractors of the 1.4 kN class. These include the MTZ 80 and 82 tractors. A plow with angles or a skimmer is installed. If a vertical knife is mounted on the last body, then risky ones are no longer installed. The choice depends on the type of soil that needs to be processed and the condition of the tractor.
After purchase, it is necessary to assemble the following parts of the plow into a single structure:
- Frame;
- Frame;
- Support wheel;
- Coulter;
- Trailed part of the harrow;
- Hang it up.
When assembling and adjusting the plow, you must understand that the harrows and cleaning parts attached are its parts. The thrust wheel screw is necessary to regulate the depth of soil flash. The skimmer should be mounted depending on the depth of tillage. We recommend installing a skimmer on the MTZ 80 according to the following rules:
- Fixing the stands on the top hole corresponds to a flash depth of 20 cm;
- Posts in the second hole - plowing to a depth of 22 cm;
- Stand on the third hole - plowing depth 25 cm;
- Stand on the fourth hole - plowing depth 27 cm;
- The bottom hole corresponds to a flash at a depth of 30 cm.
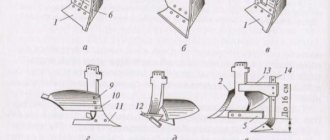
The plow body is assembled from shares that rotate to a solid stand. The blade and floorboard are also attached there. There are several types of plow body: cut-out, high-speed, moldless and classic with a deepening element.
The plow skimmer for the MTZ 80 tractor consists of a working part and a small body. A skimmer is used to remove plant residues. The skimmer structure consists of elements: blade, ploughshare, stand.
Installing a plow on a walk-behind tractor via a hitch
Before installing the unit, we install a beam under the left wheel of the walk-behind tractor to recreate the plowing process. Structurally, plows differ from each other, so you need to know the plowing depth in advance. Usually the recommended depth is indicated in the instructions for the device. In summer cottages and garden plots, the plowing depth is set from 10 to 20 cm.
The unit is hung on a single-point mount and secured with two bolts. If the walk-behind tractor is not equipped with a single-point system, then a hitch is attached to it, on which the plow is hung. When installing the device through the hitch, the main thing is that there is a slight play in the horizontal plane, no more than 5 degrees, because if you tighten the bolts as much as possible, you will have to make efforts to till the soil.
After preparing the machine for plowing and attaching the plow, you can begin setting up the device.
Safety precautions before setup and assembly
You cannot start assembling and setting up a plow for a tractor without knowing the safety rules. They include the following items:
- Before the tractor starts moving, you must sound a sound signal. Only then do they begin to move smoothly.
- Before raising and lowering the plow, you must make sure that there are no animals or people nearby.
- It is forbidden to engage infantry if there is any malfunction of the plow.
- Stand near a working plow.
- If the restrictive chain system of the plow is weakened, turns cannot be made.
- Do not sit or stand on the frame of the equipment while moving.
- With the tractor running, adjust, adjust or tighten fasteners on the equipment.
- Remove soil and plant debris from the plow during operation, without turning off the equipment.
- The plow cannot be adjusted without additional support.
- Before transporting the plow, it must be raised and the limit chains tightened as much as possible.
- If the fasteners are not tightened enough, you cannot start flashing.
How to choose a plow for a walk-behind tractor
When choosing a plow, pay attention to the technical characteristics of your walk-behind tractor. For processing small areas, a single-body plowshare unit is suitable, and if you are the owner of a heavy diesel walk-behind tractor, then you can connect a double-body device, which will speed up the process of cultivating the land twice as much as a single-body unit.
Single-body mounted plow SCOUT PL-130
The SCOUT PL-130 single-body plow is connected to a single-point attachment to mini-tractors and walk-behind tractors with a power of 10 hp or more. With.
The unit is equipped with an enlarged steel ploughshare, and the design itself is made reliably - you can forget about sharpening the ploughshare. To regulate the plowing depth on uneven terrain, a limit wheel is installed. The plow is designed for processing heavy, loamy soils and virgin soil.
When working with the floating mode of the hydraulic distributor, the device must be weighted.
Single-body mounted plow SCOUT PL-130 HYD with scoring disc
The SCOUT PL-130 HYD single-furrow plow is equipped with a scoring disc for more efficient work on turf soil. The unit is connected to mini-tractors and walk-behind tractors with a single-point attachment mechanism. The working part is made of reliable steel.
The angle of attack of the plowshare is adjusted using turnbuckles. The limit wheel regulates the plowing depth. The trimming disc is designed to trim plant roots during plowing, which increases the productivity and quality of plowing.
To plow heavy soils and virgin lands, you need to install weights on the equipment: 80 kg in the front and 60 kg in the rear.
Double-furrow mounted plow SCOUT PL-225
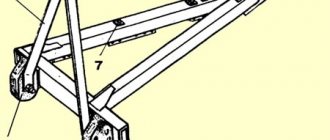
The double-furrow plow SCOUT PL-130 is the only two-furrow device that is connected to a walk-behind tractor. The unit is secured using a single-point mechanism. But for work you need a walk-behind tractor or a mini-tractor with a power of 15 hp or more. With. The base of the plow is a triangular frame with turnbuckles that adjusts the horizontal and vertical position. The plowshare body is adjusted using a stand. The plowing depth is controlled by a limit wheel.
To work on loamy soils and previously uncultivated areas, you need to make the structure heavier.
Preparing and setting up the plow for work
The plow is assembled on a special supporting wooden block or beam with a cross-section of 65 or 70 cm. The plow is heavy and if the structure falls, it can kill the tractor driver.
Assembly work is carried out in the following stages:
- Open the packaging and select spare parts; they should be put aside. We lay out the main components in a convenient order.
- We bring the frame into locking mode and install it on the prepared stand.
- The housing is hung and inserted into the stiffening beam and the rack with a bolt. The housing stand is mounted to the frame using locknuts.
- On the left, the skimmers are screwed to the body in front of the body holders using brackets. There is no need to tighten the staples at this stage.
- We secure the support wheels using brackets and spring washers. They are attached to the outside of the structure.
- The support wheels are lowered all the way; to do this, turn the screw nut at the end counterclockwise).
- We tighten all the brackets until they stop and remove the plow from the stand.
- The scraper is mounted to the wheel bracket using washers and nuts.
- The hitch is mounted on the plow frame using bolts, which must be tightened until they stop.
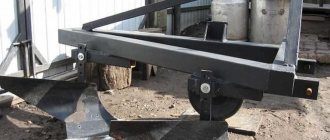
- We screw red reflectors to the back of the main beam.
Photo No. 1 Photo No. 2 Photo No. 3 Photo No. 4 Photo No. 5
The plow is assembled and ready for adjustment. The tincture is carried out in the following steps:
- Before using for the first time, inspect the equipment. Lubricate the wheel bearings and all rubbing parts with grease.
- Set the skimmer to the required plowing depth. The gap between the coulter shares and the body must be at least 250 mm. Using the protrusion on the holder, we adjust the depth of tillage.
- Tighten the skimmer clamps completely. In this case, the field edge of the skimmer covers the edge of the body.
- The PLN plow has a soil grip of 105 cm, so the track should be 1560 mm. To prevent shortfalls when plowing, the right wheel of the machine is placed in the furrow.
- The slanting rods of the mounted part are adjusted after the plow is installed on the ground.
- The braces are placed in the front holes of the rod.
- Before work, it is necessary to adjust the limit chain. The longitudinal rods should swing freely horizontally by 120-130 mm in different directions. To do this, the chain is built with a slight slack.
- Before plowing, it is necessary to adjust the depth by adjusting the traction of the mounted part and the support wheel. Initially, according to the timing of the front wheel, the average depth value is set and the first row is passed. Next, the flash depth is adjusted for each type of soil individually.
- When working, the right side of the frame should always be slightly higher than the left. As the furrow passes, it will break out and be strictly parallel to the soil.
- After passing the furrow, make sure that the plowing is uniform and completely covers the plant residues. There is an adjustment on the left side of the plow that will help make the plow for the MTZ 80 tractor more stable. If the plow moves to the side, then the canopy is moved back.
- If the frame warps, then you need to lengthen the brace.
- You can adjust the plowing depth of the front part of the body using the right link slants from the mounted unit, the rear part using the top one. In this case, the support wheel is placed at the required plowing depth and the position is fixed using a support bolt in the holder.
Final adjustment – adjustment under operating conditions
Well, the adjustment is completed in the field. After the first two passes, check the width and depth of the treatment. If the first body plows deeper than the rear one, lengthen the central link; otherwise, shorten it slightly. Distortions in the transverse plane are adjusted by adjusting the braces, and the grip width is adjusted by moving the suspension axis to the left or right along the guides.
They also pay attention to the correct position of the central link - it should be in a parallel position with respect to the longitudinal axis of the tractor, with the limit chains freely lowered. When turning the plow in the direction of the arable field, move the axis forward along the left bracket, but if it moves to the left, move it back.
After the adjustment is completed, all mechanisms remain unchanged until the completion of work in this area. After moving to a new site, the operations for setting up the unit are repeated.
Homemade tractor plow
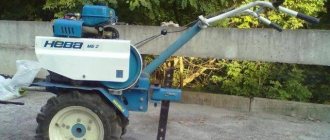
Buying a unit can be quite expensive, so the opportunity to make a plow for MTZ-82 (or MTZ-1221) with your own hands comes to the rescue.
There is a simpler design that, in principle, performs the same tasks as a plow - a homemade cultivator on the MTZ-80. The difference between them is that a plow plows the soil, turning over layers of earth, while a cultivator simply plows the soil. However, a homemade cultivator for the MTZ tractor is a popular device, as it is easier to make than a homemade plow.
To properly manufacture a plow, a tractor driver will have to use good drawings from qualified specialists, so it’s better to search. A poor-quality drawing will negatively affect the subsequent design and quality of plowing of the soil, and hence the yield. When constructing a homemade cultivator, on the contrary, a schematic drawing will do.
Once the drawing is ready, you need to transfer it to a hard cardboard sheet and cut out the template. To make a plow, you need to use materials made of stainless steel or another, harder metal. So, you can use an old spring from a domestic car or even a circular saw blade.
Let's look at the process of making a plow. Even a master with minimal experience in designing such equipment can create the simplest mounted plow - single-body, using rotary mechanisms. Such additional tractor equipment includes a ploughshare and a blade at MTZ. To manufacture the presented elements, only steel sheets are required. In this case, the homemade product is constructed according to a specific algorithm.
- Production of a ploughshare from a disk element removed from a circular saw. To sharpen the cutting part, you need to beat it on an anvil, just like a regular scythe or flat cutter.
- The next stage is the manufacture of the blade. The process is quite simple and requires minimal skills. You will need a metal pipe.
- The final stage is the manufacture of other structural elements. This modification is not particularly difficult.
In order to assemble a high-quality homemade reversible plow, you need to use special wedges with an angle of 25°. After installing the wedges, a plowshare is installed on the auxiliary metal sheet, which in turn is fixed to the blade using a welding seam.
The shields located on the sides are mounted on the ploughshare in a vertical position; for this you need to perform an arc verification. It is necessary to ensure that the side shield extends 8 mm beyond the ploughshare and is located 10 mm above the blade. At the end of the process, you need to create a continuous surface by welding the ploughshare and blade together.
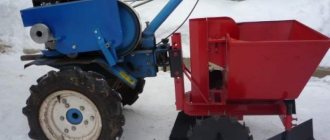
Homemade attachments
Almost any attachment for a tractor can be made independently. This could be a homemade potato digger, a homemade rotary mower (or haymaker), a rotary plow, a cultivator, or a hiller. Sometimes you can remodel some equipment to make it more functional.
The most popular queries in the search engine remain the design of an active plow on MTZ or DT and the question of how to make a cultivator with your own hands. After all, cultivators are faithful assistants to agricultural workers. The most complex element on MTZ or DT is the rotary cutter. A converted cultivator with a high-quality cutter can carry out hilling for a long time.
It is not difficult to understand how to install attachments, be it plows for tractors, a homemade cultivator, a potato digger for a tractor, or other homemade products. The main thing is to act according to the given algorithms and check the diagrams and drawings. In the same way, you can easily understand how to adjust the chisel plow of a wheeled tractor without any extra effort. Installing chisels on a wheeled tractor is a labor-intensive process, which can nevertheless be done by the tractor driver himself.
Preparing the tractor
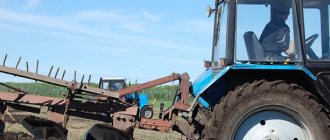
The arable unit can be equipped on the basis of various tractors. They have their own settings for working with the plow:
- On the Kirovets tractor, the fingers of the linkage mechanism connecting the brace cups are fixed into round holes. They need to adjust the length of the top link (120 cm), the length of the vertical braces (86.5 cm), the gap between the hinges (86.5 cm) and check the tire pressure (the norm is 1.4 kgf/cm²).
- Preparing the DT-75 (Agromash 90TG) tracked tractors for working with trailed plows involves installing a trailing bracket (on loose ones - in the lower position, on heavy ones - in the upper position). When assembling mounted plows, determine the correct location of the central head of the lower links relative to the axis of the linkage mechanism. This ensures stability of the tractor when moving with a buried plow.
- On the MTZ "Belarus -1221" tractor, it is necessary to adjust the track width in accordance with the working width of the plow (1400 mm with a working width of 90 cm, 1500 mm with a working width of 105 cm), as well as the length of the left brace (51.5 cm).
The plow can be mounted on a tractor:
- according to a two-point scheme - to the front end of the upper link and on the central head of the lower links;
- at three points - at one upper point and on two (left and right) heads of the lower links.
Tractor hitch DT-75, assembled according to a two-point scheme
The two-point linkage mechanism is configured in the following order:
- The bushing fixed to the lower axle is shifted relative to the longitudinal axis of the tractor frame to the right by 14 cm.
- The lower link forks are disconnected from the side hinges and secured to the bushing bracket, forming a common central head.
- The front ends of the limiting chains are connected to the yokes, and the rear ends are connected to the longitudinal lower rods.
- Adjust the position of the upper link bushing and secure it to the shaft with special stops. It should be in the same plane as the bushing on the lower axis.
- Install vertical braces (left and right).