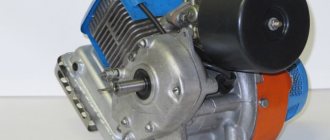
The walk-behind tractor is a universal unit for plowing land. It has gained wide popularity among farmers working on small plots, replacing the tractor.
Can perform many jobs:
- plowing the soil and hilling;
- cultivation;
- watering;
- harvesting potatoes and onions;
- mowing weeds;
- snow removal;
- transportation of goods using an additional trailer.
While cultivating the soil, the operator drives the machine in front of him, holding the control handles.
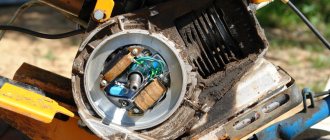
Adjusting the valves on the walk-behind tractor, adjusting the control mechanisms, changing the oil in the main components, inspecting the tires are the main work that is carried out during the maintenance of the walk-behind tractor. Maintenance is necessary to ensure safe operation of the unit, check the reliability and strength of all its components and connections.
This review will discuss the question of how to adjust the valves on a walk-behind tractor. The constant operation of the engine and the entire motor vehicle as a whole depends on them.
Relationship between engine and valves
A walk-behind tractor is a complex agricultural unit, which includes the following components:
- engine;
- box;
- running system;
- steering;
- supply system.
The engine is the power mechanism of the walk-behind tractor. There are the following types of motors:
- By picking method:
- 2-stroke;
- 4-stroke.
- By type of fuel used:
- diesel;
- gasoline.
Manufacturing plants will soon produce 4-stroke engines with the highest technical performance.
Large units are equipped with diesel engines, while small and medium-sized units are equipped with gasoline engines, widely used among farmers, with a power of 4-9 hp.
A gasoline engine is the main device in which the process of converting the thermal energy of fuel combustion into mechanical energy occurs.
The energy transformation process is carried out in 4 steps:
- fuel starting;
- compression of flammable consistency;
- combustion;
- release.
Fuel material enters the combustion chamber through the inlet distributor. The valve elements are locked, the piston rises upward, compressing the working mixture. When the spark plugs are turned on, the discharge ignites the flammable material. As the temperature rises, the mixture expands, pushing the piston down. There is a transformation of thermal energy into mechanical energy. When the valves open, gases are released into the exhaust system.
After a certain period of operation, due to heavy loads, the clearances of the intake and exhaust valves may change.
The prerequisite is wear and tear of the parts. A small gap changes the phases of gas dispersion. The engine does not work with the declared power. With a larger gap, mechanical vibrations occur, which lead to deformations. Due to the short-term opening of the valves, the cylinder is not filled to one hundred percent. This leads to failures and malfunctions, and reduced performance.
Adjusting the walk-behind tractor valves is an essential maintenance procedure.
According to technical regulations, it should be carried out once a year. If there are defects in the operation of the machine, the valves can be adjusted 2 times a year.
Using the example of the engine of a motor vehicle from the Chinese company LIFAN, we will look at a number of problems, when they appear, it is also desirable to adjust the valves on the Lifan 6.5 hp walk-behind tractor:
- if there is a “kickback” to the starter handle when starting the engine;
- if you hear a clear knock in the cylinder head when the engine is running;
- if the engine begins to run intermittently, stalls and is difficult to start “hot”, starting properly only after cooling;
- when you hear popping noises in the muffler and the walk-behind tractor loses power.
Design and principle of operation
The valves are only installed on 4-stroke engines. The fundamental difference from 2-stroke options is that intermediate idle strokes are performed.
- Stroke 1 - the piston goes down to BDC. A vacuum is created in the combustion chamber. At this time, the intake valve opens and the fuel mixture is pumped into the cylinder. The exhaust valve is closed.
- Stroke 2 - the piston goes up, the fuel mixture is compressed. Both valves are closed. When the piston approaches TDC, the fuel ignites (with an explosive flash) and after the piston passes TDC, the 3rd stroke begins.
- 3 stroke working. Both valves are closed. Under the pressure of the ignited fuel, the piston goes down from TDC.
- 4 – measure. The piston goes up. The exhaust valve opens and exhaust gases are pushed into the muffler. The inlet valve is closed.
2-stroke engines are also used on walk-behind tractors. There are no valves on such internal combustion engines; gases are removed and fuel is injected through the upper and lower windows in the cylinder liner, and oil is added to gasoline to lubricate the rubbing surfaces in the combustion chamber.
From the above-described diagram of the valve engine operation, it is clear why the correct operation of the walk-behind tractor valves is so important.
Setting gaps
Adjusting engine valves means setting good clearances. Their norm is indicated in the technical passport of the walk-behind tractor. Any model has its own acceptable characteristics, which depend on the brand and type of engine of the car.
The permissible valve clearance on a walk-behind tractor for a standard unit has the following value:
- for the inlet valve - 0.10-0.15 mm;
- for output - 0.15-0.20 mm.
To enable them, you need the following tools:
- spanners;
- probes for 0.10 mm, 0.15 mm and 0.20 mm;
- flat screwdriver.
The method of action for setting good gaps is as follows:
- The engine must be cool during operation.
- Disconnect the oil bath cup from the air filter and the filter element.
- Take the key and unscrew the 4 bolts around the protective casing.
- Remove the starter, then the flywheel protective cover of the walk-behind tractor.
- Fix the “dead center” on the end of the flywheel. The mark on the cylinder airflow edge must correspond to the zero mark of the flywheel.
- Carefully remove the valve cover with the paronite gasket, having previously unscrewed the 3 bolts.
- Check clearances:
- There is an inlet valve ;
- near the muffler - day off.
To check the interval, insert a feeler gauge between the rocker arm and the valve. If the distance is greater or less than acceptable, use a spanner wrench and a screwdriver to adjust the elements.
- Wipe all connections of the mechanism with a clean rag.
- Reassemble the structure in reverse order.
- Turn on the walk-behind tractor and check its functionality.
If the valves are adjusted correctly, the engine will operate without noise, jerking or failure.
Adjusting the walk-behind tractor carburetor
Inconsistency in the engine speed of the walk-behind tractor indicates that the carburetor needs adjustment. The need to perform this procedure usually appears before the agricultural season, when the equipment has not been used for a long time, or after it, when the walk-behind tractor has been subjected to significant loads for a long period of time. Before you begin the adjustment, you need to warm up the engine. Specifically, the work process looks like this:
- The screws regulating the low and high throttle are screwed in completely, then loosened by about one and a half turns.
- The engine starts and warms up for about 10 minutes.
- The lever that controls the operation of the power plant should be set to its lowest position, but the motor should not stop.
- The screw that regulates the throttle valve will help you adjust low idle speeds so that the engine runs smoothly, without extraneous noise or stops.
- Rotating the screws makes it possible to accurately determine the amount of flammable mixture that enters the motor.
- Tightening the screw helps to enrich the consistency, while unscrewing it, on the contrary, increases the volume of air entering the engine;
READ How to Adjust the Ignition on a Motoblock
Using the idle screw, you should adjust the highest idle speed. The same should be done with the lowest speed, using the throttle stop screw. The essence of this adjustment is that the damper screw allows you to adjust the angle at which it is closed;
The lever responsible for controlling the engine should be moved to the “gas” position. If the work of the walk-behind tractor, as before, cannot be called measured, the full throttle screw is adjusted until perfect operation is observed. Still, the very permissible number of screw revolutions is 2.5.
The accuracy of carburetor adjustment can also be determined by how the spark plug looks after a short period of operation under load. If the working mixture is impeccable, then there will be no soot or traces of fuel on the candle, which indicate a very poor or, on the contrary, very rich combustible consistency. It is necessary, however, to see that carbon deposits or traces of fuel on a spark plug can indicate not only incorrect adjustment, but also more serious problems with the walk-behind tractor, including a faulty ignition or cooling system.
Adjusting the valve clearance of the walk-behind tractor
Over time, under significant loads, the valve clearance of the walk-behind tractor engine changes. The reason for this may be wear and tear of parts. The missing distance leads to significant changes in the valve timing stages, as a result of which it is not possible to achieve a sufficient compression ratio, the power plant operates intermittently and does not reach the declared power. In particularly severe situations, even valve deformation can be monitored. If the gap is very large, then significant mechanical noise is recorded, the phases of gas dispersion also change significantly, the valves open for a very short time, which is why the cylinder is not filled properly, power drops, and failures occur. Adjustment of the gaps is necessary as soon as the engine operation becomes incorrect or occurs with significant noise. As a standard, the engine on which the adjustment is being made should be cooled down.
So, first you need to get to the flywheel. This particular part is marked with the top dead center value. The flywheel is hidden under a casing, so you will have to remove it. Before removing the casing, the oil bath of the air filter is removed. You can make the task easier when removing the casing if you secure all the latches with rubber bands. Use a wrench to unscrew all the bolted connections, after which the cover can be removed without any problems.
On the flywheel you can see marks that indicate TDC, as well as values of 5, 10 and 20 degrees. The 20 degree mark indicates the injection of a flammable mixture. The flywheel should be brought under the top dead center, focusing on the corresponding division. The valve cover is unscrewed and removed.
During the adjustment process, you must use the following tools:
- Screwdriver;
- Socket wrench 10;
- Blade 0.1 mm wide.
According to the technical data sheet, the valve clearance of the walk-behind tractor motor is from 0.1 to 0.15 mm, and therefore, using a blade, you can adjust it with pinpoint accuracy. However, you need to pay attention to the fact that some blades have a thickness of 0.8 mm, which is unacceptable. The exact value can be determined with a micrometer or from the information on the manufacturer's website. The adjustment is made as follows:
- Screwdriver;
- Loosen the nut, insert the blade and begin to tighten;
- You should focus on the blade, carefully tightening the nut;
- The adjustment is carried out until the free movement of the valve is eliminated. It should sit quite tightly.
- Reassemble the casing in reverse order and install the oil bath in place.
If all manipulations are carried out without errors, then the engine will run smoothly and without excessive noise.
How to adjust valves on a walk-behind tractor
The walk-behind tractor is a universal unit for plowing land. It has gained wide popularity among farmers working on small plots, replacing the tractor.
While cultivating the soil, the operator drives the machine in front of him, holding the control handles.
Adjusting the valves on the walk-behind tractor , adjusting the control mechanisms, changing the oil in the main components, inspecting the tires are the main work that is carried out during the maintenance of the walk-behind tractor. Maintenance is necessary to ensure safe operation of the unit, check the reliability and strength of all its components and connections.
This review will discuss the question of how to adjust the valves on a walk-behind tractor. The constant operation of the engine and the entire motor vehicle as a whole depends on them.
Car exhaust catalyst
An automobile catalytic converter helps the vehicle make this engine exhaust more environmentally friendly. It converts carbon monoxide and other harmful substances into harmless compounds. If your exhaust catalyst has become unusable, then you will notice it not only when the check engine icon appears, but also long before the moment when the power of your car drops by half. For example, when you press the gas pedal, your car will not have the same good acceleration dynamics as before.
What can cause a car catalyst to fail: -If you regularly service your car in accordance with the car company's maintenance regulations, then the catalyst in the car should not fail. The main reason for catalyst failure is untimely replacement of a faulty oxygen sensor, as well as irregular replacement of spark plugs after their expiration date. When the oxygen sensor or spark plugs are faulty, the conversion of carbon monoxide in the catalyst into harmless chemical elements stops, and this leads to overheating of the catalyst, which because of this can fail.
Adjusting valves on the Neva walk-behind tractor
Let’s take the Neva MB-23 model as an example and analyze step by step how to correctly set the valve clearances (the principle is the same for all walk-behind tractors of this company). You will need 12mm and 14mm wrenches, a 10mm socket wrench, and 0.15mm and 0.2mm feeler gauges.
- Remove the starter by unscrewing the 3 bolts.
- Carefully remove the muffler, belt and protective cover of the gasoline engine.
- Using a socket wrench, remove the valve box cover.
- Make sure what the valve clearance is on the walk-behind tractor by looking at the instructions. For the Neva MB-23 engine, this is 0.15 mm for the intake and 0.2 mm for the exhaust valves.
- Make adjustments by measuring the gap using feeler gauges and tighten the nuts if necessary. When set correctly, the feeler gauge should fit between the valve and rocker arm.
- Reinstall the valve box cover, belt, protective cover, muffler and starter.
READ How much oil is in the gearbox of a walk-behind tractor
Lifan 6.5
Adjusting the valves on the Lifan 6.5 walk-behind tractor consists of setting the correct gap under the valves. The sequence of actions will be as follows:
- Remove the casing to get to the flywheel.
- Remove the valve cover. Below it there are two valves - inlet and outlet.
- To check the intake valve clearance, you will need a 0.15 mm feeler gauge, and for the exhaust valve, a 0.2 mm feeler gauge. When adjusted correctly, the dipstick should pass under the valve quite freely.
- To adjust, loosen the fastening nuts using a wrench. We insert the dipstick between the valve and the piston so that it does not slip, but is held tightly enough in this position. We tighten the nut.
- Replace the valve cover and flywheel housing.
How to properly adjust the valve of a Zip walk-behind tractor
What is the procedure for adjusting the valves on the popular zip walk-behind tractor:
- Open the flywheel.
- Unscrew the valve cover clockwise.
- We check the gap with a feeler gauge exactly as described above.
- Use a wrench to turn the nuts and loosen them a little.
- We close the system and conduct testing.
How to adjust valves
Each model has its own characteristics regarding the valve regulation process. But basically there is a standard process, which differs little in the step-by-step version. Procedure:
- preparation of equipment and necessary tools;
- the casing is removed;
- after the flywheel, remove the valve cover;
- adjustable;
- installation of the cover and casing.
Important! Before the process, you need to check the gaps. If the gap is correct, the procedure is standard.
The list of necessary tools may vary depending on the brand and features of the motor. The standard will require a set of wrenches and screwdrivers, as well as a feeler gauge or small blade.
The process itself involves setting gaps of the optimal size. Almost any operating instructions indicate the value. Each option has its own mechanism with its own parameters. This must be taken into account during operation and maintenance.
Together with the engine and all mechanisms, the transmission and chassis are installed. Only a full-fledged tuning process will bring the entire set of mechanisms to optimal condition.
The setup itself includes the following steps:
- after the valve system cover is removed, the gap parameter is checked;
- the correct play should allow the feeler gauge to pass freely under the valve;
- with the standard, the intake type clearance is 0.15 mm, and the exhaust valve has a clearance of 0.2 mm;
- To adjust, the fastening nuts are loosened;
- After achieving the result, the fastening nuts are tightened and the cover and casing are installed.
Important! After any adjustment, it is necessary to check the operation of the mechanisms.
After repairs, do not forget to check the operation of the device.
All procedures are carried out strictly by a specialist or a person with sufficient experience. Different options have different indicators, but the procedure itself is standard. During any diagnostics, it is also necessary to check all systems. The further performance and efficiency of the entire device depends on this.
Various options for hand-assembled mechanisms depend only on the model range on the basis of which everything was assembled. Each type of agricultural implement has its own level of parameters, which is necessary for effective operation.
Important! If there are no instructions for setting parameters, then it is better to contact a specialist who will independently adjust the device to the requirements.
On a Lifan walk-behind tractor
Adjusting the valves on the Lifan walk-behind tractor has its own characteristics. There are several motor power options that have their own clearance parameters. Lifan 6.5 is mainly used. The gap size is set to standard, that is, for the intake - 0.15, and for the exhaust - 0.2. The procedure itself is also carried out in accordance with the usual procedure.
Lifan is one of the models that does not need to be warmed up before testing. The equipment is warmed up after valve adjustment, when all systems are checked together. Another important point is the ability to contact a special service, since the brand is widespread.
Almost all Lifan modifications have a similar procedure. The only exceptions are self-assembly options that are created based on the model.
Features of a gasoline engine on walk-behind tractors
The gasoline engine on agricultural machinery is often the most problematic part. It has many features that Honor requires for maintenance and setup. Peculiarities:
- There are two types of gasoline engines - two-stroke and four-stroke;
- the majority of the parts are universal, but a number of mechanisms will require spare parts from the manufacturer;
- a full installation is carried out with maintenance, which is performed at least once a year;
- most of the engines are of Asian origin, but are of sufficient quality and easy to maintain;
- For adjustments and other processes you will need to have the necessary tools.
Important! A video about adjusting the valves and the entire maintenance process can be found on the Internet, but only a person with experience and the necessary skills should carry out the procedure, since the mechanism is very sensitive to even small defects.
In this video you will learn how to adjust the valve in a walk-behind tractor :
In the design of walk-behind tractors, internal equipment occupies an important place, since the productivity of any work depends on it. It is recommended to service the equipment annually in special services, but additional installation will also be required after a period of inactivity or after long-term use.
This approach allows you to reduce wear on parts and keep equipment in optimal condition.
Any incorrect fit will result in reduced power, worn parts and permanent problems. You can also find out that the procedure was carried out incorrectly by the lack of stability during operation.
For each gasoline version, the verification process is regulated by a number of points, including operational data described in the instructions, as well as brands and types of parts sets. With different types, the level of required parameters may vary even with the same brand of equipment itself.
adjustment has its own peculiarity
Motoblock Agro and its device
The walk-behind tractor is a two-wheeled unit with a UMZ-341 gasoline engine and a gearbox (4 stages).
A special feature of the equipment is the ability to install not only standard attachments designed for the universal Agro walk-behind tractor, but also home-made devices. Also, using this technology you can transport up to 500 kg of payload. The maximum speed depends on the quality of the surface, but not more than 14-15 km/h.
The walk-behind tractor consists of the following elements:
- Engine.
- Transmission.
- Transmission units (gear reducer, clutch).
In this video you will learn how to adjust the valve: The operation of the Agro walk-behind tractor is also facilitated by the presence of reverse. With it, the equipment, despite its significant weight (160 kg), has high maneuverability.
The UMZ-341 engine is single-cylinder and is an almost exact copy of the Honda GX240. The engine is carburetor, average gasoline consumption is 3-4 liters per hour, depending on the load and intensity of use.
Setting gaps
The steps to adjust the gaps are as follows:
- Before starting any actions, check the engine: it must be cold;
- then disconnect the oil bath cup from the air filter and filter element;
- using a wrench, unscrew the four bolts from the protective casing;
- After these steps, it is necessary to remove the starter and flywheel protective casing;
- Next, you should fix the dead center on the flywheel. It must correspond to the zero mark;
- carefully remove the valve cover with the paronite gasket; before doing this, you need to unscrew the three bolts;
- It is important to check the gaps. Remember that the inlet valve is located near the filter, and the outlet valve is located near the muffler. To check the intervals, you need to insert a feeler gauge between the rocker arm and the valve. If the distance deviates from the permissible value, you need to adjust these elements with a spanner wrench or a screwdriver;
- after which it is necessary to wipe all connections with a clean rag, fully assemble the structure and turn on the walk-behind tractor to check its working condition.
With proper valve adjustment, the engine will operate silently, without any jerks or failures.
Using the proposed algorithm of actions, you will be able to correctly adjust the valves on the walk-behind tractor , while ensuring the effective operation of the device!
How to set up on an Agro walk-behind tractor
The valves on walk-behind tractor are adjusted as follows:
- We warm up the engine, and then give it some time to cool down.
- Remove the oil bath of the air filter.
- Next, you need to unscrew the flywheel housing, which is secured with 6 bolts.
- The marks on the flywheel are 0 (top dead center), 5, 10 and 20 (fuel injection). We compare the dead center of the flywheel with a mark located on the cylinder so that they are opposite each other.
- Next, remove the valve cover.
- Below it are two valves. Loosen the locknut, then insert a razor blade under the valve . The blade must pass freely between the piston and the valve.
- Having achieved this, tighten the nut back. Then we return the valve cover and flywheel housing to their place.
It is worth noting that identical adjustment steps are carried out to adjust the valves on walk-behind tractor . The Agros walk-behind tractor and its valve adjustment also correspond to the MB 1 walk-behind tractor.
So, if necessary, you can use an identical scheme.
READ How to make all-wheel drive on a walk-behind tractor
Fuel supply problems
This is the most common problem that novice walk-behind tractor users may encounter. Most often this is not a problem at all.
The fuel supply can be disrupted in two cases: when the tank is empty or when the fuel valve is closed.
Adjusting the valves of the Chinese engine Lifan 168F-2,170F,177F Lifan walk-behind tractor
The way to fix the problem is to fill the tank and open the valve.
If these measures do not help, you need to clean the air valve or fuel tap; it may be clogged. If these measures do not bring results, you may have filled in with low-quality fuel that should be replaced. If the cause of poor fuel supply is a broken needle valve or carburetor float, repair of these engine parts is necessary.
Stopping the engine
If the Lifan walk-behind tractor suddenly stalls during operation or startup, this may be due to one of three main reasons, namely:
- Malfunction of the ignition system - the ignition timing needs to be adjusted.
- Malfunction in the fuel supply system - identify the cause and eliminate it.
- Compression failure - replace worn parts, adjust clearance or repair valve .
Adjusting the fuel system of a walk-behind tractor
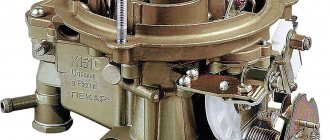
If fuel is not supplied to the cylinder, then first you need to check whether there is enough fuel in the tank. It is also necessary to check whether it is supplied to the carburetor. To do this, remove the hose from the inlet fitting of the device. If we are talking about a K45 type carburetor, you should press its quencher so that the fuel begins to pour out through the drainage hole.
If fuel does not enter the carburetor, then it is necessary to turn off the fuel supply valve, completely disassemble it and remove accumulations of dirt from the mechanical cleaning filter. To achieve the greatest purity, all components must be treated with gasoline. The fuel valve is assembled and returned to its original place.
If fuel enters the carburetor, but is not supplied to the cylinders, you need to check the correct operation of the fuel valve, as well as the presence of dirt on the jets.
To deal with the carburetor of a gasoline walk-behind tractor of the KMB-5 type, you need to remove it from the engine and empty the fuel from the float chamber. Through the fitting (see sketch), through which gasoline is supplied, you need to supply the air mixture, having previously installed the carburetor in the working position. The passage of air should proceed unhindered, and when the carburetor is turned over, it should completely stop. These features indicate the full functionality of the part.
Details in the figure: 1 – fuel supply fitting; 2 – upper body; 3 – throttle valve; 4 – idle needle; 5 – jet; 6 – lower body; 7 – air damper; 8 – screw fixing the tie; 9 – needle of the greatest gas; 10 – spray element; 11 – float; 12 – fuel supply valve.
The fuel level inside the float chamber can be adjusted using the float tongue. As a standard, it should vary from 3 to 3.5 cm.
To purge the jets, you need to unscrew the screws responsible for full and low throttle. Cleaning carburetor parts begins by unscrewing the screws holding the upper housing. The lower housing is removed, the fuel supply valve is washed with gasoline, and the dirt is blown out of the jets with a pump. You need to check if the float is intact. It is strictly forbidden to use rags during the cleaning process.
After cleaning is completed, the housings are connected. It is necessary to check that the spray tube fits correctly into the hole located on the upper body. Open the throttle valve and check that the assembly is correct. The screws securing the upper housing are tightened tightly. After the assembly process is completely completed, the carburetor should be adjusted. This will significantly improve the performance of the walk-behind tractor with attachments, because correct operation requires flawless adjustment of all its parts.
If the DM 1.08.100 carburetor is installed on the walk-behind tractor engine, then the method for adjusting it will be as follows:
- You should tighten the low throttle screw 10 (Fig. 3) all the way and turn it away from you half a turn.
- Then you need to tighten screw 9 at full throttle and unscrew it completely 2 turns.
- Unscrew screw 4 (Fig. 4) for low engine speeds until the lever stops in the boss of the carburetor body and tighten it 2 turns.
- Start the engine of the walk-behind tractor, then adjust the measured operation at the highest speed after warming up with screw 9.
Do not allow the engine control lever to be turned off, move it to the low throttle (rev) position and, by unscrewing screw 10, set constant low throttle rpm.
That's basically it. The main points of adjusting the main parts of the walk-behind tractor are considered. Adjust your walk-behind tractor with pleasure!
The walk-behind tractor can do a very wide range of work, but this requires some effort on the part of the owner of this unit. We are talking not only about replacing failed parts and devices, but also about timely adjustment of certain components of the device.
Namely, the correct operation of the walk-behind tractor engine will depend on how correctly and correctly the valves are adjusted.
And it doesn’t matter whether we are talking about a Honda walk-behind tractor, or whether we are considering a Vityaz 8hp walk-behind tractor and its correct adjustment
, we are talking about adjusting the valves on a diesel walk-behind tractor, or you need to adjust the valves on
walk-behind tractor
...
It is better to do this after each season, but there are times when such adjustment
required more than 2 times during a given period of work. The main indications for this are atypical noise in the carburetor area, tapping - in general, unusual sounds when using a walk-behind tractor.
If this is found, and if the valves do not control the throttle control in the walk-behind tractor, then it is necessary to immediately inspect and decide on actions, especially since this procedure is quite simple and can be done at home.
A trolley for a walk-behind tractor is a useful device that you can assemble with your own hands.
How to set up on an Agro walk-behind tractor
Adjusting the valves on the Agro walk-behind tractor is done as follows:
- We warm up the engine, then give it some time to cool down.
- Remove the oil bath of the air filter.
- Next, you need to unscrew the flywheel housing, which is secured with 6 bolts.
- There are marks on the flywheel - 0 (top dead center), 5, 10 and 20 (fuel injection). We compare the dead center of the flywheel with a mark located on the cylinder in such a way that they are opposite each other.
- Next, remove the valve cover.
- There are two valves underneath it. Loosen the locknut, then insert a razor blade under the valve. The blade must pass freely between the piston and valve.
- Having achieved this, tighten the nut back. Then we put the valve covers and flywheel housing back in place.
So, if necessary, you can use a similar scheme.
Lifan engine
Lifan installs several types of engines of different power and modifications on its walk-behind tractors. The most popular diesel walk-behind tractor is the 186FD. However, such a configuration from the manufacturer costs an order of magnitude more, which means that most consumers still choose familiar models with a 4-stroke gasoline engine.
In order to avoid malfunctions of the Lifan engine, you need to carefully monitor its condition and carry out timely maintenance. Let's look at the main parts of the power unit and possible malfunctions of the Lifan engine, as well as ways to eliminate them.
Running in the Lifan walk-behind tractor
Running in the engine of a Lifan walk-behind tractor allows you to prepare the cultivator for full operation when the equipment is fully loaded. The purpose of running-in is to break in and grind in all elements of the power unit. The process of running in the Lifan engine is as follows:
- Before starting the engine, check the oil level.
- Fill the fuel tank.
- Start the walk-behind tractor at medium speed.
- For an hour, you need to test the car in all gears one by one.
- Using the cultivator, perform all operations (ploughing, cultivating, transporting cargo) at medium speed and only on previously plowed land.
- After break-in, change the oil and fill the fuel tank.
- The MB is ready to operate at full capacity.
It should be remembered that the break-in process is described in detail in the user manual. Before performing any actions, read the manual and act in accordance with the description.
Engines for the Lifan walk-behind tractor have long established themselves as reliable power units that allow the engine to be used at full power. These engines are installed on both domestic cultivators and imported equipment. The maximum power of the Lifan engine is 6.5 horsepower, which provides the ability to carry out various work on cultivating difficult lands. Today, not only power units are available for sale, but also MB from this company; let’s look at their advantages.
Engine UMZ - 341 for the Agro walk-behind tractor - technical specifications, instructions, malfunctions
In 1999, OJSC Ufa Engine-Building Production Association began manufacturing a new generation carburetor engine, UMZ-341, developed by factory specialists. This single-cylinder, four-stroke engine produces 8 hp. in all respects it corresponds to the best world analogues, and in Russia it simply has no equal. It was originally created for the Agros walk-behind tractor.
Official website of the engine manufacturer UMZ 341 - www.umpo.ru
Engine for walk-behind tractor Agro UMZ-341 - operating manual download
Catalog of spare parts for the UMZ-341 and UMZ-341E engines - download
To convert the engine to AI-92 gasoline, it is necessary to replace the A11-3 spark plug with an A17B spark plug and adjust the ignition timing, moving it 2 degrees counterclockwise.
Download guidelines for converting the UMZ-341 engine and its modifications to AI-92 / AI-80 gasoline from the manufacturer (this information is from the manufacturer’s website)
Detailed technical characteristics of the UMZ-341 engine
The engines are designed to operate under the following conditions:
— ambient air temperature from minus 20 to plus 40°С.
— relative humidity of the ambient air up to 98% at a temperature of plus 25°C
The UMZ-341 and UMZ-341E engines are a single-cylinder, four-stroke, gasoline, carburetor engine with overhead valves, spark ignition, with a horizontal engine shaft, with an inclined cylinder, and has a centrifugal all-mode speed controller and a balancing shaft.
The UMZ-341 engine is designed for installation on the Agro walk-behind tractor manufactured by JSC UMPO, supplied to the domestic market and for export to countries with temperate climates
The UMZ-341 E engine is made on the basis of the base model UMZ-341 and is intended to drive the AB-4 electric unit.
ENGINE ADJUSTMENT
Adjusting the UMZ-341 carburetor
The engine carburetor is adjusted in case of unstable engine operation.
1 Start the engine and warm it up without load for 2 to 3 minutes.
2 Turn out the idle speed adjusting screw 8 (Figure 3) to a position at which the engine begins to run unstably. Turning the screw slowly, achieve stable, uninterrupted operation of the engine.
3 By rotating the thrust screw 10, set the throttle valve to the minimum opening position, at which the engine runs stably at the minimum idle speed, then by rotating the adjusting screw 12 achieve a maximum increase in engine speed. Use the stop screw 10 to adjust the regulated speed
4 If gasoline is poured through the float chamber of the carburetor, it is necessary to remove the float chamber and check the condition of the float, shut-off needle, and valve seat
Carburetor
Adjusting the thermal valve clearances on the UMZ-341 engine
Adjust the gaps between the valve and the rocker arm on a cold engine in the following sequence
— remove covers 4 and 5 of the cylinder head and the starter;
— check the tightness of the cylinder head nuts;
- set the piston to the top dead center (TDC) of the compression stroke,
— loosen lock nut 6 and bushing 7 of rocker arm 8 and, inserting a 0.08 or 0.1 mm feeler plate between the heel of rocker arm 8 and the end of valve 3, tighten bushing 7 so that the feeler plate fits into the gap without biting; tighten lock nut 6;
— check the thermal clearances between the fifth of the rocker arm and the end of the intake and exhaust valve stems
Install the cylinder head and starter covers in place, securing with nuts.
Note: To more accurately install the piston at top dead center, it is necessary to remove the fan casing and align the “E” mark on the end of the flywheel with the “G” pin on the crankcase housing (Figure 1, sheet 3).
Engine device
Engine malfunctions
We present the first list of possible malfunctions and methods for eliminating them from the user manual; you will learn more in detail by studying the instructions in full.
Replacing the UMZ 341 engine on an Agro walk-behind tractor with a Chinese Lifan engine - video
How to replace the UMZ-341 engine installed on an Agro walk-behind tractor with a Lifan? Many people want to replace this engine with a more modern one; this video is very useful for them.
Technical characteristics of Lifan walk-behind tractors
The range of Lifan walk-behind tractors is quite wide. On the market, the company presents new generation cultivators equipped with powerful Lifan engines and having excellent technical characteristics.
Let's look at the technical characteristics using the Lifan 1WG1100С walk-behind tractor as an example:
- Power – 6.5 l. With.
- Engine capacity – 270 cc.
- Engine – Lifan.
- Starting is manual.
- Walk-behind tractor control mode: manual transmission.
- Number of gears – 3.
- Productivity – 0.3 m/s.
- The width of the processed harrow is 800-1100 mm.
- Harrow depth 150-200 mm additional equipment: cutters, wheels.
- Weight – 110 kg.
Motor device
- cylinder-piston group with a crank mechanism;
- gas distribution mechanism;
- trigger mechanism;
- ignition system;
- cooling system;
- muffler;
- fuel supply system;
- easy starting mechanism;
- forced lubrication system.
Engine DM-1D: 1 – plug; 2 – cylinder block cover; 3 – plug-dipstick; 4 – pin; 5 – settling filter; 6 – connecting hose; 7 – fuel tap; 8 – nut; 9 – bolt; 10 – tank mounting clamp; 11 – bracket; 12 – fuel tank; 13 – plug; 14 – hole, 15 – high-voltage wire; 16 – candle square; 17 – candle; 18 – threaded bushing; 19 – valve; 20 – saddle; 21 – muffler; 22 – air filter; 23 – pipe; 24 – valve spring; 25 – valve plug; 26 – gasket; 27 – carburetor; 28 – screw; 29 – air lever; 30 – bolt; 31 – carburetor board.
User manual
Before using the MB, it must be assembled and prepared for use. When receiving a cultivator, pay attention to its power unit. It should have a sticker with a safety symbol on it. Latest modifications of the Lifan 8 liter engine. With. Lifan have distinctive features that Honor needs when assembling MB. Modification of the Lifan 900 mm – 1100 mm walk-behind tractor involves the installation of additional equipment to expand the plowed harrow.
When working with a motor cultivator, it is important to observe the following safety precautions:
- Before each start, you should inspect the engine.
- Beware of flammable objects when operating the Lifan engine.
- Keep children and animals away from the operating MB.
- The tank can only be refilled when the MB is turned off.
- Do not start the engine indoors.
Before starting work, each MB must be run-in in accordance with the manufacturer's requirements.
Starting work without running in the Lifan engine entails premature breakdowns and failure of the equipment.
Replacement of gearbox seals
The oil seals in the Neva MB-2 walk-behind tractor are replaced if an oil leak is detected.
This condition is dangerous because the walk-behind tractor gearbox may be left without oil, and this will lead to rapid wear of the unit.
The sequence for replacing oil seals is as follows:
- Remove the cutters from the shaft, cleaning the shaft and covers from dirt and oil residues.
- Unscrew the cover bolts, tap off the oil and debris, and remove the cover from the gearbox.
- The old oil seal is replaced with a new one and wiped dry.
- The cover is returned to its place (if necessary, it is placed on sealant) and fixed with bolts.
Lifan 6.5
Adjusting the valves on the Lifan 6.5 walk-behind tractor consists of setting the correct gap under the valves. The sequence of actions will be as follows:
- Remove the casing to get to the flywheel.
- Remove the valve cover. Below it there are two valves - inlet and outlet.
- To check the intake valve clearance, you will need a 0.15 mm feeler gauge, and for the exhaust valve, a 0.2 mm feeler gauge. When adjusted correctly, the dipstick should pass under the valve quite freely.
- To adjust, loosen the fastening nuts using a wrench. We insert the dipstick between the valve and the piston so that it does not slip, but is held tightly enough in this position. We tighten the nut.
- Replace the valve cover and flywheel housing.
READ Hiller for Walk-behind tractor with your own hands Dimensions
Motoblock Agro (Agros) - reviews, comments and suggestions
Vasily#101 wrote: the valves are adjusted according to the manual.
As before, I adjusted it by touch, 0.08-0.1 seems not enough
Tankist wrote: As before, I adjusted it by touch, 0.08-0.1 seems not enough
that is, make the gap larger? Then they will start knocking!
Within reason, when adjusting the valves, you noticed some misalignment of the rocker arms, this is where the problem lies, when adjusting one thing, during operation another. A slight knock of the valves is a signal that they are completely closed, and not that they are malfunctioning. Why guess, it’s easier to try, it won’t get worse. During short-term operation, the valve cover may not be closed; at the same time, you can check where the detonation is coming from.
Vasily#101 wrote: I press the pin and the knocking stops.
Well, I don’t know here, in theory, any misalignment in the central control unit should directly affect the smooth operation of the engine
Vasily #101 wrote: when I put my hand under the tank and press the pin, the knocking stops.
Well, think in this direction. How you press and what changes in the mechanism. For example, I haven’t seen him live yet
Don't know.
Vasily#101 wrote: that is, make the gap bigger? Then they will start knocking!
The larger the gap, the stronger the valve knock. But if it doesn’t exist at all, it’s even worse. Correctly adjusted valves, as the experts say, should rustle. There's not a knock, but a chattering sound.
umnyi wrote: Correctly adjusted valves, as the masters say, should rustle.
I set the valve according to the operating manual for the UMPO 341 motor. And you won’t hear the rustle of the valve during forward flow.
Vasily#101 wrote: I set the valves according to the operating instructions for the UMPO 341 motor.
Didn't you expose it to the cold? With the original muffler you can hear them normally.
umnyi walk-behind tractor in the house, kept warm!
umnyi wrote: With the original muffler you can hear them normally.
I agree, after the purchase I immediately noticed this, but AGROvody reassured me that this was the norm
Vasily#101 wrote: you can’t hear the rustling of the valves during forward flow.
You can hear it very well from the front, especially at idle. At very low speeds, the XX will already make itself felt by the central control unit, and there will definitely be a slight clang from there
umnyi wrote: Past the filter! For what ? Moreover, there is an even simpler way - a hole is drilled in the damper.
When the engine is running, a vacuum of air is created throughout the entire passage and in the filter; a hole is made to supply air into the idle channel, bypassing the vacuum created. Those. so that it does not in any way affect the work of XX. Take the Zhiguli carb in your hands, at its base, on the bottom side there is exactly the same channel, the only thing is that it is adjusted with a screw directly in the chamber for forming the XX mixture.
Tankist wrote: At very low speeds, the XX will already make itself felt by the CRO, there will definitely be a slight clang from there
It’s a clang, but not a small one. I’ll try to play around with the octane corrector, but on a microprocessor it’s pointless. But the bulbulator works crappy and because of this the engine runs unevenly, and perhaps there’s a clang.
Vasily#101 wrote: but your bulbulator is more beautiful! Maybe because it’s new. tell me how it will work?
I haven’t installed it yet, it’s cold here and we don’t have a garage, I’ll definitely post when I install it!
anik wrote: good afternoon, fellow countryman! I have one like this, I bought it a year ago also from e bay, only the version with gaskets. The season worked perfectly, it starts without problems, the consumption has decreased very noticeably! The adapter was sharpened from ferrous metal, and the original filter was installed.
I’ll probably do the same with a native filter, I don’t think it’s necessary to incur extra costs, and the formulators have long ago figured out everything, why reinvent the wheel!
umnyi wrote: Just if you put a regular home-made gasket there with holes for the main diffuser and 2 bolts
I have homemade gaskets. I just cut them out of poranite.
Akela and I am also thinking of installing simple gaskets, I don’t think they are anything special.
walk-behind tractor in the house, kept warm!
This is not a joke about the treatment of hemorrhoids, although the situation is very similar.
Last spring (somewhere in April) this issue was discussed here, and we came to the conclusion that an ambient temperature above +15 degrees is optimal when adjusting the valves.
s006j wrote: ambient temperature above +15 degrees is optimal when adjusting valves.
as well as what needs to be adjusted on a cold engine, i.e. so that, for example, he spends the night in the garage so that his temperature is equal to the ambient temperature.
SergeyP-Z What does this give in the end? Unlike adjustment on a warm engine.
umnyi wrote: What does this give in the end? Unlike adjustment on a warm engine.
like what? what is adjusted with a feeler gauge is called thermal gap, which is selected during the heating process of the engine, i.e. Ideally, at operating temperature there is almost no gap and there is nothing to knock! But if you adjust it when it’s hot, then when it’s hot there will be a gap, which in theory shouldn’t be there on a hot engine, and as it cools down the gap will increase more than it should, the power will drop and the valves will knock very hard!
SergeyP-Z wrote: and as the gap cools down, it will increase more than expected, the power will drop and the valves will knock very hard!
Are you seriously?
Remember, I told you about my grandfather, he generally adjusted the engine practically while the engine was running. If the gap goes away while the engine is running, that’s bad! For example, this is what happened to me at UMP. You come to the garage, it’s cold to start with half a turn. But when it warms up, the gaps are gone - the valve does not close completely. Then I adjusted it specifically on a warm engine (not hot) - then I didn’t touch the valves for 3 years.
But everyone has their own route. I want there to be gaps, especially since the valves sit on the head. Let everyone do what they think is right.
Required Tools
To adjust the carburetor valves, you will need a minimum list of handy tools:
- razor blade or feeler gauge;
- minus screwdriver;
- spanner wrench
Using these simple tools you can adjust most carburetors.
People invented snowmobiles that allow you to drive on snowy roads as quickly as possible, without much effort. Ermak snowmobiles are quality, speed and reliability.
Gardening and caring for plants and trees have always been considered one of the most difficult types of work, as they require significant time and effort. The Marolex sprayer is the ideal solution for your garden.
Labor-intensive gardening work can now be done using a walk-behind tractor. Here you will learn how to plant potatoes with a walk-behind tractor.
It is important to understand that valve adjustment means setting the optimal clearance, which is directly stated in the operating instructions for each specific model.
Setting up the walk-behind tractor ignition system
The ignition system is a very important design that ensures the formation of a spark in the internal combustion chamber to ignite the air-fuel mixture. In order not to encounter breakdowns and not to call a repairman, you need to know how to correctly set the ignition on the walk-behind tractor. This can be done in different ways.
- Thanks to the spark. Do the following:
- Turn the crankshaft so that the pulley mark and the mark located at the base of the timing mechanism coincide. In this case, the interruption-distribution slider should point to the high-voltage wire of one of the cylinders;
- loosen the nut that positions the body of the mechanism that determines the moment of creation of high-voltage pulses;
- from the system cover, which determines the moment of creation of high-voltage pulses, you need to remove the high-voltage wire located in the center, and place its contact at a distance of 5 millimeters from the “ground” of the walk-behind tractor;
- now turn on the ignition;
- the body of the mechanism that determines the moment of creation of the above-mentioned impulses must be turned clockwise to the 200 mark;
- now slowly turn your body in the opposite direction;
- the position of the mechanism should not change, but at the same time you will see a spark between the contact located in;
- tighten the breaker nut.
- Using your hearing:
- start the engine;
- Unscrew the nut that holds the distributor base a little;
- the interrupter housing must be slowly rotated on both sides;
- the state of the mechanism, which determines the appearance of high-voltage pulses, must be fixed in the position when the motor power is the highest and the speed is the highest. Listen carefully;
- turn the breaker body clockwise;
- Now firmly fasten the distributor fastening element;
- Using a strobe:
- heat the walk-behind tractor engine to a state optimal for operation;
- connect the power supply of the strobe to the network of your unit;
- the sensor, which is designed to trigger the sound, must be placed on the high-voltage electrical wire of one of the cylinders;
- remove the vacuum correction hose and plug it;
- the light from the strobe should be directed towards the pulley;
- start the engine. It should run at idle speed;
- rotate the distributor body;
- create the fastening when the pulley mark is directed to the mark on the cover of the device;
- tighten the fixing nut.
How to adjust valves on a walk-behind tractor
The walk-behind tractor is a universal unit for plowing land. It has gained wide popularity among farmers working on small plots, replacing the tractor.
- plowing the soil and hilling;
- cultivation;
- watering;
- harvesting potatoes and onions;
- mowing weeds;
- snow removal;
- transportation of goods using an additional trailer.
While cultivating the soil, the operator drives the machine in front of him, holding the control handles.
Adjusting the valves on the walk-behind tractor , adjusting the control mechanisms, changing the oil in the main components, inspecting the tires are the main work that is carried out during the maintenance of the walk-behind tractor. Maintenance is necessary to ensure safe operation of the unit, check the reliability and strength of all its components and connections.
This review will discuss the question of how to adjust the valves on a walk-behind tractor . The constant operation of the engine and the entire motor vehicle as a whole depends on them.
What is needed to regulate the valve of the Agro walk-behind tractor
Auto mechanic, specializes in agricultural equipment
The products of the Ufa Engine Plant are in deserved demand in Russia. Agro walk-behind tractors are designed for agricultural work, removing garbage and snow, mowing grass, and transporting heavy loads. With long-term use of this equipment, the question may arise of how to adjust the valves on the Agro walk-behind tractor.
The fact is that over time, the factory settings are violated for a number of objective reasons, and incorrect adjustment leads to unstable engine operation and coking of the seats (a bushing pressed into the cylinder head with which the valve is in contact).
In this article you will learn how to adjust the valve
Why are valve clearances needed?
The gap between the rocker arm and the valve support plate is needed to compensate for the thermal expansion of the assembly parts when the engine reaches operating temperature. That is, when the engine warms up, the correctly set gaps disappear.
If thermal gaps are too large:
- On a cold engine, the valve support plates may fly out.
- When the engine is warm, a characteristic clicking sound may be heard.
- The valves will open too late and close too early, which will negatively affect engine power and efficiency.
- The wear of the working part of the rocker arms will accelerate.
If thermal clearances are too small or missing:
- The valves will open early and close late, which will negatively affect engine power and efficiency.
- On a warm engine, the valves will remain slightly open on the compression stroke, which will negatively affect compression.
- It will be difficult to start the engine (especially if the cylinder-piston group is no longer new).
- The fuel mixture will not burn out completely, which will lead to engine smoking and frequent clogging of the injector nozzle.
That is, correctly installed thermal valve clearances on a walk-behind tractor have a positive effect on the service life, power and efficiency of the engine, and also simplify its starting.
Possible errors when adjusting valve clearances
Always check clearances one at a time, not all at once.
Despite the simplicity of the operation, adjusting the engine valves of a walk-behind tractor is often performed with the following errors:
- The clearances are adjusted on a warm engine . In this condition, due to the fact that the valve mechanism parts are warm, there may be no gaps at all. As a result, if they are increased on a warm engine, after it cools down they will become noticeably larger than normal.
- The piston is at TDC, but not on the compression stroke . In a four-stroke diesel engine, the piston is at top dead center twice during the operating cycle - during compression, and between the exhaust and intake strokes. In the second case, when passing through TDC, the exhaust valve is completely closed, but the intake valve is already slightly open. Accordingly, there cannot be a gap on it.
- A feeler gauge is not used to measure gaps. Shaving blades, homemade plates, pieces of copper wire and other improvised materials should not be used for this operation. The correct feeler gauge not only has the exact thickness across its entire plane, but is also made from abrasion-resistant, hard steel.
- When searching for TDC, the flywheel rotates in the wrong direction. Although a diesel engine can be started in any direction, when searching for TDC and compression stroke, it must be rotated as it rotates during normal operation.
- The intake and exhaust valves are incorrectly identified. It is very easy to distinguish them - the inlet is located on the side of the air filter, the outlet is on the side of the intake pipe of the exhaust pipe.
- Adjustment with excessive clamping of the probe. After tightening the locknut, the valve clearance tends to decrease. If, upon rechecking, it turns out that the dipstick enters with difficulty, set a slightly larger gap. It will decrease as the locknut is tightened.
- Tightening the locknut without fixing the adjusting screw. When tightening the rocker arm locknut, there is a possibility that the adjusting screw will turn spontaneously, causing the set gap to be lost. To prevent this from happening, hold the screw while tightening the locknut.
- The established gaps are not rechecked. Adjusted valve clearances should always be rechecked in two stages. First, immediately after tightening the locknuts. Secondly, by turning the flywheel two full turns (setting the piston back to TDC on the compression stroke).
Set of feeler gauges for checking clearances
If you know any other mistakes that can be made when adjusting the valves on a walk-behind tractor, share them in the comments below the article. Sensible options will definitely be added to this list.