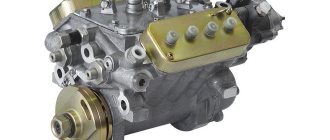
Indispensable helpers in the countryside and in rural areas: a walk-behind tractor and a walk-behind cultivator. Both of these units are driven by a gasoline engine. The main difference is that the first can also transport loads, plow and even mow, while the second can only loosen the soil. Cultivator cutters are the component that makes them similar to each other.
What is a cultivator and why is it needed?
First you need to understand what a cultivator is, how it works and what it is needed for.
So, this is a type of compact agricultural equipment designed for pre-planting soil preparation. It allows you to plow, loosen and hill up the soil, as well as make furrows and perform harrowing. This unit makes it possible to significantly facilitate agricultural work on a summer cottage or personal plot. Cultivators are divided into groups according to the type of mechanism:
- mechanical manual. They are used as additional equipment for more serious equipment. Loosen the soil to a depth of no more than 5 cm and remove only weak weeds located on the very surface;
- electric. Lightweight, maneuverable equipment that is used on limited areas of land. The disadvantage is that it runs on an electrical cord;
- battery-powered This type of agricultural equipment combines all the advantages of electric analogues with autonomy. They are heavier, but at the same time, mobile and safe;
- gasoline. This technique is distinguished by power, performance and heavy weight. A good option for cultivating large plots of land.
Cultivators of any type consist of such basic elements as a frame, control levers, engine, rotor, wheels and cultivation devices (mills).
Tillage cutter: design and technical requirements
Reliable milling technology must meet certain standards. It must be reliable and easy to operate, multifunctional, efficient, and economical. All these qualities are due to its design.
Design features of the tiller
The tillage cutter meets all the requirements for equipment intended for tillage.
The main design elements include:
- metal frame with a coupling device (for connecting to a tractor);
- a shaft with cutting knives (they can be of different shapes - sickle-shaped, rotary, chisel-shaped);
- drive (through it, rotation is transmitted to the working parts from the base device);
- fencing (performs a protective function).
The design is easy to maintain, durable and functional.
Technical requirements for tillers
General technical requirements are set out in interstate standards GOST-28516-90:
- Plowing depth should be up to 12 cm in plowed fields and up to 18 cm in unplowed fields.
- The degree of weed crushing should be at least 95 percent.
- The degree of soil loosening/crushing is at least 85 percent.
- The unevenness of tillage is no more than 15 percent.
- The use of cutters on terrain with a slope of no more than 8° in fields and no more than 12° in orchards and vineyards.
- Ease and simplicity of the tractor coupling mechanism (quick coupling or semi-automatic device).
- The dimensions of the clutch mechanism must comply with GOST 25942.
- The design of the cutters should allow adjustment of the rotation speed.
- Knives and fasteners must be made of materials established by GOST, have an anti-corrosion coating and comply with a certain strength class.
- Welds must be of high quality and free from flaws.
- There should be no lubricant leakage in connections and seals.
- Availability of drive and transmission protection equipment.
Compliance of the equipment with these requirements guarantees its reliable and safe operation. When purchasing equipment, you need to be very careful about this issue.
Deep tillage
When developing new areas, it is necessary to develop virgin soil. Usually it is abundantly overgrown with turf, perennial grasses and weeds. It is quite difficult to cope with such areas with conventional tools. More often they resort to cultivation using deep processing with formation turnover.
With reverse plowing, part of the layer is cut, lifted and turned around its own axis. As a result, the soil from the lower layer ends up on top. Weeds cannot grow for a certain period of time. Cultivated plants have a head start for advanced development.
Similar work is done in the fall. The rhizomes of nettle, wheatgrass, dandelion and other weeds freeze in November-December, when the air temperature drops below -15...-17 ⁰С (there is no stable snow cover yet). Subsequently, they lose the ability to grow.
In the future, a similar technique is resorted to every autumn. After 2...4 years of autumn fall plowing, the number of weeds on the site is reduced many times over.
Proponents of organic farming disagree with this approach. But the experience of several centuries proves that only such agrotechnical measures can clear the area of weeds. Otherwise, you will have to use chemicals to control weeds.
Deep plowing allows:
- wrap a layer of soil and allow plants to use for nutrition substances that gradually shift to lower horizons during the season. This operation makes it possible to reduce soil salinization using mineral fertilizers, as well as reduce the amount of fertilizer applied;
- aeration of the lower layers of soil contributes to the occurrence of aerobic processes of decay of plant residues. Usually in the lower layers the access to air oxygen is limited. Therefore, conditions are created when the rotting of taproots lasts for several years. Anaerobic processes (without air access) occur with the slow accumulation of humus;
- When the formation is turned over, weed seeds end up in the lower layers of the soil, and they cannot germinate. The roots remaining on the surface freeze. As a result, soil contamination sharply decreases;
- Freezing lumps of earth in winter crumble more easily in spring. A light, loose surface layer is formed in which cultivated plants can receive more abundant nutrition;
- adding organic matter before plowing allows for active rotting of manure or green manure if they were sown after harvesting the main cultivated crops.
Instructions for assembling cutters for a walk-behind tractor
Walk-behind tractors and motor-cultivators from Aurora, and in principle like many other manufacturers, are supplied with cutters disassembled. Often, for owners of new equipment, the process of assembling cutters becomes a bit of a problem. In this article we will describe how to assemble working cutters from the parts of this “constructor set”. For Aurora equipment, depending on the model, cutters are available on axes of two sizes. The axle diameter for light equipment is 23 mm, and for heavy equipment 32 mm.
Milling cutters for light walk-behind tractors and cultivators are quite easy to assemble. To do this, you need to install the blades in special mounting sockets and screw them with bolts. It is necessary to pay attention to the direction of the cutting edge of the blade. It should look in the direction of movement of the walk-behind tractor. In addition, each blade is marked. If the letter quotRquot is indicated, it means it is turned to the right side, respectively, quotLquot is turned to the left.
Each subsequent section is fixed with the previous one by means of a pin, and is locked with a pin. The cutting disc must be secured with a bolt. Depending on the power of the equipment, the number of cutters will be different. Their number can be 24, 32 or 40.
The number of blades may also vary and may be three or four per section. This is due to the number of mounting plates on the axle. If the cutter axis is straight, without displacement relative to each other, then the number of blades will be three. For offset models - four.
Four-blade cutters are assembled sequentially, one left, one right. It will be easier to assemble the cutters if at the very beginning you divide the left and right blades into two parts, for the left and right cutters.
Three-bladed ones are assembled differently. The first blade is installed on the axis and secured with a bolt. In the future, this bolt will have to be removed to fix the other blade. If the first one was installed from the outside of the plate, then the remaining two must be mounted from the inside of the mounting plate. For three-bladed cutters, the quotLquot and quotRquot markings are installed separately for each side.
How to properly assemble knives on a walk-behind tractor with 3 cutting blades?
The main mistake when assembling the cutting tools of a motor cultivator is installing left-sided blades on the left section, and right-sided blades on the right. This knife mounting scheme is functional, but has a number of shortcomings:
- the increased distance between the right and left mounted parts (from 20 to 25 cm) reduces the quality of tillage - after the passage of the equipment, a wide strip of uncultivated land remains;
- the cutting blades do not overlap each other, which reduces the quality of soil loosening;
- wear of cutting parts increases;
- the comfort of using special equipment is reduced - the motorized cultivator will bounce when passing the strip due to the asymmetrical entry of the cutting tools into the ground.
Correct assembly diagram for a 2-section cutter
To correctly assemble the knives on a walk-behind tractor, you must adhere to the principle of diagonals and carry out all installation steps symmetrically. Some models of special equipment are equipped with a left and right cutter with a removable last section. Their number does not affect the installation principle of knives.
Installation of the first knife 2 sections
If the diagonal (offset) assembly is observed, the blades of the sections will cut the soil sequentially one after another. The rotation of the left and right cutter will be symmetrical. With correct installation of prefabricated elements, uniform operation and load distribution are guaranteed.
How to properly assemble a cutter on a walk-behind tractor.
| MILLS FOR MOTOR BLOCK. REVIEW AND ASSEMBLY |
| How to assemble a cutter on a walk-behind tractor |
| HOW TO CORRECTLY ASSEMBLE THE CUTTER FOR MOTOR-BLOCK "CENTAUR" MB 2021B-3 |
| MILLS FOR MOTOR BLOCK. ASSEMBLY FOR 4 KNIVES |
| Milling cutters. How to assemble correctly? Motoblock Hopper 900MQ |
| Milling cutter assembly for FM 643, FM 653 |
| Assemble cutters for walk-behind tractor |
| Correct placement of rototiller teeth knives. |
| How to assemble cutters for the SK-1400 and SK-1600 cultivators |
| How to assemble soil tillers-cultivators on a NEVA walk-behind tractor |
| How to assemble a cutter for a walk-behind tractor, laughter and sin |
| Instructions for assembling cutters for walk-behind tractors and cultivators |
| Plates for cutters for walk-behind tractor |
| Assembly instructions for cutters for walk-behind tractors and cultivators Aurora |
| How to set up a tiller on a walk-behind tractor |
| How to plow a garden with cutters |
| Modification of standard cutters for the OKA walk-behind tractor and a little about everything. |
| A few tricks for cultivating a vegetable garden |
| TEST - cutter - rotovator and legs with weights (walk-behind tractor) |
| My light walk-behind tractor. Soil milling. |
| How to assemble cutters on a walk-behind tractor |
| Secrets of assembling soil cutters for a cultivator and walk-behind tractor |
| How to assemble cutters on a ron angel gt90m3 favorite walk-behind tractor |
| How to assemble cutters? Correctly assembled cutter video for the Tatra Garden HT 100, HT 80, HT 68 cultivator |
| MILLS for walk-behind tractors 105/135. Correction of factory errors. |
| Nothing extra: just assembly of cutters for walk-behind tractor and motor-cultivator |
| ASSEMBLY OF AN ACTIVE MILL OF A HEAVY MOTOR-BLOCK |
| Mirror symmetry when assembling cutters for a walk-behind tractor |
Rotary cutter on MTZ-82: installation and use
The times when we dug up gardens with a shovel are almost a thing of the past. Now it is easier and faster for any owner to use mini tractors and walk-behind tractors for these purposes.
Since the appearance of the first cultivator around 1911 in the fields of Europe, this technique has firmly taken up residence in our barns. Its use saves a lot of time and effort. In addition, after plowing the land using a rotary cutter for mini tractors, the soil, as a rule, does not require any special additional processing.
How to work
After the cutters are installed, start the walk-behind tractor. At first speed, right on the cutters, we approach the beginning of the section. If there is only one speed for moving forward, then we do it at the lowest engine speeds. To operate a motor cultivator with a cutter, select the speed as high as possible. We turn on the second speed and, having set the engine speed to maximum, engage the clutch.
Use the coulter to set the desired cultivation depth. First, put it on the second division from the top. The shorter the part of the opener facing the surface, the finer the processing. With its help, we create a load and slow down the forward movement of the equipment.
If the area is large, then it is more convenient to move in a circle. If it is possible to turn the steering wheel to the side, it is advisable to turn it. Then the operator will walk on solid ground and not trample the already cultivated soil.
A properly adjusted walk-behind tractor will not jump or twitch.
It happens that the soil is heavy and the cultivator is light. Then you need to hang additional weight in the area of the cutters. Select the load in separate “pancakes”, 6-7 kg each.
Cultivation is carried out with a slight overlap of the treated area. We make the second pass so that one of the cutters goes along half of the processed strip. We focus on the depression that the opener leaves behind. Thus, all the soil will be processed twice. This way we will achieve uniform soil treatment throughout the entire area.
When cultivating row spacing, we install protective guide discs on the edges of the assembly. They will not allow the plant roots to be cut and will not allow the unit to deviate from the specified trajectory.
How to assemble crow's feet
The main element of the soil device is the drive sleeve, the parameters of which must be at least five mm of the wall length, and the optimal indicator is considered to be approximately seven mm. Next, you need to machine the inside so that it fits easily onto the shaft, and make a special hole for the axial pipe, thirty or forty mm deep.
As for the axial pipe itself, it is usually made on the basis of the standard model AE25-32, but other similar parts can also be used. There are two types of finished pipe: collapsible and non-dismountable, it all depends on your expectations.
But if you believe the reviews of farmers, the collapsible option is still considered the most effective, since it is always possible to add or remove knife installations.
It is impossible to predict how the walk-behind tractor will behave in a certain area, and for this reason it is better to have a backup modification option just in case.
Be sure to read:
Motor cultivator Mole
Having chosen the appropriate type of axial pipe, it is necessary to install a special flange on it for further fastening of the knife units. The total length of such a device will depend on the width of the knives and their distance from each other.
The optimal width of triangular knives is approximately 60-80 mm, since larger sizes significantly increase the resistance of the unit to the ground and impair its performance. The knife inserts themselves should be made of dense steel and have a thickness of 3-5 mm.
Next, you should assemble the cutting element stand, which consists of a curved strip and a sharpened edge.
By connecting the blade unit and the axial tubes, you get the overall design of a modular element. Actually, this is the final stage of creating “crow’s feet” and you can carry out the first “run-in” of a homemade installation.
Also, before starting the cutter manufacturing procedure, you should first make a small drawing to reduce the risk of damage to parts.
The necessary drawing can be found in many automotive publications or on the Internet; if you have a technical education and understand the design of the cutter, you can make a rough plan yourself.
What types of cutters are installed on walk-behind tractors?
With a walk-behind tractor, you can cultivate any type of soil and perform different types of work - aeration, loosening the soil or crushing it into a lump, removing the roots of perennial weeds, mixing soil layers or fertilizers. The functions and capabilities of garden equipment directly depend on the type of installed cutters - spring, hook, flat ripper, etc. Three types of attachments are considered the most versatile, popular and functional:
- Saber-shaped. An active type of cutter for a walk-behind tractor that requires assembly. They are installed on most models of garden equipment. The cutter can consist of 2-5 sections with knives that determine the width of the cultivation. Made of steel, it provides optimal depth of loosening of soft and untrodden soil. Plant roots do not get wrapped up.
Saber-shaped cutter options with 3 and 4 knives
- Crow's feet. Inactive type of cutters with a non-separable design. Designed for processing hard, rocky and trampled soils. The cutting blades are good at breaking up plants remaining in the soil, removing the roots of perennial weeds, and promoting aeration. The blade of the knife can be shaped like a spatula, triangle or trapezoid.
Popular modifications of crow's feet cutters
- Spiral, or “Virgin” Inactive type of all-welded cutter. It is designed for deep soil plowing, virgin soil cultivation, and loosening. The design is reliable, but the processing speed is reduced. Consists of 2-4 sections.
Two sections of a spiral-shaped cutting element
The owner of a new garden equipment will need detailed instructions to assemble the cutters on a saber-type motor cultivator, since 9 out of 10 models are supplied with disassembled attachments. The other two types of cutters only need to be hung.
Walk-behind tractor design
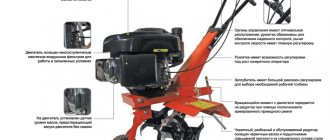
Before assembling the cutter begins, you need to understand what a motor cultivator is and what is included in it. The upper part of the frame is usually welded. The fuel tank and engine are installed here. Fastening is carried out on brackets. The engine itself, or power unit, is equipped with a clutch and gearbox. Its power can be different, it all depends on the type and purpose of the motor cultivator.
The cutters are a pattern of 2 blocks, each containing 12 separate cutters. For each block, 3 separate units with 4 knives are used, which are mounted at an angle of 90°. The position of the nodes is offset by 30°. To make one knife, a steel sheet is used, the thickness of which is 5 mm. The stand is made from a metal corner 63*40 mm. The knives are attached to the rack, their other end is welded to the flange to combine 4 knives into one structure. The entire cutter is connected with bolts, washers, and flanges. The design is reliable and can withstand significant loads. If you plan to constantly use this equipment, then you should prefer only factory options.
The need and rules for sharpening during operation
When operating a walk-behind tractor, the working surface of the knife will inevitably wear out. To restore the cutting ability of the tool, it must be sharpened periodically. The timing of the procedure is purely individual. The rate of knife wear depends on the following points:
- intensity of use of the walk-behind tractor;
- hardness of the cultivated soil;
- the presence of plant roots or stones in the ground;
- strength of knife material.
Manufacturers of agricultural equipment supply cutters with sharp blades. Therefore, when buying a walk-behind tractor, it makes no sense to sharpen knives. However, the procedure cannot be avoided during intensive use of the unit. To restore the sharpness of the knife, you will need an angle grinder (angle grinder or grinder), a sharpening wheel or a diamond wheel with a diameter of 12.5 cm.
The working edges should be sharpened at an angle of 45°. Remove the metal layer from the factory pointed side. At the same time, you shouldn’t get too carried away: just grind off 1-2 mm. Over the course of a season, it may be necessary to restore the cutting ability of the cutter several times, and excessive metal removal reduces the strength of the knife.
When using a cutter in wet soil, it is necessary to thoroughly clean the surface of the blades. When rubbed against the ground, the metal surface is cleared of the oxide film and becomes chemically active. This process is accompanied by increased corrosion, which entails the formation of pockmarks, chips, and microcracks. To prevent such phenomena, the blades should be treated with special inhibitors or automotive oil.
Tillage cutter: application, classification and principle of operation
(votes, average out of 5)
The future harvest depends on tillage. Loose, crumbly soil, without plant residues - this type of soil is obtained by using soil cutters. However, this mechanism is used not only for soil cultivation.
Application of tillage cutter
The use of a tillage cutter allows you to qualitatively crush and embed plant remains into the soil, loosen it or mix it with mineral fertilizers. The unit will help:
- get rid of weeds;
- cultivate the soil between rows in fruit nurseries and vineyards, forest belts;
- grind green manure before plowing;
- level the soil microrelief.
A rototiller is not only a cultivator, but a plow and a harrow at the same time.
The cutter is used on various types of soils - from light sandy to heavy loams. Milling of heavy soils is carried out more often, because It is this technology that better crushes sticky, compacted soil. It is advisable to use cutters to process virgin or fallow lands. Cultivation with a mill improves soil properties and increases yield.
Classification and principle of operation
A tillage cutter is a towed device for a tractor. Together with a tractor, it can easily replace other tillage machines.
Tillage milling units include:
- field;
- garden;
- row crops;
- swamp.
The principle of operation of soil-cultivating units (complexes) is almost the same and simple: cutting knives crumble the soil into small pieces (less than 5 cm in diameter). The knives are located on a milling drum rotating around its axis. Under the weight of the structure itself, the knives go deeper into the soil, loosening it.
A few words about installing attachments
After assembling the knives, all that remains is to install the assembled cutters on the walk-behind tractor using stoppers. For convenience, it is better to lift the special equipment and fix it in this position. Next you need to remove the wheels. Carefully place the boot on the support shaft, secure the structure on the left and right with a stopper. Check the connection is secure.
The final result of the build
If the cutter design is completely prefabricated, then installation can be performed sequentially section by section.
Installation sequence
It is recommended to put the motor cultivator into operation only after the correct assembly and installation has been checked. There should be no play caused by weak tightening of nuts or distortions when hanging equipment. High-quality work guarantees a long service life of machinery and equipment.
Rotary cutter for MTZ 82 (tractor, mini tractor)
What tasks can a tillage tiller handle?
What elements does a modern tractor cutter consist of? A large assortment of agricultural machinery and additional equipment allows us to significantly speed up the process of processing land plots. One of these devices is a rototiller - a unique device that combines a number of useful functions. It is about it and its nuances that will be discussed in this material.
Recommendations for assembling knives
Manufacturers of cultivators try to simplify the assembly of attachments as much as possible. Therefore, two central technical holes are provided on the flanges on opposite sides of the square. They allow you to accurately place cutting elements on the plate.
Location of technical holes on the plate
The Two Hole Rule is as follows. When placing the very first knife on the plate, it should cover one of the technical holes and be parallel to the edges of the flange. Next, the installation of the following elements is carried out at an angle to the first. It is extremely difficult to make a mistake in this case and get confused.
Solid shafts with mounting plates can have a special design. The flanges on them may already be offset - rotated relative to the adjacent one by several degrees.
Mounting plate locations
To make it easier to install the blades according to the instructions above, it is not recommended to fully tighten the nuts. This procedure should be performed at the final stage after the master is convinced that the cutter is assembled strictly according to the diagram.
Milling cutter for a mini tractor: types, purpose and how to make it yourself
A mini tractor has long become an indispensable assistant in rural life and beyond.
Despite the fact that purchasing such equipment is not a cheap pleasure, mini tractors are nevertheless in great demand and successfully cope with their tasks. And a wide range of attachments for such units only expands their functions. Perhaps the most popular and popular attachment for a mini tractor is a rotary cutter. It is this equipment that we will pay attention to and tell you in detail what kind of cutters there are, why they are needed, and how to make such a canopy with your own hands.
Assembling the first outer section
To assemble the left-hand cutter correctly, do not deviate from the instructions:
- Place the shaft with plates for fastening knives vertically.
External view of the shaft with three flanges
- Place the left blade parallel to the flange so that their edges and mounting holes line up.
- Place the second left knife at an angle from above.
- Secure both blades with a bolt from the outer edge, but do not tighten.
- Place the right knife on top of the first two blades at an angle.
- Secure with bolts and tighten.
Principle of installation of cutting blades
In the figure above, the cutting elements of one group are installed. To correct the error, you need to replace the upper knife with the left one.
There are several types of cutters. Depending on the form, the following are available for sale:
- Devices with saber-shaped knives - they are in greatest demand among buyers and allow you to perform a wide range of work. The main advantage lies in the shape of the blades and the material - the cutters are made of steel and can be removed at any time. There is practically no vegetation wrapped around them, which allows you to plow the soil many times faster;
- Crawler-foot cutters for cultivators are a new solution on the equipment market. This type of equipment is often used for plowing hard soils. It cannot be disassembled, making it more durable than the first type of cutter. Among the disadvantages is the frequent wrapping of weeds around the blades. Because of this, most farmers use these cutters to work on “clean” soil. Often, “crow's feet” are used for plowing before planting potatoes, as well as for treating the soil to prevent the appearance of Colorado potato beetles and other pests.
Today you can purchase additional cutters of the required width at any gardening equipment store. However, at a reasonable price it is most often possible to buy Chinese products that are not particularly durable. In this regard, it would be quite reasonable to try to make cutters yourself.
Milling cutters for motor cultivators do not have a complex design. Before you start creating elements yourself, you need to carefully study the store options. This will make it possible to take into account all the design features of the equipment and produce effective equipment.
Before work, you need to make a drawing or use a ready-made diagram. It will need to indicate the material of each of the parts, the sequence and method of fastening.
After this, you need to prepare all the materials. If the design will use figured elements, then it is better to immediately order them from the master.
When creating a cutter, special attention must be paid to correct assembly. Try to avoid any deviations related to the design, because any mistake can significantly reduce the efficiency of the cutters
Moreover, incorrectly assembled equipment will pull the cultivator to the right or left.
An important factor is the location of the teeth. They must be installed in exactly the same position as in the design of store products.
Experts do not recommend making cutters with a diameter of more than 50 cm. Equipment of this size can sink into the ground 26 cm, covering a strip 1 meter wide. This is more than enough for high-quality plowing.
Saber-shaped cutters are considered safer and are not capable of harming the operator if he falls on the structure. The knives on them have a transverse arrangement and consistently sink into the soil, without jerking.
To extend the life of homemade cutters, you must adhere to the rules for using equipment. When starting the cultivator engine, all blades must be positioned above the soil surface. After switching the engine from idle, the blades should be slowly lowered and plowing begins.
Not knowing whether homemade cutters need to be sharpened, many beginners make a lot of mistakes. It must be remembered that the more often sharpening is performed, the better the result of the soil treatment will be, and the longer the knives will not succumb to corrosion.
Factory cutters with saber knives
Those who start using walk-behind tractors ask the question: what knives are best to take? Types of motor cultivators can be roughly divided into 2 large groups:
Saber cutters are most suitable for all types of work.
- knives called "crow's feet";
- saber type cutters.
The saber shape of cutters is the most popular; it is these patterns that are called standard. They are effective; the effectiveness of using this particular type has been proven for decades. Often the motor cultivators that come with the cutters are saber-shaped. It is most suitable for any type of work. The advantages that saber cutters have are obvious. The shape of the knives is optimal. They are suitable for performing various types of work. For the manufacture of knives, only high-quality carbon steel is used, the strength of which is high.
Saber cutters have a collapsible design, which makes their installation and maintenance simple and effective. The steel from which the knives are made is completely impervious to welding. To improve the mechanical properties of the product, so-called thermal hardening is used during production. Steel is treated with high-frequency currents for strength.
Types of cutters
The active tool can perform rotational movement in different planes:
- Perpendicular to the direction of movement of the mobile unit, the axis is parallel to the ground. In this case, translational movement occurs due to the capture of a new section of soil.
- The axis is located along the axis of movement. The rotors rotate clockwise or counterclockwise. Such tools have not become widespread, since their operation results in the formation of stall or camber furrows. It is necessary to carry out leveling after grinding the soil layer.
- The axis is perpendicular to the ground. Increased soil resistance has to be overcome, so this type of treatment is used for local loosening.
Types of milling cutters for soil cultivation: a – spring; b – flat ripper; c – hook; g – straight foot; d – saber-shaped; e – screw hiller
When developing cutters, the designers proceeded from the need not only to crush the soil, but the second task was to comb the layer in order to separate the long subsoil roots that form in perennial weeds. Various patterns of movement of cutting and combing edges inside the soil are proposed.
Designers are faced with the question of which cutters are better.
Before 1990, many manufacturers offered the use of spring tools. It is effective in cultivated areas. The main task is to remove rhizomes. Despite all the advantages of such developments, manufacturers have failed to provide high performance. The unit moved at a speed of less than 0.2...0.3 m/s, which did not suit most users.
The flat ripper shows high working speed, but there are untreated areas between the plates. It is necessary to carry out several repeated loosening, which reduces the efficiency of work.
Spring hooks are useful when using passive tools. They are equipped with harrows. Combing is possible at a depth of 15...20 cm.
Straight profile legs turned out to be quite effective, but the saber type turned out to be more technologically advanced in production. Therefore, most manufacturers of equipment for walk-behind tractors focus on the production of this particular type of tool.
Screw cutters are used not for deep processing, but for active hilling of beds. Some crops require powdering of the root part, so such devices are in demand only for such an operation.
Another interesting design is the drum cutter. Usually two of them are installed at once. The main advantage of this installation is the simplicity of the device. As users note, similar working parts can be installed on walk-behind tractors “Oka”, “Salyut”, “Patriot”, MTZ or “Hoper”.
Unfortunately, this development has certain disadvantages:
- The rigidity of the drum's constituents is low. It is necessary to install intermediate supports in the internal space.
- For normal operation, it is necessary to load the walk-behind tractor with additional weight, otherwise it is quite difficult to keep it at a certain depth.
- The increased weight makes the unit difficult to operate. The operator has to expend great effort when turning.
Not so long ago, milling cutters began to be used for walk-behind tractors, which were called “crow’s feet”. They have proven themselves well and are most often used for processing hard and complex soils. These are the cutters that are used when cultivation needs to be carried out in difficult conditions, on rocky soils. The design of the “crow’s feet” is made solid, which ensures the highest levels of equipment strength. The cutters are available in standard sizes:
Crow's feet cutter.
- the width of the knives is 41 cm;
- the length of the knives is 38 cm;
- structure height - 38 cm;
- the weight of the cutter is 16 kg;
- The permissible operating speed of a motor cultivator with such blades is 2-5 km/h.
What are the advantages of a crow's foot cutter? Is it possible to install it yourself? It is convenient for cultivating soil and controlling weeds. Other models will not be able to do the job better. For rocky and hard soils, a crow's foot cutter is simply irreplaceable. Among the advantages, it should be noted that the steel of the cutter in this case can be welded. If necessary, you can carry out repairs at home rather than buying new knives, as this is expensive.
Read also: How to apply decorative plaster with a compressor
This type of cutter also has its disadvantages. The main disadvantage is that ordinary carbon steel is used for manufacturing. The strength of the structure itself is at a high level, but the material is slightly inferior to other varieties. Such a cutter should be regularly inspected when work is carried out on clay soils or when cultivating virgin soil . The cutter blades may be bent or simply broken. However, the repair is not too complicated; a welding machine is usually used for a broken knife, after which the fracture site is carefully polished.
When assembling the circuit, two people should work together, since the weight of the structure is significant. It is important not to confuse the direction of installation of the knives on the axis. When assembling, the sharpening point should face the direction of the cultivated soil. To strengthen the cutter, a stopper is used; it is placed on the output axis.
Crow's feet cutters
The “Crow's Feet” design was first proposed in 1986 at the Minsk Tractor Plant (MTZ). The designers justified the need for such a rotor by the fact that when cultivating virgin soil, conventional cutters break.
You can purchase ready-made tools of this type. You can also make them yourself.
| The milling shaft is located behind the walk-behind tractor. To transmit rotation from the power take-off shaft to the drive shaft, it is necessary to install an auxiliary frame. Torque is transmitted from the PTO to the differential located in the rear axle of the passenger car. The sprocket rotates from the axle shaft coming out of the differential. Next, rotation comes to the driven sprocket. It rotates the working shaft. It is equipped with rods with crow's feet. |
| The working shaft will be placed at a distance of 450 mm from the rear axle. For production, a pipe Ø 54 mm is used. It is necessary to prepare the support frame as well as the entire drive chain drive mechanism. Rotation will be transmitted on both sides of the differential. |
| The flanges are made of 5 mm thick plates. They are cut into squares with a side of 100 mm. The blanks are collected in a package. This makes it easier to drill all the flanges at once. A four-jaw chuck is installed on a lathe. At the rear is a conventional three-jaw chuck. |
| The use of two lathe chucks allows the square workpiece to be centered exactly in the center. Each jaw on a four-jaw chuck is fixed separately. |
| After drilling, boring is performed with a boring cutter. It is necessary to grind to a diameter of 54 mm. This is the size of the pipe used as the shaft. |
| The package of finished flanges is disassembled. They will be welded to the shaft. |
| By analogy with the existing sprockets, you need to make a second set of driven sprockets for the chain. |
| New sprockets are made from 6 mm thick sheet. Marking in progress. Holes are drilled to serve as grooves for supporting the chain rollers. Using a cutting disc, the outer contour is cut out. A central hole is drilled in the center, which is necessary for oriented installation of the sprocket on the shaft. |
| The frame is made of 6 mm thick sheet. The place of the future bend is sawn through half the thickness. The required bend is performed at a given angle. The cuts are welded, then reverse bending is impossible. The shape of the products is stable. |
| A hole is drilled in the cheeks of the frame. The bearing housing will be installed into it later. The hole is modified with a flap wheel angle grinder. |
| The side of the frame is attached to the rear axle. A chain is placed between the sprockets. |
| Before installing the chain, the number of links is specified. If necessary, I install additional ones or remove unnecessary ones. |
| The bearing support cup is welded in, and then the working shaft is installed. |
| Centering bushings are welded to the sprockets. They are installed on the drive shaft (rear axle axle shafts). |
| Sprockets are installed on the driven shaft through support bearings. The torque will be transmitted to the shaft through the keys. The axle shafts have grooves for keys. |
| After preliminary assembly, a frame structure is obtained. The next stage is welding the flanges. |
| The side view shows that the working body will have a greater width than the walk-behind tractor. Therefore, the grip during processing will exceed the wheelbase of the power plant. |
| The plates are screwed to the flanges. If they break down, they can be easily replaced with new ones. All that remains is to weld them in place onto the shaft. The legs will be welded to the extension plates themselves. |
| The flanges are placed on the shaft at a distance of 100 mm from each other. In this case, each subsequent flange is rotated relative to the previous one by 45 ⁰. |
| The assembled soil mill is painted. It is ready to use. |
Description
This type of attachment is quite common in the domestic agricultural market. Mostly, these are Russian and Belarusian units made in accordance with domestic quality standards.
FR-00010
I would like to start the description of the model range with FR-00010, manufactured at the Minsk Tractor Plant. It is clear that it is intended for MTZ mini tractors, but can also be mounted on other models that have a similar system for connecting attachments, for example Uralets, Kubota, Bulat 120, Yanmar, Belarus 132n, Scout.
FR-00010
This device can be used not only on light soils, but also on fairly heavy soil areas. It is allowed to use this cutter on slopes whose inclination does not exceed ten degrees.
Specifications:
- digging depth – up to 120 mm;
- width of the processed strip – from 440 to 610 mm;
- unit length – 65.5 cm;
- unit width – 68 cm;
- unit height – 47.5 cm;
- total weight – 47 kg;
- productivity on light soil – 0.18 hectares per hour;
- productivity on heavy soil – 0.12 hectares per hour;
- maximum speed – 3 km/h.
This cutter for a minitractor, the price of which will be about 24 thousand rubles, is intended for preliminary preparation of a land plot for its further use.
For more information about the operation of the FR-00010 cutter, watch the video:
FNM-1
FNM-1 is also produced in Belarus, like the previous model. It is used on a wide variety of soil types, but use on excessively inclined surfaces (up to ten degrees) is not allowed.
Specifications:
- digging depth – up to 80 mm;
- width of the processed strip – from 440 to 600 mm;
- unit length – 66 cm;
- unit width – 74 cm;
- unit height – 45 cm;
- total weight – 50 kg;
- productivity on light soil – 0.198 hectares per hour;
- productivity on heavy soil – 0.132 hectares per hour;
- maximum speed – 3 km/h.
1 GQN-125
1 GQN-125 is a fairly powerful model, so it has certain requirements for a mini tractor, or rather, for its power. Nominally, it should be from 24 to 30 hp. It can be used on a wide variety of land areas, from light to heavy soils.
GQN 125
Specifications:
- digging depth – up to 200 mm;
- width of the processed strip – up to 1250 mm;
- unit length – 90 cm;
- unit width – 100 cm;
- unit height – 135 cm;
- total weight – 220 kg;
- maximum speed – 4 km/h.
The cost of this cutter is about 32 thousand rubles. In addition, this is not the only representative of this line. In addition to this, there are quite a lot of models that differ from each other in the width of the strip they process. In this case, the serial number will be identical to the given width.
Special cases
Mills for a motor cultivator with 2-3 sections usually have a solid shaft. But often there are models with collapsible or additional bushings, hung in sections. The diagonal principle of assembling knives in all of these cases will be identical to that described above. The process is complicated only by the need to perform additional steps - to assemble the entire cutter together.
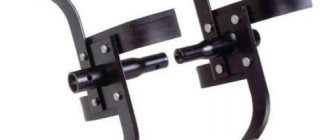
Stoppers for mounting a group of knives
The structure is installed using steel stoppers. They reliably fix all elements of attachments and prevent loosening of connections under dynamic loads.
Hanging an additional section