What do they say on the forums?
There are a large number of forums on the Internet where people share their experiences on how to cultivate with a Neva walk-behind tractor with a milling cutter.
Oleg:
“Cultivation for me, as a farmer, is an integral part of working with the land. This is a necessary procedure that allows you to increase the amount of harvest. I’m on good terms with the walk-behind tractor, because I simply can’t imagine my work without it now.
Stepan:
“I installed the cutters and happily went to my site. But the work initially seemed very difficult. Cultivation was slow, awkward, and took a lot of effort. I was at a loss as to why this was so. I thought for a long time and wondered what I had done wrong. It turns out that it was simply necessary to lower the handle to control it lower. I rearranged it, and then the work went much easier.”
Video: demonstration of attachments
In the video, the author talks about the main attachments that can be useful to the owner of a private house for more efficient use of the Neva walk-behind tractor:
An NMC water pump can be installed on a small-sized tractor. It is capable of supplying water to a height of up to 24 meters with an enviable productivity of 12 m³/h.
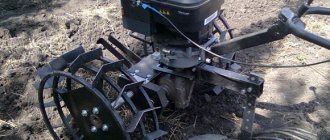
Types of cutters
The device consists of four curved knives - “petals”, attached to a shaft. Most of them are directional: when assembling, the direction of movement must be taken into account. Knives are usually bent in both directions, except for those located at the edges of the shaft.
Elements are made from stamped steel - for the lightest devices, and from steel strip, often forged. The last option is the most durable. As a rule, the cutter is a separate part, but there are models in which two rotary cutters are mounted on one shaft.
Two types of knives are used.
- Sharpened - the “petal” enters the ground more easily and does not allow adhesion to the soil. Accordingly, the load on the engine is reduced and fuel consumption is reduced. On the other hand, sharp blades cut the roots of weeds, some of them remain in the ground and germinate again. Sharpened cutters must be used with great care.
- With a semicircular edge - they are safer, but when loosening they experience more resistance and are more likely to get stuck. This element removes weeds more effectively, since it does not cut, but wraps the root and pulls it out of the soil.
The diameter of the cultivator cutter determines the maximum plowing depth. Relative is set by the opener.
The “petals” are connected in two ways:
- on rivets - the element cannot be disassembled. This difficulty is not so much during storage as during transportation;
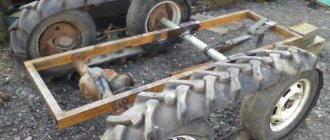
- bolted - a collapsible part. The photo shows a sample.
Welding is not used for connections - this reduces the strength of the product.
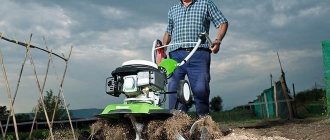
Cultivation with Neva walk-behind tractor
Mills are the main operating element in soil cultivation. They exist in several types. Each of them is suitable for processing a certain soil, and at a certain speed.
- how high-quality the final result of soil treatment will be;
- how much effort will be needed to achieve this;
- what will be the controllability of the walk-behind tractor during cultivation;
- how loaded the engine will be.
READ Diesel walk-behind tractor does not start reasons
First of all, the choice of cutter should depend on what kind of soil will be processed, i.e. where, on what land he will work.
Cultivator cutters are an integral part of any walk-behind tractor. This is one of the first attachments you should purchase.
However, there are situations when a standard cultivator is equipped with the wrong cutter that is needed. For example, it does not fit the width of the surface being treated or does not penetrate deep enough into the ground. In this case, you can purchase additional cutters for the Neva walk-behind tractor, which will be able to perform the required amount of work.
This is how the land is plowed using a Neva with 8 cutters:
By changing the number of installed cutters, you can optimize the operation of the entire Neva walk-behind tractor during cultivation, improve its controllability and the final result of loosened soil.
If you have to cultivate clay soil, then you should not install more than two pairs of milling cutters for cultivation. Because otherwise there will be a huge load on the walk-behind tractor engine. And instead of a good cultivation result, we will get a faulty engine. Moreover, the manufacturer does not recommend increasing the number of cutters when working with virgin lands, since the soil there has a large number of stones and other organic compounds.
Additionally, it is recommended to install cutters only when working with already prepared soil. In this case, cultivation with a Neva walk-behind tractor and a milling cutter will bring excellent results.
How deep the cutters will penetrate into the soil will depend on the preset adjustment, which is carried out using the coulter. This is a steel anchor that is located vertically at the cultivator coupling point.
The greatest immersion depth is characterized by the size of the cutter diameter.
Protective disc for cutter
To ensure safe operation, a protective disk must be installed at the end of the cutter.
Thanks to it, you can clearly regulate the area of the treated surface and prevent accidental cultivation of plants or flowers in the garden, or other crops.
Deep tillage
When developing new areas, it is necessary to develop virgin soil. Usually it is abundantly overgrown with turf, perennial grasses and weeds. It is quite difficult to cope with such areas with conventional tools. More often they resort to cultivation using deep processing with formation turnover.
With reverse plowing, part of the layer is cut, lifted and turned around its own axis. As a result, the soil from the lower layer ends up on top. Weeds cannot grow for a certain period of time. Cultivated plants have a head start for advanced development.
Similar work is done in the fall. The rhizomes of nettle, wheatgrass, dandelion and other weeds freeze in November-December, when the air temperature drops below -15...-17 ⁰С (there is no stable snow cover yet). Subsequently, they lose the ability to grow.
In the future, a similar technique is resorted to every autumn. After 2...4 years of autumn fall plowing, the number of weeds on the site is reduced many times over.
Proponents of organic farming disagree with this approach. But the experience of several centuries proves that only such agrotechnical measures can clear the area of weeds. Otherwise, you will have to use chemicals to control weeds.
Deep plowing allows:
- wrap a layer of soil and allow plants to use for nutrition substances that gradually shift to lower horizons during the season. This operation makes it possible to reduce soil salinization using mineral fertilizers, as well as reduce the amount of fertilizer applied;
- aeration of the lower layers of soil contributes to the occurrence of aerobic processes of decay of plant residues. Usually in the lower layers the access to air oxygen is limited. Therefore, conditions are created when the rotting of taproots lasts for several years. Anaerobic processes (without air access) occur with the slow accumulation of humus;
- When the formation is turned over, weed seeds end up in the lower layers of the soil, and they cannot germinate. The roots remaining on the surface freeze. As a result, soil contamination sharply decreases;
- Freezing lumps of earth in winter crumble more easily in spring. A light, loose surface layer is formed in which cultivated plants can receive more abundant nutrition;
- adding organic matter before plowing allows for active rotting of manure or green manure if they were sown after harvesting the main cultivated crops.
Additional recommendations
The easiest way to assemble such a device would be for someone who has some experience in the field of metalworking. A pre-compiled diagram, as well as high-quality tools and materials, will simplify the installation process.
When deciding how to properly assemble cutters on a walk-behind tractor, many owners are faced with the problem of not being able to make small and shaped parts of the structure themselves. To do this, it is best to seek help from a professional blacksmith, who will do this work much faster and with better quality.
In addition, do not forget that an incorrectly assembled system entails a change in the direction of rotation of the knives, which, in turn, can lead to equipment breakdown.
Having studied all the recommendations described above, we can conclude that it is absolutely possible to construct a mechanism such as a milling cutter for a walk-behind tractor on your own; it is only important to observe all the details of the work, and then the device will last for decades without the need for repairs.
Operating rules
To ensure that working with cutters does not cause difficulties, you should follow a few simple rules.
- Before you start working, you should adjust the height of the handle.
- It is necessary to install a coulter on the back of the walk-behind tractor, which acts as an anchor and helps make the cultivation more uniform.
- Then you need to start the engine and let it idle for 5 minutes.
- After the engine has warmed up, you should engage the gear and place the coulter in the minimum position.
- You should not linger for a long time in one area, otherwise the equipment will get bogged down.
- When the cutters overshoot, it is necessary to reduce the speed, and after passing through difficult sections, increase it again.
- It is advisable to install a protective disk at the end of the cutter. This will prevent accidental cultivation of flowers or other plants, and will help to carry out processing strictly in a given area.
To learn how to assemble cutters for the Neva walk-behind tractor, watch the video below.
Factory cutter
Most walk-behind tractors and cultivators are equipped with such cutters when sold. Depending on the situation, they can be assembled or disassembled. You can choose any walk-behind tractor you want, but unfortunately, you cannot choose which cutter to equip it with initially.
The design consists of an axis with welded plates, to which saber-shaped knives are directly attached. The finished cutter can consist of several such sections connected to each other using bolts. By adding or removing a section, you can adjust the width of the cultivation.
Pros and cons of a factory cutter:
The most important plus is that it comes immediately complete with the walk-behind tractor. The cutter copes well with its main task, provided that the work is carried out on a previously processed area.
Now about the realities. When it comes to Chinese walk-behind tractors, the cutter blades are their weak point. Bad metal will make itself felt, perhaps even in the first season; bolts and welding joints also leave much to be desired. If you cultivate virgin land or where there is a lot of grass, the process will not be pleasant. It will be difficult to hold the walk-behind tractor, and the load on the gearbox will be high.
But don’t rush to get upset, it’s no longer a problem to find high-quality knives of Polish or Ukrainian production, there is plenty to choose from, the issue with bolts is even easier to solve. And making a better welded joint is not a problem for our brother either.
Such a cutter is an all-welded structure, an axis and knives welded to it, with triangular tips or, as they are called, crow's feet.
Varieties
The classification of cutters for walk-behind tractors occurs according to several criteria. So, depending on their location, they can be lateral or hinged. The first ones are installed on the wheel drive shafts on both sides relative to the power unit. With this placement, the cutters play the role of wheels, setting the walk-behind tractor in motion. The second placement method involves installing them at the rear of the walk-behind tractor and operating from the power take-off shaft. This arrangement is most typical for most modern walk-behind tractors, including such well-known brands as Tselina, MTZ and Neva.
The second criterion for classifying cutters is their design. Based on this feature, two types are distinguished: saber-shaped (active) cutters and “crow’s feet”.
Saber cutters
This type is considered the standard option when carrying out cultivation. Saber-shaped cutters have successfully passed the test of time and proven their effectiveness.
It should be noted that this type of cutter comes standard with the Neva walk-behind tractor.
The raw material for the manufacture of saber cutters is high-quality steel with high carbon content. This metal itself is very durable. But to achieve even better metal density, it is additionally pierced and treated with electric current at high frequencies. Thanks to this, the final product is durable and reliable.
Prefabricated saber cutters. Because this steel is not susceptible to welding. Therefore, all connections are made using bolts.
READ Motoblock Neva no spark reasons
Here's how to cultivate using a Neva with saber cutters:
Factory cutters
Such tillers are considered one of the most popular and in demand on the market. These are the varieties that are equipped with factory walk-behind tractors. Depending on their purpose and design, these cutters can be assembled or dismounted. During the selection process, a person decides for himself which walk-behind tractor he needs, but he will not be able to choose a specific type of cutter.
The design of the cutter may vary depending on the manufacturer and other features.
It usually includes a pair of sections that are connected to each other using bolts. When operating such an element, the width of the cultivation is important, which can vary depending on the addition of sections.
A distinctive feature of the factory cutter is that it is offered complete with a walk-behind tractor. For standard tasks it will be quite sufficient. But it is worth considering that tillers from Chinese walk-behind tractors cannot boast of impressive efficiency. If low-quality metal was used during the production process, then problems will arise already during the first processing.
For example, when cultivating virgin land, it will be extremely difficult for the user to control the walk-behind tractor. In addition, this will lead to an increase in the load on the gearbox, which will also negatively affect the durability of the device.
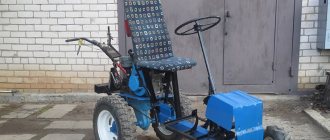
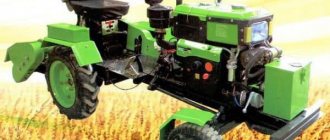
Domestic walk-behind tractor Favorit
Favorite walk-behind tractors are produced in the Vladimir region at the Degtyarev plant. This enterprise has been producing small-sized agricultural machinery and motorcycles for over 50 years.
All models of this manufacturer run on a diesel engine. This power unit provides high power to the machine with an average level of fuel consumption. The Favorit technique, regardless of the model, is well balanced, which makes the device easier to operate.
Motoblock Favorite with trailer
On the domestic market, this equipment is represented by 4 models MB-2, MB-3, MB-4, MB-5. Each of them has a number of modifications that differ in characteristics and equipment.
1.1 Technical specifications
The Favorite walk-behind tractor is powered by a four-stroke single-cylinder diesel engine with an air cooling system. It is equipped with a gearbox and a belt transmission of torque. Despite its small dimensions, the machine’s performance characteristics are quite solid:
- engine power – 6 horsepower;
- the transmission has 3 speeds (2 forward and 1 reverse);
- tank volume is from 3 to 4 liters (depending on the model);
- the soil is processed using machinery to a depth of 25 cm;
- adjustable processing system provides widths from 350 to 890 cm;
- clearance width between wheels 14 cm;
- device length – 925 mm;
- height – 940 mm;
- width is 660 mm;
- The weight of the machine without attachments is 73 kg;
- Fuel consumption per hour of operation is 1.3 liters.
The walk-behind tractor is equipped with a vibration suppression system during operation, which reduces the load on the operator’s hands. If necessary, the steering wheel can be adjusted in the horizontal and vertical plane relative to the central axis.
Attachments to the equipment are attached to a special pulley, which is equipped with a power take-off system. This allows the use of additional instruments with motor-powered moving parts.
Walk-behind tractor with some attachment options
The main components of the unit are the engine, transmission, chassis, represented by one wheel axle, power frame and device control system.
1.2 Caring for the Favorite walk-behind tractor
The thrifty and thrifty owner always makes sure that the equipment is in working order. The same is necessary when working with a walk-behind tractor. During operation, the device components are exposed to dust, precipitation, and mechanical stress. If the consequences of such impacts are not eliminated in time, the equipment will soon need repairs.
The first thing you need to do after finishing working with the machine is to thoroughly wipe all surfaces from dust, dirt and oil. After this, all bolts are checked and, if necessary, connections are tightened.
Before work, you need to carefully inspect all accessible components of the device. All connections are tightened again with bolts. The condition of the belt is checked. The last step is to check the pressure in the pulleys and the presence of a sufficient amount of oil in the engine and gearbox.
Potato digger for Favorite
The manufacturer also recommends inspecting the transmission belt and the presence of oil in the gearbox every 20-30 hours of operation.
1.3 Cost of some models
On the market, the cost of Favorite walk-behind tractors depends on the type of equipment included in the device. Various modifications are available with different types of engines. Equipment with our engine costs on average from 27 to 30 thousand rubles.
Instructions for assembling cutters for a walk-behind tractor
Walk-behind tractors and motor-cultivators from Aurora, and in principle like many other manufacturers, are supplied with cutters disassembled. Often, for owners of new equipment, the process of assembling cutters becomes a bit of a problem. In this article we will describe how to assemble working cutters from the parts of this “constructor set”. For Aurora equipment, depending on the model, cutters are available on axes of two sizes. The axle diameter for light equipment is 23 mm, and for heavy equipment 32 mm.
Milling cutters for light walk-behind tractors and cultivators are quite easy to assemble. To do this, you need to install the blades in special mounting sockets and screw them with bolts. It is necessary to pay attention to the direction of the cutting edge of the blade. It should look in the direction of movement of the walk-behind tractor. In addition, each blade is marked. If the letter quotRquot is indicated, it means it is turned to the right side, respectively, quotLquot is turned to the left.
Each subsequent section is fixed with the previous one by means of a pin, and is locked with a pin. The cutting disc must be secured with a bolt. Depending on the power of the equipment, the number of cutters will be different. Their number can be 24, 32 or 40.
The number of blades may also vary and may be three or four per section. This is due to the number of mounting plates on the axle. If the cutter axis is straight, without displacement relative to each other, then the number of blades will be three. For offset models - four.
Four-blade cutters are assembled sequentially, one left, one right. It will be easier to assemble the cutters if at the very beginning you divide the left and right blades into two parts, for the left and right cutters.
Three-bladed ones are assembled differently. The first blade is installed on the axis and secured with a bolt. In the future, this bolt will have to be removed to fix the other blade. If the first one was installed from the outside of the plate, then the remaining two must be mounted from the inside of the mounting plate. For three-bladed cutters, the quotLquot and quotRquot markings are installed separately for each side.
Soil preparation equipment
Loosening and preparing the soil for sowing is the main function of the walk-behind tractor. To implement it, manufacturers of small-sized tractors "Neva" created 3
type of attachment. We mentioned cutters at the beginning of the article, so let’s move straight to heavy artillery.
Mounted plows
Preparing the land for sowing crops begins with plowing. The working width of a single-body plow is 220 mm, and the depth is 200 mm. The mounted PN model has different parameters: 180 and 220 mm, respectively.
To prevent the walk-behind tractor from “emerging” from the furrow, you can use weights that are installed on the wheel rims and on the pin. The lugs increase the stability of the equipment and prevent slipping.
Harrow BD 850
After pre-treatment of the soil, it needs to be harrowed to loosen it. The BD 850 model harrow will cope with the task. Thanks to the simultaneous operation of 8 discs, it is capable of capturing 700-960 mm of soil. The angle of attack is 10-20°.
Hillers and weeders
To pile soil onto the lower parts of plants, you can use single-row, double-row or disk hillers with a working width from 210 to 650 mm. Weed rippers will help to cope with weeds.
How to work
After the cutters are installed, start the walk-behind tractor. At first speed, right on the cutters, we approach the beginning of the section. If there is only one speed for moving forward, then we do it at the lowest engine speeds. To operate a motor cultivator with a cutter, select the speed as high as possible. We turn on the second speed and, having set the engine speed to maximum, engage the clutch.
Use the coulter to set the desired cultivation depth. First, put it on the second division from the top. The shorter the part of the opener facing the surface, the finer the processing. With its help, we create a load and slow down the forward movement of the equipment.
If the area is large, then it is more convenient to move in a circle. If it is possible to turn the steering wheel to the side, it is advisable to turn it. Then the operator will walk on solid ground and not trample the already cultivated soil.
A properly adjusted walk-behind tractor will not jump or twitch.
It happens that the soil is heavy and the cultivator is light. Then you need to hang additional weight in the area of the cutters. Select the load in separate “pancakes”, 6-7 kg each.
Cultivation is carried out with a slight overlap of the treated area. We make the second pass so that one of the cutters goes along half of the processed strip. We focus on the depression that the opener leaves behind. Thus, all the soil will be processed twice. This way we will achieve uniform soil treatment throughout the entire area.
Useful tips
In order to optimize the load and increase the service life of the cultivator, the loosening width is selected by changing the number of mounted soil cutters.
The adjustable coulter allows you to adjust the depth of the blade. It does all the work, no effort is needed on the walk-behind tractor. The steering handle is slightly pressed to the ground, the coulter penetrates the soil more strongly and slows down the progress of the equipment, thereby increasing the depth of cultivation.
To prevent the gearbox from resting on the uncultivated ground, the equipment is rocked a little.
When working with a cultivator, the user must keep his back straight and his hands at waist level. This body position contributes to longer operation of the unit and will not cause harm to health.
If the blades become dull after long use, they must be sharpened using a grinder. For ease of maintenance, choose self-sharpening knives. The type of soil has a big influence on the cutting edges. In wet or heavy soil, blades wear out faster.
For more comfortable work and high-quality soil cultivation, the rotation speed of the cutter for the console walk-behind tractor should reach 275 rpm, and for the cultivator - 140 rpm.
If mechanized equipment does not work well with a soil cutter, it is necessary to find out the cause of the malfunction and eliminate it in a timely manner. If it is impossible to carry out repairs, turn to specialists for help.
How to make a cultivator for a walk-behind tractor
Before making a cultivator for a walk-behind tractor with your own hands, it is necessary to treat all metal elements with a special anti-corrosion compound to prevent the premature appearance of rust after frequent contact with the ground.
Simple models can be made without drawings. To make and correctly assemble more complex devices, it is necessary to plan the work, calculate the dimensions of the module and parts.
A homemade cultivator made from a pitchfork is a simple way to reprocess (remake) products. To do this, the teeth of the mechanism are bent with a hammer like a corkscrew and placed on the handle. A shovel handle is used as a handle. Electrical tape is used for fastening.
Some craftsmen manage to make a cultivator with their own hands from a bicycle frame with a wheel. A steel rod is welded or bolted between the 2 base blocks. The head is mounted to the crossbar. For this design, it is recommended to take a medium-sized wheel.
In order to correctly assemble a disc cultivator and work correctly with cutters, it is necessary to design diagrams of components and individual parts. Taking into account the deformation of the discs, special adjusting nuts are used. The discs are welded to bushings located on a rotating axis with brackets.
What is a cultivator and why is it needed?
First you need to understand what a cultivator is, how it works and what it is needed for. So, this is a type of compact agricultural equipment designed for pre-planting soil preparation. It allows you to plow, loosen and hill up the soil, as well as make furrows and perform harrowing. This unit makes it possible to significantly facilitate agricultural work on a summer cottage or personal plot.
Cultivators are divided into groups according to the type of mechanism:
- mechanical manual. They are used as additional equipment for more serious equipment. Loosen the soil to a depth of no more than 5 cm and remove only weak weeds located on the very surface;
- electric. Lightweight, maneuverable equipment that is used on limited areas of land. The disadvantage is that it runs on an electrical cord;
- battery-powered This type of agricultural equipment combines all the advantages of electric analogues with autonomy. They are heavier, but at the same time, mobile and safe;
- gasoline. This technique is distinguished by power, performance and heavy weight. A good option for cultivating large plots of land.
Cultivators of any type consist of such basic elements as a frame, control levers, engine, rotor, wheels and cultivation devices (mills).
How to properly assemble cutters on a walk-behind tractor?
Assembling the cutter with your own hands should be done as correctly as possible. And here it is especially important to ensure that the active part crashes into the ground during operation. To do this, it is initially recommended to study the drawings and then begin manufacturing the equipment. To create cutters, the following tools are required:
- The rotor axis is of the required length. It can be divided into two parts if you need to assemble a cutter from two blocks.
- Short axis.
- Gearbox with clamps.
- Left and right knives.
- Bolts, washers, nuts.
Assembling the structure does not take more than an hour, but here it is important to install the knives in such a way that they do not interfere with the rotation.
- The long rotor axis is equipped with knives at an angle of 30 degrees.
- It is necessary to combine four knives on one block, securing them to the gearboxes.
- Next, the correctness of the design is checked and all fasteners are tightened.
This design is very reliable and can withstand fairly high loads.
Additional Tips and Warnings
After completing the self-assembly of the hiller, the most important thing is to test it in the garden. Successful production does not yet guarantee high-quality work, because it depends on a combination of many factors - weather conditions, soil conditions, correct sharpening of the hiller elements, etc.
Before you start hilling, you need to walk through a regular piece of land. During the work, you will feel the correct operation of the hiller and will be able to adjust the optimal depths and angles of entry into the soil.
The second important point is the speed with which you will carry out the hilling process. A correctly selected pace of work can be no less useful in work than the presence of a hiller itself, because at high speeds the unit will simply scatter the earth in different directions without hilling.
Which cutters are better
Saber-type attachments are suitable for any soil. For areas with stones and large roots, it is recommended to use high-performance attachments. In active cutters, the knives do not break due to the high-quality material used.
Crow's feet are distinguished by the high permeability of the cutter on virgin soil, untouched by agricultural machinery, as a result of which the soil is easily and quickly processed, the earthen ball is thoroughly crushed, mixed at a depth of 30-40 cm. They are convenient for cultivating rocky and hard soil types, controlling weeds and installing both for motor-cultivators and walk-behind tractors.
The disadvantage of the weapon is its lower strength. During operation, knives must be constantly inspected for damage and repaired. The material of the crow's feet does not have such high strength characteristics as alloy or high-carbon steel, but nevertheless lends itself well to welding processes.
Criterias of choice
Before you start purchasing cutters for a walk-behind tractor, you need to correctly assess the operating conditions and the type of soil being cultivated. So, if you plan to work on rocky areas, then it is better to purchase a saber-shaped model. Such equipment will be easier to cope with difficult soils, and in case of breakdown it will be easier to repair. To do this, simply unscrew the damaged knife and put a new one in its place.
If you plan to plow virgin soil, then it is better to choose a “Crow’s Feet” cutter. It is well suited for cultivating heavy soils, as well as for deep plowing, up to 30-40 cm. However, the claw model is absolutely unsuitable for working with turfy soils: the knives will wrap grass and long roots around themselves, and work will often stop.
For such cases, you need to use only a saber cutter.
The need and rules for sharpening during operation
When operating a walk-behind tractor, the working surface of the knife will inevitably wear out. To restore the cutting ability of the tool, it must be sharpened periodically. The timing of the procedure is purely individual. The rate of knife wear depends on the following points:
- intensity of use of the walk-behind tractor;
- hardness of the cultivated soil;
- the presence of plant roots or stones in the ground;
- strength of knife material.
Manufacturers of agricultural equipment supply cutters with sharp blades. Therefore, when buying a walk-behind tractor, it makes no sense to sharpen knives. However, the procedure cannot be avoided during intensive use of the unit. To restore the sharpness of the knife, you will need an angle grinder (angle grinder or grinder), a sharpening wheel or a diamond wheel with a diameter of 12.5 cm.
The working edges should be sharpened at an angle of 45°. Remove the metal layer from the factory pointed side. At the same time, you shouldn’t get too carried away: just grind off 1-2 mm. Over the course of a season, it may be necessary to restore the cutting ability of the cutter several times, and excessive metal removal reduces the strength of the knife.
When using a cutter in wet soil, it is necessary to thoroughly clean the surface of the blades. When rubbed against the ground, the metal surface is cleared of the oxide film and becomes chemically active. This process is accompanied by increased corrosion, which entails the formation of pockmarks, chips, and microcracks. To prevent such phenomena, the blades should be treated with special inhibitors or automotive oil.
Peculiarities
The walk-behind tractor is equipped with additional components. In addition to cutters, they use a blade with an adapter - this is a snow shovel, which includes a knife. The blade is installed on walk-behind tractors MKM, Salyut, Agat and a number of other models of domestic manufacturers. Individual rotary mowers are provided for different models of walk-behind tractors. Farmers can choose them according to their taste.
Tilling the soil to different depths is done with knives. It is with their help that the soil is crushed and loosened. During operation, these components are damaged or broken. As a result of wear and tear, if they become dull, there is a need to replace them.
Factory samples can be exchanged for elements of a similar brand. All of them differ from each other in the bend of the blade (right and left), length and width, the material from which they are made, and the method of fastening. When replacing, you need to pay attention to this.
A rotary mower has two rotating discs, each equipped with four blades. Each of them is attached to the disk using a cotter pin. The discs themselves are fixed on a metal frame. The new rotary mower is assembled at the manufacturing plant. Knives are replaced if they break or when there is a need for sharpening.
Cutters for walk-behind tractors can be sold complete with a pin, cotter pin, bolts and nuts, which must be properly assembled and then installed. Craftsmen can independently make knives at home for both cutters and rotary mowers, as well as for snow plows.
The design of knives can be in the form of a saber or in the form of crow's feet.
Necessary materials
Before we begin to analyze one or another method of making a hiller ourselves, we need to list a minimum list of what we will definitely need during the work.
KamAZ 65115 belongs to one of the oldest series of this plant, production of which began back in 1998. Here are all its technical characteristics.
One of these oldest companies is Vogele, which produces a wide range of asphalt pavers models. Vogele asphalt pavers stand for German quality and commitment to progress.
The T 70 tractor on wheels is the brainchild of the Chisinau Tractor Plant. By clicking on the link you will get acquainted with all the information on this tractor.
Of course, no one is forcing us to retrain as a blacksmith in order to forge all the necessary parts using the ancient method that was used several decades ago. But we still need a basic list of welding and plumbing equipment:
- Welding machine (it is preferable that this machine is intended for arc welding).
- Grinder with a set of different discs and attachments.
- Electric drill with a set of reliable drill bits.
- Electric emery.
- A gas burner, which is necessary to heat the metal during hardening.
- Vise or workbench.
- Various files and other consumables (bolts and other fasteners).
This list relates directly to the tools we need. In addition, you will need the material itself from which self-assembly will be made, but we will talk about this in more detail in the process of describing methods for making hillers.
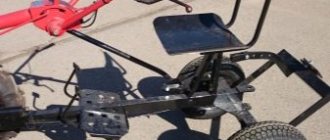
Assembling crow's feet with your own hands
If for some reason the existing rotary cutters are not satisfactory or have become unusable, home-made rotary cutters for a walk-behind tractor can be an alternative to purchased devices. This task is not particularly difficult and at the same time has advantages in the form of the desired degree of reliability of the structure and its features, increasing the efficiency of land cultivation and, of course, saving money on the purchase of a ready-made device.
The easiest way to make it is to study the design of industrial cutters and diagrams of how to assemble a cutter, and then create an analogue, making the desired adjustments if required. It makes sense to draw drawings for assembly that take into account the necessary parameters and requirements for the device.
When assembling crow's feet, the homemade design includes the following parts:
- bushing (can be made of a tube having a diameter of 50 mm);
- flange (made of a thick sheet of steel, can be round or square, which is easier to make);
- racks for knives (easy to make from a steel angle, profile, car spring);
- blades (the optimal material is tool alloys; springs from cars are suitable).
You can either make cutters for a walk-behind tractor yourself or purchase them in a store. The knives are welded to the posts, which, in turn, are fixed to the flanges, and the flanges to the bushing. Sometimes bolts are used for connections, but practice shows that it is much more reliable to use a welded connection.
To prevent premature wear of the knives when processing particularly difficult and turfy soils, it is recommended that the design include lightening the load by additionally installing limit wheels on the sides of the device. This complicates the processing process somewhat, since only the top layer of soil is cultivated, after which the restrictions must be dismantled and re-processed.
There are several types of cutters. Depending on the form, the following are available for sale:
- Devices with saber-shaped knives - they are in greatest demand among buyers and allow you to perform a wide range of work. The main advantage lies in the shape of the blades and the material - the cutters are made of steel and can be removed at any time. There is practically no vegetation wrapped around them, which allows you to plow the soil many times faster;
- Crawler-foot cutters for cultivators are a new solution on the equipment market. This type of equipment is often used for plowing hard soils. It cannot be disassembled, making it more durable than the first type of cutter. Among the disadvantages is the frequent wrapping of weeds around the blades. Because of this, most farmers use these cutters to work on “clean” soil. Often, “crow's feet” are used for plowing before planting potatoes, as well as for treating the soil to prevent the appearance of Colorado potato beetles and other pests.
Today you can purchase additional cutters of the required width at any gardening equipment store. However, at a reasonable price it is most often possible to buy Chinese products that are not particularly durable. In this regard, it would be quite reasonable to try to make cutters yourself.
Milling cutters for motor cultivators do not have a complex design. Before you start creating elements yourself, you need to carefully study the store options. This will make it possible to take into account all the design features of the equipment and produce effective equipment.
Before work, you need to make a drawing or use a ready-made diagram. It will need to indicate the material of each of the parts, the sequence and method of fastening.
After this, you need to prepare all the materials. If the design will use figured elements, then it is better to immediately order them from the master.
When creating a cutter, special attention must be paid to correct assembly. Try to avoid any deviations related to the design, because any mistake can significantly reduce the efficiency of the cutters
Moreover, incorrectly assembled equipment will pull the cultivator to the right or left.
An important factor is the location of the teeth. They must be installed in exactly the same position as in the design of store products.
Experts do not recommend making cutters with a diameter of more than 50 cm. Equipment of this size can sink into the ground 26 cm, covering a strip 1 meter wide. This is more than enough for high-quality plowing.
Saber-shaped cutters are considered safer and are not capable of harming the operator if he falls on the structure. The knives on them have a transverse arrangement and consistently sink into the soil, without jerking.
To extend the life of homemade cutters, you must adhere to the rules for using equipment. When starting the cultivator engine, all blades must be positioned above the soil surface. After switching the engine from idle, the blades should be slowly lowered and plowing begins.
Not knowing whether homemade cutters need to be sharpened, many beginners make a lot of mistakes. It must be remembered that the more often sharpening is performed, the better the result of the soil treatment will be, and the longer the knives will not succumb to corrosion.
Installation
If the user purchased cutters without assembly, they must be assembled correctly. Today this is not difficult, since the buyer has at his disposal not only detailed instructions from the manufacturer, but also a wide range of video materials that can be obtained on the Internet.
When assembling the product, it is important to ensure that the active part of the unit enters the soil during operation. Side options are installed on both sides of the walk-behind tractor; they operate from drive shafts and wheels. In this position, the cutters are a practical replacement for the wheels of a motorized cultivator; they are the ones that set the motorized equipment in motion.
The cutters, whose operation is carried out by the power take-off shaft, are located behind the cultivator. They do not take part in the movement of the device.
To install any option on the cultivator, it is advisable to use the help of a partner. This will avoid injury, falling, and equipment damage. At the very beginning, you need to raise the walk-behind tractor.
To install the cutters on the cultivator, you need to use special wooden trestles with a height of about 50 cm. Also, in this case, the equipment must not only be lifted, but also rested on the coulter, and also tilted at an angle of 45 degrees. Then the wheels are removed from the cultivator and cutters are placed in this place.
Additional sections are installed to the main ones through the use of pins. The restrictive metal disk is connected to the frame using bolts. In this case, the number of blades should be selected for the cultivator, based on its power.
Assembly diagram of walk-behind milling cutters consisting of three knives
The connection of the cultivator fragments with three flanges can be divided into three stages:
- installation of the right part of the outer section;
- assembly of the middle piece;
- mounting the internal section.
We start constructing from the right compartment. We select from the kit the cutting parts of the right side, the shaft, and prepare the fastening tool.
Place the shaft on the table so that the outer edge is on top. Place the knife on the shaft so that one of its edges coincides with the side of the flange and covers the hole located in the center.
We place the next cleaver at an angle. The holes must match. Now we attach the resulting structure with a bolt, washer and nut.
We attach the third one on top of two knives, at an angle from the second one. The holes must match. First, we attach the assembled structure using fastening materials, then we tighten it using keys.
Let's move to the middle. We place the cutter on the flange so that it is in the middle of two identical elements of the first level. There should be no parallels between the cutting parts of the middle and first levels. We attach the remaining knives identically to the assembled cutter.
Start assembling the inner section by positioning the first knife. It should be parallel to the first row and figuratively divide the space between the middle knives in half. Install the remaining cleavers and secure the result with tools.
Using the instructions given above, you can assemble walk-behind milling knives in a short period of time and without anyone else's help.
Types of cutters
The active tool can perform rotational movement in different planes:
- Perpendicular to the direction of movement of the mobile unit, the axis is parallel to the ground. In this case, translational movement occurs due to the capture of a new section of soil.
- The axis is located along the axis of movement. The rotors rotate clockwise or counterclockwise. Such tools have not become widespread, since their operation results in the formation of stall or camber furrows. It is necessary to carry out leveling after grinding the soil layer.
- The axis is perpendicular to the ground. Increased soil resistance has to be overcome, so this type of treatment is used for local loosening.
Types of milling cutters for soil cultivation: a – spring; b – flat ripper; c – hook; g – straight foot; d – saber-shaped; e – screw hiller
When developing cutters, the designers proceeded from the need not only to crush the soil, but the second task was to comb the layer in order to separate the long subsoil roots that form in perennial weeds. Various patterns of movement of cutting and combing edges inside the soil are proposed.
Designers are faced with the question of which cutters are better.
Before 1990, many manufacturers offered the use of spring tools. It is effective in cultivated areas. The main task is to remove rhizomes. Despite all the advantages of such developments, manufacturers have failed to provide high performance. The unit moved at a speed of less than 0.2...0.3 m/s, which did not suit most users.
The flat ripper shows high working speed, but there are untreated areas between the plates. It is necessary to carry out several repeated loosening, which reduces the efficiency of work.
Spring hooks are useful when using passive tools. They are equipped with harrows. Combing is possible at a depth of 15...20 cm.
Straight profile legs turned out to be quite effective, but the saber type turned out to be more technologically advanced in production. Therefore, most manufacturers of equipment for walk-behind tractors focus on the production of this particular type of tool.
Screw cutters are used not for deep processing, but for active hilling of beds. Some crops require powdering of the root part, so such devices are in demand only for such an operation.
Another interesting design is the drum cutter. Usually two of them are installed at once. The main advantage of this installation is the simplicity of the device. As users note, similar working parts can be installed on walk-behind tractors “Oka”, “Salyut”, “Patriot”, MTZ or “Hoper”.
Unfortunately, this development has certain disadvantages:
- The rigidity of the drum's constituents is low. It is necessary to install intermediate supports in the internal space.
- For normal operation, it is necessary to load the walk-behind tractor with additional weight, otherwise it is quite difficult to keep it at a certain depth.
- The increased weight makes the unit difficult to operate. The operator has to expend great effort when turning.
Snow removal equipment
Snow removal equipment is indispensable in the harsh conditions of the middle zone. It will help clear garden paths and driveways, especially in remote areas that are bypassed by municipal vehicles.
Rotary brush
The rotary brush captures 850 mm at a time and has an enviable productivity of up to 2200 m²/h. The main advantages are low weight (only 45 kg) and decent maneuverability, which is provided by a rotary joint with a degree of freedom of 24°.
Auger snow blower
The passage width is 640 mm. The mechanism is capable of clearing sediment up to 25 cm high. The augers throw snow up to a distance of 5 meters. The knives are made of high-quality steel, so the equipment can last 6
and more seasons.
Mounted blade blade
The knife in an oblique position clears 810 mm of the width of the area from snow, and in a straight position - all 900. In the first case, the productivity is 0.33 hectares/hour, in the second - 0.36 hectares/hour. The walk-behind tractor can move at speeds up to 4 km/h.
Crow's feet cutters
The “Crow's Feet” design was first proposed in 1986 at the Minsk Tractor Plant (MTZ). The designers justified the need for such a rotor by the fact that when cultivating virgin soil, conventional cutters break.
You can purchase ready-made tools of this type. You can also make them yourself.
| The milling shaft is located behind the walk-behind tractor. To transmit rotation from the power take-off shaft to the drive shaft, it is necessary to install an auxiliary frame. Torque is transmitted from the PTO to the differential located in the rear axle of the passenger car. The sprocket rotates from the axle shaft coming out of the differential. Next, rotation comes to the driven sprocket. It rotates the working shaft. It is equipped with rods with crow's feet. |
| The working shaft will be placed at a distance of 450 mm from the rear axle. For production, a pipe Ø 54 mm is used. It is necessary to prepare the support frame as well as the entire drive chain drive mechanism. Rotation will be transmitted on both sides of the differential. |
| The flanges are made of 5 mm thick plates. They are cut into squares with a side of 100 mm. The blanks are collected in a package. This makes it easier to drill all the flanges at once. A four-jaw chuck is installed on a lathe. At the rear is a conventional three-jaw chuck. |
| The use of two lathe chucks allows the square workpiece to be centered exactly in the center. Each jaw on a four-jaw chuck is fixed separately. |
| After drilling, boring is performed with a boring cutter. It is necessary to grind to a diameter of 54 mm. This is the size of the pipe used as the shaft. |
| The package of finished flanges is disassembled. They will be welded to the shaft. |
| By analogy with the existing sprockets, you need to make a second set of driven sprockets for the chain. |
| New sprockets are made from 6 mm thick sheet. Marking in progress. Holes are drilled to serve as grooves for supporting the chain rollers. Using a cutting disc, the outer contour is cut out. A central hole is drilled in the center, which is necessary for oriented installation of the sprocket on the shaft. |
| The frame is made of 6 mm thick sheet. The place of the future bend is sawn through half the thickness. The required bend is performed at a given angle. The cuts are welded, then reverse bending is impossible. The shape of the products is stable. |
| A hole is drilled in the cheeks of the frame. The bearing housing will be installed into it later. The hole is modified with a flap wheel angle grinder. |
| The side of the frame is attached to the rear axle. A chain is placed between the sprockets. |
| Before installing the chain, the number of links is specified. If necessary, I install additional ones or remove unnecessary ones. |
| The bearing support cup is welded in, and then the working shaft is installed. |
| Centering bushings are welded to the sprockets. They are installed on the drive shaft (rear axle axle shafts). |
| Sprockets are installed on the driven shaft through support bearings. The torque will be transmitted to the shaft through the keys. The axle shafts have grooves for keys. |
| After preliminary assembly, a frame structure is obtained. The next stage is welding the flanges. |
| The side view shows that the working body will have a greater width than the walk-behind tractor. Therefore, the grip during processing will exceed the wheelbase of the power plant. |
| The plates are screwed to the flanges. If they break down, they can be easily replaced with new ones. All that remains is to weld them in place onto the shaft. The legs will be welded to the extension plates themselves. |
| The flanges are placed on the shaft at a distance of 100 mm from each other. In this case, each subsequent flange is rotated relative to the previous one by 45 ⁰. |
| The assembled soil mill is painted. It is ready to use. |