High-quality parts for the walk-behind tractor ensure excellent and long-term operation of the unit, especially for generator belts, the dimensions of which must correspond to the design features of the device.
You should not hope that the purchase of more powerful belts will increase the functionality of the “technical assistant” itself, because their goal is to realize the potential of the walk-behind tractor, and not to raise it to the highest level. Modern belts for walk-behind tractors are made of polyurethane and neoprene. These materials are considered more durable and wear-resistant, but still, even they cannot withstand enormous loads from time to time and tear.
Belts for Neva walk-behind tractors: types, sizes, self-tensioning
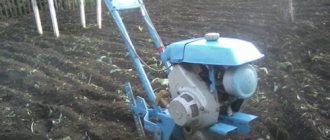
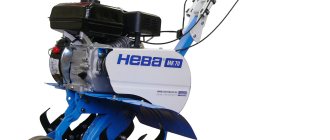
As you know, walk-behind tractors can be of two types. The first of them operate on a chain drive, and the second on a belt drive. In the second case, a belt drive is used to transmit torque from the motor to the attachments of the walk-behind tractor, and also plays the role of clutch and transmission. We propose to consider the principles of installing belts on the Neva walk-behind tractor, as well as methods for adjusting them with your own hands.
Rules for choosing belts for Neva walk-behind tractors
The model range of Neva walk-behind tractors is not limited to just one representative. On the contrary, there are several modifications of agricultural implements, each of which is suitable for a certain type of belt.
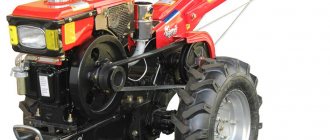
The MB-1 walk-behind tractor, as well as the Neva MB-2 walk-behind tractor, uses primarily a V-belt drive. The use of a wedge transmission allows the unit to move in both the forward and rear directions. If the V-belt mechanism malfunctions, Neva brand machines will not work. MB-1 walk-behind tractors are equipped with V-belt drives for forward and reverse gears. At the same time, the MB-2 modification is equipped only with a forward gear. Such a difference in the design of the two models of units does not allow the same type of belts to be used for them. On the contrary, in order to choose the right belt for the Neva walk-behind tractor, you should study a number of the following factors:
- Belt type that exactly matches your walk-behind tractor model;
- Element dimensions;
- The degree of tension of the element;
- Wedge transmission type.
By carefully studying each of these characteristics, you will be able to accurately select spare parts that are suitable specifically for your unit model.
Types of belts for Neva walk-behind tractors
There are three types of belts that are installed on walk-behind tractors. These include:
- V-belts;
- Forward elements;
- Reverse belts.
In order to accurately select a drive belt for Neva brand units, it is best to use a table that indicates the correspondence of the elements to a specific walk-behind tractor model.
This table will tell you how to choose a belt for the Neva walk-behind tractor, based on the modification of the agricultural unit.
Belt sizes for Neva walk-behind tractors
Another important factor when choosing drive belts for the Neva walk-behind tractor is their size. A special table will help you determine which part is suitable for your agricultural machine.
Before using the table, you should take measurements between the pulleys and rollers on which the new part will be installed. This will help determine the exact length of the new element.
Tensioning the belt of the Neva walk-behind tractor - how to do it yourself?
In the design of the Neva MB-1 and MB-2 walk-behind tractor, the location of the belts is slightly different. Consequently, the installation algorithm for both models will also have certain differences. To tighten the belt on the Neva MB-1 walk-behind tractor, you need to follow the following procedure:
- First of all, it is necessary to remove the casing from the V-belt mechanism;
- Then carefully remove the back bar from the pulley;
- Using a wrench, loosen the spring-loaded roller;
- Remove the old belt and tighten the new element;
- After this, install all previously dismantled parts of the walk-behind tractor.
Adjusting the belt on the Neva MB-2 walk-behind tractor is performed in the following order:
- As in the first case, remove the casing from the V-belt mechanism;
- Use a special screw to loosen the tension on the standard belt;
- Unscrew all the screws that hold the bracket to the walk-behind tractor body;
- Pull out the old belt and adjust the pulleys;
- Before installing the belt, be sure to wipe the space between all visible parts and blow out the hoses to which there is easy access;
- When installing a new belt, install one end of it on the gearbox shaft, and the other on the pulley located in the engine;
- Finally, reassemble the structure in reverse order. You can learn more about installing belts on Neva walk-behind tractors from the video.
In most cases, the installation of a new element on the Neva unit is carried out in the event of a breakdown of the unit. Less often, owners of agricultural machines change the belt prematurely to prevent it from being damaged or broken directly while working with the walk-behind tractor. In both cases, you should be as careful as possible, since excessive tension on the element will inevitably lead to its breakage.
Belting
To choose the right belt for your motorcycle, you should have the following information:
- type of drive belt suitable specifically for your modification of the unit;
- its length;
- tension level;
- type of V-belt drive (for specific models).
All about belts for Cascade walk-behind tractors
Features of belts for walk-behind tractors Cascade
There are not many models of Cascade walk-behind tractors on the agricultural market, but it is necessary to accurately select all the missing components for the existing models. Any discrepancy, no matter how small, can lead to very rapid wear of the belts. That is why the manufacturer strongly recommends purchasing only belts of its own production.
Every manufacturer of agricultural machinery uses belt drives, but they are not always interchangeable - a belt for a walk-behind tractor from one manufacturer may not fit a walk-behind tractor from another. Even models of walk-behind tractors from the same manufacturer may have differences in belts. That’s why you need to look at the operating manual for markings and catalog numbers.
Production of belts for the Cascade walk-behind tractor
Modern belts for the Cascade walk-behind tractor (their sizes can be any) are made from the following materials:
- polyurethane;
- rubber.
The functionality of this agro-element is determined by the cord (this is the name of the main belt part). The cord is made from polyester, steel and Kevlar materials, specialized fabrics, and fabric cords.
Belt size for walk-behind tractor Cascade
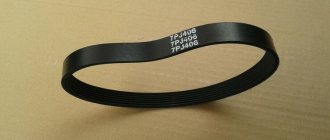
From practice: the reverse belt on the Cascade walk-behind tractor is used much less often than the front one. Consequently, the front elements wear out faster, although as a rule, the belts can last even a year. But it happens that the “life expectancy” of a belt component is calculated in days. Some farmers have found a solution to this problem in that they purchase agricultural components from foreign walk-behind tractors (with internal teeth) that fit the Cascade in size. The belt marking size for the Cascade walk-behind tractor is A-1180 or A-1213 GOST 1284 (for forward travel), A-1400 (for reverse travel). Profile “A” is thirteen millimeters. The marking number will help you order the device correctly from the catalog.
Replacing the drive belt on a Cascade walk-behind tractor
Tensioning belts on walk-behind tractors is a simple and quick job. To correctly replace the belt on a Cascade walk-behind tractor, use our instructions:
In neutral gear, turn off the walk-behind tractor engine. Turn off the engine. Remove the protective cover. Remove old, worn belts. If they are not torn, but simply very worn, cut them. Connect new agricultural components. To begin, remove the pulley from the motor drive. Pull the belt onto the gear pulley (the latter remains in place), then install the motor pulley
It is important to double-check that the belts are not twisted and are located in strictly designated areas. Reinstall the protective cover.
Technical parameters of various modifications
Motoblocks of all manufacturers, be it Neva, Ural motor vehicles with a UMZ-5V engine or Hyundai T-500, Euro-5 and many others, are produced almost according to the same scheme. Only in certain episodes we talk about different powers and available functions. The manufacturer "Neva" made the upper camshaft placement. As a result of the use of an air cooling system, belts for motorcycles need to be purchased less frequently.
In the Cascade model line, the emphasis is on the use of belt drives. The owner of the equipment must select belts for motor vehicles in strict accordance with the technical specifications of the manufacturer. The slightest deviation from the prescribed requirements will cause rapid wear of the mechanical elements. In essence, similar conditions are imposed on the Zubr units.
It is worth mentioning the “Mole” unit, in which the belt drive is used in the same model A-710, A-750, where the length is 710-750 mm, width 13 mm, and the procedure for replacing them is similar to the “Cascade”.
Walk-behind tractors are endowed with high power, which imposes specific restrictions on the permissible types of machine belts. It is strongly recommended to focus on products labeled A-1180. In the event of unscheduled or scheduled repairs, a flexible belt drive element with similar parameters is purchased.
Chinese-made walk-behind tractors are characterized by very great freedom when choosing a belt.
Belts of units for motor vehicles, as well as for attachments, for example, a belt pump, are selected taking into account only one condition: the length and strength of the product cannot differ by +/- 1.5% from the prototype. In this case, the use of analogues will not provoke repeated failure.
Varieties
Unit belts are:
- wedge;
- toothed;
- forward travel;
- reverse.
To ensure optimal tension and long service life of not only the entire belt drive, but also the transmission, the size of the unit belt must be precisely selected for a specific modification of the walk-behind tractor. If you place extremely long products, as well as very short ones, they will wear out quite quickly and create an extra load on the engine or gearbox. For example, a 750 mm “Mole” belt drive is installed on units with a domestic engine.
In addition to the above, before purchasing, you need to check the outside of the product: the belt should not have damage, scratches, protruding threads, or kinks. A high-quality product is one that retains a distinct factory pattern and cannot be stretched by hand.
Firework
The products of the Moscow enterprise Salut are manufactured under this brand. Most often, a unit from the Chinese company Lifan is used as an engine. However, the clutch used is the same - a belt one. Therefore, a belt is necessary in such a device. Thanks to the belt-gear transmission, a smooth ride is obtained and there is sufficient force to operate additional equipment. And this is complemented by even less weight - only 78 kg (this applies to the Salyut-5L model).
A six-speed belt transmission allows you to choose the optimal option (two reverse speeds and four forward speeds).
Walk-behind tractor "Cascade": replacing belts
Before you start changing belts, you must know the location of the belts on the Cascade walk-behind tractor. To do this, you must carefully study the instructions.
To replace the belt, you do not need much effort or special tools. The whole process consists of the following steps:
- Turn off the walk-behind tractor;
- Remove the protective cover;
- Remove damaged belts;
- The pulley must be removed from the engine, and then the belt must be pulled onto the gear pulley, and then the removed part must be returned to its original place. Make sure that the part is not twisted or incorrectly installed;
- Replace the protective cover.
https://youtube.com/watch?v=j7uL0JLEmlA
To ensure that your car serves you as long as possible, do not forget to periodically check the integrity of all parts, including belts. During storage, they should not be bent or twisted, and high ambient humidity is also unacceptable. When purchasing a new item, check its integrity.
Causes of wear
Belts fray and break for many reasons. The main provoking factors are as follows:
- rearrangement or misalignment of pulleys after replacing the motor (the belt bends and rubs against the edges);
- cuts, abrasions, scratches and other mechanical damage that occurs during operation;
- defective parts, which are indicated by a ring rupture when the mechanism is correctly configured;
- installing the damper too close to the pulley.
It will not be enough for a farmer who uses agricultural machinery to be able to replace worn-out parts of a mini-tractor. He should understand the reasons for the breakdown so that he can prevent them in the future. Having eliminated the root cause of the rupture, the owner of a motor cultivator will not spend money on buying new components so often.
Belt selection
To ensure the cultivator drive has sufficient reliability and durability, it is necessary to take a responsible approach to the selection of all parts
When choosing this element of a walk-behind tractor, first of all you should pay attention to the following:
- When inspecting an item, you must check it for protruding threads or other mechanical damage. If this part is defective, most likely it will not last even 1 month.
- This element of the mechanism should not stretch.
- Once the belt has been purchased, you should not try to bend or stretch it. Such treatment will affect its service life.
- Experienced gardeners give preference to such products that are recommended by the manufacturers of the previously purchased walk-behind tractor. If you do not adhere to this rule, the potential of the walk-behind tractor may not be revealed to 100%.
If a person manages to choose the right part of the mechanism, he will not have problems with plowing the land, as well as hilling potatoes, armoring, applying fertilizer to the soil and other work. At the same time, the gardener must always be prepared for the fact that sooner or later this part will become unusable and will have to be replaced.
Important! It may be best to buy another belt, since the first one can quickly break or wear out due to circumstances that are not always clear.
A few more subtleties on operating the cultivator
Once, while working with a cultivator, I noticed that it was somehow being pulled to the side, and I had to make an effort to level it and keep the given course. I didn’t immediately understand what was going on, but it turned out to be very simple and ridiculous.
The fact is that the cutter can be attached to the shaft with either side, this is how the fastening works, but either side is not correct! The cutter should cut into the ground with a sharp, cutting edge, and this is understandable, but due to carelessness, the cutter on one side of the cultivator was turned over and it entered the ground with its blunt edge.
Be careful when installing the cutter.
As a result, the correctly installed cutter hit the ground well, but the other side “rested.” So the motor-cultivator was dragged to the side!
Pay attention to the direction of the fastening bracket
The cutter is attached to the cultivator shaft using a “finger” with a fixing bracket, so you also need to keep an eye on it. When installing the pin, the bracket should not “unfasten” when it meets the ground.
Place the fastening pin correctly.
Here is an example of how the finger brace is deployed incorrectly.
Example of incorrect installation
Drive belt tension options
Depending on the design features of the car, manufacturers install various tensioner options under the hood. Such units are in demand if drivers detect sagging belts or excessive overtightening, which may have been allowed at the station after maintenance. Most often, you can adjust the load on the belt connecting the generator and the crankshaft using regulators, in which the force is transmitted through one of the types of element:
All designs have their positive and negative characteristics.
Tension with adjuster bar
The technique is more relevant for older generation cars, for example, “classics” from VAZ. The method is to fix the generator on the housing using an arc-shaped strip clamped with a bolted connection through a groove. By loosening the thread, you can move the generator to adjust the force. The following algorithm is used:
- unscrew the fastening nut one turn or half a turn to loosen the bar that acts as a belt tensioner;
- we use a pry bar to pry up the body of the electrical appliance, which must be tensioned by the generator belt to an acceptable level to ensure the required tension;
- tighten the fasteners, fixing the generator in the new position.
Since the process is relatively labor-intensive, it can be repeated as needed.
Tension using adjusting bolt
A more progressive method is to adjust and fix the tension of the generator belt using an adjusting bolt. By moving it along the thread, you will be able to achieve the desired result. The step-by-step algorithm includes the following positions:
- First of all, we loosen the mount of the generator;
- then use a wrench to unscrew/tighten the adjusting bolt;
- tighten the upper and lower bolts securing the generator.
The advantage of this method is that the car owner has the opportunity to control the degree of force directly during the adjustment process
It is important to take into account the error that occurs when tightening fasteners
Optimal tension adjustment via roller
On certain models of modern cars, a structure with a roller is installed to comfortably loosen the belt. For example, this is how the generator at Priora is weakened. It should be taken into account that the installed belt is also used to ensure rotation of the air conditioner and power steering. A special roller is an integral part of the design. To work with Priora, an auto mechanic will need a 17-size open-end wrench. It will help loosen and tighten the threaded system. In addition, you will need a special key used to rotate the roller. The special device looks like a key with a handle, the working end of which has two rods with a diameter of 4 mm, a length of 25 mm, located at a distance of 18 mm perpendicular to the handle.
The cost of a special key usually does not exceed 80-100 rubles. They search for it using the encoding 67.7812-9573. Having selected the optimal force, use a 17 wrench to tighten the adjusting rollers. Access to the settings is simple; it opens from the top from under the hood. You can check the degree of tension after starting the engine and turning on electrical appliances. They should work as normal. While the engine crankshaft is rotating, the “Battery” dashboard light should not light up, and the belt whistle should not appear. Manufacturers recommend monitoring the force on the belt at least every 15 thousand km. Mandatory replacement of consumables is carried out no later than 60 thousand km. Since the product can stretch over time, we recommend periodically checking its performance several times a season.
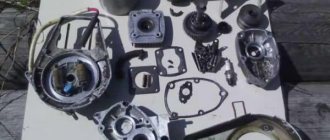
Engine
Depending on the modification, the Oka walk-behind tractor is equipped with engines from different manufacturers (DM-1M, DM-1M1, MITSUBISHI GT600 6.0/4.4, I/C 6.0 HP 6.0/4.4, Honda GX-200 6.5/4.8, Lifan 168 F-2A 6.5/4.8, Vanguard 6.5 HP 6.5/4.8, Lianlong 168F-1A 6.5/4.8, Robin Subaru EX 17 6.0/4.4, Robin Subaru EX21 7.0/5.2, KADVI 168F-2A).
Engine Lifan LF177
One of the popular modifications is the Oka with the Lifan engine. This engine is economical, and its functionality allows it to be installed in small-sized equipment (motor cultivators, walk-behind tractors). Lifan is manufactured in China and has proven itself to be a durable and reliable engine.
The choice of model is made depending on the area of land the operator intends to cultivate using the walk-behind tractor, as well as on the main tasks (plowing, cultivation, digging up potatoes, etc.) that the device will perform.
Engine malfunctions
Let's figure out why the engine on the Oka walk-behind tractor may be acting up? So, the main reasons that the engine does not work and the walk-behind tractor does not start may be the following:
- insufficient fuel or oil level;
- low-quality gasoline;
- clogged fuel or oil filter;
- problem with spark plugs or seals (oil is leaking; spark plugs need to be replaced);
- the angle of inclination when setting up the walk-behind tractor is exceeded (more than 15 degrees, start the walk-behind tractor on a flat surface);
- the integrity of the electrical wiring is compromised;
- rupture or delamination of transmission belts;
- poor tire pressure in combination with any of the above reasons;
- attempt to start the engine without warming up;
- The storage temperature of the walk-behind tractor is too low, as well as a big minus outside when starting the equipment (store the walk-behind tractor in a warm room; in sub-zero temperatures, pour warm oil into the engine and gearbox).
Lighting
The most popular modifications, unfortunately, are not yet equipped with a headlight, but some equipment owners themselves regulate this nuance.
It is very easy to make lighting on a walk-behind tractor; a basic electric generator is usually used for this. The connection is made as follows:
- a device that generates electricity is connected to a button on the steering wheel;
- lay the necessary wires from the button to the electrical equipment (for example, a headlight);
- the wires are insulated in any way from mechanical damage and water (most often a corrugated pipe is used).
If the generator power is sufficient, the headlight will be bright. If there is insufficient power at low engine speeds, the light will go out. Some craftsmen replace the walk-behind tractor generator with a car or tractor generator.
How to make a light for a walk-behind tractor or mini tractor with your own hands:
In any case, even without using a generator, you can make light on a walk-behind tractor. All you need is a 12-volt battery and an LED lamp. The battery can be taken from an electric bike or scooter.
It is recommended to place it between the gearbox and the engine. According to the diagram above with an electric generator, connect the battery. The wires from the battery are routed to a switch and then to a headlight or other electrical equipment.
Air filter maintenance
Many motor cultivators and others use an air filter in the form of a foam sponge. That's how it is here.
Air filter
As you can see, under the cover of the air filter housing, there is already dusty foam rubber. It needs to be cleaned periodically; the foam rubber is removed and washed by hand in warm soapy water. Then it needs to be dried, and now the most important thing is that it needs to be soaked in machine oil, it should be in oil, not dry. This will protect the engine from dust getting into it.
Well, that’s all for now, not such big discoveries, but maybe it will be useful to someone. If you have any tips of your own, you can share them in the comments. Thank you!
All about belts for Cascade walk-behind tractors
Features of belts for walk-behind tractors Cascade
There are not many models of Cascade walk-behind tractors on the agricultural market, but it is necessary to accurately select all the missing components for the existing models. Any discrepancy, no matter how small, can lead to very rapid wear of the belts. That is why the manufacturer strongly recommends purchasing only belts of its own production.
Every manufacturer of agricultural machinery uses belt drives, but they are not always interchangeable - a belt for a walk-behind tractor from one manufacturer may not fit a walk-behind tractor from another. Even models of walk-behind tractors from the same manufacturer may have differences in belts. That’s why you need to look at the operating manual for markings and catalog numbers.
Production of belts for the Cascade walk-behind tractor
Modern belts for the Cascade walk-behind tractor (their sizes can be any) are made from the following materials:
- polyurethane;
- rubber.
The functionality of this agro-element is determined by the cord (this is the name of the main belt part). The cord is made from polyester, steel and Kevlar materials, specialized fabrics, and fabric cords.
Belt size for walk-behind tractor Cascade
From practice: the reverse belt on the Cascade walk-behind tractor is used much less often than the front one. Consequently, the front elements wear out faster, although as a rule, the belts can last even a year. But it happens that the “life expectancy” of a belt component is calculated in days. Some farmers have found a solution to this problem in that they purchase agricultural components from foreign walk-behind tractors (with internal teeth) that fit the Cascade in size. The belt marking size for the Cascade walk-behind tractor is A-1180 or A-1213 GOST 1284 (for forward travel), A-1400 (for reverse travel). Profile “A” is thirteen millimeters. The marking number will help you order the device correctly from the catalog.
Replacing the drive belt on a Cascade walk-behind tractor
Tensioning belts on walk-behind tractors is a simple and quick job. To correctly replace the belt on a Cascade walk-behind tractor, use our instructions:
In neutral gear, turn off the walk-behind tractor engine. Turn off the engine. Remove the protective cover. Remove old, worn belts. If they are not torn, but simply very worn, cut them. Connect new agricultural components. To begin, remove the pulley from the motor drive. Pull the belt onto the gear pulley (the latter remains in place), then install the motor pulley
It is important to double-check that the belts are not twisted and are located in strictly designated areas. Reinstall the protective cover.
What types of belts for walk-behind tractors exist?
Today, there are only three separate types of such mechanisms on sale. Let's look at their names, as well as the characteristic features inherent in each of the specimens under consideration:
- V-belt for Neva brand walk-behind tractor (here we are talking about the most common models that have built-in transverse wedges, which ensure continuous rotation);
- devices for the forward movement of the walk-behind tractor (in this case we are talking about transmission mechanisms, due to which the torque is redirected to the axis of the special equipment and forward movement is performed);
- belts for reverse (these mechanisms are used to transmit torque to the axle of special equipment, which ensures that the walk-behind tractor moves in the opposite direction).
In each individual case, before purchasing a tensioning device, you need to find out whether the selected option matches the model used. It should be understood that it is not recommended to use an old worn-out belt when choosing, since its dimensions and other distinctive features will not correspond to reality.
In order to tension the belt on the Neva MB-2 walk-behind tractor, we need:
- inspect the pulley for contamination with soil particles and, if necessary, remove all excess from the installation grooves;
- using a universal wrench, unscrew the nuts, thereby freeing the frame on which the motor part is located;
take an 18 mm wrench and place it on the thread of the adjusting bolt and turn it clockwise, thereby bringing the engine closer and pulling it towards you. It is advisable to periodically check the belts by hand: if they are correctly tensioned, they spring easily and quickly return to their previous position when loaded. An overtightened belt is also a problem that will cost the bearing that holds the motor pulley;
- we check whether the motor is skewed, which is often observed with these walk-behind tractors. If this nuance occurs, loosen the adjusting screw by one turn and fix the nut located on the opposite side of the housing from the belt drive. This makes it possible, on the one hand, to accurately fix and immobilize it on the frame, and on the other hand, to leave it movable for alignment;
- tighten the bolts (4 pcs. in total).
The tension of the drive belt on the MB-1 walk-behind tractor looks slightly different. It is produced using a clutch lever, which is most often installed on the left handle.
For the new MB-1 walk-behind tractor, which is just getting ready for operation, the course of action will be as follows:
- unscrew the clamp screw;
- We place the lever on the left side of the steering wheel, aligning its fastening with the fastening of the clamp;
- tighten the fastenings with a screw tie;
- When turning the clutch adjusting screw, monitor its tension: when the load is created by the fingers, the deviations should not exceed 10 mm.
Adjusting the belt on the Neva MB-1 walk-behind tractor after repairing or replacing the belt drive comes down to only adjusting the clutch lever screw. Correct adjustment will be indicated by the immobility of the gear pulley when the engine is turned on and slight sagging of the belts when the clutch handle is lowered.
For the Neva MB-2 and MB-1 walk-behind tractors, it is important to check the serviceability and tension the belt drives every 25 hours of operation. The following will help increase the “lifespan” of these parts:
The following will help increase the “lifespan” of these parts:
- elimination of pulley misalignment;
- installation of a damper;
- shortening the rocker arm or installing a longer reverse gear belt (for MB-1).
Finally! I got to the point where I could tell you how to replace the belt in a cultivator. But the most important thing is that I will tell you where to get this belt for only 130 rubles. Well, and some other subtleties in using and maintaining a motor cultivator.
Last time I already wrote about how to replace the reverse cable in a Husqvarna cultivator; that replacement cost me only 30 rubles. Today we will talk about replacing the belt, although in reality, changing the belt is not that difficult. But there is something I can share. And I’m sure many didn’t know this!
When the belt in the cultivator breaks, you will undoubtedly look for it and contact the appropriate store, I did exactly the same! But the price for which they offered me the belt was more than 1000 rubles. Then I remembered that in our city there is such a wonderful
I assure you, this is not an advertisement! It’s just that once before I visited this company with my son, we then needed bearings for a washing machine and we noticed that they also had belts and much more. And now they helped out again, but with a belt
I don’t know how widespread this company is throughout the country, but it is available in Belgorod and Stroitel.
As a result, a suitable belt was purchased for 126 rubles 85 kopecks! Don't believe me? See for yourself!
Sales receipt for the purchase of a belt.
Carburetor adjustment
The carburetor valves of the walk-behind tractor require periodic adjustment. Violation of the norm of the distance between the valves causes a change in the periodicity of the gas distribution stages, as a result, the engine does not reach the declared power. If the gap is large, noise appears and the valves themselves become deformed.
As soon as any extraneous noise appears in the engine during operation of the walk-behind tractor, the carburetor should be adjusted. To adjust, you need a screwdriver, a wrench and a blade (after all, the valve clearance norm is from 0.1 mm to 0.15 mm).
The MB-1D walk-behind tractor uses a membrane-type carburetor, model DM 1.08.100. The external view of the DI1.08.100 carburetor is shown in the figure below:
Appearance of carburetor DM1.08.100
1 — full throttle screw; 2 — idle screw; 3 — air damper lever; 4 — minimum speed screw; 5 - flange; 6 - dosing device; 7 - pipe; 8 - tide: 9 - hairpin; 10 - nut; 11 — inlet fitting; 12 - button.
The adjustment is performed as follows:
- use a screwdriver to unscrew the valve nut,
- the blade is inserted and the nut is tightened.
- Once the process is complete, the carburetor housing is put into place.
Replacing forward and reverse belts
Replacing the OKA walk-behind tractor belt is carried out without the use of technical devices by releasing the clamping mechanism, so you can carry out this action yourself, without the involvement of technical specialists. The main thing is care and accuracy when working. An important nuance is the use of drive mechanism parts with identical parameters.
The belt installation diagram is as follows:
- First you need to remove the reverse belt. Loosen the drive pulley bolt and pull the spare part away from the lever.
- We unscrew the two bolts from the bracket, remove the limiting pins and remove the forward belt.
- We put new belts in place of the old ones in accordance with the direction of the forward pulley and the reverse pulley, and then tighten the bolt of the drive pulley and bracket.
- To assess the correct placement of the belts on the walk-behind tractor, you must release the clutch lever. If they sag in this position, it means that all of the above steps were completed successfully. Otherwise, it is necessary to adjust the position of the belt drive until it is in the correct position.