The device of a screening potato digger
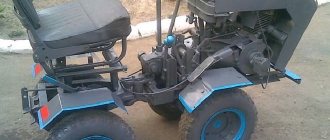
A vibration-screen potato digger is a special self-propelled device that digs up potato tubers and throws them to the side of the harrow. After passing through the field, the root crops lie in one row, which makes them easier to collect and avoids heavy manual digging. Along with potatoes, you can use this device to collect onions, beets, and garlic.
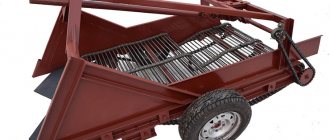
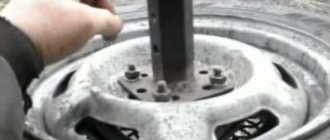
The device is a carriage that moves on two small wheels. It is based on a body, which is welded from twigs at intervals of 2–3 cm. Thanks to this, the tubers are immediately cleared of tops and a significant part of the soil.
In the front part, a shovel of the same shape as the body is mounted on the axle. It is made from a thin sheet of steel, welding small rods at the back and bending them down. This must be done so that the curved elements cling to the wire, which will prevent the twigs from accidentally falling out.
The shovel is placed on the axis of the potato digger so that it is located slightly below the body (from 5 to 10 cm). Then, when performing back-and-forth movements, the shovel will rise and throw away potato tubers, which will fall directly into the wire body.
The schematic diagram will help you make the device yourself
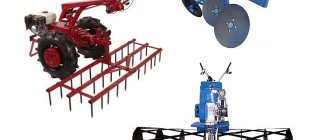
Design features and types
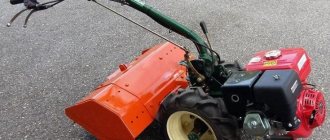
Before you make a potato digger for a walk-behind tractor with your own hands, you need to study the device, design features and prepare the tools and materials necessary for the work. The principle of operation is the same for all models: the teeth of the mechanism stick into the ground and rake out the earthen clod along with the root crops. The harvest can be collected in a bunker or left in the garden. This will depend on the design solution of the model. Potato diggers are:
- fan (lancet);
- vibrating (screening);
- conveyor.
Experienced craftsmen show engineering savvy and independently create multifunctional units that are used for planting root crops, hilling, and harvesting.
Optimal metal thickness
The hanging structure is assembled from metal parts. The thickness of the sheet steel should be selected taking into account the expected load: the greater it is, the thicker the material should be. Experts recommend using sheets with a thickness of at least 8 mm.
Wheels for digging
The design is equipped with movable wheels. When making a digger in a home workshop, you can borrow them from an old garden wheelbarrow. Wide tires will make it easier to move around the beds. The best option is equipped with an axle. Stands are attached to the axle, in which locking holes are made.
Alternatively, you can use metal ones. They will make the structure heavier, which will improve the performance of the rawl on hard soils. Rubber ones will move worse on wet ground; rubber ones, but with a tractor tread, will perform better in such a situation.
Connection methods
All elements of the unit are connected by resistance welding (electric or gas), as well as using classic fasteners (bolts, nuts). Moreover, the advantage of a bolted connection is that, if necessary, the unit can be disassembled and reassembled.
The principle of operation of a screening potato digger and how the screen works
The crusher rock digger works by transmitting movement to the shovel from a walk-behind tractor or internal combustion engine through a drive (extension cord or chain drive). To dig potatoes, use a ploughshare, which is installed horizontally. It cuts into the soil and lifts the tubers mixed with the soil.
This “mass” enters a horizontal grid, which constantly vibrates. Thanks to this, the soil is shaken down, and the tubers slowly move back and, having reached the edge of the surface, fall to the ground (on the harrow itself or to the side).
As a rule, in homemade devices it is impossible to adjust the depth of immersion or the strength of vibration. However, if desired, these functions can be provided, and then the parameters can be changed during operation.
Attention! Screen potato diggers are used for digging light and medium-density soils (hardness index no more than 20 kg/cm2). The tool can quickly fail due to digging in clayey, rocky soil.
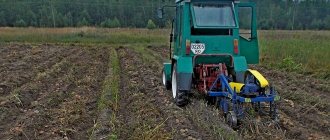
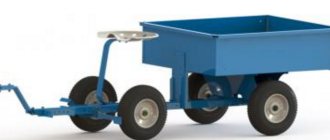
Conveyor digger for heavy traction devices
Heavy-duty agricultural machinery also requires appropriate attachments, since work is carried out over large areas. This means that labor should be mechanized as much as possible. Thus, a conveyor digger is the most complex potato digger in design, having the largest number of rotating elements.
The harvest harvested by such a unit is almost ready for storage (the tubers are whole and clean). High productivity is ensured due to the fact that the attachments for tractors provide for double-row processing, rather than 1 row, which is ensured by working with a walk-behind tractor.
It is extremely difficult to make such a universal conveyor yourself. Factory models are expensive, but large agricultural enterprises can purchase ready-made designs. For example, for high-quality and quick harvesting using a mini-tractor, mounted double-row potato diggers DTZ-2V or DK-2T are designed.
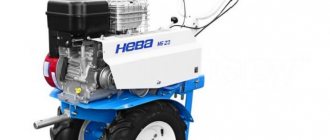
Drawings, diagrams and dimensions of a potato digger for the Neva walk-behind tractor. Farmer, MTZ, mini tractor
There are several options for drawings of a screening potato digger - for example, for a heavy walk-behind tractor, mini tractor and others. The most common schemes:
- Basic model.
- Potato digger for mini tractor with hydraulic drive.
- Another drawing provides for the following dimensions of a potato digger:
- Trailed digger for walk-behind tractor.
- You can draw up a drawing of a 2-row, screen-type potato digger yourself based on the finished model.
How to make a potato digger for a walk-behind tractor with your own hands
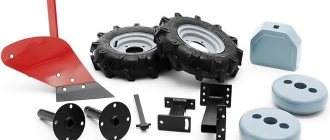
To make a potato peeler, you will need the following materials and tools:
- square metal pipe 40×40 mm;
- 2 metal sheets with a thickness of 0.3 mm and 0.4 mm;
- rod with a diameter of 10 mm;
- wire 8 mm;
- metal corner;
- spanners;
- bolts;
- sledgehammer;
- Sander;
- welding machine;
- drill or engraver.
You can take one of the drawings presented above as a basis. Step-by-step instructions for making a simple homemade potato screener are as follows:
- At the first stage, the frame is made. To do this, you need to cut a square metal pipe. As a result, three segments are obtained - one is 120 cm long, and the other two are 80 cm long.
- Installation of jumpers on the base of the frame (quarter length). On the other side, 2 elements are fixed, on which the wheels will then be installed. They consist of two metal tubes (each 15 cm long, 3 cm in diameter).
- Installation of vertical racks. To do this, 2 squares measuring 3*3 cm are attached to the side of the jumpers (5 cm retreat from the edge of the frame). Then you need to install 4 cm long posts (at a distance of 20 cm). Then they retreat another 40 cm and fix the posts, each 30 cm long. They are connected to each other by a narrow strip with a diameter of 0.4 mm.
- Now you need to make the ral. To do this, take a metal sheet of small thickness (0.3 mm) with parameters 40*40 cm. Two holes are made in the lower part of the racks for fastening. Mounted on racks. Fasten the same workpiece on the reverse side. Then they take a sheet 0.4 mm thick (also square, 70*70 cm) and weld it close to the first element. After this, they give it a cone shape, hammering the surface with a sledgehammer.
- At the final stage, the lattice is constructed. Take a metal rod with a diameter of 1 cm and attach it to the bottom of the rala. The second end is brought out beyond the perimeter of the frame of the Neva walk-behind tractor or another model. Then the traction and wheels are installed.
- To assemble the potato digger, you need to connect it to the hitch unit of the walk-behind tractor. In this case, the shaft itself is brought into engagement with the splined shank. The kingpin is placed in the hitch hole and secured with a cotter pin. Then the reliability of the clutch is checked again and testing is carried out.
Visual instructions for making a potato peeler with your own hands can be found in the video.
Harvesting with a potato digger
The digging process itself looks like this:
- The ploughshare is stuck into the soil.
- Turn on the device, monitor the movements of the knife (it should work synchronously with the rumble).
- Cut off a layer of soil and throw it so that the tubers fall onto the surface of the sifter.
- The excess soil is then removed by constant vibration and the roots are slowly rolled to the rear or tilted parallel to the harrow.
Advantages and disadvantages
The positive aspects of using a potato peeler are:
- The procedure for digging up potatoes is greatly simplified.
- The ability to make a rumble potato digger with your own hands.
- Simplicity of the device and ease of use.
- The device can be double-row.
However, the potato peeler has its drawbacks:
- It is difficult to use in large farms.
- If the soil is dense, then the use of such home units will be ineffective.
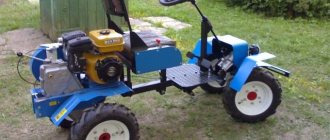
How to make a potato digger with an autonomous internal combustion engine with your own hands
A potato grinder can also be made for a T-25 mini tractor. This makes it possible to completely mechanize harvesting: the driving force is the internal combustion engine (ICE) of the tractor. To create the structure you will need the following materials and tools:
- steel sheet 5 mm thick;
- wire with a diameter of 8 mm;
- metal corner;
- spanners;
- bolts;
- wheels;
- Bulgarian;
- welding machine;
- Grinder;
- sledgehammer.
The instructions for developing a screening potato digger for a mini tractor are as follows:
- Make a drawing and transfer it to sheets and metal profiles.
- Cut out the frame (base of the frame) and weld it.
- Weld the racks from the bottom (the wheels will be mounted on them).
- Weld holders for hanging the screen from below using hinges.
- Attach brackets to the frame for installing the gearbox and mechanisms that create vibration.
- Weld a screen from rods. Hang it on the frame also using hinges.
- Attach vibration generating equipment connected to the screen to the gearbox.
- Make a knife from steel (cut according to the drawings and bend it using a sledgehammer).
- Attach the share to the bottom of the frame and sifter using hinges.
- The last step is to attach the wheels and test the device.
Attention! Before work, you need to review the structure again and tighten the bolts with standard wrenches. Rubbing surfaces are treated with lubricant (periodically the same procedure must be repeated 1-2 times per season).