In most of our country, winter is normal. Very often the temperature drops much below ten degrees. When its values turn out to be quite low, the capabilities of the car’s standard heater are sometimes not enough to warm up the interior, especially if it has large volumes. And spending the night with the engine running is not the best vacation. Moreover, if it is prohibited, as is customary in paid parking lots. In such cases, an autonomous interior heater will be the best option to resolve the contradictions in the current situation.
General design of the “autonomy” and principle of operation
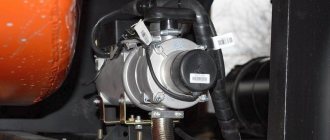
Autonomous interior heaters differ in design, however, in general terms, the device consists of:
- combustion chambers;
- heat exchanger;
- fan;
- fuel tank (on some models);
- a sleeve designed to supply air to the combustion chamber and exhaust gases;
- The delivery kit includes a fuel pipe, fuel line pump, wires and fasteners.
As for the operating principle of an autonomous heater, it looks like this:
- Cold air enters the combustion chamber, forced by a fan into the flame tube area;
- The air heated in this way is returned to the car interior;
- Combustion products escape through a heat-resistant sleeve;
- Devices that additionally perform pre-heating of the engine, which has a common circuit with the cooling system.
What does the engine preheating system consist of (liquid type)
When starting the engine in the range of negative temperatures, due to the high viscosity of the oil, wear of parts increases, torque increases, the process of formation of the combustible mixture is disrupted, and compression decreases. In winter, starting an engine, especially a diesel engine, without warming up is difficult.
The main function of the preheater is to heat the engine and interior. On some vehicles the device is included as an option, but can be installed additionally if necessary.
The equipment set consists of:
- boiler and combustion chamber;
- radiator;
- fuel piping system;
- fuel pump;
- antifreeze pump;
- thermal relay;
- electronic control unit;
- heater starting systems.
Interior liquid heater
The device is integrated into the overall system of the car - it is connected to the fuel line, and the electrical components of the heater are connected to the car's electrical circuit. When turned on, the liquid heats up in the cooling system and passes through the engine and radiator. As it heats up, the fan turns on and warm air is supplied to the cabin. The device, using a sensor, automatically regulates the refrigerant pumping and fan speed.
The liquid interior heater is turned on either manually or automatically according to the start time specified by the user. In addition, some models are controlled remotely, which allows the car owner to warm up the car in advance.
Fuel pumping
Before the very first start, it is necessary to pump the fuel. To do this, simultaneously press the two lower buttons - OK and down arrow.
The words “H” and “OF” will light up on your display.
Switch to ON.
After this, the pump starts in a jerky manner with clicks. The corresponding icon is displayed on the screen.
To turn off pumping, set everything to OF mode by pressing the down arrow. The first step when pumping is to fill the filter.
Eventually the liquid in the tube should reach the end of the fuel hose.
Pull it and clamp it with a clamp at the corresponding inlet into the stove.
Upon completion of pumping, we proceed to the first launch.
Types of interior heaters by power source
Interior heaters also differ in power sources:
- Electrical appliances are divided into 12 and 24 V models;
- Gasoline;
- Diesel;
- Gas.
12V interior heaters have low power - up to 200 W, and operate from a 12V car cigarette lighter. The device heats the driver's seat and windshield. 24-volt models are used primarily in trucks.
A gasoline interior heater, in addition to heating the air inside the car, warms up the engine. However, such devices are difficult to install and have a higher cost compared to air devices.
Diesel heaters operate on the same principle as gasoline heaters and offer the same options. However, they consume less fuel, which makes their use more expedient than warming up the car with a standard “stove”.
Price
The most expensive device presented in the rating is the Webasto Air Tor 3500, a 12-volt autonomous diesel cabin heater. Russian Planar 4D complete with tubes, boiler and other necessary elements can be purchased at half the price.
| Separately | Included, original | |
| Webasto Air Top 2000 ST | 15-20 thousand rubles | 42-45 thousand rubles |
| Webasto Air Top 3500 | 18-25 thousand rubles | 50-55 thousand rubles |
| HYDRONIC B4W SC | 20-25 thousand rubles | 30-32 thousand rubles |
| Eberspächer Airtronic D2 | 14-15 thousand rubles | 25-27 thousand rubles |
| Planar 4D | 8-10 thousand rubles | 22 thousand rubles |
Advantages and disadvantages of autonomous interior heaters
Autonomous interior heaters have the following advantages:
- Do not depend on external power sources;
- Suitable for long-term use;
- Economical;
- They have good power;
- They have a remote control option.
Among the disadvantages of such devices are:
- Difficulty of installation;
- High cost of the device itself and installation;
- Some models depend on the quality of the fuel used for them;
- The equipment depends on the operation of a stable battery.
Table: technical characteristics of Webasto Air Top 2000 ST
| Permissible fuel supply height H (m) | 1-2 |
| Permissible fuel suction height S (m) | 1 |
| Maximum permissible excess pressure in the fuel line (bar) | 0,03-0,11 |
| Maximum permissible vacuum in the fuel tank (bar) | -0,02 |
| Voltage, V | 12 for petrol, 12/24 for diesel units |
| Fuel | petrol/diesel |
| Heating power, kW | 2 |
| Power consumption, W | 14 — 29 |
| Fuel consumption, l/hour | 0,14 — 0,27; 0,12 — 0,24 |
| Max. volume of supplied air, m3/h | 78 |
| Weight, kg | 2,6 |
| Dimensions, mm | 311 x 120 x 121 |
TOP 5 tips for choosing an autonomous interior heater
To buy an effective interior heater, but not overpay for it, follow these tips for choosing autonomous “stoves”:
- Decide on the type of equipment - electric, gasoline, diesel or gas;
- Decide on the power of the device - do not buy a powerful autonomous heater for a passenger car. The device will place an increased load on the on-board network and also consume a lot of fuel;
- Study manufacturer ratings, reviews and prices. Preliminarily look at reviews of the models you like. This minimizes the risk of purchasing the wrong equipment;
- Do not buy “autonomy” from “hands-on”, try to purchase equipment in trusted stores;
- Find out the cost of installing equipment in advance.
By following the above tips, you will buy a functional and efficient car interior heater, which will help maintain an optimal microclimate inside with significant fuel savings.
Step-by-step instructions for assembling a Chinese Webasto
How to assemble this heater and prepare it for operation? The first thing you need to think about is attaching a metal plate to the wall on which this stove will stand.
To do this, it is convenient to use small metal corners.
But with sufficiently thick walls, you can make a more reliable fastening with studs.
Next, before placing the stove on the plate, do not forget to thread the power cable through a special slot.
Screw the exhaust corrugated pipe with a clamp to the pipe, from the side of the hole with the aluminum radiator.
Those who have already tested this stove in operation suggest fitting the exhaust with a high-temperature sealant. A conventional clamp cannot always create such a tight connection that completely isolates the exhaust gases.
Here's a look at the results of operating such a stove without good exhaust sealing. Gases visibly escape.
When installed in a car and the pipe protruding on the street, this is not critical. But when installed inside a small garage with poor ventilation, the smell may be noticeable.
On the other side, where there is a plastic grille with a fan, air is taken in.
Professionals and the manufacturer advise taking fresh air from the street, and not from the garage.
The stove has two independent air circuits. For the first circuit, air is taken from outside, heated by a burner, after which the metal radiator heats up and the air is released along with the exhaust gases back into the street.
This air flow is needed for combustion of the mixture, and not for heating, as some are mistaken.
In the second circuit, the air inside the garage is driven. If you take air from the garage, then you will simply throw already heated warm air masses outside, thereby worsening the efficiency of the heater!
Where is the best place to place this stove and where to secure the platform? Someone, without much fuss, stuffs this thing into a standard case from a computer system unit.
At the same time, connecting it from the computer power supply. But it’s better to do everything wisely. Place it where it is easiest to remove the exhaust gases outside.
For example, you can place it near an existing ventilation grill. And if you have a potbelly stove in your garage with a pipe leading out into the street, then place the heater not far from it.
This way, the exhaust pipe can be led directly into this furnace and there will be no need to break or drill the walls.
In this case, the stove itself will heat up to 50 degrees from the gases and also release this heat into the room.
And as an option, you can install a heating radiator nearby. First lead the exhaust from the heater into it, and only then take it out.
This way, your hot exhaust gases will not be wasted, and will additionally heat up another battery in the garage.
Just be careful with sealing the joints. Use a high temperature sealant here too. It handles high temperatures calmly. Entry and exit from the radiator is done through pipes.
Some even recommend installing two radiators in order to further increase efficiency. Should not be doing that. When the heater switches to low mode, a dew point will form inside the batteries and condensation will accumulate.
You always want to leave some heat on the outlet tube that will be exposed to the outside. This outlet should never freeze.
Otherwise, at one point, the hole will become clogged with ice and gases will flow into the garage. When working well, such a pipe “smoke” like a real potbelly stove.
In addition, do not forget that according to the instructions, the outlet through the direct flow pipe should be no more than 2 meters.
Therefore, as you understand, a large number of radiator sections cannot be connected here. And repairmen of such stoves claim that for stable operation of the entire unit, the exhaust and intake pipes must be the same length.
After connecting the pipes, we move on to the fuel outlet.
It somehow needs to be screwed from the inside into a plastic 10-liter tank. To do this, you will have to drill a hole with a diameter of 8mm in the tank.
This can be done in two places. Which one depends on where your filler neck is located. But in any case, the outlet should always look down towards the floor so as not to accidentally “snatch” air.
This fuel outlet must be installed through the inside of the tank. To do this, insert the wire through the drilled hole and bring it out of the neck.
Next, screw the fuel outlet to it by threading the wire through the hole in it.
And tighten the whole thing back so that the guide end of the tube faces outward.
All that remains is to tighten the nut, which presses the sealing rubber from the inside and seals the joint.
We recommend reading: The subtleties of connecting a heated floor with your own hands
Next, cut off a few centimeters of the rubber hose that comes with the kit and pull it onto the fuel pipe sticking out of the tank. A piece of hose is needed to put the filter on it.
Position it following the directional arrows that indicate the movement of fuel.
On top of the filter, through another piece of hose, a thin fuel supply tube is inserted. All connections are tightened with clamps.
When the outlet for diesel fuel is prepared, you can secure the tank to the wall.
At the same time, remember that for safety reasons, the tank should be located below the burner in the stove.
So that under no circumstances could fuel flow inside by gravity.
Table: technical characteristics of Webasto Air Top 3500
| Heating power, kW | 3,5 |
| Rated voltage, V | 12/24 |
| Fuel | diesel |
| Fuel consumption, l/h | 0,42 |
| Power consumption, W | 36** |
| Supply volume air, m 3 / h | 138 |
| Heater dimensions, mm (length x width x height) | 425 x 148 x 148 |
| Weight, kg | 5,9 |
| Internal temperature control range | -40… +20 °C |
| Volumetric flow of heated air at fan speed, relative to 0.5 mbar | Max. 132 (200) m3/h at 3600 (5000) rpm |
| CO2 in flue gases (permissible operating range) | 1.5 kW: 5.0-8.0%; 3.5/5.0 kW: 9.0-12.5% |
Table: technical characteristics of Planar 4D
| Rated supply voltage, V | 12 or 24 V |
| Type of fuel | diesel fuel according to GOST 305 depending on the ambient temperature |
| Heating capacity, kW | 1-3 |
| Amount of heated air, m3/h | 70-120 |
| Fuel consumption in modes, l/hour | 0,12-0,37 |
| Start and stop mode | manual |
| Weight, kg, no more | 10 |
If you have any questions, leave them in the comments below the article. We or our visitors will be happy to answer them
Table: technical characteristics of HYDRONIC B4W SC
| Coolant | Water, coolant |
| Heat flow regulation | High, small |
| Heat Flux (W) | 4300/1500 |
| Fuel consumption (l/h) | 0,2-0,6 |
| Average electrical consumption power (W) in operating mode | 22-48 |
| Average electrical consumption power (W) at startup | 120 |
| Rated voltage | 12 V |
| Permissible operating pressure | up to 2.5 Atm |
| Amount of water in the heating device | 0.18 l |
| Water pump capacity at 0.1 atm | 900 l/h ±100 l/h |
| Minimum water throughput of the heating device | 250 l/h |
| Permissible ambient temperature in operating mode | -40 °C to +80 °C |
| Weight - without coolant and mounting parts | 2.7 kg |
Manufacturers
The main manufacturers of wet tanks:
- "Webasto".
- "Ebersprecher".
Additionally, the systems can be equipped with a GSM module with the ability to program the start of the autonomous system. But the trouble is that the cost of such heaters starts from 50 thousand rubles. And if for a Volvo-type truck tractor this is a small expense, then for a light-duty Gazelle it is a significant waste of money. In addition, their cabin volume is different. And Webasto mainly produces 2-3 kilowatt battery packs. As practice has shown, one and a half kilowatts of energy is enough for a Gazelle. The question arises: which battery should I choose?