For maximum efficiency, safety and reliability of the autonomous heater Planar 2D-12, 24, it is necessary to install and operate it correctly. The manufacturer provides a number of requirements for the installation of this autonomous heater, which we present below. In addition to the manufacturer's recommendations, you should not lose common sense during installation; if you have any difficulties installing the heater, we recommend that you contact specialists - the Athclimat company will carry out a complete installation of the Planar 2D-12, 24 air heater in Moscow, you will receive a ready-to-use and configured autonomous heat source.
The installation recommendations given below must be followed, as improper installation and use can lead to bad consequences. 1. The air heater Planar 2D-12, 24 is designed in such a way that it can only be used in a horizontal position. Under no circumstances should you install it at an angle; this can lead to incorrect operation and the possibility of emergency situations. For correct installation, see the diagram below.
2. The distance from the inlet to walls, interior objects, partitions and similar things is at least 50mm, the distance from objects to the heater outlet is at least 150mm. 3. When installing the incoming air pipe, it is very important to ensure that exhaust gases from the car or the heater itself, or other harmful fumes, cannot enter there. 4. It is imperative to exclude the possibility of any objects, bulk materials, or liquids getting into the heater. It must also be possible to remove the heater for routine maintenance or repairs. 5. The inlet pipe of the air necessary for combustion should not become clogged (with dirt, snow) or suck in exhaust gases. 6. Important! The air intake inlet must not be directed opposite the incoming air flow when driving.
7. Installation of the exhaust pipe is carried out taking into account its high temperature during operation of the autonomous heater. The installation is carried out with a slight inclination towards the exhaust, to ensure safety and protection from heat of the wiring, interior parts and car body, thermal insulation is used on the exhaust pipe. The exhaust pipe itself is made in the form of a corrugated element, which quite easily takes the shape you need while maintaining its integrity. For a tighter connection with the outlet pipes of the heater, it is recommended to make a longitudinal cut of up to 15 mm on the corrugated pipe, which will allow the pipe to be compressed more efficiently, while the pipe should not touch the rubber seal of the heater. It is VERY important to prevent exhaust gases from being reabsorbed through the heater or ventilation system of the car. A screen is installed at the end of the exhaust pipe; there is no need to neglect its installation, since it has an impact on the quality of the heater at low power. The heater outlet must not be placed opposite the oncoming air flow; the outlet must be directed along the direction of the vehicle, backwards. 8. As for the fuel tank, its installation must be carried out taking into account the impossibility of damage during operation of the vehicle, ensuring the possibility of fuel leaking to the ground in the event of a spill. To prevent fuel from leaking out when the fuel line is depressurized, it is advisable to take it through the highest point of the tank. If sampling is carried out from the main fuel tank, it is important to ensure the tightness of the tapping point. 9. As for the fuel line, its length should correspond to the diagram below:
10. The manufacturer recommends installing the fuel pump as close to the tank as possible, and placing it, if possible, below the lower fuel level in the tank.
11. Installation of electrical wiring, cabin sensor and heater shut-off valve is carried out in full compliance with all electrical installation rules - high-quality insulation, prevention of damage to the wiring and its heating. The cabin sensor is mounted in any convenient place in the driver's cabin, serves to maintain a given temperature, the cable length should not exceed 5000 mm. A locking electromagnetic cable is installed in front of the fuel pump, opens when voltage is applied to it, and prevents fuel leakage in the event of damage to the lines.
Features of operation and repair of the autonomous system on KamAZ trucks
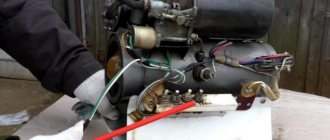
The parking heater (in common parlance, autonomous heater) on KamAZ is used to heat the cab when the main engine is not running. Depending on the design, devices are divided into “dry” and “wet”. The first ones use a flame torch to heat the air that is supplied to the cabin, and the second ones heat the coolant of the car’s engine cooling system. In this case, the cabin is heated by a standard stove.
How the KAMAZ autonomous vehicle turns on | KAMAZ
autonomous stove KAMAZ
How do air auxiliary heaters work?
Long-distance travel across Russia, about autonomy...
Launch of PZD
Do-it-yourself Kamaz autonomous vehicle
Resetting active errors of the Eberspacher preheater
Pzh14TS TS 10(GP) Kamaz Omsk
Autonomous car PLANAR on Zubrenok
Planar 44d-12gp
autonomous
Also see:
- How many axles does KAMAZ 5410 have?
- KAMAZ maximum slope
- Pump for KAMAZ frame
- How much oil to fill in the KAMAZ Euro 3 engine
- KAMAZ for suction
- KAMAZ 53501 mustang family
- All types of pgu for KAMAZ
- Chassis of KAMAZ 4310 cars
- How much oil to pour into KAMAZ 5511 axles
- KAMAZ in which city are they created?
- Spare wheel bracket KAMAZ Euro
- Maintenance of VVT KAMAZ
- Radiator mounting on KAMAZ
- KAMAZ crankshaft tightening force
- PGU KAMAZ how it is located
Home » Hits » How the KAMAZ autonomous vehicle turns on
kamaz136.ru
How does it work
The heater is an autonomous heat source and operates independently of the car engine. The device includes:
The operating principle of the 14TS-10 heater is based on the transfer of heat from burnt fuel to a coolant pumped through a heat exchanger. The device is located under the hood and connected to the engine cooling system.
Before putting the autonomous heater into operation, an automatic check of the functionality of all its components is carried out. Having received information about the working condition, the control unit gives a command to ignite the device. At the same time, the circulation pump is turned on. There are 2 heater operating programs: “Economical” and “Pre-start”. The first one has lower power consumption, and the execution time is 8 hours. The second is more energy-intensive, but completed in 3 hours. You can stop the device manually at any stage of the cycle.
The fuel mixture is ignited after the combustion chamber is purged with air. A glow plug is used as a fire source, which remains in operation until the torch burns steadily. Diesel fuel is supplied to the combustion chamber by an electromagnetic fuel pump from its container or car tank. After heat is transferred to the walls of the heat exchanger, the exhaust gases are released under the car.
Automation ensures safe operation of the device and turns it off in the following cases:
The first start-up and periodic switching on of the heater during the “Pre-start” program are carried out in the “Full” mode, and in the “Economic” mode - in the “Medium” mode. In this case, fuel consumption is 2 and 1.2 l/hour.
Purpose of the device
In any KAMAZ 65115 or other modification, at temperatures below -15°C, a problem arises - the fuel acquires a viscous structure. Because of this, the engine injectors are not able to provide the necessary fuel spray, and the crank mechanism is very difficult to turn. That is why on KAMAZ one of the most useful additional devices is the pre-heater.
Before starting the engine, the device will warm it up to the optimal temperature, ensuring a stable start. As for the KAMAZ brand, in this case the device is mounted if the ambient air temperature reaches below -15°C. Some models are capable of performing several functions at once, including warming up the car cabin.
Unit features
For KAMAZ vehicles, autonomous liquid pre-heaters are used, which operate on diesel fuel. The main advantage of these variations is that they can provide effective engine warming up with minimal consumption.
Pre-heater KamAZ
It should also be noted that the device connects to the car’s electrical network, but does not consume a lot of electricity. It turns out that when using the KAMAZ preheater, the battery operates autonomously and does not require third-party power sources.
In more outdated truck models, simple devices of the 4310, 520 series are installed. These variations have a simple design and do not differ in complex installation schemes. Modern units are in great demand in new KAMAZ vehicles, buses, special equipment and tractors. But despite the difference in functions, the operating principle of the devices consists of standard steps.
VIDEO: Preheating a cold engine
Design and device
The design of the KAMAZ pre-heater includes several main components:
- boiler room;
- burner;
- water pump;
- remote control device.
The main element is the boiler compartment, which consists of 4 durable cylinders that form a heat exchanger. This part includes 2 cavities that facilitate the unhindered passage of exhaust gas and coolant circulation. There are 3 tubes on the outer part of the engine heater, 2 of them are intended for draining or supplying antifreeze, one is for exhaust gas removal.
Pre-heater device
The exhaust gases hit the damped part of the boiler, which due to this action change direction and flow to the outlet pipe. In this case, thermal energy is consumed for heating in the engine sump.
On the reverse side, at the open end of the boiler compartment, a burner is mounted, which includes:
- spark plug;
- nozzle;
- valve;
- fuel heater;
- gas heater.
The car smokes and won’t start
The owner of Planar visited several repair shops, as a result he changed two (!) fuel pumps, one burner, supercharger bearings and something else. The last idea of the repairmen is to replace the heater ECU, they cannot check it, only a large-scale repair. Opening:
There is soot on the burner and in the chamber, although the device has been to several workshops in a row. And even the burner looks like new, but smoked quite efficiently. According to the owner, the work capacity was only enough for a day, then another trip to the workshop. The key point in the owner’s story was that after the failure to start, the cabin was full of smoke. This is the cause of the fire:
Despite the fact that all manuals and assembly drawings indicate an o-ring under the spark plug, there is none.
In principle, when I opened the heater, I already expected that there would be no gasket in the fuel line (No. 1 on the assembly) or a ring under the spark plug (No. 10). And so it turned out, it’s good that at least the shaped washer was left in place. However, with such vigorous soot formations, it is necessary to check the fuel pump for the amount of fuel supplied. The capacity is indicated on the pump:
6.8 ml of diesel fuel per 100 pumping. I won’t do 100 pumping exercises with my hands. Moreover, if the pump is knocked down, it will have to be adjusted, and this again means 100 pumps. And then another 100 pumps. And then maybe more and more. These are not our methods. Our method is the AVR controller. Scheme:
It’s about to start, why Atmega, why not crumbling, why not logic? Asshole. What was on the solderless board will be there. Firmware and all the tripe, including the project in Proteus.
For some devil, I printed the number of each muscleman into the terminal:
I set it to 45ms retracted, 155ms released, a total of 5 Hz, as in the primer.
The car smokes and won't start. Eberspacher D5WZ
Eberspacher D2 smokes does not start repair explanation of the reason.
The Ebeshpecher autonomous vehicle does not start, it smokes, we are repairing it, a short time passes, it breaks down again, what can it do.
It smokes, Planar 44D-24 does not start, or find the error. )))
The planar 44d heater was under repair. According to the client, the car does not start and just smokes. At.
The battery does not start. It's not about the network. Repair of Autonomous Airtronic.
Our other video on how to check if the pump is not pumping or the stove is clogged https://www. youtube. com/watch? v=lXK4F8_0KxQ&t=1s appareil de chauffage.
Starting the battery, cleaning, dry hairdryer
How do I start an autonomous vehicle when it cannot start on diesel fuel, quickly and efficiently since it is cleaned.
The car is blowing cold air, we revive it.
AUTONOMKA Repair Autonomous interior heater, maintenance after summer inactivity repair
Part 2 disassembly after 5 years of operation on gasoline Repair of Autonomous car, here is the link Autonomous car is not.
How to start the battery if it is clogged! Lifehack #1
Sooner or later, the battery becomes clogged and clogged with soot. And as always at the most inopportune moment! And if.
The battery has broken down. What to do.
Cleaning the heater Eber D2. Salarya SHIT. but KAMAZ endures.
Donate: ▻ https://www. donationalerts. ru/r/alekseyka Group in VK; ▻ https://vk. com/avtonomka21 Instagram; ▻ https://www. instagram. com/avtonomka21/
How to revive the autonomous (webasto) Volvo Fh
Autonomous system (webasto) Volvo Fh does not work.
Cleaning the Eberspaecher heater (it smokes and does not start)
Donate: ▻ https://www. donationalerts. ru/r/alekseyka Group in VK; ▻ https://vk. com/avtonomka21 Instagram; ▻ https://www. instagram. com/avtonomka21/
If the car smokes a lot and won’t start. (truck. Trucker. Roads.)
The Webasto AT2000 battery often gets coked. Webasto repair.
Incorrect clearance in the auxiliary heater supercharger leads to frequent clogging of the combustion chamber.
We clean the battery.
Planar 44D-24 heater constantly smokes
They brought the battery for repair. The cause of the malfunction is a large gap between the impeller and the pump housing.
✔️ How to start a battery with a clogged grid in a couple of seconds? Does it smoke? Error?
Autonomous battery repair
Autonomous heater diagnostics. Why doesn't the fuel pump click?
How to independently diagnose an autonomous heater. Why doesn't the heater start? Samodi.
Autonomous planar does not work after repair and smokes
eberspacher webasto Autonomous operation (deactivates and does not start. What is the problem?
Autonomy deactivates and does not start eberspacher webasto.
Autonomous device does not start
Webasto smokes heavily when starting up
Initially, there were no versions at all, because diagnostics does not give any errors, visually everything is normal, but disassembling is working.
Some nuances when repairing the Eberspächer D1LC and Webasto Air Top 5000 autonomous vehicles.
Don't forget to like the video. You can thank for the video here https://www. donationalerts. ru/r/teamservice Repair.
The Pramotronic heater is smoking
A client arrived with the problem that the autonomous heater would not start. We launched it, but since it was strong.
Repair of dry autonomous unit Eberspacher Airtronic D4. Service scam!
Don't forget to like the video A little about deception at the service station and repair of the Eberspecher Airtron.
How to remove the autonomous vehicle on a KAMAZ
autonomous stove KAMAZ
Autonomous car PLANAR on Zubrenok
KAMAZ 65115
Glitch of the Planar 44D autonomous system or how to check the spark plug on the Planar heater.
How do air auxiliary heaters work?
KAMAZ 65221, We remove the PZD or, more correctly, the Ramtronic for repair)
Maintenance, disassembly/assembly and repair of the autonomous heater Planar.
Resetting active errors of the Eberspacher preheater
Long-distance travel across Russia, about autonomy...
Long-distance travel in Europe. What is the L sign on the track and how to lubricate the saddle
Also see:
- Seeing an accident from KAMAZ trucks
- Animation of KAMAZ 5460
- Front brakes jam on KAMAZ
- Autonomous vehicle KAMAZ 6520
- KAMAZ with anti-aircraft gun
- How to remove a KAMAZ from the handbrake
- Winding a KAMAZ speedometer with your own hands
- KAMAZ dump truck 55111 width
- Water-oil separator KAMAZ 53215
- How to remove a pump on a KAMAZ Euro 3
- Oil volume for KAMAZ engine
- Special equipment KAMAZ trucks
- Suprotec for KAMAZ engine
- Timber truck based on KAMAZ 4310
- KAMAZ hydraulic volumes
Home » The best » How to remove the autonomous vehicle on a KAMAZ
kamaz136.ru
Malfunctions and their elimination
The organization of searching for defects is described in the operating instructions for the device. Malfunctions that arise during operation and require complete or partial disassembly of the heater must be carried out by specialists from repair organizations. All faults, except the inability to turn on the heater, are indicated by a blinking LED on the control panel.
Error codes
The heater is equipped with a monitoring system for the proper operation of components and individual elements. If a defect occurs, the automation classifies it and notifies the driver by the number of LED flashes. The list of possible malfunctions is summarized in a table indicating the necessary actions to be taken to restore the device to operability. Error codes correspond to the number of blinks of the indicator.
Malfunctions are collected into 10 groups based on the same causes of occurrence and methods for eliminating defects. The table is given in the heater operating manual.
Why doesn't it start
If, when you try to turn on the heater, the LED indicator does not light up and the start-up does not occur, then there may be several reasons for this situation, but they are all related to a lack of power:
If there is power to the control panel, the cause of the malfunction may be a defect in any of the controlled elements. In this case, the defect code will be shown by a flashing indicator.
How to turn it on
Starting and changing operating modes of the “autonomy” are carried out from the control panel. To start the heater, you need to select a program using the mode key (3 or 8 hours) and turn on the power switch. The LED will light up and the control unit will begin executing the program. After testing is completed and the blower, pump and fuel pump are turned on, the burner will ignite. The program runs automatically and does not require driver intervention. At the end of the set time, the device will stop.
Restart is possible after a power failure; its subsequent activation - no earlier than after 10 seconds.
Repair
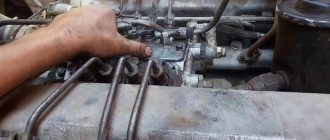
Despite the fact that the manufacturer recommends repairing breakdowns associated with disassembling an autonomous heater in specialized workshops, many drivers and car owners prefer to fix the faults themselves. The fairly high price of the work pushes them to this decision.
Most often, the flame sensor fails and the fuel line becomes clogged. The work is simple and does not require the use of special tools.
Regular scheduled maintenance will help reduce the number of defects.
For this type of heaters, there are 2 types of maintenance: daily and seasonal. The volumes, timing and list of work performed are given in the technical documentation for the device.
How to install
The 14TS-10 heater is installed on the frame cross member under the hood in front of the radiator. The device is mounted standard: bolted. The boiler's pipes cut into the standard cooling system. Fuel supply is possible from its own tank installed outside the engine compartment, or from the fuel system. Exhaust gases are removed through a corrugated metal hose under the bottom of the car between the cab and the body (trailer).
This placement of the autonomous unit allows for maximum removal of exhaust gases from the cabin, minimizing the length of the cooling system pipes and obtaining an additional heat source in the engine compartment.
Kamaz and romance | Topic author: Evgeniy
Hello everyone, question, I start the autonomous system, but the heater does not turn on itself, and so on all five new KamAZ trucks, it turned on on the old one, what can I do?
LYDI (Macario) fuse!
Artyom (Nadiyya) maybe it needs to be connected?
Sergey (Luvena) sometimes the fuel supply freezes and it doesn’t turn off until the tank is full, this happened to us.
Sergey (Luvena) is the autonomous vehicle a PZD?
Sergey (Luvena) well, it has its own fuel barrel from where it is powered; when there is fuel there, it works as expected, it turns on and off, only the fuel runs out and it doesn’t rush, it won’t turn off until it has enough.
Sergey (Luvena) is autonomous and the stove works separately in our column on the new ones, so the PZD works separately without turning off the stove.
Evgeniy (Tudwal) on the old one, as before, you turn on the railway and it’s like a test; the pump turns on, which drives the antifreeze and the heater motors for 2-3 seconds, after that everything turns off and the railway starts to start, and in this test only the nose starts up and that’s it
Evgeniy (Tudwal) no, not a hair dryer, the original factory automatic, or whatever you like, but a twister, that is.
Sergey (Luvena) on one there is only a button on the other. which one do you have? with a button or with a twist?
Evgeniy (Tudwal) 2 buttons one on off the other 3 hours 8 hours and a knob model I think 14st-10
Despite the variety of brands, the design and operating algorithm of all air heaters differ little from each other. Heaters can be equipped with a separate control panel, on which you can set the start time, operating duration, or simply the required temperature. Having received a signal from the sensor about low temperature in the cabin, the automation will give a signal to turn on the heater. A functional sensor located in the right place reacts even to short-term door openings.
When starting the heater for the first time, the device is first diagnosed. If everything is in order, ignition starts; if not, a fault code appears on the remote control. The most popular are 002 and 011 (low voltage); 052, signaling problems with fuel, and 012 (overheating). If you run an overheated heater for too long, it will lock up.
If the device is working properly, the fan turns on. It purges the combustion chamber and frees it from residual combustion products and fuel vapors that may have remained from the previous operating cycle. After this it is the turn of the glow plug. The current consumed by the 24-volt heater is only slightly less than 10 A. After the spark plug glows, the fuel supply begins. After achieving stable combustion, the candle turns off. Only such low-cost units in terms of electricity, such as a fan and a fuel pump, remain in operation. In this case, the current consumption drops sharply and does not reach 1 A. Therefore, you can stand with the heater running and turn off the engine for quite a long time. If the voltage drops, the autonomous system will turn itself off, saving energy for starting.
Turning off the heater is also not so easy. The fuel pump stops, the torch goes out, the spark plug turns on to clean it, and the fan continues to run for a few more minutes so that the heat exchanger, which is an aluminum casing, or the boiler, as some drivers call it, has time to cool.
Sometimes this trick happens with cars: it drives and drives over bumps, and then all the electricity is gone. It seems like a trifle, a wire has fallen off, but if this happens while the air heater is running, the fan stops instantly, the radiator is deformed, and the plastic heater casing melts. By the way, the same result can be achieved if you start removing the batteries immediately after turning off the stove. A heater installed according to the rules is not afraid of turning off the “mass”; it has an autonomous power supply.
In winter (when else can you use such a thing?) the intake air pipe becomes clogged with snow dust. The result is like in a carburetor car - an over-enriched fuel mixture and smoke. The cause of heater smoke may also be reduced fan speed. It’s good (although, of course, not very good) if the control unit issues incorrect commands. It also happens that the reasons for this are purely mechanical. In general, if a normally operating fan falters for a split second, as if it’s caught on something, it’s not a big deal. It is much worse if the fan “scrapes” constantly.
Anyone who is familiar with the design of an electric motor will say: “The end of bearings has come,” and he will be right. At the same time, the armature is able to move and engages the excitation winding. If you continue to operate such a stove, the insulation will fray, a short circuit will occur and the fan will stop. We already know why the boiler will suffer. Moreover, the control unit located under the impeller may not be able to withstand it. At WEBASTO it is not protected, but at Eberspacher it is in a ribbed metal box, which in addition helps to cool it. Replacing the electric motor is almost inevitable. Although theoretically it is possible to replace the bearings and armature in the engine, the motor-fan is considered a disposable unit, it is very cleverly assembled.
Often heaters do not work due to thickened fuel. Characteristic signs are difficulties with starting and spontaneous cessation of combustion during operation. It’s quite easy to deal with thickening. It is enough to fill a separate fuel tank of the heater with diesel fuel and kerosene in a ratio of 1:4 (2 liters of kerosene per 8 liters of diesel fuel). There is no point in “improving” the proportion or working on pure kerosene. This is one of the fastest ways to overheat the heat exchanger.
It is more difficult with heaters that fail due to contaminated fuel. The cause of poor performance may be a clogged fuel filter, which is located in a separate pump at the inlet (tank side). It is strictly not recommended to unscrew the “outlet” of the booster pump. There is a fuel metering system there. But often the matter is not limited to replacing the filter, and you cannot do without completely disassembling the stove.
General signs of malfunction of Webasto air heaters
If a malfunction occurs, it is necessary to check all fuses and plug connectors and be sure to eliminate any defects found.
| Malfunction | Cause | Recommendations for elimination |
| The heater switches off automatically. |
No combustion after 2 starts or flame breakage during operation.
The heater overheats and the operation indicator flashes.
On-board voltage is too low.
Turn off the heater (for at least 2 seconds) and then turn it on again.
Check the air duct for permeability, cool the heater, turn it off (for at least 2 seconds), then turn it on again.
Charge the battery. Turn off the heater (for at least 2 seconds) and turn it on again.
If the measures presented above do not help, the air heater must be sent for diagnostics.
Attention! If the malfunction cannot be eliminated using the above measures, contact a Webasto service center. Do not attempt repairs yourself.
Types of interior heaters by vehicle type
When choosing a heater, it is important to correctly calculate the required power. Many PBX owners believe that the larger it is, the better. However, this opinion is wrong. Unreasonably high heater power will lead to excessive fuel consumption and premature wear of the equipment.
Air heater for passenger car interior
If you need to completely heat the passenger car interior, then it is enough to install a liquid model of an autonomous heater with a power of up to 2 kW. To heat one driver's seat, you can use a “dry hairdryer”.
Air heater for truck interior
The choice of an autonomous heater for a truck depends on the dimensions of the vehicle and the heated area. To heat the driver's seat, you can use an "air"; for a small cabin, a power of 2 kW is sufficient. If the cabin is high and equipped with a berth, then a heater of up to 4 kW will be required, and for heating the cargo compartment - 5 kW or more.
Heater for minibus interior
To heat the interior of a minibus with a passenger capacity of up to 12 seats, a 3 kW heater is sufficient. On larger machines, 4-4.5 kW equipment is installed.
Bus interior heater
For the bus interior you need to choose heaters with a power of 4.5-5 kW
System for facilitating the start of a cold KamAZ 65115 engine
System for facilitating cold engine starting (ECU and pre-heater)
An electric torch device (EFD) is used to facilitate engine starting at ambient temperatures from minus 5 to minus 20 °C.
| Options | Without the use of EFU | Using EFU | With preheater |
| Limit temperature for reliable start-up, °C, not higher | minus 10 | minus 22 | minus 45 |
| Engine preparation time to accept load, min, no more | 8 | 10 | 36 |
| Viscosity (grade) of engine oil, mm/s, (cSt) | 4000 | 6000 | winter, class 8 GOST 17479.1-85 |
| Fuel according to GOST 305-82 | diesel "Z" minus 35 | diesel "Z" minus 45 | diesel "A" |
Checking the functionality of the EFU
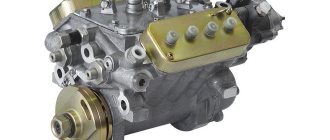
Pre-heater model 15.8106
The preheater model 15.8106 is designed to warm up a cold engine and automatically maintain the thermal state of the engine and cabin, regardless of the operation of the diesel engine.
The heater is operated at ambient temperatures from minus 50°C to plus 65°C with relative humidity up to 80% at a temperature of 15°C.
Technical characteristics of the pre-heater
| Model | 15.8106-01 |
| Heating capacity kW (kcal/h) | 11,6 (10000) |
| Fuel | diesel |
| Fuel consumption, kg/h | 1,25 |
| Rated voltage, V | 24 |
| Operating voltage, V | 20-30 |
| Power consumption (without pump), W | 70 |
| Electric circulation pump | mod.35.3730 |
| Pump capacity at back pressure 0.015 MPa, l/hour, not less | 1600 |
| Rated voltage, V | 24 |
| Power consumption, W, no more | 46 |
The heater is installed on the front cross member of the frame and consists of a heat exchanger 19 (Fig. Pre-heater) and a tilting burner.
The heat exchanger is welded with a “jacket”, inside of which a heated liquid, the coolant, circulates. A combustion chamber with a swirler 20 is inserted inside the heat exchanger. On the outer pipe of the heat exchanger, pipes 24, 25 for inlet and outlet of the heated liquid, pipe 23 for exhaust gases are welded.
A thermal fuse 29 and temperature sensors 30 and 31 are installed on the heat exchanger under the casing, which monitor the temperature of the liquid in the heater system and the vehicle cabin.
Sensor 30 controls the fluid temperature from (48±5)°С to (70±3)°С, sensor 31 - from (40±3)°С to (30±5)°С (maintains the thermal regime in the car cabin).
The thermal fuse turns off the heater when the maximum permissible temperature of the liquid in the heat exchanger is reached (103±5)°C (if sensor 30 fails, there is no water in the system, etc.).
The burner consists of a fan 5, a fuel pump 8, an injector 11, a solenoid valve 9, a flame indicator 15 and two ignition electrodes 12. The burner is used to create a torch and provide the necessary thermal conditions for the heated medium.
A fan with a plastic impeller and a 2 DC electric motor is designed to create air flow.
The 8-gear fuel pump is designed to supply fuel to the injector under pressure. The pump is driven by electric motor 2 through gear 7. Injector 11 sprays the supplied fuel. To increase the reliability of the nozzle, a sintered bronze filter is installed in front of the sprayer.
Electromagnetic valve 9 controls the supply of fuel from the fuel pump to the injector at the command of the control unit, depending on the operating modes of the heater.
The flame indicator 15 is installed on the disk 16 in close proximity to the nozzle and the flame and sends commands to the high voltage source, turning it on and off.
Two ignition electrodes 12 are located in front of the nozzle and ensure ignition of the heater due to a spark between them, formed when high voltage is supplied from the power source 28.
The burner is secured to the heat exchanger with hinged bolts and provides access to its elements during installation and maintenance. The burner is protected by a plastic casing on which is attached a high voltage source 28 and a suction pipe 3 for air intake.
The circulation pump is installed on the front cross member and is designed to pump coolant through the heater.
The connection diagram of the heater to the engine cooling and cabin heating system (see figure) allows for optimal use of the heater's thermal energy by creating various coolant circulation circuits.
When the heater is operating, fuel is supplied to the injector by a pump under pressure. Excess fuel from the fuel pump returns to the heater tank. The fuel supply circuit for the heater is shown in the figure.
Pre-heater model 15.8106
The preheater of this model is used on KamAZ 65115, 6520 and other trucks.
Most modifications of 15.8106 have discrete temperature sensors, with the exception of 15.8106-15 - it is equipped with an analog thermistor.
The PZD is controlled using a unit and a control panel. The pre-heater operates autonomously from the engine, connecting to the battery or fuel system.
Heating occurs in different modes, heating the coolant to certain temperatures.
The control panel has an indicator showing whether the system is working stably. An electronic timer allows you to turn on the heater for a certain time, or until the liquid is heated to the required temperature.
Various sensors detect the voltage in the electrical circuit, and if it is below 20 W, the heater will automatically turn off. At a voltage of 26 W or more, the heater switches to a mode with a maximum temperature of 80°C.
- fuel consumption per hour – 1.6 liters
- voltage – 24 V
- heating capacity – 15 kW
- weight – 15 kg
Webasto Air Top 2000 STC 12/24
Modern air heaters AT 2000 STC are equipped with a MultiControl timer as a control; in the event of a malfunction, error codes are displayed on the timer screen, see the column (Code on the timer) in the table below.
If the Webasto autonomous system is equipped with a switch with a thermostat as a control element, then an error code is issued after the heater is turned off in the form of a flashing operating indicator light on the switch.
After 5 short signals, long pulses are issued - the number of these pulses corresponds to the number in the (Code) column in the table below.
Autonomous air heaters: catalog and prices
- from 20,150 ₽
Aero Comfort 4d 12V
Buy in 1 click
More details
- from 20,150 ₽
Aero Comfort 4d 24V
Buy in 1 click
More details
- from 45,240 ₽
Webasto Air Top 2000 STC 12V
Buy in 1 click
More details
- from 62,000 ₽
Webasto Air Top Evo 40 (petrol) 12V
Buy in 1 click
More details
- from 91,700 ₽
Webasto Air Top Evo 55 12V
Buy in 1 click
More details
- on request
Planar 2D-S (2 kW) 24V
Buy in 1 click
More details
- on request
Planar 2DS (2 kW) 12V
Buy in 1 click
More details
- on request
Planar 44D-GP-S (4kW) 12V
Buy in 1 click
More details
- on request
Planar 44D-GP-S (4kW) 24V
Buy in 1 click
More details
- on request
Planar 4DM-S (3 kW) 12V
Buy in 1 click
More details
- on request
Planar 4DM-S (3 kW) 24V
Buy in 1 click
More details
- on request
Planar 8 DM-S (7.5 kW) 12V
Buy in 1 click
More details
- on request
Planar 8 DM-S (7.5 kW) 24V
Buy in 1 click
More details
- on request
Planar 9D (8 kW) 12V
Buy in 1 click
More details
- on request
Autonomous heater planar error codes
Below we have collected for you all the error codes for all autonomous heaters of the Planar series. With their help, you can preliminarily determine the breakdown and even fix it on your own, but in some cases you may still have to contact us at the service center for a more accurate diagnosis and save your finances from unnecessary expenses. (If you get the error “candle” or “pump”, do not rush to buy them; first you need to make sure that they are the reason.)
Malfunctions that occur during heater operation are coded and automatically displayed on the control panel indicator. In this case, the fault code and the operating mode LED will flash rarely.
! If you did not find your code in this table, then with a high degree of probability, it is not a code, but the firmware version of the remote control (for digital remote controls). In this case, you need to check the power supply to the heater; the firmware version appears immediately after connecting the power.
| Number of LED flashes | Description of the malfunction | Recommended Troubleshooting Methods | |
| 1 | Heat exchanger overheating | Check the inlet and outlet pipes of the heater for free entry and exit of heated air. Check the overheating sensor on the heat exchanger, replace if necessary | |
| 2 | Startup attempts exhausted | If the permissible number of starting attempts has been used, check the quantity and supply of fuel. Check combustion air supply system and exhaust pipe | |
| 3 | Flame interruption | Check the quantity and supply of fuel. Check the combustion air supply system and the exhaust pipe. If the heater starts, check the flame indicator and replace if necessary. | |
| 4 | Glow plug malfunction | Check glow plug, replace if necessary | |
| 5 | Flame indicator fault | Check the flame indicator circuit for an open circuit; the resistance between the terminals should be no more than 1 ohm. If the indicator is faulty, it must be replaced | |
| 6 | Temperature sensor (on the control unit) | Replace control unit | |
| 7 | Fuel pump malfunction | Check the electrical circuits of the fuel pump for short circuits and open circuits, replace if necessary. | |
| 8 | There is no connection between the control panel and the control unit | Check connecting wires, connectors | |
| 9 | Shutdown, high voltage. Shutdown, undervoltage | Check the battery, voltage regulator and electrical supply wiring. The input voltage should not be higher than 30 V (15 V). Check the battery, voltage regulator and electrical supply wiring. The input voltage must be at least 21.6 V (10.8 V) | |
| 10 | Ventilation time exceeded | During purging, the heater is not cooled sufficiently. Check the combustion air supply system and the exhaust pipe. Check the flame indicator and replace if necessary | |
| 11 | Blower motor malfunction | Check the electrical wiring of the air blower motor, if necessary, replace the air blower | |
| 12 | Overheating inside the heater in the area of the control unit (temperature above 55 degrees) | During the 5-minute purge before starting, the control unit has not cooled sufficiently or the control unit has overheated during operation. It is necessary to check the inlet and outlet pipes of the heater for free air inlet and outlet and repeat the start to cool the heater | |
| 13* | Flame failure in the combustion chamber due to voltage drop | Check the battery and electrical wiring. (Voltage sag may occur due to prolonged use of the electric starter). | |
| 14* | Overheating inside the heater in the area of the heated air outlet temperature sensor | Check the heater inlet and outlet pipes for free air inlet and outlet. | |
| 16* | Heater locked** | To unlock the heater, you must contact a service center. | |
| 0 (78) | A flame failure was recorded during operation. | Shown for user information. Check the tightness of the clamps on the fuel line, the tightness of the fuel line, the tightness of the fitting on the fuel pump | |
* - only for air heaters type PLANAR-8DM
Unlocking Planar-8DM. Reset 33 lock codes.
** Attention! If during startup or operation of the heater the “Overheating” is repeated 3 times in a row, the heater will be blocked.
Blocking is carried out upon overheating, regardless of the sensors that recorded errors. In case of blocking, code 33 will be displayed on the control panel.
To unlock the heater, you must first find out what year it was produced: For the first version of heaters produced (01.2014 - 03.2015), the lock can only be reset using a special program installed on the computer or in our service center.
For the second version of heaters produced (03.2015 – current time), the lock can be reset in two ways: 1) Using a special program. 2) On your own.
Algorithm for resetting the lock WITHOUT using a computer:
■ Connect the product to the power source, start the product, wait for code 33 to appear. ■ After the code appears, within 30 seconds you must disconnect the power connector on the harness or disconnect the power from the heater in any other way. ■ Repeat this procedure 3 times in a row.
If you do not disconnect the power connector within 30 seconds, you will need to start the whole procedure over again. After 3 power resets the heater will be unlocked.
Autonomous "Planar" is an air heater developed by Russian specialists, the production of which is carried out in Samara. The model range of these car heaters consists of four devices (Planar 2D, Planar 4DM2, Planar 44D, Planar 8DM), each of which is available in two versions - 12 and 24 Volts. Even in severe frosts, such an installation can ensure optimal air temperature in the car interior. First, we will briefly consider the design and operating principle of the heater, and then we will study all the “Planar” errors (fault codes) and their interpretation.
Video “JSC testing after system installation”
In the video below you can see how the installed interior heating system is tested (the author of the video is Slava Petrov).
A working stove in the car is very good, especially if it’s winter outside. After all, driving a car when it’s cold inside is very inconvenient and sometimes dangerous. But often ordinary standard stoves require large amounts of electrical energy and fuel to operate effectively. To reduce fuel consumption, car owners began to use a 12-volt diesel autonomous interior heater. These devices have a number of serious advantages over standard stoves. One of the advantages is saving battery power and fuel.
Principle of operation
Heaters from this manufacturer operate on the principle of supplying outside air to the heating compartment. When fuel is burned, energy is released that heats the air. Only after this is hot air supplied to the vehicle interior.
To select the optimal power, a special regulator is used with the ability to be fixed in a given position. After the user selects the optimal operating mode, the heater will independently maintain the set temperature.
The basic operating principle of the Planar autonomous vehicle:
DIY installation instructions
To avoid the need for repairs to car autonomous heaters later, most manufacturers initially recommend contacting specialists for installation. Of course, it is better to entrust the installation of such a system for the cabin or car interior to professionals, especially if you are faced with such a task for the first time. But sometimes car owners have to install the AO on their own. This issue is especially relevant for car enthusiasts from small towns, which simply do not have good specialists and, accordingly, the possibility of high-quality installation.
In addition, it is sometimes necessary to install a gasoline or electric 12 or 24 volt battery on your own due to the high cost of installation. However, it is always necessary to remember that car owners are not always able to save money by installing the AO themselves. After all, if you accidentally break at least one fastening of a 12 or 24 Volt electrical joint, this can lead to serious financial costs.
So, in order to independently install a 12 or 24 Volt electrical system in the cabin or interior of the car, you should perform the following steps:
- First of all, in order to correctly install a gasoline, diesel or electric 18-volt JSC, you need to decide on the installation location of the stove heater itself. To do this, you need to find a place in the engine compartment that will be most optimal.
- The next stage of installation of a 12-volt gasoline or electric joint stock will be laying the main line. If this is a 12-volt electric version, then it can be powered from a cigarette lighter or battery. Accordingly, it is necessary to connect the device’s power to a 12-volt battery or cigarette lighter. If we are talking about a fuel option, then a line should be connected to the stove heater, which can come directly from the tank or the gas pump. If necessary, you can use a branch in the engine compartment.
- Next, an electrical connection must be made to activate the control unit. It is advisable to place the unit itself in the vehicle interior. Please note that the unit should not be exposed to moisture and high temperatures, as this will negatively affect its functionality. For connection, you can use an unloaded circuit protected by a fuse. Using a fuse or relay is important because power surges can cause the control unit to burn out. But, as practice shows, blocks from well-known manufacturers, as a rule, last quite a long time.
- Then you need to run air ducts from the device into the interior of the vehicle. For this, as a rule, the lines of the car's standard stove or other holes are used.
- Make sure that there are no gaps at the entrance of the heating pipes, as this will lead to cold air flow into the cabin. In order to get rid of gaps, use the sealing elements that should be included in the kit.
- After the additional interior heater has been installed, it is necessary to check its functionality. It is advisable to do this before you begin assembling all the engine compartment components. Turn on the stove and, in accordance with the operating instructions, check the operation of the system in all modes. More details about the installation of such a system are described in the video (the author of the video is Timur Safin).
Safety precautions
One of the main aspects of using a Planar heater is compliance with safety regulations. Let's look at the most significant rules:
Anyone can install a planar heater on their own. However, for greater confidence in its subsequent reliability and performance, it is recommended to entrust this process to a professional. The cost of services is relatively low and significantly lower than the cost of possible restoration or repair.
The considered device for heating cars in winter or small, but always well-ventilated rooms (gatehouse, change house, etc.) is in demand. However, despite the many benefits, cost can be a bit of a barrier. On average, prices for various models start from 18 thousand rubles.
As mentioned earlier, you can install heating equipment yourself. In order to save time and for greater reliability, you should contact a specialist, whose service cost starts from 5-6 thousand rubles.
When transporting various cargoes, as well as when operating special equipment, emergency situations often arise in winter in which it is necessary to warm up the cabin or trailer, various components and structures. An excellent solution for such situations is the Planar autonomous vehicle. This is a diesel heater that can quite effectively provide heat to the cabins of trucks, buses, and trailers. This is a very relevant device for truck drivers who have to work in extreme northern conditions at low temperatures.
How to install a heater
The installation process is a simple operation. It is necessary to find a place for the device, connect the system to the fuel line, then make pipelines for air intake and exhaust gases. The latter will go outside. Then all that remains is to connect the electronics and electrical wires.
It is possible to install an autonomous interior heater yourself. To do this, you do not need to contact specialists. However, there will be no guarantee for installation either.
Fault codes Planar 2D-12-S / 2D-24-S
| Code | Malfunction | Reason for error |
| 01 | Increased heat exchanger temperature. | The temperature sensor sends a signal to turn off the autonomy. The heat exchanger in the area where the sensor is installed has reached a temperature of over 250ºС. |
| 02 | Possibility of overheating based on temperature sensor. Its temperature exceeds 55°. | Before starting, during purging for 5 minutes there is not enough cooling or the control unit overheats during operation. |
| 05 | Sensor error. | A break in the electrical wiring or a short circuit to ground (housing). |
| 06 | Error in temperature sensor in control unit. | Failure of the temperature sensor (located in the control unit, replacement is not possible). |
| 09 | Glow plug problems. | Broken or short circuited wiring, failure of the control unit. |
| 10 | The electric blower motor does not reach the required speed. | Electric motor failure. Lack of lubrication in the bearings or contact of the impeller with the volute in the supercharger. |
| 12 | Shutdown, voltage exceeds 16 V (above 30 V for 24 V device). | Failure of the battery or voltage regulator. |
| 15 | Shutdown, voltage below 10V (below 20V for 24V device). | Failure of the battery or voltage regulator. |
| 13 | The device does not start after two attempts. | There is no fuel in the tank. |
The quality of the fuel does not meet the conditions of use in cold weather.
The air intake or exhaust pipe is dirty.
Poor heating of the glow plug, failure of the control unit.
The impeller is in contact with the volute in the air blower, due to which insufficient air is supplied.
Contamination of the hole in the combustion chamber (diameter - 2.8 mm). Contamination of the spark plug grid or incorrect installation in the fitting (not all the way).
There is no connection between the control unit and the remote control. The remote control does not receive information from the unit.
Gas heater
This group of equipment operates on liquefied gas. Due to its combustion, a special fan is activated. The latter ensures natural air circulation processes in the cabin. The air is heated to certain temperatures. To make this process faster, many devices have additional fans.
These devices can operate even if the engine is turned off. The device also does not require electrical energy, which cannot be said about a standard stove. So, even if you need to stand in one place for a long time, the battery will not run out, and the driver will not freeze.
Among the disadvantages is the ability to heat only the interior. On what car can such an autonomous interior heater be installed?
Features and benefits
The “Planar” autonomous vehicle is manufactured in Samara at the “Advers” enterprise. The company is engaged in the production and sale of various climate control equipment, which is in great demand in Russia. The main advantage of the company's products is affordable prices and high quality equipment.
Errors Planar 4DM2-12-S / 4DM2-24-S
| Code | Number of LED flickers | Problem | Reason for error |
| 13 | 2 | The device does not start after two attempts. | There is no fuel in the tank. |
The quality of the fuel does not meet the conditions of use in cold weather.
The air intake or exhaust pipe is dirty.
Poor heating of the glow plug, failure of the control unit.
The impeller is in contact with the volute in the air blower, due to which insufficient air is supplied.
Contamination of the hole in the combustion chamber (diameter - 2.8 mm). Contamination of the spark plug grid or incorrect installation in the fitting (not all the way).
Autonomy errors Planar 44D-12-GP-S / 44D-24-GP-S
| Code | Malfunction | Reason for error |
| 01 | Exceeding the permissible heat exchanger temperature. | The temperature sensor sends a signal to turn off the autonomy. The heat exchanger in the area where the sensor is installed has reached a temperature of over 250ºС. |
| 02 | Possibility of overheating. Overheating near the control unit in the heater itself. | During purging, there is not enough cooling or the control unit overheats during operation. |
| 04 (06) | Error in temperature sensor in control unit. | Failure of the temperature sensor (located in the control unit, replacement is not possible). |
| 05 | Flame indicator is broken. | A break in the electrical wiring or a short circuit to ground (housing) of the indicator. |
| 08 (29) | The flame breaks out during operation. | Leaks in the fuel supply line, failure (wear) of the fuel pump or flame indicator. Contamination of the air supply or gas exhaust pipes. |
| 09 | Glow plug problems. | Broken or short circuited wiring, failure of the control unit. |
| 10 | The electric blower motor does not reach the required speed. | Electric motor failure. Lack of lubrication in the bearings or contact of the impeller with the volute in the supercharger. |
| 12 | Shutdown, voltage exceeds 16 V (above 30 V for 24 V device). | Failure of the battery or voltage regulator. |
| 15 | Shutdown, voltage below 10V (below 20V for 24V device). | Failure of the battery or voltage regulator. |
| 13 | The device does not start after two attempts. | There is no fuel in the tank. |
The quality of the fuel does not meet the conditions of use in cold weather.
The air intake or exhaust pipe is dirty.
Poor heating of the glow plug, failure of the control unit.
The impeller is in contact with the volute in the air blower, due to which insufficient air is supplied.
Contamination of the hole in the combustion chamber (diameter - 2.8 mm). Contamination of the spark plug grid or incorrect installation in the fitting (not all the way).
Oxidation or corrosion of contacts in the block.
Leaks in the fuel supply line, failure (wear) of the fuel pump or flame indicator. Contamination of the air supply or gas exhaust pipes.
* The new error code is indicated in parentheses.
Types of interior heaters
All modern interior heaters are classified by type into:
- air;
- liquid;
- gas;
- electric.
Interior air heater
The first representatives of autonomous interior heaters were air heaters with the operating principle of a conventional hair dryer. The air flow is passed through the heating element and supplied to the cabin by fans. In older models, the function of the heating element was performed by a metal spiral, then it began to be replaced with ceramics, which made it possible not to dry out the air and maintain normal humidity.
Interior liquid heater
The heaters are integrated into the overall car system: the power is connected to the standard fuel line, and the electrical components are connected to the car’s electrical circuit. When the device is turned on, the liquid in the cooling system is heated and passed through the engine and radiator. As the desired temperature is reached, the fan turns on and warm air enters the cabin. The device automatically reads readings from temperature sensors, regulates the pumping of refrigerant and the intensity of the fan.
The interior liquid heater can be started manually or automatically according to a precisely specified switching time. The remote control device included in some models allows you to issue commands from a distance of up to one kilometer.
Gas interior heater
The operating principle of gas interior heaters is similar to liquid models, with the difference that they are not connected to the vehicle’s fuel system. Propane is used as fuel, which is supplied by a separate reducer. Gas enters the chamber through a nozzle, which sprays it. Automation regulates pressure, injection force and temperature indicators.
In terms of efficiency, gas models are not inferior to liquid ones, and in some characteristics they are superior to them.
Electric interior heater
Heater models operating from a household AC power supply of 220 V cannot be classified as autonomous. It is convenient to use such devices for pre-heating the engine and heating the interior in parking lots equipped with sockets, however, if the stop occurs in an open field or just in the middle of the street, then an electric interior heater is of no use.
Error codes Planar-8DM-12-S / 8DM-24-S
| Code | Description | Cause of malfunction |
| 01 (1) | Exceeding the permissible heat exchanger temperature. | The temperature sensor sends a signal to turn off the device. The heat exchanger in the sensor installation area has reached a temperature of over 250ºС. |
| 02 (12) | Possibility of overheating. Overheating near the control unit in the heater itself. | During purging, there is not enough cooling or the control unit overheats during operation. |
| 04 (06, 6) | Error in temperature sensor in control unit. | Failure of the temperature sensor (located in the control unit, replacement is not possible). |
| 05 (5) | Flame indicator is broken. | A break in the electrical wiring or a short circuit to ground (housing) of the indicator. |
| 7 (17) | Break in the wiring of the overheating sensor. | Failure of the sensor itself. Oxidized contacts in the block. |
| 08 (29, 3) | The flame breaks out during operation. | Leaks in the fuel supply line, failure (wear) of the fuel pump or flame indicator. Contamination of the air supply or gas exhaust pipes. |
| 09 (4) | Glow plug problems. | Broken or short circuited wiring, failure of the control unit. |
| 10 (11) | The electric blower motor does not reach the required speed. | Electric motor failure. Lack of lubrication in the bearings or contact of the impeller with the volute in the supercharger. |
| 11 (18) | Damage to the heated air temperature sensor (supply) | Mechanical defect. Oxidized contacts in the block. |
| 12 (9) | Shutdown, voltage exceeds 16 V (above 30 V for 24 V device). | Failure of the battery or voltage regulator. |
| 15 (9) | Shutdown, voltage below 10V (below 20V for 24V device). | Failure of the battery or voltage regulator. |
| 16 (10) | Ventilation is too long. | During purging, the heater temperature did not drop to the required value. |
| 17 (7) | Fuel pump error. | Open or short circuit in the electrical circuit of the fuel pump. |
| 13 (2) | The device does not start after two attempts. | There is no fuel in the tank. |
How to choose an autonomous heater for your car
The car market offers a large number of additional heaters of various configurations and prices. Car owners are always faced with the question of how to choose an autonomous heater for their car in order to get the most practical device at a reasonable cost. Much depends on how often you drive in winter, and how much time you spend in open parking lots or unheated garages. In addition, there are many other criteria:
- climate of the region;
- dimensions of the car and dimensions of the heated area;
- design features of the machine;
- the type of fuel the vehicle runs on;
- current-voltage characteristics of the on-board electrical circuit, etc.
We must not lose sight of such factors as the price of the device, taking into account the profitability of use and payback period. In this case, it is better to take equipment from well-known manufacturers with good reviews.
Specifications
Let's consider the popular model 4DM 12 24. This is also a Planar autonomous vehicle. Its price is 19,400 rubles. The device is a diesel autonomous heater. The device has the following technical characteristics.
Thus, the level of heat production is 3 kW in active mode, and 1 kW in low mode. Fuel consumption in active mode is 0.36 l/h. In low mode, the device consumes up to 0.12 l/h. Power consumption – up to 30 W. Injected air – 120 m3/h. The supply voltage is 12 and 24 V. All these characteristics were measured at rated supply voltages and a temperature of 20 degrees. There may be a slight measurement error.
Preheater 14TS-10
PZD 14TS-10 prepares the engine for operation by heating the coolant.
This type of preheater has several heating modes:
- full
- average
- small
And also 2 heating programs:
- pre-launch
- economical
In full mode, the pre-start program warms up the liquid to 70°C, in economy mode – up to 55°C. After reaching the highest temperature, the PZD switches to the “medium” mode, in which the liquid is heated to 75°C, and then to the “small” mode: in it the maximum temperature of 80°C is reached. Next, the heater goes into cooling mode.
- Heater weight – 10 kg
- Power consumption – 132 W (full) / 101 W (medium) / 77 W (small)
- Fuel consumption in different modes – 2 l/h (full), 1.2 l/h (medium), 0.54 l/h (small)
- Heating capacity – 15 kW/ 9 kW/ 4 kW
- The fuel used for work is diesel, the coolant is antifreeze or antifreeze.
- The adjustment is carried out automatically, remotely using a control unit.
Electrical diagram
The heater operates from a battery and is also powered by diesel fuel. It is the electrical circuits of the heater that provide automatic and remote control through the unit and control panel.
When overheated, the system automatically turns off. Also, when the voltage decreases to 20 W or increases to 30 W, the preheater turns off. In addition, the PZD switches off after two unsuccessful startup attempts; If the combustion stops during operation, the system turns off.
Connection diagram for the electrical circuit 14TS-10:
Summary
Planar car heaters are a good choice for those who need to provide additional heating for the cabin or covered body of trucks or passenger cars. Please note that to achieve the required results, correct installation of the battery and timely maintenance of the device are extremely important. The price of heaters starts from 19.5 thousand rubles.
This section contains a complete list of error codes for “samarka autonomous cars” Planar Teplostar
How to determine if a stand-alone oven is faulty
1) Check the fuel level and quality. 1) Visually assess damage to wires, hoses, presence of parts (pump, fuel tank), etc. 3) Calculate error codes for models without a display 4) Carry out repairs according to the documentation
There may be other malfunctions that are not diagnosed by the control unit, for example: loss of tightness of the heat exchanger (burnout), or burnout of sealing gaskets, or a decrease in thermal performance as a result of carbon formation on the inner surface of the heat exchanger. The listed faults can be detected visually.
Autonomous vehicles on KAMAZ without a control unit
Planar 44d does not start. Starting an autonomous system without a boiler.
D5WSC starting without control unit
Heater planar 4dm2 24
Connecting the control panel to the Planar 2D heater. STO Tim service.
Control unit Planar 14TS-10 24V (thermocouple flame indicator)
KAMAZ 65115
Launch of the Autonomous Civil Code.
Launch of PZD
Glitch of the Planar 44D autonomous system or how to check the spark plug on the Planar heater.
central locking for Kamaz 2
Also see:
- KAMAZ camshaft gear puller
- Traction KAMAZ 5320
- What engine can be installed on KAMAZ 4310
- KAMAZ head office
- Tuning KAMAZ cabin itself
- Concrete mixers KAMAZ 65115
- KAMAZ 6520 frame assembled
- Volume of liquids of a KAMAZ vehicle
- KAMAZ in flight video
- KAMAZ Batyr dump truck
- Collision between KAMAZ and a passenger car
- KAMAZ in a corn field video
- We accept KAMAZ for recycling
- How to determine the engine model on KAMAZ
- Clutch KAMAZ 54115
Home » Video » Autonomous vehicles on KAMAZ without a control unit
kamaz136.ru
Planar heater: the main advantages of its use
Among car owners, especially truckers who spend most of their time on the road, the planar heater deservedly receives a lot of positive feedback. Domestic development, in comparison with imported analogues, is reliable, but less expensive.
A large number of positive characteristics include:
Planar heaters are widely used in vehicles used for transporting medicines, drinks, animals, process liquids, etc. They are actively used by drivers of cougars, cranes and other special equipment.
To use the Planar heating unit, there is no need to start the car engine. This makes it possible to continue to use it during the night.
There are several models offered on the market, each of which is characterized by its own characteristics. However, the most popular among them is the Planar-4dm 24 model. Its installation is possible not only in large vans, but also in change houses, booths, etc. During operation, the heating device makes virtually no noise.
What is a cabin heater?
One of the main problems of operating a car in winter is difficulty starting the power unit. In cold weather, due to the high viscosity of the oil, the engine starts poorly and requires pre-heating. The standard heater cannot cope with this task, since it turns on only when the power unit is running.
It is also irrational to use engine-powered stoves during long periods of parking. To do this, you need to start the engine, which entails high fuel consumption: even at idle, the power unit of a cargo vehicle similar to KamAZ “eats” about 8 liters of fuel per hour. In this case, the constant operation of the piston group is also unjustified, which leads to its premature wear.
Another aspect of the problem is the environmental component. If the driver has to stop in the city or in a public parking lot, the noise of the running engine and exhaust fumes will cause a lot of dissatisfaction among others.
For Russian drivers, all these issues are most relevant, because in most regions the cold period occurs for more than 6 months a year. What can we say about the Far North, where during the times of the USSR and cheap “state” diesel fuel, diesel engines were practically not turned off in winter? Pre-heating installations, which, in particular, were installed on military equipment, helped to prevent such a barbaric attitude towards cars to some extent. However, they did not solve the problem of heating the cabin.
In warmer Western Europe, there were significantly fewer problems with winter operation of cars, but it was from there that the trend came to install autonomous heaters on cars. Germany has achieved particular success in this matter, where the law prohibited turning on the engine while parked. And even though it is customary for German truckers to spend the night in comfortable motels rather than in trucks, and winters are much milder, a few hours spent in a windy warehouse or customs office made us think about an alternative solution to the problem. This is how the idea of heating with an air dryer came about. In the USSR, similar devices were manufactured by the Shadrinsky Automotive Aggregate Plant and installed on Zaporozhets. However, they were extremely capricious, unreliable and often caused fires. For the most part, domestic drivers continued to use handicraft inventions such as transferring heat to the cabin via copper wire wound around the exhaust pipe. They learned about high-quality interior heaters only during the period of mass import of foreign cars, including minibuses, into the country. These devices operated autonomously in economical mode and provided heating for a long time.