In rural life, a tractor is an important piece of equipment. It is especially necessary when farming. Without him it’s like without hands. Bags of grain, harvested hay, potato harvest, or simply building materials - all of this must be transported in some way. It is very difficult to move such loads manually, but a small mechanical assistant can handle this quite easily. Today, buying such a unit for the farm is an expensive pleasure for many. It will be much easier and cheaper to assemble such a small tractor on tracks with your own hands at home. Moreover, the parts for it may have long been lying forgotten in the household yard and waiting in the wings.
Step-by-step instructions on how to make a homemade crawler tractor
Many landowners and small farmers cannot imagine farming without mechanized equipment. Transporting cargo and building materials, processing and leveling the soil, clearing the area of debris and snow - these agricultural works become more efficient and convenient with the presence of a self-propelled machine - a tractor. In a unit with mounted and trailed equipment, the list of procedures performed increases, while the working time is significantly reduced, the technological process is shortened, and productivity increases.
The use of caterpillars in homemade products is found in rural areas more often than wheeled counterparts, which is due to their greater maneuverability and power of movement in any area.
Tractors on agricultural machinery markets are expensive, and not every farmer can afford them. Therefore, the best solution is to make a homemade crawler tractor yourself.
Preparing to create a homemade mini tractor
The process of creating a homemade mini tractor begins with drawing up a drawing, a kinematic diagram of the future “plowman” and preparing the necessary materials, tools, and equipment. If you have the skills, you can develop a diagram yourself to demonstrate the mechanisms and components of the tractor; if not, find a suitable option on the Internet or use the example presented here.
As for the parts and components involved in the modernization of the walk-behind tractor, you can use a purchased factory kit to convert it into a mini tractor. But this option is not suitable for those who want to, for example, break a 4x4 and at the same time save a lot.
So, to create a homemade tractor you will need:
- Set of tools;
- Welding equipment;
- Drill with a set of drills;
- Metal pipes, channels;
- Fasteners, hardware (bolts, nuts);
- Grinder, discs for working with metal.
Also, in order to make a tractor with your own hands, you will need two suitable wheels, a hitch, a driver’s seat, a steering mechanism, pedals and, of course, a walk-behind tractor with sufficient weight and power. It is better to opt for a heavy-duty unit with a diesel engine (the Zubr, Neva, Agro, and Scout models are good options). This will make it possible to obtain, as a result of the alteration, a home-made, but productive mini-tractor capable of effectively performing various agricultural operations. You will probably want it to perform not only agricultural functions, but also be able to pull a trailer.
The weight of the selected unit must correspond to the condition of the soil on which it is planned to use the homemade product. If it is compacted and dry, then the future mini tractor is unlikely to cope with the tasks assigned to it. Therefore, the harder the soil, the heavier the walk-behind tractor will be needed. And the power of its engine should be correlated with the area of the land on which agricultural work will be carried out using a motor tractor. So, the larger the plot, the higher this parameter should be.
Step-by-step production
The process of making a homemade mini tractor on caterpillar tracks is not complicated. Often craftsmen make it based on an old walk-behind tractor by installing a special adapter. There are also designs whose components are completely assembled with your own hands.
Before starting work, you should prepare the necessary materials and tools, calculate the traction force, dimensions, use them to draw up a kinematic diagram of the unit and design drawings.
To improve theoretical skills and knowledge in engineering mechanics, experts recommend reading technical literature, using the Internet, and reading the operating manual for welding equipment.
The performance indicators of a homemade caterpillar mini tractor differ little from factory models, the costs of their creation are minimal, especially in cases of using ready-made components, hydraulic connectors and adapters from faulty equipment.
The set of mechanisms, materials and necessary tools is as follows:
- welding machine;
- consumables - electrodes, wire, gas, oxygen;
- electric drill with drills;
- wrenches and screwdriver;
- Bulgarian;
- discs for cutting metal;
- fasteners;
- rolled metal for the frame;
- lubricants;
- primer and paint.
Working units are made separately and assembled. When assembling, the drawings of each part must be checked against the manufactured mechanisms.
Frame and cab
The stability of the entire structure depends on the strength and rigidity of the frame, because All mechanisms and components are installed on the base.
The frame is a welded base consisting of transverse cross members and longitudinal spars. Professionals make 3-stage spars and weld them from sections of lightweight steel channel No. 10. The front traverses are made from channels No. 12, the rear ones - No. 16.
To increase stability, 5 mm gussets made of “troika” steel are installed at the inner corners of the front axle brackets. 8 mm steel plates are attached to the side members at the front, securing the structure to the rear axle and the hitch bracket, and steel running boards are welded to the sides. 15 M12 mounting holes are drilled on the frame at the location where parts and assemblies are installed according to the drawings, and the possibility of mounting the engine and seat is provided.
2 welded bushings made of 20 mm St3 are mounted in the front traverse, and a steering column bracket made of steel strip with a cross-section of 8x70 mm is installed in the rear cross-beam.
Then the road wheels and wheelsets are attached to the base.
If desired, a homemade tracked vehicle can be made with a stainless steel body, which will protect the driver and machine mechanisms from dirt and external mechanical factors.
Engine and electrical equipment
For a mini tractor, an engine is selected that meets the requirements for power and torque. A diesel 4-cylinder power unit of at least 12 liters is most suitable. With. with water cooling. To increase technical performance, you can use a more powerful motor.
Electrical equipment is connected according to the electrical diagram. The battery is built under the seat of the car in a special box. Headlights, side lights, and brake lights are optional and are installed to the extent possible and if desired by the technician.
Chassis and brakes
The movers are installed on both sides of the frame. The tractor frame is connected to the road wheels using a suspension that transmits gravity and ensures a smooth ride when turning and driving on uneven surfaces. The role of rollers is played by wheels that can be removed from a garden cart; tires with deep tread are suitable instead of tracks.
The module can be equipped with disc brakes, while the car is equipped with 2 axles; the presence of clutches and planetary gears is optional. Experts also install band brakes on tractors. They are distinguished by their simplicity and excellent compatibility with all mechanisms.
Installation of the chassis
Upon completion of installation, the mounting devices are installed on both axles (front, rear), and the wheels are already on them. The ones that came with the walk-behind tractor (Scout, Zubr, Neva) are usually attached to the rear axle, and wheels from a passenger car or some kind of agricultural machinery are mounted to the front axle. It is important that they have a deep tread - this will make the homemade mini tractor a high-cross-country vehicle with improved wheel grip on the ground.
To equip a homemade tractor with a full-fledged front chassis, they buy hubs assembled with a brake system and preferably complete with steering rods, steering wheel, gearbox and steering column. They can also be remade by removing them from used passenger vehicles.
The front wheels are attached to the mini tractor in this way:
- Select a metal profile pipe that matches the thickness of the front axle of a homemade tractor;
- Wheel hubs are attached to the ends of the profile;
- The structure with hubs is fixed to the front frame directly in the center;
- Mount the steering rods, and then align them with the steering gear;
- The gearbox is fixed to the frame;
- Install the steering rod and steering wheel;
- Adjust the steering column.
Design features
Making a caterpillar mini tractor with your own hands has the following features:
- It is better to install brake mechanisms on the front shafts.
- The machine should not be high, because... the center of gravity shifts, which leads to the module tipping over.
- The second driven axle is increased by 1-2 cm to increase stability.
- In the absence of a differential, a rotating extension is used for greater maneuverability.
- The wheelbase can be extended. To do this, a bushing is inserted onto the drive shaft, which is purchased ready-made or machined yourself.
- The tracks of a homemade mini tractor do not turn simultaneously in one direction.
Review of famous models
The most common tracked mini tractors have their own characteristics.
Countryman
It has the following features that allow it to become one of the most loved models:
- high reliability and ease of use;
- availability and full compatibility of all spare parts;
- presence of a belt drive;
- ease of transportation;
- permeability;
- ease of use;
- relatively affordable price;
- efficiency;
- the presence of a nominal rotation speed of 2300 m2 per hour;
- the engine is driven by 2 belts and cooled by an air system;
- weight – 438 kg.
Uralets
Specifics of the Uralets tractor:
- engine power 12 horsepower;
- weight – 1030 kilograms;
- the presence of a ring-tracked base, thanks to which the unit, if necessary, can be converted into a wheeled one;
- This tractor model is equipped with a first-class shaft and has a three-point device.
This is interesting . This tractor is equipped with a large hydraulic motor. But, despite this, it is completely interchangeable and compatible with most power plant models.
Build process
Before assembling all mechanisms, take into account the operating principle of the unit:
- Torque from the engine is supplied to the gearbox through the clutch.
- From the gearbox, rotation is transmitted to the differential, which distributes it between the axle shafts.
- The drive wheels start moving and transmit it to the caterpillar track, which moves the module.
- The tractor is turned like this. One axle shaft is braked. The differential system transmits torque to the second axle shaft. The first track stops, while the second track continues moving.
The assembly algorithm for homemade tracked units is as follows:
- assembly of frame elements into a single structure;
- installing the engine, connecting it to the gearbox;
- placement of the brake system and differential;
- connection of controls, driver's seat;
- assembly of caterpillar tracks.
After assembly, the working condition of the components is checked, the module is painted, the parts are lubricated, and the machine is run in.
Design and principle of operation
A small tractor on tracks may seem like a daunting device. But that's not true. Its design includes the following - rather complex - mechanisms.
- The frame is where the main load falls. It has 2 spars and 2 traverses (front and rear).
- Power unit (engine). A very important detail, since the operation of the tractor depends on it. The best diesel engines for this technology are four-cylinder, water-cooled, and 40 horsepower.
- Bridge. For mini-tractors manufactured by specialized companies, this part of the machine is quite reliable and of high quality. If you manufacture the unit yourself, you can take the axle from any Russian-made car. But the best way is from a truck.
- Caterpillars. The tractor on a caterpillar chassis has 2 varieties: with steel tracks and rubber tracks. Steel tracks are a more common option, but rubber tracks often have roller wheels from which the tracks can be removed and ridden on. That is, it becomes possible to move a little faster on asphalt.
- Clutch, gearbox. Necessary for setting the mini-tractor in motion.
As for the operating algorithm of such a machine, it is impossible not to mention that, in essence, it does not differ from the procedure of an ordinary caterpillar tractor. The only difference here is the size of the device and a simpler reversal system.
- When starting, the engine transmits torque to the gearbox, after which it, entering the differential system, is distributed among the axes.
- The wheels begin to move, transmitting it to the tracked belt mechanism, and the machine moves in a given direction.
- The mini-tractor turns like this: one of the axles slows down, after which the torque transfers to the other axis. Because the caterpillar stops, the second one begins to move, as if bypassing it - and the tractor makes a turn.
Advantages and disadvantages
A mini tractor on tracks with your own hands has a number of advantages:
- high cross-country ability;
- maneuverability;
- good grip on the ground;
- low soil deformation;
- increased traction force;
- smooth running;
- low manufacturing costs.
The disadvantages of tracked vehicles include:
- reduced speed;
- high fuel consumption;
- inability to move on an asphalt road;
- high noise level.
Caterpillars
In fact, there are only two options: either metal, high-torque and heavy. Either rubber
Gentle towards asphalt and soil, if it is important for you not to trample it down to the same asphalt state. Rubber tracks are not inferior to metal tracks in terms of reliability, although in terms of cross-country ability they may demonstrate a lower degree of traction with the soil surface.
How to make homemade caterpillars? In fact, there are detailed instructions online and, of course, drawings. But here we can say that the simplest option is to use a design with roller wheels. The size of these wheels should be correlated with the size of the mini tractor itself.
Homemade caterpillars: do-it-yourself mini tractor - tractor drawings
Transporting various construction materials, bags of potatoes and grain - all these are familiar and everyday tasks for a rural resident, with which a caterpillar mini tractor can help him.
However, purchasing a new mini tractor in a specialized store can cost quite a significant amount, which may put you off somewhat from such an idea. In this case, the optimal solution would be to construct a mini tractor on tracks with your own hands, using available tools and materials.
This will not only help you save your money, but will also become a fun activity for a real owner and man.
Making a tractor on tracks
A caterpillar tractor is an integral piece of equipment in a farmer’s work. With its help, you can plow tens of hectares of fertile soil, as well as transport various loads. Now you will learn how to make a tractor on tracks with your own hands.
First you need to make the tracks; read the detailed process of making them above. Next, using a welding machine, begin welding the structure, which will be the basis for the tractor. It can be made from metal plates, beams, slats and other metal elements.
We smoothly approach the cabin. It can also be made by welding metal structures and fixing them with construction bolts for greater strength.
As for the engine, the most suitable option would be a diesel engine with at least 14 horsepower.
Application of a caterpillar mini tractor
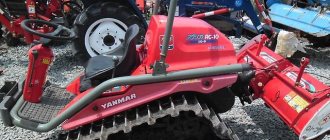
The use of a caterpillar mini-tractor, as well as the mini-tractor Uralets, Kubota, Bulat 120, Yanmar, Belarus 132n, Scout on your farm significantly expands the owner’s capabilities in terms of carrying out a certain type of work.
In addition, if a fastening is provided on such a unit, then additional equipment can be attached to it, which will further expand this list of works. In general, the following types of work can be carried out using a caterpillar mini tractor:
- loosening land holdings, as well as digging beds;
- fertilizing the soil by spraying various additives into the soil;
- harvesting and lawn care;
- cleaning up various garbage;
- clearing the area of snow;
- transportation of various goods, etc.
As we can see, with the help of this unit it is possible to carry out almost all work typical for rural areas and beyond.
It would also be incorrect to say that this unit can only be used in agriculture - the use of a caterpillar mini tractor in construction completely refutes this.
For more information about a homemade caterpillar tractor, watch the video:
Engine and hydraulic installation
The most profitable option for converting a walk-behind tractor into a homemade tractor is considered to be a single-cylinder water-cooled diesel engine - this is usually installed on Chinese walk-behind tractors of the Scout, Zubr and Russian Neva brands. A single-cylinder diesel engine is economical, so operating a mini tractor based on it will not be expensive. It is typically placed on the front of the frame, allowing the small tractor to maintain optimal balance when operating with additional tools. A fastening system is installed at the location of the motor, which is best made “floating” (sliding) to simplify the adjustment and tension of the belts.
The transmission of force from the engine to the rear wheels of a homemade tractor is organized using a belt drive. The PTO transfer case, like the gearbox, can be used from a decommissioned GAZ-53 car. The homemade power unit is mounted in such a way that the PTO pulley is located in the same plane as the pulley located on the rear axle of the mini tractor. At the same time, they mark out a place for the clutch pedal. The belt drive is covered with a protective cover to avoid slipping during operation and to make its service life longer.
After completing the main work, a hydraulic lift is installed on a homemade mini tractor with an engine from a walk-behind tractor. The hydraulic conversion kit must include an oil pump, oil reservoir, hydraulic cylinder and distributor. All components of the system are connected by flexible oil-resistant hoses. It is advisable to make the hydraulics in a floating mode - this will ensure full operation of the motor-tractor hitch.
An inexpensive tractor for the price of a walk-behind tractor for only 150 thousand! - Order here.
For a large selection of attachments that are also suitable for homemade tractors, see the link.
The entire range of walk-behind tractors (Scout, Ugra, Neva, etc.) - https://garden-shop.ru/motobloki.html
Then the driver’s seat is installed, as well as headlights and dimensions if the mini tractor is planned to be driven on roads. They will ensure safety when operating vehicles at night and will allow you to avoid problems with demanding road patrol officers.
How to make it yourself
A homemade caterpillar mini tractor is a structure consisting of various working units. Each such unit is manufactured separately, therefore, consideration of the mini tractor will consist of a description of its components.
This part is decisive, because the stability of the entire structure will depend on its strength, since the rest of the components are attached to the frame. To make the frame we will need a welding machine, a pair of traverses and two spars.
The design of the homemade unit contains a spar consisting of several stages - the outer parts consist of a channel, and the inner parts are made of a square pipe.
Advantages and disadvantages
In general, a home-made tracked mini tractor is, in essence, a smaller copy of its “big brother” - a tracked tractor. Accordingly, it will have similar advantages and disadvantages as its larger counterpart.
Main advantages:
- higher traction rates than wheeled counterparts;
- sufficient smoothness even in the most difficult areas of the territory;
- caterpillar analogues do not deform the soil so much during their movement;
- high cross-country ability, many times greater than that of the same wheeled mini tractors.
- Manufacturing a homemade unit can significantly save money.
The disadvantages include the following:
- relatively low speed compared to wheeled mini tractors;
- high fuel consumption;
- inability to move on asphalt;
- tracked mini tractors are quite noisy when performing work.
Main pros and cons
- The advantages of tracked vehicles for farming or homesteading include:
- a wide range of tasks performed: weeding, sowing, cultivation, plowing, mowing grass, removing garbage, leaves and weeds, clearing snow;
- the presence of increased traction, achieved due to the presence of tracks;
- stable and smooth running of the compact tractor, since, thanks to the tracks, stability and high maneuverability of the tractor are achieved even on bad roads;
- low pressure on the soil, due to which it retains its structure, this is very important during spring plowing;
- caterpillars leave few traces;
- the tractors are repairable, most spare parts are compatible with them;
- ChTZ devices are easy and simple to operate.
The relative disadvantages of such machines include:
- low speed: even the most advanced tractor cannot move at a speed of over 10 kilometers within an hour;
- this machine consumes a large amount of fuel;
- during operation, the caterpillar mini tractor makes a lot of noise;
- A mini-tractor with tracks cannot be used on roads or highways.
Additional Tips
Making a homemade caterpillar mini tractor is a rather complex process, so it is a good idea to follow certain tips that will help with assembly.
Among the main recommendations are:
- At the initial stage, even before assembling the unit, it is best to reflect the future mini tractor on paper by making a detailed drawing indicating the exact parameters and dimensions.
- You need to make sure that you have the necessary tools - an angle grinder, a welding machine, a drill, etc.
- When assembling a caterpillar mini tractor, you need to carefully tighten all fastening connections. Although the design looks rather cumbersome, it requires a certain amount of frugality, because assembling it yourself is a rather specific process.
All-terrain vehicle tracks
As a rule, tracks for homemade all-terrain vehicles are made from high-strength conveyor belt, which lends itself well to various types of deformation while driving. It does not require special care; all you need is to clean it from dirt from time to time.
So, let's now talk more about creating caterpillars. For work you will need the following materials:
- Bolts and nuts of various shapes and sizes.
- Profiled pipe with cross-section.
- Massive fittings.
- Conveyer belt.
You should also have the following tools in your arsenal:
- Powerful drill.
- Welding machine.
- Big hammer.
- Universal set of wrenches.
- Track pressing machine.
Based on the size of the track, you need to prepare the appropriate bolts and nuts. Next, take the reinforcement and start shaping it into a rounded shape using a crimping machine. Then, using a welding machine, you need to weld the letter V at the top of the reinforcement.
For a more detailed understanding of the steps, we recommend watching a video on how to make caterpillars with your own hands.
After the work has been done, you will have a homemade track that needs to be attached to another track, etc. The result of the work will be a reliable track for an all-terrain vehicle.
Homemade crawler tractor
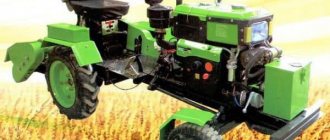
Homemade mini caterpillar tractor with a blade for clearing snow: photo and description.
This mini tractor was built by an American with his own hands in his garage. A homemade tractor is designed for clearing snow on the site and for towing a trailer.
We invite you to look at the photo and get acquainted with the design of the homemade product.
The frame of the caterpillar tractor is made of channels and profile pipes; an air-cooled engine with a variator is installed on the homemade engine.
In this design of a mini caterpillar tractor, a belt drive is implemented.
The photo shows a device for tensioning the track.
The tracks are completely metal.
A front blade for clearing snow has been manufactured.
Here is a mini tractor on caterpillar tracks, made by a craftsman with his own hands.
Caterpillar for UAZ
Next we will tell you how to make tracks on an UAZ with your own hands. For this model, a caterpillar made from ordinary car tires is suitable. Select a massive truck tire in advance.
Be sure to pay attention to the characteristic tread pattern. If it has triangular cutouts, then the tire will fit.
To make it, you need to carefully cut out the sides and, most importantly, do not forget to leave space for the treadmill. Then start connecting the resulting tires using car belts.
The result of the work will be a ready-made caterpillar for operation by the UAZ all-terrain vehicle.
List of sources
- TractorReview.ru
- o-motoblokah.ru
- SpecMahina.ru
- mastertraktor.ru
- labuda.blog
- fermerteh.ru
- vsesvoimirykami.ru
- sadovij-pomoshnik.ru
- stroy-podskazka.ru
Tracked unit design
The design of a homemade tracked mini tractor includes the following required elements:
- a frame with a seat on which the drive axle and additional axle are fixed;
- engine;
- bridge;
- gearbox with differential;
- caterpillars.
The frame is the main part of the mini tractor to which all other components and mechanisms are attached. You can make the frame yourself, but other parts must be purchased.
Frame making
For this you will need a welding machine. An inverter or transformer is suitable, since the frame is welded from channels or beams made of ordinary steel.
To manufacture the frame, it is necessary to provide two spars (longitudinal load-bearing elements) and two traverses (transverse). To ensure greater strength, you can use one triple spar - the side elements are made of a channel, and the middle one is made of a square pipe with a stiffener.
The front crossbar should be smaller than the rear. The best option is to make the front part from a twelfth-size channel, and the rear part from a sixteenth-size channel.
Any comfortable seat is mounted on top of the frame, the engine, gearbox and all other structural elements are installed.
Before assembly, you need to make a qualified drawing with the location of all elements, their sizes and calculation of the capacities involved, and prepare a step-by-step installation diagram.
Power point
To make a mini tracked tractor with your own hands, you will need a diesel engine with a power of 12 to 40 hp. With. (the larger the area that the mini tractor will have to process, the more powerful the engine is). It must develop a torque suitable for the tractor (in some cases it will be necessary to reduce the speed).
The power unit is cooled with water, otherwise it will quickly boil.
The engine is connected to the gearbox and differential.
This is the most critical part of the structure, in which waste elements cannot be used. Due to the technical complexity of the bridge, it, like the motor, cannot be made independently.
It is recommended to take a serviceable axle kit from a suitable car, for example, from a GAZ-21 Volga. For these sizes, it will need to be shortened to 800 mm by turning the sides, and remove the rivets on the fixation stockings.
Tracks and wheels
For a mini tractor on do-it-yourself tracks, purchased or homemade tracks are used. If you can’t buy them, you can make them from old tires with deep tread, fastening the parts with staples.
Rubber tracks are used in low-power mini tractors. They are pulled tightly onto wheels, which can be taken from any type - rubberized from a cart, used from old car wheels, etc. Due to the short length of the tracked vehicle, there is no need to install intermediate rollers.
Minitractor from the Zubr walk-behind tractor
Motoblocks of this brand have a reliable and fairly powerful motor, the presence of which allows you to convert the unit into an all-wheel drive mini tractor. Before work, be sure to study the detailed drawings, and also buy steel sheets, pipes and angles. The procedure for making a mini tractor is as follows:
- When arranging the frame, you will need to expand the existing frame of the walk-behind tractor. This is necessary in order to install additional wheels. Cut the corners and pipes into suitable pieces, then weld them to each other;
- The front beam is mounted on a mini tractor using a ready-made hub equipped with brakes. The wheels in the front part of the unit must correspond to the size of the rear wheels, or be slightly larger than the latter - this will prevent the mini-tractor from “burrowing” when driving over rough terrain;
- Then install the walk-behind tractor motor. It is best to install it in the front to achieve the best balance of the entire structure;
- Weld a tow bar to the back of the finished mini tractor - it will be needed for mounting the trailer.
Build process
Assembling a caterpillar mini tractor with your own hands is a process of sequential installation of all elements in accordance with the prepared diagram. The algorithm is as follows:
- Making a frame, installing a seat, wheels and axle on it.
- Installation on the engine frame with a fuel tank and gearbox (a box from a GAZ-53 is suitable) and a clutch (for example, from a GAZ-52).
- Connecting the onboard brakes and differential, connecting the latter to the gearbox.
- Installation of control levers (turns are carried out by supplying torque through the differential only to the left or only to the right track).
- Putting tracks on rollers.
After this, all that remains is to check the tracked vehicle in action.
Installation of the brake system and electrical equipment
After installing the engine, they begin to install an equally important component of the mini tractor - the brake system. In the store you can buy new brakes for a homemade unit or use standardized parts from a passenger vehicle.
First, determine the location (using the layout diagram) where the brake pedal will be located in the alteration. The pedal mount and the main brake cylinder are mounted on the designated plot. The cylinder is then connected by hoses to the brake drums located on the front wheels of the converted tractor.
Immediately after this, the brake system is checked for leaks and if it is broken, everything will have to be redone. To avoid ridiculous mistakes, it is better to use a visual drawing that shows all the main components of the tractor. To control, the system must be pumped and any remaining air removed. This will make it operational and provide proper functionality. The system can also be supplemented with a parking brake.
The next stage of self-conversion of a walk-behind tractor into a full-fledged mini tractor is connecting electrical equipment and displaying sensors on the instrument panel. It is recommended to do this for the convenience and safety of transport operation. The panel displays a temperature meter, a liquid cooling indicator, an ignition key, an oil pressure sensor and a fuel level sensor in the gas tank. If desired, a homemade tractor is equipped with a sound signal, brake lights and direction indicators.
Additionally, agricultural machinery can be equipped with cladding elements and a canopy. This will give the minitractor an attractive appearance and make the operator’s work more comfortable. After completing the process of modernizing the walk-behind tractor, you should run in the homemade mini tractor so that the parts can be “grinded in” and the lubricity of the mating surfaces will improve.