Adjusting the carburetor of the K60V walk-behind tractor: how to adjust and clean the device
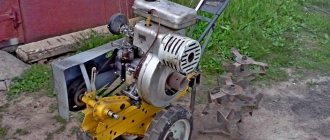
The Mole walk-behind tractor is a small-scale mechanization tool designed directly for working with the ground. Its great popularity in our country is due to the fact that, despite its low cost, it shows quite good technical characteristics.
However, in order for this walk-behind tractor to continue to work correctly, it must be periodically maintained.
These measures can significantly extend the operational life of the unit, without losing its performance qualities.
One type of such maintenance is carburetor adjustment , which must be carried out immediately after the end of the first season of operation.
Installing an imported engine on a Mole walk-behind tractor
It is generally accepted that the operation of such a model with an imported engine becomes more stable and convenient for the operator. In this case, minimal modifications to the frame will be required, and the whole process will consist of several fairly simple manipulations. Many owners of the Krot cultivator note that the best option is to install it on a Lifan-168FB engine with a power of 6.5 l/s. Patriot and SadkoDE-220 with a power of 4.2 l/s for installation
Do-it-yourself engine replacement algorithm:
- unscrew all fastenings on the factory engine, represented by four standard bolts;
- remove the muffler and gas wires and remove the factory engine from the frame;
- Mark all the drilling points on the frame, which will allow you to install the new engine. To do this, you need to install the new engine on the frame, put on a belt and move the motor along the frame to the required belt tension;
- mark areas for drilling a pair of through holes and drill them;
- secure the new engine to the frame using bolts 3.5 cm long;
- tighten a couple of bolts until they stop, then connect the system to the clutch, gas and muffling.
After the new engine is installed on the walk-behind tractor frame, you need to once again carefully inspect all connection points and test the operation of the unit.
Device
The Mole walk-behind tractor is a fairly standard design without the use of frills. This model of walk-behind tractor began to be produced in 1983 in Moscow, but then the production of this unit expanded, so they began to be produced in Omsk.
They were equipped with factory engines, the power of which did not exceed 2.6 hp. It is attached, like the gearbox, to the frame using ordinary bolts. The declared power was not always enough, so many Mole owners adapted to some modifications, replacing the factory engine with more powerful models.
In general, the structure of the Mole walk-behind tractor looks like this:
- Frame structure on which the internal combustion engine and gearbox are located.
- The control handles on which the clutch is located, as well as the engine speed controller.
- A wheelbase that allows you to freely move the unit from place to place. During operation, these transport wheels are removed.
- Soil cutters, which are put on the output shafts of the gearbox.
For more details about the Mole walk-behind tractor, watch the video:
As we can see, the design is very simple, which allows you to carry out repair work yourself. But you may have to do this, because the factory engine does not always operate in a stable mode.
The operating principle of the Mole walk-behind tractor is as follows. The torque is transmitted to the gearbox, and then to its two output shafts through a V-belt. When the clutch is pressed, the belt is tensioned, driving the gearbox shaft.
This gearbox shaft, on which the cutting elements (soil cutters) are located, rotates around its axis, cutting off the soil crust, while at the same time crushing and mixing it. Similar translational movements are used to move the walk-behind tractor along the surface of the earth.
The kit includes four rototillers , which need to be placed in pairs on each side of the shaft. By the way, it is possible to install six cutting elements at once, which improves the quality of tillage.
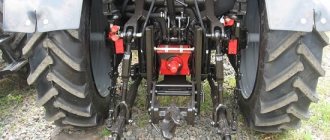
The scope of application of this and other walk-behind tractors, such as Cayman, Patriot, Texas, Foreman, Crosser, Viking, Forza, can be significantly expanded if additional attachments are attached to it. It is connected to the unit through a special bracket located at the back of the walk-behind tractor.
You will have to purchase such equipment separately, but thanks to it, an expanded scope of work opens up:
- transportation of goods of various weights;
- processing of inter-row spaces of beds;
- hilling and weeding of beds;
- making hay for livestock;
- planting and digging up potato tubers;
- using the pump you can water the beds, etc.
In other words, with the help of the Mole, Sadko, Don, Huter, Profi, Plowman, and Champion walk-behind tractors, you can carry out virtually the entire range of agricultural work. This circumstance makes it an indispensable assistant for a rural resident who uses his garden to the fullest.
Carburetor k60v repair and adjustment
Currently, the Salyut outboard motor is equipped with a K2-00-00 carburetor, which is manufactured by the plant itself.
The design of this carburetor is largely outdated and has a number of significant shortcomings. In particular, there is no idle system and devices that facilitate starting a cold engine. Since the metering needle of the main fuel system, operating in a pulsating flow, does not have a spring, increased wear of the needle-nozzle pair occurs, which ultimately leads to increased fuel consumption.
There is no elastic locking element on the fuel valve needle. The fuel is blocked by metal parts, so the valve seat and needle wear out quickly. The float mechanism loses its tightness, the fuel mixture overflows and becomes over-enriched. Hence, it is difficult to start a hot engine, fuel gets into the reservoir, and there is a fire hazard.
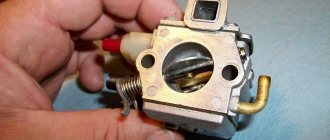
In order to eliminate these shortcomings, increase power, improve the starting and operational qualities of the engine, we can recommend a K60V carburetor manufactured by PO LENKARZ for installation on the Salyut. This carburetor is equipped with mopeds from the Riga and Lvov plants. Its design is reliable, quite simple and requires virtually no maintenance. The carburetor goes on sale in the retail network and can be purchased in specialized Motolyubitel stores.
How to adjust - setting and adjustment rules
Many people wonder how to adjust the carburetor installed on a Mole walk-behind tractor? Many people note that it is this particular working unit that causes the most problems. The thing is that the Mole is also equipped with a Soviet K60-B carburetor, which is used in the design of mopeds.
Before describing the likely problems with it, you need to consider how to adjust this carburetor, which will help avoid these very problems. So, our actions will be as follows:
- To adjust the carburetor fuel level, we need to remove the float chamber of the Mole walk-behind tractor.
- After this, turn the carburetor over so that the float is at the top. Then we bend the tongue until the distance H is exactly about 15-17 mm.
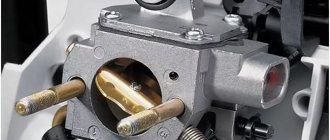
- This carburetor has two adjusting screws. One regulates the throttle lift, and the second controls the quality of the mixture used. The design is made in such a way that when the second adjusting screw is tightened, the mixture is enriched and vice versa.
- First, you need to warm up the engine a little, and then start adjusting the idle speed. By the way, at the initial stage you need to adjust the ignition.
- We adjust the position of the screw responsible for the quality of the mixture. To do this, you need to screw it 1 or 1.5 turns counterclockwise until it stops.
- At this time, we use the throttle screw to normalize the stable operation of the engine. Then we use the quality screw to increase the number of revolutions.
If everything is done correctly, the engine will respond normally to the opening of the gas , without the appearance of failures. In addition, the rotation speed will remain unchanged, regardless of the degree of warming up.
Types and methods of adjusting carburetors
As you know, a walk-behind tractor, like many other units of this type, works with the help of an engine. Due to the fact that the engine cannot ignite without oxygen supply, there is a need to use a carburetor. Two types of carburetors are used for walk-behind tractors. One of them is rotary, the other is plunger. Naturally, each of the mentioned types has its own advantages and disadvantages; the choice depends on the walk-behind tractor, its performance and the type of work performed.
There are cases when disturbances occur in the operation of the carburetor (the process is unstable). In such a situation, the carburetor needs adjustment. How to adjust the carburetor on a walk-behind tractor? This can be done with your own hands, following a certain sequence of actions.
- First you need to turn the screws (full and low throttle) until they stop. After that, turn them one and a half turns.
- Turn on the engine, give it time to start and warm up.
- Do not turn off the engine and set the engine control lever to the lowest speed mode.
- Next, set the minimum number of revolutions when the device is stable.
- After this, set the idle speed to maximum.
- Turn the idle speed to low. Repeat this action, alternating with the previous one, until the engine starts running without interruption.
- Move the control lever to the “gas” position.
Following these instructions, you can independently adjust the carburetor of the walk-behind tractor.
Repairing the carburetor of the Mole walk-behind tractor
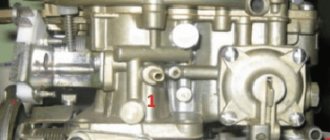
The carburetor of the Mole walk-behind tractor was produced back in Soviet times . Despite the fact that the Soviet industry was famous for its high level of performance and reliability, this carburetor still had several flaws. To understand them, you first need to completely analyze it into its components:
- Remove the cover by unscrewing the bolt on it. Underneath we find a gasket made of gas-resistant material, as well as a spring that needs to be pulled out.
- We take out the damper located there, under the cover.
- On the reverse side there is a float chamber, which also needs to be unscrewed. We remove the gasket.
- Then you need to remove the float by removing the pin from the corresponding hole. There is a special needle under the float, which also needs to be removed. On it we find a small elastic band, which under no circumstances should be lost, so we carry out all manipulations very carefully.
- We unscrew the fitting under which the gasoline filter is located.
- Then you need to remove the jet. After this, we need to pull out absolutely all the “internals” located in the carburetor body.
Such disassembly is necessary , because we gain access to the internal content, which is considered the most problematic.
The most common defect of such carburetors is the adjusting screw, which is responsible for the quality of the mixture.
In other words, we turn this screw, but the mixture does not change, it remains constantly the same.
To change this, you need to make some repairs to the carburetor located inside the Mole walk-behind tractor. The main cause of problems with mixture adjustment is one circumstance. The fact is that inside the carburetor there is a special channel that runs to a tube located in the center of the carburetor.
The T-70S tractor is a multifunctional unit for a wide range of activities. By clicking on the link, you will become familiar with the advantages and operating features of the T-70 tractor.
A bulldozer is a tracked or wheeled earth-moving machine that belongs to the class of special equipment. Monster bulldozers are the largest in the world of special-purpose vehicles.
|
The market of our country offers products from a large number of world-famous manufacturers of snow removal equipment. It's all about the legendary German snow blower Huter.
In this pipe, in theory, there should be a through hole connecting this very channel. The problem is that on some factory units this pipe is installed askew, which leads to the fact that the channel and the hole on the pipe do not match.
There are cases when this hole is completely absent on the pipe, or it is of insufficient diameter. To carry out repairs, we need to perform several sequential steps:
- Unscrew both adjusting screws. Please note that the screws have different tapers - the mixture quality screw has a larger taper.
- To pull out the pipe located inside, we need to slightly heat the part that is located outside. To do this, you can use a small fire on a gas stove, or heat it with a regular lighter.
- We warm until he can hold the body in his hands. After this, we insert the pin into the hole where the cover fastening bolt was located.
- Using a hammer, carefully hit the inserted pin until the pipe pops out.
- As practice shows, the hole is drilled only on one side of the pipe, i.e. it is not end-to-end. We need to make a symmetrical hole on the other side of this tube, or modify the one that exists.
- If there is a second hole, but it is smaller in diameter than the first, then we need to sharpen it a little. To do this, we use a regular round needle file and bore the edges of the hole.
- Then we install the tube in its original place. This must be done in such a way that the through hole on it and the hole on the channel coincide exactly.
- Before inserting the tube into place, you need to slightly heat the carburetor body again so that it fits into place without problems.
- We insert the tube into place and, using the same pin that we used to push the pipe out, we insert it into place. We knock lightly so that the pipe does not go far inside - on the back side we should see a hole located just above the through hole, which should coincide with the channel.
- You need to make sure that the hole is strictly in the center.
- We take a thick wire and insert it into the channel hole. If everything is done correctly, then the wire should freely pass further through the through hole on the pipe and come out of it as a continuation of the carburetor channel.
- If the wire gets stuck, then you need to tap the pin a little more, pushing the pipe a little further.
- Next you need to reassemble the carburetor in reverse order.
That's the whole process of necessary changes in the carburetor design. Thanks to them, the adjusting screw fully fulfills its responsibilities for changing the quality, which, in fact, was required of it.
Review: World Motors K60V carburetor repair kit - Somehow everything is not going according to the compass.
Now all modern cars are fuel-injected and have lost carburetors. So, as before, you can’t remove the carburetor and clean it, because it’s simply not there. But the Krot-OM motor-cultivator uses a single-cylinder engine from a moped, and for operation it uses a fuel-air mixture prepared by a K60V carburetor. During the next disassembly of the K60V carburetor in order to wash it from dirt, the polymer washer of the shut-off valve was lost. It flew off the valve somewhere when it was removed, and the dimensions of this washer are literally 3-4 millimeters in diameter. So there was no chance of finding her. And there is nothing to replace the lost one. An ordinary rubber washer will not work, since a gas-resistant material is needed, and ordinary rubber swells in gasoline. We tried to find the right washer from other materials, but we couldn’t find one that was exactly the right size. A washer was cut out of translucent polymer from a plastic sleeve of suitable diameter. But such a washer together with the valve did not hold gasoline in the float chamber, and it flowed in a stream from the carburetor. Therefore, they began to look for a way to buy such a cheap washer. The only solution was to buy a K60V carburetor repair kit. The asking price was 200 rubles, and the required repair kit was on sale in one of the local stores selling spare parts for mopeds, walk-behind tractors and other light-duty vehicles.
Here is this repair kit in a sealed blister in front of us:
On the back of the blister is a list of kit components:
Contents of the delivery, on the right in the bottom photo is a new float. It is slightly different in shape and size from the old one, but it fits quite well:
Here it is, the shut-off valve along with the washer, it is in the center of the bottom photo:
Possible malfunctions, repairs
Despite the simplicity of their design, Krot motor cultivators are extremely sensitive to contamination of individual components, parts, mechanisms and other components of the unit. Many problems during operation arise due to untimely replacement of consumables and neglect of basic rules for caring for equipment. The ironic slogan “Tanks are not afraid of dirt” does not work in this case.
Let's look at the most common problems and breakdowns that occur in the main components of the cultivator.
Engine
The first samples of Mole cultivators had many complaints specifically from the motors, which were unreliable and had a short service life. Equipment owners modified agricultural machines at their own risk. Often, new engines were installed on the units to replace the ones that had fallen into disrepair from other garden equipment: Forza, Patriot, Sadko, Lifan.
Thanks to factory design developments, cultivator models with engines Honda GC 120, Honda GC 135, Greenfield, GeoTeck, Subaru Robin EY-15D, Hammerman, INNOMOTOR , Briggs & Stratton from well-known Japanese, German, American, Hungarian, and Italian brands appeared.
Thanks to modern engines and innovative developments, the Mole has turned from a once narrowly functional milling cultivator into a universal agricultural machine, which is capable of performing any agricultural work on tillage, cultivating crops, as well as transporting goods and clearing territory.
Therefore, if your Mole motor cultivator still has an old two-stroke engine, urgently replace it with a new model and feel free to expand the functionality of the unit. The most budget-friendly and fairly reliable option is Lifan; “Americans” and “Japanese” will be more expensive, but subsequently they will require much less attention.
If the engine does not start:
- empty fuel tank or poor quality fuel;
- difficulty with ignition;
- consequences of decompression in the form of deformation of the exhaust valve, breakdown of piston group elements - it is necessary to disassemble the engine and replace worn-out parts.
The mole won't start!
Started up:
Ignition
The ignition may be completely absent or not fire in the following cases:
- If the magneto fails, it is replaced, since the device cannot be repaired.
- If there is no spark, the spark plug may have simply burned out; you should replace it with a new one.
- A sooty spark plug must be thoroughly cleaned and washed with gasoline.
- If there is a spark, but the equipment does not start, pay attention to the condition of the spark plug - if it is damp or wet, it means the insulation has been damaged. To eliminate the defect, it is enough to change the tip. In turn, a wet spark plug is most often caused by low-quality fuel.
- Due to excessive wetness of the spark plug and fuel leakage, there will also be no spark; you should bleed the engine using a manual starter, thereby drying the cylinder.
- Increased gap between the electrodes - it is necessary to set the optimal gap size.
- A dirty air filter is the most common cause of lack of spark, so it is necessary to systematically check its condition and change it in a timely manner.
- The integrity of the fuel line is damaged - the hoses should be replaced.
- Electrical system insulation failure.
- Check the position of the flywheel plates - they may be jamming the magnetic circuits.
Replacing the magneto in the Mole cultivator:
Operation of the Mole cultivator with a repaired ignition
Carburetor
The consistency of processes when starting the engine and its further operation depends on the correct adjustment of the carburetor. The main function of the carburetor is to create a fuel-air mixture, which, after ignition, powers the heart of the cultivator - the motor. Therefore, it is extremely important to adjust it in accordance with the recommendations of the factory instructions. The carburetor requires adjustment after the first season of operation.
The adjustment consists of setting a consistent fuel supply and the required speed. The speed and fuel quality screws are used to make the necessary adjustments to the carburetor in idle mode. In addition, it is important to keep the carburetor clean at all times.
Another reason that the Mole motor-cultivator does not start, especially after long periods of inactivity, may be the appearance of condensation in the carburetor due to temperature changes. In this case, you will have to completely disassemble the carburetor and clean it. Due to poor quality fuel, the carburetor may also not work efficiently.
DIY repair
If the device fails, first of all, you should check the warranty period and, if it has not yet expired, contact a service center. In some cases, the device requires qualified repair or even replacement. However, troubleshooting is often possible with your own hands. However, as mentioned above, it is best to prevent malfunctions from occurring through proper maintenance of the device.
During operation, it is important to monitor its condition and, if necessary, clean and replace worn parts. By the way, they are the ones that can cause the engine to seize. Difficulties may also arise with closing the carburetor damper - this problem can be eliminated by monitoring the operation of the drive. Do not forget about the quality of the fuel used, which must necessarily meet the manufacturer’s requirements specified in the operating instructions.
Description
The “Mole” motor-cultivator appeared in the early 80s of the last century and immediately gained popularity among rural residents and dacha owners. This is not surprising, because with the help of this agricultural technology, mechanized soil cultivation, as well as planting, care and harvesting, became possible.
Over more than 30 years of its existence, “Mole” has been modified more than once. Such parts as the engine, gearbox, handles, cutters, as well as other equipment (including attachments) were brought to perfection. Having gone through a difficult path of improvements, we no longer received the original motor cultivator, which has some limitations in operation, but a multifunctional motorized device, with which we can easily carry out the following field work:
- plowing the soil;
- cutting beds;
- planting potatoes;
- spud of plants;
- weeding plants from weeds;
- mechanized potato harvesting;
- mowing;
- irrigation;
- transportation of bulk and piece goods;
- snow removal.
In order to perform all of the above work, you need to acquire the appropriate tools. You can find out more in the article about attachments for the Mole cultivator on our website.
No matter how powerful your unit is, no matter how much you care for it, sometimes it still requires repair - the engine won’t start, the engine gets hot, or some other malfunction... To know how to repair a motor cultivator, you need to understand its structure.
Cultivator Mole: technical characteristics and purpose
Gasoline walk-behind tractors "Mole" consist of the following main parts:
- gearbox;
- frame secured to the gearbox with bolts;
- handle for manual control;
- a bracket designed for the use of additional types of equipment;
- levers for switching speed and clutch.
Some modern models are characterized by the presence of reverse gear, switchable on the handle. Mounted equipment is mounted on gear input shafts.
The purposes of the “Mole” cultivator are as follows:
- plowing the soil. Soil cutters are installed on the output gear shafts. The wheels are raised, and a coulter is attached to the bracket, through which braking is carried out and the depth of plowing is adjusted. A pair of external and a pair of internal cutters belong to the category of working bodies and movers of motor-cultivator equipment. On fairly light soils, the additional use of a third set of cutters is allowed, which improves the stability of the equipment;
- weeding activities involve installing special L-shaped weeders on the internal cutters;
- Weeding activities with preliminary hilling of potatoes involve replacing the coulter with a special hiller. The equipment is provided with metal wheels with ground hooks;
- To dig up potatoes, metal wheels and lugs are installed. The opener is replaced by a digger;
- plow plowing involves installing metal wheels and lugs on the gear shafts and attaching the plow;
- If you need to mow grass and make hay, you need to hang the mower on the front of the cultivator. Wheels must be installed on the geared output shafts;
- When pumping water from an open reservoir to the frame, it is necessary to install special pumping equipment. A V-belt drive is used to connect to the engine.
It is very convenient to equip it with a small-sized trolley with a load capacity of up to 200 kg. In this case, replacement with rubber wheels is performed.
Common breakdowns
What machine elements may require the operator's close attention?
Let's list them:
- motor;
- magneto, ignition system;
- carburetor;
- gearbox;
- air filter, etc.
Now let’s take a closer look at all those malfunctions that can affect the performance of the unit, no matter what model it belongs to.
Does not start
So, what to do if the “Mole” does not start, what could be the reasons for this? The ignition fails or there is no ignition at all in the following cases:
- No spark. This could mean the spark plug is burnt out. In this case, you need to unscrew it and simply replace it with a new working one.
- The spark plug is smoked. A good cleaning will bring it back to life (remove carbon deposits, clean the contact), after which the spark plug must be thoroughly rinsed in gasoline.
- If the cultivator does not start, but there is a spark, then most likely the reason is a lack of insulation. We look at the candle again, in this case it is wet or slightly damp. You don't have to change the entire spark plug; you only need to replace the tip.
- Poor quality fuel may cause the cultivator to fail to ignite. It is for this reason that the spark gets wet, after which you will have to change the tip.
- Fuel dripping from the spark plug is another reason why the car will not start. To rectify the situation, it is necessary to drain the cylinder by bleeding the engine using a manual starter.
- The reason for the lack of ignition may also be problems with the fuel supply hoses. To restore the operation of the cultivator, it is necessary either to properly tighten the hoses, or, in case of rupture, replace them with new ones.
- Poor insulation of the electrical system (high and low voltage wires) can also cause the unit to not start.
- Pay attention to the air filter. If it is dirty, then problems with ignition are guaranteed. It needs to be either cleaned or replaced. Most often they resort to the second option, fortunately, this spare part is available both in price and in availability in the store.
- Failure of the magneto itself. This part cannot be repaired and is immediately replaced with a new one. How to check the magneto of the “Mole” motor-cultivator to make sure it is faulty? Yes, it’s very simple - if all the reasons why there may be no spark are excluded, then the cause of the malfunction is in the magneto. Many craftsmen rework the working magneto, thereby increasing its service life.
This is what the Magneto ignition circuit for the “Mole” motor cultivator might look like
- There may be no ignition if the flywheel plates jam the magneto cores.
- An incorrectly set gap between the electrodes will not allow a spark to escape.
Video review of the modernization of the ignition of the “Mole” motor cultivator
As you have seen, setting the ignition is not so difficult.
Engine
The main reasons that the “Mole” engine does not start are:
- lack of fuel (or its low quality);
- ignition problems discussed above;
- the appearance of decompression and, as a result, piston wear and deformation of the exhaust valve.
In the first case, it is enough to simply fill in the required amount of fuel (a mixture of gasoline with M-8V autolom oil) and all problems will be resolved. In the case of a compression failure, you will have to completely disassemble the engine and replace damaged parts, and this could be a piston or an o-ring.
Deformation of the exhaust valve becomes another cause of compression failure, which leads first to a loss of power of the “Mole” motor-cultivator, and then to starting problems.
|
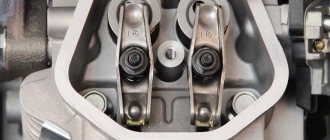
To restore engine functionality, it is necessary to completely disassemble it. Having assessed the condition of the piston, replace it if necessary. We change the piston rings and exhaust valve. We examine the engine head, in particular the gas distribution mechanism, and if there is carbon deposits, we clean it. If structural elements are damaged, we replace them with serviceable ones.
Motor selection
During the Soviet Union, only domestically produced two-stroke single-piston engines were used, which were not particularly powerful. Today you can find “Mole” with a four-stroke imported engine. But if you still have the first model of a cultivator in your arsenal, then upgrading your “Mole” by replacing the motor is not at all difficult.
And here a new question arises: which engine is better to install on the unit? It’s not difficult to answer - those models that are installed in newer cars are suitable.
It is best to replace the domestic engine with an imported one:
Any of them will not only give the motor-cultivator a new life, but will also significantly increase the power and service life of the unit.
An excellent solution would be to install the Lifan engine on the “Mole” motor-cultivator. Such a motor provides the car with a long life, because in addition to reliability and efficiency, Lifans also stand out for their unpretentiousness and definitely do not require additional attention.
Video review of replacing the engine on a Lifan 168 F-2 with a Mole cultivator
Carburetor
What is a carburetor and why do you need to adjust it? A carburetor is a small device designed to produce a fuel-air mixture. This mixture, with the help of a piston and a spark plug, will be maximally compressed and ignited, and the engine will start and continue to operate.
Carburetor adjustment must be carried out after the first working season.
Carburetor adjustment is one of the mandatory points included in the “maintenance” section of the unit. Thanks to timely inspection and repair, the service life of the cultivator will increase. In addition, inspection and adjustment are also necessary when the engine roars strongly for no apparent reason.
Before we start setting up, we need to familiarize ourselves with the design of the carburetor of the “Mole” cultivator:
So, to debug the fuel supply and ensure the required speed, you need to turn to two screws: the number of revolutions (in Fig.) and the quality of the fuel (Fig. ). Using these two screws, we adjust the fuel supply to the carburetor of the “Mole” motor-cultivator at idle speed. You must act very carefully; first check the state of the ignition.
Important! Thoroughly clean the carburetor, where necessary - strip it, wash it, where necessary - change parts. Then the Mole motor cultivator will serve you for a very long time.
Owners of the unit are often interested in how to start the “Mole” cultivator after winter. The reason for the lack of ignition is condensation in the carburetor that has accumulated during inactivity at changing temperatures. Complete disassembly of the device and further cleaning will help solve this problem. All kinds of additives found in low-quality fuel and dust that has seeped through the filter will also not contribute to the operation of the device.
Gearbox
The main task of the gearbox is to transmit torque from the engine to the shaft. The transmission of motion is carried out using a V-belt transmission. You can learn more about the design and repair of the gearbox of the “Mole” motor-cultivator by watching the video.
Video review of the Mole motor-cultivator gearbox
Reverse
The first modifications of the “Mole” are not equipped with a reverse function (reverse speed), which somewhat affected their performance characteristics and ease of working with such attachments as a cart, snow blower, mower, etc. To modify the “Mole”, the manufacturer released new modifications of it , already with a reverse function, which significantly increased the mobility of the cultivator.
Video review of the reverse function on the Mole motor-cultivator
Drive belt
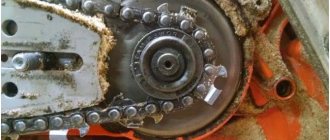
The drive belt transmits torque from the engine to the gearbox. The cause of breakdown of the “Mole” motor-cultivator is often a rupture of the drive belt. This occurs due to the belt jamming during operation due to heavy loads on the working parts of the cultivator (hard soils, blunt cutters). The cutter bends and catches the belt with the knife, thereby rendering it unusable.
Drive belts for the “Mole” cultivator can have various modifications, but their dimensions are strictly defined:
Carburetor care, replacement and repair
Sometimes, in order to bring the carburetor for a walk-behind tractor into a stable, working condition, adjustment is not enough, repair or replacement is necessary.
Motor-cultivator "Mole" adjustment, magneto repair. ignition
It happens that the carburetor air damper does not close completely. To eliminate this problem, you should monitor the operation of the drive. If jams are found, remove them. Moreover, given that the carburetor supplies fuel and, therefore, drives the walk-behind tractor itself, you should carefully monitor the condition of this part and properly care for it.
To avoid serious carburetor damage, you must constantly monitor its operation. In addition to adjusting the idle speed, you need to regularly clean the carburetor and replace worn parts. Since the carburetor interacts with the fuel mixture and air, the cause of its contamination may lie in either the first or the second source.
Magneto
If the magneto fails, it will be impossible to restore it. The only solution is to buy a new, working device.
MK-4-03
The model weighs 53 kg and comes with a BriggsStratton engine that produces 4 hp. The device has only 1 gear - forward. It is distinguished by improved soil gripping capabilities, which ensures high-quality agricultural work.
Maintenance
What does maintenance mean? This is a series of measures that ensure proper operation and proper storage of equipment. Maintenance of the “Mole” cultivator means the following work:
- washing;
- cleaning;
- lubricant;
- control;
- gas station;
- control;
- fasteners;
- adjustment of all blocks and systems
Such work must be done as often as possible, especially if you have to work in unfavorable conditions.
Before starting the cultivator engine, it is necessary to check the presence of fuel, oil, etc. It is necessary to fill the mixture to a certain level, and if necessary, replace the fuel and oil. For cultivators, Avtol oil (M-8V) is used, which proved itself during the Soviet Union.
If it is difficult to get it, then you can use analogues:
- 10W-30 (do not use at temperatures above +27 degrees);
- SAE 30 (do not use at temperatures below +4 degrees).
Adjustment work involves adjusting the clutch, reverse gear, carburetor, spark, etc.
Cleaning work includes cleaning the filter, working surfaces, housing and all clogged parts on the surface of the Mole motor-cultivator. If malfunctions occur, or for preventive purposes (less often), it is necessary to clean the internal parts of the machine.
Before putting any part back in its original place, make sure it is in good working order.
Installation or replacement of any attachments must be carried out with the engine completely turned off. When preparing for long-term storage, the motor cultivator requires conservation. To do this, you need to prepare the engine in a certain way (see instructions), then clean (rinse) and dry all the external parts of the “Mole”, wipe them with a rag, drying them well. After this, you need to lubricate all accessible areas of the cultivator with grease. The unit is now ready for a long rest.
User manual
The gasoline and electric cultivator Mole is a reliable and functional device, but its service life directly depends on compliance with the operating instructions.
Motor cultivator Mole. carburetor adjustment K. 60 V
There are a number of rules that must be followed when using a walk-behind tractor.
Maintenance
Since gasoline models operate by burning a fuel mixture and engine oil, it is necessary to adhere to the factory proportions of the components when creating the mixture. Otherwise, the engine will soon fail.
Reviews from owners on thematic forums emphasize that it is impossible to use analogues of the M-8B oil recommended by the manufacturer, since they do not have the required parameters.
Before starting and starting work, you need to make sure that the fasteners are tightened and check the functionality of the V-belt drive, reverse gear and operating systems. You should familiarize yourself with the fuel and oil levels, and, if necessary, evaluate the condition of the air filters.
During the first 15-20 hours, the equipment with installed attachments is run-in. During this period, operation of the unit at light loads is allowed, and plowing of the ground is carried out in 2-3 passes to a depth of no more than 10 cm.
How to adjust the K60-V carburetor of the Mole cultivator
Auto mechanic, specializes in agricultural equipment
Among domestically produced small agricultural machinery, the Mole cultivator is quite popular due to its optimal technical characteristics and low cost. However, as every walk-behind tractor owner knows, durability and uninterrupted operation depend on proper maintenance of the equipment. This service includes, among other things, carburetor adjustments required after the end of the season.
Main types of walk-behind tractor repairs
The versatility of the technology is the reason for its intensive use. High engine loads lead to unscheduled maintenance of walk-behind tractors and replacement of worn parts. It is important to observe the service interval and change the oil and filter regularly. This will allow you to postpone major repairs of the walk-behind tractor engine.
We clean the crankcase and fuel system, change spark plugs and leaking seals. Low wear resistance of belts and chains leads to the need to replace them. We add oil to the gearbox, adjust the tension of the clutch cable and the fastening of the main components of the walk-behind tractor. During servicing, high-quality parts and consumables are used.
Maintenance of equipment begins with diagnostics; based on the defect sheet, the cost of services is formed. This makes prices clear to customers, and a guarantee is given for the work performed. You can order professional repair of motor cultivators with delivery of the restored equipment to the work site.
- Catalog
- About company
- Working conditions
- Shipping and payment
- Repair
- Contacts
Monday-Friday: from 9:00 to 19:00
Saturday: from 10:00 to 16:00
Rental St. Petersburg, Vyborgskoe shosse, 226
The design of the carburetor on the Mole cultivator
The design of the Mole agricultural unit can be called classic. The engine and gearbox are fixed to the frame with ordinary bolts, the controls are located on the steering column, and the cultivator itself is equipped with wheels for transportation from place to place (they are removed during operation). Rotators are mounted on the output shafts.
Do not forget to monitor the serviceability of the parts in your walk-behind tractor
A carburetor is a device responsible for controlling fuel and air flows (creating a fuel-air mixture), thanks to which the engine starts and optimizes operation. Like the entire design, the carburetor of the Mole walk-behind tractor has a standard design.
The engine design of the Mole cultivator uses a K60-B carburetor. This is a fairly simple device that, if necessary, can be adjusted or even repaired with your own hands. In order to ensure uninterrupted operation of the cultivator and maximize its service life, it is necessary to adjust the carburetor in a timely manner: without fail after the first season of operation and then as necessary. One of the signs that the carburetor needs adjustment is instability of the engine or an unreasonable increase in the volume of its operation.
An important point in operating the cultivator is the first start after winter, especially if the unit was stored in an unheated room. Problems with ignition may arise due to condensate accumulated from the temperature difference in the carburetor installed on the Mole motor-cultivator. It is also possible that there may be a lack of ignition due to contamination of the fuel tank and the content of various additives in the fuel if it was of low quality. Debugging is carried out by completely disassembling and cleaning the carburetor.
In this video we will look at how to disassemble and repair a carburetor:
Adjustment
The K60-V carburetor of the Mole cultivator is adjusted using two screws, one of which is responsible for lifting the throttle, and the second for enriching the fuel mixture. In order to adjust the device, you need to perform the following steps:
- Remove the float chamber.
- Place the device so that the float is at the top, then bend the tongue to a distance of 15-17 mm.
- Warm up the engine (after performing a preventative ignition adjustment) and begin adjusting the idle speed.
- Adjust the adjusting bolt responsible for enriching the mixture by turning it one or one and a half turns counterclockwise until it stops.
- At the same time, adjust the other screw responsible for the throttle, thereby stabilizing the operation of the motor. After this, use the same screw to increase the number of revolutions.
As a result of correct tuning, the engine should start correctly and without interruption on the gas supply, and the speed should remain stable at any stage of warming up.
How to clean the carburetor on a walk-behind tractor?
The walk-behind tractor plays an important role in the lives of people who need to cultivate a plot of land. This is especially true for rural residents, where the walk-behind tractor is almost idolized. But nothing lasts forever. And even an expensive walk-behind tractor from a renowned manufacturer begins to malfunction and operate with interference. Very often, the reason for poor performance of a walk-behind tractor is a fuel system clogged with various debris, namely the carburetor. That is, the whole problem is a clogged filter mesh or carburetor jets.
Repair: main faults and their elimination
In most cases, problems with fuel supply appear when the tiny holes of the injectors become clogged and when the membrane-rocker pair fails. The brass cross of the rocker arm can bend or jump out of its seat and cut off the fuel supply when it is not needed. The soft membrane can dry out over time, lose elasticity, bend, and also incorrectly turn off the fuel supply.
This is what a brand new membrane looks like (right)
There are two methods for cleaning the jet:
- The carburetor is purged with compressed air from a compressor or pump. The gas supply hose is removed from the tank, an air hose is put on the fittings and the carburetor is injected.
- If the problem is not solved, they remove it, disassemble it, gain access to the jets, clean and rinse the entire carburetor of the chainsaw. The jet is cleaned on site or unscrewed (threaded).
The soft membrane on old carburetors in most cases fails after long breaks in operation. It just dries without gasoline. Therefore, before you start after a long period of inactivity (a year or six months in the summer in the heat), you need to open the gas tank tap, fill the carburetor of the Ural chainsaw with gasoline and conduct a test run after half an hour.
An unusable membrane cannot be repaired; it is simply replaced.
Adjusting the idle speed
The idle speed of the carburetor on a Ural chainsaw is regulated by a screw located on the gas handle. Its rotation changes the position of the throttle valve (opens it a little) and, as a result, the idle characteristics change.
This indicates support for KMP-100U at the end. the usual and clear option method.
Repair kit for Ural chainsaw carburetor
Repair kits are still available for KMP-100U carburetors. a set of gaskets, a membrane, in other configurations there may be a rocker arm with a spring attached to it.
During the Soviet era, when there was a shortage of not only chainsaws, but also spare parts for them, the gaskets were made themselves from paronite sheets.
In the absence of paronite, the gaskets were made of thick single-layer paper (not cardboard) coated with alkyd paint.
Running in a chainsaw
Often, after purchasing a new tool, the thought arises - how to ensure its longest service life without breakdowns and expensive repairs. Proper running-in of the chainsaw will help ensure this operation. To understand what running-in is, how to do it correctly, and why it is actually needed, knowledge of the following information will help:
Running in is necessary to minimize friction in the internal components of the chainsaw. In simpler words, this means that all moving parts must “grind in” well with each other for their long-term and problem-free operation. During this period, the saw needs to be given variable loads. Namely, alternate periods of idle operation with minimum and medium load modes.
As a rule, running in a chainsaw is done as follows:
- During the first 5 - 6 hours of break-in, you need to start working with the saw in idle mode. This means that you can start sawing only after first accelerating the chain to a certain speed and carefully measuring the force when working with the saw. Only after a few hours is it possible to move from low to medium loads, always alternating them with idle operation.
- For better running-in of the piston group, an increased concentration of lubricant is created in the fuel mixture in a ratio of approximately 1:15 to fuel. This proportion will allow the internal components of the engine to break in with each other as painlessly as possible.
- It is determined that for a full running-in of a chainsaw, it is enough to use approximately 4 - 5 full tanks of gasoline.
Operating manual for the Ural 2T Electron chainsaw
The instruction is an invariable companion of the Ural chainsaw - this is the passport of the chain saw, which contains complete information about the tool:
- Design and diagrams of the Ural chainsaw.
- Tool assembly steps.
- Equipment.
- Safety requirements when sawing and during maintenance of a chainsaw.
- Table with characteristics of the 2T Electron model.
- Sequence of putting gas-powered tools into operation.
- Instructions for starting a chain saw.
- Chainsaw engine running-in period.
- Sawing methods and techniques.
- Carrying out maintenance of the Ural 2T Electron chainsaw.
- List of possible malfunctions, causes of their occurrence and methods of elimination.
Chainsaw Ural 2T Electron, device, working diagrams
The photo shows how the legendary unit works, and we also see a list of its main components:
The device of the Ural 2T Electron chainsaw
Below is the ignition diagram:
Equipment for Ural 2T Electron
The standard delivery set consists of:
- 5.5 liter petrol engine. With.;
- frame and handles;
- starter rope;
- fuel tank;
- gas line;
- clutch;
- powertrain activation system;
- ignition system;
- start button;
- spark plug;
- muffler;
- sawing unit;
- box;
- operational manual.
Safety precautions when working with a chain saw
- Be sure to use personal protective equipment (gloves, goggles, earplugs/headphones, mask) and comfortable clothes and shoes.
- Fill only with fresh fuel. Refueling should be done away from the work area.
- Smoking near the Ural 2T Electron chainsaw is strictly prohibited.
- Monitor the condition of the chain, do not cut with a dull chain.
- Carry out maintenance of gas-powered tools with the engine turned off.
- Remove bystanders from the area.
- Learn ways and techniques of working with power tools.
Sequence of putting into operation the Ural 2T Electron chainsaw
- The chainsaw is assembled into a single structure.
- The cutting unit is mounted and the chain is tensioned.
- The fuel mixture is being prepared.
- The finished fuel is poured into the tank.
- The chain saw crankcase is filled with regular 10B40 motor oil.
- All fasteners are checked again.
- The chainsaw is starting up.
- Idle speed and lubrication supply are checked.
- Running in the engine is mandatory.
How to prepare a fuel mixture for Ural 2T Electron
How much gasoline and oil is required to prepare a high-quality mixture for the Ural 2T Electron? Previously, the fuel mixture was prepared from AI-72 gasoline and motor oil for two-stroke engines. Today, 72-grade gasoline is replaced by 92-grade gasoline (72 has been discontinued), any oil for 2-stroke engines can be used. During the break-in period, the fuel mixture is prepared in the following ratio: 1/15. The carburetor is initially set for break-in, where more enriched fuel is used. After this is done, it is necessary to adjust the carburetor again, setting it to less enriched fuel with an oil to gasoline ratio of 20/1.
Break-in period
The testing of the Urals is carried out in 2 stages:
- Four full tanks of rich fuel mixture burn out at idle.
- The next day and for 25 hours, the chainsaw is run in with minimal loads.
- At the end of the break-in period, the oil in the crankcase is changed, and the carburetor is adjusted to the new mode.
Chainsaw Ural 2T Electron, maintenance
Let's highlight the main points of service:
- Regular cleaning work:
- cleaning the body;
- cutting unit;
- asterisks;
- carburetor;
- spark plug;
- filter.
- Lubrication of components and mechanisms.
- Sharpening the chain directly on the bar after each cut.
- Adjustment (if necessary).
Download instruction manual
Causes and methods of troubleshooting the Ural 2T Electron chainsaw
- The chainsaw does not want to start:
- the fuel mixture has run out;
- poor quality mixture;
- the ignition is not set;
- the carburetor is clogged or not adjusted;
- filter cleaning required;
- the candle doesn't work;
- The high voltage cable is not connected.
- Smoke is pouring out:
- The chainsaw squeals loudly when working:
- fuel is lean.
- The saw stalls under loads:
- carburetor adjustment required;
- the mixture needs to be replaced;
- clean the filter, spark plug, carburetor.
- Strong knocking, squealing, extraneous noise during operation:
- Working with tension, small chips at the output:
Video review of adjusting the carburetor on a chainsaw:
Video
Video review of ignition adjustment on a chainsaw:
Video
Chainsaw repair Ural 2
Any tool can fail over time. This is an indisputable fact. It should, however, be noted that repairing the Ural 2 electron chainsaw mainly comes down to working with the engine. Such units in the saw can stall under a certain load, hold idle speed poorly, and so on.
The reason the saw stops working immediately after it starts may be a faulty carburetor. It will have to adjust the jets in order to receive the appropriate fuel supply.
When a heated engine stalls, most likely you will have to change the pistons, spark plugs, or clean the air filter. It must be said that a fully serviceable motor in a saw simply must work without jerking. If a ringing knock is heard during its operation, this may indicate a malfunctioning cylinder.
Modification of the Druzhba-4 chainsaw carburetor
The KMP-100 carburetor was produced for almost half a century. Millions of copies have been released. All the weak (raw) points of this model were identified and eliminated back in the early 60s of the last century. This carburetor requires modification only if the Druzhba-4 chainsaw engine is not used for its intended purpose. For example, as a boat motor.
What kind of carburetor is on the Druzhba-4 chainsaw?
All old-style Druzhba-4 chainsaws have KMP-100 carburetors.
KMP-100 is notable for the fact that it was the only carburetor for chainsaws in the country. It was also installed on the Ural chainsaw. And besides the Druzhba and Ural chainsaws, no others were produced or imported into the country. Therefore, we are familiar with the KMP-100 carburetor. It is simple, reliable, and designed with a large margin of safety.
On models of Druzhba-4 chainsaws produced after 1993, you can find carburetors KMP-100A and KMP-100AP. Today, such carburetors can be found on sale both in the “nameless” version and under the Rezer brand. Options A and AP differ significantly both from each other and from KMP-100 and 100U.
We are looking at the old classic KMP-100 carburetor, which worked on millions of Druzhba-4 chainsaws, many of which are still in use today.
The red square in the photo marks the location of the carburetor on the Druzhba-4 chainsaw
This is what the new KMP-100 carburetor looks like
Device
KMP-100 can be considered a new generation carburetor, despite its age. For the first time in the country, an elastic membrane was used instead of a float. Before that, chainsaws used float carburetors, like all two-stroke engines (mopeds, motorcycles, etc.). In a float carburetor, when the carburetor storage chamber is filled, the float floats up and its needle axis cuts off the fuel supply.
The float carburetor cannot operate upside down, which is a big disadvantage for chainsaws. But a diaphragm carburetor can operate in any position, even when the chainsaw is upside down.
The KMP-100 carburetor is made according to the classical design.
Main details:
- A housing with channels for the supply of fuel and air, a fuel storage chamber and a mixing chamber for the fuel-air mixture (Venturi tube).
- Case cover.
- Throttle (gas) valve.
- Jet with calibrated hole.
- Elastic membrane.
- A rocker arm with a valve that shuts off the fuel supply from the gas tank when the carburetor chamber is filled.
- Two adjustment screws.
- Gaskets.
In total, the Druzhba-4 chainsaw carburetor has 25 parts, including non-removable channels and chambers in the body.
For a better understanding, we suggest that you read an excerpt from the repair instructions
Principle of operation
The KMP-100 carburetor ensures operation of the internal combustion engine in three modes:
- Cold start.
- Low and medium speeds.
- Maximum speed (full throttle).
Before the engine starts, the fuel supply to the engine is shut off by a membrane connected to the valve.
Before starting, fuel is pumped up manually using the pump button (suction or primer).
When starting and operating the engine, the piston stroke creates a vacuum in the carburetor diffuser. Due to the pressure difference, the membrane bends, presses on the valve and opens the fuel supply.
The fuel is mixed with air and, due to the vacuum formed during the stroke of the piston, is sucked into the combustion chamber.
The adjusting screws determine the amount of fuel supplied and the quality of the fuel-air mixture. A fuel mixture that contains a lot of gasoline and not enough air is called enriched.
An overly rich mixture may not burn completely due to lack of oxygen. This leads to excessive fuel consumption or flooding of the spark plug.
A lean mixture contains little gasoline. The engine cannot operate at full power, the mixture is dry, the piston system overheats and wears out faster.
Engine speed is controlled by the position of the throttle valve in the carburetor. When it is fully open, the fuel-air mixture flows without restrictions (full gas).
Gas trigger that regulates the opening of the throttle
When it is closed, fuel flows to a minimum and the engine runs at idle speed.
What material is the Druzhba-4 chainsaw carburetor made of?
When assembling the KMP-100 carburetor, parts from different metals are used.
- The KMP-100 carburetor body is cast from an alloy of aluminum and zinc.
- The adjustment and fastening screws are made of steel.
- The jet with a calibrated hole is made of brass.
- The membrane is made of elastic, petrol-resistant plastic.
- The throttle body is made of a steel-based alloy, with additives for resistance to oxidation and corrosion.
- The gaskets are cut from paronite.
The body of more modern KPM 100U carburetors could be cast from an aluminum alloy with the addition of magnesium to lighten the weight.
Do-it-yourself carburetor adjustment - what does it include?
The main sign of the need for the procedure is increased fuel consumption. It is significant when, when cold weather sets in, the car produces increased speed and stalls. Only a professional or car enthusiast with experience and special skills can diagnose the problem (do not forget to study the manufacturer’s instructions before starting work).
Find out the cost of carburetor adjustment online in 3 minutes
Don't waste your time - use the Uremont search and get offers from nearby services with specific prices!
Carburetor repair and adjustment
The node in question is part of the engine system and is responsible for the formation of the air-gas mixture in the internal combustion engine. The fuel supply system consists of several chambers (float chambers collect the liquid component, mixing chambers combine vapor with air).
When the machine is equipped with two chambers for the formation of the working mixture, one is responsible for “idling” (the second operates in normal mode). When they operate simultaneously, the system fills with condensate and the motor fails in the cold. At the same time, the car suddenly starts moving.
Signs of a carburetor problem:
- engine power has dropped;
- excessive fuel consumption is observed while driving;
- gasoline leak (can be detected at the parking lot);
- carbon deposits on spark plugs;
Is it possible to adjust the carburetor yourself? If the car owner has special skills and experience, yes. Let us remind you that an effective preventive measure to extend the operating life of the unit is its regular washing. It is carried out with a special means every 7 thousand km.
DIY carburetor repair
First, the unit is dismantled. To do this, remove the air filter and remove hoses, pipes, and wires. Before work, prepare screwdrivers (including for jets) and wrenches.
The operating algorithm is described below:
- remove the mesh filter by unscrewing the plug;
- on the axes of the air damper and throttle, disconnect the linkage of the levers;
- dismantle the gasket and top cover of the carburetor;
- remove the floats;
- remove the damping springs and needle valve;
- unscrew the jets;
- take out the emulsion tubes;
- unscrew the discharge valve and nozzles;
- dismantle the remaining valves.
After this, all spare parts are washed with a special product (resinous deposits can be removed with a solvent - we do not recommend using abrasives). Next, the parts are dried with compressed air.
When repairing a VAZ carburetor with your own hands (for owners of domestic cars this is usually justified), do not forget to change the cracked gaskets and “put” the jets in their places.
In order not to get confused, we recommend that you find a detailed video on the request “VAZ carburetor repair”.
Setting the float mechanism
If bent, the bracket is smelted manually. To adjust, it is necessary to close the needle valve and align the float with the walls and lid of the fuel chamber. Next, the element is moved away from the valve by 15 mm.
Fuel mixture supply
Here the work is done with the carburetor control screws. Factory pressing limits their rotation to 50-70 degrees. If it is not possible to unscrew it, it is broken off. Warm up the engine to operating temperature and set the correct position of the bolts.
To adjust the idle speed, turn out the quality and quantity screws a few turns. Tighten and listen to the operation of the internal combustion engine. The signal for the correct position will be the smooth operation of the power unit.
Knot rods
Remove the air filter cover and use a caliper to measure the distance between the tips (guideline - 80 cm). To correct the problem, you need to loosen the clamps. To check the strainer, there must be fuel in the float chamber. This allows you to check the operation of the shut-off valve, which is cleaned and dried. If the needle allows air to pass through (tested with a rubber bulb), it needs to be changed.
Frame
In case of severe deformation, straightening with light blows of a special tool (hammer or mallet) is necessary. Next, the surface is leveled with a wide velvet file. To identify the curvature of the body, use a ruler. Before leveling, remove the adapter tubes (you will need drills slightly smaller than the diameter of the holes to fit into tension).
What can be made from a Ural chainsaw?
It is difficult to find someone who has never tried to make useful homemade products with their own hands from a Ural chainsaw. Their diversity is amazing and gives a chance to once again be convinced of the ingenuity of folk craftsmen. Let's consider the main ones:
- sawmill - is made on the basis of a metal frame with a guide along which the chainsaw moves. A homemade sawmill is the simplest homemade product, the creation of which does not require expensive spare parts;
- motor drill - consists of a chainsaw motor and a gearbox that reduces its speed. Useful for lovers of winter fishing, construction and outdoor installation work;
- outboard motor is a homemade device for small-sized boats. It is assembled from a motor, gearbox, shaft, and screw that receives torque from the chainsaw engine. Allows you to reach speeds of up to 16 km/h with relatively low fuel consumption;
- moped from a chainsaw - a bicycle is taken as a basis, which is aggregated by a chainsaw motor. The gear transmission helps transmit speed to the gearbox, which is necessary for easier control of the vehicle;
- tricycle made from a chainsaw "Ural" - a small-sized 3-wheeled vehicle with a welded base. Wheels are attached to the metal body, like on a children's tricycle. The steering and chain drive are what you'll have to tinker with;
- a snowmobile is a unit that is a motorized sled. It has a complex design: in addition to the engine and gas tank, the clutch, transmission, gas switch must be thought out, and the turning of the skis or tracks must be ensured.
There are quite a lot of accessories for the Ural chainsaw. This suggests that the possibilities of using this tool can only be limited by human imagination.