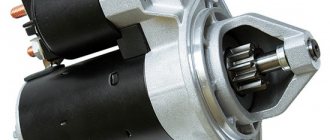
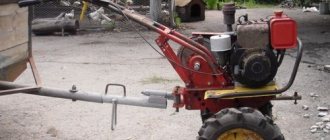
The starter for the walk-behind tractor is responsible for starting the engine.
With its help, the engine starts properly and quickly. Many walk-behind tractors operate on manual starters. But it is possible to independently replace a manual starter with an electric one. To do this, you should follow a simple scheme. A simple algorithm will allow even a novice farmer to complete all installation work.
To ensure proper operation of the starter, it is necessary to regularly perform preventative maintenance. Simple steps will keep the entire unit in good working order. The equipment will last longer and work smoothly.
How to install a starter on a walk-behind tractor - the correct procedure
Even a beginner can remove the electric starter from the walk-behind tractor in order to further repair the broken mechanism.
However, many novice farmers usually have problems installing the starter back onto the unit with their own hands. Due to improper installation, the starter does not start the walk-behind tractor engine even after several strong jerks. To avoid common mistakes, you should study the algorithm for installing a starter on a walk-behind tractor in more detail. Installation of the starter should be done in this order:
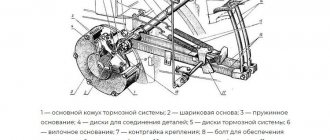
- First you need to remove the flywheel - this will be required to install and fix the crown on it. To dismantle the flywheel, you need to dismantle the air filter, which will give free access directly to the internal structure of the walk-behind tractor on the farm;
- Then you will need to remove the protective casing and unscrew the screws that secure the starter mechanism basket, flywheel and its nut. Removing the flywheel, as a rule, causes certain difficulties, and therefore many experts advise purchasing a removable key immediately before repairing the walk-behind tractor. As soon as the flywheel is dismantled, you should unscrew the key, which is located immediately behind the flywheel;
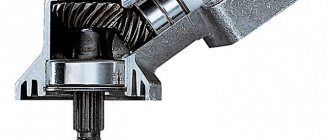
- After this, the generator should be installed. The wiring in it must be inserted into a hole located in the metal wall of the engine. The generator will then need to be secured in place on the motor wall;
- Next, generator magnets must be installed inside the existing flywheel. In this case, all existing holes in the flywheel and generator must match. Both elements will need to be connected with fasteners, after which the crown of the walk-behind tractor used will be installed. Immediately before installing the crown, it must be heated using a spray burner;
- The assembled mechanism must be installed on the motor of the walk-behind tractor, simultaneously screwing in the nut and key of the flywheel;
- Next, you need to screw in the starter basket, fix the casing and firmly install the standard air purification filter in its regular place;
- Then you will need to remove the plug and install the starter itself on the engine;
- Next, you will need to connect the generator wiring to the charging relay;
- At the final stage, the starter terminals must be connected to the walk-behind tractor battery and the unit must be started.
Installing a starter on an existing walk-behind tractor is not as difficult as it seems at first glance. The most important thing is to be as careful as possible and adhere to the correct assembly algorithm.
All of the listed methods for repairing a starter are suitable for owners of Neva, Cascade and Agro walk-behind tractors. The procedure for removing and reassembling the mechanism will be similar for agricultural machines of all listed equipment manufacturers.
Walk-behind tractors seem to be an extremely common device that can significantly simplify land cultivation, as well as many other types of work. Having figured out how to install a new starter on a walk-behind tractor, the farmer will be able to repair the product himself, saving on the services of a specialist.
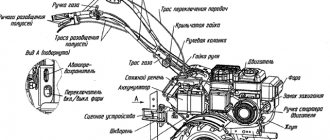
How to install a starter on a walk-behind tractor - the algorithm in detail
Even novice farmers do not have problems dismantling, disassembling and installing a walk-behind tractor's manual starter. However, the assembly and installation of an electric starter raises a number of questions for inexperienced owners of walk-behind tractors. As a result of incorrectly performed procedures, the engine starting mechanism refuses to work, which is why the starter has to be taken to the workshop. To avoid this need, let’s learn how to install a starter on a walk-behind tractor at home. The installation looks like this:
- To install and secure the crown on the walk-behind tractor flywheel, the flywheel will need to be removed. To do this, remove the air filter of the unit to gain free access to the internal structure of the walk-behind tractor;
- After this, remove the protective cover, unscrew the screws holding the recoil starter basket, the flywheel nut and the flywheel itself. Dismantling the walk-behind tractor starter flywheel can cause certain difficulties, so to remove this part it is better to purchase a special removable key in advance. After removing the flywheel, do not forget to unscrew the key located immediately behind it;
- Next you need to install the generator. In this case, insert its wires into the hole in the steel wall of the motor, and install the generator into the seats on the engine wall;
- Then install the generator magnets inside the flywheel so that the holes in both elements match. Connect both parts with screws and install the crown. Before this, the crown needs to be heated using a burner in the form of a spray can;
- Install the assembled assembly back onto the engine, simultaneously screwing in the keys and flywheel hook;
- Screw in the recoil starter basket, secure the casing and reinstall the walk-behind tractor air filter;
- Next, remove the starter installation plug and install the starter itself on the walk-behind tractor;
- After this, connect the generator wires to the charging relay;
- Connect the starter terminals to the unit’s battery and start the walk-behind tractor.
As you can see, installing a starter to a walk-behind tractor is not as difficult as it might seem at first glance. The main thing when assembling it yourself is to strictly follow all the rules and recommendations listed in the algorithm.
All described methods for repairing and installing a starter are suitable for installing the mechanism on walk-behind tractors Neva, Cascade, Agro and agricultural machines of other well-known manufacturers.
Walk-behind tractors seem to be an extremely common device that can significantly simplify land cultivation, as well as many other types of work. Having figured out how to install a new starter on a walk-behind tractor, the farmer will be able to repair the product himself, saving on the services of a specialist.
Related:
Our project lives and develops for those who are looking for answers to their questions and strive not to get lost in a stormy sea of often useless information. On this page we told (or rather, showed