Homemade ratchet winch
Homemade winch in the garage /Homemade winch in the garage/
Do-it-yourself winch from a KAMAZ ratchet and a carriage for it
Homemade ratchet winch. Power!
homemade winch with brake ratchet
Do-it-yourself winch from a KAMAZ ratchet
Ratchet winch.
Homemade winch for the garage /Selbstgemacht Haspel in die Garage
Manual Winch With Your Hands
winch from a KAMAZ trestle
DIY winch. Winch for car
The winch is an ancient invention that appeared before man studied the laws of physics. The device operates on the principle of a lever—the operator applies little force to the handle, and the device moves heavy objects. An irreplaceable thing for car enthusiasts or summer residents, but expensive. Making a handmade homemade winch solves the problem of high price. For little money you can make a design of any complexity.
Purpose of the device
When driving off-road, a driver may encounter an insurmountable obstacle. Then the car will have to be pulled out of the mud or sand with something. A winch is the ideal tool for this. Some vehicles have the device installed on the front bumper from the factory. Purchasing a ready-made winch can cost a lot of money, so it makes sense to make it yourself using improvised materials.
A factory or homemade winch with a manual drive (or with an electric drive from a starter) allows you to pull out a car without a tow. Experienced car enthusiasts prefer home-made devices that fully meet their needs. Factory winches often fail or cost a lot of money.
There are different types of structures. It is impossible to say unequivocally which one is better. Different types are used for different situations and purposes.
Device types
Classification is the first thing you need to know about the traction device. They are divided depending on the type of design, drive and technical features. Some types of winches are easy to make yourself - this is the simplest mechanism with a manual drive .
And complex structures will work reliably only if they are manufactured in a factory. This specificity must be taken into account when choosing a type for self-production. There are removable and stationary winches. The first option can be removed from the car, carried out maintenance or used for other economic purposes.
Classification depending on the type of drive:
- Manual. Its advantages are its small size and relatively light weight. The work is carried out according to the drum principle. The cable is pulled onto a separate reel, and it is rotated by hand. The disadvantage lies in the limitation of the mass with which work can be done - no more than 1 ton.
- Mechanical. The drum with the cable is rotated by the machine's engine. The design is heavy, so car enthusiasts rarely use it.
- Electric. The best option is for the drum to be driven by an electric motor. The latter is powered by a battery or the vehicle's electrical system. The load capacity in this version is 4 tons.
- Hydraulic. The design is complex, but it works silently and with great traction force. But such systems are unreliable and expensive. Another drawback is that it is impossible to make a hydraulic drive system yourself.
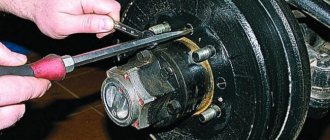
How to divorce and let down
Before opening the ratchets on a KamAZ, it is necessary to measure the free play of the rod.
Before starting work, you need to make sure that the parking mechanism is turned off along with the power unit.
To carry out this procedure, it is recommended to install the vehicle on an inspection pit or a special platform designed for repair work. After this, you should measure the air pressure in the pneumatic drive system of the brake system.
It is necessary to mark the location of the extreme point of the rod. To do this, you will need to install a ruler parallel to the rod with the end facing the brake chamber body. After this, press the brake pedal all the way and mark the new position of the rod.
If the difference in the results obtained exceeds 40 mm, you need to loosen the locking bolt, rotate the brake lever axis and move the ratchets apart until they come into contact with the drum body.
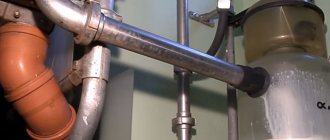
A simple option made from scrap materials
Some motorists often drive into a field or forest, which may result in problems negotiating difficult areas - mud and sand.
The car gets stuck, and you have to puzzle over how to get it out. The simplest hand-made homemade winch can be made in the field. Materials:
- Scrap and pipe cuttings.
- Cable.
- A piece of pipe for a lever.
It is unlikely that you will have the materials with you on the road. But everything you need can be found in the nearest village. Instead of a cable, a strong rope will do.
Manufacturing procedure:
- Drive a crowbar or a small diameter tube into the ground to create an axle.
- A larger diameter tube is placed on the axle, to which a cable is attached.
- A lever is slipped under the lower turn of the cable. This could be another tube, a shovel handle, or a pole. The main thing is that the material is durable.
With such a device, which can be assembled in ten minutes, you can move any heavy object, not just a car. The lever is rotated so that the cable is wound around the pipe. Such a manual winch will help to quickly solve the problems of moving heavy loads. This is not a full-fledged device, but it will get the job done.
Design and principle of operation
The brake lever (ratchet) structure includes the following mechanisms and parts:
- lid;
- gear type wheel;
- stub;
- worm;
- frame;
- sleeve;
- retaining bolt;
- fasteners;
- spring locking mechanism;
- locking device ball;
- oiler;
- worm axis.
In the body of this device there is a gear-type worm wheel, which is equipped with special holes. The axles on the expansion fist are installed in these holes.
In order for the axial mechanism to be fixed, the design provides a locking device, the ball of which is inserted into a special hole on the worm axis under the influence of a spring mechanism. The spring itself rests against the bolt of the locking mechanism.
The gear-type wheel mechanism does not fall out of the lever body thanks to protective covers. As the axial device rotates, the worm begins to rotate the wheel, and the expansion cam rotates with it, thereby moving the brake ratchets apart and reducing the gap between the shoes and the drum mechanism.
When you press the brake pedal, the ratchet is rotated by the chamber rod. Before adjusting the clearance of the locking bolt, you need to loosen the bolt itself by 1-2 turns, and after adjustment, tighten it back.
Manufacturing a system with a universal drive
The manual system is easy to manufacture. Of the special skills the master is required to do, only own a welding machine. Any metal will do the job. The appearance of the device is not so important, the main thing is performance and resistance to heavy loads. The frame should not be deformed.
Materials and tools:
- Rectangular tube for frame.
- Shaft for the drum, you can use a round tube.
- A sheet of metal with a thickness of at least 3 mm for the manufacture of drum disks.
- Threaded rods M10-M12, 24 cm long – 6 pieces, nuts.
- Tube diameter 14 mm - 6 identical pieces of 20 cm.
- Asterisks - large and small. Chain.
- Hubs to secure the drum to the shaft and secure the shaft to the frame.
- Drive lever.
- Cable with carabiner.
- Welding and electrodes.
- Grinder and grinding disc for it.
- Paint and primer.
- Wrenches included in the set.
Some materials are better purchased - for example, tubes for the studs and shaft. The rest can be picked up from old mechanisms - cars or motorcycles. Any metal will do, even used.
Manufacturing procedure:
- They sketch out a drawing, because this will make it easier to navigate during assembly - you won’t have to stand guessing over the half-finished product and think about what to do next.
- Cut out the frame parts from a pipe with a cross-section of 2 by 2 cm. Connect the frame parts together strictly perpendicularly. The cut on the workpieces is made at an angle of 45 degrees.
- Lay the frame blanks on a flat surface. The joints are spot-tightened by welding, after which they check whether everything is installed correctly. The angles of the connections must be strictly 90 degrees. If there is a lack of accuracy, corrections are made and then the parts are welded.
- Scale is removed with a grinder and a grinding wheel. The finished frame is sanded and then coated with a primer. After the latter has dried, the metal is painted with enamel in 2 layers. You can use regular paint. The goal is to protect the metal from corrosion, since operating conditions will be difficult, with dirt and moisture.
- Creating a drum. Take a sheet of metal and cut out 2 circles, their diameter is about 30 cm. On each circle you need to make 7 holes:
- One in the center. The diameter must match the shaft size.
- 6 holes at a distance of 7 cm.
- The discs are fastened together using pins. The pin is inserted into the hole of one disk in a vertical position. Tubes with a diameter of 14 cm are put on the studs, and a second disk is installed on them. The studs must not only be secured with nuts, but also additionally reinforced with locknuts to ensure reliable connections.
- The drum is ready, now the shaft is mounted. It is made from a metal pipe, but you can take a finished product from any mechanism. The latter option is preferable: since the accuracy of the factory part is higher, vibrations of the drum will be small or absent altogether.
- A large diameter sprocket is mounted on the shaft on the outside of the drum. A sprocket from a motorcycle gearbox will do. To secure the drum to the frame, the outer sides of the shaft must have hubs.
- The drum assembly with the shaft is mounted through the hubs on the frame. The structure is secured with bolts. Before installing the drum, you should prepare a platform on the frame. A drive will be installed on it - manual or electric. When using an electric drive, a motor is placed on the platform with a small sprocket attached to its shaft.
- A universal drive is often installed: a handle is placed on the reverse side of the output shaft of the electric motor. In the absence of electricity, the winch can be turned manually.
- It is important to properly tension the chain. It should not sag, but strong tension is also unacceptable - this will cause the sprockets to wear out faster, and the chain may break. Check the chain tension by rotating the drum - the chain should not hinder its rotation when the cable is unwound.
- The end of the cable is secured to the shaft and wound around the drum. A carabiner is hung on the other, free end of the cable.
- A shank is attached to one end of the frame. With its help, the winch is secured to the car frame.
The winch is created in a day. Since it will be installed on an SUV, the operating conditions will be appropriate. To prevent dirt and sediment from getting on the drum, it is covered with a casing. This way the mechanism will last longer and the cable will not wear out.
The design is simple, reliable, and easy to make yourself . Yes, it does not have the ability to change the gear ratio, there is no reverse and other additional functions. A self-made electric winch is capable of dragging a heavy load across the terrain, be it a car or something else.
How to change
Before starting the procedure, it is recommended to release the parking brake and secure the rear wheels with shoes on both sides. After this, loosen the tension on the mounting bolts and nuts, jack up the tire treads and install the support stand.
In order to change the freewheels, you need to completely unscrew the wheel mounting mechanisms and remove all the bolts from the disk. Then you need to pull out the brake hose and use a screwdriver to bend the edges of the lock washers that secure the guide bolts from unscrewing. A screwdriver should be inserted between the disc and the brake bar on the side of the piston part of the caliper, press on the bar (this will help relieve the pressure of the pistons) and move the ratchet away from the disc. You can then lift the protective cover and remove the ratchet.
After these steps, you need to loosen the fastening nut and move the caliper housing along with the fixing brackets.
Before installing a new part, it is necessary to press the caliper piston inward until it stops using a pry bar. After this, it is recommended to check the brake fluid level in the system; if necessary, top up to the required level. You should also conduct an external inspection of the thickness of the disc and brake hose for damage and defects. If cracks are found, the elements must be replaced with new ones.
After this, you can install new ratchets. The mechanism is assembled by performing all steps in reverse order.
Brake system of Kamaz vehicles
The braking system of Kamaz-5320 vehicles consists of four autonomous braking systems: service, spare, parking and auxiliary.
Although Kamaz brake systems have common elements, they operate independently and provide high braking efficiency in any operating conditions.
In addition, the Kamaz vehicle is equipped with an emergency brake release drive, which makes it possible to resume the movement of the vehicle (road train) when it is automatically braked due to a compressed air leak, an alarm and control devices that allow monitoring the operation of the pneumatic drive.
The Kamaz-5320 braking system is designed to reduce the speed of the vehicle or stop it completely.
The brakes of the Kamaz-5320 service brake system are installed on all six wheels of the vehicle. The drive of the working brake system of KamAZ-5320 is a pneumatic dual-circuit one; it operates separately the brake mechanisms of the front axle and the rear bogie of the vehicle.
The drive is controlled by a foot pedal, mechanically connected to the brake valve. The executive bodies of the drive of the working brake system of KamAZ-5320 are the brake chambers.
The Kamaz-5320 spare brake system is designed to smoothly reduce the speed or stop a moving vehicle in the event of a complete or partial failure of the working system.
The Kamaz parking brake system provides braking for a stationary vehicle on a horizontal section, as well as on a slope and in the absence of a driver.
The parking brake system on Kamaz vehicles is designed as a single unit with the spare one, and to activate it, the hand valve handle should be set to the extreme (upper) fixed position.
Thus, the Kamaz brakes of the rear bogie are common to the working, spare and parking brake systems, and the latter two also have a common pneumatic drive.
The Kamaz brake auxiliary system serves to reduce the load and temperature of the brake mechanisms of the service brake system.
The auxiliary braking system on Kamaz vehicles is an engine retarder, when activated, the engine exhaust pipes are blocked and the fuel supply is turned off.
The Kamaz emergency brake release system is designed to release spring energy accumulators when they are automatically activated and the vehicle stops due to a compressed air leak in the drive.
The drive of the Kamaz emergency brake release system is duplicated: in addition to the pneumatic drive, there are emergency brake release screws in each of the four spring energy accumulators, which allows the latter to be released mechanically.
The Kamaz alarm and control system consists of two parts:
— Light and acoustic signaling about the operation of brake systems and their drives. At various points of the Kamaz pneumatic drive there are built-in pneumatic-electric sensors, which, when any braking system, except for the auxiliary one, closes the circuits of the electric brake light lamps.
Pressure drop sensors are installed in the drive receivers and, if there is insufficient pressure in the latter, they close the circuits of the signal lamps located on the vehicle's instrument panel, as well as the sound signal (buzzer) circuit.
— Valves of control terminals, with the help of which the technical condition of the Kamaz pneumatic brake drive is diagnosed, as well as (if necessary) the selection of compressed air.
Tractor vehicles are also equipped with a set of pneumatic devices for actuating the brake mechanisms of a Kamaz trailer (semi-trailer) with a single-wire and double-wire drive.
The presence of such a drive on tractors ensures their aggregation with any trailers (semi-trailers) that have a pneumatic drive of the brake mechanisms.
Kamaz brakes (Fig. 1) are installed on all six wheels, the main unit of the brake mechanism is mounted on caliper 2, rigidly connected to the axle flange.
Fig.1. Kamaz car brake
1 — block axis; 2 — caliper; 3 — shield; 4 - axle nut; 5 — pad axle lining; 6 — block axis pin; 7 — brake pad; 8 - spring; 9 — friction lining; 10-bracket for expanding fist; 11 — roller axis; 12 — expansion fist; 13 - roller; 14 — adjustment lever
Two brake pads 7 with friction linings 9 attached to them, made along a crescent-shaped profile in accordance with the nature of their wear, rest freely on the eccentrics of the axles 1, fixed in the caliper.
The axes of the shoes with eccentric supporting surfaces allow the shoes to be correctly centered relative to the brake drum when assembling the brake mechanisms.
The Kamaz-5320 brake drum is attached to the wheel hub with five bolts.
When braking, the KamAZ-5320 pads are moved apart by an S-shaped fist 12 and pressed against the inner surface of the drum. Between the expanding fist 12 and the pads 7, rollers 13 are installed, which reduce friction and improve braking efficiency.
Assembly Tips
Design development is carried out carefully, as well as assembly. The task is to treat each operation as responsibly as possible. The goal is to complete the assembly with high quality. This will avoid troubles when operating in extreme conditions. Therefore, there is no need to force the work, even if it is really necessary.
Steps to achieve high build quality:
- The work is done slowly and thoughtfully. A raw, unfinished unit cannot be used.
- Follow the drawing.
- Weld seams are treated with an anti-corrosion compound. Welding is done in carbon dioxide to obtain a high-quality seam.
- The electric drive control panel is placed as far away from rotating parts as possible.
- Electrical wiring is carefully insulated. The contacts are protected by additional insulation from moisture and dirt.
Advantages of Hottecke brake adjustment levers
All components of Hottecke automatic brake adjusters comply with the strict technical requirements that apply to every part delivered to the automotive assembly line.
Engineers at the plant where Hottecke adjustment levers are produced regularly conduct Life-time tests, receive information about the overall resources of the units, and take timely measures to improve the quality of components.
Each detail of ratchets for trucks undergoes additional testing at a special stand. One hundred percent input, intermediate, and output control is the key to producing serviceable, high-quality, reliable adjustment levers.
In addition to reliability, Hottecke nodes differ:
- • Corrosion resistant. Parts are tested in a salt chamber.
- • Increased safety margin of key elements, built in at the design stage.
- • The brake levers work properly in a wide temperature range from -40°C to +80°C. Lever elements that are worn out after long-term use in difficult conditions can be replaced with new ones. Repair kits are produced specifically for Hottecke adjustment levers; they are presented on our website. Universal, with all key components.
Winch made of KAMAZ ratchet with electric drive
Post by Mohati » 16 Feb 2011, 18:10
I'm interested in designing and building a cheap winch, I'm stuck on the question: Ratchet from KAMAZ (Zil Kraz) (worm gear 24) Will it withstand 600 rpm if the input is 800 n/m? will it withstand the question of resource approximately?
I’m thinking about how to make it easily replaceable or not.
Post by School » 16 Feb 2011, 18:26
Post by nuf » 16 Feb 2011, 18:51
Post by Yurich » 16 Feb 2011, 19:48
Post by Mohati » Feb 25, 2011 11:49 am
the task is to start by making a test sample (for dragging stones onto a trailer, 2 tons of traction is needed) according to my calculations, with a handle of 300 mm and a drum of 80 mm, it turns out that we take the force on the handle equal to 15 kg, then the input moment = 4.5 kg * m , multiply by 24 and 0.7 (efficiency) we get the output torque of 75.6 kg*m and divide this value by 0.04 (drum p) we get 1890 kg. Regarding the speed when loading, there is no need to rush because this is a hobby.
The next question is a 2 ton UAZ in a 2 ton trailer, Crimea, mountains, you can get stuck on a seemingly level place where you have passed many times, but due to the weight you can’t pull it out and you will get swayed, there is no way to unhook and pull the trailer, what should you do? I adapted the same ratchet to its same shaft and got, with the same amount of force, a thrust of 5000 tons, it saves, but it’s really very slow, I started thinking about a winch (I’ll say right away that I don’t want to buy it because I don’t need it for 40,000 20 days a year) but my UAZ didn’t cost that much.) I climbed and read and found a winch from the main pair made and a clutch motor so it has a total gear ratio of 27 and they say the UAZ flies through the water on its belly, I don’t need speed but I need crazy traction ( as an option, hydraulics, but that comes later) if through the chain from the shaft we multiply the gear ratio from 3 to 5 by the gearbox and get 72 or 100, which is not bad at all. The question is at 1000 rpm of the engine and 200 revolutions of the ratchet (we’ll set a maximum of 500) there is no doubt that it will withstand (I tore the cable 14 for it) the question is how long.
And I also read a bunch of forums and came to the conclusion that if you design such a winch and put it into production, its cost will be approximately 10-15 thousand rubles (depending on the method of disconnecting the drum and jaws) and sell it to all those who write and suffer from the fact that there is no cheap sample, or expensive or not of good quality, because if you are an athlete, then of course you have an electric one and a manual one, and if so, for peace of mind. You can also carry manual ones with you, but they are always dirty, bent and the stroke is small, and the MTM does not work in the mud. And here There will be an installation kit for the UAZ (with preservation of the curve) for 15 I would buy it.
It’s no problem to put the components on stream in the Kamaz machine, the drum at the factory (1000 rubles is a way out) the cable is on the market, I got a worker to assemble it for 200 rubles) mine cost me 6000. and even if the ratchet survives 15 climbs (20 m in both directions ) under load, if it is made in such a way that it is easy to change the worm and gear, so what is the question of carrying with you, let 2 spare ones cost 300 rubles each. I made it so that the ratchet can be removed from the frame in 2 minutes using one key.
Chassis repair.
Hello everyone, I continue the renovation!
I decided to overhaul the brakes and check the gearbox. I removed the hubs and brake drums from the entire car, riveted new brake linings, welded and turned the expansion knuckles on a lathe. I bought and installed new ratchets. Since the car behaved disgustingly on the road - (steering and steering everywhere) I decided to change the support washers to roller support bearings from KamAZ 6520 on the steering knuckles. I knocked out the kingpin on the right side with a sledgehammer, replaced the crushed washer with a new, lubricated bearing, added adjusting washers and reassembled it. I fiddled with the left side for two days; the kingpin didn’t want to come out of the sledgehammer! I had to weld a frame from a channel and old springs to press out the kingpin with a jack.
Having welded the frame, I began to try to squeeze out the kingpin, the frame tore at the seams three times, until I specifically reinforced it with reinforcement. After that, in the dark, I still squeezed out the kingpin! The next day I collected my fist without any incident. Since it was clear that they were squeezing out the last juices from the machine and didn’t even bother to syringe it, I decided that it would not be a mistake to revise the gearboxes, and I was not mistaken. Having pulled out both gearboxes, I found a bunch of chips in the crankcases and chipped teeth on almost all the gears. The crosspieces were broken and the satellites were welded to them. In one of the stockings, huge fragments of something else were found from a previous repair by peace traders :)
In general, I go to the store, pick up bearings, shims, gears and assemble the gearbox.
Then my hands reached the drooping rear bumper. I straightened the bumper as best I could with the help of winches and sledges. painted, screwed on new LED lights and put them in place.
In order for the LEDs in the new flashlights and headlights to work longer, I decided to install additional protection in the form of voltage stabilizers. Having purchased L7824CV3 stabilizers, I soldered wires to them and screwed on a homemade radiator made from an old liner.
I connected the dimensions and brakes through the stabilizers and checked. When the car was running, there was 28 volts on board the network and 24 volts came out through the stubs!
Fixed the torn front bumper, installed new headlights and hooked it up. The running lights were also connected via stabilizers.
Do-it-yourself winch from the starter
A winch is a necessary element of vehicle equipment if you plan to travel off-road. It can also come in handy in urban conditions if a wheel gets stuck, but in difficult terrain, where there is no way to call for help and the car is stuck on the very bridge, the winch is indispensable.
Often SUVs are equipped with this device at the assembly stage or you can buy it. But a homemade winch for a car, if you look at it as an ordinary task, is completely within the capabilities of anyone and does not require an engineering education.
In addition, such a device can replace a construction crane if everything is calculated in detail, a drawing and a work diagram are made. This will be more effective than using a hoist. Such a mechanism can be installed on a trailer or MZSA trailer.
Types of homemade winches
Winches are divided into three main types: electric, mechanical and hydraulic. The fourth is manual. Each design has its pros and cons, both during the design and installation process, and during operation.
A hand winch is a popular option. The downside is that its use requires physical effort. The advantage is complete autonomy, no electricity required. In order to pull out a car, all you need is a firmly standing tree or just a crowbar driven into the soil. Hand winches are divided into 3 main types:
Lever ones use a ratchet or ratchet mechanism. Their main drawback is the traction force - from 0.7 to 4 tons. The advantage is that there is no need for rigid fixation; you can work on weight. This is the simplest type of winch.
Assembly-traction winches are almost similar to lever winches, but are not equipped with a drum. This is the most common type, and not only for cars.
Drums are the most effective option. The drum can be toothed or worm. The first wears out much more slowly.
Advantages of drum winches: traction force from 0.25 to 5 tons; a brake that is activated in an emergency situation; cable length (up to 40 meters with a diameter of 15 mm). If the thickness is greater, you can pull out any heaviest car from anywhere, and the cable will not break, even if you give full throttle.
Homemade winches from various materials
A winch can be made from a variety of readily available materials. These are mainly spare parts from automotive equipment, other devices and mechanisms whose service life has expired. Finding available materials - metal pipes, iron sheets, different types of cables is also not a problem. There are several types of winches that are increasingly popular.
Winch from starter
A DIY starter winch is a convenient option for saving money. In order for a homemade winch from a starter to realize its potential, you will need:
- 12 volt gear starter (easy to find from VAZ 2106 or 2110).
- As a gearbox (reduction), you can get by with a drill assembly.
- For the casing that covers the space between the engine and the gearbox, a piece of pipe (for example, PVC) is suitable. It should be easy to disassemble for access inside and maintenance of the device.
- The drum is often made of durable (from 120 mm) steel pipe and sheet iron (2-3 mm).
- Gears, cable, electrical wiring.
IMPORTANT! To prevent the battery from draining quickly, it is worth reducing the consumption of the electric drive. It is better to use a 12 volt starter with a planetary gearbox. This is the most compact and lightest option.
To make such a winch from a starter, a platform is made from a sheet of metal, and components are attached to it. The drum seats are then welded to it. The gearbox is welded so that the input shaft is on top. An adapter for the starter is attached to the gearbox, and gear teeth are attached to the input shaft. For this, the flywheel crown is used. Then the starter and wiring are attached.
Winch from wiper motor
To make a winch, you can use a motor that previously used a windshield wiper or windshield wipers for its work. These devices are capable of showing good results and lifting weights up to 300 kg.
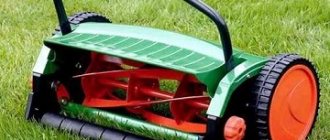
It is popular to use such a mechanism to mount a blade on a vehicle of sufficient cross-country ability (for example, Niva) - for clearing snow or similar tasks.
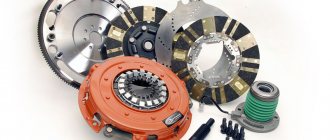
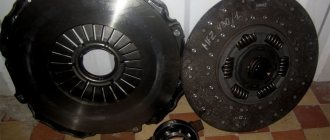
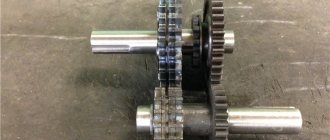
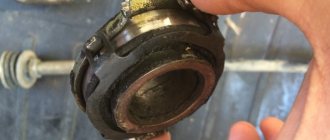
Winch from KAMAZ ratchet
A truck brake ratchet (a self-leveling mechanism for adjusting brakes) is a popular option for a homemade winch. Many people use the KAMAZ version of the ratchet, since KAMAZ is widespread and parts from it are easy to find. Such a mechanism can lift from 400 kg to 2 tons. The popularity of this option is due to the use of a worm gear in the mechanism.
IMPORTANT! The place where such a device is used is often a garage where heavy loads need to be moved. The garage version is used for working with large car parts. Such a mechanism can be installed on a boat to facilitate loading and unloading or raising and releasing the anchor. The anchor mechanism of such a winch must provide an auto-reset function.
For production you will need:
- Two rear ratchets of the truck.
- Two hooks.
- Cable 4-5 mm thick.
- Fist for releasing brake pads.
- Bolt for fastening the hook.
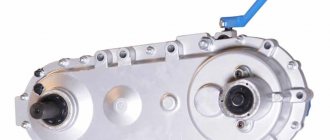
Worm gear winch
The main convenience of a worm gearbox, in addition to its load capacity, is the ability not to use a drum brake. One of the popular options for such a winch is a gearbox from trolleybus doors. It has enough gear ratio for fairly heavy loads and is easy to mount.
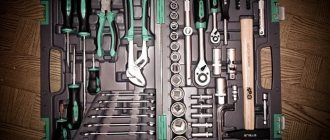
What can be useful for a winch made from scrap materials
To make a homemade winch, any scrap and any working parts that are within reach will be useful. The source of the motor for the electric winch can be a chain saw, a motor scooter or an automatic washing machine (if the motor is running). Cuttings of thin-walled and thick-walled pipes, bearings, gears, starters from old cars, ratchets from trucks, a motorcycle clutch disc, etc. will be useful. You will only have to buy a cable and something not very expensive. A welding machine and a lathe will suffice as equipment.
Possible malfunctions of KamAZ bridges
• Wear of bevel gear teeth. Remedy: No adjustment should be made, since bevel gears must be operated until they are completely worn out without additional adjustment.
• Wear of tapered roller bearings (there is significant axial play in the mesh). Remedy: Restore the preload of the drive bevel gear bearings, then remove the required number of shims from under the bearing housing flange to compensate for bearing wear. Check the correctness of the contact pattern and the lateral clearance in the meshing of the bevel gears.
Increased noise level when driving a car at a speed of 30-60 km/h
• Shift of the contact patch towards the wide part of the teeth. Remedy: Adjust the engagement according to the contact patch of the driven bevel gear.
Increased noise level when braking a car
• Shift of the contact patch towards the narrow part of the teeth. Remedy: Adjust the engagement according to the contact patch of the driven bevel gear.
Intermittent noise when disengaging the clutch and changing gears
• Shift of the contact patch closer to the tops of the teeth. Remedy: Adjust the engagement according to the contact patch.
Continuous noise when driving
• Severe wear or damage to gears. Remedy: Replace the gears as a whole.
• Loose bearings. Remedy: Tighten the nut securing the bearings to the shafts.
• Severe wear of bearings. Remedy: Replace bearings, install new ones with preload.
• Insufficient oil level in the axle housing. Remedy: Check the oil level and top up.
• Leakage of lubricant through the seals and cover connectors. Remedy: Replace the cuffs and tighten the cover bolts.
Deterioration of vehicle stability
Homemade winch for UAZ
Technical characteristics allow you to install homemade winches of any type on the UAZ, the most popular option is an electric winch. It allows you to pull out the UAZ even if the engine has stalled. Easy to use and reliable. Cons: short battery life and vulnerability to moisture. When installing a homemade winch on a UAZ, if it is electric, it makes sense to increase the battery power or carry a spare one.
IMPORTANT! It is possible to install a hydraulic winch, but only with a hydraulic booster. Manual and mechanical (shaft) winches are also used.
Homemade winch for Niva
In some serious way, assembling and installing a winch on a Chevrolet Niva is no different from the same work on other SUVs. One of the features of the Niva is its light weight, so it is recommended that the winch pull be 3-3.6 tons. Sometimes it is advised to install a mechanism with a 4-ton thrust, but this will pull the front of the car down while driving. If you plan to travel long distances off-road, you need a spare battery (for the electric winch).
The height of the role itself is not important, since the vector of application of the load force depends on the location of the rollers through which the cable passes.