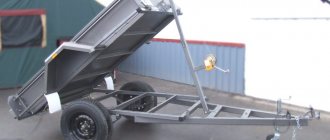
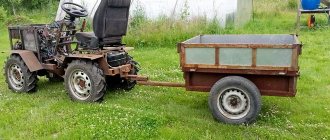
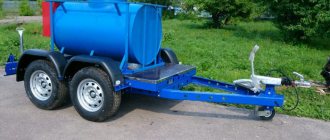
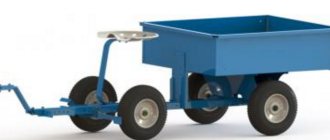
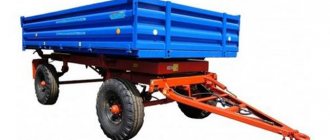
A trailer is a universal means of transporting a variety of cargo. A modern trailer is a square-shaped metal structure with standard machine wheels.
Most often, trailers are used in agricultural activities, as well as for transporting building materials over long distances.
Although a trailer is considered a vehicle, it does not have an engine and moves only with the help of external traction.
To get one, you don’t have to purchase it from a specialty store. Now there are many ways to make a trailer for a car with your own hands.
GOST requirements for the parameters of a passenger trailer
If you want the State Traffic Inspectorate to allow you to operate your homemade trailer, you need to make it yourself in accordance with the requirements of GOST 37.001. 220-80 “Trailers for passenger cars.” For those who do not want to read the original source, we will briefly outline the main restrictions imposed by this document on trailers for passenger cars.
- The trailer must weigh no more than the weight of the towing vehicle. Moreover, its weight should not exceed 1.8 tons.
- A trailer without braking equipment must weigh no more than half the weight of the towing car.
- The static load on the center of the ball joint of the coupling device for any load of the body should be from 25 KGS to 100 KGS.
- A trailer can be no more than 1.5 times longer than the towing vehicle. Its length cannot exceed 8 meters.
- The trailer can be no more than 20 cm wider than the towing vehicle on each side. Moreover, its width should not exceed 230 cm.
- The height of this vehicle for the transport of goods must not be more than 1.8 times the width of its track and cannot exceed 3 m.
- Its ground clearance cannot be less than the ground clearance of the towing car.
- The center of gravity of a loaded trailer should be located no higher than its track width multiplied by 0.725.
- A trailer for a passenger car can only be single-axle. The use of a paired axle is allowed. A twin axle is two parallel axles, the distance between which does not exceed 1 m.
- A trailer with a flat bottom installed on a horizontal platform must have a load on the wheels of one side of no more than 0.55% of its weight.
- The angles at which the drawbar should be able to deviate from the longitudinal axis of the tractor are regulated by OST 37.001.096-77.
- Two permanent pieces of chain or cable must be attached to the towbar (TCU) for insurance. They are designed to ensure that, in the event of a breakage or disconnection of the trailer hitch hinge, the drawbar does not unhook from the car’s tow bar.
- The trailer must be equipped with two wheel chocks (shoes), which can also be made by hand.
- The trailer must have places to install a jack.
- The parking brake control lever (if equipped) must be removable and located on the right front of the frame or on the drawbar.
- The trailer must have fenders and mud flaps to cover the wheels in case the body parts do not fulfill their purpose.
- Its color and appearance are regulated by GOST 7593-80.
- The towing device must comply with the requirements of OST 37.001.096-77 and cannot be made by hand.
- Requirements for electrical wiring and light signaling devices are regulated by GOST 8769-75, GOST 10984-74 and GOST 20961-75.
- To connect to the vehicle's electrical equipment, there must be a connecting cable with a plug (regulated by GOST 9209-76).
- A trailer with wheels that are not identical to those of the tractor must be equipped with a spare wheel and equipped with a device for securing it.
- To ensure stability of an uncoupled trailer, it must have support posts that do not interfere with its towing.
- The trailer must have brackets or a platform for attaching a license plate.
List of things needed to make a trailer
If you decide to make a trailer for a car with your own hands, you will need the following parts and materials.
- Towing device – 1 pc.
- Rear hub axle from a front-wheel drive car – 2 pcs.
- Rear hub from the same car as the axle – 2 pcs.
- Springs from any car - 2 pcs.
- Spring rear end earring – 2 pcs.
- Stepladders with pads – 2 sets.
- Shock absorbers – 2 pcs.
- Steel pipe with a cross section of 30 by 60 mm (2 pieces of 190 cm each - spars; 2 pieces of 122 cm - drawbar beams).
- Steel pipe 25 by 25 mm (4 pieces of 190 cm each - the bottom and top of the side side trim; 8 pieces of 40 cm each - the uprights of the side boards; 4 pieces of 119 cm each - the bottom and top of the front and rear sides; 7 pieces of 114 cm each - crossbars).
- 2 pieces of U-shaped channel No. 5 for the manufacture of bridge beams.
- Hinge loop – 4 pcs.
- Bead fixing device – 4 pcs.
- Rear lights – 2 pcs.
- Multicore insulated wires.
- Plywood 10 mm thick - 1 sheet (size 1.9 by 1.14 m).
- Sheet steel 0.8 mm thick.
- Chain or cable Ø 3 mm – 2 pieces of 20 cm each.
The tools you need are a welding machine, a grinder and an electric drill.
Making a bridge
Fold the channel sections to form a rectangular pipe and tighten them with clamps. Boil the joints. Weld the hub axles to the ends. Attach the resulting bridge beam to the springs using stepladders.
Materials and tools
To work you need the following tools:
- grinder for cutting parts;
- welding machine;
- welding electrodes;
- jigsaw;
- screwdriver;
- a regular construction square for measuring angles.
When making a trailer structure, you will need the following materials and parts:
- metal profile pipes of square or rectangular section;
- wheels and springs;
- duralumin sheets 2 mm thick;
- steel sheets;
- channel No. 5;
- metal corners;
- metal rod;
- fasteners.
All parts, especially if they are remnants of old metal products, are carefully inspected for damage, cracks, cleaned of rust, and trimmed.
Frame welding
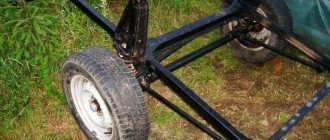
- Lay out the side members, cross members and cross members on a flat surface.
- Cook them according to the dimensions.
- Turn the structure over and weld the brackets securing the front ends of the springs to the side members. This must be done so that there is about 950 mm from the middle of the installed bridge beam to the rear edges of the side members.
- Weld the drawbar and attach the trailer hitch to it.
- Screw the front ends of the springs to the brackets, and the rear ends through the earrings to the side members.
- Install the hubs on the axles and the wheels on them.
- Place the trailer on its wheels.
- Fix the trailer hitch on the car's towbar ball.
- Roll the trailer up to the tongue.
- Fold the drawbar beams overlapping with the side members. Secure the alignment with clamps.
- Remove the hitch from the hook, roll the trailer away from the vehicle and weld the connection between the drawbar and the side members.
Basic information
Before carrying out work on the manufacture of a trailer, it is necessary to develop a detailed action plan and adhere to it.
The work plan for the manufacture of a trailer for a walk-behind tractor looks like this:
- At the preparatory stage, it is necessary to familiarize yourself with the structure of the mechanism and analyze its functionality depending on the power of the walk-behind tractor.
- Make a design sketch. A trailer diagram drawn up yourself will greatly simplify the work.
- Calculate the dimensions of the cart for the walk-behind tractor.
- Design a drawing of the trolley, which includes the main components, parameters and dimensions of the parts.
- Plan the operating principle of the main and additional mechanisms, think through ways to connect all the components and parts, and their functioning.
- Prepare a list of necessary materials and tools.
- Start the assembly and finishing process.
Depending on the ability to transport cargo, trailers are divided into 3 types:
- A simple 1-axle attachment for walk-behind tractors with a lifting capacity of up to 70 kg. Its design is simple and inexpensive.
- Universal cart with a carrying capacity of up to 110-120 kg. Often used in households.
- Carts for walk-behind tractors with a carrying capacity of over 120 kg. Such mechanisms are designed to move heavy loads, so they have a more complex design, which increases the cost of materials for the frame and cladding. The functionality of this technology is expanding.
Based on these parameters, a material is selected based on strength for the frame and finishing of the mechanism.
How to register a homemade trailer
A homemade trailer that can be used without fear must be registered with the State Traffic Safety Inspectorate. To register you must have:
- Conclusion of a technical examination on the compliance of a self-made vehicle with the requirements of GOST001. 220-80. Where such an examination can be done, you need to check with the MREO. Since a conclusion issued by a laboratory not accredited by the State Traffic Safety Inspectorate may be declared invalid.
- Receipts confirming the purchase of parts and materials used to manufacture the vehicle.
- Certificate for the hitch hinge (this is why we advise you to buy it and not do it yourself).
- A copy of your passport.
- A copy of the vehicle's registration certificate.
- An application addressed to the head of the MREO with a request to register a homemade trailer.
- Receipt for payment of state duty.
- 4 photos of homemade products taken from different sides (size 10 by 15 cm).
If you present all these documents, you will be allowed to undergo technical inspection. A positive inspection result will be the basis for registering a self-made vehicle.
A car is not a luxury, as pedestrians believe. Man has made great strides in development, having mastered mechanized wheeled vehicles. Today, this vein, although not as strong, but no less intrusive, continues to excite the minds of motor vehicle enthusiasts from large factories to garage workshops. Exactly in that order. After all, the latter have fewer resources and a much greater desire to experiment. Designing a trailer for a car with your own hands is a suitable goal.
The reason why drivers choose a homemade trailer for a passenger car: individual parameters, cost. Serial manufacturers offer any modification, but the further from the base, the higher the price. Why is this necessary if a pair of wheels, a metal profile and a tool are lying around in the garage? Registration will not cost more, and the experience gained is invaluable. Before constructing the future pride of the street, you need to understand the types of homemade trailers for cars.
Frame covering options
To cover the structure, craftsmen choose inexpensive material or what is available. The price of the product becomes much lower.
- Wooden planks that are often left behind after construction. The main advantages are low-cost, the disadvantages are moisture-resistant, and as a result, the low life expectancy of a wheelbarrow for a walk-behind tractor. In addition, additional funds are needed to process them.
- Plastic. Pros: resistant to moisture, unlike wood; cons: not strong; if damaged, it will break.
- Sheets of metal. Pros - durable material, therefore durable, cons - one of the most expensive options.
But if the cart for the walk-behind tractor will be used constantly, then it is more profitable to make it metal and not spend extra money on repairs. The sheets can be secured to the frame using a welding machine.
Types of self-assembled trailers
Business and industry use professional trailers equipped with special equipment for a specific load. They are distinguished by additional load-carrying capacity and the ability to handle it efficiently under various conditions. Some components are made in the factory using complex technology that cannot be done in a garage: zinc coating, strong welding.
Therefore, you should not aim at a trailer over 750 kg, besides, it assumes category “E”. But if this state of affairs does not suit the motorist, then he challenges the biaxial design for universal use and tests as he pleases. Before the first modification.
The choice of trailer type depends on what to transport and what materials for making it are lying around. A four-millimeter corner or profile, two wheels of a domestic car, a set of springs, wires with lights already bring the unit into the class of homemade single-axle trailers up to 750 kg. Plywood for the sides and bottom is not in short supply, unlike thick sheet metal, which still needs to be cut. The main thing is not to skimp on the coupling mechanism. Making a connecting unit will not cost you just bolts and nuts. For increased safety of a homemade trailer, it is better to buy a special fastener for the towbar. Anyone who has decided to create a passenger trailer with their own hands already knows what a trailer is and what they are, but information on the standards for the manufacture of trailer hitch devices will make it possible to operate the miracle of technology even after the first traffic police stop.
Trolley device
Motoblocks and motor-cultivators on trailers consist of the following basic elements:
- frame;
- body;
- hitch or drawbar;
- driver's seat;
- steering gear;
- chassis.
To withstand heavy loads, a homemade cart for a walk-behind tractor is reinforced with special stiffeners.
For a 1-axle trailer, a manual type device is sufficient. A 2-axle dump truck with a large load capacity must be equipped with a hydraulic drive to prevent it from tipping over.
With a load capacity of over 350 kg, for safety, the self-propelled cart is equipped with braking parts. You can make mechanical brakes yourself. If these details are not taken into account, then if overloaded while descending from a hill, the walk-behind tractor trolley will not be able to stop with its own hands and will tip over. To ensure that it remains in the working position after being disconnected from the walk-behind tractor, stops are installed.
You need to know this
Firstly, this is a simplified list of requirements of GOST 37.001.220-80, given below:
- Permitted trailer weight up to:
- 1.8 t;
- Not heavier than the weight of the tug or half of it when the trailer hitch is without brakes;
- Allowed length no more than:
- 8 m;
- Not one and a half times longer than the car;
- Allowed width no more than:
- 230 cm;
- No wider than the car by 20 cm on both sides;
- Permitted height no more than:
- 3m;
- Not 1.8 times higher than the trailer wheel track;
- The center of gravity with a load is not higher than the track width multiplied by 0.725;
- Ground clearance is not less than the car's ground clearance;
- A homemade trailer for a passenger car can only be single-axle. (A twin axle is also a single-axle design, although it is called a two-axle design among car enthusiasts). The distance between the axes of the paired structure is up to 1 m;
- The trailer must have a load on each side of no more than 0.55% of its own weight;
- The load on the hitch is 25-100 kgf.
- The coupling device must be equipped with:
- A permanent cable or chain in case of sudden disconnection of the trailer hitch from the car while driving;
- Homemade anti-rollbacks (shoes);
- Jacking platform;
- Removable lever brake;
- Mudguards, fenders;
- Signboard for the sign;
- Stable support;
- A spare wheel similar to the car;
- Lighting fixtures, wiring and plug.
Factory walk-behind tractors and trolleys
The configuration of the walk-behind tractor can be very diverse:
This is characterized by the equipment’s carrying capacity, weight, power and other indicators. The walk-behind tractor can be medium, light and heavy (professional). A motor cultivator is considered an analogue of this technique, but it is made to perform one job - cultivating the land. Sometimes it may come with an additional feature.
The design of the carts is not complicated. If you have the usual tools, almost any owner can independently build a cart for a motor cultivator or Neva walk-behind tractor
An important part of manufacturing is the correct drawing up of a drawing or sketch. The main work should begin, strictly adhering to the intended dimensions.
To simplify the process, you can take the factory model of the cart as a sample. Trailers can be of large and small load capacity (500 or 100 kg). At the same time, the body differs in size.
For different types of walk-behind tractors, trolleys with different technical characteristics are selected:
- For heavy ones (more than 10 hp), a single-axle or two-axle cart with a body length of up to 1.5 m in width and 3 m in length can be used.
- For medium-sized ones (power up to 10 hp), single-axle trolleys with a body length of up to 1.5 m and a width of up to 1.4 m are most often used. The load capacity of such trolleys is approximately 300-500 kg.
- For light trailers (power up to 4.8 hp), single-axle trailers with a body length of about 1.15 m and a width of 1 m are used. The trolleys are designed for a load of up to 300 kg.
Standard models of towbars are characterized by placing the center of gravity at the rear, which makes it easier to tip the cart and unload some cargo. Only heavy-duty models are usually equipped with a hydraulic lift cylinder. Such models must be equipped with brakes, since on steep slopes the inertial force of movement will act and it will not be possible to stop the walk-behind tractor.
Trailer manufacturing process
Making a passenger trailer with your own hands, based on the information above, prompts the craftsman to draw a drawing of the future model and search for materials of the appropriate size.
There are basic drawings. But there is one caveat: they require direct assembly with components, the absence of which can puzzle or even discourage you from making a trailer with your own hands. The effective path combines economy, the desire to cut, cook, twist and the ability to give a good result. Therefore, it is worth listing the parts necessary for manufacturing and dividing them into homemade and purchased:
- Square rolled metal 30x60 mm or 25x25 mm is suitable for a frame, rack, and additional stiffening ribs. Although a 40 mm corner is also suitable for the latter. A U-shaped channel is suitable for bridge beams.
- The sides and bottom are made of thick multi-layer plywood 10-12 mm or galvanized iron sheet 0.8 mm. When combined, you get an economical option. In any case, the structural fasteners for the sides must unite the body.
- The chassis is easier to find when disassembling a Zhiguli or Moskvich. It includes:
- Axis;
- Hubs;
- Springs;
- Spring earrings;
- Stepladder with pads;
- Shock absorbers;
- Wheels.
Preparation of drawings for a trailer with a load capacity of up to 350 kg
A walk-behind cart, capable of transporting equipment and luggage weighing up to 350–400 kg, is considered universal for use with a household walk-behind tractor. In principle, it is not worth planning to manufacture a more bulky structure, as this will entail additional costs, as well as wasted time and effort.
To make the walk-behind tractor trolley as reliable and balanced as possible, it is extremely important to study the diagrams. Depending on the material and parts available, the dimensions of the main and additional structural elements can be changed. Below we suggest looking at drawings of the optimal middle-class trolley for household use.
The first diagram describes in detail the general appearance of the trailer with the main parts and components included in its design.
The second drawing details the manufacture of the frame. The main material for its assembly is round or rectangular pipes connected to each other by welding. The body of such a cart is made of boards at least 2 cm thick. All existing sides are tightly connected to the frame and do not fold down.
Registration of a homemade trailer with the traffic police
The last step will be to register a homemade model of your own production. The traffic police will send the owner and the trailer for examination. It is important that the laboratory is accredited. It is necessary to save receipts for used components, and most importantly, a certificate for the hinge device, that same fastening element. In such circumstances, it is better to buy it. From standard papers you need: a copy of the owner’s and car’s passport, do-it-yourself photographs of a trailer for passenger cars, an application to the traffic police to register the towbar, a receipt for the state duty. If you had the documents, you first had to undergo a technical inspection, the positive decision of which recognized that the trailer complied with the standards, after which it was registered and numbers were issued. This procedure is described in more detail in this article.
Events and exhibitions are constantly held to showcase automotive technology. Motorists love to show off a light trailer they created with their own hands, which fits the style of the car, at least due to the color scheme. Today it is profitable to make a trailer yourself. Individual solutions add to the collection of technical insights when designing a trailer. Reliability and safety remain the constant rule.
Without thinking twice, I decided to make a trailer myself from scrap materials. The base of the frame is a profile 150 x 60 mm, 4 mm thick. I also had to dig into my cash stash. Subsequently, it turned out that making a trailer was a little more difficult than making a sauna stove.
My profile is 2.5 m long, and I decided to make the trailer platform 3.5 m long. I welded the beams to the required length. The frame will consist of three segments so that the trailer can be disassembled and compactly folded in the garage. As strength elements, I welded two identical frames with three internal jumpers - 45 cm wide and 350 cm long.
It is very convenient to work on the welding table; with the help of clamps and other simple devices it is easy to control the parallelism and perpendicularity of the elements of the structure being welded.
I used a used profile.
I boil the corner joints completely, and then clean them with a grinder.
Next, I take the drawbar and drill holes in the frames and blanks for it.
I make three internal jumpers: one for attaching the number and two identical ones for the middle part of the frame.
Dump truck trailer lifting mechanism
A 1PTS-9 tractor trailer lift was used as a hydraulic cylinder. The stroke of its rod is 850 mm, which made it possible to raise the body at an angle of slightly more than 50°, sufficient for complete sliding from the ground. Body frame diagram: 1 — side pillar (channel 500x50x5); 2 — stringer (channel 120x52x5); 3 — spar (channel 100x46x4); 4 - loop; 5 — floor trim (corner 80x80x6)
However, in order to install a hydraulic cylinder on the frame, it was necessary to make a truss in the form of an inverted truncated triangle - a strut - from a channel with a section of 120x52x5 mm. On the resulting lower platform of the strut, 300 mm wide, I placed a hydraulic cylinder. As a stop in the upper part, I used a metal circle with a diameter of 650 mm, welding it to the parts of the body frame. I connect the hose directly to the tractor’s hydraulic system. The strut clearance is 300 mm. Hydraulic cylinder in the strut: 1 - hydraulic cylinder, L 675 mm, 0102, rod stroke 850, weight 26 kg; 2 — strut, channel 120x52x5; 3 — front cross member of the frame; 4 - central beam of the frame. Strut clearance - 300 mm
Shock absorbers
Now we install shock absorbers (they are from Moskvich, made in Belarus). When installing shock absorbers, it should be taken into account that when the suspension is activated, it moves back, therefore, when unloaded, the attachment point to the frame should also be shifted slightly back.
First test drive with shock absorbers installed to check suspension performance.
Wings
Now we need to attach the wings to the trailer. There is no pipe bender. The arcs are made using a grinder and welding.
When purchasing electronics, I also bought plastic wings.
To ensure that the trailer complies with the class of platform trailers, I welded eight rectangles of 2 mm steel. Then I painted the trailer with Alpina hammer paint. The paint was applied with a brush and roller in three layers.
Your car is in good hands!
Transporting large loads is a fairly common necessity in the lives of many motorists. As practice shows, the trunk of a car is most often not very suitable. The ideal solution in this case would be to use a car trailer. It is worth noting that a car trailer is quite relevant not only for domestic needs, but is also actively used by car travelers.
Read also: How to drift with front-wheel drive

