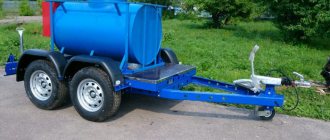
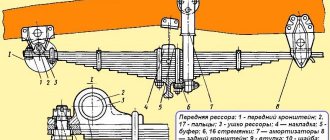
Spring suspensions of the German brand Al-Ko are in demand in the market of spare parts for passenger trailers. Therefore, it is logical to consider the process of installing springs using the example of designs from this manufacturer. In the example given, the springs are of the floating type and are installed on a boat trailer. Their installation is also possible on other trailers such as “Kremen”, “KMZ”, “Krepysh”, “Pchelka”, and the “Moskvich” trailer.
The following instructions describe the installation diagram of Al-Ko leaf spring suspensions on trailers. You need to understand that the assembly process may vary depending on the type of structure and springs, as well as the goals that the trailer owner wants to achieve.
- The spring is fixed at the front using a metal eye, the metal thickness of which is 5 mm. An M12 bolt is used as a fastening element.
- The front eye includes a fluoroplastic spring bushing. Replacement of this element is necessary every 50 thousand km.
- The recommended distance between the spring and the eye should not exceed 1 mm. Ideally, the parameter should be within 0.25-1 mm. This point should be taken into account when making your own or ordering an ear.
- There are no special requirements for tightening.
- The rear spring is of a floating type. At the place of fixation (closed eye), the metal is 5 mm thick. To avoid rapid wear of the spring under the influence of constant friction, it must be periodically treated with a special lubricant.
- For the upper and lower connection of the spring with the beam, sheet metal plates 1 cm thick are used.
- To connect the structural frame and the spring, an element called an earring is used. It is sold in auto parts stores and costs about 30-50 rubles.
- The spring plates are fixed to each other using long M12 bolts.
- Mounting a rubber-lined bump stop on top of the trailer frame helps guide the top plate underneath it in the event of severe structural loads.
- A universal shock absorber is installed as an additional element. It regulates the smoothness of the vehicle with an empty or loaded trailer. The shock-absorbing device increases the safety of fragile cargo, making its transportation as reliable as possible.
A self-modernized trailer requires proper operation.
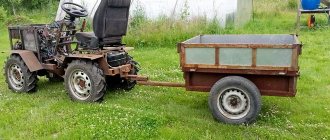
Scrap metal trailer for a car
One day, on occasion, I dropped in to see one of my friends, who works at a scrap metal collection point, and saw in his pile of pieces of iron the fragments of an old “bee” trailer, it seems.
There, in this heap of old iron, the size of my house, there was also an old rear axle, apparently from a “Muscovite”.
Immediately the idea was born to build a trailer from this trash for transporting various useful household goods.
After short and productive negotiations involving several Bank of Russia notes, these remains ended up with me, and I safely brought them to my village.
That's what I got.
I already screwed my own wheels onto the bridge, fortunately I have Moskvich wheels. In addition, I also got two dented sides, front and rear, with broken hinges.
So, let's list what I used to make this trailer.
1. Rear axle with springs from a Moskvich 2. The remains of an old body from a Bee trailer 3. Two forged rowlocks from an antique gate 4. Spring bushings for a Muscovite, rubber, 6 pcs. 5. A piece of stainless steel tube (an old curtain) 6. M10 bolts with nuts, 6 pcs. 7. Hinges, 4 pcs. 8. Aerosol paint, 1 can, orange 9. Hitch, 1 pc. 10. Wheels from a Muscovite, 2 pcs. 11. Welding machine 12. Grinder 13. Corner 45X45 from an old bed, 2 pcs.
A small note about hardware. As they say, everything is learned by comparison. Like the corners from an old bed, or the old oarlocks from a gate - the antique metal in them is of excellent quality, unlike modern corners that can be bent by hand - these old pieces of iron were cut and drilled with great difficulty. I don’t think it was some kind of alloyed or special steel - it’s just that steel was made differently before.
There were also 6 bushings cut. from an old stainless steel curtain.
Once everything was assembled, bolted down and properly welded, it was time to put the trailer on its feet, that is, on its wheels, and begin its final assembly.
I have not checked the maximum load capacity of the trailer, but the trailer can easily transport 0.3 m3 of sand, 10 bags of cement, 200 pcs. bricks I didn’t load it anymore, but not because it would break, but because the tractor I have is an old Moskvich-412, I feel sorry for it.
I transport anything on a trailer. Sand, stones, bricks, earth, manure, garbage, a boat, a closet, a refrigerator, a washing machine, potatoes, hay, and so on and so forth.
I am not going to install lighting devices on the trailer and register it with the traffic police, because it is used only during daylight hours and only within our village, it does not go on the highway, and the maximum speed of my “road train” with a load is no more than 30 km/h. For the same reason, I did not make wings over the wheels and did not install shock absorbers. At these speeds there is no such need. I just screwed the reflectors (reflectors) from the bicycles, two at the back and at the front. Just in case.
Installing springs on a passenger car trailer and strengthening them
Some trailers are already equipped from the factory with spring suspension, which is considered better than the classic rubber-band design. It is commonly called a torsion bar suspension.
If springs are provided from the factory, they may only need to be strengthened. But even with a conventional torsion bar design, it is quite possible to replace it with springs with your own hands. This will require an appropriate set of materials and your free time.
There is nothing fundamentally difficult about upgrading a trailer. Many trailer owners are switching to springs and strengthening them.
Main advantages
Independent replacement of the classic torsion bar suspension, which is equipped with a trailer, with a spring structure is due to the disadvantages of the first and the advantages of the second.
The main disadvantage of the rubber-harness type of suspension is the difficulty of repair and maintenance. In fact, here you can only replace the bearings with your own hands, while to replace the torsion bar or lever you will have to turn to specialists. Moreover, the cost of such repairs is equal to the cost of a new axle.
Because of this, it is logical to abandon the torsion bar and switch to springs.
If you modify your trailer suspension, you will get the following benefits:
- simplified maintenance;
- easy operation;
- adequate cost;
- reliable design;
- better resistance to increased loads;
- suitability for repair.
Using drawings and instructions, you can upgrade the suspension of your passenger trailer in a couple of days, depending on the amount of free time. Obviously, the suspension of a trailed vehicle using springs will change for the better.
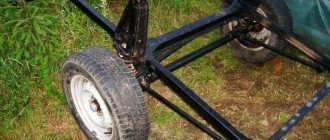
For trailers, all suspended equipment is installed under the bridge, taking on the main load. In this design, the springs act as a damper load-bearing unit. They take on longitudinal, vertical and lateral loads. The bridge is presented in the form of an ordinary pipe.
Based on the drawings and design details of your car trailer, switching to a leaf spring design can provide a number of additional benefits. All that remains is to implement the idea.
Why is this necessary?
And indeed, why take and change a ready-made trailer if initially its layout or design suited you completely?! The question is purely personal and depends on the individual needs of the car owner.
Let's take a few good trailers as an example:
Good vehicles with enviable technical characteristics for many manufacturers. But if suddenly there is a need to use them to transport boats or to transport a motorcycle, then they will not be able to cope with such tasks.
Yes, any standard trailers are perfect for traveling to your dachas and loading several bags of potatoes collected from the garden. But I want something different and more.
I would highlight several main goals that car owners pursue when deciding to change a trailer:
- increase functionality;
- increase carrying capacity;
- change reliability parameters for the better;
- modernize the purely appearance of the vehicle.
Now let’s go through each of the points separately and decide what can be done in this or that situation with your factory standard towed vehicle.
Reliability
If you are concerned about the issue of reliability, then it is better to immediately buy a more expensive trailer that is resistant to all loads and impacts. Then you won’t have to think about whether it can last 5-10 years.
To reduce the rate of wear, that is, increase the reliability of your car, truck or boat trailer, you can:
- make the lining of the body and bottom of the trailer using ordinary plywood;
- replace standard optics with LED ones, which last longer and place less load on the car’s electrical system;
- apply anti-corrosion agent to the body;
- treat the body with high-quality paint;
- put up an awning (we talked about it separately in this article).
It is possible to replace the hubs, modernize the suspension and other improvements. It is very popular to switch the Bee trailer to springs with a standard torsion bar. It has a good effect on the reliability, performance and behavior of the trailer on roads of varying quality. So it's worth thinking about.
Installation procedure
Since everyone chooses different spring kits and installs them on different trailers, it is impossible to offer universal instructions that will suit everyone. The main point is to dismantle, install new elements and securely fasten them.
But it’s worth considering an example of switching to springs, abandoning the rubber-harness suspension. The first step is to dismantle the old system. Usually it is enough to unscrew a few fasteners. Then it is more convenient to work by turning the trailer on its side.
Let's look at the nuances of installation using the example of a floating spring suspension manufactured by Al-Ko. The sequence of work will be as follows:
- In the front part, the spring is mounted using a special metal eye. For its manufacture, metal 5 millimeters thick is used. Fixation is carried out using an M12 bolt.
- Please note right away that there is a bushing in the front metal ear of the spring. The Al-Ko company makes them based on fluoroplastic. The estimated service life of the bushing is about 50 thousand kilometers. At this interval you will have to change this element.
- During installation, check the gap between the eye and the spring itself. The recommended distance should be between 0.25 and 1 millimeter.
- The regulations do not specify what tightening torque of the M12 bolt should be used. Therefore, tighten tightly, but do not use excessive force.
- At the rear there will be a floating spring design. The thickness of the metal for the fixation site will be 5 mm. This is a variation of the same mounting eye as the one in front, only it is closed.
- In this area, be sure to periodically add lubricant. Otherwise, strong friction will appear, and this will cause accelerated wear of the new springs.
- To connect the spring to the trailer beam, you will need to use a pair of metal plates. One is attached at the top and the other at the bottom. These metal plates are about 10mm thick.
- The connection between the spring and the trailer frame is more complex, since there is some work to be done with the earring. It is inexpensive and sold in many auto parts stores. But the role of the earring in installing a spring suspension on a trailer is enormous.
- To fix the plates, use strong M12 bolts. Make sure first that their length is sufficient for a tight connection.
- Above the top plate, you need to install a special bumper equipped with a rubber gasket on the trailer body. When a load appears, it will be transferred to the bump stop, maintaining the integrity of the most important components of the trailer suspension.
- Additionally, shock absorbers can be installed. This is not necessary, but with them the smoothness of the ride will noticeably increase. This will be especially noticeable when driving with an empty trailer. At the same time, shock absorbers increase the level of protection of the transported cargo if it turns out to be fragile or requires careful transportation.
In addition to replacing fluoroplastic bushings, which need to be changed approximately every 50 thousand kilometers, it is imperative to monitor the condition of the bolted connections. During use and strong shaking, they may weaken. If the tightening strength is compromised, the springs will begin to wear out faster and may completely fail.
Therefore, experienced trailer drivers recommend checking the connections at least once every 10 thousand kilometers, tightening them, and adding lubricant to the eye of the floating part of the spring. Never lubricate the assembly with your hands. Use the means at hand. Motorists often use regular grease. Not the worst option, but graphite lubricant is better. Lubricant is added according to the condition of the unit, since there are no regulations for such cases.
Maintenance requirements for a modernized trailer
When using a modernized trailer, the car owner must comply with the following rules.
- Change fluoroplastic bushings after 50 thousand km or as parts wear out. Replacement of functional parts is sometimes necessary earlier if the trailer is subject to heavy loads and is actively used.
- Periodically check the tightness of the bolts where the spring connects to the suspension beam. Over time, the fasteners weaken, leading to deformation of the spring mechanism and its rapid failure. Therefore, every 10 thousand kilometers it is necessary to carry out a preventive inspection of the condition of fasteners. Do not allow any play to form between the working parts of the suspension.
- Periodically add grease or graphite-based lubricant to the joints of the spring suspension. There are no strict regulations for performing this procedure. The car owner must independently control the moistening of components with technical lubricant. If this is not done, the dried plates will quickly wear out and break ahead of schedule.
- Place lubricant in the eye where the floating element of the spring mechanism is located. To add lubricant (solidol, graphite composition), the spring plate is carefully bent with a pry bar or other available object. During the procedure, it is mandatory to follow safety regulations. Do not apply lubricant with your fingers. For this purpose, use a paint brush or a cotton swab.
According to some drivers, the floating part in leaf spring suspensions gives the device poor performance. They advise replacing the oscillating structure with a silent block. In fact, floaters have their own advantages that make them an indispensable part for trucks and trailers.
What is spring reinforcement
In addition to abandoning the torsion bar or rubber-harness suspension and switching to a spring design, many trailer owners are thinking about strengthening it.
Strengthening the springs on a caravan refers to the replacement of several already worn leafs and the addition of additional elements.
If you want to strengthen the knot, you need to strictly follow the following rules:
- One spring is installed on each side of the axle. Moreover, they must be completely identical. This applies to dimensions, number of sheets used and maximum load.
- When strengthening, it is necessary to preserve their identity.
- It is prohibited to strengthen one spring while leaving the design of the second one unchanged. This will significantly affect the operation of the trailer. And in a negative way.
- The technology for strengthening trailer springs is extremely simple.
- The main difficulty lies in the need to exert significant physical effort, which is due to the use of durable and heavy metal for their manufacture.
How to strengthen springs
Having figured out how to strengthen the springs on their passenger trailer, many naturally decide to take on this matter on their own.
The procedure consists of several successive steps:
- First you need to remove the spring from the platform. To do this, it is usually enough to unscrew the mounting bolt at the front of the spring, which is held in a metal eye, and then remove the mounting clamp connecting the structure to the beam. Most often, 4 M12 bolts are used here.
- Now the spring needs to be disassembled. First, the tightening bolt located in the center is unscrewed. Then carefully bend the staples.
- Next, the condition of each sheet is checked. If you see signs of wear on one or more sheets, their life has come to an end, and therefore at this stage it is better to immediately remove them and replace them with new ones.
- After these manipulations, the required number of additional sheets is added. In most cases, owners of passenger trailers strengthen the spring suspension by 2-3 leaves.
- Having added the required number of sheets, the assembly is assembled in the reverse order.
- As the number of sheets has increased, the previously used lag bolt may no longer be suitable. You will need to get a new one with an increased length.
- Before returning the already reinforced spring to its place, be sure to check the current condition of the fluoroplastic bushing. If there are signs of wear, replace the bushing.
This completes the strengthening procedure. As you can see, there is nothing complicated.
Spring suspension used on car trailers has its strengths and weaknesses. In terms of basic performance characteristics, it is superior to its rubber-harness analogue. Therefore, motorists have every reason to think about replacing the suspension.
Models that do not require amplification
The models presented in the table were able to prove themselves from the best side. Their performance characteristics will certainly please you.
Hello, friends! Since a factory trailer cannot always fully satisfy the needs of its owner, many decide to make structural changes to the vehicle. All possible modifications to the trailer are aimed at achieving those characteristics that will suit you.
But what can be created from it and how much can trailers be modified? Let's talk about this.
Springs for a passenger trailer: which ones to choose and how to install them yourself
Hello everyone, dear friends! Today we will talk about trailer springs.
Some models already have them, so the only question that arises is how to strengthen and increase the load-carrying capacity of the structure.
In other cases, passenger car trailers have rubber-harness (torsion bar) suspension options.
Their disadvantages are complex maintenance and repair. You can only change the bearing yourself, but the lever or torsion bar will be replaced either at a service station or at the factory where the trailer was manufactured. The price of such a repair is equal to the cost of a new torsion axle. Therefore, for many, it is preferable to convert the torsion bar to a leaf spring suspension (RS).
Features and Benefits
If you have purchased a new passenger car or a used trailer with a torsion bar suspension, you may want to change the design to a spring one. I won’t name the reasons and motives; everyone has their own.
Spring devices have objective advantages. They appear as:
- ease of maintenance and operation;
- affordable cost;
- reliable design;
- increased resistance to heavy loads;
- maintainability.
Even if one sheet fails on the road, there is nothing terrible about it. This type of suspension allows you to get to a service station or a spare parts store, take an additional sheet and change it yourself.
Many people consider RP to be the prerogative of a truck and its trailer. There is some truth here, since it is actively used on:
But no one forbids you to put the RP on a regular single-axle or two-axle passenger car trailer, but only with fewer sheets. By the way, I have already compared single-axle and two-axle trailers.
On trailers, the suspended equipment is located above the bridge. He takes on the main load. The springs serve as a load-bearing damper unit. This allows you to take lateral, vertical and longitudinal loads. The bridge in trailers is a conventional pipe-shaped structure, and there are no additional mechanisms.
How to register a homemade trailer
A homemade trailer that you can use without fear is necessary. To register you must have:
- Conclusion of a technical examination on the compliance of a self-made vehicle with the requirements of GOST001. 220-80. Where such an examination can be done, you need to check with the MREO. Since a conclusion issued by a laboratory not accredited by the State Traffic Safety Inspectorate may be declared invalid.
- Receipts confirming the purchase of parts and materials used to manufacture the vehicle.
- Certificate for the hitch hinge (this is why we advise you to buy it and not do it yourself).
- A copy of your passport.
- A copy of the vehicle's registration certificate.
- An application addressed to the head of the MREO with a request to register a homemade trailer.
- Receipt for payment of state duty.
- 4 photos of homemade products taken from different sides (size 10 by 15 cm).
If you present all these documents, you will be allowed to undergo technical inspection. A positive inspection result will be the basis for registering a self-made vehicle.
What to choose
A logical question when choosing springs will be which ones to install on your passenger trailer. This depends on a number of factors. There are also good Volgov springs available on the market, as well as products from Al-Ko and other domestic or foreign manufacturers.
Here I want to make a few clarifications.
- Domestic springs are quite long. To prevent shaking, it is better to supplement them with shock absorbers. This will significantly increase the overall cost of the rework;
Designs may differ in the number of sheets. Reinforced models are made from a larger number of spring leaves, but they are stiffer and designed to work under heavy loads. For passenger cars, usually from 3 to 9 units are chosen.
Which one to choose from, decide for yourself.
Possible improvements
I want to say right away that it’s impossible to consider literally all tuning options, even with a great desire. There are too many of them to fit into one material or even several articles.
If you're really interested in upgrading your caravan, you need to start with the basics. Namely, from the idea. Since you are not happy with the design in its current form and something needs to be changed, you need to understand what exactly is wrong and what you should strive for. And here the first difficulty arises, since there are many ideas, but many motorists simply do not have a clear definition. You have to go through different options, look for compromises and try to calm your ardor in impulses to do something that can later make your hair stand on end.
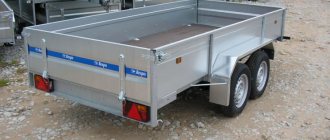
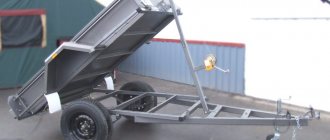
Let's take a regular flatbed trailer as a basis. After all, most often they are the ones who undergo tuning and all sorts of modifications.
What exactly the model or brand is doesn’t really matter. There is just a trailer from which you need to make something.
There are several options for what you can turn into an onboard vehicle for a passenger car. I advise you to decide right away, so that later you don’t have to stop halfway, change your mind and start implementing a completely different idea.
DIY installation
I suggest you find out how you can install an Al-Ko spring with your own hands. As an example, I use a boat trailer and a floating type of spring design.
Although you can put it on any other trailer:
- MZSA;
- Flint;
- Sturdy;
- KMZ;
- Kurgan trailer;
- Moskvichevskie trailers;
- Bee;
- any homemade trailer, etc.
Now about the installation itself. These are approximate instructions, since the assembly differs depending on the type of selected RP, the trailer itself, the goals of the car owner, etc.
- At the front, the spring is fixed with an eyelet. The thickness of its metal is 5 mm. Fastening is carried out with an M12 bolt;
- The front eye will contain a fluoroplastic spring bushing, which will have to be changed every 50 thousand kilometers;
- When ordering or making lugs, make sure that the distance between the metal of the lug and the spring is 0.25-1 millimeter;
- The tightening torque is not regulated;
- The spring at the rear will be floating, with a metal thickness for the fixation point (a kind of closed eye) of 5 mm. Be sure to periodically apply lubricant, otherwise strong friction will occur and the spring will quickly wear out;
- The spring and beam are connected by two metal plates (top and bottom) each 1 cm thick;
- Connecting the spring and frame of your trailer will require some fiddling with the shackle. This is a simple and affordable element that you can buy for literally 30-50 rubles. But the earring plays an important role when installing the structure;
Application area
Let's imagine what modernized flatbed trailers that have gone through tuning stages can be used for.
- For relax. Even an on-board model can become a full-fledged mobile place for spending the night, going out into nature, barbecuing, for tourist trips and other delights of active recreation;
- For fishing and hunting. A common tuning option aimed at increasing functionality and load capacity. Also, often such tuning provides the ability to use a trailer as a sleeping place;
- For a snowmobile. The presence of an on-board model does not interfere with making it an excellent vehicle for transporting snowmobiles;
- For watercraft. A current and widespread modification option, in which the onboard is made into something like a boat trailer. Moreover, without compromising the possibilities of its use as a simple on-board model;
- For off-road use. Tuning aims to improve the vehicle's cross-country ability, which will require a number of measures.
Let's not forget about purely technical improvements, where the owner's main goal is to improve the basic characteristics and expand the capabilities of the trailed vehicle.
I propose to consider several tuning options separately and find out what you can do with your own hands.
Installation of awning
The simplest but most effective tuning. It is not only effective, but also spectacular. With the help of an awning, which is not included in the original package, you can expand the capabilities of the vehicle, increase its loading area, and use the trailer for larger purposes.
In terms of tuning of this kind, there are a couple of current options:
- Installation of a tarpaulin awning. The classic version requires preliminary installation of the frame under the tarpaulin and its subsequent tensioning. An outdated method of improvement that is losing its relevance;
- Using the lid. A plastic lid is a great alternative. A more reliable, durable, outwardly attractive option. No frame needed. But you will need to provide fasteners to secure the cover to the sides.
If you are willing to spend a lot of effort and money, then plastic will be the best solution.
The awning is too banal and has much less benefit than a durable plastic cover, complemented by security locks.
Suspension on SST trailers 11/15/2016 00:26
Single-axle trailers of the SST model range use a dependent spring suspension with telescopic shock absorbers. Springs are 3 or 2 leaf with leaves of variable section.
The purpose of a leaf spring involves three main concepts - comfort, durability, and reduction in metal consumption. In the trailer spring, the loads are distributed unevenly: the maximum falls on the central part of the spring, where they are compensated by a package of sheets of constant cross-section. The longitudinal profile of the spring leaf is variable; from the ends to the middle of the leaf, the cross-section increases according to a parabolic law (hence the name parabolic), which ensures stress distribution along the entire length of the leaf evenly, without jumps.
This determines the lower stiffness of the spring, thus ensuring a smooth ride of the trailer. A driver who has driven on “soft” springs is unlikely to be seated in a car with a trailer with classic multi-leaf springs.
Installed intersheet spacers increase the durability indicator by one and a half to two times due to the reduction of intersheet friction, which means abrasion and chipping of sheets, and the absence of peak stresses.
Rubber spring bushings (from the Moskvich car) are used in the spring eyes. Single-acting telescopic shock absorbers (used in the rear suspension of rear-wheel drive VAZ cars). A special feature of the suspension design is the use of rubber compression springs developed by GAZ OJSC for GAZ-14 Chaika vehicles as springs. Subsequently, this part began to be used in the front suspension of Gazelle cars. Unlike conventional bump stops that serve to eliminate hard shocks from the suspension, rubber springs themselves carry a fairly significant load of up to 200–250 kg. on one side and have a working stroke of up to 80 mm with a length of 120 mm. The contact of the spring and the suspension (the suspension is activated) occurs already when the trailer weighs 100-150 kg. The full suspension travel (before the iron parts touch) is 140.150 mm. With such a load, the 3-leaf spring absorbs 650 kg each (slump load), while the main leaf is completely straightened. Thus, the maximum loaded suspension can withstand 650+650+200+200=1700 kg, taking into account the trailer’s own weight. Please note that the technical load capacity of a trailer is calculated based on the reference spring load, and not the draft load. The control load of a 3-leaf spring is 375 kg (2-leaf spring, respectively, 260 kg). The suspension travel is 80.100 mm. Taking into account part of the load perceived by the springs, the technical load capacity of the suspension will be 375 + 375 + 75 + 75 = 900 kg without taking into account the trailer’s own weight. This carrying capacity of the suspension elements is sufficient to guarantee the normal operation of the trailer with the declared nominal carrying capacity of trailers from 450 to 620 kg, depending on the curb weight of the model, including taking into account the permissible 20% overload. Many customers are interested in whether the trailer will withstand if loaded, for example, 1.5 tons. As operating practice shows, short-term significant overloads, when driving at a speed limit, evenly distributing the load over the body and off public roads end without consequences for the technical condition of the trailer. But, you need to understand that the suspension of an overloaded trailer stops shock-absorbing and all hard impacts through the wheels are transferred to the body and drawbar of the trailer, which sooner or later will definitely lead to breakdown and expensive repairs of both the trailer and the car. Not to mention violations of road safety rules. We categorically do not recommend increasing the stiffness of the springs on your own, since an excessively stiff suspension will lead to the “galloping” of an empty trailer (at speed, the trailer wheels will be more often in the air than on the asphalt), which will negatively affect the handling of the road train.
