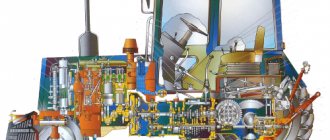
Do-it-yourself GAZ-53 valve adjustment
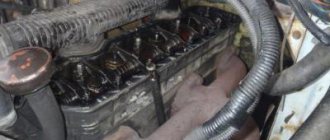
GAZ-53 is a medium-duty truck that was produced in the USSR at the Gorky Automobile Plant. The first cars rolled off the assembly line in 1961. Despite their age, these cars are still in use - the reason is the extraordinary survivability of the components and assemblies of these cars. Engineers have put a good resource into engine parts. But even such cars need maintenance. The usual procedure for these engines is to adjust the GAZ-53 valve. You can adjust the thermal gaps with your own hands. The procedure is not too complicated.
Restoring the technical condition of the machine
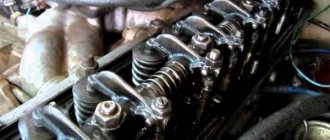
The situation will be corrected at a service station, but you can cope without a visit there. It will be enough to carefully study the operating instructions for the vehicle. It describes how to adjust the GAZ 53 valve. There are 2 methods for this, both of which are used only when the engine is cold. An adjusting screw with a lock nut is used for this. They are fixed on the rocker arm.
The further adjustment procedure is as follows:
- Install the piston of cylinder I so that the mark on the pulley completely coincides with the mark at TDC.
- According to the manufacturer's recommendations, the correct gap between the pressure end of the rocker arm and the valve is from 0.25 to 0.3 mm. It is necessary to make sure that the 0.25 mm probe moves freely, and the 0.3 mm part does not fit into the existing gap.
- The indicated dimensions change during long-term operation of the vehicle under increased loads. The manufacturer has made a reservation regarding cases of deformation of parts. The optimal gap is determined by eye. The main thing is that both valves are configured taking into account the rule: one moves freely, and the second does not fit into the existing gap at all.
- Experienced drivers suggest adjusting the valves to a gap value of 0.4 mm. As the locknut is loosened, hold the adjusting screw with a screwdriver. Carefully insert the dipstick into the gap formed.
- When adjusting the gap size, you must slowly turn the screw, otherwise the process of setting the desired parameter will be long.
- The adjusting screw is tightened without removing the dipstick. Once the driver is convinced that the procedure was performed correctly, it is necessary to remove the dipstick. Then you need to adjust the second part.
Tightening the adjusting screw
Before you begin adjusting the next valve, you must turn the crankshaft 90°, otherwise there is a high chance of breaking the engine.
Why do you need to adjust the valves of the GAZ-53?
On all internal combustion engines there is a certain gap between the tip of the valve and the part that pushes it. This gap is necessary to compensate for the thermal expansion of the gas distribution mechanism parts that occurs during engine operation.
However, over time, due to friction, this distance increases, and this leads to the fact that the motor power decreases and extraneous noise occurs.
To eliminate this problem, adjust the thermal gap.
Do-it-yourself adjustment of GAZ-53 valves:
First way
This method can be considered basic when adjusting valves on ZMZ-53 power units. The engines have 2 valves per cylinder and 8 cylinders, so 16 parts need to be adjusted. The normal thermal gap for the ZMZ-53 engine is considered to be 0.25–0.3 mm. To adjust, you need to do the following:
- Remove the valve covers;
- We set the piston of cylinder No. 1 to top dead center (TDC). This is done as follows. There is a corresponding mark on the pulley, another mark is located at the end of the power unit. These marks must match;
- The required gap is set using appropriate metal probes. In order to achieve the required clearance for Lawn motors, you need to use a feeler gauge 0.4 mm thick;
- Hold the adjusting screw with a screwdriver and unscrew the locknut;
- We insert the dipstick between the end of the valve and the rocker arm. There is no fundamental difference in which valve to start with;
- We set the gap using the adjusting screw. The required distance will be achieved when the feeler gauge is tightly clamped between the rocker arm and the end of the valve;
- Tighten the locknut and remove the dipstick. The dipstick should come out tightly;
- After the gap for one of the valves is set, we set it on the second valve of the first cylinder in a similar way;
- An important point is the order of operation of the cylinders for the ZMZ-53 engine - 1, 5, 4, 2, 6, 3, 7, 8;
- After the gaps in the first cylinder are set, use a wrench to turn the crankshaft 90°. This way we set TDC in the next cylinder. According to the operating order of the power unit, the piston of cylinder No. 5 will be at TDC;
- We adjust the thermal gap in the fifth cylinder and further in order. We must remember to rotate the crankshaft 90° every time after the thermal gap in the desired cylinder is adjusted. Thus, we place the piston of the next cylinder on the list at TDC;
- After the gaps are set, we perform a test start of the engine. If the engine is running smoothly and there are no extraneous knocks, then the clearances are set correctly and the valve covers can be closed.
According to factory recommendations, valve adjustment is recommended at least once every 700-900 km. If there are no symptoms that the gap is increased, then it can be checked at least once every 1000 kilometers.
Second way
This method is intended for adjusting the thermal gap in engines with high mileage. Considering how long the GAZ-53 has not been produced, it can be carried out on any engine of the legendary truck.
The adjustment principle remains the same, but the order in which the cylinders are adjusted changes.
- Remove the valve covers;
- We set TDC in the first cylinder;
- We set the gaps in the intake valves in cylinders 1, 3, 7, 8;
- We adjust the clearances in the exhaust valves of cylinders 1, 2, 4, 5;
- Rotate the crankshaft 360°. That is, a full turn;
- We adjust the gaps in the remaining valves;
- We check the correctness of the adjustment by starting the power unit;
- If everything is set correctly, close the valve covers and tighten the bolts on them.
As you can see, the second method is much simpler and, usually, adjustment in this way takes no more than one hour.
Options for repairing a car engine with significant mileage
Trucks are used for a long time, but do not always undergo regular technical inspection on time. The natural result is the occurrence of problems in the operation of the engine, increased fuel consumption and problems with starting. The cause of the problems is wear of parts and increased gaps. The consequence is the need to repair the GAZ-53.
To prevent problems from occurring, for cars with impressive mileage, it is recommended to use the second method of valve adjustment.
- The principle of adjusting the GAZ-53 valves is identical to that described in the first method, only the order changes.
- After turning the cylinder piston until the marks coincide, the intake valves of cylinders 1, 3, 7, 8 are first adjusted.
- Then, it is necessary to adjust the exhaust valves of cylinders 1, 2, 4, 5.
- The final stage is adjusting the remaining valves with a preliminary rotation of the crankshaft 360 degrees.
If you have some experience and knowledge base, you can perform the described steps and complete the setup in just an hour, saving a lot of time and money on engine repairs. But you should be extremely careful and visually monitor each stage.
Valve clearances
The gaps are adjusted using a feeler gauge. On the intake valves the gap should be 0.3 mm and on the exhaust valves 0.4 mm. There is no point in catching hundredths of a millimeter. When tightening the adjusting bolt with a locknut, these hundredths will still be lost. It is enough for the feeler gauge to move between the valves and the rocker arm with little force when compressing the adjusting bolt. But it was not clamped. Such thermal clearances are used on almost all engines. To begin the adjustment, you need to unscrew the lock nut on the adjusting screws. You need to unscrew it a few turns. So that it does not interfere with reducing the gaps later. The feeler gauge is inserted between the valve and the rocker arm. The adjusting screw is tightened with a screwdriver. And it is brought to the optimal clamping of the probe. Then the locknut is tightened. The screw must be secured with a screwdriver. If it doesn't work out. Then you can insert the key 11 into the edges of the screw. And hold the screw with a wrench. And so on for each next cylinder in order.
Adjusting valves GAZ 402
The ZMZ-402 engine has been produced since 1985; it first appeared on the transitional GAZ 24M models. The eight-valve engine has a lower camshaft and an overhead valve arrangement; its gas distribution mechanism contains the following parts:
- camshaft, it rotates in five supports of the cylinder block;
- camshaft, transmits movement from the crankshaft to the camshaft;
- 8 pushers, driven by camshaft cams;
- 8 aluminum rods;
- the rocker axis, on which the rocker arms themselves are located (8 pcs.) with adjusting screws;
- exhaust and intake valves located in the cylinder head.
When the camshaft rotates, the valves in the cylinder head rise and fall. Just like all other modern engines, the ZMZ-402 operates on a four-stroke circuit:
- first, an intake occurs into the internal combustion engine, the air-fuel mixture fills the cylinder;
- then the mixture is compressed in the cylinder, and it is ignited by a spark from the spark plug;
- working progress occurs;
- The last step in the process is the release of exhaust gases.
When compression occurs, both valves are closed and sealed - the valves are adjusted in this position. In order for the combustion chamber to be sealed at the moment of compression, there must be a thermal gap between the valve stem and the rocker arm - if there is none, when the metal expands on a hot engine, the valve will not fit tightly to the seat (seat), the engine may lose power, and in some cases In some cases, it will not start at all.
The valves on the ZMZ-402 can be adjusted in two ways. In the first option, the adjustment is made as follows (let's take the GAZ 24 car as an example):
- stop the engine, turn off the ignition, put the car in neutral;
- open the hood, remove the air filter housing;
Close the valve cover, start the engine and check how the engine works. Valve clearances on all GAZ vehicles are adjusted using special feeler gauges; they are usually collected in one set.
There is such a thing as valve overlap, and if the valves of the first cylinder (at TDC) are free, both valves of the 4th cylinder will be clamped, but on the second and third, one valve each will remain free. Therefore, the adjustment can be done in two crankshaft rotations:
- set the TDC of the first cylinder, adjust the valves 1-2-4-6, counting them from the front of the engine;
- make a revolution of the crankshaft and adjust all the other valves (3-5-7-8).
In the books it is recommended to carry out adjustments when cold, on the outer valves (1 and
set the gap to 0.35 mm, on the rest - 0.3 mm. But cold adjustments cannot be made - aluminum rods expand as the engine heats up, and the clearances in the valves on a hot internal combustion engine decrease. Practice has shown that the most optimal option is adjustment on a well-warmed engine with clearances of 0.3 mm on all valves. By the way, the valve clearances on the GAZ 21 Volga are adjusted in exactly the same way.
Soviet truck suspension
The GAZ-53 medium-duty truck was equipped with a spring-dependent suspension system. At the front, the car is equipped with telescopic shock absorbers. It is difficult to drive the car because there is no hydraulic booster.
In order to change gear, it was necessary to double-depress the clutch. The cardan transmission consisted of two shafts. Despite many design flaws, repairing the GAZ-53 was not too difficult, and spare parts were quite accessible. Among other problems with the car, there were problems with the valves. We will tell you about them right now.
About self-adjustment of valves
For any engine to operate, it is necessary to have at least two valves for each cylinder. Today, disc-shaped elements are used. On the GAZ-53 car, the exhaust valve is made of high-quality steel. It has a hollow structure. The intake is also made of high quality steel. In order for the heads to cool better, metallic sodium is poured into the body of the element. To increase heat resistance, the chamfer of the exhaust valves is welded with a special alloy. The rods have special grooves for crackers. They connect the valves and the spring plate.
In order to ensure better filling of the cylinder with the fuel mixture, the plate on the exhaust valve has a larger diameter than on the exhaust valve.
When a GAZ-53 diesel car is started and used, these parts are subjected to very serious loads.
As a conclusion
As you can see, valves and the principles of their adjustment are no different from passenger cars. The operation is very simple and does not require too much time. The driver only needs knowledge of the location of these components and a little experience. You will also need a basic set of tools to carry out the setup.
Even a novice driver can handle adjusting the valves, and this way you can save on service station services.
So, we have found out the technical structure and rules for adjusting the valves of the GAZ-53 medium-duty truck.
Specifications
The Gas 52 engine has fairly high technical characteristics. The cars were equipped with a 6-cylinder in-line engine, which significantly distinguished them from other engine models . So, let's look at the main technical characteristics and design of the power units:
| Name | Characteristic |
| Model | GAZ-52 |
| Type | Straight six |
| Fuel | Petrol |
| Injection | Carburetor |
| Volume | 3.5 liters (3485 cm3) |
| Power | 75 horses |
| Number of cylinders | 6 |
| Number of valves | 12 |
| Cylinder diameter | 82 mm |
| Cooling | Liquid |
| Cylinder block material | Cast iron |
| Block head material | Aluminum |
| Cylinder operating order | 1-5-3-6-2-4 |
Adjustment of thermal clearances of internal combustion engine valves in Kharkov
Hello dear friends! Today we will learn how to adjust valves. It would be more accurate to say that correctly . I will describe how I myself adjust the valves on ZMZ 511 engines. Actually, adjusting the valves: where they are adjusted in the usual way (by the term “usual method” I mean a wrench, a screwdriver and a feeler gauge) be it a Gazonchik, be it a Zil or an L engine /ah, yes, at least a diesel engine.
The valves are regulated approximately the same way, you just need to observe how many degrees to turn the crankshaft or camshaft. And necessarily the size of the gap; each engine has its own parameters. (There is even a difference between the intake and exhaust valves, but this is not so critical). I can’t help but say that there are still engines where the valve clearances are adjusted not with a feeler gauge, but with so-called nickels:
that is, the size of the required gap size is adjusted by the thickness of a suitable nickel. Nickels, as I think you guessed, come in different thicknesses and their thickness is measured using a micrometer - microns. So the dimensions are burned out with a laser on them, but it happens that the size is not visible, it is rubbed off, and this is where the micrometer comes to the rescue. This method of adjustment is not yet found on our domestic trucks (I can’t say anything about foreign cars, I don’t know). But on vehicles this method has been used for a long time since the first front-wheel drive VAZs began to be produced since then and is still used today. There is also one type of engine where our intervention is not required, that is, the valves do not need to be adjusted. The valve clearances are regulated by a special hydraulic compensator; or rather, there is no gap; it is compensated by a special hydraulic compensator.
The correct operation of hydraulic compensators depends directly on the oil pressure in the engine. But this is a separate topic, I’ll write about it someday, but not today, and I haven’t digressed much from the topic.
Adjusting valves on the ZMZ 511 engine!
First way!
And since I already said, I will describe how I regulate it myself. So far there have been no problems or complaints.
First of all, you need to open the valve cover and remove the rocker arms.
Why take it off, you ask, then to check if there is wear on the rocker arms. If the engine already has a lot of operating hours, then wear out on the rocker arms cannot be avoided. I indicated where the workings appear with an arrow in the picture.
The plane indicated in the picture should be exactly like this. If there is a waste, then you need to get rid of it. You need to clamp the rocker arms in a vice and use a flat file (rasp) to bring them to such a state that there are no developments. Otherwise you won't have any luck :). And so with each rocker. In this case, it is not necessary to remove the rocker arms from the rocker arm axis, as shown in the picture, you can align it, that is, get rid of the wear and tear in assembled form.
And so we aligned the rocker arms, got rid of the wear, now put the rocker arms in place and continue.
Now remove the ignition distributor (distributor) cover. In general, you can move the distributor cover with the spark plug wires to the side so that they don’t get in the way :). If you are suddenly afraid of getting confused with the order of connecting the high voltage wires from the distributor to the spark plugs, then you can read it, it’s all there. So put the wires with the distributor cap aside, they will only get in the way.
Installing the piston of the first cylinder at TDC.
And now we need to set the piston of the first cylinder to TDC (Top Dead Center) and precisely in the compression stroke. How can we quickly find out exactly the compression stroke or not? We insert the handle for manual start, or whatever it is scientifically called (in some places it is a humpback, and in others it is crooked, I think you understand what I mean). And we turn it until the marks on the crankshaft pulley and in the front engine cover match:
A is a mark on the front cover of the engine, B is a mark on the crankshaft pulley. Thus, we set the piston of the first cylinder to TDC.
And so, when these marks coincide, this does not mean that we can start adjusting; we still need to make sure that the compression stroke is exactly in the first cylinder. There are two simple ways:
- You need to unscrew the spark plug from the first cylinder and insert some kind of wad, preferably rubber, instead of the spark plug. And turn the handle until the marks coincide, and it is at the moment the marks coincide in the compression stroke that the wad will fly out, that is, the compression will simply blow it out. And this will be exactly the compression stroke.
- You can also check the compression stroke in a second way, faster than the above. After the marks on the pulley and the front cover match, the distributor slider should point backwards along the direction of the car. This will correspond to the fact that a spark is supplied to the first cylinder of the engine. And the spark is supplied precisely during the compression stroke (If the slider looks forward, this will be compression in the 6th cylinder). That is, I repeat once again: when you turn the engine with the handle, the slider also turns. If marks A and B , the slider should look backward with its contact copper plate (backward along the direction of the car).
Now we have determined the TDC and compression stroke in the first cylinder and we can safely adjust the valves. Set the valve clearances to 0.30 mm and you won’t go wrong. 0.30 the feeler gauge should move with little effort, and 0.25 it should go through easily, then you will have an excellent gap, believe me, I always do this and recommend it to you. And so, after adjusting in the first cylinder, we turn the engine 90°, that is, a quarter turn, and adjust in the fifth cylinder, and so on, etc. Here's the order: 1-5-4-2-6-3-7-8.
Adjusting valves on the ZMZ 511 engine!
Second way!
I still can’t tell you that there is another way to adjust the valves . This is a “two-turn adjustment”, how do you understand this? Yes, very simple:
Restoring the technical condition of the machine
The situation will be corrected at a service station, but you can cope without a visit there. It will be enough to carefully study the operating instructions for the vehicle. It describes how to adjust the GAZ 53 valve. There are 2 methods for this, both of which are used only when the engine is cold. An adjusting screw with a lock nut is used for this. They are fixed on the rocker arm.
Major renovation
Do-it-yourself overhaul of the GAZ 52 engine is quite typical, as for other 6-row engines. As practice shows, most car enthusiasts do this on their own, since the cost of restoration is quite expensive.
At the beginning of the repair, the motor is disassembled, which is typical for the restoration operation. The piston group is disassembled, the crankshaft is pulled out, and the cylinder head is removed. The next stage is to carry out diagnostic work.
Diagnostics
During the diagnostic process, ICE Gas 52 undergoes measurements. So, the piston group, as well as the crankshaft, are measured. Accordingly, the motor is inspected for cracks. According to measurements, the GAZ 52 engine, which is being repaired, is being selected for pistons. The main repair dimensions are pistons - 82.5mm, 83mm. In the future, there is no point in boring, and the block is lined.
As for the crankshaft, it is bored on a special machine for turning crankshafts. Thus, typical repair sizes that are installed on journals are 0.25 mm, 0.50 mm and 0.75 mm. In very rare cases, a size marked 1.00 mm is used. This dimension of the crankshaft journals significantly reduces hardness, which can most likely lead to the engine heart breaking and other consequences.
GAZ-53 valves: adjustment. Trucks
In the 60s of the last century, the Gorky Automobile Plant launched a series of medium-duty trucks. One of them was GAZ-53. Let's find out its technical characteristics and also talk about valve adjustment.
Trucks from the 52, 53 and 66 series were a line of real station wagons for use in the national economy. They provided cargo transportation in industry and were also successfully used in agriculture.
Model history
In 1964, the basic model of the GAZ-53 car was introduced. It was already equipped with a unit from ZMZ with index 58. It was a GAZ-53 (diesel) with a capacity of 115 hp. With. The maximum speed that this engine produced was 85 km/h. However, the model was produced for only one year.
In 1965, the 53A flatbed truck appeared. Engineers managed to increase the model's carrying capacity to four tons. In 1966, a modification for military purposes was released. The ignition of the GAZ-53 already occurred due to sparking.
Production was stopped in 1982, and a total of about 4 million copies were produced.
Interior and exterior design
The appearance of the 53 was very modern. The designers made the cladding more seamless. This especially affected the radiator grille. The gas tank is located under the driver's seat. The tank neck was located at the driver's door, behind the cab. This helped a lot in the future when they began to convert these cars to LPG. Most often, the GAZ-53 body was flatbed and isothermal.
The launch was carried out from an electric starter with a retractor relay. The cabin was equipped with an excellent heater and windshield wipers. The seats were made in the form of a sofa. However, it was comfortable to sit on even in winter.
Carburetor GAZ-53
The truck is equipped with a two-chamber emulsion carburetor. It also features simultaneous opening of the throttle valves with the possibility of a balanced float chamber.
This carburetor has the index K-135. The model differs from previous modifications in some adjustments. If you don’t adjust the parameters, you won’t be able to use it on engines with conventional cylinder heads.
The GAZ-53 carburetor works as follows. The left chamber is responsible for cylinders 5,6,7,8. The right one supplies fuel to cylinders 1, 2, 3, 4.
Transmission
The engine works together with a four-speed gearbox. It was equipped with four forward gears and one reverse. The GAZ-53 gearbox worked normally even in harsh conditions.
The transmission system is built according to a standard design. Rear-wheel drive. The clutch used is a classic single-disc dry clutch. The cardan shaft and cardan transmission mechanism are also implemented according to the classical design.
It must be said that the GAZ-53 box provides for the installation of a transfer case. It will ensure power take-off.
Engine
ZMZ-53 was used as the power unit. This is a diesel eight-cylinder engine. It had a head as well as a cylinder block made of aluminum. The distributors and ignition coil on this engine often failed. Before the need for major repairs, the car traveled about 400 thousand km. The engine could not be called economical. Drivers also often complained about the GAZ-53 valves. Adjusting them was commonplace.
A two-chamber model was used as a carburetor to correct high fuel consumption.
Soviet truck suspension
The GAZ-53 medium-duty truck was equipped with a spring-dependent suspension system. At the front, the car is equipped with telescopic shock absorbers. It is difficult to drive the car because there is no hydraulic booster.
In order to change gear, it was necessary to double-depress the clutch. The cardan transmission consisted of two shafts. Despite many design flaws, repairing the GAZ-53 was not too difficult, and spare parts were quite accessible. Among other problems with the car, there were problems with the valves. We will tell you about them right now.
About self-adjustment of valves
For any engine to operate, it is necessary to have at least two valves for each cylinder. Today, disc-shaped elements are used. On the GAZ-53 car, the exhaust valve is made of high-quality steel. It has a hollow structure. The intake is also made of high quality steel. In order for the heads to cool better, metallic sodium is poured into the body of the element. To increase heat resistance, the chamfer of the exhaust valves is welded with a special alloy. The rods have special grooves for crackers. They connect the valves and the spring plate.
In order to ensure better filling of the cylinder with the fuel mixture, the plate on the exhaust valve has a larger diameter than on the exhaust valve.
When a GAZ-53 diesel car is started and used, these parts are subjected to very serious loads.
Operating principle
Before we look at valve adjustments, we need to know how they work. Everyone knows that the main task assigned to these parts is the implementation of exhaust and intake. This is gas exchange.
First, the fuel mixture is supplied to the cylinder through the inlet valve, then the combustion products exit through the exhaust element. Closing and opening them is carried out using a camshaft. In order for the valve to return to its place after opening, a special spring is provided. It is very important in this design. When the valve is closed, a spring seals the hole.
GAZ-53 valves - adjustment and the need for clearances
So, this element has a rod and a plate. When the engine warms up to its operating temperatures, the rod heats up and elongates. Therefore, to compensate for such elongation, designers provide special technological gaps between the camshaft cam and the rod.
This gap can only be measured in idle mode. When the unit is already hot, it will decrease or disappear altogether. The rod elongates due to heat. These are the so-called thermal gaps.
When to adjust?
How often do you need to adjust the GAZ-53 valves? Adjustment is necessary when a characteristic noise is heard. It is created by the knocking of rockers and cams. Clearances must comply as closely as possible with the engine manufacturer's specifications. But you shouldn’t focus only on noise. If the valve wears out, then not only the valve will fail, but also the rocker, and with it the cam.
How to adjust valves?
This procedure will not present any difficulty. First you need to find out in what order the setup takes place. You need to regulate according to certain criteria. For example, if engine power has decreased, fuel consumption has increased, and extraneous sounds have appeared from the carburetor and exhaust.
The adjustment is made using very simple methods. If you use the first one, then the piston in the first cylinder must be set to top dead center. For this purpose, there are special marks on the timing pulley. The cylinder valves are closed. We need to find out what the gap is. It can be different: from ideal to very large. Each driver knows his personal ideal clearance on a particular engine.
To adjust, use a screwdriver to hold the adjustment screw on the first valve, and then loosen the locknut. Next, you should insert a test probe of the required size into the gap, and you should turn the screw until it is clamped between the rocker arm and the valve stem. The valve is adjusted. This procedure is also carried out on the second element. Next, to adjust the valves on the remaining cylinders, you need to turn the pulley another 90 degrees. The adjustments are repeated on the fourth cylinder. The order of operations on the cylinders will be as follows: 2 - 6 - 3 - 7 - 8.
If we talk about the second method, it is very similar to the first, but the order will be slightly different. So, the intake valves for cylinders 1, 3, 7, 8 are adjusted, and then the exhaust valves 1, 2, 4, 5. The remaining ones can also be adjusted if you rotate the crankshaft 360 degrees. At this point we can consider the question “how to adjust the GAZ-53 valves” closed. Adjusting them is not very difficult, and it doesn’t take much time either.
As a conclusion
As you can see, valves and the principles of their adjustment are no different from passenger cars. The operation is very simple and does not require too much time. The driver only needs knowledge of the location of these components and a little experience. You will also need a basic set of tools to carry out the setup.
Even a novice driver can handle adjusting the valves, and this way you can save on service station services.
So, we have found out the technical structure and rules for adjusting the valves of the GAZ-53 medium-duty truck.
