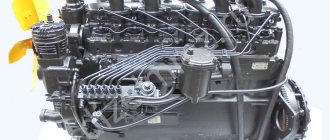
The carburetor is the most important component of any gasoline snow blower. In fact, without this element, the technology simply will not work. With the help of a carburetor, a fuel mixture with air is created and enriched. The node is constantly running. Because of this, other components of snowblowers fail more often than not.
It is in the interests of every owner of snow removal equipment to learn to understand the structure of the carburetor system. This will extend the service life of the entire unit, as well as save on repairs in specialized service centers.
If you get to the bottom of it, it turns out that adjusting, washing and even removing are not such difficult tasks as some may think at first glance.
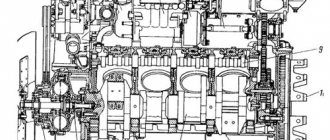
The design and principle of operation of the carburetor of a snow blower
At first glance, it may seem that the carburetor has a rather complex design, but in fact there is nothing complicated in the design of this unit. The carburetors of most snow blowers consist of the following components:
- Chambers with float;
- Float equipped with a locking needle valve;
- Mixing chamber;
- Sprayer and diffuser;
- Air and fuel valves with jets;
- Throttle valves.
A float connected to a needle valve is responsible for maintaining the required amount of fuel in the unit. As the fuel level drops, the float moves down, thereby opening the needle valve. At the same time, the required portion of gasoline enters the fuel chamber. As the amount of fuel in the chamber increases, the float rises and closes the needle valve.
From the float chamber, gasoline enters the mixing chamber through a spray tube, where it is mixed with air coming from the inlet pipe. The level of fuel in the float chamber is always slightly lower than the level at which the outlet is located. Thanks to this, when the engine is turned off, gasoline does not leave the float chamber, even if the snow blower is standing on a slope.
Why does the engine speed of a snow blower fluctuate?
Main faults of snow blowers
Gasoline and electric snow blowers are quite powerful and reliable equipment that can withstand serious overloads. According to the design of the snow removal unit, models are one- and two-stage, according to the method of movement - non-self-propelled and self-propelled (wheeled or tracked). Light and medium equipment is used mainly in private areas, heavy professional equipment is used in public utilities. Due to significant mechanical stress and natural wear and tear of individual components and parts, units may completely fail or cease to partially perform their functions.
Adjusting the snow blower carburetor - when is intervention required?
Often, during active use of a snow blower, malfunctions occur, which can be eliminated by adjusting the carburetor. A number of signs indicate that it is time to perform this procedure:
- The appearance of unexpected stops in the engine when starting it;
- The motor begins to “sob” under load;
- The amount of exhaust gases emitted has greatly increased.
All these signs indicate a failure in the settings of the standard carburetor of the snow blower. Without timely adjustment, the unit will begin to consume too much fuel, and its internal elements will be subject to significant load, which will lead to even more serious damage.
Repair of MTD snow blowers
Winter means not only excellent snow-white landscapes and skiing, but also a lot of snow that will have to be constantly removed.
If earlier this required a lot of hard work and effort, then with the invention of snow removal equipment it will become easy and simple for you to do this process. But sooner or later you will still need repairs to MTD snow blowers, which can be carried out by a service technician. We can easily cope with replacing the bucket, auger, spark plugs, thrust springs or machine flywheel. Our craftsmen also perform high-quality repairs of the gearbox, fuel tank or starter of the equipment. In addition, specialists will deal with carburetor problems and then fix them in a short time, while also adjusting the operation of the final drive and adjusting the wheels of the device. We will carry out all diagnostic procedures before carrying out these manipulations in order to know exactly why the breakdown occurred.
Repair of MTD snow blowers from our service center includes:
- reliability;
- professionalism;
- technicality;
- efficiency.
We will provide the entire package of services at a budget cost, which will be a real surprise for the client. With our professionals, you can work with your equipment easily and with pleasure.
5 advantages of Remmarket
The service carries out repairs of garden and construction equipment of any complexity in a short time.
- Free delivery to service for repairs over 10,000 q
- Cash and non-cash payments with (VAT)
- We comply with the stated repair deadlines
- Warranty for repairs and spare parts
- Work experience 7 years
Why should you contact us?
The professional approach of our specialists to service issues allows us to guarantee improved driving characteristics of snow blowers, optimization of production capacity and multiple extension of the service life of machines. Fuel routes are cleaned, consumables and leaky engine components and technological units are replaced.
Our master technicians have documented qualifications that allow them to repair gas-powered tools and electrical equipment. Specialists constantly improve their skills in real work, regularly raising their professional level with specialized training. .
We pride ourselves on our ability to perform snow blower repairs quickly. The high speed of our work is the result of a long development of the technical base. We ensure availability of most spare parts for every brand and model of snow removal equipment. Our capabilities in diagnosing faults deserve special attention - the most modern equipment in the arsenal of skilled repairmen. It is possible to deliver snow blowers.
We value our reputation as the best technical center for repairing gasoline-powered equipment and power tools. High quality repairs and service are our priority. It is also important to us that our services remain available to every snow blower owner. Therefore, we do not inflate the price of instrument repair, even when working with original spare parts, and we help a wide range of consumers.
Prices for repair of MTD snow blowers
| Type of repair | Repair cost | |
| Collection analysis | 1500 rub. | Order repairs |
| Change of oil | 400 rub. | Order repairs |
| Replacing the spark plug | 200 rub. | Order repairs |
| Cleaning and adjusting the carburetor | 900 rub. | Order repairs |
| Speed adjustment | 600 rub. | Order repairs |
| Adjustment of valves | 600 rub. | Order repairs |
| Replacing the Auger Belt | 400 rub. | Order repairs |
| Replacing the drive belt | 400 rub. | Order repairs |
| Replacement (installation) of the carburetor | 600 rub. | Order repairs |
| Starter repair | 500 rub. | Order repairs |
| Replacing (installing) a shear bolt | 100 rub. | Order repairs |
| Maintenance of chassis | 700 rub. | Order repairs |
| Engine flushing | 300 rub. | Order repairs |
| Engine deep flushing | 600 rub. | Order repairs |
| Replacing the friction roller rubber | 600 rub. | Order repairs |
| Replacing (installing) the friction roller | 500 rub. | Order repairs |
| Adjusting the travel traction | 600 rub. | Order repairs |
| Starter replacement | 300 rub. | Order repairs |
| Gearbox lubrication | 300 rub. | Order repairs |
| Editing the auger bucket | 700 rub. | Order repairs |
| Editing screws | 700 rub. | Order repairs |
| Replacing the slide | 500 rub. | Order repairs |
| Replacing (installing) the travel cable | 600 rub. | Order repairs |
| Replacing (installing) the auger cable | 600 rub. | Order repairs |
| Replacing the drive shaft | 800 rub. | Order repairs |
| Replacing the worm shaft | 1000 rub. | Order repairs |
| Replacing the auger shaft | 1000 rub. | Order repairs |
| Engine replacement | 4000 rub. | Order repairs |
| Replacing the ignition coil | 600 rub. | Order repairs |
| Replacing the charging coil | 600 rub. | Order repairs |
| Replacing the oil scraper cap | 300 rub. | Order repairs |
| Replacing the wheel release trigger | 800 rub. | Order repairs |
| Flywheel replacement | 600 rub. | Order repairs |
| Replacing a wheel axle | 800 rub. | Order repairs |
| Replacing the scoring knife | 400 rub. | Order repairs |
| Replacing the gas regulator | 400 rub. | Order repairs |
| Replacing the auger gearbox | 1500 rub. | Order repairs |
| Replacing the drive belt tension roller | 300 rub. | Order repairs |
| Replacing the snow throw adjustment cable | 600 rub. | Order repairs |
| Replacing the fuel filter | 300 rub. | Order repairs |
| Replacing the auger pulley | 600 rub. | Order repairs |
| Replacing the electric starter | 900 rub. | Order repairs |
| Setting the Propulsion Mechanism | 2000 rub. | Order repairs |
| Engine overhaul | 4000 rub. | Order repairs |
| Tank flushing | 400 rub. | Order repairs |
| Carburetor adjustment | 600 rub. | Order repairs |
| Speed adjustment | 600 rub. | Order repairs |
| Adjusting the auger cable | 600 rub. | Order repairs |
| Adjusting the auger draft | 400 rub. | Order repairs |
| Adjusting the cable/auger rod | 600 rub. | Order repairs |
| Repair of auger gearbox | 1500 rub. | Order repairs |
| Snow blower repair | 600 rub. | Order repairs |
| Electrical wiring repair | 750 rub. | Order repairs |
| Cleaning the snow blower | 300 rub. | Order repairs |
Didn't find what you were looking for?
Leave your phone number and find out the cost of repairs within 15 minutes!
By filling out the form and clicking on the “Submit” button, you consent to the processing of your personal data.
How to adjust the carburetor on a snow blower - the procedure in detail
Before adjusting the carburetor of the snow blower, you need to start and warm up the engine of the unit. The further algorithm of work is as follows:
- First of all, remove the crankcase ventilation tube and check for the absence of vacuum;
- Find the mixture adjustment screws and start screwing them in one by one until you hear unstable and rough operation of the engine;
- When the engine is running at maximum speed, stop tightening the screws. Otherwise, the snow blower motor will stall;
- Finally, turn the screws back one full turn. During this, the unit’s motor will begin to operate smoothly and without strange sounds.
Having finished adjusting the carburetor, you need to turn off the engine of the snow blower. After this, the engine must be started again and continued operation.
Recommended Posts
Your post must be reviewed by a moderator
Related publications
Hello. I have a Domotek jigsaw, China. I want to adapt it to a homemade jigsaw machine, but for this I need a speed controller, which this Domotek did not have initially. I bought this thing, tried to connect it in different ways, but the speed does not change. Please tell me how to connect correctly This regulator. There are 4 wires in the jigsaw: 2 from the network, 2 to the winding? Maybe there is another way to reduce the speed? Please advise which regulator to use? And is this motor amenable to regulation? I don’t understand much about this, what kind of excitation there is.
Cleaning the carburetor of a 2-stroke engine
If you need advice on professional carburetor cleaning, check out this article. In it you will learn how to clean the carburetor of a two-stroke engine and under what circumstances you may need to clean it. Cleaning a small engine carburetor is usually done when rebuilding a carburetor, but there are a number of reasons why you may only need to clean it.
Proper cleaning of a two-stroke engine carburetor involves complete disassembly and reassembly of the device. Below are explained the steps on how to properly disassemble, clean and reassemble the carburetor of a two-stroke engine.
Advice! There are many small parts in the carburetor. Keep the parts in your preferred order for quick and accurate assembly.
1. Remove the bottom cover.
Remove the two screws that secure the bottom cover to the carburetor body. On some models, the bottom cover is secured with four screws.
2. Remove the diaphragm and diaphragm gasket and separate them if necessary.
The diaphragm will be easy to detach once you remove the bottom cover.
The diaphragm gasket often sticks to the diaphragm, so if they are stuck together, they will need to be separated for thorough cleaning later.
How to clean a snow blower carburetor - the correct operating algorithm
Flushing the carburetor of a snow blower is no less important than timely adjustment of the unit. A clean unit will work much more stably, consume the optimal amount of fuel, without making unnecessary noise.
There are two ways to flush the carburetor. The first of them does not involve dismantling, and is suitable only in cases where only a certain part of the unit is clogged. To do this, you will need to purchase an aerosol cleaner. The further procedure is the same for both a Chinese snow blower and more expensive and high-quality units. It looks like this:
- Remove the upper part of the air filter housing and start the engine;
- Next, direct a stream of cleaner to the upper area of the carburetor, increasing the engine speed from time to time;
- Repeat these steps several times. At the same time, try to get the cleaner not only into the mixing chambers, but also inside the air jets.
- Then do all the above steps with the idle mechanism.
If the snow blower has been used for a long time and its carburetor has become heavily soiled, the unit will have to be removed and cleaned completely. Many beginners don't know how to remove the carburetor on a snow blower. To do this you need to adhere to a certain algorithm:
- First of all, you will need to completely dismantle the air filter;
- Next, disconnect the gasoline and oil supply hoses;
- Then you need to unscrew several screws and disconnect the inlet pipe from the carburetor;
- After this, you need to remove the carburetor and pull out the throttle valve;
- At the end, all that remains is to disconnect the starting enrichment.
After removing the carburetor, rinse it thoroughly using an aerosol cleaner. In this case, it is necessary to try to direct the jet into all, without exception, holes and channels. After drying, the carburetor must be reinstalled by performing the installation in the reverse order.
A snow blower is a type of equipment that becomes very popular in winter. Summer residents and owners of private housing construction especially need it. To ensure that your equipment does not fail during heavy snowfalls, it must be prepared for winter in advance. Preparation consists of a preventive inspection of the unit to identify possible malfunctions. If they are found, then in most cases, repairing the snow blower yourself is quite possible. Below we will discuss typical malfunctions of a snow blower and methods for eliminating them yourself. But first you should familiarize yourself with the internal structure of the equipment.
Snow blower gear lubrication
Stable operation of the unit depends on many factors, the main one of which is high-quality lubrication. The oil used to service the snow blower mechanism must have the following properties:
- frost resistance - since the snow blower is used at extremely low temperatures, the lubricant for its gearbox must retain its structure under constant exposure to frost;
- high fluidity - the oil must quickly penetrate into the smallest grooves and holes, thereby ensuring continuous lubrication of rubbing parts;
- viscosity - the working fluid must be thick enough to cover the working parts of the unit with a durable, homogeneous oily film.
Replacing used lubricant in a mechanism that has lost its properties is quite simple.
To do this you need to act in this order:
- First you need to remove the screws and remove the casing;
- After this, the operator will need to unscrew the bolts located directly behind the “snail”;
- Then you need to carefully remove the factory auger belt installed on the factory pulley;
- Next, you need to unscrew the bolts one by one, which firmly secure the shaft of the built-in auger;
- After this, you need to carefully turn the “snail”, and also remove the auger and the impeller installed on it;
- Then you will need to unscrew the standard shear bolts and completely disassemble the mechanism shaft;
- In the end, the operator will have to completely disassemble the built-in gearbox itself.
https://youtube.com/watch?v=ptYGBLcnVA4
After this, you will need to thoroughly rinse the mechanism parts. The operator can then reassemble the factory snow blower gearbox and apply new lubricant.
Structural elements of a snow blower
All snow blowers, no matter what engine is installed on them, consist of the following elements:
- engine;
- ladle;
- rotor or auger;
- outlet chute;
- tracks or wheels;
- control knobs;
- control panel (not available on all models).
Engine
Snow blowers have 2 types of engines: gasoline or electric. The engine drives the snow removal unit, which includes either an auger or a rotor. Also, if the unit is self-propelled, then the wheels and tracks are driven by a drive connected to the engine.
It is also called the casing. It is installed in the front of the unit and serves as a housing for the snow removal mechanism. The bucket can be made of sheet steel or durable plastic.
Gutter
The main purpose of the gutter is to direct the snow thrown out of the unit in the desired direction. Also on some chutes it is possible to adjust the throw distance. The part can be made of durable plastic or metal.
The main working part of a snow blower is the auger. It is made on the principle of an Archimedes screw and is designed to capture and move snow to the center of the bucket. The screw is made of metal. The edge of the screw can be either serrated or smooth. Toothed augers cope better with icy and compacted snow.
Below are drawings of a screw snow removal mechanism that can be used when repairing this unit.
Rotor
Just like the auger, the rotor is the main part of the snow blower, but only of the rotary type. This part is made of metal and has the shape of a disk with two/several blades or the shape of a propeller with several impellers turned inward.
Attachments for walk-behind tractor: homemade snow removal bucket and auger
The photo below shows a version of a homemade Cuznetzov snow blower, made in the form of an attachment to a walk-behind tractor.
The portal user already has a factory-made snow blower, so his thought process when creating a homemade product is interesting.
A commercial snow blower handles regular snow well. I will throw my homemade product into the “battle” of removing heavy wet or trampled snow, icy crust, which can only be broken with a shovel.
So, a homemade snow blower is intended for heavy work, for which it would be a pity to “kill” the branded unit. This determined its design:
- Open type screw made of thick metal.
- Powerful motor, gearbox and transmission.
- Big wheels.
The last two points are best answered by the drive of a snow blower - a walk-behind tractor. All that remains is to make the auger and select parts for the gearbox. The work was divided into stages:
- Making a bucket and auger.
The ladle is made from an old metal barrel.
- Bucket after painting.
- The gearbox is taken from an old Ural motorcycle.
Turning work was also required.
A snow blower made by hand from scrap metal in assembled form. For comparison: next to the homemade product there is a factory (blue) snow blower.
After testing the snow blower, I can say that it takes any snow: stale, with ice, with debris, wet. Among the disadvantages: 1. The further you drive into the snowdrift, the higher the snow blower tries to climb onto it. This is due to high screw speeds and low torque. In dense, heavy snow, the auger choke and the engine of the walk-behind tractor loses speed. 2. When clearing frozen crust for the first time, I tore the right auger. The second time I bent the impeller and cut off 7 bolts. I fixed everything quickly. A factory snow blower would not be able to work in such conditions, if these were not flagship powerful models of equipment.
Conclusion: an open auger is an advantage when working on frozen snow. A motorcycle gearbox is not the best option, but it can withstand loads that would kill the gearbox of a regular snow blower one or two times.
Subsequently, Cuznetzov installed wheels with developed lugs on the walk-behind tractor and, without a shovel, made paths in the snowdrifts with a snow blower.
The user also plans to remake the bucket and remove the gearbox from it. Increase the rotor speed to throw snow further. Reduce the speed of the auger and make it and the shaft even stronger, so as not to have to straighten the metal after working on old snow.
Operating principle of the unit
An auger snow blower works according to the following principle. After starting the engine, gasoline or electric, the auger begins to rotate at high speed. When the bucket sinks into the snow, the auger begins to move it towards the center. Since a paddle is installed in the center of the auger, it grabs the snow and throws it through the chute.
The operating principle of the rotary unit is not much different. After starting the engine, the rotor begins to rotate. The bucket plunges into the snow, the rotor blades capture the snow mass, crush it and throw it through the chute.
A two-stage snow blower works like this. After starting the engine, not only the auger begins to rotate, but also the rotor installed behind it. When snow gets into the bucket, it is captured by the auger and fed to the center of the casing. Since a rotor is installed in the center of the bucket, the snow is captured by its blades and thrown out through the chute.
Petrol snow blower MTD M 53
By choosing the self-pickup option, you can pick up the goods for free at a convenient time. Our specialists will tell you everything about the chosen position and prepare the equipment for work.
Pickup hours:
Mon.-Fri. from 09:00 to 21:00 Sat.-Sun. from 09:00 to 21:00
Express delivery
Free delivery for orders over RUB 1,500.
You can specify a convenient time and day of delivery when placing an order or discuss it over the phone with the operator.
Delivery in Moscow for order amounts over 7,000 rubles. is carried out free of charge.
If the order amount is less than 7,000 rubles, the delivery cost is 290 rubles.
- Description
- Characteristics
- 1):?> (0) —>
- Reviews
- Ask a Question
The MTD M 53 snow blower is characterized by high performance and maneuverability. The compact gasoline snow blower is designed for cleaning medium-sized areas. And thanks to the wear-resistant rubber auger, you can work without fear of scratching the surface.
A snow blower is an excellent solution for clearing concrete and stone surfaces. And its body and outlet chute are made of impact-resistant plastic. Thanks to this, you can effectively clear away snow and ice, even in areas with obstacles.
Features of the MTD M 53 snow blower
- Simplified launch.
- Adjustment of direction and range of ejection.
- Reinforced plastic screws.
- High maneuverability.
The gasoline snow blower engine is equipped with a soft traction cable. This allows you to start it smoothly from the first pull. In addition, at temperatures below -15 ° C, starting with an electric starter is provided. Once your snowblower is plugged into a household electrical outlet, you can start the snowblower by turning the ignition key.
By adjusting the direction and throw distance, you can choose a convenient angle and evenly distribute the snow mass in the right place. The handle on the chute allows you to rotate it 180°. And in combination with a throw setting of up to 9 m, you can throw snow even through high fences or snowdrifts.
The snow blower is equipped with a durable shredding auger made of reinforced rubber. The captured snow is thoroughly crushed and thrown out through the outlet chute. Crushing the raw material into small particles protects the engine from overload and increases the emission range.
Compact wheels with special tires ensure easy and quick cleaning. Their size allows you to deploy the snow blower almost on the spot. And the deep tread guarantees exceptional traction and eliminates slipping.
You can get more information, answers to your questions, learn more about the features of the model and buy a petrol snow blower MTD M 53, article number: 31A-2M1E678 at a competitive price in our retail store or on the website MT-Rus.ru
| Engine | |
| Engine model | MTD SnowThorX 35 OHV |
| Engine power (l/s) | 3 |
| Fuel tank volume (l) | 1,9 |
| engine's type | petrol |
| Engine start type | manual starter |
| Main settings | |
| Guarantee | 2 years |
| Travel speeds (forward/reverse) | no no |
| Augers | reinforced rubber |
| Processing options | |
| Grip height (cm) | 28 |
| Release distance (m) | 10 |
| Release direction | manually |
| Support skis | No |
| Rotation of the chute (deg) | 180 |
| Heated grips | No |
| Turn control | manual |
| headlight | No |
| Cleaning width(cm) | 53 |
| Packaging options | |
| Length (mm) | 970 |
| Width (mm) | 610 |
| Height (mm) | 470 |
| Package weight | 34.5 |
You can ask any question you are interested in about the product or the work of the store.
Common snow blower malfunctions and their causes
Snow blowers, despite their simple design, are also prone to malfunctions. Failures can be simple, which the user can fix independently, or more complex. In such cases, repairing the snow blower will be impossible without the help of a specialist. The most common snow blower malfunctions are as follows.
- Snow blower won't start. The cause may be a faulty spark plug or poor contact of the high-voltage cable in the coil or in the spark plug cap.
- The engine is running erratically. Often this engine behavior is caused by clogged spark plug electrodes or an incorrectly set gap between them.
- Black exhaust gases. Black smoke may appear due to poor quality gasoline or due to a closed carburetor choke.
- The unit stopped moving forward. This problem may occur due to weakening of the drive cable, due to misadjustment of the friction drive or traction belt.
- Strong vibration. The unit begins to vibrate excessively if the screws that secure the engine to the frame are loose.
- The starter rope does not extend. This means that the flywheel is blocked by something. You will need to open the cover hiding the flywheel mechanism and find the cause of the jamming.
- The unit stopped throwing snow. There may be several reasons for the malfunction: a foreign object has entered the auger (rotor); the protective bolt has been cut off; the engine runs at low speed; the drive belt slips due to poor tension or even breaks; the augers are covered with ice and cannot rotate.
Assembly
Let's start collecting. First let's install the handle. Please note that the intermediate handle, which is installed closer to the snow blower, only has three bolts! This is how it should be, and this third bolt should be installed in the hole that is closest to the snow blower. First, it is more convenient to attach the intermediate handle to the snow blower, and then the control handle to the intermediate handle.
Then install the clutch cable. It is placed on the INSIDE of the clutch control handle. First you need to unscrew the last part from the cable (sealed with tape), insert this part into the hole, and then screw everything back so that the cable stops sagging. There is no need to pull it like a string.
Then I got carried away and didn’t take any photos. I used the instructions. There it becomes more or less clear. Let me clarify the nuances.
When attaching the snow chute, you need three small bolts and nuts. To secure the orange skis you need 4 large bolts with washers and nuts. Moreover, bolts of short length are installed closer to the front of the snow blower, and bolts of longer length are installed deep in the auger through the reinforcing plate. Moreover, this bracket was screwed on crookedly and I had to first unscrew the bolts from it, screw on the orange skis and then screw on the plate itself.
Snow blower won't start
If the snow blower does not start, then first of all you should make sure that there is fuel and its quality: the engine will not start if it has been in the tank for about 3 months. It is necessary to drain the old gasoline, add fresh gasoline, pump it into the carburetor (if required according to the instructions) and try to start the engine. Usually changing the fuel gives a positive result.
Problems with starting the engine may occur in the following situations.
- The oil sensor blocks the engine from starting. You need to make sure there is enough oil in the engine crankcase using a special dipstick. If everything is fine with the oil level, you can try disconnecting the sensor. If the engine starts after the sensor is disconnected, it should be replaced.
- After pressing the start button, the starter stays put. In this case, you need to check the battery, since at low temperatures the battery charge is quickly lost. The battery must be charged in a warm room, then installed in the unit and started the engine with the starter. Also, the starter may not start if it breaks down. Checking this is quite simple: try starting the engine using manual start. If the engine starts, repair or replacement of the starter assembly is necessary.
- It is difficult for the starter to rotate the engine crankshaft. This can be heard by the characteristic low sound. It is difficult to turn the crankshaft, usually due to the oil in the engine thickening in the cold. It is necessary to place the unit in a warm garage for a while until the engine warms up to room temperature, and after that the snow blower is rolled out onto the street and the internal combustion engine is started.
Important! Never try to warm up an engine with a blowtorch. In most cases, this leads to a fuel explosion and fire. In addition, there are many plastic parts attached to the engine, which can become deformed when exposed to high temperatures.
If the internal combustion engine does not start either with a manual starter or with an electric one, or it stalls after starting, then there may be 2 “culprits” for the breakdown: the ignition module or the carburetor.
Problems with spark plug and ignition
To ensure that the spark plug is not starting the engine, it should be removed from the cylinder. Examine her electrodes. If they are covered with carbon deposits or filled with fuel, then clean them thoroughly, dry them well and set the correct gap - it should be 0.75 mm.
Next, follow these steps. Place the cap on the spark plug and touch it (the metal nut) to the cylinder body of the internal combustion engine. Pull the handle of the manual starter of the device. In this case, a spark should appear between the electrodes of the spark plug. If a spark does not appear, it is weak or deviates towards the insulator, the spark plug should be replaced with a new one.
If after replacing the spark plug there is still no spark, then you should look for the cause in the ignition system (coil, magneto, etc.). Most often, adjusting the ignition solves the problem.
- Remove the cover covering the magneto.
- Remove the screws holding the ignition module.
- Take a small piece of paper from a regular A4 printing sheet. Fold the paper 4 times.
- Insert a strip of paper under the ignition module as shown in the following photo.
- Press the coil against the magneto and tighten the fasteners. At this point, the ignition adjustment of the snow blower engine can be considered complete.
Required tools and materials
Different models require different tools. Some adjustment screws have slots for a flathead screwdriver. Others have a hex key for a socket wrench.
Also required are spark plug and valve cover wrenches.
A dipstick is required. Some people recommend using improvised calibers. For example, a blade that is said to have a thickness of 0.1mm. But it’s not a fact that it will fit, because... other sizes (0.15 mm, 0.20 mm) cannot be set without a probe. Two blades folded together, due to a loose fit to each other, will not give 0.2 mm, but an unpredictable value.
Basic errors during adjustment
You cannot check clearances on a warm, much less a hot, engine. Due to the thermal expansion of metals, there may be no gaps at all at this time, but they will appear as they cool. To stop such vibrations, clearances are largely provided on simple engines.
After adjustment and tightening, the clearances were not checked. There may be a change in clearance during tightening. Therefore, checking with a probe after completion is required.
Incorrect stroke and piston position during adjustment. When searching for TDC of the third stroke, described above, the flywheel should be rotated in the direction in which it rotates when the engine is running.
On a 4-stroke internal combustion engine, the piston rises to TDC twice. To avoid confusion, you must follow the above diagram for setting the piston position for adjustment.
Additionally, examining the position of the exhaust valve at TDC will help you get your bearings:
- at the position required for adjustment, stroke 3: both valves are closed, the piston is at TDC;
- at intermediate - the piston is at TDC, but the intake valve begins to open. At the same time, there is no gap on it at all. It is impossible to adjust the gaps in this position.
Replacing drive belts in a snow blower
Snow blower drive belts are designed to transmit rotational motion from the drive shaft to the driven shafts.
There are 2 types of belts installed in snowblowers. The first belt connects the unit’s auger shaft with the drive shaft, and the second transmits rotational motion to the wheels.
Therefore, if the snow blower does not move forward, or its auger does not rotate, then you need to check the belts and, if necessary, replace them. To install the belt on your snow blower, follow these steps:
- Disconnect the chute from the snow blower.
- Remove the protective cover covering the belt pulleys.
- Disconnect the screw mechanism from the engine of the device by unscrewing several bolts.
- Next, you need to put a new belt on the snow blower pulley, that is, on the pulley of the auger mechanism. The size of the belt should be the same as that of the broken one.
- Pull the auger mechanism (you may need the help of another person) to the engine and put the belt on the drive shaft pulley so that on one side it falls under the pressure roller with the spring attached to it. The roller serves to tension the belt.
- When you screw the auger mechanism to the engine, replacing the auger belt will be completely completed.
In cases where the unit refuses to move, there may be 2 reasons: wear of the friction ring and rupture of the wheel drive belt. If everything is in order with the clutch, then to fix the breakdown, all that remains is to change the drive belt.
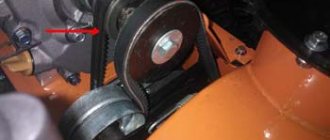
Replacing the wheel drive belt is done in the same way as replacing the auger belt. Only after disconnecting the auger mechanism should you remove the cover hiding the wheel drive pulley (indicated by the arrow).
Friction disc for a snow blower - making the part yourself
Buying a new friction disc for a snow blower will not entail significant financial costs. However, many craftsmen make friction discs from improvised materials. It should be noted right away that the homemade part must be perfectly flat, which can only be achieved after prolonged work with a file. The procedure for making a friction disc is as follows:
- First, find a workpiece made of aluminum or any other soft metal - such a product will be easier to process;
- Cut a circle along the outer contour of the old friction ring from a metal blank. It will not be possible to do this perfectly evenly with the help of a grinder, so all irregularities will have to be processed with a file;
- The most difficult step in making a friction ring for a snow blower is making a straight hole inside the disc. You can use a drill for this. Drill several small holes in the center of the workpiece with a thin drill, which should be located next to each other. Carefully cut off the jumpers that remain between the holes using a chisel. This way, the excess parts of the disk will fall off, and you will be left with a ring with a lot of jagged burrs that will need to be removed with a file.
After making a snow blower disc, you will need to put a rubber seal on its edges. Find a ring that has the appropriate diameter and pull it onto the finished product. To ensure that the seal sits firmly on the disk, use “liquid nails” glue.
Installation and testing of a homemade friction disc is carried out in the same order as in the case of a factory disc. After practicing making disks, you can continue to install homemade parts on your snow blower, saving a good amount of money.
Friction ring repair
The friction ring is a transmission part that allows the snow blower wheels to move.
The ring is installed on the clutch wheel.
During normal operation of the snow blower, in compliance with all rules for switching gears, the friction ring is subject to very slow wear. But if the rules are violated, this element quickly wears out and fails.
The reasons for wear of the rubber clutch ring may be as follows.
- When the unit is operating, the user changes gears without stopping the device. In this case, the rubber seal experiences heavy loads and wears out. When the ring wears out, the metal ring also deforms, after which the snow blower stops moving.
- Rapid wear of the ring and the appearance of deep grooves on it causes careless operation of the unit. That is, the operator allows the wheels to slip, for example, on inclines, on difficult sections of the road or in large snowdrifts.
- Also, the clutch wears out due to banal corrosion of the ring as a result of dampness. If after work you do not take preventive measures to remove snow residues from this block, the ring rusts, crumbles, and the clutch ceases to perform its functions.
When the clutch wears out, the unit begins to move jerkily or stops completely. Problems also arise when switching the speed of movement of the unit and when switching the direction of movement (forward and backward).
Do-it-yourself friction disc repair is carried out as follows.
- drain the gasoline from the tank;
- set the unit to the technical position. maintenance as shown in the following figure;
- remove the wheels from the unit;
- remove the crankcase cover by unscrewing 4 or 6 bolts (depending on the model of the device);
- remove the chassis;
- remove the right and left flanges (see figure below) - these are covers covering the bearings;
- Move the hex shaft to the left and remove the friction disc from it.
If not only the ring, but also the wheel itself is worn out, then a complete replacement of the clutch will be required . To replace the rubber ring, unscrew the 4 bolts, remove the worn part and insert a new one into the disk, then tighten the fasteners again.
Reassembling the entire friction unit and the snow blower as a whole is carried out in the reverse order.
Instructions
Over time, everything breaks down. Any technique has a limit of strength and does not work forever. As for the Patriot, Champion, Honda, and Foreman snow blowers, some of their components are specially prepared so that breakdowns of special simple parts occur in them.
Shear bolts
Thanks to this, you can keep all important parts intact. This part, the shear bolts, is the second consumable of the snow blower, after gasoline.
The shear bolts are made in such a way that they come off on their own in the event of excessive load on the auger. In this case, the gearbox will remain intact, and the bolts just need to be replaced. But you won’t learn to buy them all the time for reasons of economy.
Shear bolts
The cost of the kit, although not very large, becomes very noticeable when the consumption is high. Therefore, you should seriously think about how to make shear bolts for a snow blower with your own hands.
To do this, you need to take bolts of the required diameter, be sure to note that the diameter of the bolt is the same along the entire length, this is important, and simply transfer the dimensions of the original shear bolt to the workpiece. Next you just need to make grooves in those places where they are on the original bolts
In principle, not a difficult operation, but useful for the wallet
In principle, not a difficult operation, but useful for the wallet.
Caterpillars
As for the tracks for snow blowers MTD, Huter, Kraftsman, Stig, much more tools and consumables will be required. But the result will still be beyond praise. One simple option is to make tracks from an old tire.
Its main advantage is that the result is a closed circuit, which means durable and reliable.
It is also quite simple to make - you need to cut off the edge from an old tire of the required size. A knife dipped in soapy water or a jigsaw with a fine-toothed attachment is suitable for this. After the jigsaw, it is best to process the edges to achieve greater smoothness to avoid tears.
If necessary, you can completely solder it. The only drawback of this design is the fixed size of the future caterpillar. But if necessary, you can make a larger cut if you need a narrow track, or tie two together if you need a wider one.
Gearbox
As for the gearbox, everything is simple - its service life is the longest of all moving parts. The gearbox transmits the driving moment from the engine to the auger and is located on the axis of the auger.
In fact, several gears, with regular lubrication, will not cause any special problems, especially since the total time of use of the snow blower does not exceed several tens of hours.
This video shows the assembly of a snow blower gearbox.
Friction disc
Another part that often breaks is the friction ring. Too much force on the wheels leads to the fact that the wheel-friction disc pair slips, which causes the friction ring to wear out and then break.
As a result, the friction wheel, made of steel, leaves deep grooves in the aluminum friction disc. But these are not the only problems. In the process, the belts wear out and the clutches completely fail.
And due to the fact that it is practically impossible to make such a ring at home, it is better to carefully monitor the progress of the snow blower and not try to skid on it.
The video shows how to replace the friction disc.
Chains
Snowblower chains, it's just a parade of diversity. Here you can see absolutely all types of them, especially if it is made by yourself. Absolutely everything is suitable for connecting the motor and auger. Homemade installations often use bicycle chains along with bicycle sprockets.
But this option is only suitable for low-power units. As for wheel protection, it can also be replaced with improvised means. It is enough to have a piece of chain at your disposal, and, at best, a welding machine.
But if it is not there, you can get by with simply riveting it with a hammer. The only condition for making the correct chain for a wheel is that it should not be too small and too loose. And the best option is the shape of a ladder.
True, it is possible to make something similar at home, but such a product will be far from having the functionality of a factory part. Here, cheapness is very inferior to quality.
Tips for proper use of a snow blower
In order to extend the life of the snow blower and reduce the likelihood of various malfunctions, you should adhere to certain rules for caring for this type of equipment.
- Before winter sets in, you should check all the mounting screws on your snow blower and tighten them if necessary. You should also check the tension of the belts and the serviceability of all moving parts of the unit.
- After turning the device over, check the integrity of the scraper shaft, whose task is to scrape snow from the ground. If this part is worn out and is not replaced in time, then in the future this will cause damage to the auger body.
- Monitor the oil level in the engine crankcase. For these purposes, there is a special probe on the crankcase body. The more often you check the oil level, the less likely it is for engine failure. On average, the oil will be used up after 25 hours of operating the snow blower.
- After finishing snow removal, do not immediately turn off the engine of the unit. It is necessary to let the device run idle with the auger rotating. This will allow the moving parts of the snow blower to clear away any remaining snow and ice. It is also recommended to pour warm water over the unit components covered with snow or ice, then wipe and dry them. If moisture has entered the mechanisms of the unit, it can be removed using kerosene in the form of a spray (sold in cylinders). After cleaning, the snow blower should be stored in a warm garage or other area.
- Check and clean the spark plug at least once a season. If necessary, replace the part with a new one.
- Also, once a season you need to lubricate all bearings, gearbox and eccentrics. For lubrication you can use LITOL-24.
- Before sending the snow blower for long-term storage, it is necessary to: remove accumulated dirt on all parts of the unit; remove all moisture from all components of the device; drain all gasoline from the tank and lubricate all its working elements; remove the battery (if it is provided for in the design of the unit) and store it separately from the device.
As for electric snow blowers, they are cared for in the same way as gasoline units, with the exception of the rules for servicing the internal combustion engine.
Snow blower Huter sgc 4800. Technical characteristics, operating instructions and reviews
The Huter sgc 4800 snow blower is a universal winter equipment whose task is to clear areas of snow. It has a power of 6.5 hp, has increased endurance and working life, suitable for using the machine in severe weather conditions.
The Huter snow blower copes well even with dense snow and with an icy crust on the surface of the snow cover.
The scope of application of the Huter sgc 4800 snow blower is very wide: utility companies, the territory of a private house and cottage, local areas, clearing garden paths, streets, park areas, parking lots. The Huter snow blower can be used for both domestic and professional purposes, as a full-fledged working equipment for a janitor or gardener in the winter. Gasoline engine, air cooling.
To adjust the position of the Hooter sgc 4800 snow blower, change the height of the auger by lifting the limit shoes. Thanks to this option, the car can drive even on uneven terrain, with a large number of bumps or branches.
The features of the Huter sgc 4800 snow blower include the following qualities:
- convenient placement of control levers (all switches on one console, close to the operator);
- presence of a lighting device;
- double strength metal screw;
- anti-corrosion coating of metal components of a snow blower;
- simple operation resulting from a simple design;
- large wheels that provide good grip on the ground;
- easy start function;
- simple operation even in severe frost.
Among the malfunctions of the Huter sgc 4800 snow blower, according to reviews on thematic forums, the most common are:
- the need to adjust the carburetor after six months of operation (factory adjustment is sometimes not stable);
- snow blower slipping on too smooth ice;
- increased vibration of key components (a possible cause is loose connections or deformation of the auger as a result of an impact/collision with a large stone or obstacle);
- uneven engine operation (such a malfunction is most often associated with low-quality fuel or a clogged air filter);
- icing of the drive system, in particular, ice freezing on the wheel axles, in which case the ice must be removed and work started.
COMMENTS • 53
Technology, like a woman, loves affection and care. Make a hood for the engine and the speed will not fluctuate, experienced owners know about this problem.
Top up the fuel and filter every time you use it for drying, the operating instructions say to store it at above-zero temperatures, that’s where all the problems come from! Drive it into a warm place every 3 cleanings, close the fuel valve after work, lubricate the cables with silicone grease, add 2 cubes of transmission oil to the worm gear, the pressure in the wheels is 1.8, run-in in a gentle mode for 15 minutes of operation 15 muffled!
The point of buying a modern snow blower is to finish it off. I'm also struggling with it.
He piled up too much. I have a Hyundai. Essentially the same thing. The only thing that had to be modified was the hood. Cut off the spark plug, wiring, and air vent from the flow of snow. Everything is dry and works great.
Hello! Of course, a lot of time has passed since you posted this video, but still. We have the same problem with our snow blower. We can’t find such a carburetor anywhere - we’ve turned the entire Internet upside down. Maybe, if it’s not difficult for you, you can write where you purchased it or send a link. I will be very grateful to you.
@Antonina Ivanovna third small photo below RUB 3,113
@Dmitry Zinoviev Thank you so much!
Unfortunately I won't give you any advice. But you can also modify the Chinese carb, there is a video. First you need to establish what is the reason for the floating speed, and there are two of them, the gas pump and the carburetor, or both. In my case there was a carburetor. Adjusting the gas pump is on YouTube.
Dmitry, well done! And all the colleagues who are discussing! If I were the Chinese, I would look at these and similar videos and draw conclusions.
I would advise our manufacturers to climb and assemble a fucking snow blower
I sealed the holes for the winter, what do you do with it in the summer? Cold air increases power in the internal combustion engine! Swap the wheels!
Tell me, the snow blower is new, it works properly for the first 20 minutes, then the revs start to float, as if it will soon die, the filter has been removed, there are no changes. Tell me what is the reason, it gets hot and the speed fluctuates, what to adjust, change, etc., like a new device brand ENERGOPROM
At -30, my damper still freezes, there is no condensate drain here, it starts spitting until it warms up well. But it’s still better now than it was from the store. Another option is to warm it up in a warm room, but be careful with gases.
Either the gas man is playing, or the Chinese carburetor is leaking. Or both. Set up the gas pump, then change the carb to one that was removed from a properly working one. You can check the valve clearances just in case. Try warming it up with the ventilation hose removed, and once it warms up, put it back on completely. It doesn’t matter the name, everything is China. Quality depends on the plant and the shifts at the plant. Good equipment - Canada, America and a 220 starter in them, well, the prices are there.
Wheels don't spin
Friction ring malfunction
The friction ring is the part of the transmission that makes the wheels rotate.
It is attached to the clutch wheel and naturally wears out very slowly.
But if you change gears incorrectly, the ring may crumble or fray ahead of schedule. In this case, the snow blower moves jerkily or stops completely, and changing gears or moving direction is difficult.
The main reasons for the failure of the friction ring:
- Changing gears while the snow blower is moving. In this situation, the ring experiences a lot of pressure and quickly grinds, deforming the metal clutch ring. This results in the unit being unable to move.
- Careless operation. This includes use on difficult hilly areas, in snowdrifts when wheels slip.
- Ring dampness and corrosion. To avoid this, after each use of the snow blower, you must completely clear its parts of snow and leave them in a dry room to dry.
Ring repair and replacement diagram:
If you decide not to do the repairs yourself and we don’t have time to take the unit to the service center, then order snowblower repairs at your home. Specialists will come, pick up your equipment, repair it and deliver it to your home.
This is interesting: How to choose the right snowblower for your home?
Why does a snow blower suck at throwing snow?
This problem may be caused by:
- foreign particles entering the rotor;
- cutting off a protective bolt made of soft metals and alloys;
- insufficient engine speed;
- slipping of the drive belt.
A snow blower may not be able to throw snow well because the auger stops turning due to an ice crust that has formed on it. The auger may not rotate due to a broken gearbox, problems with the cable, or cut off protective bolts. In rotary snow blowers, the rotor does not spin if the bearings of the shaft on which the impeller is mounted fail.
It is recommended to entrust the solution to serious problems with snow blowers - engine breakdowns, mechanical malfunctions, situations when the speed does not turn on - to the professionals of a service center equipped with diagnostic equipment.
The need for drawings of rotary snow blowers
To properly assemble snow removal equipment, you will need drawings. On the Internet there are many options for device diagrams of the simplest rotary snow removal equipment.
Not every scheme is suitable for each type of unit. For example, for owners of a mini-tractor - and this is a very powerful piece of equipment - it is irrational to hook up a rotary hitch. Most often, a combined mechanism is produced for this type of equipment. The hitch consists of a rotor and auger. This snow blower is capable of handling large snow drifts.
In a combined snow blower, snow is processed in two stages. The auger grinds the captured cover, and the rotor mixes the loose mass with air, after which it throws it out through the sleeve under strong pressure.
A combined type snow blower will cope with compacted and wet snow, as well as icy crust. To obtain greater productivity, a serrated edge is made on the screw disc knives. It crushes ice according to the principle of a saw into small grains .
Methods for increasing the working life of a snowblower carburetor
There are methods that can extend the life of a unit. To ensure that your snow blower carburetor lasts as long as possible.
Its owner must do the following:
- Take regular breaks when working with a utility machine. It must be remembered that the mechanisms of the snow blower, including its carburetor, constantly heat up during operation. To ensure that its operating temperature does not exceed permissible standards, the snow blower operator must take 10-minute breaks after each hour of working with the machine;
- use only high-quality fuel and branded motor oil - the operator needs to pay attention to the octane number of gasoline and the freezing point of the motor oil. In addition, it is important to remember that the more beneficial additives in the engine oil, the better it will protect the engine and carburetor of the snow blower;
- make sure that the mechanism does not succumb to mechanical shocks - sharp knocks towards the carburetor will soon lead to its breakdown. The first to suffer from this are the adjusting screws, which can move or fly out of their seats.
In addition, the operator must remember that the snow blower should only be used in areas that have been previously cleared of stones and small debris. Otherwise, glass or stones may damage the carburetor and other important operating components of the machine.