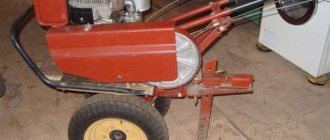
How to adjust the carburetor
There are several signs that indicate that the carburetor on your walk-behind tractor needs adjustment. Let's list them:
- the engine power of the unit has decreased sharply;
- the volume of fuel consumed has increased rapidly;
- the volume of exhaust gases has increased;
- after starting, the engine turns off spontaneously;
- At idle, the walk-behind tractor engine is unstable.
This is interesting: adjusting the carburetor of a walk-behind tractor.
Each of these problems may have several reasons, including increased loads on the unit or, conversely, long downtime of the walk-behind tractor. An effective measure to eliminate them is to set up the unit. Doing this yourself is not at all difficult. To do this, you need to perform several steps:
- Before tuning, start the engine and warm it up - leave it running for 5 minutes.
- Turn off the device and leave it motionless on a horizontal surface. After this, turn the full and low throttle screws, first until they stop, and then one and a half turns in the opposite direction.
- Start the engine again and warm up for 5 minutes.
- Without turning off, adjust the engine speed control lever to the lowest speed.
- Adjust the throttle screw to the desired position - the one in which engine operation will be the most stable.
- Unscrew the carburetor low speed adjustment screw to the maximum position.
- Set the throttle valve screw to the minimum position.
- Adjust both of the above screws until the engine of the unit begins to demonstrate maximum uninterrupted operation.
- Having adjusted both screws, you need to set the engine speed lever to maximum gas.
- A check is required to complete the setup. To do this, the maximum speed adjustment screw is turned in one direction or the other by two and a half turns in order to check the smooth operation of the motor.
Design and adjustment of the K-45 carburetor
The Neva walk-behind tractor of models MB-1 and MB-2 is equipped with a DM-1K engine with a K-45 carburetor. There are also modifications of the model, such as K-45R, K-45U, K-45M.
To set it up correctly, let’s briefly look at its structure.
A carburetor is an engine component that transfers fuel, mixing it with air, and regulates its flow into the cylinders.
Consider the K-45 scheme. Here, the throttle lever 11 is located at the bottom of the valve, which regulates the amount of mixture of gasoline and air. The regulator rod is attached to it. At the top of the throttle valve there is a stop screw 5. The main lever of the throttle valve 14 controls its position. In the closed position it is held by a spring, and when the internal combustion engine starts, it opens to a certain angle. The degree of angle is calculated so that there is no excessive enrichment of the fuel mixture in the cold engine of the walk-behind tractor.
Adjusting K-45 allows the entire power system and the engine itself to operate without interruption:
- prepare the carburetor for adjustment and warm up the walk-behind tractor engine;
- reduce the engine rotation speed using screw 5;
- using screw 8, you need to set the maximum engine idle speed;
- and finally change the rotation speed by turning the screw in the opposite direction by 0.25 turns.
Repair K-45: basic recommendations, video
In order to repair the carburetor with your own hands, we suggest that you watch the video of repairing the Neva MB-2 walk-behind tractor.
Let's consider the main malfunctions of the K-45:
- If an excess amount of air enters the internal combustion engine chamber. Try replacing the gasket between the head and the carburetor and tightening the mounting nuts on the connection. If this does not help, the cause may be wear on the shaft on the damper or the hole where it is connected. Such a shaft must be replaced, and in case of broken holes, the entire device is replaced.
- When too much fuel enters the float chamber. In this case, check and replace worn parts: float, jets, needle.
- If the carburetor is getting little gas, check the filter and sump, fuel supply hoses and gas tank. Contaminated elements must be washed or replaced, and if the tank is rusty from the inside, you will have to clean it with caustic soda.
- If you notice an increase in fuel consumption, adjust the carburetor by referring to the operating instructions.
Replacing with another carburetor
In order for the carburetor of the walk-behind tractor to work properly and without interruptions, it is necessary to constantly monitor the condition of the filters, carry out adjustments for the correct supply of fuel and air, and also use gasoline with an octane rating of at least 92. In the event that a breakdown of the K-45 could not be avoided :
- purchase the original unit;
- dismantle the faulty mechanism, starting from the engine head;
- Drain the remaining fuel from the faulty carburetor;
- clean the connection and replace the unit.
Or contact service for a replacement. If you want to install a carburetor of a different brand on the unit, purchase the necessary adapter.
Operating rules
The device will last a long time if you follow the following recommendations.
To keep the mechanism in working condition, it is important to monitor the composition of the supplied gasoline - it should not contain mechanical impurities. Before starting repair work, it is necessary to treat the parts with the same fuel. It is not recommended to use solvent, as it can reduce the elasticity of rubber parts and damage washers. It is best to dry parts by blowing with compressed air. Do not clean small holes, for example, with a needle or wire.
- Perform final assembly and installation of parts evenly - this way you can avoid deformation or bending of carburetor parts.
- Make sure that the float chamber is tightly connected to the body - future success lies precisely in their tightness.
- Before starting the mechanism, check how the air filter is connected - you should be wary of fluid leaks.
- To avoid leakage, the fuel valve must be opened, then the air damper must be closed, the control lever must be tightened tightly, and the throttle valve must be opened to 1\8-1\4. The seal should be pressed until drops of fuel appear (if the temperature has dropped to 5 degrees).
- When starting, the air damper must be opened slightly. As soon as the engine warms up, open it all the way.
Adjustment recommendations
Unstable engine operation is the first signal to adjust the carburetor on the walk-behind tractor. Experts advise starting this procedure in early spring - just when you start the mechanism after winter “hibernation”, at the end of autumn - after the end of the load. Disassembly should be carried out in a bright, ventilated area. Setting up the Neva carburetor yourself is not at all difficult, the main thing is to follow the basic recommendations:
- warm up the engine for at least 5 minutes;
- screw the screws in until they stop;
- the screws, in turn, must be adjusted by 1.5 turns;
- set the gear lever to minimum speed;
- in the case of throttle control parts, set only the minimum speed;
- Make sure that the engine is running for the duration of the entire repair - turn it off when completed, then start it again to check/monitor the result;
- The idle speed is regulated by the idle screws - it is important to ensure non-stop operation of the engine;
- If all rules are followed, the carburetor will function quietly and without failures.
Adjustment features of different brands
As noted earlier, the carburetor of a walk-behind tractor is configured in the same way, regardless of the brand: Neva, Cascade, Agros (or Argo, as it has been called since 2012), Lifan and others.
If, after carrying out all the manipulations described above, the carburetor continues to operate incorrectly, it will need to be removed and inspected. The unit may need repairs, cleaning or washing of parts.
After adjustment, be sure to check the spark plugs for dirt: clean them from carbon deposits or replace them if they are faulty, adjust the spark plugs.
How to set the ignition correctly
The operation of any device begins with starting the engine and the ignition system must work no worse than a Swiss watch.
Before setting the ignition on the walk-behind tractor Luch, Don, Huter, Profi, Plowman, Champion, you must first of all:
- Check the spark plugs. They are the main reason for the failure of this system. It is also always recommended to have a spare candle with you, in case manipulations and cleaning do not help. To deal with the spark plug, you need to unscrew it and wipe the electrodes and remove carbon deposits from them.
- Next, you need to set a gap between them.
- Next, put the wire square on the spark plug, and firmly press its body against the cylinder, its head, while turning it away from its hole, which is located in the cylinder head.
- It is necessary to rotate the crankshaft. This can be dealt with using a starter cord. In a working system, the spark that jumps between the electrodes should be light blue. If it is missing or has a white-yellow color, the system is faulty.
In this case, you can check the gap between the stator and the magnetic shoe of the flywheel; it should be from 0.1 to 0.15 millimeters. After these simple manipulations, you will receive a perfectly working Luch walk-behind tractor. Installing the ignition on it is as simple as setting it up, since it consists of several parts that are connected like parts of a construction set.
All grooves are designed in such a way that nothing can be mixed up, the spark plug cannot be inserted on the wrong side, or the wires cannot be connected incorrectly
After you have adjusted the ignition of the Luch walk-behind tractor, and this part of it is working properly, you can begin setting up the next important engine component
Carburetor care for walk-behind tractor
It is possible to prevent a walk-behind tractor from frequent breakdowns or repairs only by carefully monitoring the operation of the mechanism.
As has already become clear, it is important to carry out timely idle adjustment. In addition, do not forget to clean the carburetor, inspect the condition of the parts; to do this, you must first remove them; perhaps they need a complete replacement
For example, gaskets often wear out. Due to constant interaction with fuel liquid and air, the engine becomes heavily polluted. The filters that are installed on the unit will help reduce manual cleaning. In this case, they will have to be cleaned when they become very dirty.
The condition of the equipment is affected by the composition of the fuel being poured. Low-quality flammable liquid impairs the functioning and service of parts and the mechanism as a whole. It is for this reason that craftsmen often resort to replacing or repairing agricultural equipment. You can purchase new spare parts at automobile markets or in stores staffed by qualified specialists.
It is quite easy to adjust the Neva brand device even with your own hands. The main thing is to adhere to the above rules. It will not be superfluous to purchase a connection diagram for each part after repair work or setup, since incorrect installation of spare parts will lead to equipment malfunction - it simply will not start. Try to use high-quality fuel, make adjustments on time, and do not skimp on spare parts. After all, the operation of the entire mechanism depends on every detail.
In the next video you will find cleaning and flushing the carburetor from the Neva MB23 walk-behind tractor.
Let's block ads! (Why?)
Device Features
The walk-behind tractor is a fairly powerful unit, with great strength, but at the same time of medium size, equipped with multifunctional equipment. The equipment is mainly produced with a gasoline, diesel or electric engine. The latter, by the way, are extremely rare. A carburetor is required for the added fuel to ignite. The manufacturer presents the following types:
- rotary - the simplest in structure, they are mainly equipped with small-sized engines of 12-15 cubic inches;
- plunger - in this case the design is more complicated, therefore it is used for assembling powerful walk-behind tractors.
Carburetion is carried out using the main parts:
- main piston;
- connecting part - fitting;
- fuel tank;
- high/low speed needle;
- Venuri tube.
So, the process begins with a piston moving upward, resulting in the creation of a vacuum. The carburetor absorbs air, and it subsequently moves through the Venuri tube. The movement of fuel (from the tank) is directed towards the engine, this is done using a connecting fitting, which operates due to the created vacuum. The liquid goes around the main needle, flows through the inlet socket, entering the Venuri tube. By pressing the gas lever, fuel is released due to the low speed needle. Next, the first needle is responsible for the flow of gasoline.
Among domestic craftsmen and agricultural workers, equipment of the Russian brands “Neva”, “Oka”, “Agro”, “Utra” is especially popular. It features optimal equipment, a high-quality, powerful carburetor. Russian buyers especially appreciate the Neva K-45 walk-behind tractors for their reliability and durability. The KMB-5 model is an older unit, so before purchasing, consult with a specialist who will provide a product that meets your needs.
For heavy loads, it is recommended to use MB-2 walk-behind tractors - they are equipped with powerful engines and feature reliable carburetors that can operate for many years without forced repairs. MB-1, in turn, is considered a lightweight type that optimizes the functional engine.
Repairing the carburetor of the Mole walk-behind tractor
The carburetor of the Mole walk-behind tractor was produced in Soviet times. Despite the fact that the Soviet industry was famous for its high level of performance and reliability, this carburetor still had several flaws. To understand them, you first need to completely analyze it into its components:
- Remove the cover by unscrewing the bolt on it. Underneath we find a gasket made of gas-resistant material, as well as a spring that needs to be pulled out.
- We take out the damper located there, under the cover.
- On the reverse side there is a float chamber, which also needs to be unscrewed. We remove the gasket.
- Then you need to remove the float by removing the pin from the corresponding hole. There is a special needle under the float, which also needs to be removed. On it we find a small elastic band, which under no circumstances should be lost, so we carry out all manipulations very carefully.
- We unscrew the fitting under which the gasoline filter is located.
- Then you need to remove the jet. After this, we need to pull out absolutely all the “internals” located in the carburetor body.
Such disassembly is necessary, because we gain access to the internal contents, which are considered the most problematic.
Disassembly
In other words, we turn this screw, but the mixture does not change, it remains constantly the same.
To change this, you need to make some repairs to the carburetor located inside the Mole walk-behind tractor. The main cause of problems with mixture adjustment is one circumstance. The fact is that inside the carburetor there is a special channel that runs to a tube located in the center of the carburetor.
In this pipe, in theory, there should be a through hole connecting this very channel. The problem is that on some factory units this pipe is installed askew, which leads to the fact that the channel and the hole on the pipe do not match.
There are cases when this hole is completely absent on the pipe, or it is of insufficient diameter. To carry out repairs, we need to perform several sequential steps:
We unscrew both adjusting screws. Please note that the screws have different tapers - the mixture quality screw has a larger taper. To pull out the pipe located inside, we need to slightly heat the part that is located outside
To do this, you can use a small fire on a gas stove, or heat it with a regular lighter. We warm it until we can hold the case in our hands. After that, we insert the pin into the hole where the cover fastening bolt was located. Using a hammer, carefully hit the inserted pin until the pipe pops out. As practice shows, the hole is drilled only on one side of the pipe, i.e. it's not end-to-end
We need to make a symmetrical hole on the other side of this tube, or modify the one that exists. If there is a second hole, but it is smaller in diameter than the first, then we need to sharpen it a little. To do this, we use a regular round needle file and bore the edges of the hole. Then we install the tube in its original place. This must be done in such a way that the through hole on it and the hole on the channel coincide exactly. Before inserting the tube into place, you need to slightly heat the carburetor body again so that it fits into place without problems. We insert the tube into place and, using the same pin that we used to push the pipe out, we insert it into place. We knock lightly so that the pipe does not go far inside - on the back side we should see a hole located just above the through hole, which should coincide with the channel. You need to make sure that the hole is strictly in the center. We take a thick wire and insert it into the channel hole. If everything is done correctly, then the wire should freely pass further through the through hole on the pipe and come out of it as a continuation of the carburetor channel. If the wire gets stuck, then you need to tap the pin a little more, pushing the pipe a little further. Next you need to reassemble the carburetor in reverse order.
That's the whole process of necessary changes in the carburetor design. Thanks to them, the adjusting screw fully fulfills its responsibilities for changing the quality, which, in fact, was required of it.
Power system design
One of the components of the internal combustion engine is the fuel system. It is necessary for an uninterrupted supply of fuel to the engine. The system consists of a gas tank, fuel line, filters and carburetor. The latter doses gasoline to maintain a given crankshaft speed, depending on the operating modes of the walk-behind tractor. A gas tank is needed to store fuel reserves. Fuel lines connect all components to each other, and filters clean the fuel from foreign impurities.
The most complex and critical part in an internal combustion engine is the metering unit. The design of the carburetor installed on the walk-behind tractor allows the user to adjust the quality of the fuel mixture entering the engine. In general, the control system consists of the following:
- Float chamber. It contains the parts responsible for preparing the fuel mixture. Gasoline accumulates in the receiving glass, which affects the float. When the specified fuel level is reached, the latter, by pressing the shut-off needle, shuts off the fuel supply.
- Mixing chamber. It saturates the air entering the engine with fine gasoline dust. The latter is formed due to the rarefied atmosphere in the mixing chamber. The reduced pressure draws fuel from the float chamber, which, passing through the metering nozzle, is sprayed into the air stream.
- Throttle valve. This unit regulates the crankshaft speed. The damper closes the passage channel through which air enters the cylinder. The larger the cross-section, the faster the ICE output shaft will rotate. The position of the damper is adjusted using a steel cable attached to the handle of the walk-behind tractor.
- Idle speed regulator. Typically this is a metal or plastic screw that the throttle actuator rests on. Screwing in the regulator increases engine idle speed.
Please note! Depending on the manufacturer and purpose of walk-behind tractors, their remote control may be equipped with additional elements. But, regardless of this, all nodes work on the same principle.
how to adjust valves on a Chevy Niva | Topic author: Anastasia
I can’t figure out the hydraulic compensators. SOS
Zoya In my opinion, the valves with compensators are not adjustable, but when some computer fails, ass, because it’s hard to say for sure, but you have 8 of them, it’s probably easier. My friend has a glitch on one on the 16th valve, it manifests itself in the form of a characteristic sound in a not warmed up car, he was told to drive and not bother, attacks on the mind should be removed from the head.
Victoria If one or more valves are knocking Daria, of course, something needs to be done. To wash or clean or replace one or two or all hydraulic compensators, in any case you need to dismantle the cylinder head - they sit under the camshaft. It's like taking half an engine apart - throttle body, manifolds, injectors, timing belt, and - finally, the camshaft. Hemorrhoids, in a word. This fall I overhauled the engine of my 8-valve Deushka, I say all this first-hand. And there is no need to adjust the valves in the Zhiguli or Moskvich sense, as we used to climb there with feeler gauges. The compensator itself sets the required gap using the same oil pump.
Carburetor gx 390 on agro walk-behind tractor
Auto mechanic, specializes in agricultural equipment
At the moment, when processing soil, humanity uses various special-purpose equipment. There are devices of varying complexity here.
Special attention should be paid to motor cultivators, since this series of equipment is used everywhere from agriculture to personal gardening. This equipment option is not distinguished by a complex device, however, equipment owners need to understand how the carburetor and fuel supply of the Agro walk-behind tractor, as well as other common models of equipment, are adjusted in practice
