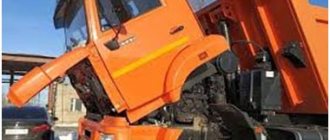
How to make a cabin for a MTZ tractor yourself?
Detailed instructions for making a cabin for a Belarus tractor.
List of necessary devices and tools. The tractor cabin is the main workplace of the tractor driver, and the overall productivity of his work largely depends on how convenient and comfortable it is. But what to do if the cabin fails for some reason? You can’t live without it, but buying a new one costs a lot of money. However, there is a fairly simple solution - you can make a cabin for the tractor with your own hands, which, in fact, is what will be discussed in our material.
Interior decoration
In the manufacture of MTZ tractor cabins, modern high-quality and environmentally friendly materials are used. This applies to both the materials from which the load-bearing part of the frame is assembled and the materials for interior decoration. The cabin is made of sheet steel and has a frame structure. The strength of the materials and precise design calculations ensure the safety of the tractor driver in critical situations, for example when the tractor rolls over or even turns over.
Finite element model of the MTZ-5 tractor
It is also important what materials are used for the interior decoration of the tractor cabin. To equip it, modern noise-absorbing and heat-absorbing materials are used, which cover the interior of the cabin.
There are rubber mats on the floor to hold your feet in the desired position and prevent them from slipping off the pedals.
All materials used in the manufacture of cabins are certified and meet the requirements of environmental standards and are safe for the life and health of operating personnel. The materials from which the interior trim elements are made have neutral gray colors that do not irritate the eyes and do not distract the tractor driver from his work.
Tools and accessories - what you need for work
The cabin for MTZ tractors is made in a single-seat variation with a steel frame made of pipes. To make it, you should take care of the following in advance:
- Spacious room with a total area of about 30-40 sq.m;
- Wooden blocks 1.6x6 cm;
- Steel pipes or profile;
- Glass (front, rear and side);
- Sheets of steel 1.2-2 mm thick;
- Welder;
- Grinder or hacksaw for metal;
- Set of power tools;
- Joiner's and carpenter's tools;
- Self-tapping screws, bolts and other fastening components.
Making a cabin for a tractor - sequence of actions
So, it’s time to look at the sequence of operations for making a tractor cabin at home. All work should be performed in the following order:
- First of all, we mark and determine the dimensions of all components of the future cabin. We take the dimensions of the front glass as a basis, after which we draw a contour on a sheet of chipboard, adding to it the thickness of the sealing material and 2 mm for the general tolerance;
- Based on the measurements obtained, we cut a wooden beam, connect it using self-tapping screws and place a pipe or profile along the outer contour, adjust all existing joints and carry out spot welding. We set all joints to be parallel, and then close the corners with a profile (the dimensions of the profiles are shown in the figure);
- We turn the frame over, place it on a flat base and weld the openings for the glass;
- We prepare metal for the roof (thickness 1.2 mm), floor and wings (thickness 2 mm). We cut it strictly according to the markings (it is better to use a grinder). Please note - the roof can be of very different configurations and sizes, but its height should be approximately 15-20 cm above the driver’s head;
- We make the front frame in a one-piece variation, and the doors are necessarily equipped with gas lifts. The base of the doors is formed from a profile frame, initially made on side tacks, followed by installation of a central pillar. Based on the position of the side glass, we set the angle for the central and rear pillars, after which we cut the central pillar at the required height and set (grab) the transverse pillar;
- We cut a pipe with a diameter of 100 mm lengthwise and weld a steel sheet to each of the resulting halves, acting as a roof, and connect it to the common frame using metal bolts or spot welding;
- We complete the work with the inner lining of the resulting cabin, for which we use foam rubber, leatherette and special glue. We glue the foam rubber to a metal base, cover it with leatherette on top and make a screed using self-tapping screws.
That's all. All that remains is to choose a seat for the cabin - you can buy it at almost any car market. The main thing to remember is that its back should be flat and low.
Summarizing
As you can see, the homemade cabin is not anything overly complicated. Yes, working with it requires increased attention, a certain amount of time and patience, but at the same time, its production is quite within the capabilities of every tractor owner who wants to save money and do everything on their own.
Implementation of the rework
To switch to mechanical activation, the automatic locking sensor is removed from the power steering housing, and the seat is jammed. The locking clutch is dismantled and the locking shaft is re-equipped.
Reworking the locking shaft, part dimensions
Manufacturing a part can be done in two ways:
- use standard locking shaft
- apply if there is a handbrake shaft in stock, installed on the other side of the axle in the right drive axle shaft
Dimensions of the converted locking shaft Using the right brake shaft has the advantage of a less labor-intensive conversion process, where you need to cut off one splined part on the part and turn it to the required diameter (33 mm for installing o-rings) on a lathe for free installation inside the axle shaft on the left side . You need to leave the outermost splined part on the shaft, which is absolutely identical in size to the splined end of the right side axle shaft.
right shaft brakes MTZ 80
To use a standard blocking shaft, you need to cut the disk from the outer end of the part and weld on a splined part that matches the splines of the axle shaft. As splines, you can use the cut splined part of the power transmission gear block to drive the hydraulic system pump and the PTO in the gap, which engages with the splines of the clutch basket hub. As well as any corresponding splined part from the primary and additional gearbox shafts.
The end part of the blocking shaft can be equipped with a place for installing the inner race of the bearing, which will be installed with the outer race in the device cover. The bearing support of the outer end of the shaft will eliminate axial and transverse runout of the rotating part and ensure comfortable engagement of the clutch when connecting both shafts.
Making a sliding sleeve
To make a connecting sliding block, it is convenient to use the block gear 1,2 and reverse gears mounted on the splines of the additional gearbox shaft or the gear block 3,6,9 regularly located on the input shaft of the gearbox.
Gear of the first and reverse gears of the MTZ 80 gearbox; gear of 3,6,9 gears of the MTZ 80 gearbox
The internal splines of these parts correspond to the splined parts of both shafts involved in mechanical blocking. The alteration consists of cutting off the outer teeth of the gears and leveling the outer cylindrical surface. The end parts of the coupling are equipped with collars to support the shift fork using a groove, or washers with an outer diameter larger than the outer diameter of the part are welded.
Homemade mechanical locking shaft with splined coupling
Switching mechanism
Switching is carried out using a fork that moves the block, pivotally connected to a lever located in the cabin. The working stroke of the coupling, when turned on, must ensure uniform overlap of the splined parts of both shafts. It is desirable that the amplitude of movement of the fork be organized with a small free play, which prevents constant friction of the part against the collars of the rotating coupling block. The position of the control lever must be fixed to prevent spontaneous or partial activation.
Do-it-yourself tuning of MTZ 80 with a small cabin
Tractors from the Minsk plant are known in the post-Soviet space as “workhorses”, ready for difficult tests, where there is no place for beauty and comfort. However, MTZ tuning is always popular, and in the workshops of enthusiastic mechanics you can see incredible machines made on the basis of well-known tractors. The modification concerns almost all components and assemblies, but primarily the engine and cabin. Engine tuning allows you to increase power and improve the performance of the tractor, and the modified cabin provides the driver with comfortable working conditions.
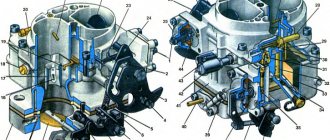
Basic problems in engine starting systems
Any engine starting system for MTZ tractors requires maintenance, and in case of malfunction, repair.
There are several possible malfunctions of the electric starter:
- The starter does not turn on. If there is no doubt about the serviceability of the device itself, then you should look for the reasons in the electrical circuit of the tractor. The switch may be faulty or the wiring may be broken. It is necessary to check, if necessary, clean and tighten fasteners and terminals.
- When the starter is turned on, the engine cranks slowly. The reason may be insufficient battery charge or inappropriate oil for the season. The brush contacts may be broken. In this case, the starter is disassembled, the commutator is cleaned, the brushes are changed and the brush springs are adjusted.
- If the starter armature rotates, but does not turn the crankshaft. Most likely the freewheel is slipping. This leads to inevitable replacement of the starter drive.
- After starting the engine, the starter does not turn off. This may be a consequence of drive jamming, sintering of relay contacts, short circuits of relay winding turns, or bearing wear. In these situations, the starter must be removed to accurately determine the cause of the failure. If necessary, replace bearings, traction relay, etc.
- One of the common malfunctions is the lack of engagement of the starter bendix with the flywheel crown. Most often this is due to contamination of the Bendix mechanism itself, and is eliminated by washing it in gasoline. After that, you need to manually turn the gears and you can install them in place.
It is important to remember that the performance of the starter, like any other mechanism, depends on the prevention of malfunctions. For MTZ tractors, monthly maintenance periods have been established that the owner must comply with. As a result, the lifespan of all tractor systems will increase significantly
As a result, the lifespan of all tractor systems will increase significantly
For MTZ tractors, monthly maintenance periods have been established that the owner must comply with. As a result, the lifespan of all tractor systems will increase significantly.
Possible cabin modifications
Among all the options, it is worth noting first of all the installation of a small cabin. In this case, the modification is aimed not so much at increasing comfort for the driver (rather, on the contrary), but at expanding the capabilities of the car. Installing a small cabin results in a noticeable reduction in the overall height of the tractor, which literally opens up new possibilities - the machine can easily drive into gates and openings with a height of 260 cm or more.
In the photo of the MTZ cabin it is easy to recognize by the changed proportions of the tractor - it becomes more squat, because it loses 28 cm in height.
Tuning options
The most interesting options can be seen when considering the tuning of the MTZ 82 tractor with a large cabin. Improvements are being made in the following main areas:
- improving working conditions (window tinting, replacing the stove and ventilation, installing a radio, replacing the seat);
- improvement of appearance (body painting, installation of attachments);
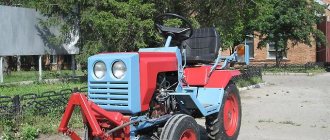
Creation of a more modern tractor from MTZ 50
Questions can only be asked after registration. Please login or register.
I decided to share the modernization of my MTZ 50 bought as scrap, maybe someone will be interested, I hope for your help in implementing this idea
I will post photos of the gradual transformation, I hope with your help
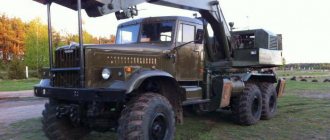
Too bad I didn’t save all the photos from the advertising site where it was sold, bought it in the fall for $500, unassembled
They wanted to drag it into the metal last year, the MTZ-5 cut up the complete one, this year the DT-75 came under its own power, the tracks were almost new. And our MTZ 82 is very expensive now, 2004 for 650 thousand. They only sell it to those who need it; there are no livestock left
out of habit, it seems a bit narrow. With the new MTZ low cab, I like it better, but the price is too high.
They wanted to drag it into the metal last year, the MTZ-5 cut up the complete one, this year the DT-75 came under its own power, the tracks were almost new. And our MTZ 82 is very expensive now, 2004 for 650 thousand. They only sell it to those who need it; there are no livestock left
Source
How to do cabin tuning
Before carrying out work, it is worth watching the video of tuning the MTZ cabin in order to more clearly imagine what the innovations will look like and how much effort will have to be put in. And also evaluate the current condition of the tractor. Owners of a new copy should weigh the pros and cons before deciding not to limit themselves to improvements directly related to comfort and safety. If the car body is rotten or has received severe mechanical damage and in any case is subject to thorough repair or complete replacement, you can show your imagination and do something truly unusual.
Interesting examples of tuning can be seen at tractor races. They have been held for more than twenty years in Rostov-on-Don (Bison Track Show) and other cities. Races are carried out on standard tires, but everything else is a figment of the imagination and work of the owners.
Many tractors have turbochargers, additional air radiators, and modernized brakes and fuel equipment. The tractors accelerate to 100 km/h versus the design speed of 40, and show miracles of maneuverability and cross-country ability.
Work on improving the tractor begins with careful calculations and numerous drawings. It is important not to overload the frame and standard components, so it is worth consulting with experienced craftsmen - in person or through forums.
MTZ cabin
DAP-300.38.00.000-01BO - for installation on the MTZ-80 (82) tractor instead of a small cabin (MC) with opening side windows.
DAP-300.39.00.000-01BO - for installation on the MTZ-80.1 (82.1) tractor instead of a unified cabin (UC) with opening side windows.
Installs without additional modifications.
Allows you to reduce the height of a tractor with a unified cab (UC) to 2550 mm.
It is possible to install an air conditioner without additional modifications.
DIMENSIONS:
Height 1530 mm.
Width 1400 mm.
Width with wings 1800 mm,
Do-it-yourself MTZ 82 cabin drawings
07/13/2018 admin Comments No comments
The work of tractor drivers cannot be called easy, since the influence of external factors that arise during the performance of assigned tasks on the body is obvious. Tractor drivers often encounter large amounts of dust, high ambient temperatures, natural precipitation, strong shaking and other unpleasant situations.
Tractor manufacturers have long begun to take these factors into account and supply the markets with cabs equipped with the latest technology. The manufacturer MTZ is one of the clearest proofs of this. For example, the old-style MTZ 80 tractor cabs were replaced with a new modern “workplace”, which provides many details and nuances. These details increase the level of comfort during the work process for the operator of the device.
Installing a dispenser on an old-style MTZ 82
The main difficulties when installing the dispenser on tractors of the earliest production MTZ 82 (80) is fastening the bracket for the hydraulic cylinder to the bridge beam in the absence of installation space. The network shows the experience of practitioners from several options for solving this problem using clamps on the beam or direct welding of the bracket.
Bracket on the bridge beam
The most acceptable solution that ensures a reliable connection is the following technology, which is feasible under normal plumbing conditions:
- A place is marked for a platform for attaching the bracket to a beam of the appropriate size for the contact plane of the part. The measurement is carried out by applying a hydraulic cylinder with the rod extended to the middle position (100 mm), provided that the edge of the rod is connected to the rotary lever in the straight position of the wheels and the symmetrical reach of the left and right axle axles of the bridge relative to the axis of movement of the tractor. In this case, the location for the connection area between the bracket and the bridge is determined by the coincidence of the eye of the second edge of the hydraulic cylinder with the hole of the bracket. The matching hole must match the installed bridge track. It should be taken into account that, in the case of a minimum track set, the cylinder is connected to the rightmost hole of the bracket (along the path of the tractor), with a maximum track to the far left.
- Having determined the location of the platform by attaching the cylinder and bracket to the bridge beam, they begin to prepare it. To ensure the connection of a flat part, it is necessary to bring the semicircular surface of the bridge beam as close as possible to the flat one by surfacing the metal with electric arc welding and subsequent surface treatment with a grinder grinder wheel.
- After obtaining a more or less flat surface, prepare a tire from a sheet of steel with a thickness of 15 -20 mm corresponding to the contact area of the bracket of the size. The holes on the tire are marked and drilled using the holes in the bracket. Cut the appropriate threads for the four bracket mounting bolts and adjust the diameter of the two threadless holes for the pins.
- At the final stage, the manufactured part is applied to the prepared welded area on the bridge beam and welded with a seam along the perimeter with maximum observance of the level of the horizontal position of the tire plane. Thus, a flat platform will be created for a tight fit and reliable connection of the bracket to the bridge without the use of milling.
Design and internal arrangement of modern MTZ cabins
Modern MTZ 80 cabins, like MTZ 82, are presented in the form of a rigid frame and a sealed structure, which is attached through shock-absorbing cushions, thereby reducing the level of vibration and vibrations that appear during various work tasks. A lighting shade and a sun visor are attached to the cabin frame, as well as a hanger on which outerwear or other items can be hung.
For work in the hot season, microclimate devices are provided, in particular, air conditioning, opening windows and a sunroof. Experts know that when working in summer, the temperature in the cabins can reach 60-65 degrees, this is especially noticeable during long continuous work.
MTZ cabs are equipped with a comfortable seat and control levers
Air conditioners installed in modern MTZ tractors can reduce any temperature to 20-25 degrees in just 5-10 minutes. Also, it is worth noting that the glass installed in the frame of the cabins of the Minsk Tractor Plant products is made on the basis of a heat-absorbing substance, due to which excessive heating of the air inside the cabin is almost completely eliminated.
At the same time, the Minsk Tractor Plant equips models 80 and 82 with cabins that receive air purified from dust, smoke and other harmful factors. This is achieved through the use of a multi-stage air filtration system. However, in order for the microclimate to meet the requirements, it is necessary to keep the windows and hatch closed.
Cabins on MTZ 80 and cabins on MTZ 82 allow you to work in comfortable conditions, both in summer and in winter. The cabin heater is a stove that is connected to the engine cooling system and has several operating modes that allow you to set the desired temperature, regardless of the weather outside.
The role of the stove is not only to heat the cabin, but also to prevent the windows from fogging, in particular during rain, snow or fog. Moreover, if there is no need to use the stove, for example, in the warm season, it is very easy to turn it off - just turn on a special tap.
Distinctive advantages of MTZ cabins
A distinctive feature of the cabins of all modern MTZ tractor models is the possibility of a 360-degree view. You can understand this simply by looking from the outside at what a tractor with an MTZ cab looks like.
Almost completely glazed side doors, large front and rear windshields, and even a glass sunroof built into the roof, as well as additional viewing windows mounted on the cab walls, all provide such broad visibility that increases comfort while driving. In addition, large rear-view mirrors are installed on the outside of the cab on the right and left sides, which are easy to adjust.
Has anyone installed the cabin from the MTZ 80 (large) on the MTZ 50?
Questions can only be asked after registration. Please login or register.
Hello comrades! Has anyone installed the cabin from the MTZ 80 (large) on the MTZ 50?
and what’s the problem? You just need a cabin with brackets for the mullion and bridge stockings, fuel tanks, brake and clutch levers. Well, and fit the panels inside the cabin. gsv.kapot MTZ50 is a little longer than the eightieth, but it is quite possible that it will fit a large cabin. The eighty has a “collar” on the cab - it is possible that without it, even the fifty-hundredth hood will be suitable.
and what’s the problem? You just need a cabin with brackets for the mullion and bridge stockings, fuel tanks, brake and clutch levers. Well, and fit the panels inside the cabin. gsv.kapot MTZ50 is a little longer than the eightieth, but it is quite possible that it will fit a large cabin. The eighty has a “collar” on the cab - it is possible that without it, even the fifty-hundredth hood will be suitable.
Hello Sergey. Yes, you are right - installation is not a problem. However, if you leave the mechanical blocking, then only the right tank will fit in. (Shifted to the left by 50 Hz.). And you will have to weld the neck to it. Or you will have to reduce the width of the left tank. I introduced the MK cabin and left only the right tank - that’s quite enough. UK also has its own camshaft arm bracket, although this is not a problem. Colleagues install the camshaft on the lower right window.
Hello Sergey. Yes, you are right - installation is not a problem. However, if you leave the mechanical blocking, then only the right tank will fit in. (Shifted to the left by 50 Hz.). And you will have to weld the neck to it. Or you will have to reduce the width of the left tank. I introduced the MK cabin and left only the right tank - that’s quite enough. UK also has its own camshaft arm bracket, although this is not a problem. Colleagues install the camshaft on the lower right window.
aviary for veo in the courtyard of a private house
Greetings Alexander. Yes, installing the cabinet itself is not a big problem. It’s a small thing, one doesn’t fit, then another interferes. Then the third one is missing. Also, the locking - the factory option for switching on is not the most successful. I really liked Valera Gritsenko’s version. There’s a plug of the same type yumz and she needs very little space. In a tractor with a large cabin on our collective farm they installed a half-ton blocking - nothing interfered. The cylinder was only moved to the left on the bracket eye - how did the half-tons work out. And the tanks, as they were, remained unchanged.
Source
DIY cabin for MTZ tractor
It happens that one of the equipment elements fails. Tractor cabins are no exception. Tractors without cabs can also be used, but the number of possibilities and level of comfort are reduced to almost zero, especially in bad weather.
Many of those who have their own minitractor with a cab also note its superiority over devices that are not equipped with this part. It is easiest to build a structure for the “habitation” of tractor drivers on a device with a small cabin; units with a large cabin will require much more time and effort.
The easiest way is to make a single-seat cabin with a frame made of durable steel. To complete this homemade project you will need the following parts:
Drawings of a homemade MTZ cabin
- work space of sufficient size;
- steel sheets 1-2 mm thick;
- welding installation;
- carpentry and joiner's tools;
- a hacksaw, or better yet a grinder with a metal disc;
- a set of power tools, including a screwdriver and an electric drill with metal drills;
- pipes made of durable steel (suitable from old motorcycle frames);
- bolts with nuts, self-tapping screws and other components intended for fastening something;
- wooden blocks measuring 1.6 cm by 6 cm;
- set of glasses (back, sides and front).
The work process can be divided into the following stages:
- draw a drawing of the future product, taking into account all the dimensions you need. Front windows are usually taken as a basis. Also, when choosing dimensions, keep in mind that there should be at least 20-25 cm from the operators head to the roof;
- Based on the intended dimensions, cut the wooden beam, then connect it together with self-tapping screws;
- position the pipe along the outer contour of the beam and adjust all the joints that exist, then spot weld;
- align all existing joints parallel and cover the corners with the profile;
- turn over the assembled part of the structure, place it on a flat surface and weld the glass openings;
- prepare 1.2 mm metal for the roof and 2 mm for the wings and floor, cut it strictly following the dimensions in the drawing. It is optimal to cut metal using a grinder with an appropriate disc;
- form the base of the doors from the profile frame. By the way, doors must be equipped with gas lifts;
- Based on the position of the side windows, set the angle for the rear and center pillars. After this, cut the central one and weld the transverse post;
- cut a pipe with a diameter of 10 cm lengthwise. Weld a steel sheet to each half, which will act as a roof, and connect it to the common part of the frame. The roof and frame should be connected by spot welding or bolts;
- the last stage involves covering the inside of the product. Take foam rubber and cover the metal base of the cabin with it. Cover the foam rubber with leatherette, using metal screws for good tension.
Having completed all the steps, all you have to do is purchase a comfortable chair on which the operator driving the tractor will sit. You can buy a chair, or you can, if you wish, rummage around in the garage or ask your friends, maybe someone is planning to throw away what you are looking for.
A cabin for a mini tractor with your own hands, of course, will not replace the factory model, since manufacturers of modern tractors equip them in compliance with all modern standards, but if there is no money to buy a new part, then you can use your own strength, mind and hands. A homemade MTZ cabin is a fairly common occurrence among owners of this equipment. However, the most common thing in everyday life is the cabin for a mini tractor, which many also make on their own.
How to remove the engine from MTZ 82
How to properly remove the engine from MTZ 82? The entire engine is removed from the tractor for troubleshooting and repair, without disassembly. To remove the engine from the MTZ 82, the tractor is rolled out, i.e. the frame to which the main working units are attached, including the motor, is separated. To roll out the tractor, a special stand or rolling carts are used - they support parts of the machine, which roll out to the sides in blocks to open access to the power unit.
In practice, many farmers overhaul and repair the engine themselves, so choosing an alternative to repair stands or rolling carts becomes an important task for them. Is it possible to roll out the tractor and remove the engine from the MTZ 82 at home without the use of specialized equipment? Of course, we will continue to look at the main methods
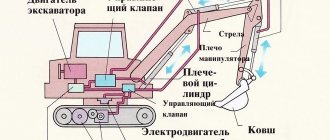
How to properly remove the engine from MTZ 82: sequence of actions
Scheme for rolling out the MTZ 82 tractor Before actually rolling out the tractor and dismantling the power plant, it is necessary to carry out preparatory work. It involves removing and disconnecting all hoses, wires and mechanisms that could be damaged during rolling. The sequence of actions is as follows:
- remove work equipment;
- remove the heating radiator (the cable, hoses going to the cabin, although long, are better to be disconnected too - before this you need to drain the antifreeze);
- remove all tubes and wires (return from the injectors to the tank, power cable from the batteries to the starter, wire going to the start, return from the pump, hose to the coarse filter, pipes of the metering pump (if the tractor has been converted), etc.;
- Unscrew all bolts on the side members.
All tank taps must be turned off before rolling. After disconnecting, hoses and tubes must be secured so that the ends are above the level of the tanks so that fluids do not leak from them.
Roll back the beam, front axle and side members together, as one block. To roll back the front axle and beam, you must first remove the radiator, otherwise it may be damaged. You need to bring a rolling cart under the front of the tractor - you can make it yourself from a frame welded from a metal angle or channel and a pair of wheels.
The next step in how to properly remove the engine from the MTZ 82 is to securely secure the motor to a hook, cable or any other lifting device. Often, a second tractor with a kun and even a two-hundred-liter barrel are used for these purposes.
Rolling options for the MTZ 82 tractor, which you can do yourself, are presented in the gallery.
After this, unscrew the motor mounting bolts and remove the engine from the MTZ 82. First, it must be suspended on a hook, hoist or other lifting device. Under no circumstances should you disconnect a hanging motor.
- First, the engine is simply fixed on a hook or hangers, but not lifted.
- Then disconnect all fasteners and hoses.
- Only after this can the engine be removed from the MTZ 82 by lifting it up.