Application area
A self-made all-wheel drive mini tractor has quite good cross-country ability, which gives it the opportunity to perform virtually the same scope of work as store-bought counterparts, such as Uralets, Kubota, Bulat 120, Yanmar, Belarus 132n, Scout.
Of course, the power of a homemade unit may be somewhat weaker, but at the level of domestic use this fact is almost unnoticeable.
The main area of application of this DIY unit is agricultural work. This term covers a fairly wide spectrum, including many related works. In other words, a homemade mini tractor is needed for the following purposes:
- plowing of land holdings for the purpose of their further use;
- cultivating the soil and getting rid of weeds;
- harrowing the soil;
- carrying out sowing work on treated soil;
- planting and digging potatoes.
In principle, this is the main purpose of a mini tractor, for which it is made. But, its application can be significantly expanded if a special connection for additional equipment, mounted and trailed, is provided in its design.
If everything is done correctly, then your homemade product can additionally perform the following work:
- transportation of various goods (transportation of firewood, construction waste, etc.);
- snow removal in winter;
- mowing lawns and lawns, as well as making hay for livestock.
As we can see, a mini tractor breaking a classic 4x4 with your own hands can significantly make the life of any rural resident easier, because with the help of this equipment it becomes possible to perform all types of work that are required for proper management of a subsidiary farm.
The indispensability of a home-made unit is also due to the fact that its production uses a minimum of investments and funds, which is very important for rural areas.
Features of homemade mini tractors from Oka
It is worth noting that the mini tractor with an Oka engine is ergonomic, reliable and easy to operate. With the help of such a unit you can perform many tasks on the site:
- digging up potatoes;
- weed removal;
- formation of beds;
- soil cultivation;
- planting potatoes using additional equipment.
Instructions on how to make an all-wheel drive mini tractor with your own hands - drawings and dimensions
Having assessed all the advantages, many people ask the question - how to make a 4x4 mini tractor? In principle, this assembly method is not much different from traditional methods, except, perhaps, for the construction of the frame structure.
Basically, the frame comes in one piece, but in fractures there is an option with a breaking frame, which is where the name comes from.
The appearance of the structure may be a little puzzling to an outside observer, but its apparent unpretentiousness should not be misleading. The fact is that everything inside is located so proportionally, if you follow the drawings exactly, which allows the unit to show fairly good performance indicators.
Speaking of drawings. This is probably one of the most important stages of the entire assembly, because the success of the entire design depends on the correctness of leaving a detailed drawing and determining the exact dimensions.
The fact is that the specifics of self-assembly involve adjusting some parts to the individual characteristics of the frame or power unit. This is understandable, because the components are taken from completely different equipment, which leads to their dimensional discrepancy.
The fitting itself is carried out mainly on a lathe, which in itself presupposes the presence of a detailed drawing. After all, it is much easier to make certain holes or stitches while looking at the drawing than keeping all this abstraction in your head.
So, having made the drawing, we begin the assembly process:
- The frame itself will consist of traverses and spars. The spars, in this case, have a three-stage structure. The first stage is made from channel number 10, and the last stage is made from a square steel pipe with dimensions of 80x80 mm.
- The rear traverse is made from channel number 16, and the front crossmember is made from channel number 12.
- If you are converting a walk-behind tractor into a mini tractor, then the main power unit will be the engine located on the walk-behind tractor. If not, you will have to purchase the engine separately. In principle, any diesel engine of the required power (at least 12 hp) can be suitable.
- However, experts advise taking a more powerful one - a motor with 40 hp. and water cooling.
- The gearbox and power take-off shaft, as well as the clutch, can be taken from GAZ-53 and GAZ-52 cars, respectively. They won't fit ready-made, so you'll have to modify them a little. To do this, you need to remake the motor flywheel by cutting off a little from the back and drilling one hole in the middle.
- The bridge can be installed in the unit in the desired form, without performing any manipulations. It is attached to the frame structure using four stepladders.
- Wheels can be taken from old cars, but their optimal diameter is considered to be 18 inches. The process of installing wheels on hubs is quite simple. It is enough to cut a hole of the required diameter from the center of the disk, and the center of the disk from the ZIL-130 is welded to this place.
- The front axle is not so important, because it will not be the drive one. Therefore, you can take a bridge from another technique.
- Steering is best enhanced by hydraulics. You can take it from old agricultural machinery, but for it to work correctly you need an oil pump.
- By the way, the driver’s seat also needs to be installed correctly, because a person spends more than an hour operating the unit. The seat should be positioned so that the steering column does not rest on the person’s knees.
In general, the assembly of a homemade all-wheel drive mini tractor is carried out using third-party spare parts, including mainly automobile ones.
In particular, the drum brake will be used in the front wheelbase system, and the steering rack will be borrowed from the VAZ family of cars.
Other components can be freely found on the spare parts market, where there is quite a lot of useful stuff. In addition, on specialized websites there are a sufficient number of advertisements for the sale of parts that can be purchased for mere pennies.
How to choose an engine and transmission
What is the difference between homemade mini tractors with a breakable frame and purchased ones, first of all? That's right, because almost no one has the opportunity to choose the most suitable engine for them. People take what is closest and cheapest. As a result, the most common engines used by modern “breakthroughs” are:
- "UD2".
- "UD4".
In addition, some examples come across diesel engines with two or one cylinder.
- Some craftsmen manage to get hold of an M-67 engine.
- If you have the opportunity to install the MT-9, then this will be the best option because it has more volume.
Just know that in this case your 4x4 vehicle will require an increase in transmission ratio. This is the only way you can achieve an acceptable traction force on the wheelbase. It is also highly advisable to provide a suitable cooling system for it even before the first start and breakdown of the engine. The fact is that standard forced air cooling, which could help the engine cope with the tasks facing mini tractors, is simply not provided there. As a solution to the problem, you can install a fan with a guide casing on the toe of the crankshaft. But for this you will have to make an adapter, which means you will need to get a drawing for it too.
If you have the opportunity to get a free engine from a Moskvich or Zhiguli, then you can end up with a very good mini tractor. Because this is a great way to connect the clutch, engine and transmission with the transfer case into a single unit.
Most often, to create a rear axle, axles with shortened axle shafts from cars or trucks are used. The operation is quite simple and only requires a lathe and an idea of what exactly you are doing. If you have the opportunity, then at the same stage you should select the gear ratio for the gearbox.
Tools and materials
Frames are often made from traverses and spars. The spars themselves are made of channels and steel pipes. Cross members are made in a similar way. In this regard, the preparation of any mini-tractor is not much different. As for motors, any version that is powerful enough will do.
But still, professionals believe that the best option is a four-stroke diesel engine cooled by water. They save fuel and are more stable in operation. Transmissions and transfer cases, as well as clutches, are often taken from domestic trucks. But we must take into account that the individual components will have to be adjusted to each other. For this purpose, you will have to use a home lathe or turn to professionals.
Bridges are taken from old motor equipment almost without changes. Sometimes they are only shortened a little. In this case, metalworking equipment is used. Wheels are sometimes removed from passenger cars, however, their diameter must be at least 14 inches (for the front axle).
By installing smaller movers, farmers will often encounter the mini-tractor sinking into the ground. If you install too large a chassis, maneuverability will deteriorate. Hydraulic power steering helps to partially compensate for this disadvantage. Whether to remove it from old cars or do it yourself is up to the master to decide. As for the driver's seat, although this is optional, it is a very important element.
If you take an old walk-behind tractor as a basis, you can take it in finished form:
- motor;
- checkpoint;
- clutch system;
- wheels and axle shafts.
But the frame from the walk-behind tractor can only become an integral part of the frame of the mini-tractor. When using it, you need to make sure that the mounts for the engine and gearbox are ready. If a motor cultivator is used as a basis, a powerful frame is abandoned; a 10 cm square pipe is sufficient. Preference is given to the square shape because home mini-tractors often drive on bad roads. The size of the frame is selected according to the size of other parts and their weight.
A simple type of transmission involves the use of a belt clutch placed on the gearbox. In a more complex version, torque is transmitted using cardan shafts. However, the consumer has no choice - it all depends on the characteristics of the engine and the wheel formula. If an effective breakable frame is used, then in any case you will have to install cardan shafts. It must be taken into account that this is difficult when making it yourself.
The controls are created according to a standard scheme; they simply take parts from any car. Since the load on the steering wheel when operating a mini-tractor is less than that of a passenger car, you can safely install used parts. Attaching the column, tips and other components occurs in exactly the same way as on a car. But the tie rods are shortened a little to accommodate the narrowed track. To work, therefore, you will need:
- angle grinder;
- screwdrivers;
- spanners;
- roulette;
- welders;
- hardware.
Preparation of drawings and details
You can’t start work without a ready-made plan. Converting the Oka into a mini-tractor will be successful if everything is done according to the drawings. For a frame structure, you need to stock up on two spars - right and left. You will need the same number of crossbars: 1 on each side. The first ones are made from channels No. 10, for the second, the profile of structural elements No. 12 and No. 16 is suitable. Elements made from a transverse beam are suitable.
The main part that needs to be removed from Oka's car is the engine. It must comply with the standards prescribed in the legislation of the Russian Federation. It is especially important to take this into account if the mini-tractor will be used on additional access. The power of the engine determines what licenses you will have to obtain for such special vehicles. It is best if the old car used a 4-cylinder engine.
Advantages and disadvantages of a homemade mini-tractor
In an unstable economic situation, a homemade tractor can greatly help people avoid spending extra money on equipment. A homemade tractor has other advantages:
- small dimensions allow you to work in small areas;
- the design will pay for itself in one season;
- good technical performance.
Among the disadvantages, the main one is the complexity of the design process: not everyone can quickly find the necessary parts. In addition, such homemade products are quite difficult to repair.
What to make a chassis from
To assemble a mini tractor, you need to prepare its chassis. It includes wheels, front and rear axles, and transmission elements.
When choosing wheels for a mini tractor, you should take into account the purpose of using the latter. If the unit is being built for transporting and pulling loads, then a disc diameter of 16 inches will be sufficient. When using a tractor in field conditions, it is better to use more massive wheels with discs with a diameter of 18 to 24 inches.
If the drive axle in your tractor is only the rear one, then the front beam is made quite simply.
- It is necessary to prepare 2 steering knuckles from a VAZ Classic car.
- A piece of the required length is cut from a profile pipe (40x40 mm square). The width of the track will depend on the length of this beam.
- Next, racks of 35x35 mm corners are welded to this pipe. The steering knuckles will be attached to them. There is no need to disconnect the steering bipod - it will be useful when installing the steering mechanism.
- Brackets are welded to the corners into which ball joints are installed.
- The front beam of the mini tractor also has a swinging mechanism in the center. In this case, it, together with the cross, was removed from a UAZ vehicle.
To make a homemade front axle, as well as its rear analogue for an all-wheel drive unit, you will need to take 2 identical chassis units, for example, from a VAZ or Moskvich car, and shorten them. You can learn how to shorten the bridge from a VAZ car from this video.
Important! Axles must have the same gearboxes, with the same gear ratio. Otherwise, the front and rear wheels will rotate at different speeds when the tractor moves.
Since the bridges already have a built-in mechanism for transmitting rotational motion to the wheel axle, there is no need to make a homemade gearbox.
Wheelbase
The mini tractor frame is mounted on wheels, and they should be selected depending on what exactly you are going to do with your tractor. Either you will mainly transport cargo, in which case you need disks with a mounting diameter of 13 to 16. Or you will work in the field, in which case the mounting diameter should vary from 18 to 24 inches. The turning unit of the mini tractor provides a sufficient degree of maneuverability so that you can feel comfortable on any type of soil, cultivating it, sowing or harvesting.
Safety precautions
Regardless of the design nuances and the selected models, you must work with a mini-tractor with caution. Every time before starting it, you need to inspect all parts of the machine and check their suitability. First of all, you should evaluate the serviceability of the brake system. Stopping is done only at low speed, and the engine can only be turned off with the clutch depressed and the brake gradually released. An emergency stop is made only in a critical situation.
Both the driver and passengers can only ride in adapted seats. Do not lean on the traction bars. Driving on slopes is only allowed at minimum speed. If the engine, lubrication system or brakes are leaking, the mini-tractor cannot be used. Any mounted tools can only be attached to standard mounts.
For an overview of a mini-tractor made by yourself, see the following video.
If you have some tools - a welding machine, a metal cutter and a lathe, making a tractor-breaker becomes a very real project, and there are hundreds of proofs of this.
Craftsmen who do not have tens of thousands of rubles manage to save significant money by assembling a homemade 4x4 tractor with their own hands. Paying for spare parts turns out to be several times cheaper than buying a factory one.
Pros of installing hydraulics
Hydraulics are installed on a minitractor in order to ensure the operation of some of its mechanisms and facilitate the control of this unit. A unit with installed hydraulics has its advantages.
- The car becomes easy to control. The steering wheel can be turned with virtually no effort, with one hand.
- Hydraulics makes it possible to use various attachments.
- The use of hydraulics allows you to modernize the brake system. Thanks to the hydraulic cylinders installed on the unit, the unit brakes instantly.
You can make hydraulics on a mini tractor if you purchase a ready-made system in advance in a store or use parts from old agricultural machinery.
Important! When installing hydraulics on a mini tractor, it should be taken into account that some of the engine power will be spent on servicing this unit. Therefore, for tractors with low-power engines, installing hydraulics will not bring any benefit.
Features of vehicle steering
Pins are installed on the bridge located in front, the lower part of which ends with axles, and the upper part ends with rotary levers, and between them, a thrust is formed, which is considered transverse.
The value of the transverse inclination angle must be within certain standard limits, namely, not exceed 10 degrees; as for the longitudinal inclination, it should also not deviate more than 3 degrees back. The rod, which is considered longitudinal, must be connected to the steering gearbox with a bipod.
Completing the build
- The brake system is removed from cars or motorcycles and installed without modification.
- The fuel tank is selected for specific tasks. On average, a tank of 10 liters of fuel will be sufficient. If necessary, the container dimensions can be increased.
- If you plan to work in the field at night, you should install a path lighting system on your homemade breaker tractor. To do this, headlights, wiring, battery and generator are installed.
- The driver's seat must be installed taking into account the stiffness of the suspension, otherwise the driver will feel every uneven terrain.
- The cabin will help to give an aesthetic appearance to the assembled agricultural machinery, and will also protect it and the driver from weather conditions. Finishing is done based on your own tastes and preferences.
The use of a homemade tractor is permitted only after it has been fully tested under various conditions. Otherwise, shortcomings may appear at the most crucial moment.
The attractiveness of a homemade tractor from Oka can hardly be overestimated. The cost of spare parts and components needed to manufacture a tractor is quite low. The total cost can be recouped in one harvest season. This solution is suitable for beginning farmers who do not have the funds to purchase factory-made agricultural machinery.
Additional equipment for 4x4 tractor with breakable frame
For productive work, a mini-tractor must be equipped with a power take-off shaft (PTO) - mounted and trailed units (ploughs, mowers, reapers) are connected to it. The PTO can be taken from an old tractor or decommissioned military equipment.
If you plan to use a mini-tractor in winter, you can equip it with a cabin. Otherwise, a canvas canopy will suffice. For the convenience of working at night, install headlights and markers.
Did you know? The first tractors appeared in the middle of the 19th century and were steam-powered.
Homemade mini-tractors with a 4x4 drive and a breakable frame are indispensable helpers in farmers' fields. Such a unit can be assembled during the winter months, when there is no field work.
And the low cost of assembly and maintenance makes it an almost uncontested choice for small farms.
Additional tips and warnings about the mini tractor
If you have a sufficient amount of money, then you can buy some old Zhiguli, Oka, walk-behind tractor to use it as a “donor” for a future homemade mini tractor.
You can purchase it without documents, and it’s quite used, so its cost will be approximately 25-30 thousand rubles, which is relatively little compared to a ready-made mini tractor.
The essence of this advice is simple: in order not to look for spare parts and parts everywhere, you can take everything from one machine, i.e. gearbox, clutch, etc. By the way, the car body can then be sold.
Also important is the registration of a home-made unit with the traffic police. Of course, you don’t have to do it if you don’t plan to travel outside your garden, but for those who plan to use public roads, this action is necessary.
The fact is that a minitractor, even a homemade one, is classified as special equipment, and therefore requires mandatory registration with the inspectorate. If you do not comply with these rules, the employee may impose a fine on you, and the vehicle itself may be removed to the impound lot.
What is a fracture tractor?
In terms of design and dimensions, the fracture is nothing more than an ordinary mini-tractor. Typically, such equipment is produced on the basis of a walk-behind tractor. There is a home-made tractor with a factory-made fracture frame or one assembled at home from old spare parts. There is a third option for fracture. The unit is assembled from a walk-behind tractor, and spare parts are used from a special conversion kit sold.
In terms of performance and a number of characteristics, a homemade tractor is inferior to a factory-made tractor. But homemade products also have their advantages:
- Properly assembled equipment can surpass powerful factory mini-tractors in functionality, and the cost of a home-made unit is many times less.
- The functionality of the breaking tractor can be significantly expanded to suit your requirements. Craftsmen adapt to technology those mechanisms that help perform the necessary work.
- The costs incurred during self-assembly of the tractor will pay off in 1 year. And if there are a lot of spare parts from old equipment at home, then the unit will cost the owner almost free.
The disadvantage of a homemade tractor can be considered the lack of necessary spare parts. If you have to buy them all, there will be no savings. Then it is better to immediately purchase a factory-made mini-tractor.
Manufacturing a three-point hitch
The hitch is used to connect additional equipment, such as a plow, to the tractor.
The hitch must be movable both in the horizontal and vertical planes. In the first case, mobility helps to reduce the overhang of the nozzle when taxiing. Vertical movement of the suspension is required to lower the equipment into a working position or raise it into a transport position.
The hitch on a mini tractor is made from various parts removed from old agricultural machinery. It is quite difficult to describe how to make a three-point hitch at home. Therefore, it would be more correct to use the following video, which shows the dimensions of all parts of the device.
If you decide to make a mounted loader, then you can use T-25 and T-40 in tandem with this equipment. This option will be simpler compared to a front loader, which is true in matters of installation on a tractor and calculation of dimensions. At the first stage, you need to find or independently make a drawing, in which you should indicate the dimensions and proportions of the metal parts.
Features of device collection
Assembling such a complex device as a tractor will require significant time and financial investments.
In addition to purchasing parts and components of the unit, you need to take into account that you will need some tools. If you don’t have them, you can ask friends for help or rent them.
What tools will you need?
Since many parts will have to be adjusted to each other, and some will even have to be made independently, you will need a lot of tools:
Necessary materials for construction
The device consists of several components, some can be taken entirely from other equipment, some will have to be redone:
- composite frame;
- engine;
- chassis, including suspension, axles and wheels;
- assembly with brake discs;
- steering mechanism;
- seat;
- mechanism for attaching attachments.
Important! To create a homemade fracture, it is not advisable to use new materials and parts; it is better to use a “second-hand machine.” The ideal option would be to purchase an old passenger car: a Zaporozhets, Moskvich or Zhiguli, then there will be no need to connect the engine to the chassis and transmission
Preparing for work
Before assembly, you need to prepare a set of plumbing tools and all the necessary units. If the equipment will not be used in difficult conditions, then it is enough to install small wheels - 13 inches. Wheels with a larger diameter are often installed in the rear and smaller ones on the front axle.
For assembly you need to prepare the following components:
- Transmission driven by UAZ.
- Clutch mechanism assembled with basket, disc and release bearing.
- Extension cord for connecting the gearbox.
- Engine flywheel.
- The channel is the right size.
- From the pipes you need to weld spars, cross members and a support for attaching the power unit.
- 4 supports for mounting a homemade cabin.
You will also need forged steel sheets to make a plate and a car mounting bracket.
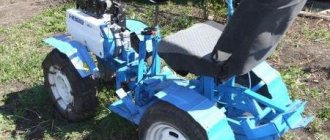
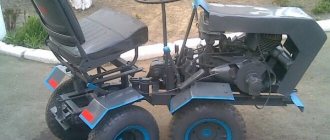
Self-assembled mini tractor
Assembling a tractor with your own hands is not an easy task, but it is quite an interesting task that requires diligence and concentration. There are a large number of assembly variations, but there is an optimal design, not only for experienced, but also for novice designers. The design is shown in the photo.
Design of a homemade mini tractor
First of all, let's look at the frame design. Despite the angularity from the outside, all the nodes that connect and chassis parts are distributed rationally.
Main parts of the frame:
- spars;
- traverse.
The tractor spars have a three-stage assembled structure. The front steps are made of size ten channels, the last one is made of a square-shaped pipe (material steel), with sides 80x80 mm. The traverse at the back is also made from a sixteenth-size channel, and at the front - a twelfth. Exactly the same system is suitable for preparing the crossbar.
For the tractor, you can choose any engine that suits the power. The best option is a 4-cylinder water-cooled diesel engine. The power is 40 hp, but as for a self-made model of a mini tractor for the purpose of working on home plots, this is quite enough.
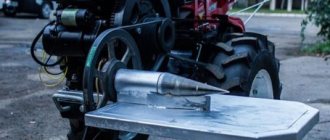
Clutch with GAZ-52
The PTO transfer case and gearbox will fit from an abandoned GAZ-53 (or similar model), and the clutch will fit from a GAZ-52. To dock the clutch basket with the power unit, it is important to remake the engine flywheel and build an updated basket casing in order to adjust the required size. The flywheel is processed on a lathe. You need to cut off the area at the back and carve another span in the middle.
The bridge is integrated into the mechanism without significant changes. It can be used in any size. Four stepladders facilitate attachment to the frame. The driveshaft can be made from different cars. Good shock absorption is achieved thanks to the installation of 18-inch tires.
Installing the wheels on the hubs is very simple. You can notice that a part of it in the center with a hole for installation is cut out of the disk, instead of which the central part of the disk from the ZIL-130 is welded. The bridge in front is constructed on its own - you do not need to have serious skills for this, since it is not the leader. To simplify the assembly process, you can rearrange the bridge from other machines.
Wheelbase
It is important to pay special attention to the wheelbase of a mini tractor. Of course, it is quite enough to use wheels from a passenger car, but here you should go slowly. The required wheel rim dimensions for the front axle are approximately 14 inches. If you choose a smaller diameter, there is a risk that the mini tractor will not operate correctly in the future. After all, it is important for us that the tractor does not fall into the ground. But there is another side to the coin - if the front wheels are too huge, the driver will have to gain strength to perform certain maneuvers. It will be physically difficult. But this process can be simplified with the help of power steering.
Steering wheel control
To increase the maneuverability of the tractor, it is necessary to install hydraulic control on the steering wheel. You can find hydraulics on equipment that was written off in agriculture. To assemble it you need an oil pump, which is driven by the engine. It provides the required pressure in hydraulic motors. It is good when the wheels of the main shaft are controlled by a gearbox. The direction of rotation occurs thanks to a simple distributor with four working positions.
A four-wheel drive tractor with a 4x4 breakable frame has the main advantage of good maneuverability. This, of course, complicates the assembly, since it is necessary to design the correct and high-quality shaft with connections.
When making a homemade tractor with a breaking frame, it is necessary to use final drive cardans from trucks. There are many videos on making tractors yourself.
But the manufacturing principles used are approximately the same everywhere. In all tractors, the gearbox is moved towards the driver and fixed to the frame, and steering rods contribute to steering. A hydraulic drum brake is used everywhere, which, like the clutch, is pedal controlled. The accelerator and attachments are used by manual control.
Construction Tools
In addition to spare parts, it is important to use a wide range of tools:
- welding machine;
- drill;
- spanners;
- disk plate and many others.
Sometimes, when designing, you may need to contact a welding professional or an auto repair shop. Here you need to build on your own skills and capabilities.
Controls and seat
Car seat for mini tractor
Usually, installation of the control system and kinematic diagram begins after designing the chassis. An important point in this matter is the correct placement of the seat. A passenger car seat is perfect for this case. It is easy to find in car workshops or car services. It is important that the steering wheel is attached at a comfortable height for the driver. The steering wheel should not crowd your knees, so it should be mounted in such a way that the work process does not provoke any feelings of discomfort.
Engine and bodywork
After the chassis has been assembled, the kinematic plan has been implemented, the seat has been installed, you can begin to mount the main part of the mini tractor - the engine. In order to properly fix it on the frame, it is necessary to use a specialized plate with grooves. It also gives the necessary rigidity to the chassis. Then the electrical and mechanical circuits of the control system are laid. The body is sheathed based on the manufacturer's wishes. But it is better to hide certain components and parts of the body in order to prevent clogging and damage upon contact with the ground and unnecessary objects.
The basis of the mini tractor is the frame
The practice of many shows that a channel is perfect for creating a base.
From number five to number nine. The channel should be chosen because it is very rigid in torsion and bending. Homemade mini tractors with a breakable frame, made from high-quality channel wood, can last a long time, being subjected to daily high loads. Of course, the channel does not have to be used to create the entire structure. You can use profiles of a different type in those places of your future mini tractor that do not require particularly heavy loads. For example, you can create a canopy frame over the seat using a 10 mm rod. It is also suitable for creating a frame for the wings.
The fracture unit for a mini tractor, also known as a semi-frame articulation. To create it, you can use the cardan from the final drive of the truck. To simplify the task of controlling a minitractor during plowing, at the design stage we recommend that you think about installing a steering system with hydraulic cylinders.
Homemade tractor frame: 1 - bumper (StZ, channel 80x80); 2 — engine mounting eye (StZ, sheet s20): 3 — front frame spar; 4 — mounting bracket for the steering cylinder (StZ, sheet s20); 5 — mower mounting eye (StZ, sheet s20); 6 — cabin mounting post (2 pcs.); 7 — body, central hinge unit (StZ, sheet s20); 8 — bracket for fastening the hydraulic cylinder for lifting the body and the towbar (StZ, sheet s20); 9 — rear frame spar: 10 — body mounting unit (StZ, sheet s20); 11 — connecting plates 12 — hinge body, special (steel 20, pipe 150×1(1); 13 beam for fastening the transfer case and the cab floor (from GA3-66); 14 — bracket for fastening the transfer case (from GAZ-06) ; 15 blade mounting unit; 16— transverse beam (StZ. pipe 80x80x6): 17 — mounting eye for the blade hydraulic cylinder (StZ, sheet s20); 18 — stand (steel 20, channel 100x46); 19 — cross member.
This is interesting: The design of the steering control of a homemade mini tractor: we introduce the issue
Technology capabilities
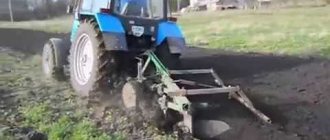
In the agricultural sector, these machines are capable of doing a huge amount of work. Thanks to its maneuverability and the ability to attach additional attachments, the assembled classic 4x4 mini tractor can cope with the following operations with its own hands:
- deep plowing of the soil;
- cultivation to remove weeds;
- harrowing of certain areas;
- implementation of sowing spring field operations of cereal crops;
- planting/harvesting potatoes.
In winter, the fracture mini tractor can also not be parked in the garage, but can be used to clear roads of snow. A trailer is attached to the tow bar, which helps in transporting loads of up to several hundred kg. Owners can even use mini tractors at home to mow lawns.
Technical characteristics of the fracture mini tractor
A mini tractor assembled with your own hands has a number of positive characteristics, including certain savings on purchase costs. The advantages of homemade products include:
- the compact dimensions of the transport ensure its convenient operation even in small areas, and since most farms include small cultivated areas, a DIY assembled mini-tractor will be very appropriate;
- homemade devices with a single-axis drive or with a full drive in the vast majority of cases pay for themselves in one or two seasons, and subsequently allow you to save on components;
- agricultural new products have decent performance indicators that can compete with factory models, since a master can make a mini tractor independently using selected units and components that have a large margin of safety.
Homemade mini tractor fracture (with breakable frame) 4x4
It is worth considering that a homemade 4x4 mini tractor may also have disadvantages. The disadvantages lie in the following factors:
- sometimes the process of searching for the necessary components or individual parts is delayed;
- in the case of using non-standard structural elements, repairs are difficult;
- It will be possible to assemble a homemade 4x4 mini tractor if you have the appropriate set of tools and have the skills to work with them;
- Frequent breakdowns can occur due to the use of old used technical components.
Frame assembly
The frame design is optimal for homemade products assembled in the garage. The key parts for it are the longitudinal spars and a pair of transverse crossmembers. It is preferable to make the spar beams in a three-stage form from a tenth channel, and for traverses a sixteenth square profile at the front and a twelfth at the rear are suitable.
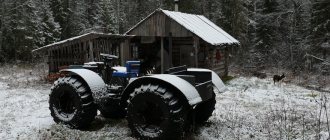
Dimensions of a machine with a breaking frame
During the assembly process, it is important to ensure that the front half-frame can be rotated relative to the rear half-frame at a certain angle. Car hinges from trucks are suitable for this. In most cases, cut driveshafts are used. When folded at an angle, they continue to transmit rotation.
Motor and clutch for fracture mini tractor
After assembling the frame, they begin to install the power unit. It is recommended for cars with a single-axle drive to take engines in the range of 15-30 hp, and for all-wheel drive, the optimal solution would be an engine with a power of 30-40 hp. Preference should be given to water-cooled diesel units. They are quieter in operation than analogues with air removal of excess heat.
Kinematic diagram
As a ready-made solution, engines from walk-behind tractors or old cars can be mounted on the frame. There are drawings where the central place is occupied by power plants from the following models:
- walk-behind tractor "Neva";
- model with walk-behind tractor “Bison”;
- homemade from the Centaur walk-behind tractor, etc.
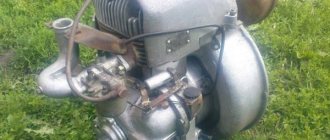
A minimal exhaust system may involve an empty metal fire extinguisher with metal shavings from a lathe stuffed inside it. If an air-cooled motor is used in the design, then some of the partitions can be eliminated in the lower docking area. It is also important to ensure the presence of mounting holes for fixing the power unit.
Engine UD-2
The next step after installing the engine is installing the transfer case and gearbox. An acceptable option is to choose them from GAZ-53. To ensure a good connection between the clutch and the engine, the flywheel will have to be rebuilt. In such a situation, turning work will be needed.
The back part is cut off, the excess with tides. A hole is bored in the center for a new shaft. The clutch basket cover is optimized in terms of dimensions to the required dimensions.