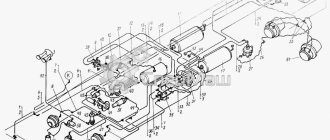
BOSCH and WABCO schemes
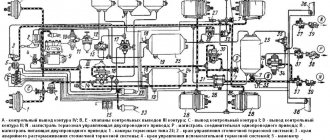
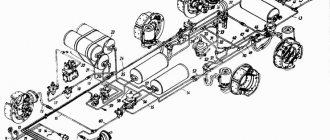
BOSCH brake system diagram . 1 — vacuum receiver, 2 — vacuum hose, 3 — vacuum brake booster, 4 — master brake cylinder, 5 — master brake cylinder reservoir, 6 — ABS modulator.
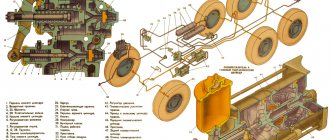
WABCO brake system diagram . 1 — vacuum receiver, 2 — vacuum hose, 3 — vacuum brake booster, 4 — master brake cylinder, 5 — master brake cylinder reservoir, 6 — front wheel brake, 7 — tee, 8 — ABS modulator, 9 — rear pressure regulator brakes, 10 - rear wheel brake.
Specification of system elements
Front drum brake
Inner diameter of the brake actuator cylinder. 31.75 mm
Clearance between piston and cylinder: nominal. 0.03 - 0.13 mm limit. 0.20 mm
Brake drum inner diameter: nominal. 320 mm limit. 322 mm
Friction lining (width x thickness): standard. 85 x 10 mm option. 110 x11 mm
Rear drum brake
Inner diameter of the brake actuator cylinder. 28.57 mm
Clearance between piston and cylinder: nominal. 0.02-0.11 mm limit. 0.2 mm
Brake drum inner diameter: nominal. 320 mm limit. 322 mm
Friction lining (width x thickness): standard. 85 x 10 mm models (HD72, HD78). 110 x11 mm
Brake pedal Full pedal travel. 162 mm
Vacuum booster Diaphragm diameter. 228 and 251 mm Pusher stroke. 32 mm
Brake Master Cylinder Inner Dia. 31.75 mm
Piston stroke: front. 17 mm rear. 14 mm
Tank capacity. 305/505 cm
Exhaust brake Effective diameter of the vacuum chamber diaphragm. 76.2 mm
Note: the air damper is not installed on engines of models D4AE, D4AF.
Parking brake Drum inner diameter: nominal: gearbox M2S5, M3S5. 180 mm gearbox MO35S5. 190 mm
limit: gearbox M2S5, M3S5. 181 mm gearbox MO35S5. 191 mm
Friction lining (width x thickness): gearbox M2S5, M3S5. 35×5 mm gearbox MO35S5. 45 x 4 mm maximum thickness. 2 mm
Bleeding the brake system
1. Fill the master cylinder reservoir with brake fluid to the maximum level mark . When bleeding the system, maintain the fluid level above the minimum level mark .
Attention. Brake fluid degrades the quality of painted surfaces. If any fluid comes into contact with painted surfaces, immediately wash off the brake fluid with water.
2. The order of priority for bleeding the brakes is shown in the first figure. ( diagonal )
3. Connect the clear vinyl hose to the slave cylinder drain screw. Place the other end of the hose in a transparent container half filled with brake fluid. The cut hose must remain below the liquid level .
4. Press the brake pedal several times Press the pedal all the way down and tighten the drain screw.
Torque. 7-9 Nm 5. Release the pedal. 6. Repeat step 3 until the release of air bubbles stops .
Adjusting the gap between the pads and the brake drum
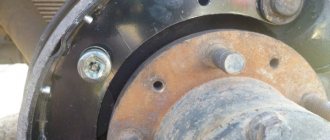
Using a screwdriver ( A ), through the access window, rotate the slack adjuster wheel ( B ) in the direction of decreasing the slack until stops freely rotating . From this position, turn the adjuster wheel in the opposite direction by 4 - 6 wheel teeth .
Source
Fuse box
General scheme
p, blockquote 10,1,0,0,0 —>
| 1 | 15A Working light |
| 2 | 5A Headlight relay |
| 3 | 10A Fan and Air Conditioner Controller |
| 4 | 10A Brake, tachograph (EC), cold start switch |
| 5 | 15A Glass cleaner and washer |
| 6 | 5A Electronic ABS control unit |
| 7 | 5A Power take-off device |
| 8 | Reserve |
| 9 | 10A Pre-heater |
| 10 | Reserve |
| 11 | 10A Vehicle speed sensor, reversing lights |
| 12 | 10A ETASK, instrument block |
| 13 | 20A Electric glass lift |
| 14 | 10A Stop signal, horn, data connector |
| 15 | 10A Cab tilt switch, hazard warning lamps |
| 16 | 10A Rear fog lamp |
| 17 | 10A Locking (unlocking) the electric door |
| 18 | 15A ABS valve control |
| 19 | 15A Outside mirror heater |
| 20 | Reserve |
| 21 | 20A Fuel heater |
| 22 | Reserve |
| 23 | 10A Tachograph, ETASK, audio system, instrument cluster, interior lighting |
| 24 | 15A Start |
| 25 | 10A Left headlight (low beam) |
| 26 | 10A Right headlight (low beam) |
| 27 | 10A Left headlight (high beam) |
| 28 | 10A Right headlight (high beam) |
| 29 | 10A Left rear light |
| 30 | 10A Right rear light |
| 31 | 10A Fog light |
| 32 | 5A Electrical unit control (EC1)) engine |
| 33 | 15A Condenser Fan Relay, A/C Relay |
| 34 | 15A Heater fan |
| 35 | 10A Voltage Converter |
| 36 | 15A Instrument cluster, audio system, cigarette lighter , clock |
Brake problem
We changed the clutch and brake pipes on the front panel, removed the vacuum seal from the main clutch and the brake vacuum and the main one, put it in place and bled it diagonally starting from the rear right. The pedal is pumped up with 6-7 strokes, after a pause of pressing for 5-10 seconds. When pressed, it falls to the floor and the brakes disappear. We pumped the brake fluid with 3 liters. What could be the reason where to look?
Last edited by V-U67; 05/25/2017 at 19:50.
If the brake fluid does not leak anywhere, it means the cuff in the master cylinder is leaking.
I have another problem. Changed the pads and all brake cylinders. when turned off, it inflates without problems. I started the car and the pedal slowly went to the floor. The brakes work but on the floor. turned off the pedal at the beginning. the liquid does not come out. I don’t understand what the reason is. Has anyone had such witchcraft?
when you turn off either the front right or rear right the pedal is normal and with the engine running
Fuse box
General scheme
| 1 | 15A Working light |
| 2 | 5A Headlight relay |
| 3 | 10A Fan and Air Conditioner Controller |
| 4 | 10A Brake, tachograph (EC), cold start switch |
| 5 | 15A Glass cleaner and washer |
| 6 | 5A Electronic ABS control unit |
| 7 | 5A Power take-off device |
| 8 | Reserve |
| 9 | 10A Pre-heater |
| 10 | Reserve |
| 11 | 10A Vehicle speed sensor, reversing lights |
| 12 | 10A ETASK, instrument block |
| 13 | 20A Electric glass lift |
| 14 | 10A Brake light, horn, data connector |
| 15 | 10A Cab tilt switch, hazard warning lamps |
| 16 | 10A Rear fog lamp |
| 17 | 10A Locking (unlocking) the electric door |
| 18 | 15A ABS valve control |
| 19 | 15A Outside mirror heater |
| 20 | Reserve |
| 21 | 20A Fuel heater |
| 22 | Reserve |
| 23 | 10A Tachograph, ETASK, audio system, instrument cluster, interior lighting |
| 24 | 15A Start |
| 25 | 10A Left headlight (low beam) |
| 26 | 10A Right headlight (low beam) |
| 27 | 10A Left headlight (high beam) |
| 28 | 10A Right headlight (high beam) |
| 29 | 10A Left rear light |
| 30 | 10A Right rear light |
| 31 | 10A Fog light |
| 32 | 5A Electrical unit control (EC1)) engine |
| 33 | 15A Condenser Fan Relay, A/C Relay |
| 34 | 15A Heater fan |
| 35 | 10A Voltage Converter |
| 36 | 15A Instrument cluster, audio system, cigarette lighter , clock |
Hyundai brake bleeding
If you need to bleed the Hyundai HD-78 (HD-72) brakes, then it is better to contact a professional car service center that offers such services.
If you have to do the work yourself, then you need to take into account several recommendations.
Fluid is poured into the brake master cylinder tank. Its level must correspond to the maximum position mark. When performing work, you must constantly ensure that the level does not fall below the minimum value, otherwise air will get inside and all the work will be in vain.
Bleeding begins with the farthest wheel (relative to the driver), then the driver's wheel, then the left rear, then the right front.
To do the job properly, you need to connect the vinyl hose to the drain screw of the brake wheel cylinder. In this case, the other end of the hose must be lowered into a special container prepared in advance, into which liquid must first be poured.
- Bleed the pedal;
- Stop mid-stroke;
- Carefully unscrew the drain screw to allow air to escape from the system;
- Press the pedal all the way and tighten the screw.
Perform this procedure several times until the release of air bubbles stops.
Diagnostics
In order to determine the degree of wear of the pads, you first need to dismantle the wheel. Next, you need to remove the rubber plugs in the brake support disk, then shine a flashlight into the holes and look at the wear indicators.
If the recess is level with the working part, the pads need to be replaced.
How to bleed brakes on a Hyundai HD 78 and repair faults
The production of Hyundai medium-duty trucks is based on the latest engineering and technical developments in the field of mechanical engineering. Assembly is carried out at the best car assembly plants of the South Korean automobile manufacturer Hyundai Motor Company. However, during operation of the machine, malfunctions and various malfunctions in the main systems and components are possible.
Carrying out maintenance (MOT) and timely repairs of the Hyundai HD 78 contribute to the long service life and stable operation of the vehicle.
Basic faults and repairs
Hyundai HD 78 repairs are carried out when any mechanical faults are identified by experienced specialists at service stations or auto repair shops. Guided by the instructions for repair and maintenance of cars of this series, as well as if you have knowledge of car mechanics, minor repair and restoration work can be performed independently.
Problems often arise in nodes such as:
- steering control (RU);
- high pressure fuel pump (HPFP);
- gearbox (gearbox).
RU allows the driver to freely change the direction of movement of the car. The main malfunctions of a steering wheel without power steering are difficulty turning or increased play of the steering wheel.
Steering gear sticking occurs due to damage to the ball bearings or wear of the circulating balls; jamming of the steering mechanism (RM) - due to deformation of the rod, wear, damage or insufficient lubrication of the cardan joints. To repair the switchgear, it is necessary to replace the bearings, rod, nuts of the working pair and lubricate the shaft. If problems are identified in the front axle that affect the operation of the switchgear, the ball joints of the rod ends are lubricated and the wheel alignment angles are adjusted (camber, toe, longitudinal inclination). If the thrust bearing is damaged, replace it with a new one.
How to bleed the brakes
Brakes are vital to the safe operation of your vehicle. Therefore, they should be checked during maintenance in accordance with the schedule. The amount of brake fluid should be normal. If the level is at the MIN mark, add fluid to the maximum, but do not overfill.
If air gets into the pipes, the brake system must be bled. The air gap is removed using a pedal, so an assistant is required to carry out the procedure.
When pumping the entire system, work on each cylinder separately:
- first check the rear right wheel cylinder;
- then rear left;
- front right brake caliper;
- front left.
Bleeding the brakes is done as follows:
- Turn on the ignition system.
- The pedal is pressed 4-5 times, at the same time the bleeding valve opens, the hydraulic pump turns on, and pressure appears.
- Press the pedal again and hold it.
- Turn the tool 1/2 turn to remove the air and collect the escaping liquid into a bottle.
- When the pressure decreases, close the valve. In mechanisms with ABS, the valve is tightened after 2 seconds to prevent damage to the hydraulic pump.
- The process is repeated until the air bubbles in the liquid disappear.
- With the pedal depressed, tighten the bolt.
- Remove the hose and put on the boot.
- Bleed the remaining cylinders.
- Close the lid on the tank.
If the car won't start
If the Hyundai 78 truck stalls and does not start, and no error code appears on the information screen, then there are 2 possible faults:
- the starter turns when you turn the ignition key, but the engine does not start;
- the system does not turn on the starter when the ignition is turned on.
We carry out repair work in the same way as we repair 65 and 72 models. In the first case, the causes of failure are defects in the mechanical components of the machine. It can be:
- fuel injection pump damage;
- mechanical defects of the engine and injectors;
- airing of the fuel system;
- lack of fuel in the tank;
- clogging of the fuel separator and wires;
- check valve deformation.
If the starter does not operate, you should pay attention to electronic mechanisms and electrical equipment, in particular:
- CAN bus short circuit;
- damage to the main relay;
- lack of detachable electrical wiring contacts;
- defects in the starter solenoid relay;
- lack of supply voltage in the motor control system;
- failure of the ignition switch;
- short circuit or break in the wiring cable.
Troubleshooting methods: replacement of parts, diagnostics, programming and parameterization at a service station.
Downloading a book
After successfully completing the payment (by any method) and returning to the KrutilVertel store from the payment system website, you will be taken to the successful payment page:
On this page you need to indicate your e-mail, where access to download the book will be sent.
If you are already registered on our website, then simply follow the link to your personal account.
The book you purchased will be in your personal account, from where you can always download it.
Please note that after making the payment, you need to return back from the payment system website to the KrutilVertel website.
If for some reason you did not return back to the site and closed the payment system tab with a message about the successful completion of the payment, please let us know - we will send you a letter indicating access to download the book.
Tuning
Despite the good quality of the car and the comfort provided by the manufacturer, the exterior and interior of the truck need detailed improvement. Hyundai tuning helps hide flaws and improve the appearance of the car. Many experts recommend installing additional elements: - aerodynamic body kit, wings, new generation optics. For decoration and protection of parts, eyelashes are used on the headlights, wind deflectors on the side windows, and moldings for mirrors and doors.
Source
