Currently reading:
Do-it-yourself hydraulic press: dimensions, photos
Restoration of the GAZ-12 (ZiM) car
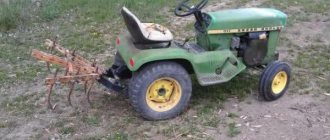
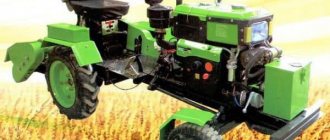
Homemade mini tractor 4x4
Moskvich 2137 station wagon: restoration
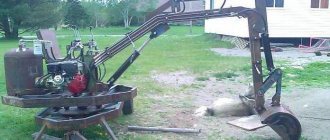
Homemade 4x4 ATV with an engine from an Oka car: photo and detailed description of the manufacture of the ATV.
In previous articles, we have already considered several options for manufacturing rear-wheel drive ATVs, now let’s take a look at the all-wheel drive design. 4x4 all-wheel drive significantly increases the capabilities of the ATV; in fact, it is already a full-fledged all-terrain vehicle for off-road use.
The author of this homemade technique is Sergey Pletnev. Let's take a closer look at the design of the homemade product.
Mini-tractor with an engine from a Ural motorcycle | Step-by-step assembly photos
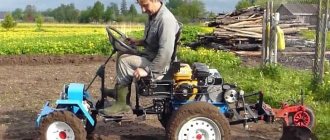
Dear visitors to the “Self-Made Friend” website, today we will look at detailed instructions on how to make a mini-tractor with an engine from a Ural motorcycle with your own hands.
This tractor is created on the basis of a breakable frame welded from professional pipe with a cross-section of 100x40 mm. The engine is installed from a Soviet heavy motorcycle "Ural" purchased from a nearby scrap metal collection point. The tractor has 2 boxes, one is a “original” motorcycle box, and the second is from a Moskvich-412 car. The tractor has all-wheel drive on all 4 4x4 wheels. The engine cylinders are equipped with additional air cooling, carried out from adapted VAZ stove motors, namely fans in a tin casing. Steering, traction "Moskvich" The mini-tractor also aggregates a plow, a car trailer, a blade and other useful attachments. The ignition on the tractor is electronic. Living in rural areas, such an assistant as a home-made tractor is simply irreplaceable; with its help you can plow and cultivate a vegetable garden, transport various loads on a trailer (firewood, manure for the garden, hay, crops collected from the plot). In general, the equipment is very useful. Let's look at step-by-step photos of assembling a mini-tractor.
Materials
- engine and gearbox from a Ural motorcycle
- professional pipe 100x40 mm
- bridge VAZ 2103
- Checkpoint "Moskvich-412"
- VAZ wheels
Tools
- welding inverter
- Angle grinder (grinder)
- drill
- set of wrenches
- hammer
- roulette
- welding angle
Step-by-step instructions for creating a mini-tractor with an engine from a Ural motorcycle with your own hands.
The first step was to weld the frame; it will consist of two parts and is connected to each other by a breaking point. The material used was a 100x40 mm pipe, 2000 mm long and 950 mm wide.
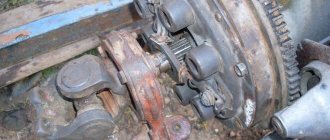
The tractor transmission, shortened rear axle stockings are from a VAZ 2103, torque from the gearbox is transmitted through a chain drive to the sprocket, and from it through shortened cardan shafts to the front and rear axles.
Frame swivel unit.
The frame is assembled and the wheels are installed.
Installation of a gearbox from a Moskvich-412 car
The engine from the Soviet heavy motorcycle "Ural" was purchased from a metal collection point and restored.
Interface of internal combustion engine and gearbox.
Electronic ignition from a VAZ 2108 car.
Installation of electrical equipment, as well as additional forced cooling for engine cylinders.
Turn signals and brake lights.
This is such a wonderful mini-tractor.
This tractor has good characteristics and optimal specific power, which allows it to plow the ground with a plow with two moldboards and haul a car trailer with a load of more than 500 kg. The tractor also has a blade for clearing snow in winter. You can watch the video and see for yourself. Enjoy watching.
We hope you liked the material
Thank you for your attention!
All-wheel drive 4x4 walk-behind tractor: a mini tractor from Niva with a do-it-yourself engine
The specifics of life in rural areas presuppose the presence of certain means of small-scale mechanization that help the summer resident in his daily work. This especially applies to farmers who have fairly large holdings, the processing of which by hand is simply impossible.
In such cases, homemade mini tractors made by rural craftsmen are becoming increasingly relevant and worthy of attention. This is quite justified, because this approach to business allows you to significantly save on the purchase of the unit itself, which is the main reason for such homemade products.
This can also be interesting because the assembly process itself can be quite exciting, especially for those people who are partial to technology.
For more information about homemade mini tractors, see
Safety precautions
Regardless of which mechanism was the main one when assembling the mini-tractor, you must understand that this is a rather dangerous device. There are no instructions for homemade equipment, and therefore the first safety measure is careful selection of the design. It is recommended to read the comments on the drawings and descriptions, and the reviews of those who have already tried to use them.
If the unit has a gasoline engine, do not allow oil to get into the fuel. It is also impossible to fill fuel to the very edge. If it spills out while moving, serious problems can occur. It is strictly forbidden to use open fire when refueling a mini-tractor, and ideally at any time when people are near it.
Fuel should only be stored in special tightly sealed canisters.
If the canister becomes leaky, it should be thrown away. There is no need to create fuel reserves in excess of the required volumes. The refueling and engine starting points must be at least 3 m apart from each other. To avoid a fire, do not start the engine in the immediate vicinity of trees, bushes, or dry grass. If the engine starts poorly or starts with strange sounds, it is better to postpone work and look for the problem.
You cannot drive a mini-tractor over garden equipment or allow it to collide with walls, branches and stones. Only people who understand it should operate the mechanism. Even if headlights are installed, it is advisable to work mainly during the day.
It is also undesirable to drive at maximum speed if you can work more calmly. In any case, you need to drive slower.
You can learn how to assemble the transmission and brakes on a mini-tractor by watching the video below.
How to make a cabin for a mini tractor
If in the summer you can work on a mini tractor without a cab, then with the onset of the autumn-winter period, using the unit becomes quite uncomfortable or even impossible. Therefore, craftsmen are trying to assemble tractors with cabins in order to use this equipment all year round.
The cabin for homemade equipment is made of sheet steel according to a pre-prepared drawing. You can take the cabin from the MTZ tractor as the basis for the calculations. The following photo shows a drawing, based on which you can make a cabin yourself.
Advice! If the cabin dimensions shown in the drawing do not fit the dimensions of your mini tractor, then they must be changed. But the main thing that needs to be taken into account when adjusting the dimensions is the size of the windshield and the height of the cabin. Its ceiling should be 25 cm higher than the head of the person sitting in the cabin.
The cabin is manufactured as follows.
- First of all, you need to assemble a frame from wooden blocks according to the dimensions of the drawing.
- Next, a metal profile pipe is cut to the size of the wooden frame parts. All parts are connected by welding.
- The welded structure is placed with the roof on the ground and glass holders are welded inside the cabin.
- The roof is made of 1 mm sheet steel. The fragment can be cut out with a grinder and welded to the top of the cabin.
- The floor and side parts of the cabin are made of 2 mm thick sheet steel.
- The door frame is also welded from a profile pipe. To automatically close the doors, gas elevators can be installed on the frame.
- After installing the glass, the inside of the cabin can be lined with foam rubber and covered with leatherette.
- The cabin is installed on the frame, in a place prepared in advance for it.
In general, to better understand how to make a mini tractor with your own hands, you can watch this video, a kind of guide for beginners.
Technology capabilities
In the agricultural sector, these machines are capable of doing a huge amount of work. Thanks to its maneuverability and the ability to attach additional attachments, the assembled classic 4x4 mini tractor can cope with the following operations with its own hands:
- deep plowing of the soil;
- cultivation to remove weeds;
- harrowing of certain areas;
- implementation of sowing spring field operations of cereal crops;
- planting/harvesting potatoes.
In winter, the fracture mini tractor can also not be parked in the garage, but can be used to clear roads of snow. A trailer is attached to the tow bar, which helps in transporting loads of up to several hundred kg. Owners can even use mini tractors at home to mow lawns.
Technical characteristics of the fracture mini tractor
A mini tractor assembled with your own hands has a number of positive characteristics, including certain savings on purchase costs. The advantages of homemade products include:
- the compact dimensions of the transport ensure its convenient operation even in small areas, and since most farms include small cultivated areas, a DIY assembled mini-tractor will be very appropriate;
- homemade devices with a single-axis drive or with a full drive in the vast majority of cases pay for themselves in one or two seasons, and subsequently allow you to save on components;
- agricultural new products have decent performance indicators that can compete with factory models, since a master can make a mini tractor independently using selected units and components that have a large margin of safety.
Important Electric cultivator Nadezhda of domestic production
Homemade mini tractor fracture (with breakable frame) 4x4
It is worth considering that a homemade 4x4 mini tractor may also have disadvantages. The disadvantages lie in the following factors:
- sometimes the process of searching for the necessary components or individual parts is delayed;
- in the case of using non-standard structural elements, repairs are difficult;
- It will be possible to assemble a homemade 4x4 mini tractor if you have the appropriate set of tools and have the skills to work with them;
- Frequent breakdowns can occur due to the use of old used technical components.
Frame assembly
The frame design is optimal for homemade products assembled in the garage. The key parts for it are the longitudinal spars and a pair of transverse crossmembers. It is preferable to make the spar beams in a three-stage form from a tenth channel, and for traverses a sixteenth square profile at the front and a twelfth at the rear are suitable.
Dimensions of a machine with a breaking frame
During the assembly process, it is important to ensure that the front half-frame can be rotated relative to the rear half-frame at a certain angle. Car hinges from trucks are suitable for this.
In most cases, cut driveshafts are used. When folded at an angle, they continue to transmit rotation.
Motor and clutch for fracture mini tractor
After assembling the frame, they begin to install the power unit. It is recommended for cars with a single-axle drive to take engines in the range of 15-30 hp, and for all-wheel drive, the optimal solution would be an engine with a power of 30-40 hp. Preference should be given to water-cooled diesel units. They are quieter in operation than analogues with air removal of excess heat.
Kinematic diagram
As a ready-made solution, engines from walk-behind tractors or old cars can be mounted on the frame. There are drawings where the central place is occupied by power plants from the following models:
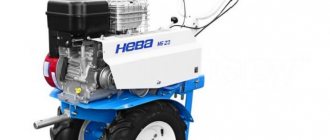
- walk-behind tractor "Neva";
- model with walk-behind tractor “Bison”;
- homemade from the Centaur walk-behind tractor, etc.
A minimal exhaust system may involve an empty metal fire extinguisher with metal shavings from a lathe stuffed inside it. If an air-cooled motor is used in the design, then in the lower docking area some of the partitions can be eliminated
It is also important to ensure the presence of mounting holes for fixing the power unit
Engine UD-2
The next step after installing the engine is installing the transfer case and gearbox. An acceptable option is to choose them from GAZ-53. To ensure a good connection between the clutch and the engine, the flywheel will have to be rebuilt. In such a situation, turning work will be needed.
The back part is cut off, the excess with tides. A hole is bored in the center for a new shaft. The clutch basket cover is optimized in terms of dimensions to the required dimensions.
Features of assembling an all-wheel drive mini tractor
A design feature of all-wheel drive vehicles is a small turning radius, which is achieved by using a breakable frame. Drawings of a homemade 4x4 mini tractor are distributed by the authors through periodicals and are in the public domain.
Tools and materials
To make homemade equipment you will need a set of tools:
- welding machine;
- steel profile cutting tool;
- drilling machine;
- vice;
- measuring tool;
- a set of keys.
The list provided is a minimum. In the process of finalizing serial units, additional equipment and accessories may be required.
For self-assembly, you will need several components that can be borrowed from serial equipment with modifications:
- frame made of steel profile;
- engine;
- components and spare parts for suspension;
- transmission units;
- steering gear;
- various fasteners.
Cabin for mini tractor
To protect the driver from moving and rotating parts, you need to install protective covers around the units and make a cabin. To do this, a frame made of thin steel pipes of round or square cross-section is welded onto the frame. It should form an engine compartment that will insulate the engine. Then sheets of tin are screwed onto this frame. One sheet must be hinged in order to have access to the motor. He will be the hood.
A good overview of the mini tractor is provided by the open cab. It contains the seat and controls. To protect from rain and snow, you can make a removable canopy.
Homemade tractor Framelka 4 4 with your own hands with an Oka engine
It will be much easier to cultivate a plot of land if you make a homemade 4 4 breaker tractor with your own hands with an Oka engine. Making a homemade tractor will be much cheaper than buying a ready-made product. However, to create a tractor with your own hands, you will need basic knowledge of technology and special tools.
Homemade tractor-breaker 4 4
The main advantage of homemade equipment for cultivating land is significant cost savings. The main components required for assembly can be borrowed from non-working vehicles or purchased at low prices.
In addition, the mini-tractor shows higher efficiency than more powerful factory machines on small plots of land where there is a lack of free space.
Among the disadvantages, it should be noted the need for technical skills and ability to work with drawings. To assemble a homemade tractor, you may also need additional tools and devices.
The most convenient option for cultivating small fields, gardens and greenhouses will be a tractor with a tipping frame. The breaking frame is two half-frames fastened together by a hinged connecting mechanism. The advantages of such devices are as follows:
- Increased maneuverability. The breaking tractor can make a complete turn almost in one place.
- Increased cross-country ability. Thanks to the features of the breaking frame, traction on the surface in difficult areas of the soil is significantly increased.
- Increased power. Successful load distribution helps to obtain the maximum power value of the equipment.
Using a homemade 4 4 tractor with all-wheel drive, you can perform the following tasks:
- Harvesting.
- Weeding.
- Formation of beds on the field.
- Cultivation and soil treatment.
- Sowing garden crops.
- Transportation of oversized cargo.
Preparation of drawings and details
The assembly of complex mechanisms begins with the production of drawings. Based on your technical knowledge, you need to put your ideas on paper in detail, or use ready-made solutions posted on the Internet.
Important! Without the appropriate skills, it is not recommended to create a drawing of a tractor yourself. Incorrect calculation will lead to rapid wear of parts and premature failure
Having a ready-made drawing, it will be very easy to prepare all the parts, and in the future, assemble everything into a single device.
https://www.youtube.com/watch?v=wRCKYLQX8LQ
How to make an unusual ATV with your own hands from an ordinary walk-behind tractor?
The designers of walk-behind tractors, probably, could not even dream in their wildest dreams what folk craftsmen would turn their brainchild into. What can they make out of it with their own hands: a mini tractor, a snow blower, an all-terrain vehicle, a snowmobile - in short, everything that can move under its own power on Mother Earth. It would be simply surprising if modern “Kulibins” did not try to turn a walk-behind tractor into such an entertaining vehicle as an ATV.
The idea of an ATV from a walk-behind tractor
In English-speaking countries, such transport is called All Terrain Vehicle. The closest wording to this name in Russian is: “vehicle for off-road driving.”
Unlike conventional all-terrain vehicles, an ATV is essentially a four-wheeled motorcycle - powerful, fast, with excellent maneuverability, and at the same time easy to control and safe. In any case, it is much easier to fall off a regular motorcycle than from an ATV.
The most important part of any moving mechanism is a reliable and well-functioning motor. Homemade ATVs with an engine from a Neva walk-behind tractor have proven themselves best. If you have a well-functioning motor of this walk-behind tractor, that’s already half the battle. The walk-behind tractor does not have to be “Neva”, any model will do, it’s just that “Neva” is one of the best models for conversion.
Everything further is just a matter of skill and patience. When creating a homemade ATV from a walk-behind tractor, you need to be prepared in advance for the fact that it will not turn out to be as powerful and fast as the real one. Another feature of an ATV made from a walk-behind tractor is that its seating position will not be that of a motorcycle, but will remain standard for a walk-behind tractor. But in terms of endurance and maneuverability, such a homemade product is no worse than its factory counterparts.
Instructions on how to make an all-wheel drive mini tractor with your own hands - drawings and dimensions
Having assessed all the advantages, many people ask the question - how to make a 4x4 mini tractor? In principle, this assembly method is not much different from traditional methods, except, perhaps, for the construction of the frame structure.
Basically, the frame comes in one piece, but in fractures there is an option with a breaking frame, which is where the name comes from.
The appearance of the structure may be a little puzzling to an outside observer, but its apparent unpretentiousness should not be misleading. The fact is that everything inside is located so proportionally, if you follow the drawings exactly, which allows the unit to show fairly good performance indicators.
Speaking of drawings. This is probably one of the most important stages of the entire assembly, because the success of the entire design depends on the correctness of leaving a detailed drawing and determining the exact dimensions.
The fact is that the specifics of self-assembly involve adjusting some parts to the individual characteristics of the frame or power unit. This is understandable, because the components are taken from completely different equipment, which leads to their dimensional discrepancy.
Important Review of characteristics and features of the RDK-250 crawler crane
The fitting itself is carried out mainly on a lathe, which in itself presupposes the presence of a detailed drawing. After all, it is much easier to make certain holes or stitches while looking at the drawing than keeping all this abstraction in your head.
So, having made the drawing, we begin the assembly process:
- The frame itself will consist of traverses and spars. The spars, in this case, have a three-stage structure. The first stage is made from channel number 10, and the last stage is made from a square steel pipe with dimensions of 80x80 mm.
- The rear traverse is made from channel number 16, and the front crossmember is made from channel number 12.
- If you are converting a walk-behind tractor into a mini tractor, then the main power unit will be the engine located on the walk-behind tractor. If not, you will have to purchase the engine separately. In principle, any diesel engine of the required power (at least 12 hp) can be suitable.
- However, experts advise taking a more powerful one - a motor with 40 hp. and water cooling.
- The gearbox and power take-off shaft, as well as the clutch, can be taken from GAZ-53 and GAZ-52 cars, respectively. They won't fit ready-made, so you'll have to modify them a little. To do this, you need to remake the motor flywheel by cutting off a little from the back and drilling one hole in the middle.
- The bridge can be installed in the unit in the desired form, without performing any manipulations. It is attached to the frame structure using four stepladders.
- Wheels can be taken from old cars, but their optimal diameter is considered to be 18 inches. The process of installing wheels on hubs is quite simple. It is enough to cut a hole of the required diameter from the center of the disk, and the center of the disk from the ZIL-130 is welded to this place.
- The front axle is not so important, because it will not be the drive one. Therefore, you can take a bridge from another technique.
- Steering is best enhanced by hydraulics. You can take it from old agricultural machinery, but for it to work correctly you need an oil pump.
- By the way, the driver’s seat also needs to be installed correctly, because a person spends more than an hour operating the unit. The seat should be positioned so that the steering column does not rest on the person’s knees.
In general, the assembly of a homemade all-wheel drive mini tractor is carried out using third-party spare parts, including mainly automobile ones.
In particular, the drum brake will be used in the front wheelbase system, and the steering rack will be borrowed from the VAZ family of cars.
Other components can be freely found on the spare parts market, where there is quite a lot of useful stuff. In addition, on specialized websites there are a sufficient number of advertisements for the sale of parts that can be purchased for mere pennies.
DIY jeep all-terrain vehicle
Externally, the “jeep” looks smaller than, say, a LuAZ, although it is not inferior in size to the interior and trunk. This is achieved, firstly, by the dense “packing” of the engine compartment and, secondly, by the external placement of part of the luggage (on the roof), a spare wheel (on the left side) and a canister (at the rear). Total weight - 900 kg.
“Comfort, visibility, beauty!” — this is how cosmonaut Vladimir Dzhanibekov spoke about this car after sitting behind its wheel. The creator of the “jeep,” S. Khopshanosov from Yerevan, received 1st prize at the show of home-made cars; the car was shown in the TV show “You Can Do It.”
We have no doubt, our dear reader, that you too can build such a car. The experience of Stanislav Khopshanosov will help you with this.
When conceiving a car for travel, the author decided to include in it design simplicity, reliability in operation, unpretentiousness and ease of maintenance. When choosing a layout, I settled on the “jeep” design, but its version differs from the classic one in that it has only one drive axle - the rear one, for simplicity.
Externally, the “jeep” looks smaller than, say, a LuAZ, although it is not inferior in size to the interior and trunk. This is achieved, firstly, by the dense “packing” of the engine compartment and, secondly, by the external placement of part of the luggage (on the roof), a spare wheel (on the left side) and a canister (at the rear). Total weight - 900 kg.
The simplifications, however, did not affect the driving performance of the car; it has already covered hundreds of thousands of kilometers. Every year, trips were made on it from Yerevan to Moscow and back. Including a homemade trailer-dacha weighing 500 kgf. Participation in the rally made this journey much longer. However, the design passed the test of the roads of Karelia and the Kola Peninsula with honor. The Jeep walked confidently both along the highway (at speeds of up to 120 km/h) and along the broken track.
It used to be that S. Khopshanosov helped stranded fellow motorists by pushing their cars with the front bumper of his all-terrain vehicle.
In his native Armenia, he climbed on it to a height of up to 3000 m above sea level, overcoming off-road conditions, rocky screes, and slopes of up to 30°.
The hardships of the journey are easily tolerated in the comfortable and cozy interior of the car. In hot weather, you can slide any of the four side windows to bring in fresh air. Or, if this is not enough, open the sunroof.
Rice. 1. General view of the all-terrain vehicle jeep
There are many other simple and original design solutions in the car. Here, for example, is how the body works. It consists of a space frame and outer skin. The frame, designed to withstand significant torsional and bending loads, is welded from square and rectangular steel pipes. The less loaded hood, doors and rear window are made of channels, tees and angles connected with rivets.
The floor in the cabin and the hood trim are made of corrugated duralumin sheets 2 mm thick. The body trim is made of smooth sheets 1.5 mm thick. They are attached to the frame with M5 screws with countersunk heads. The joints of the sheets are hidden by rubber and metal overlays.
Rice. 2. Body frame:
1 — front beam (50X 25 mm), 2 — engine compartment elements (50X 25 mm), 3 — engine mounting cradle, 4 — shock absorber bracket, 5 — front spar (50X50 mm), 6 — hood beam (40X40 mm), 7 - elements of the rear wall of the engine compartment (50X25 mm), 8 - threshold (50X 25 mm), 9 - rear spar (40X40 mm), 10 - side (25X20 mm), 11 - rear cross member (40X40 mm), 12 - window sill crossbar (25 X 20 mm), 13 — trailer bracket, 14 — rear spring shackle, 15 — rear wheel arch (angle 25X25 mm), 16 — intermediate cross member (40×40 mm) with pins securing the shock absorber to the body, 17 — rear spring bracket, 18, 21 - door pillars (40X40 mm), 19 - front cross member (40x40 mm), 20 - struts (50X25 mm), 22 - front spring shackle 23 - front spring bracket.
The inside of the cabin is lined with a thin layer of foam rubber and soft plastic. Triplex glazing, as well as the doors, are equipped with rubber seals from cars from the Volzhsky Automobile Plant. The floor is covered with rubber and synthetic mats. All this reduces the noise level in the cabin and prevents the penetration of dust.
The instrument panel and glove box are homemade. The front seats with reclining backrests are “Zhiguli” ones. The rear passenger seat, designed for three people, is homemade and has a fixed backrest. Behind it, at the bottom, is a fuel tank with a capacity of 45 liters (from a UAZ) with a neck leading out under the rear bumper. Above the tank is an internal trunk. Access to it through the rear window.
The principle of “simplicity plus reliability” has also extended to the power plant: the engine and gearbox are taken together with the units that serve them from the Zhiguli VAZ-2101. Only the paper oil filter was replaced by a cheaper inertia filter from the ZAZ-968.
The rear axle, taking into account the possibility of towing a trailer, was taken from a VAZ-2102 and slightly modified: the lower support cups of the suspension springs and the mounting brackets for the upper reaction rods were removed. Instead, two U-shaped suspension pads are welded to the bridge beam.
The springs are used from the front suspension of the UAZ-469 car. Each package consists of five sheets, coated with graphite lubricant before assembly. They are suspended from the body frame in the area of the rear side members.
Rice. 3. Modification of the rear axle:
1 — lower support cup of the outer suspension (removed, a spring cushion is welded in its place), 2 — mounting bracket for the upper reaction rod (removed), 3 — left suspension cushion (welded).
In addition to springs, there are telescopic shock absorbers. With rubber-metal hinges of the tanks, as on the Zhiguli, they are attached to the rear axle brackets, and with casing hinges - to the pins on the intermediate cross member of the frame.
Torque from the engine to the rear axle is transmitted by a driveshaft from the Volga GAZ-21. The choice of this particular type is due to the fact that it is simpler and more reliable and does not require special care. True, the mounting holes do not coincide, so adapters are machined to attach the shaft to the flanges of the gearbox and axle.
Rice.
4. Adapter. They are steel washers with a diameter of 100 mm and a thickness of 33 mm, in which 8 through holes are drilled.
The 4 corresponding holes on the flange have M8 threads, and the rest M10. As for the front axle, it is completely homemade: When designing it, Khopshanosov was guided by his favorite principle of “simplicity plus reliability”. The line of reasoning was something like this: the front axle is a very important unit. It provides motion control; the “health” of the entire car depends on its “well-being.” Therefore, the fewer parts and moving joints it contains, the better.
Rice. 5. Front axle:
1 - rotating axle, 2 - upper support platform, 3 - bolt on the upper ball bearing, 4 - lining, 5 - pipe 50X X 25 mm, 6 - main pipe, 7 - suspension platform, 8 - shock absorber axle bracket, 9 - bolt and lower ball bearing, 10 - lower support platform, 11 - shock absorber trunnion.
Three years of operation have shown that the decision was made correctly. Whatever stones and potholes fell under the front wheels - nothing mattered. This is how the bridge works.
Its main element is a thick-walled seamless steel pipe 060 and 1100 mm long. Spring cushions, shock absorber mounting pins and support pads for the ball bearings of the front suspension are welded to it.
Rice. 6, Hatch diagram:
I - hatch, 2 - handle, 3 - guide, 4 - roof, 5, 6 - gutters.
When assembling the front axle, it is necessary to take into account the camber of the wheels, so the support platforms were attached to the pipe in a certain order. First, the lower ones were welded and the (also lower) ball bearings of the steering axles of the Zhiguli wheels were screwed to them. The upper platforms were first attached to the corresponding ball bearings of the steering axles, and then welded to the pipe. Moreover, the camber angle was 0°20/ 0°30′, which corresponds to a 2-3 mm difference between the dimensions taken from the edges of the wheel rims to the vertical (the pipe is horizontal); installed using a plumb line. The front axle is attached to the body frame in the same way as the rear axle - with springs (four leaves in a package) using bolts and clamps and telescopic shock absorbers, the rods of which rest against special brackets on the front side members.
Rice. 7. Steering gear:
I - steering shaft, 2 - cardan joints, 3 - intermediate shaft, 4 - steering mechanism, 5 - non-adjustable linkage, 6 - adjustable linkage, 7 - double lever of the right wheel, 8 - axle, 9 - single lever of the left wheel.
The toe-in of the wheels is adjusted by a steering rod (from the Volga GAZ-21).
The all-terrain vehicle control device is also very simple and reliable. By turning the steering wheel, the driver, through two shafts and two hinges (from the ZIL-130) located under the hood, acts on the steering mechanism mounted on the front beams in front of the radiator grille. Next, the force is transmitted by an unregulated rod to the double (welded from two) lever of the right rotary axle, and from it by an adjustable rod - to the lever of the left rotary axle.
The brake system, interior heater, headlights and electrical wiring are borrowed from the Zhiguli VAZ-21011, the rear lights are from the Skif trailer, and the windshield wipers and control devices are used from the UAZ-469.
S. Khopshanov (Him 1993 01)
Build process
To assemble a tractor with a breaking frame, you need to start with the base and then move on to the remaining components. This is what the step-by-step assembly of such a machine looks like.
Articulated frame
To assemble such a structure, it is necessary to weld two half-frames. Recommended front dimensions: 900*360, rear – 600*360. The components for the semi-frames are made from channel No. 8.
It is necessary to install two pieces of square pipe on the front half-frame. This will be a subframe for installing the engine. In addition, several platforms need to be welded for mounting other components. Their number will depend on the overall layout of the tractor.
A vertical metal stand, reinforced on the sides with corners, is mounted on the rear half-frame. A metal plate is attached to the back of the rack. This is needed to install the canopy. Without a rear linkage, the tractor will not be able to work with additional units and mechanisms.
For the plate and corners you will need material 12 millimeters thick. A 3-mm sheet of metal is welded to the top of the half-frame. This will be a platform for the driver and additional protection for the frame fracture site.
The front and rear half-frames are connected to each other by a flat cardan mechanism. It consists of two steel forks and a hinge. The forks are welded to the traverses of the half frames. The hinge will require a pin and support bearings. These parts can be taken from a Kamaz vehicle.
It is worth noting that the half-frames must move not only in the horizontal, but also in the vertical plane. This is necessary so that a tractor with a breaking frame does not hang its wheels on potholes. To do this, the chassis is installed on a rigid coupling.
A hub from the front wheel of the UAZ is mounted in the front part of the rear semi-frame. This will provide an additional horizontal deflection angle and displacement of the components of the structure relative to each other.
To prevent the parts of the base from deviating too far from each other, a gear is welded to the front half-frame, and two limit stops are welded to the rear half-frame.
Engine and transmission
An engine from any passenger car can be installed on a tractor with a breakable frame. For example: from “Oka” or “Moskvich”. The engine is mounted on a subframe and secured with bolts.
When installing the engine, it is necessary to correctly calculate the gear ratio. At a speed of 3-5 km/h, the engine speed should be in the range of 1,800-2,000 rpm. This is the optimal indicator for performing arable work.
In this case, the traction force on each share can vary from 190 to 300 kg/cm. It is not recommended to exceed these parameters, otherwise plowing will be uneven and shallow. Still, the mini-tractor has a relatively low weight.
To transmit torque from the power plant to the input shaft of the gearbox, it is recommended to use a clutch from a Ural motorcycle. By the way, the gearbox can also be borrowed from Moskvich.
The hub of the secondary shaft of the box is connected to the chain gearbox and transmits torque to the front axle. Rotation is supplied to the rear axle through the articulated joint of the half-frames and the rear driveshaft.
Steering and hydraulics
The steering column is attached to the front frame plate using bolts. In order for the steering wheel to rotate in accordance with the movement of the tractor, it is necessary to change the position of the worm gear. In other words, insert it in reverse.
To do this, you will need to make a gap in the bearing adjustment nut and drill a hole in the crankcase cover. Let us explain why such complexities are needed. A mini-tractor on a breakable frame has one interesting feature: the steering wheel is on the front of the frame, and the driver's seat is on the back. Therefore, if you do not change the direction of the worm gear, a conflict may arise between the half-frames, and accordingly, driving the machine will be very problematic.
Important The most popular models of Chinese Zubr walk-behind tractors: diesel, technical characteristics, attachments
The oil tank and hydraulic pump are usually located next to the power unit. The hydraulic outlet will be located at the rear, where the mounting area has been prepared. If you plan to use a mini-tractor to perform various tasks, for example, not only agricultural work, but also for removing snow or debris, then it makes sense to install a front linkage.
To raise and lower the attachment, you will need a power cylinder. It can also be removed from the old tractor.
Important Construction and repair of the brake system of the Urals
Minitractor perelomka with transfer case from Niva
In terms of functionality, tractors have no equal. Reliable, versatile and wear-resistant, they take on any task related to field work. They have only one drawback - the high cost, which grows from year to year. But this problem can be easily circumvented by making a tractor from scrap materials with your own hands.
A tractor is a mechanism with a wheel or track drive, characterized by the coordinated interaction of its working units. Today, “Kulibins” have learned to make homemade tractors from almost anything that runs on a powerful engine. Among them is the once popular car “Niva”, also known as “Lada” or “VAZ” 2121, which will be used in our homemade product.
The process of recreating a tractor from Niva 2121 looks like this:
- Frame assembly;
- Installation of motor and transmission;
- Hanging the steering column, hydraulics and wheels;
- Adjusting the brake system;
- Refinement of comfort elements - driver's seat and body.
Let's look at each of them in more detail.
Design features and dimensions
Of course, this equipment can also be bought in a store. But the costs in this case are often excessively high. And what’s most annoying is that for the largest plots of land, where powerful machines are required, purchase costs rise sharply. In addition, for those interested in technology, preparing a 4x4 all-wheel drive mini tractor will be enjoyable in itself.
But we must take into account that when working independently, you will have to carefully think through all the nuances. There is no point in making the design worse than on factory models.
First, they determine what kind of work needs to be done on the site. Then the appropriate attachments are selected, the optimal placement and methods of attaching them are determined. It is customary to divide homemade mini-tractors into the same parts as their “store-bought” counterparts:
- frame (the most significant part);
- movers;
- power point;
- Gearbox and gear unit;
- steering block;
- auxiliary (but no less important) parts - clutch, driver's seat, roof, and so on.
Device
Such home-made products in the countryside, such as a mini-tractor, are distinguished by a rather simple design structure, which provides certain advantages to the person who will carry out the assembly process. For a skilled owner, it will not be difficult to assemble a homemade tractor with your own hands at home.
Conventionally, you can divide a homemade mini tractor into several working units:
- Frame design. This is perhaps the most important part of the mini tractor design, because the stability and performance of the entire unit will depend on the strength of the frame.
- Transmission. This device can be taken from old Soviet cars, which are quite suitable for these purposes.
- Gearbox.
- Wheelbase. For this purpose, you can use wheels from old equipment - the same domestic cars.
- Power unit. In a homemade mini tractor, you can use a walk-behind tractor as the main driving force. Consequently, the same engine will be used as on the walk-behind tractor, but this is not a strict recommendation (see how to make a tractor from a walk-behind tractor with your own hands).
- For these purposes, you can use another engine, preferably running on a diesel engine, with decent power (at least 9 hp).
- Steering.
- Other components. This includes the clutch, driver's seat, etc.
Making tractor wheels
Let's consider creating the wheelbase of a mini-tractor. You can install wheels removed from a passenger car on a homemade Perelomka tractor, but here you will need to take into account a number of factors. So, the wheels installed on the front axle should be approximately 14 inches in diameter. If you choose smaller wheels, there will be a high risk of the structure not working properly in the future: the tractor runs the risk of falling into the ground. However, you cannot go too far with the dimensions, otherwise the tractor driver will have to make enormous efforts to perform even the simplest maneuvers: the steering wheel will be very difficult to turn. However, this task can be simplified a little if the steering column is equipped with a hydraulic booster.
Please note that the tires on the tractor must be equipped with good lugs. This will make the mini tractor, created with your own hands, more maneuverable, reduce the load on the wheelbase and simplify work on it.
For greater maneuverability, a self-made mini-tractor called Framelka can be equipped with a hydraulically strengthened steering column. Hydraulics can be removed from any other agricultural equipment. To assemble such equipment, you will need an oil pump, which will be driven by an engine. This element creates the correct pressure in the hydraulic motor.
If you want to achieve maximum ease of operation, you can make a fracture all-wheel drive mini tractor yourself. All-wheel drive, even made with your own hands, allows you to achieve good maneuverability. Of course, all-wheel drive makes assembling all the components of the structure more difficult, since you will have to make a shaft with all the high-quality and correct connections.
If you are going to make a tractor with all-wheel drive, it is recommended to find a video review that will show and tell you in detail how and what needs to be done. Remember that assembling a mini-tractor will require extreme care.
A 4x4 fracture minitractor is constructed with your own hands using a variety of spare parts, most of which are borrowed from cars, but they are not the only ones that will be needed during work. For example, in order to make a rotating unit or a breaking unit, you need to acquire a welding machine, a drill, fasteners and tools for connecting parts. The fracture assembly for a mini tractor requires special attention when assembling and you may need to turn to professionals for at least advice.
A do-it-yourself tractor cannot be done without installing a driver's seat. As a rule, the control system, including the seat, is installed after the main part of the DIY work with the frame is completed. This technique often uses seats taken from passenger cars. This item can be easily purchased at any automotive store. Remember that the steering wheel must be placed at a comfortable height for the tractor driver. It should not be located too low above the knees, but you should not set it too high either: your arms can get tired quickly.
Russian cars are an excellent source of spare parts for the construction of agricultural machinery. If you have minimal skills and abilities, you can, without much effort, make a tractor that will differ little from factory products. This will allow you to save a significant part of the family budget or completely make the tractor for free if you already have all the necessary elements and do not need to buy anything.
You don’t have to make the entire design yourself; you can take a ready-made machine as a basis and remake it. For example, craftsmen often make a Perelomka mini-tractor from LuAZ: they borrow the transmission and brake system from it, and make the rest so that it is convenient to work with.
The mini tractor from LuAZ is popular primarily because these machines are extremely reliable in operation. The main thing when assembling a homemade product is to focus on the width of the wheelbase, since if you plan to plow hard soil, you will need wheels with a larger diameter than for normal work. As in the case of a completely homemade design, assembly should begin with a frame for which a steel pipe is used. The steering column comes from the machine on which you are making your tractor. The rear axle and engine can also be taken from LuAZ.
Performance characteristics of the outboard motor Neptune-25 E
What has changed in the new modification of the Neptune-25 E outboard motor ? Firstly, the working volume has increased to 408 cubic meters. cm due to the use of new pistons with a diameter of 67 mm. Pistons are supplied by the Kovrov plant named after. V.A. Degtyareva. This enterprise has modern equipment that allows it to produce large quantities of highly reliable pistons that are almost identical in size and weight. According to the results of bench tests, the power of the Neptune - 25E LM ranges from 24.5 to 25.5 hp. and more. The increase in displacement led to a noticeable increase in torque, which had a positive effect on acceleration dynamics. The carburetor is supplied by St. Petersburg Carburetor and is marked “K65A” (for “Neptune - 23” and “Neptune - 23E” - “K65 L”). Today, however, work is underway to improve this carburetor, and, probably, in the near future another model or modification will be installed on the engines. The engines are equipped with an electronic ignition system “MB-23”, which is unified in fasteners with the conventional contact ignition “MB-1”. This allows, if necessary, to replace one ignition system with another without any modifications. The ignition systems with which the plant equips engines have proven themselves to be reliable and unpretentious. Motors with an additional propeller shaft hub bearing should appear on sale in the near future. The new version involves installing an additional bearing of a larger diameter, which should increase the contact area with the shaft. They decided to make “Neptune - 25E” completely black. Perhaps the “car” gloss will be replaced with matte paint. But the use of expensive paints and varnishes can increase the cost of the engine, since the painting technology as a whole will have to be changed. Also, work is currently underway to improve the cap (hood), including the selection of new material for its manufacture. So, the new Neptune 25E turned out to be successful. Thanks to modernization, it can easily compete with imported outboard motors. The relatively low cost of the engine, low fuel consumption, as well as the ability to operate on low-octane gasoline and undemanding quality of oils give it serious advantages. As the race for the Kiya prize, in which the Corsair inflatable boat with the new Neptune - 25E took part, showed, it is not inferior in speed and power to imported ones. The new "Neptune", of course, not without the participation of pilot Yuri Zhukovsky, won 2nd place in the 15-minute race, and in the sprint easily beat a plastic boat with a 25-horsepower Yamaha.
Project work
Most craftsmen start making self-propelled vehicles with only a general idea in their heads and a bunch of iron in the garage. To some extent, we can agree with this, but, in my opinion, the work goes faster and much less nerves are wasted if, before starting work, you have pre-prepared drawings or, in extreme cases, detailed sketches.
This has long been tested in our own experience and in other people’s examples. So, having the main components of the future tractor, we draw up a layout diagram (required), on which we link the relative positions of all the units and the driver, and working drawings of the parts that you will need to make yourself, or order from a familiar turner if you don’t have your own machines at hand. By the way, an outside turner will be more willing to take on the job if he sees normal drawings instead of a piece of paper with a drawing and explanations for it “on the fingers”.