A tracked or wheeled all-terrain vehicle from Oka has small dimensions and light weight, which increases maneuverability in forests and wetlands. The production of equipment does not require the use of expensive equipment; parts from production cars are used in the design. It is possible to build a swamp vehicle according to the “karakat” design, which ensures high maneuverability.
Oka engine tuning
The process of improving engine performance can be divided into 2 directions:
- A radical change in characteristics - a complete replacement of the motor
- Improving the standard power unit
In the first case, the ideal option would be a 1.3-liter injection engine from Rover Mini. The advantage of this type of tuning is a significant increase in technical indicators; the disadvantages are the high cost of implementation and the need to rework most of the car’s systems for a new engine. It's expensive and time consuming.
The second option - upgrading the standard power unit - is cheaper and simpler, but will not allow you to obtain such an increase in power as in the first case.
Do-it-yourself Oka engine tuning must begin with the carburetor. The first step is to increase the throttle body diameter to 52–54 mm. This will allow the engine to receive more air, which will make its operation easier, improve performance and increase engine life. You can immediately install a tuning modification of the carburetor.
Installing a new camshaft allows you to increase the speed to 7000 units. In this case, it is necessary to increase the engine power, which is done using the following operations:
- Replacing standard valves with lightweight ones
- Valve seat upgrades
- Modification of inlet and outlet valve channels
- Sealing valves
- Installation of bronze guides
- Changing the shape of combustion chambers
Additionally, it is necessary to replace the intake and exhaust manifolds with sports modifications, as well as the air filter with a K&N model with zero resistance. This set of measures will significantly improve the technical characteristics of the engine and optimize its operation, that is, the loss of power will be minimal.
The muffler attachment can be used to give the engine a sporty growl. Illuminated models will create the effect of a flame escaping from a jet nozzle.
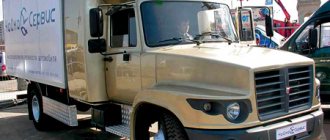
Lada Oka All-wheel drive Syncro › Logbook › all-wheel drive gearbox is ready
Let me remind you: the most important task was to make the same shank for transmitting torque to the bevel gear, this operation is not simple, and most importantly there were very serious concerns that this unit would not fall apart on the first exit, in the end the decision was made to implant gearbox VAZ differential housing from the Passat. they look almost alike
It would probably have been easier to just attach the entire VW box at once, but it is very heavy, and most importantly, I need a lowering pair because the car is built for driving on dirt roads, light off-road and for household needs (pulling a trailer) in fact, here is the “tuning main pair” with a ratio of 5.3 instead of the standard 4.1
The differential housing was modified many times on a lathe in order to fit into the gearbox housing. It was necessary to modify both the housing itself and the bearing mounting locations
The bearings themselves from the VW differential are installed through adapter rings
As I already said, the differential housing was machined several times in order to go as deep as possible to the bottom without touching the crankcase walls. The final operation was to measure the gap between the crankcases and groove the bearing so that no distance shims were required
I also had to modify the planetary gear because it should be attached to the VW differential housing on one side and on the VAZ on the other
I also had to prepare a diff housing for mounting on the other side for the planetary gear
According to the law of meanness, the holes for attaching the gear to the body were a multiple of the number of bolts but with different diameters. Having drilled the necessary holes, the problem arose that the edges of the bolt heads rested against the body, I spent a long time looking for bolts! I found only one version of bolts with an internal hexagon with a hardening number of 12, but a package of 100 pieces for 50 rubles each... in the end I had to be content with bolts from the ball basins of the new model, which everyone criticizes so much for the fact that they are for Torex. By the way, I also had to look for bolts because They don’t come with a ball joint and aren’t available in stores. They have a hardening level of 10, but I hope that they’re enough for a stock motor. Anyway, I had to slightly mill the body for the bolt heads.
on the reverse side the bolts had to be trimmed with a grinder
of course I changed the bearings and seals in the box and put everything back together
Assembly steps
How to make tracks for all-terrain vehicles with your own hands: drawing, design and components
Making an all-terrain vehicle with your own hands begins with finding a suitable base. A common solution is to use motorcycle frames. The specific brand does not play a special role. It is much more important to take into account the financial side of the matter and the passability of the finished structure. If you need to conquer the most severe off-road conditions, the base frame is taken from Izh motorcycles, and the engine and control system are mostly left from the car.
At the next stage, you need to make a connection between the suspension and the rear axle. Most often it is formed from a strut that tightens the spar parts. By adding a strut and handlebar bushing, an independent type rear suspension will be formed.
Most often, all-terrain vehicles based on the Oka are equipped not with wheels in the full sense of the word, but with cameras from trucks. Hubs are used to secure the suspension. The stability of the structure is guaranteed by special tapes wound on the outside. Practice shows that such projects are quite reliable and successfully overcome various obstacles. The next step is fixing the engine and installing mechanisms that transmit torque.
We will also have to install brakes, a clutch and an exhaust system. When all the main work is completed, the all-terrain vehicle must be tested. Experts emphasize that errors in its manufacture often make the device dangerous for the riders themselves and other people. It is worth understanding that even the “simplest” transport cannot be done properly if the drawings are not prepared. The scheme of operation differs slightly depending on the execution of a particular sample.
Thus, making a vehicle on tracks with an Oka engine is possible only with careful consideration of the dimensions of all components. There are much fewer “degrees of freedom” here than when working with wheeled vehicles. The engine is removed along with the gearbox, because using dissimilar units is too problematic.
Recommendation: for models designed for off-road use, the “native” power plant is not powerful enough. We'll have to take more serious models from cars with more power. The caterpillar rollers and “stars” are installed independently. Sometimes only the body of the Oka is left. It and all the main components are installed on a self-made frame.
It is also useful to consider how a 4x4 with an Oka engine is made. The wipers, pedal assembly, brakes, calipers, exhaust pipes are also removed from it. The entire frame is made from scratch using a suitable tubular profile. The next step is the installation of bridges and main components. First of all, you need to place the steering column among them; after that, the “kung” is made and assembled, and the car is sheathed.
If the Lenekhod model is taken as a basis, then the transfer case needs to be fixed to the mounts from the Moskvich bridge, which usually hold the springs. These fasteners are measured and welded. On weak all-terrain vehicles you can make spring suspensions. However, springs are much more reliable and eliminate the need to modify the frame or add silent blocks.
All-terrain vehicle assembly instructions
To make a wheeled all-terrain vehicle based on the Oka car, you need:
- calculate the chassis structure and prepare detailed drawings;
- assemble a welded frame from a steel profile on a slipway;
- mount suspension elements and rear axle;
- install the steering mechanism on the chassis;
- calculate and install a rocker that allows you to change gears;
- install the power unit;
- carry out final assembly and test the functionality of the structure;
- eliminate detected faults and modify the all-terrain vehicle.
Blueprints
The drawings contain frame dimensions indicating the distances between the installation points of transmission and suspension parts and allow you to calculate the distance between the body and the chassis. The diagrams provide calculation of the amount of steel profile, the strength of the structure is calculated separately. During further test runs, parts may be destroyed, which will have to be reinforced with additional gussets. The reinforcements are made from sheet steel or profiles and then welded to the frame of the all-terrain vehicle.
Frame
The steel frame for remaking the Oka is assembled from side elements that are connected to each other by cross members. For construction, it is recommended to use a closed square section profile measuring 50x50 mm with a wall thickness of 2.5-3.0 mm. Welded seams are descaled and ground, the surface of the frame is cleaned of rust and covered with a layer of acid primer. Holes are provided for mounting transmission units, power plant, leaf springs and shock absorbers. On average, up to 20 m of pipe is required, the weight of the structure is 50 kg.
Rear axle and suspension
When constructing the suspension, the design of the axles and the weight of the all-terrain vehicle are taken into account. The base of a wheeled off-road vehicle remains unchanged or increases, since the tires do not fit into the standard body arches. It is recommended to use leaf springs from Volga passenger cars or GAZelle light trucks. The frame is provided with support brackets into which the ends of the sheets are inserted. The number of elastic elements is selected experimentally.
Telescopic shock absorbers removed from the Niva are introduced into the chassis. They smooth out vibrations when driving on uneven roads. The posts are attached to the bridge beam and to bolts on the frame cross members. The bridges are installed on springs using homemade clamps, which prevent lateral displacement of the structure when driving off-road.
Steering
To change the direction of movement, steered front wheels are used, which are installed on standard steering knuckles from Niva or UAZ cars. The steering gearbox from Volga is mounted on the frame.
Using a device with a hydraulic booster is difficult, since you will need to install a pump on the engine and mount the supply and discharge lines of the working fluid.
The gearbox is connected to the steering knuckles by levers and rods equipped with articulated joints.
To install tires, modified rims are used that allow the installation of wide tires (for example, from ZIL or Ural military trucks). The outer part of the tire is processed with an abrasive tool, which forms the tread pattern. To reduce weight, a metal cord is cut from the sidewalls of the tire. Due to the increased offset of the wheel rims, the load on the wheel bearings and joints increases; it is recommended to carry a set of spare drives with you.
How to make a curtain
The link is made on the basis of drawings, taking into account the design features of the Oka-based all-terrain vehicle. The shift lever is installed in the cabin, then a rod with a cardan joint is mounted, which is protected by a metal screen from overheating. When manufacturing elements, it is necessary to provide length adjusters that allow you to adjust the rocker taking into account the position of the engine. The power unit and gearbox are installed longitudinally (on the Oka, the motor and gearbox are mounted transversely).
A metal angle attached to the engine is used to install guide bushings in which the shift rod runs. From the rod comes a lever system that is attached to a bushing on the speed selection rod. The vertical rod is also installed in the guide cylinders, providing increased switching accuracy. The softness of changing gear ratios is inferior to the factory mechanism; during operation, damage to the gears and synchronizer rings in the gearbox is possible.
Engine installation
The power unit is installed on the frame cross members using standard rubber pads. Before starting operation, the engine is serviced and fresh engine oil is added.
The radiator is connected by hoses to the cooling jacket and the heat exchanger of the stove, which heats the air in the cabin of the all-terrain vehicle. Torque from the power unit is transmitted through the gearbox to the transfer gearbox, which distributes the power flow between the drive wheels of a homemade all-terrain vehicle.
Wheels or tracks
Do-it-yourself Karakat with a VAZ engine
Before developing drawings, you should decide on the concept of the chassis of the future homemade product:
- The low-pressure tire design is based on axles mounted on leaf springs and additional hydraulic shock absorbers. The closed body is placed on brackets that allow the use of large diameter tires. The equipment is lightweight and can move through deep snow and marshy areas. To reduce weight, it is possible to build an all-terrain vehicle on stripped tires - tires from agricultural machinery with a partially removed tread and cut out steel cord.
- A do-it-yourself tracked all-terrain vehicle from Oka is built on the basis of a chassis with rubber bands and road wheels made of wheels with rubber tires. The equipment can move on loose soil and ford water obstacles. The vehicle weighs more than the basic Oka passenger car; due to the use of a tracked propulsion system, it requires the installation of control levers connected to the on-board brakes to turn the all-terrain vehicle.
Required spare parts
To make a wheeled or tracked all-terrain vehicle based on the Oka, you need to prepare:
- car body with engine and gearbox;
- steel profile for building the frame;
- drive axles from VAZ or UAZ vehicles;
- shock absorbers and leaf springs;
- cardan shafts and transfer gearbox;
- caterpillar belt and road wheels.
The list of additional parts depends on the design of the future all-terrain vehicle. These can be drive wheels and brake mechanisms for a tracked chassis.
Tuning headlights for Oka
DIY mini tractor with Oka engine
Tuning Oka optics is one of the important elements affecting the appearance of the car. An effective method of transforming headlights is to install overlays. You can buy them or make them yourself. Before that, you need to install LED lamps and polish the headlights. It is possible to completely replace optical devices. To install an advanced model, modifications to the body will be required.
What other techniques can be used to change the appearance of headlights:
- Changing the design of the headlight rim - applying a shiny coating, stylized as chrome
- Refinement of the headlight substrate
- Decoration with LED strips, most often they resemble eyelashes, but you can place them at the bottom and give the car an aggressive look
Tuning Oka taillights is carried out mainly by installing overlays. It is worth remembering that they should not harm safety - the lights in any case remain clearly visible.
The compact dimensions and primitive design of the VAZ-1111 became the subject of much ridicule, but the model anticipated the era of small-capacity and economical cars. At the same time, Oka has not received proper development in terms of restyling and new generations, which allows car owners to tune the car with their own hands.
Tuning VAZ 1111
The VAZ 1111, better known as Oka, became the subject of ridicule due to its compact size and simple design. Meanwhile, this car anticipated the era of economical, small cars. Today, almost every global automotive brand is developing its own “baby car”, so serious competition has unfolded in the class of compact cars. The domestic auto industry, along with the Italian one, can be considered a pioneer in the development of the production of compact cars. Another question is that the VAZ 1111 has not received sufficient development in the form of the development of restylings and new generations. But Oka provides fans with car tuning with their own hands and ample opportunities for modernization.
There are many options for transformation and restyling of the VAZ 1111:
- SUV
- rally car
- Retro car - design concepts of the late 60s and early 70s of the XX century are determined by the angularity of body shapes and the use of bright colors in design
- Cabriolet
- Roadster
The simplest and most accessible is tuning the Oka for off-road use, since the car’s appearance is similar to this class of car. To enhance this effect, it is enough to lift the suspension, install larger diameter wheels and tires with a powerful tread. But tuning the Oka for a jeep is not limited to the above changes; they can be considered only the first stage in creating an exclusive little all-terrain vehicle.
External tuning of the Oka can be styled after the popular Grand Cherokee SUV model. This is facilitated by the similarity of the headlights and radiator grille. In both cars they are oblong, rectangular in shape. It is enough to install a body kit, wheels with a large diameter and tractor tire tread, as well as give the hood the appropriate configuration and the nondescript OKA will turn into a miniature clone of an SUV popular in the 90s.
Tuning Oka cars with your own hands is quite easy. This is due to the simplicity of the technical structure of the car and its unpretentious appearance, which, on the one hand, makes modernization simple and cheap, and on the other, allows you to carry out all kinds of experiments on the car. From all of the above, we can conclude that tuning a VAZ 1111 is the best school for a beginner and a kind of creative studio for an experienced master.
In conclusion
It is difficult to imagine that Oka can act as an all-terrain vehicle. Nevertheless, ingenuity and resourcefulness make it possible to create a real off-road conqueror out of this “baby”. Full-fledged Russian-made SUVs, not to mention foreign-made grandees, are very expensive. Converting a “compact car” into an all-terrain vehicle also requires considerable expenses. However, many consumers are confident that “the game is worth the candle.” First, the transformation can be carried out in stages. Secondly, you can easily find spare parts, as well as use improvised means and parts from non-working cars.
Among the most popular homemade versions of the all-terrain Oka, Fr. They are based on low-pressure pneumatic wheels. The originality of the tracked models is that they are perfect for snowy and sandy areas.
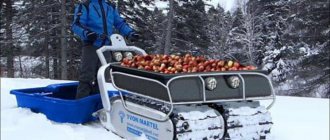
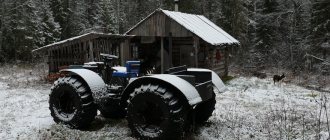
A fairly simple and cheap to assemble all-terrain vehicle based on the Oka was made by Leonid from the city of Nyagan. The all-terrain vehicle is capable of reaching a speed of about 50 kilometers per hour, and can also overcome water obstacles by swimming. the car was made mainly for forays into remote areas of the forest for gathering.
To assemble such an all-terrain vehicle, the following parts and materials were required:
1) Body from an Oka car 2) profile pipe for frame assembly 3) VAZ 1111 internal combustion engine 4) most of the chassis from Niva 2121 5) SHAIN tires 6) Steering gear from VAZ 2109
Let's take a closer look at the work done on the all-terrain vehicle.
To begin with, the author decided to make the frame of the future all-terrain vehicle. the frame was made independently from a profile pipe available from the author.
The frame manufacturing diagram is shown below:
This is what the front axle of the assembled all-terrain vehicle looks like:
The fastenings from the Muscovite bridge were cut off to install springs. Springs from the Muscovite 412 with stepladders were installed; for this purpose they were pre-sized and overcooked. Initially, the author planned to make a spring suspension, as is customary to do on all-terrain vehicles with a small mass of the Oka type, but decided that springs were still more reliable, since for springs it was necessary to complicate the frame to accommodate the travel of the springs and install more salen blocks for fastening. That is, the main factor in favor of spring suspension was simplicity and reliability.
After the main assembly, the author began testing the car. As the tests progress, minor improvements are also being made, in particular, deficiencies are identified and eliminated, work continues on the appearance of the vehicle, and the suspension system is being improved.
The weight of the all-terrain vehicle was about 800 kilograms. The all-terrain vehicle has the following dimensions: base length 210 centimeters, width 208 centimeters, length of the entire all-terrain vehicle 360 centimeters, height is about two meters, ground clearance is 40 centimeters.
Painting work was carried out, and foam was installed under the bottom for greater buoyancy:
For the same purpose, a camera can be attached to two straps in the front of the all-terrain vehicle; with this approach, you don’t have to worry about the stability of the vehicle on the water.
4x4 all-terrain vehicle "Kamazik-oka"
A 4x4 all-terrain vehicle based on OKI has a fairly conventional layout and is interesting for its simplicity and unpretentiousness. the author made a number of upgrades before bringing the all-terrain vehicle to its finished form. While building the all-terrain vehicle, the author encountered some problems that are useful to know for any novice all-terrain vehicle builder. It is to them that special attention will be paid in this article.
Materials and mechanisms used to create the all-terrain vehicle:
1) Wheels measuring 1200 by 508 2) racks from a VAZ 2110 3) hood from a VAZ 2101 4) profile pipe 50 by 50 5) axles from the Volga 6) transfer case from a Niva 7) axles from a Niva transfer case from a GAZ-69 9) gearbox from OKI.
Let's take a closer look at the problems the author encountered when building this all-terrain vehicle.
To begin with, a frame was made by hand from a profile pipe measuring 50 by 50.
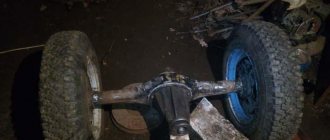
Initially, axles from Niva were installed on the frame, but unfortunately the wheels and loads turned out to be too strong and the bridges could not withstand, namely, the satellites were torn, so it was decided to replace Niva axles with Volga axles.
But thanks to such wheels, the all-terrain vehicle has excellent maneuverability. A transfer case from Niva was also installed, which is also planned to be replaced with a transfer case from GAZ-69.
The radiator is installed, switching from 06 is done in a similar way:
The transfer case was replaced with a GAZ-69, racks from a VAZ 2110 were installed since the standard disc did not fit, so the springs had to be removed. At the same time, the suspension travel remained the same as on the Niva.
Replacing the transfer case from the Niva is due to the fact that it is quite weak and tears the housing, and also when the lock is turned on, there is a strong load on the rear axle shaft, with GAZ-66 there are no such problems and the downshift does not crash.
In the gearbox from the Oka, a differential was welded and a drive was made from one CV joint to the transfer case. The Volga bridges also did not live up to expectations and in the future the author plans to replace them with standard UAZ bridges.
Below are photographs of a more detailed description of the connection between the GAZ-69 transfer case and the CV joint from the Niva:
The CV joint was drilled to 27 and the landing gear was machined from the axle shaft. Then it was put on hot and clamped into the machine, where it was centered and welded. The result was a high-quality and reliable connection.
Video of testing the finished all-terrain vehicle:
Author of the all-terrain vehicle: Alexander from the city of Zlatoust with the nickname “THAT”
Source
How to make an SUV on tracks from the Oka?
Creating such an all-terrain vehicle is quite difficult and expensive. Caterpillars from the Buran all-terrain vehicle are suitable as a running element. You can also make them yourself, but for this you need to have the appropriate skills, materials and time. The drive shafts are also taken from the specified model, since the variable gearbox will be optimally combined with the braking system of the future Oka SUV.
The car's own CV joints will be used. Connecting and connecting the brake discs is not difficult. Identical manipulations are performed on the front shafts. Experts recommend mounting the brake unit in the front of the car. After completing the specified work, the functionality of all main elements and their fastenings is checked. If the first tests do not raise any complaints, you can move on to field testing of the all-terrain vehicle. On some modifications, craftsmen put tracks on each wheel. Among the advantages of this design is the reduction in the total weight of the vehicle. In this case, grip on the road surface will deteriorate.
View gallery
Examples of Oka SUV
Page content
Often users turn on their imagination, which amazes the imagination of professional automobile designers. Basically, the alterations differ in design, chassis elements and wheel sizes. Often, low-pressure tires are installed on a car, which improve the vehicle’s off-road capability.
The base of such cars, as a rule, consists of the chassis of other vehicles. To install wheels with a large radius, the wings are cut off; some Oka SUVs undergo body modifications. All manipulations are aimed at giving the car an original and presentable exterior. In addition, craftsmen beautifully straighten and paint the joints.
As an option, you can install protection for the bottom of the all-terrain vehicle. The low-power engine of the original is replaced with more powerful analogues. This is one of the most complex and time-consuming processes when improving a small car. In general, there are modifications that are not embarrassing to present at international exhibitions.
Tracked all-terrain vehicle from Oka: design features
Making an all-terrain vehicle based on tracks is a complex and expensive process. Of course, you can build them yourself, but it’s best not to overthink anything and buy ready-made ones. An excellent option would be tracks from Buran. They are much cheaper and have sufficient mass.
Drive shafts also need to be purchased from this model. The Oka variable gearbox with brake mechanism will be ideally combined with such tracks. The splined part of the drive shafts must be removed and mounted with the Oka. This is where the car's own CV joints come in handy. Brake discs are also convenient to attach and connect to mechanisms. The same work must be done on the front shafts. After this procedure, it is necessary to install the brake mechanisms. It is best to install the brakes at the front.
Next, you need to check the operation of all mechanisms and their fastenings. If everything works flawlessly, then we can safely start using such an all-terrain vehicle. You can also find models in which tracks are installed on each wheel. The only advantage of such a vehicle is considered to be less weight. However, traction will be better with solid tracks.
Do-it-yourself tracked all-terrain vehicle with an Oka engine
- home
- Feedback
Popular
Homemade muesli with your own hands
Sandwiches with tomatoes: step-by-step recipe with photos Sandwiches with cheese baked with mayonnaise
Black beans: benefits, recipes, cooking secrets Black bean recipe
Flash point of vegetable oil
Letter for refund: sample
Sunflower oil (refined)
Lenten chocolate muffin with cranberries in a slow cooker
Do-it-yourself caterpillar all-terrain vehicle made of oka. How to make an all-terrain vehicle from the Oka with your own hands? Snowmobile with Oka engine drawings
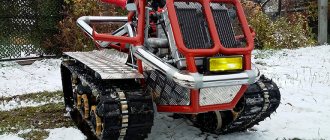
Homemade all-terrain vehicle on caterpillar tracks, made from Oka.
The Oka compact car is not the best option for the village; in off-road conditions, to travel on country roads, you need a good SUV.
One craftsman solved this problem in a rather original way; he made his Oka into a powerful homemade all-terrain vehicle on caterpillar tracks. We invite you to familiarize yourself with the process of building an all-terrain vehicle shown in the photo.
And here are the mounting points for the engine and suspension of the all-terrain vehicle.
I made an all-terrain vehicle frame from profile pipes.
I started making suspension on balance beams with torsion bars.
Rollers for tracks and drive stars were made from wheel rims.
Then, the Oka body was installed on a homemade frame.
I would like to clarify that the tracks are taken from a snowmobile.
And this is what the interior of the all-terrain vehicle looks like, instead of a steering wheel there are track control pedals, brakes are installed on the leading track stars, turning is carried out by braking one of the tracks.
This is how the all-terrain vehicle from Oka turned out, on caterpillar tracks. The homemade vehicle reaches a speed of 30 - 40 km/h and can easily move through snow and mud. You can additionally install a blade and clear snow in winter. The all-terrain vehicle can tow a light trailer or pull out a stuck car. In general, an excellent homemade product for a villager.
All-terrain vehicle from Oka, built with your own hands: drawings, photos and description.
This all-terrain vehicle is built on the basis of the Oka compact car. We invite you to take a look and get acquainted with the design of the homemade product.
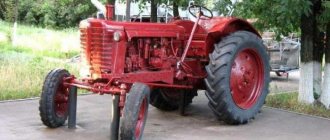
Let's start making a tractor
So, let's start by making the frame. To make a tractor with your own hands, you need two spars - left and right. You will also need two traverses (front and rear). For the manufacture of spars, you need to use channel No. 10. For traverses, channel No. 12, No. 16 is suitable. According to the diagram given in the article, you need to connect all the parts.
As for the engine, ideally, of course, choose a diesel one. Such engines have much higher torque than gasoline engines. If you plan to make a tractor with all-wheel drive, you will need to increase the gear ratio on the gearbox pairs. But if a diesel engine is not available, it is possible to install a unit from an Oka car.
The front axle from Oka is installed on the frame without changes and is secured to it at four points. In principle, you can install a driveshaft from any rear-wheel drive car, for example, a VAZ-2101.
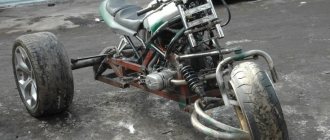
Self-made all-terrain vehicle fracture on the wheels
Dear visitors to the “Self-Made Friend” website, today we will look at the step-by-step process of assembling a fractured all-terrain vehicle on Alexander Murashov’s wheels. Video of testing and photo of assembly is attached. This all-terrain vehicle has two semi-frames connected to each other by a steering knuckle from the front axle from the UAZ, and is driven by the steering control of the VAZ.
And also interesting: Buy all-terrain vehicles, swamp vehicles Trom-8 from the manufacturer in Surgut - official website
The semi-frames are welded from square-section corrugated pipe, the rear part of the frame has a conical shape tapering to the junction with the steering knuckle - this is necessary to increase the steering angle. This frame layout is borrowed from the T-150 tractor, that is, the operating principle of the fracture.
The engine is installed from the Domestic car OKA 0.7 l 33 l/s VAZ gearbox and axles, rubber wheels, VAZ rims modified to the inner diameter of the wheel, additional protection for the camera nipple. The cardan shafts are shortened and adjusted.
Additionally, a lightweight cabin and kung were made from corrugated pipe, the kung was covered with a banner.
Materials
- ICE OKA 0.7 33 l/s
- Bridge VAZ 2 pcs
- professional pipe
- VAZ gearbox
- the wheels are strong
- steering knuckle UAZ
- finishing materials: aluminum sheet, polycarbonate, banner.
Tools
- welding inverter
- Angle grinder (grinder)
- drill
- set of wrenches
- measuring tool
- skillful hands)
Step-by-step photos of assembling an all-terrain vehicle with your own hands.
The frame is welded from professional pipe, in front of you is its front part, on which the engine will later be installed.
Rear part of the frame.
Place where the bridge is attached to the frame.
Trying on the bridge.
The wheel rims are mounted on the axle hubs.
checkpoint
Two half-frames are connected to each other by a steering knuckle from the front axle of the UAZ.
Brake system.
Shortening the driveshafts of an all-terrain vehicle.
Steering knuckle UAZ
Note. The lever has been converted to a straight position.
Connection of shortened cardan shafts to the axle. Note! That torque is transmitted directly through the steering knuckle.
An engine from an OKA 0.7 l 33 l/s car was installed
The angle of rotation of one part of the frame relative to another.
Manufacturing of all-terrain vehicle rims.
Rim.
Tire stripping.
Note! The camera's nipple is well protected!
Steering and instrument panel installed.
Manufacturing of the body and kung of an all-terrain vehicle.
The lightweight cabin is trimmed with polycarbonate.
Cladding with sheet aluminum.
Engine and wiring connections.
Video from all-terrain vehicle testing.
Source
Read news about the new Niva
- All-terrain vehicle fracture 4x4: photo of step-by-step assembly video of a trip on an all-terrain vehicle
- Homemade all-terrain vehicle on low-pressure tires (45 photos)
- Powerful homemade off-road all-terrain tricycle: photo and description of the design
- DIY ATV 4x4 with Oka Engine 11113
- Do-it-yourself low-pressure wheels for the Niva video
- All-terrain vehicle fracture Bobik, Toptyga and some others
- How much does it cost to prepare a Niva for off-road use?
- Automotive winch with reverse from starter
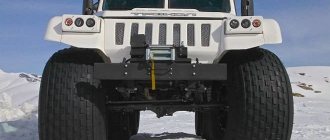
Oka base, transmission – Niva
In this “passenger tractor” it is quite difficult to recognize Oka, which the owner managed to install on truly gigantic low-pressure tires on homemade rims, assembled from tubes that had become completely unusable and protected from mechanical damage by a dense fabric layer from a fire hose.
Moreover, the master went even further, providing all-wheel drive in his super SUV, using the transmission from the old Niva for these purposes. It is noteworthy that the entire chassis was also borrowed from the Niva, which makes it possible to overcome almost any off-road terrain.
In addition, a winch was provided on board this hybrid in case of various force majeure. As for the shortcomings, the durability of such tires and chassis does not inspire much confidence, although it is quite possible that these fears are completely unfounded.
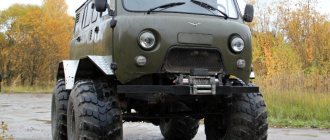
All-wheel drive Oka
To create this unique all-terrain vehicle, donors such as Oka, which habitually donated its body, UAZ, which donated strong axles to the SUV, and Niva with its durable transfer case, were used.
As for the features of the assembly, among them it is worth highlighting the wheels with tires from KrAZ, spaced from the body, mounted on discs with an offset, springs from the Volga cut into two leaves and its steering, which, although it did not give light turns, but cost zero, in contrast to the previously planned expensive hydraulic booster.
There were also weaknesses, which turned out to be CV joints that quickly fail, as a result of which the owner always has to carry a spare tire with him.
How to make an all-terrain vehicle from Oka with your own hands?
To make your own unique jeep you will need several basic elements:
- directly the Oka car under the SUV;
- profile pipe for making a frame;
- running gear from Niva;
- steering block, can be from VAZ-2109;
- special tires.
At the first stage, a frame is created from a profile pipe. To begin with, they develop a detailed diagram, after which they entrust the work to an experienced welder, who is guaranteed to ensure the quality of all connections. Next, the transfer case is mounted with its connection to the corresponding mechanisms of the machine.
It is recommended to use springs as a suspension. Springs are not excluded, but they will significantly complicate the frame structure. To mount larger wheels, the fenders are cut off, otherwise it will not be possible to install larger diameter tires. The Niva chassis will ensure ideal off-road performance of the vehicle. After the Oka SUV is ready, test and field tests are carried out in several stages, starting with light off-road and low speeds.
Small KAMAZ
Although the development of the small car was carried out in Serpukhov, it was supposed to be launched into mass production in Elabuga, and since the city is located on the Kama River, the model was given the name “Kama” VAZ 1111. But due to the unstable economy then in the Soviet Union, there were no plans not destined to come true - the production of the brand in the planned volume (900 thousand cars per year) did not work out, and the Elabuga plant was repurposed. VAZ-1111 began to be produced in smaller volumes, and at other enterprises:
- at the Volzhsky Automobile Plant in Tolyatti;
- in Serpukhov (SeAZ);
- in Naberezhnye Chelny (ZMA).
Preliminary design stage
The following parts are taken from the Oka car during construction:
- Motor;
- Transmission;
- Wheel axles;
- Steering.
If necessary, elements can be replaced with compatible ones and some connections can be modified.
A mini tractor from an Oka walk-behind tractor is constructed on the basis of a channel No. 6-8 or a corner 4x4 centimeters. The amount of necessary materials is determined according to prepared drawings with the exact dimensions of the elements.
You need to acquire the following tools and materials:
- Bulgarian;
- Welding machine;
- Screwdrivers and keys;
- Sheet metal;
- Tires and wheels with a diameter of 13-24 inches;
- Operator's seat. You can use not only a car seat, but an office chair. It is fixed to the frame of the unit.
What tools are needed?
To make a homemade all-terrain vehicle based on the Oka car, you will need:
- welding machine;
- equipment for cutting steel profiles;
- drill press or drill;
- set of wrenches;
- tool for cleaning welds;
- hammer;
- Screwdriver Set;
- metal ruler and awl for marking parts.
Stages of creation
To acquire the design of an SUV, you will need to carry out the following manipulations:
- Finding the basis for the vehicle. Using a motorcycle frame is quite suitable for this. The brand doesn’t matter, it all depends on the financial choice, as well as off-road preferences. This indicator is most developed in IZH motor vehicles.
- Creation of the rear axle and suspension. To do this, you need to use a strut that connects the side members. All this is complemented by a strut and steering bushing, which as a whole form an independent rear suspension. It is recommended to use just such a suspension, because it will provide the product with the necessary maneuverability in difficult places.
- Installation of wheels. In practice, such an all-terrain vehicle based on the Oka is equipped not with the wheels themselves, but with their cameras. They are taken from trucks and attached to the suspension using a hub. Stability is complemented by special tapes that wrap around the wheel. As a rule, cameras from KAMAZ, Ural and cargo trailers are used. This solution increases the reliability of the trip.
- Providing torque and mounting the engine. Such procedures begin to be done after installing the frame and suspension. In addition to the motor, you will also need to install a brake, clutch and exhaust system.
When the entire list of work has been completed, it is necessary to test the device for functionality. If errors are identified, they must be corrected. As practice shows, an illiterately made all-terrain vehicle or swamp vehicle from the Oka can create a danger to others.
Possible nuances
Despite its advantages, this technique has its drawbacks. Frequent troubles are caused by the fragility of low-pressure chambers. Of course, due to the absence of a differential, the vehicle does not require frequent maintenance, but the presence of high pressure in the overall wheels reduces their maneuverability. Also, due to the size of the wheel system, there is a problem with flying dirt, because it is quite difficult to cover them with wings.
Practice shows that pneumatics have poorer maneuverability than the Oka all-terrain vehicle on tracks. The choice of materials used for the design and type of future vehicle directly depends on the purpose of use. More and more people from suburban and rural areas prefer to create such structures, since converting the Oka into an all-terrain vehicle is, first of all, financially beneficial.
A homemade all-terrain vehicle from Oka is profitable and convenient, because the device can be repeatedly modernized and improved. In different weather seasons, its design and characteristics can be changed to adapt them to the weather conditions of the area.
Creating a homemade all-terrain vehicle is a common practice in suburban areas where it is not possible to purchase an expensive car
But it is important to take into account the design features and approach the creation of such a machine with all responsibility. Negligent performance of work can create a risk to the life of the driver and others
Source
Thoughtful solution
Since in rural areas you often have to navigate difficult terrain, many people want to buy an SUV. Alas, such cars are quite expensive, so you need to know how to make an all-terrain vehicle from the Oka. To create it, they use improvised means, which include spare parts from broken cars and motorcycles.
Among the most popular options for “folk” crafts are “station wagons” based on low-pressure pneumatics or air-cushioned ones. The use of crawler tracks is also common, but they are more suitable for snowy areas. Creating an SUV based on the Oka is a cost-effective solution, since it does not require the purchase of expensive components.
All-terrain vehicle on low-pressure tires
This design is based on an invention that uses a body that is located on a breakable frame. This solution significantly strengthens the design of the product. All wheels are installed with your own hands as drive wheels, so they can even overcome swampy terrain.
Based on Oka engines, the production of so-called karakat engines is also very popular. They stand out for their increased cross-country ability thanks to wide-format tires. This complements the advantages of pneumatics, because it does not destroy the grass cover.
Using Tracks
These “station wagon” options are most popular among fishermen and hunters. Homemade tracked all-terrain vehicles from Oka have increased maneuverability in water bodies and wooded areas. Their body is usually made of a box structure, which reaches a length of 3 meters. It is light in weight, so in places where deep traces of a person remain, vehicles penetrate into the quagmire only 10 cm.
Correct execution of such a device is possible only with reliable calculations. This is especially true for the chassis, which should be in contact with the ground by 1.4 square meters. m. The speed of the product is 45 km/h. You can also find hovercraft all-terrain vehicles. They have greater maneuverability than the Oka tracked all-terrain vehicle, and also do not require a chassis.
Examples of Oka SUV
Often users turn on their imagination, which amazes the imagination of professional automobile designers. Basically, the alterations differ in design, chassis elements and wheel sizes. Often, low-pressure tires are installed on a car, which improve the vehicle’s off-road capability.
The base of such cars, as a rule, consists of the chassis of other vehicles. To install wheels with a large radius, the wings are cut off; some Oka SUVs undergo body modifications. All manipulations are aimed at giving the car an original and presentable exterior. In addition, craftsmen beautifully straighten and paint the joints.
As an option, you can install protection for the bottom of the all-terrain vehicle. The low-power engine of the original is replaced with more powerful analogues. This is one of the most complex and time-consuming processes when improving a small car. In general, there are modifications that are not embarrassing to present at international exhibitions.
Conversion kit for Oka wheels from R12 to R13
The conversion kit for OKA wheels from R12 to R13 is your real chance to save on the purchase of scarce R12 tires.
In addition, wide and large wheels hold the steering wheel better on the road, are more resistant to potholes, and on a straight and smooth road they roll the car confidently and smoothly.
The range of 13-inch wheels is huge, which will allow you to choose wheels to suit your taste.
Contents of the kit for the transition of OKI to 13th discs:
- 2 brake drums with 4 studs;
- 2 front brake discs with 4 studs;
- 2 front wheel hubs with 4 studs;
- 2 front wheel hub bearings (as a repair kit);
- 2 rear wheel hub bearings with seals (as a repair kit);
- 16 wheel studs (bolts) with nuts.
The total weight of the set is 16 kg.
Converting the OKI to 13-wheel drives does not cause any difficulties, everything is clear and understandable: 13-inch wheels fit freely inside the front arches, and there are no problems when replacing the rear drums. The only negative is that the rear arches are small.
It is necessary to install spacers from the “classic” or from the “eight”. After the OKI switches to the 13th radius, it is imperative to adjust the angles of the front wheels.
It is recommended to install tires 155/65/R13 and wheel rims of size 5Jx13 4x98 with offset ET=30 and hub hole diameter DIA=58.5. A standard OKI wheel of size 4Bx12ET40 has an offset of 40 mm.
Reducing the reach extends the wheelbase of the vehicle, which increases the stability and controllability of the vehicle. However, the service life of the wheel bearing is reduced.
Installing tires of size 175/70/R13 with an offset of 35-40 mm will require significant work on the car body.
The next step in car modernization could be the installation of front ventilated brakes from the “ten” or rear disc brakes (VAZ 2108 wheel hubs) on your OCU (with R13 wheels and 4 bolts!)
Due to the significant weight of the transition kit (16 kg), delivery of goods to the buyer is carried out by transport companies.
If the Buyer intends to receive the specified set by post (heavy parcel), he makes a partial prepayment of the cost of the goods. The amount of the advance payment is 1.5 (one and a half) tariff of the Federal State Unitary Enterprise "Russian Post" for delivery of the kit to a populated area.
Rear spring spacer VAZ 2108 (1111), comp.
Back
DIY ATV frame drawings
The false tank has a complex shape. It was not possible to bend it out of hardboard. Therefore, having wrapped the engine with plastic film, I began to fill the space intended for it with layers of polyurethane foam. After each layer, drying is mandatory, otherwise the thick volume of foam may not dry out inside. Filled until the layers went beyond the contour. Finally, after the foam had completely dried, I began to draw out the desired shape with a knife. The edges were smoothed with coarse sandpaper.
Part of the Oka dashboard was used under the instrument panel. I secured it to the blank also using polyurethane foam. Since the foam is large-porous, the pores were filled with gypsum and then processed. When the shape of the blank began to correspond to the intended design and its surface became more or less smooth, I coated the blank with PF-115 paint. Since I was not going to make a matrix for gluing the body kit on the block, but immediately glued the body kit on it, followed by finishing the surface to an ideal state, putting plaster and painting the block could be neglected.
So, the blockhead is ready and to glue a high-quality product, it was required: 10 kg of epoxy resin, 1 kg of plasticizer for it and 1 kg of hardener, 15 linear meters of thin fiberglass fabric, 5 m of glass mat, brushes, gloves. It is highly advisable to wear breathing protection. And the more expensive they are, the more reliable they are. But, as you know, you can’t buy experience, so I gained it in the process of work.
I used transparent tape as a separating layer between the block and the product. The whole idiot covered it with stripes carefully, without any omissions. It only took 1.5 rolls of wide tape.
I diluted the resin in 200 - 300 grams with a hardener and plasticizer. I used measuring cups and syringes, which is not very convenient. Before this, I cut strips of fiberglass in such sizes that large canvases would lie on flat surfaces, and on uneven surfaces, pieces of fabric could repeat them without making folds. By the way, fiberglass stretches moderately along the diagonal of the weaves, “flowing around” the desired shape.
Read also: Is it worth buying a used VAZ 2114
First, I thickly coated one area of the blockhead with epoxy resin, placed fiberglass on it and impregnated the top with resin again. The adjacent piece of fabric was glued using the same technology with an overlap of 3 - 5 cm. We had to work quickly - the resin sets quite quickly, and the higher its temperature, the faster. Yes, I also heated the resin a little near a powerful lighting lamp for better fluidity.
After covering the blockhead with fiberglass in one layer, I began to cover it with glass mat. The fiberglass mat I got was quite thick, and it turned out to be good for gaining the thickness of the product. But it does not hug uneven surfaces, so I used it only on flat (or slightly sloping) surfaces and without overlap. Impregnation with resin was carried out in the same way as when working with fiberglass. Just keep in mind that it takes a lot of resin to impregnate glass mat, so you need to dilute it more. After gluing the glass mat, uneven surfaces were glued in several layers with cloth. Each subsequent layer was applied after the previous one had set a little, so that the resin would not leak. And since the process of gluing the body kit took more than one day, after a day of break it was necessary to “roughen” the surface with coarse sandpaper and degrease it - after all, the resin cures completely during this time. The final layers on top of the mat were again covered with fiberglass, and not even just one layer.
Since I needed the surface, as they say, the smoother the better, and I didn’t have enough experience, dips and holes still remained - I filled them with resin alone, and with pieces of fiberglass applied there. There wasn't enough resin. I already bought more at the hardware store, in boxes. I liked working with it more because it was already packaged, and all I had to do was mix the ingredients. And it dried faster than the one purchased from the company.
After the glued body kit had completely dried, I made cuts in it, dividing the product into three parts: rear fenders and rear, false tank with seat, front fenders and front end. Carefully, slightly prying and pulling with his hands while picking, he separated the product piece by piece without much effort from the blockhead.
Now, having removed the parts, I began to process them separately, bringing them to the desired result. In general, ordinary preparatory and painting work using “all” technology: first, rough grinding with the removal of large bulges of resin and fiberglass; then painstakingly filling the recesses with putty and fiberglass; then grinding the outer surface and priming with a plasticizer. Finally - metallic painting and varnish with a plasticizer.
The blockhead also carefully cut it off and put it in the far corner - just in case. The body kit was attached to specially made and welded “in place” mounts on the frame.
Finally, I welded front and rear luggage racks from thin-walled steel pipes with an outer diameter of 20 mm, and in addition to them, “kangaroo bars” that replaced the bumpers.
How to make an all-terrain vehicle from Oka with your own hands?
To make your own unique jeep you will need several basic elements:
- directly the Oka car under the SUV;
- profile pipe for making a frame;
- running gear from Niva;
- steering block, can be from VAZ-2109;
- special tires.
At the first stage, a frame is created from a profile pipe. To begin with, they develop a detailed diagram, after which they entrust the work to an experienced welder, who is guaranteed to ensure the quality of all connections. Next, the transfer case is mounted with its connection to the corresponding mechanisms of the machine.
It is recommended to use springs as a suspension. Springs are not excluded, but they will significantly complicate the frame structure. To mount larger wheels, the fenders are cut off, otherwise it will not be possible to install larger diameter tires. The Niva chassis will ensure ideal off-road performance of the vehicle. After the Oka SUV is ready, test and field tests are carried out in several stages, starting with light off-road and low speeds.
"Lenekhod"
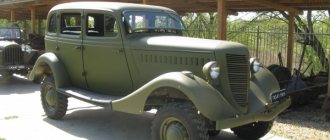
Just by the name of this transport, it becomes clear that its author and designer was a master named Leonid. Indeed, a resident of the city of Nyagan, who built such a miracle of technology, capable of accelerating up to 50 km/h and overcoming any water barriers, bears this very name.
If we talk about the technical characteristics of the snowmobile, then it was built on the body of the same Oka, placed on an all-welded profile frame, receiving a motor from a VAZ-1111 as a power plant.
The result is a real hodgepodge of meat, and even on studded SHAIN tires, but the car copes with its duties with a bang, helping the owner transport firewood and other cargo.
Dashboard tuning
Remaking the Oka dashboard is accompanied by difficulties associated with the compact dimensions of the car. Accordingly, it will not be possible to install a dashboard from other models, so all that remains is to remake the original panel.
Most often, car owners resort to covering the dashboard with film or leather. Using materials and tools, you can change the design of the panel and supplement it with connectors for special equipment.
Tuning the dashboard is done in two ways:
- Modernization of the standard panel.
- Replacing the dashboard with a new one.
The first option involves installing LED backlight lamps instead of conventional ones, a new substrate, or modifying the old one, which allows you to change the design of the panel. A complete replacement of the tidy will also require changes to the overall design.
When working on tuning the Oka dashboard, be sure to take into account high-quality sealing: parts should not creak while driving.
Tuning the Oka's interior
There are more than enough options for modernization:
- Complete replacement of interior trim. To do this, use your own materials or buy a special set. You can try the author’s method of reworking the interior, for example, modifying the standard trim
- Partial decoration - installation of shaped inserts and elements in the cladding
- Modification of standard seats - installation of comfortable headrests, purchase or production of stylish covers. In this case, the general design concept of interior redesign in terms of color selection should be taken into account
- Replacing standard seats with sports or executive seats
- Installing a new steering wheel
- Installing stylish pedal covers
- Installation of additional equipment: automatic windows and side mirrors
- The roof can be made panoramic or a hatch can be cut out
These are not all the options that can be implemented when tuning the Oka’s interior with your own hands. In fact, there are no dogmas or prohibitions here; everything depends on the imagination of the master. This is an excellent option for carrying out creative experiments and inventing original decorating techniques.
SUV from Oka: what to watch out for
As practice shows, the all-terrain vehicle also has weaknesses and vulnerabilities. Engine oil consumption increases, especially if you often overcome water obstacles. Some owners of such all-terrain vehicles note rapid wear of the rubber. There shouldn't be any problems with the frame, but it's best to play it safe and double-check the welds. It is best to cover all mechanisms and parts with protective material or paint to avoid corrosion. Due to sloppy connections, water can get inside the car, which will soon cause a problem.
It is necessary to additionally install special protection on the engine sump. Some car enthusiasts specifically attach foam to increase the buoyancy of the vehicle. If the designer decided to leave springs instead of springs, then there is a high risk of their rapid wear. It causes roughness and discomfort for passengers while driving off-road.
Tags: oka, jeep, SUV, dirt
Comments 43
what's wrong, it's just a normal road for my little girl)
Oka is not an SUV. Verified. We need to collect 4wd. I made it easier, bought Niva 3D
We are not looking for easy ways, and in fact it was interesting to try to assemble something with our own hands)
It’s fine, but put on other tires and it won’t go anywhere
It will go, the differential is welded)
The other one got dirty for the winter, I took off the Simex, put on the Goodrich and went for a ride, and I don’t take off the Simex anymore
It will go, the differential is welded)
Also brewed in front
How much do these tires cost?
I bought 2 sets of used tires, for 1000r and 3000r
On Avito I saw such kits selling for 35 k, I think.
Yes, but it was expensive for us, so we assembled everything on our own and spent 7k, including tires and body painting)
Well, it turned out okay) But it’s not official? )
No, front-wheel drive with welded differential)
Well done! Not everyone will decide to redo it. And it’s easy to scratch with your tongue!
I have an okushka) it will go through such mud and on ordinary wheels, suspension and tires)
the cheaper the car, the less a pity it is to kill it and the higher the cross-country ability)
Here at the opening of the hunt in the spring, Muscovites on Kruzak 200s and X6 boomers are bludgeoning through the swamps.
for them the price of those cars is like dust...that’s why they kill
Here at the opening of the hunt in the spring, Muscovites on Kruzak 200s and X6 boomers are bludgeoning through the swamps.
Well, not only you. We regularly drag such “hunters” out of shit. They are imported and they are expensive. They don't give a damn about knee-deep dirt, they talk through their lips. And when they come running “save, help!”, such people immediately become simple. I know a driver who spent 4 (four!) days in a salt marsh on Cayenne, and who the hell helped him. For during the day (at the opening of the hunt) this creature was rude to everyone he met, opened his hands a couple of times and was beaten. Listen to him - and his brother is a minister and he opens the door to the president with his feet and is the uncle of the general of all generals. And why is he hunting here, and the rest are rabble and go to hell! In my life I will never pull out these show-offs again. Normal men come up and ask in a humane way - I will always help you out. And these here will buy tough guys, but in the head it was like a cast bone, and remains so. They don’t ask, they just order, you fucking boyars! - “Whose UAZ, come on, pull me!” And fuck you with a thick layer and all over your makeup! Go ahead on foot behind the tractor!
Stages of creation
To acquire the design of an SUV, you will need to carry out the following manipulations:
- Finding the basis for the vehicle. Using a motorcycle frame is quite suitable for this. The brand doesn’t matter, it all depends on the financial choice, as well as off-road preferences. This indicator is most developed in IZH motor vehicles.
- Creation of the rear axle and suspension. To do this, you need to use a strut that connects the side members. All this is complemented by a strut and steering bushing, which as a whole form an independent rear suspension. It is recommended to use just such a suspension, because it will provide the product with the necessary maneuverability in difficult places.
- Installation of wheels. In practice, such an all-terrain vehicle based on the Oka is equipped not with the wheels themselves, but with their cameras. They are taken from trucks and attached to the suspension using a hub. Stability is complemented by special tapes that wrap around the wheel. As a rule, cameras from KAMAZ, Ural and cargo trailers are used. This solution increases the reliability of the trip.
- Providing torque and mounting the engine. Such procedures begin to be done after installing the frame and suspension. In addition to the motor, you will also need to install a brake, clutch and exhaust system.
When the entire list of work has been completed, it is necessary to test the device for functionality. If errors are identified, they must be corrected. As practice shows, an illiterately made all-terrain vehicle or swamp vehicle from the Oka can create a danger to others.
A snow and swamp-going vehicle that can even swim
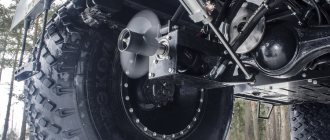
Even more solid results were achieved by a car mechanic from Rubtsovsk, who used not only the body, but also the Oka engine when creating his unique creation.
To ensure record cross-country ability, allowing the all-terrain vehicle to overcome any off-road conditions, snow drifts and rivers, the designer tried to make this model as light as possible, actually removing rear axles from its design.
In addition, the master made the wheels himself, using the tubes from an old trailer as a basis. In any case, the machine turned out to be quite solid in appearance, having served its owner faithfully for three years in a row.
Moreover, she has attracted the interest of other residents of the Far North, who call the talented master, offering to buy his masterpiece for a considerable sum.