A reversible plow is an attachment designed for efficient cultivation and plowing of land. It differs from the classic one in the absence of a camber groove and a stall ridge. It has two working parts that rotate relative to the frame using hydraulic mechanics. That is, the tractor uses one set of blades when moving along the first line, and a reverse one when entering the second line.
Let's consider why this type of equipment is used. A similar device is usually used when plowing virgin lands or dense soils, as well as slopes and hills, where not only loosening is required, but also rolling the earth in a certain direction. A reversible plow can significantly increase crop yields on the field, effectively combat established weeds and improve germination. The plowed surface does not have ridges or furrows, as is the case with a classic semi-mounted plowshare device, and is suitable for sowing any agricultural plants. The recommended operating speed of such a unit is no more than 10 km/h: if it is exceeded, the quality of plowing decreases and fuel consumption increases by 20–30%.
Reversible plow
The agricultural plow has been modified many times during its existence (which dates back thousands of years). Man sought to give this most important tool an ever more advanced appearance, to make it more effective, simpler and easier to use, and economical. Today, like thousands of years ago, a plow remains a plow, but more than one generation of engineers have worked on its properties.
One can, of course, consider attempts to “reinvent the wheel” ridiculous, but the plow, a design that, at first glance, is even less complex, has been invented again and again hundreds of times. And as a result, we have received design options for plows that are ideal for a wide variety of soil types, applicable for cultivating various crops, universal and specific. One of the types of plows that are popular among farmers today is the reversible plow. In this article we will take a closer look at its features and scope of application.
Reversible plow device
The main advantage of this type of plow is that it can significantly reduce the costs associated with operating equipment, as well as increase field productivity. The design features of the reversible plow eliminate any unnecessary operations with the soil layer. Each subsequent pass of the plow across the field is carried out close to the previous one.
This effect is achieved due to the presence of two sets of plowshares, a mirror design, which are fixed to a fixed frame. During one pass of the plow across the field, only one set of plowshares is used to cultivate the land.
When the strip is passed, the unit turns around, and the set of shares that was previously “resting” becomes active. It turns out that the reversible plow plows strip by strip, swapping sets of plowshares alternately with each turn. This method of soil cultivation makes it possible to obtain particularly smooth plowing, devoid of furrows and ridges.
Operating a reversible plow
It is no secret that the future harvest directly depends on the quality of plowing the field. The popularity of the reversible plow is largely explained by the high quality of plowing provided by this unit. The reversible plow is intended for basic soil cultivation and is used for this purpose in agriculture. Plowing the soil with this plow can be done for the purpose of subsequent sowing or to improve the quality of the soil by adding fertilizers to the soil.
A plow of this type demonstrates excellent performance in both cases, thanks to the deep and high-quality cultivation of the land obtained with its help. If it is necessary to plow using the shuttle method, it is the reversible plow that will be most appropriate for use. If, when plowing with a conventional plow, the ridges of half the paddock will be on the right, and the other half will be on the left, then a reversible plow will help to avoid this drawback - after it all the ridges will be in one direction.
Tools for smooth plowing: mounted and semi-mounted reversible plows
There are models of plows that work with both full-size tractors and mini tractors or walk-behind tractors. Most often, the reversible plow is attached to the tractor using a special three-point hitch. However, it is worth noting that there are mounted and semi-mounted reversible tillage units.
Basically, there are plows with 2-5 moldboards. However, semi-mounted models sometimes have up to 18 blades. A reversible plow is not only efficient, but also quite economical, as it eliminates the need to waste energy on turning around at the end of each pass.
Choosing equipment for your farm
When choosing equipment for your equipment, we recommend paying attention to the main characteristics:
- The power of the equipment with which the attachments will be aggregated. The more powerful the tractor, the more bodies the plow can have.
- Safety device. There are models with spring and bolt protection, less often with a cut nut. The last protection is the worst to use.
- Frame thickness, standard dimensions for tractors are 140 and 180 mm.
- Plowing depth to which the equipment is adjusted.
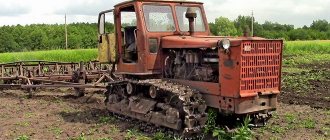
8, 5 and 3 case devices are especially popular. 3- and 5-furrow plows are capable of cultivating the soil to a depth of 20 to 27 cm. Since the model is lightweight, it is possible to work with a canopy only in fields not littered with stones. Suitable for mounting with tractors: MTZ-100/102, 80/82, YuMZ-82, T-150. The traction resistance of the models is no more than 12 kN. During operation, the tractor speed can be up to 9 km/h.
The 8-furrow reversible plow has a semi-mounted connection to the tractor. The maximum tillage depth is from 20 to 30 cm. Suitable for tractors with a power of 280 hp. With. The frame has wheels that simplify transportation. A tractor with an 8-furrow plow can move across the field at a speed of up to 9 km/h.
Design and operation of the plow, adjustment, diagram, working parts
The main working parts of the plow are the knife, skimmer and body. If we look at the structure and operation of the plow in more detail, we can add that sometimes an angle bar and a subsoiler are installed on the plow. The auxiliary parts of the plow are a frame with a mounted or trailed device, deepening and deepening mechanisms, support wheels.
The quality of plow work depends on the shape of the body (working surface) formed by the moldboard and ploughshare.
Housing structure:
- field board
- sidewalls with heel
- dump
- rack
- ploughshare
The work process consists of cutting off part of the soil from below, lifting it and sending it to the dump. The blade, shifting the layer to the side, partially crumbles it and turns it over, throwing it into the furrow. The layer moves due to the shape of the plowshare-moldboard surface, with the plowshare and mouldboard installed at an angle to the furrow wall and bottom.
Plow bodies differ in the shape of the working surface on
- cultural
- cylindrical rukhadlovye
- screw
- semi screw
- universal
The most common are semi-screw and cultural cases. Good crumbling and wrapping of the formation is ensured by bodies with a cultural surface. Such buildings are used for plowing fallow and virgin lands and old arable soils.
However, in the case of fallow and virgin lands, half-screw bodies are more effective; they wrap the sod layer better, since this type of blade has a wing more bent towards the layer that is being wrapped. When the plow moves, with soil pressure on the body, due to its lateral pressure, the plow tends to move towards the plowed part of the field.
Against this, a field board is attached to each body, to the bottom of the stand, increasing the supporting surface of the plow, which in turn prevents the plow from moving. A plow for non-mouldboard plowing lifts the layer cut by the ploughshare and then it goes to the expander. In this case, the formation crumbles and the soil loosens.
Plow diagram
The plow is divided into main parts (plow diagram):
- skimmer 1
- Pavilion 2
- knife 4
- frame 3
- support wheel adjustment screw 6
- support wheel 5
- tow hitch 7
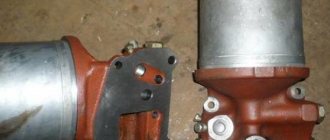
Sometimes a hydropneumatic fuse is installed on plows; this is done for processing old arable soils that are clogged with stones of various shapes and sizes, partially protruding to the surface or hidden in the thickness of the layer. Its main components are: a hydraulic cylinder, a pneumatic hydraulic accumulator (PHA) with a piston and fitting, a valve, a pressure gauge, and oil lines.
Each plow body is controlled by articulated supports and a beam. For better wrapping and crushing of the formation, a chisel, a feather and an angle are installed on the body.
How to adjust a plow for plowing
1. Adjustment of the plow for plowing should begin with its working parts. The main working element of the plow is the ploughshare; when plowing, more than half of the load falls on it. The plowshare must be sharpened accordingly. Otherwise, fuel consumption will increase by 20%, productivity will decrease by almost 20%, and the processing depth may decrease by more than a third.
How to properly adjust the plow on MTZ and T 40?
Initial settings of plows for walk-behind tractors and mini tractors are carried out at the service center. If it is far away, you should start by inspecting the product:
- Checking the complete set according to the technical passport.
- Lubrication of parts.
- Tightening nuts and fasteners.
First, the required plowing depth is adjusted. For this purpose, the plow has an adjusting bolt, calibrated taking into account the minimum and maximum permissible depth. The bolt is located on the top of the frame, increasing the depth by turning the bolt clockwise.
Plow on tractor T 40
Tension rods help adjust the plow's width. The right and left working parts should be at equal distances from the ground, and the front and rear relative to the frame. The extension of the cross shaft changes the width of the plowed land. The tractor wheel should be on the track, the working part should be in the center of the ridge, and the right tiller should be strictly perpendicular to the frame.
For the T 40 tractor, the plow adjustment is similar to the others, with the exception of the location of the plowshares. When installing PON-2-30 designed for this type of tractor, the field edge of the blade cannot protrude beyond the surface of the field stand by more than 8 mm. The adjusted and tuned plow is connected to the T 40 exclusively through the holes of the longitudinal rods, since the connection through the groove makes the work ineffective.
The test is carried out on a straight surface - it is important that all elements are in the same vertical plane.
Rules when working on tractors with an attached plow:
- equipment is stored in a dry and ventilated area in winter and lubricated once a month;
- Once a week the shares must be sharpened;
- after each day of work, clean and lubricate;
- rises when turning to avoid damage;
- adhering dirt, stones, grass, roots and other debris are periodically cleaned off so that resistance does not increase;
- There is no point in tightening the chains and moving parts to the limit; slight vibrations increase the effect of plowing.
There is also one important safety rule - you should never stand astride a plow. If the ground is too hard and the blades do not go to a sufficient depth, wheels, iron beams, concrete slabs, blocks, and building materials will help weigh down the equipment. The weights are carefully attached to the top of the frame and the weight is distributed evenly across the width of the plow.
Which plow is better for a walk-behind tractor?
To increase the productivity of the work performed, it is very important to responsibly approach the question: which plow is better to choose for a walk-behind tractor?
reversible plow
For example, a reversible plow can be made independently from high-strength steel. Consequently, it costs him nothing to withstand the necessary pressure while working on a plot of land.
It is also necessary to take into account the density of the treated soil. This especially needs to be taken into account for a rotary plow - the engine of the walk-behind tractor should not overheat, which will allow the unit to be used longer.
Rotary plow
A rotary plow for a walk-behind tractor is compared to a metal ridge, which makes it possible to plow the soil. These types of plows of different models may have different shapes. However, these models are united by the fact that their shape expands towards the top, which allows these units to pour earth away from the trench.
When choosing a plow, it is necessary to take into account the presence of a walk-behind tractor plow setting. It is necessary to be able to adjust the cutting depth and tilt angle for greater efficiency in working with the plow.
Reversible plow
A reversible plow that can be disassembled is perhaps the most ideal option because the blade can be replaced or sharpened. You also need to decide what size your plow will be, which will directly depend on what model of walk-behind tractor you are using.
To use the plow more efficiently, it is necessary to adjust the device, for which it is better to use a hitch (although not necessary). For more precise adjustment, it is necessary to take into account several principles: first, it is necessary that the longitudinal axis of the regulator and the walk-behind tractor coincide, and second, the vertical position of the beam.
This setup will allow you to perform agricultural work more efficiently. It is also necessary to use axle extensions and metal wheels with weights for various tasks.
When purchasing a plow for a walk-behind tractor, you must follow several rules: the plow should not have a thin stand, a shortened blade, a thin body sheet, or low-quality steel. There must be an instruction manual. Compliance with all of the above will reduce your costs by preventing breakdowns, and also perform quality work.
Instructions: Adjusting the plow PLN 3-35
The PLN 3-35 plow is adjusted on the adjustment platform before use when plowing the field. First you need to install spacers for the support wheel of the plow under the left wheels of the tractor on which we attach the plow. The spacers are installed 20-50 mm less than the depth that we are going to plow.
After this, we lower the plow so that all the shares touch the surface. Then use the plow wheel screw mechanism to place the support wheel on the spacer. Now you need to adjust the plow in the longitudinal and transverse planes.
To do this, level it in the longitudinal plane using the tractor hitch, and in the transverse plane using the central link. The main thing is that the plow is parallel to the surface in both planes. We need to install the braces of the tractor hitch on the front holes of the plow's upper link.
We connect the frame and the upper link using the SA-1 automatic coupler through the openings and nothing else.
Under no circumstances use grooves to fasten them, otherwise the plow will then shake when working.
Depending on how deep you want to plow the soil, adjust the skimmers on the plow. Place the toes of the skimmer shares at a distance of 25 centimeters from the body. There is a cylindrical protrusion on the holder. Insert this tab into one of the blind holes in the skimmer post.
Attachment chains. tractors serve as limiters for the plow. They are secured with screws. In this case, the chains should hang a little. All this is required so that when transporting to the ground the plow does not wobble more than 2 cm. Now close the edge of the skimmer so that its edge of the body is covered by the edge of the skimmer.
Now we need to install the left brace of the tractor canopy between the hinge axles. The distance between them should be 51.5 cm.
Before working on the ground, do not under any circumstances change the length of the brace that we have already adjusted.
Before starting work, we need to set the plowing depth in front to 2/3 of that previously set on the support wheel. Once we have completed the first furrow, we complete the setting of the PLN 3-35. Make sure the frame remains parallel to the surface. Make sure that all plow bodies plow the soil to the same depth.
Make sure that all plant residues are thoroughly ground. If the left side is lower than the right, reduce the attachment brace. If the left side is higher than the right, on the contrary, increase the canopy brace. If the rear plow body plows deeper or shallower than the front one, then the upper link needs to be lengthened or shortened. And lastly: if you plow the ground with a power regulator, you don’t have to use the support wheel, since the plowing depth control will be automatic during operation.
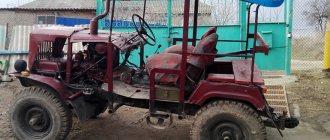
Do-it-yourself plow to a walk-behind tractor from a horse-drawn tiller
An equally viable idea is to recycle an old horse-drawn plow into a walk-behind tractor.
A full description of the process is given in the video. A feature of all horse plows without exception is their heaviness, created by a bulky moldboard. If such a plow is installed on a walk-behind tractor without modification, the ground will not tilt. This is a big plus, since the horse plow share will not undergo any changes.
To make a plow from a horse horse into a walk-behind tractor you will need:
- make your own blade, which is cut according to a pre-drawn drawing from a steel blank (3 cm thick). For accuracy, it is advisable to make a cardboard template;
- after cutting, the stainless steel blade is given a special shape;
- remove the horse blade and install a homemade one instead;
- remove the handles that were on the vertical axis;
- Instead, weld metal fasteners through which the plow will be hung to the walk-behind tractor.
- If during field testing it turns out that the converted horse plow does not throw well, the ploughshare should be slightly bent so that it can cut deeper into the soil.
Plow from scrap materials
The big advantage of making the plow yourself is that you can adjust the depth of the plow and assemble it specifically for your type of soil and soil. Under the same conditions, you can create a plow that is suitable in weight for your mini-tractor. This will avoid heavy load on the motor. For such a tool you will need some fasteners and spare parts. Most of them can be found in various construction markets, but the easiest way is to go to the website https://traiv-komplekt.ru/catalog/categories/shaiby/shayby_stopornye/ and see everything you need in the catalog.
Let's start creating the plow. First of all, you should think about what material your plow will be made of. The base must be strong structures made of dense steel. Before selecting and purchasing a part, make sure that it is free of rust, cracks, and scratches. Still, this will be the basis of your tool, and it must be perfect for the plow to last a long time.
First of all, you need to purchase thick, high-strength sheet metal. This will be the basis of your plow. Next, he buys metal corners of suitable thickness. To fasten your assistant, we pay attention to bolts of various calibers. And the final element will be washers, bolts, springs that are suitable specifically for your design.
We recommend reading! Pruning fruit trees: basic methods, optimal time and tips for choosing a scheme (70 photos)