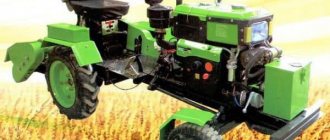
Mini excavators are becoming more and more popular among Russian consumers every year. Such equipment, despite its modest size, has all the functionality of its “bigger brothers” and at the same time has a number of advantages over them. These include compactness, light weight, efficiency, ease of transportation to the work site and relatively low cost.
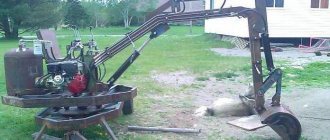
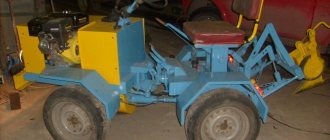
Homemade mini excavator
Small sizes allow mini excavators to be used in limited spaces, including indoor spaces where large equipment cannot operate. They are used when carrying out various construction and earth-moving works: digging pits, trenches for laying pipelines and cables, landscaping areas, etc.
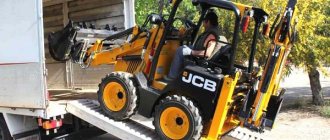
Today's market for special equipment offers a large selection of models of mini excavators from foreign manufacturers. But the cost of such equipment is quite high and largely depends on the reputation of the manufacturer. Therefore, for many consumers, purchasing it becomes unaffordable and an alternative option is to independently manufacture a mini excavator to suit their needs, which can significantly save the cost of purchasing it.
Photo of a homemade mini-excavator
Finishing touches
As you can see, you can make a mini-excavator with just a little effort. In principle, after the above assembly steps, the homemade equipment is ready for use. To work comfortably, you can make a canopy or a small cabin from a metal profile. Install a passenger car seat inside. If you plan to work in the dark, it makes sense to think about lighting.
Before you start assembling, think about whether it would be better to purchase a ready-made mini-excavator? Homemade options are not much cheaper and require certain skills during assembly.
TELL YOUR FRIENDS
Similar articles:
- Road roller - how to choose a machine with the necessary parameters
- Motor grader - what you need to know about this equipment
- The Amkodor backhoe loader is a new word in mechanical engineering
Where to begin
The first step in the process of building a mini excavator with your own hands is to determine its type, which can be of two main options:
In the form of removable attachments for existing special equipment, for example a mini tractor. A fully autonomous model that can be self-propelled (wheeled or tracked) or in the form of a trailer transported using other vehicles.
The advantage of the first option is the versatility of mini equipment, which can perform various types of work by changing attachments. In the absence of such a possibility, the only option left is to create an autonomous mini excavator. It should be noted that making a completely self-propelled model with your own hands, especially on tracks, is a rather labor-intensive and costly process that requires appropriate technical knowledge and skills, as well as a large number of different consumables and spare parts.
The simplest and least expensive option in this case is a homemade mini excavator based on a trailer in the form of a supporting frame with one wheel pair, on which an autonomous internal combustion engine, hydraulic drive and directly excavator equipment are installed.
Selection of kinematic scheme
The tasks that the created machine must solve on the territory of a private plot are:
- digging trenches when laying sewerage, water supply and cable networks;
- digging pits for foundations, septic tanks, etc.;
- cleaning work;
- Carrying out loading and unloading of materials.
The technical and operational parameters of the project were formed for these tasks - a homemade excavator with your own hands.
| Parameter indicator | Unit | Magnitude |
| General platform diagram | single-axle trailed with 2 manual outriggers | |
| Power unit | carburetor, 4 power strokes, 8-13 l. pp., with fuel consumption up to 2 liters per hour | |
| Duty cycle diagram | backhoe | |
| Boom rotation angle | hail | 120—150° |
| Required digging depth | m | up to 2.50 |
| Bucket width | m | 0,30 – 0,40 |
| Performance | m³/h | up to 5 |
| Pumping hydraulic installation | gear NSh-10 or axial piston | |
| Weight limit | T | 0,5 |
Based on the given parameters, the serially produced trailed single-axle excavator Mini Digger-2500 was selected as a sample.
Figure 1 Trailed excavator MINI DIGER-2500
Where to get drawings
The next step when creating a homemade mini excavator is to select a specific model diagram that includes all the necessary elements and standard sizes of individual parts and mechanisms. In this case, you can develop your own design, if you have the appropriate technical knowledge and skills for this, calculating the required engine power, hydraulic pump and forces on the hydraulic cylinders, taking into account the nature of the future work performed.
You can also use a ready-made scheme developed by other craftsmen. Ready-made drawings of various models of mini excavators and instructions for their manufacture can be found on many Russian and foreign sites on the Internet by entering the query “homemade mini excavator drawing” in the search bar of your browser. However, one should take into account the fact that in most drawings presented on foreign sites, dimensions are indicated in inches. Therefore, for the convenience of further work, it is necessary to convert them to the metric system of measurements.
Having a specific diagram (drawing) in hand, it is necessary to make an approximate estimate for the purchase of the necessary spare parts and materials, as well as the availability of the necessary tools, equipment and skills in handling them. Thus, you can finally determine your capabilities and prospects for independently manufacturing a mini excavator.
Design Features
A homemade mini excavator, as a rule, has a classic layout and operating cycle diagram based on the “backhoe” principle, like most industrially produced models of similar special equipment.
The main elements of such a scheme include:
- supporting frame on wheels or tracks;
- engine driving the hydraulic pump;
- a rotating support platform on which the working equipment is mounted;
- hydraulic system, including a hydraulic pump, oil filter, hydraulic tank, distributor with control handles, working hydraulic cylinders and connecting pipelines (hoses);
- working equipment in the form of a two-section rotating boom with a bucket.
As a supporting element, you can take as a basis a frame from an old tractor or trailer, or make it yourself, installing an engine, a fuel tank and at least one wheel axle on it, for example from a car. For greater stability and to prevent possible tipping during work, it is advisable to install two or four support shoes on the sides of the supporting frame.
In such homemade products, Japanese engines with a power of 6.5 to 15 kW are most often used, distinguished by their compactness and reliability in operation.
Recently, their Chinese analogues have also become popular, which are actually not inferior to them in reliability and have a much lower cost (for example, Lifan brand motors). Less commonly, various domestically produced engines are used for this purpose.
Selection of individual mini excavator components
The simplest option for assembling a homemade mini excavator is to purchase a ready-made boom with a hydraulic system, which are offered today by some manufacturers, and install it on existing mini equipment or a homemade frame with an engine and hydraulic drive. This allows you to avoid many problems with setting up this equipment and purchasing consumables and spare parts during its further operation.
However, the cost of such new equipment is quite high, so many do-it-yourselfers try to make its individual components on their own, using scrap materials or parts from old special equipment with some modification.
Hydraulic system
The classic design of an excavator hydraulic system includes 4 main sections that control the operation of the slewing support, lifting boom, arm and bucket. To simplify the assembly of a homemade mini excavator, you can dispense with the rotary platform device, limiting yourself to installing the boom on a slewing support column directly attached to the supporting frame.
For a homemade version, you will need 4 hydraulic cylinders that provide rotation and raising/lowering of the boom, the working stroke of the handle and control of the bucket.
Hydraulic cylinders with suitable parameters from various types of special equipment may be suitable for this, for example, those used to lift the cabin of heavy-duty vehicles (MAZ, KAMAZ, etc.).
Hydraulic drive
The choice of hydraulic pump depends entirely on the preferences and financial capabilities of the master. The gear pump is characterized by its simple design, ease of operation and low cost. In contrast, an axial piston pump is more expensive, but has higher power with the same overall dimensions.
As practice shows, in home-made mini equipment the NSh-10 gear pump complete with an R-16A distributor is most often used. To increase the required power, it is possible to use two such pumps and distributors simultaneously, which is often practiced by domestic manufacturers of special equipment.
Gear pump
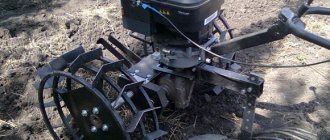
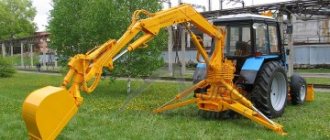
Working equipment
As mentioned above, the easiest way is to buy ready-made excavator equipment with an installed hydraulic system. If available finances do not allow this, then it is cheaper to make a lifting boom and handle by welding from profiled pipes and sheet metal blanks of the required thickness, cut according to available drawings. Also, if possible, you can remove the boom from the old front loader, but it will have to be thoroughly modified.
The photo shows working equipment ready for installation.
Ladle
The bucket of a mini excavator is its main working body, which takes the main load when removing soil. Therefore, its production requires high-quality sheet steel with a thickness of at least 6-8 mm. The blanks cut according to the drawings are thoroughly welded along all seams. To strengthen the structure, the bottom and top edge along the entire perimeter are additionally reinforced with steel plates. “Fangs” made of particularly hard alloys, for example fingers from caterpillar tractors, are additionally welded onto the outer front edge of the bucket.
It is necessary to take into account that to assemble a homemade mini excavator you will need certain spare parts and materials, as well as the need to carry out various types of plumbing, welding, turning and milling and other types of work.
Before deciding to make it yourself, you need to assess the availability of the necessary parts and materials, your technical knowledge, skills and abilities, and the availability of the necessary tools.
Otherwise, it may turn out that making a mini excavator yourself will cost more than buying an industrially produced model, which at the same time has significantly better technical characteristics and is more convenient to use.
The video shows a homemade mini-excavator in action:
Technical characteristics of dragline excavators - set out point by point
The first dragline prototype was invented back in the Renaissance by the famous scientist Leonardo da Vinci. This type of equipment entered mass production in the United States only three centuries later. In the Soviet Union, the production of such excavators was established in the first years after the war.
Dragline application area
Many people don’t know what a dragline is and have never even heard of the word. This is a single-bucket excavator with a long boom (up to 100 m), which is connected to the bucket via a cable mechanism. This design feature allows you to dig only “toward yourself” towards the excavator. Units may differ in digging and unloading depth.
Such excavators are used to develop soil that is located below the location of the unit. This allows them to be used for digging quarries, pits, and creating embankments. The technology is also actively used in hydraulic engineering and reclamation construction, in the creation of highways and railways.
The efficiency of special equipment is achieved due to the fact that the characteristics of the dragline exceed the parameters of excavators, the equipment of which is represented by a front and back shovel.
Rope system
A dragline has a complex system of ropes. To avoid overlap, the working cables of independent traction and lifting winches must be in constant tension. Raising and lowering the boom is also carried out by a separate cable mechanism. Tipping of the bucket occurs due to the auxiliary tipping ( unloading)
) cable see figure.
Dragline design features
Dragline in its design differs favorably from various similar equipment in that it has the ability to simultaneously install a large amount of necessary equipment, which is controlled by ropes.
Among the technical capabilities of the dragliner are:
- Arrow 100 - meter length;
- Bucket with a capacity of up to 168 m3;
- Cable mechanism;
- Weight more than 8000 tons.
The boom of the unit is lattice and lightweight, despite this, it has a large load capacity.
Flexible suspension bucket helps increase digging radius and depth.
The cable mechanism, which controls the boom and bucket, allows for various manipulations in hard-to-reach places. However, operator experience is an important element here.