The demand for a snow blower arises at a time when, after a snowfall, it is necessary to clear a large area. The prices for such factory-made equipment are quite high, so craftsmen try to make it themselves. The main working mechanism of a snow blower is an auger. To make it, you will need accurate drawings. Errors made in the calculations will lead to the snowblower being thrown to the sides during operation. Now we will look at how to make a do-it-yourself auger for a snow blower from a steel sheet and a conveyor belt.
Types and design features of homemade snow blowers
In specialized literature and the Internet you can find a lot of design solutions for snow blowers. The problem is that most of the homemade products presented are ineffective or very expensive to manufacture. Some of the widely advertised devices require solid tools and very specific metal working skills, which not all owners of suburban real estate possess. This publication will discuss simple but very effective designs of snow blowers that any home craftsman can make.
Before you make a snow blower with your own hands, you need to understand the operating principle and design features of this device.
Any snow blower is a device that collects and throws snow mass aside.
The design of this unit consists of three main modules:
- Actuator.
- A device for collecting and transporting snow.
- A frame for attaching the mechanical and power parts of the snow blower, as well as a base for moving the unit around the site.
Let's look at the types and design of each module in more detail.
Actuator
An electric or gasoline engine is used to drive a homemade snow blower. Not everyone on the farm has these power plant options. That is why, with a little modification, you can use a gasoline or electric chain saw, a powerful grinder, or an electric motor from an old washing machine as a drive. A wheeled lawn mower, trimmer or motor cultivator is ideal for use as a power drive for a homemade snow blower, if, of course, these units are available.
The electric drive is suitable for clearing snow from garden paths, a small area, and putting things in order around a house or garage. Disadvantages: connection to the power grid, insufficient performance.
Snow blowers assembled on the basis of an internal combustion engine are distinguished by autonomy, high power and the ability to control shaft speed. Disadvantages: difficulty starting in cold weather, heavy weight, need to refuel.
Snow removal attachment
This is the most important block of any snow blower assembled by yourself, because the weight, dimensions and efficiency of the entire device, as well as operator safety, depend on its design and quality of workmanship.
There are four design options for the snow blower:
- Rotary.
- Auger.
- Combined two-stage.
- Brush.
Rotary snow blower
This is a very simple device, the basis of which is an impeller with blades enclosed in a casing. The impeller is fixed directly on the working shaft of the engine according to the principle of axial fan blades. To increase the width of snow capture, specially shaped guides are attached to the casing and frame.
An electric motor or an internal combustion engine can be used as a power drive for a rotary snow blower.
To prevent short circuits and electric shock to the operator, the motor and all electronic components must be well protected from moisture and snow. It is better to entrust the connection and electrical insulation of the power plant to professionals.
Auger snow blower
It is much more difficult to make such a model with your own hands. This device consists of a steel body, inside of which a double-threaded auger rotates, moving the snow to the center of the structure. Blades-paddles, rigidly fixed on the central part of the shaft, are responsible for removing mass.
The screw is made of metal and can have a smooth or serrated surface. The first option is suitable for removing fresh snow; auger with a serrated edge - for removing compacted mass with an ice crust. It is better to use a chainsaw engine as a power plant, which will transmit rotation to the shaft through a standard chain.
Combined two-stage
These models combine an auger and a rotary snow blower. The auger scoops up the snow to the center of the box, and the rotor blades throw the mass to the side. This design is considered the most effective, but also more difficult for self-assembly.
The best power unit option for a two-stage cleaner is a motor cultivator engine, since it contains a power take-off shaft necessary to drive the auger mechanism. If you have the necessary tools and materials on your farm, it’s quite easy to make a combined snow blower for a walk-behind tractor with your own hands.
Drawings of this design are presented below:
- The body is made of roofing iron. A hole is made in the central part for installing the rotor.
- The screw is made of a steel strip, which is welded to the shaft in a double spiral. The direction of the turns is towards the center of the structure.
- To install the shaft into the housing, blind journals are used, into which bearings are pressed.
- Depending on the location of the drive, a sprocket is welded onto the auger shaft, which will be connected to the power take-off shaft sprocket through a chain transmission.
- The frame with runners and the attachment of the snow blower attachment are assembled from angle steel.
Brush snow blower
In reality, this is a symbiosis of an auger structure and a sweeper. In this solution, a brush is installed instead of a spiral knife. The body of the purifier is placed at an angle to the frame to throw snow outside the area being cleared. This design solution is often used as an attachment for small agricultural machines that are idle in winter and can be quite successfully used for removing snow mass. Making your own brush for a walk-behind tractor is quite simple. It is necessary to weld steel plates on four sides of the shaft, which will serve as the basis for attaching the polymer bristles.
In terms of efficiency, such a brush cannot be compared with production samples, but due to its high speed it will be very good for clearing garden paths of shallow snow.
Basic structure
Depending on the chosen solution and the type of power plant, frame materials and a base for moving the device are selected. The frame is assembled from steel pipe, ½ or ¾ inch in diameter. The structure is mounted on a wheelbase or runners, which are attached to the frame in the manner of a children's sled. In some cases, it will be appropriate to use a steel angle instead of a pipe. A frame made of such material can be assembled with bolts without using a welding machine.
Read also: The gear ratio of chain drives usually does not exceed
Design and diagram of a snow blower
Before you start designing a machine, you need to prepare calculations and drawings. It will be easier to prepare if you have a clear idea of the visual image, the operating principle of the unit and its functioning in your head.
How does a snow blower with an auger attachment work:
Scheme 1
The front part of the cleaner consists of a huge bucket with a funnel that collects a large amount of snow. Inside there are two conveyor screws - this is an auger (see here how to make it yourself), moving the accumulated mass into the pump. Each screw consists of blades that rotate around the screw.
Once the motor is running, the blades begin to rotate. Each rotation cuts sharp jagged edges into the snow, then is replaced by a second sharp blade.
Rotating conveyors and screws perform the following main functions:
- snow crushing;
- add it to the pump.
The conveyors have a trick - they are located at an angle to the pump, which allows snow to be brought to the pump. With the help of rapid rotation of the screw, the snow mass breaks out at high speed and is carried by air pressure over a long distance.
A scoring plate is attached to the bottom of the “shovel”.
If the structure of a universal device includes an air-cooled electric motor, then the air intake must be protected from accidental contact of the electrical part with wet snow.
Scheme 2
Simulation preparation scheme:
- Buy, or use an existing walk-behind tractor engine. For example, Honda brands (requirements: 6.5 liters per second; auto transmission; gear ratio);
- Prepare a plastic pipe, mainly sewer, with a diameter of 16 cm;
- You will need roofing iron;
- Plywood (10 mm thick) will come in handy;
- Half-inch pipe;
- Steel corner;
- Take a pipe measuring ½ inch;
- The steel plate should be equal to 120*270 mm;
- Jig for drilling holes;
- Rear wheel axle.
- Check the plain bearings according to the pipe size. If the pipe is wider than the inner ring, then it can be turned on a machine.
The total width of the homemade machine is approximately 65 cm (the working width is 50 cm), which is convenient for storage.
More information in the following videos:
Assembling a rotary snow blower with your own hands
To create your own snowplow you will need the following tools:
- welding machine;
- angle grinder with cutting disc;
- drill with a set of metal drills.
As a material for making the casing, you can use roofing iron or an old metal barrel. The drawings presented below will be very helpful in understanding the diagram for assembling a snow blower with your own hands.
The simplest design is assembled as follows:
- Frame. At a distance of 150-200 mm from the bottom, the metal barrel is cut crosswise. Based on the direction of rotation of the power plant shaft, it is necessary to cut out part of the side. This solution is necessary to remove snow from the housing. A hole for the power drive shaft is drilled in the central part of the bottom.
- Impeller. This element is made from a piece of pipe to which four steel blades are welded. The inner diameter of the tube must match the outer diameter of the shaft. Holes are made on strictly opposite sides of the pipe to fix the impeller on the drive shaft. If the motor shaft has a thread, then the impeller must be made of a steel disk, the diameter of which is 2-3 mm less than the diameter of the housing (bottom of the barrel). A hole is drilled in the center of the disk for installation on the motor shaft. The blades are welded at a distance of 10 mm from the edge of the central hole. The impeller is secured with a washer and nut.
The last element of this design is a frame with a handle. For the frame and runners, a ¾ metal pipe or a steel 45 angle is used. When making the handle, you can use a steel plumbing pipe with a diameter of ½ inch.
To connect the electric motor, it is necessary to use a cable of the required cross-section in a factory sheath, designed for use in outdoor conditions.
Making a snow blower with your own hands - video
Every winter, a summer resident or a resident of a rural area faces the problem of clearing snow. Of course, you can take a shovel and remove the snow manually, but this takes a lot of time and effort. And if you dig around in the garage, you can find an old chainsaw, lawn mower, or other tool with an engine and use it to make a homemade snow blower with your own hands.
Operating principle of auger snow blower
Auger snow removal units are divided into two types based on their operating principle:
In single-stage ones, snow is collected and ejected by rotating an auger, which is shaped like the shaft of a mechanical meat grinder. An auger with a smooth edge handles the removal of freshly fallen snow. To clean up stale and dense material, you need an auger with serrated edges.
Smooth Edge Auger for Snow Blower
In two-stage models, the rotor assists the auger in removing snow. It is attached to the drive shaft. The rotor blades protrude slightly forward, thereby making it easier to grip snow. Rotor blades are made from either metal or durable plastic.
When assembling a snow blower with your own hands, the easiest way is to make it a single-stage one, since this is the easiest unit to manufacture. Its snow throw reaches 10-12 meters.
What kind of engine can be used for a snow blower
If you are going to make a snow blower from a walk-behind tractor, you can skip the engine selection procedure, since the resource of the unit will be used. In this case, you can move on to the next step.
Gasoline snow blower
To make a snow blower you will need an internal combustion engine or an electric motor. For the latter, an extension cord will be needed, which will determine the range of our snow blower. If the action takes place near the house, then it is better to use an electric drive, but you need to remember that the electric motor is afraid of moisture and it needs high-quality waterproofing.
Drive shaft for snow blower
If you need to work in a country house or a remote area where there is not always electricity, then an internal combustion engine running on gasoline is suitable. It can be taken from a walk-behind tractor with low power (6.5 l/s is quite enough). The motor will be mounted on a quick-release platform, which will allow for easier repairs and maintenance in the future.
Required tools and materials
Before choosing materials and making the device, you should remember that the chainsaw engine has little power. You should not use the unit to clear ice or heavily frozen snow to avoid damage.
First you need to think about what to make the cleaner from and what devices to use. It is not difficult to guess that different types of work will require different materials. They will be indicated in the instructions for the manufacture of a particular design.
What tools should you use:
- welding machine;
- hammer, pliers, screwdriver;
- different keys;
- file;
- grinder and drill;
- hacksaw;
- vice.
Do-it-yourself snow blower: making an auger and frame
The snow blower consists of a welded metal body, inside of which there is an auger ─ this is the main working element. It is a spiral-shaped profile welded onto a shaft that rotates on bearings. It is necessary to secure the engine to the frame and transmit the rotation of the engine shaft to the auger. A small gap between the auger and the box provides excellent removal of collected snow.
Making a screw with your own hands
In order to make an auger, we need an old box or sheets of iron that need to be bent to the shape of the auger.
Diagram of a screw mechanism for a snow blower
Manufacturing consists of the following stages:
- cut out 4 disks from sheet steel;
- cut the disks in half, bend each disk into a spiral;
- We weld four blanks into a spiral on the pipe, on one side and four on the other;
- We put bearings on the edges of the pipe.
You can use any bearings, as long as their internal diameter matches the diameter of the pipe. Glasses for installing bearings are welded into the sides of the snow bucket.
DIY snow blower frame
The frame for a homemade snow blower is obtained by welding 50 mm corners, to the crossbars of which strips for a quick-release engine platform are mounted. It is necessary to attach skids or wheels to the frame to move the snow blower. If the surface to be cleaned is perfectly flat, then wheels are sufficient. For uneven surfaces and deep snow, runners are appropriate.
Do-it-yourself auger snow blower assembly diagram
Read also: Convector circuit on a PWM controller
The controls are attached to the frame with M8 bolts. Next, an easily removable platform is screwed onto which the engine is installed.
DIY snow blower video
Assembling an auger snow blower
Snow blowers that use an auger are the most powerful and can handle even icy snow. In addition, the auger is most often used in self-propelled snow removal machines.
Based on a chainsaw
Making this snowblower with your own hands is quite simple. Since it will be powered by a chainsaw engine, several additional parts will be required for the chain drive. For these purposes, you can use the front and rear sprockets from a motorcycle, as well as a chain from it.
How the frame and auger are made was described above. A long handle is attached to the frame. A large sprocket from a motorcycle is installed on the auger shaft on the right side, and a small one is installed on the chainsaw engine shaft. Next, the chainsaw is installed on the frame, after which the chain is put on the sprockets and tensioned. To control the engine, the throttle cable is routed to a handle attached to the frame.
Below are drawings of a homemade chassis, where a chainsaw is used as the main part of the drive.
Trimmer based
To make an auger snow blower from an electric trimmer or from a lawn mower, you will need to install a gearbox: it will serve to transmit rotational motion from the trimmer shaft to the auger shaft.
But there is one nuance here. The gearbox for this type of unit is quite expensive, and it is not practical to buy it to make an attachment for a trimmer. Therefore, based on the latter, rotary-type snow blowers are manufactured, which will be discussed below.
Based on a motor cultivator (motor block)
The simplest addition to a walk-behind tractor is a snow blade.
A homemade snow removal attachment (shovel) on a walk-behind tractor is screwed to the frame of the unit, after which it turns into a small bulldozer.
Advice! Instead of a blade, you can attach an auger to the front of the frame of a walk-behind tractor or cultivator, resulting in a self-propelled snowplow. When not needed, this attachment for a walk-behind tractor can be easily disconnected from the main unit.
Below is a diagram that clearly shows the design of a snow blower based on a cultivator.
The scheme is deciphered as follows.
- A snow blower drive that connects the engine to the auger.
- Caterpillar drive.
- Drive belt.
- Roller (parasitic) to provide reverse gear.
- Intermediate shaft.
- Belt tension roller. Thanks to it, the unit moves forward.
A self-propelled snow blower greatly facilitates snow removal, especially in large areas where using the machine on skis, pushed by the operator, requires a lot of physical effort from the operator.
Features of the snow blower
The unit is equipped as follows:
- To make handles, you can take a regular half-inch pipe.
- The entrance box is made of sheet iron, the side parts of which are made of 10 mm plywood.
- The width of the bucket is 500 mm, but you can change this parameter as you wish (as the width increases, you will need to select a more powerful engine).
- We make the outlet chute from the remains of a plastic pipe with a diameter of 160 mm.
- The drive shaft is made from steel pipe with a diameter of ¾ inches.
- The drive to the shaft is carried out using a belt and pulleys.
Snow blower with chainsaw engine
To study the assembly process in detail, pay attention to the video instructions.
3D model of a homemade snow blower video
Do-it-yourself snow blower: useful tips
In order for the snow blower to work for a long time and be a reliable assistant for a long time, it is recommended to follow the advice of professionals:
- In order to prevent stones or ice fragments from entering the engine, it is worth adding safety bolts or bushings to the design. Without them, there is a risk of the engine jamming.
- The choice of bearings plays an important role in the reliability and durability of the unit. They must be closed, otherwise snow may get inside, which will lead to accelerated wear and tear.
- It is better to take a belt drive than a rigid one. Since there is a possibility of jamming of constantly moving parts when large objects or ice hit. The motor may seize, causing the snow blower to break down. In such a situation, the belt will simply slip.
DIY snow blower
By following the instructions and advice of experts and having technical skills, you can assemble the unit, and thereby save on the purchase of equipment. And if the snow blower you assembled with your own hands is also painted, then it will be no different from the one you bought, and its service life and quality of work will be no worse.
You can assemble a snow blower with your own hands with an electric motor and a gasoline engine. In order for the homemade product to meet its purpose, you need to know the basic structure of special equipment for snow removal. Moreover, a snow blower can be an independent unit with a motor or a hitch that requires connection to a drive, for example, a walk-behind tractor.
Engine maintenance and first start
When putting the engine into operation for the first time, it is necessary to fill in gasoline and oil. If there is oil from the factory, then it is not necessary to drain it, but after five hours of operation you need to fill in new one. After this, you should check the recoil starter cable: it should rotate easily and not jam.
To check the performance of the engine, you need to measure the compression: its normal value is from 9 to 12 atmospheres. At the first start, a lower value is possible, the reason for this may be piston rings that are not ground in. The problem should go away on its own after 5 hours of operation; if this does not happen, then there is a defect in the motor, and it is best to immediately return the equipment under warranty. Low compression indicates that the engine is not able to produce full power.
In order to start the snow blower for the first time, you need to carry out a series of sequential actions.
- Fuel is pumped using a special button.
- The operating mode switch must be set to on.
- The carburetor lever for fuel supply must be moved to the open position (to the right until it stops, the lever is lower).
- The top one blocks the air flow; it also needs to be turned all the way, and the air supply will be stopped.
- The gas lever is set to the maximum position.
- If the starter is manual, then you need to pull the starting cable smoothly and firmly. If it is electric, then you just press the desired button. If the engine does not start, the procedure should be repeated.
- After the engine has started, the air supply must be opened. To do this, the upper lever returns to its original position.
When the engine is running, you do not need to immediately remove the snow; it is important to check its operation. To do this, the device is left running for 5 hours.
Periodically you need to listen to how it works: the speed should be the same.
Advice! You can check the engine by its noise: if it is monotonous, then everything is working properly. If there are interruptions or a metallic knock, then there is a defect, and the engine should be turned off immediately.
If everything is working properly, then you need to turn off the engine, and when it cools down (after 2 hours), you can measure the compression. If the indicator is normal, the engine needs to be warmed up and the engine oil changed.
Snow blower device
If there is a need to create a snowplow for your dacha with your own hands, you need to know the main differences between special equipment. This will help you more accurately determine the appropriate homemade model.
The main differences between snow blowers are the following components:
- Motor. Snow removal attachments do not have their own motor. They get their drive from a walk-behind tractor or a mini-tractor. Full-fledged snow blowers are powered by a gasoline or electric motor.
- Snow removal unit. The mechanism for capturing snow is an auger or rotor. There are combined models - rotary screws.
- The mechanism of the snow blower movement unit. Non-self-propelled models are mounted on skis. Wheels may be present, but the unit still needs to be pushed to move. Self-propelled snow blowers are driven by a motor. The operator only controls the direction of movement. Factory self-propelled guns are produced on wheels and tracks.
To further study the snow blower, you should know its basic structure:
- The unit receives traction force from the motor. First of all, the engine drives the snow removal mechanism: an auger or rotor. In self-propelled snow blowers, the motor transmits torque to the movement unit: wheels or tracks.
- The bucket is the casing of the snow removal mechanism. The working element is always located in front of the snow blower. The width and height of grabbing the snow layer in one pass depends on the dimensions of the bucket.
- The chute for throwing snow is equipped with a rotating visor that sets the direction. A square or round sleeve is made of metal, less often plastic. In homemade products, they use a piece of PVC sewer pipe with a diameter of 110 mm. The visor is the knee.
- An auger or rotor is the working units of the unit designed to capture snow. The first version of the knife resembles a spiral and works on the principle of a meat grinder. The rotor is a kind of impeller with blades. The resulting vortex flow enhances the ejection of snow due to additional air flows. To ensure efficient operation, snow blowers can be equipped with combined units consisting of an auger and a rotor.
- Snow blower wheels are used with rubber wheels. It is important to install tires with a deep tread pattern to ensure good traction on slippery surfaces.
- Factory-made snow blowers have caterpillar tracks. Heavy self-propelled units with a gasoline engine are characterized by improved maneuverability in difficult terrain.
- Even a self-propelled snow blower has handles. They are needed to control equipment. Controls for clutch, gas, and engine start are placed on the handles.
An important component of a snow blower is the control panel. It is installed on self-propelled factory units. All controls are displayed on the panel: buttons, toggle switches, levers.
Which trimmer should you choose?
To make a snow blower you will need a fairly powerful unit.
It can be made from an electric trimmer or a lawn mower. The latter is often preferred. The reason for this is the technical characteristics of the first. The electric motor of such a device is designed for certain power loads. Improper use can lead to its rapid failure. An important role is played by the design of the rod, a manual mower, designed to transmit torque. Some of them are a curved tube. In such “Arcs” the transmission is carried out by means of a flexible cable. This engineering solution is not suitable for using the unit for snow removal. The cable transmission cannot cope with the load, which will increase significantly during the process of clearing snow.
In such modifications, the driving energy is transmitted via a cardan shaft. It is significantly ahead of the cable equivalent in terms of technical indicators.
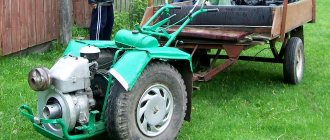
You can use a wheeled lawn mower to make a snow blower. A model equipped with two wheels and a rotating working element located in the front part is suitable. A mower of a suitable configuration is shown in the photo below.
The four-wheel model is not suitable for conversion into a snowblower.
How to make a snow blower with your own hands from a chainsaw
Having the drawings at hand, you can even build a homemade snow blower with your own hands using a chainsaw. Using such a drive has a number of advantages:
- low cost;
- high performance;
- the possibility of equipping the snow blower with homemade components.
The homemade unit will receive traction force from a gasoline engine. A chain drive is installed for the drive. The tire is removed from the chainsaw. The motor shaft is already equipped with a sprocket. A similar part is placed on the shaft of a homemade auger. For the chainsaw engine itself, the frame is welded. The bucket is bent from sheet steel. The auger is made from a piece of pipe 20 mm thick. The helical blades of the knife cut steel or rubber from the conveyor belt.
Making a screw
When looking for snow blower drawings for assembly, first of all you need to find a diagram of the auger. The shaft of a homemade screw knife is a tube with a cross section of 20 mm. The optimal length is 80 cm. Trunnions are welded at the ends and the bearings are hammered. The auger of a homemade snow blower will rotate on them. A through groove is cut through the center of the pipe and a rectangular plate measuring 120x70 mm is inserted. The blades will rotate with the shaft, pushing snow out of the bucket through the deflector.
Homemade fractional rings in the amount of 4 pieces are cut out of steel. They are stretched to form a spiral and welded to the pipe. If the auger blades of a homemade snow blower are made from a conveyor belt, the rubber strip is fastened with bolts to the eyes pre-welded on the pipe.
Read also: How to increase the speed of an asynchronous motor
Assembly of the unit
After making the auger, a homemade housing is made for it. An excellent option is a piece of pipe or barrel with a diameter of approximately 300 mm. The cut segment in the form of a half is slightly unbent. The sides are welded with metal, the hubs are placed in the center, and an auger with bearings is inserted. On the one hand, the trunnion should protrude. An asterisk is attached to the end of the shaft, the same as on the chainsaw engine.
The frame is welded from corners. A platform with skids is adapted for the engine. It is made with the ability to move along the frame and then be securely fastened in the chosen position. A homemade snow blower bucket is attached to the frame at the front, and control handles are attached to the rear. The throttle control lever is located on the right handle. After installing the motor, the sprockets are connected with a chain. The dangerous transmission unit is covered with a casing. To move, the frame of a homemade snow blower is equipped with skis or wheels from an old cart are adapted.
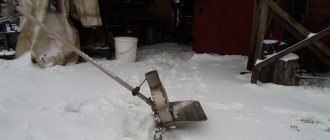
Grinding machine - snow blower from an angle grinder
A snow blower from an angle grinder is made on the basis of a wooden sled, to which the rest of the mechanism is attached. The design contains: a deflector, a rotor and its casing. A sheet of steel in the shape of a shovel is attached to the front. The grinder plays the role of a drive and is responsible for the rotation of the blades.
How does this miracle of technology work? The operator pushes the sled, shoveling snow in front of him. The snowball, falling on the shovel, enters the rotor blades and is thrown to the side.
The operating principle of this device is very similar to a mechanical snow blower, which we will talk about here.
What to do and from what
For assembly you will need plywood, 20 mm thick, from which the sled and handle will be made. Sheet metal, 1–1.5 mm, is useful for the manufacture of the main parts of the apparatus and the raking shovel. Metal tube of small thickness. Semi-automatic welding machine. Drill, jigsaw and some hand tools.
Spare parts and assembly
Let's start by making the base. Using a jigsaw, we cut out two blanks measuring 610 by 100 mm, cutting one of the edges at 45 degrees. You will need two pieces of plywood, measuring 370 by 50 mm, to connect them.
Another detail, 370 by 100, in which a semicircle is cut to fit the dimensions of the body. The runners are ready, let's start creating the handle
From the same sheet of plywood we make two bars 50 mm wide and long enough for the operator’s height.
Please note that the handle will be at an angle relative to the runners. Its length can be measured experimentally.
Strong fastening of the handle will be provided by two more bars - struts, of a similar width. Their length depends on the angle of the handle.
This article contains useful tips on which chainsaw to choose.
Before purchasing a Buhler tractor, you should carefully read its technical characteristics, which are located here //machinspec.com/selskoxozyajstvennaya/traktor/buhler.html.
Let's make a scraper. Iron sheet 570 mm long and 150 mm wide. We bend it so that we get a shovel with a base size of 370 mm, an initial side height of 100 mm and an opposite side of 570 mm.
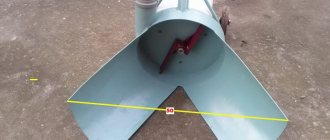
Let's start making the main parts. We cut out a strip of metal 330 mm long and 250 mm wide. We roll the resulting workpiece into a ring. We fix it using spot welding. We make a bottom for the pipe we learned and weld it in place.
Now you need to make 2 holes. One will be in the center of the bottom. Its diameter should be equal to the protruding part of the grinder gearbox cover. The other hole is located on the side. Its dimensions are 150 by 200 mm.
We make a deflector, which is responsible for the direction of the ejection. It consists of a rectangular plate 420 by 150 mm and two triangular lateral supports. The long side of the triangle is 420 mm, height is 150 mm. At its base you will have to cut out a semicircle for a tight fit to the body.
The rotor will look like a disk with welded blades. Its diameter is 300 mm. You will also need to cut 4 blades in the form of a right triangle, with a height of 100 mm and a base size of 277 mm. Drill a 23 mm hole in the center of the disk.
It is better to order a rotor from a turning workshop. If there are the slightest errors in the calculations, increased vibration will quickly damage the gearbox.
There is no need to disassemble the grinder. The only thing you need to do is find 4 bolts. Their diameter and thread must match the holes in the grinder gearbox. Only the length should be at least twice as long.
- Assembling the base. We fasten the runners together using prepared bars. We fasten it with self-tapping screws, one in the middle, the second at the end with the saw cut. We use the same fasteners to attach handles and struts. We attach a metal pipe on top, connecting both handles.
- We attach a spatula to the even ends of the runners. To increase strength we use bolts and nuts.
- We attach the deflector by spot welding above the side hole of the housing.
- We attach the angle grinder to the body using extended gearbox bolts. Additional fastening would be appropriate. It is made from thin strips of metal. We bend it into a half ring, put it on the tool, and weld it to the bottom of the body.
We put the rotor on the landing washer of the angle grinder and tighten the clamping nut. We weld two corners on each side to the body. We, in turn, screw them to the runners so that the body fits tightly onto the front bar.
All parts of the resulting snowplow should be coated with paint. This will help extend their service life. As you may have already noticed, as a result you will receive a unit of impressive size, but if you are the owner of a small area, then it is better to concentrate on assembling a mini snow blower with your own hands, because it is much easier to assemble it, and after use, put it in the far corner of the garage.
How to make your own electric snow blower
An electric snow blower is assembled with your own hands from a powerful grinder, a drill, and a motor from a washing machine is used. The most popular traction device is the trimmer. For a homemade unit, use an electric scythe with a flat rod and a motor with a power of more than 1 kW.
Electric snow blower drawings
First, you will need to find drawings for your snowblower that show the rotor diagram. It is this unit that is working and the most difficult to manufacture. Using the drawing it is also easier to make a homemade snail for the rotor.
Product assembly
Creating a homemade snow blower occurs in the following sequence:
- The snail body is cut from a stainless beer barrel. A grinder is used to cut off a fragment 150 mm wide from the bottom side. By drawing two intersecting lines with a cross, the center of the circle is determined at the bottom. At the intersection point, drill a hole for the trimmer gearbox shaft.
- In a homemade snail, they determine where the top will be. A hole 100 mm wide is cut on the side side, and a piece of pipe is welded. The length of the pipe should be sufficient to firmly install the outlet hose from a piece of PVC sewer pipe.
- Having cut out a semicircle from metal, weld 1/3 of the snail from the end. A plug is placed in the upper part so that the snow is directed by air flow to the discharge sleeve.
- The blades of a homemade rotary fan are cut from steel. You should get 4 plates of equal size. It is desirable that they match even in weight. This will avoid imbalance of the rotating rotor. The plates are welded crosswise onto a metal disc trimmer blade.
- Assembly begins by bolting the electric scythe gearbox to the bottom of the barrel. An impeller is mounted on the shaft. They try to rotate it so that the blades do not touch the walls.
- For better snow capture, a homemade snow blower is equipped with a guide blade. A rectangular plate is welded perpendicular to the end of the volute, only on the bottom side. When the homemade snow blower moves forward from pushing forward, the guide vane will begin to capture snow and feed it onto the blades of the rotating rotor.
A homemade snow blower is placed on skis. Connect the cable to the socket and try to start the engine. For control, they use the original rod of the electric scythe. The video shows a DIY snowblower:
Snow mower
By installing a blade, it's easy to make a snow blower out of a lawn mower. But it must be self-propelled. In this case, the mechanism moves due to the motor drive, and the snowball is raked by a shovel attached in front. A convenient solution for those who do not want to disfigure their instrument. There will be no major changes to the mower design.
The worst mechanism for converting into a snow blower is a gasoline lawn mower. Its engine shaft is directed downwards, which significantly reduces the design options for the future device. It will not be possible to place such an engine on its side; the oil will leak and the engine will jam.
Necessary materials and tools to make a snowblower with your own hands
We will make a blade from a 20 by 20 mm metal profile and a sheet of smooth roofing iron. The tools you will need are: an angle grinder, a welding machine, a drill, a riveter and other hand tools.
Step-by-step manufacturing of parts and assembly of a homemade snow blower
Let's start cutting the profile. We make 2 pieces 100 cm long and 4 pieces 50 cm long. Parts of shorter length should be bent, giving the shape of the future dump. We weld the resulting parts. Long pieces are located vertically at the top and bottom. A pair of short parts are located at the edges, remaining at an equal distance from the middle.
We take a sheet of metal and cut out a blank with a width of 100 cm and a height of 50 cm.
Drill holes along the contour, at a distance of 1 cm from the edge. We attach the workpiece to the frame, drill the profile along the holes already obtained. Now let's rivet the parts together.
Fastening elements are made from profiles. We cut two blanks 20 cm long and another pair, 30 cm long. Different sizes are needed so that the raked snow goes to the side. We fasten them in the form of a corner using spot welding. At a distance of 3 cm from the seam, we drill each part.
- We weld the fasteners to the shovel frame.
- We attach the blade to the lawn mower. We make holes in its body for the mounting bolts.
- We fasten the structure.
Remove the blade before starting the mower.
These mechanisms have positive and negative qualities. We get a snow removal machine from existing tools, at minimal cost. The device becomes multifunctional. But there is also a minus. The equipment is not designed to work in winter, which means its parts will wear out faster.
These devices are easy to remove only loose dry snow. And as you may have noticed, you will have to tinker before assembling the working unit, and some refuse the idea of assembling it with their own hands, but still plan to save money, and it is for these purposes that an article was written in which we will talk about the Husqvarna 227 snow blower, because unlike our This product costs much less than its counterparts.
For the same reasons to save money, the grass cutter from a washing machine is quite simple in design and easy to assemble with your own hands.
How to make a rotary snow blower with your own hands
You can make a powerful do-it-yourself rotary snow blower for your home using a gasoline engine. Additionally, you will need a fuel tank, a muffler, and a cable for connecting the throttle control to the handle of a homemade unit. The rotor shaft can only be manufactured on a machine. The snail, frame and other elements are independently welded from metal.
Description and preparation of components
The technology for assembling a homemade rotary machine is similar to creating a snow blower from an electric scythe. In a similar way, a snail is made from a beer barrel. If in the trimmer the gearbox was bolted to the bottom, then here the rotor is made homemade. The design consists of two bearings on a shaft. They are mounted in hubs, which are attached to the rear wall of the cochlea. An impeller with blades is mounted on the shaft on the working side. The protruding part of the shaft beyond the volute is equipped with a pulley.
A homemade snow receiver is attached to the frame. The gasoline engine is mounted on adjustable skids. A belt connects the rotor and engine pulleys. To move around, the homemade car is placed on rubber wheels.
Advantages of combined units
A combined homemade snow blower consists of a screw and rotor mechanism connected together. The traction device is an electric or gasoline engine. The advantage of a homemade combined model is performance. The auger captures a wide strip of snow, grinding even compacted and slightly icy layers. The fine mass enters the volute, where the rotating impeller blades create a vortex. Crushed snow under high air pressure flies out of the discharge sleeve at a distance of up to 15 m.
How to make a snow blower for a walk-behind tractor
Craftsmen show a lot of videos with homemade snow blowers attached to a walk-behind tractor. Their only difference is that the mechanisms are hinged. Homemade snow blowers receive traction force through a belt from the walk-behind tractor motor.
There are 3 common models of homemade attachments:
- A homemade rotary hitch is made in the same way as for a rotary snow blower with a gasoline engine. Two guide vanes can be installed, which allows you to increase the width of snow capture.
- The easiest way is to equip the walk-behind tractor with a homemade blade. The working part is cut out from ½ part of a pipe with a diameter of 300 mm. Rods and a coupling mechanism are welded on the back side, allowing you to quickly connect the blade to the walk-behind tractor.
- A self-made rotary auger hitch is a combined device. For a walk-behind tractor, this is the most productive mechanism. The rotor volute is attached to the back side of the auger snow receiver bucket. First, the screw blade grinds the snow. The loose mass enters the cochlea, where the rotor mixes it with air and throws it out through the outlet sleeve.
Rotary and auger-rotor attachments for walk-behind tractors are usually placed on skis. It is advisable to equip the blade with a lifting mechanism to create a full-fledged homemade bulldozer.
Types of devices for mechanized snow removal
Mechanical homemade snow blowers are equipped with internal combustion engines. Most often they are mounted (trailer attachments), they are mounted on walk-behind tractors or tractors, including mini tractors. They are distinguished by their low weight and simple design.
Based on their operating principle, snow removal machines are divided into:
- auger-rotor devices having two types of active bodies: an auger or augers that move the snow to the inlet of the rotor, and the rotor itself, which throws the snow in the desired direction;
- dump grader or bulldozer type - operate on the principle of mechanical movement of snow mass, most often such devices are used on self-propelled equipment;
- blade shovel, used in conjunction with walk-behind tractors to move snow in a confined space;
- air-fan units - applicable only on freshly fallen snow, they are characterized by their very small size and extremely simple design; snow removal occurs due to the air flow created.
The most widespread are auger-rotary snow blowers. They cope well with snow cover of varying sizes. Sometimes problems arise with compacted snow, so expensive units also have an auxiliary shaft with spikes that destroy compacted snow. In some devices, the augers are equipped with additional removable toothed attachments; they cut through a dense mass of snow.
Features of an air rotary snow blower
The simplest snow blower is based on an air-rotor action. This is usually a box that can be moved on small skis across the snow. There is a rotor inside. The drive to the rotor is carried out from an autonomous engine or from the power take-off shaft of a walk-behind tractor.
The receiving part of the box is designed so that when moving forward, snow flows onto the rotor blades. Next, the mass is thrown out by rotating blades through a pipe located above. Its deflector can be directed in any direction. Therefore, the snow is thrown to the left or to the right, where required in a particular case.
The peculiarity of the device is that, in addition to snow, a fairly powerful air flow is formed. Therefore, a snow-air mixture is formed at the exit, which can fly up to 5-6 m. This is often enough to clear the passages.
The disadvantages of air-ventilated snow blowers include a relatively narrow grip, as well as the impossibility of removing snow in the presence of compacted mass. When clearing passages immediately after snow falls, a snow thrower of this type is characterized by fairly high productivity. Do-it-yourselfers quite often take a similar design as a basis. The main thing is to create a high rotor speed.
Blade shovel - the simplest snow blower
In some cases, it is not necessary to have a complex unit consisting of a walk-behind tractor and supports on wheels, equipped with a bulldozer shovel. It is enough to have a mechanical assistant - a blade that will move the mass of snow over a short distance.
A special shovel is attached to the walk-behind tractor, and then only due to the traction force created by the walk-behind tractor, the snowball moves to the side. Using reverse gear shifting, the snow blower moves back. Consecutive movements forward and backward clear the area of snow.