All-terrain vehicles are a universal means of transportation that can take you to the right place in catastrophically bad weather conditions.
All-terrain vehicles are most often used in the northern and eastern parts of our large country, where frosts, heavy rains and terrain that cannot be passed by an ordinary car prevail.
It should be noted that all-terrain vehicles move using wheels and tracks. The latter just likes to break down often and cause its owners a lot of problems in repairing or completely replacing this component.
As you might have guessed, we will talk about how to make tracks for an all-terrain vehicle with your own hands.
Tools and materials
In the vast majority of cases, snowmobile tracks are formed from a conveyor belt or tires. But making tires is complex, time-consuming and too painstaking. In some cases, the propeller of a snowmobile is made from V-belts. In various versions, tracks are also made from chains and plastic pipes.
To work you will need:
- large knives with a well-sharpened blade;
- electric jigsaw with fine teeth;
- bolts;
- nuts;
- wrenches;
- fishing line (helps strengthen the edges);
- cable or similar material that helps strengthen the track;
- hammer and sharp tool for preparing holes;
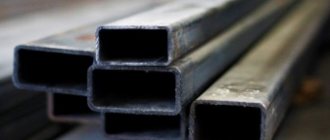
- rectangular profile pipe;
- Grover;
- washers;
- fittings
Manufacturing options
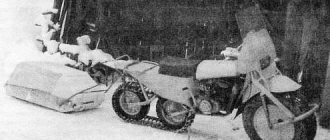
The photo below shows a possible scheme for creating a track for a snowmobile. The length of the main section is 5.8 m. In this case, rollers measuring 0.07 m are used. The center-to-center distance is taken to be 0.9 m.
Advanced people may not limit themselves to this drawing and study another version of the kinematic diagram of the snowmobile as a whole.
Making a snowmobile track with your own hands if you have the drawings is very simple. But if you take even the best conveyor belt in its pure form, it will quickly wear out during operation. Stitching along the edges with thick fishing line helps correct the situation. There is no need to come up with anything original here - you just have to act in the same way as when sewing, you overcast the edges of the fabric.
It is the perimeter that is the most vulnerable link, and it does not matter whether the caterpillar is made 1 meter, 2 meters or some other length.
The rubber strip must be looped. Some people simply sew the ends together, but this technique is not reliable enough. It would be much better to use a hinge that is matched to a piano hinge.
Important: the thickness of the tape must be selected according to the engine power. In most cases, a thickness of 1 cm is sufficient, as on agricultural machines.
But some people note that tires removed from an old motorcycle (manufactured before 1990) are also suitable for a snowmobile track. True, such a resource is, for obvious reasons, rare. An alternative solution is to make a track propulsion system based on belts. Grousers of their own design are added to the wedge-shaped blade. Most often, rivets or a nut-bolt combination are used for clutch.
The belts are equipped with holes at the factory, which can easily be adjusted to the main sprocket of the snowmobile. You just need to leave a certain gap between the stripes. Fastening of such a structure is done using a cable of small diameters and other durable materials.
Important: do not rush. Otherwise, there is a high risk that the entire assembly will fall apart while moving.
It is useful to consider alternative solutions (of which, in fact, there are a lot). One of the schemes also involves the use of a conveyor belt. Additionally, you will need a profile pipe of rectangular cross-section. Nuts, bolts, engravers and washers are used for fastening. They begin work with a homemade propulsion unit, forming track blanks.
They are simply cut exactly to the width of the track using an angle grinder. When the rough blanks are made, they need to be given a special shape by pressing on a machine.
Recommendation: the edges of the tracks should be lubricated with used oil.
After this, limiting fangs and fittings resembling the letter Y are welded on. The resulting specimens are checked and adjusted to the place where they should fit.
Assembling the caterpillar yourself, once the tracks are made, is no longer difficult. You just need to make holes in the tape using a tube sharpened at the end. The side of the tube is also equipped with a hole, which helps remove crumb rubber and dust. The tracks are drilled with an electric drill; there should be two holes on each edge. Assembly with such blanks is not difficult.
But there are a few more subtleties that need to be taken into account in any case. If increased cross-country ability is in the foreground, then you need to make a two-track snowmobile, which is also more stable than one with one support. There is no practical difference in the work, unless you have to make one more caterpillar additionally.
The movers themselves sometimes have to be modified by tenoning with self-tapping screws. This procedure is designed to increase the vehicle’s cross-country ability to the maximum.
On a snowmobile without studs, as practice shows, it is very difficult to drive onto icy shores and slippery serpentines. If the procedure is performed correctly, you can forget about this problem for at least one season. However, it is worth considering that studded tracks turn worse, especially on asphalt. But safety in difficult conditions is worth it. It is also necessary to pay attention to the rear suspension, which must work well in conjunction with the tracks.
Linked suspensions are used in sports and cargo models. But in deep snow and when using long tracks, unlinked suspensions are better. This design enhances traction and perfectly distributes the weight load.
Important: shock absorbers must also match the tracks. In addition to the main points, it is advisable to take into account several additional nuances.
Chassis
Light snowmobiles designed for riding on loose snow are equipped with a hinged suspension made from an extended M16 nut. This is a lightweight design with a simple structure that does not provide comfortable driving characteristics of the homemade product.
Snowmobiles on tracks intended to travel on compacted snow must be equipped with shock absorbers (from a motorcycle or moped). Shock absorbers are installed where skis and axles are attached to the frame. The suspension travel is selected so that moving elements do not touch the snowmobile body during operation.
Steering wheel and skis
The steering is output to two front skis according to a scheme structurally similar to the suspension. It is made from a threaded stud installed in an extended M16 nut, rigidly welded to the frame. The steering wheel from a moped or motorcycle (“Minsk”) is used.
In total, the design uses 3 plastic skis from a children's scooter (or homemade ones from 3 mm thick plywood). A pair of front skis is used for taxiing. Skis up to 1 meter long are used and, if necessary, reinforced with a steel pipe and plate.
The third ski is a support ski, used to maintain the belt in working condition. It is shorter than the others, located between the bridges (in the center). A T-shaped beam is attached to the support ski, rigidly welded to the frame. On top of the beam are freely rotating rollers for the tracks. Installation of such a structure is not necessary if the track does not sag.
Construction of bridges
Bridges are located under the loading area. One bridge requires 2 inflatable wheels from a garden cart and a metal rod. The wheels rotate freely and have no drive. In snowmobiles built on the basis of motors from walk-behind tractors, the wheels are inflated halfway. Clamps are welded to the outer ends of the wheels, with the help of which the axles are attached to the frame.
The front axle is stationary, its clamps are rigidly welded to the frame.
The rear axle must move freely along the frame as it serves to tension the track. Its clamps provide friction tightening from M10 bolts, securing the bridge in the working position. views
Making tracks from tires
This option for constructing rubber tracks has a number of advantages. There is plenty of material to be found. In case of urgent need, it will not be difficult to carry out repair work in a very short time. To make rubber tracks, you should choose truck tires. In addition, the tread must be identical in pattern to the rest of the tires - this will significantly simplify further work.
Manufacturing process:
- Initially, a tire is taken. A transverse cut is made to create a strip. The sides are cut out of it - a kind of treadmill should be formed. The procedure requires a lot of patience, because cutting out excess parts of the tire is quite labor-intensive. The tools used are a large knife with a good sharp blade.
- Rubber is easy to cut if the knife is soaked in warm, soapy water. Wetting needs to be done periodically. To achieve greater ease of operation, you should use an electric jigsaw with a fine tooth blade. The blade is also soaked in soapy liquid from time to time.
- If the tire hardness is high, it is recommended to remove a couple of layers of rubber from the inside - this is very difficult, so it is easier to find a tire with a soft structure. In case of dissatisfaction with the tread pattern, new cutting of the lugs is allowed at your discretion.
- A rubber track made by yourself has a huge advantage - it is a closed loop. With this advantage, reliability and strength are significantly increased. The only thing you need to pay attention to is securing the individual elements of the tire when creating a track for a snowmobile. Often, some tire options are not suitable in width. In this case, you should find material for specific parameters or tighten individual pieces with a small cable.
Devices for increasing cross-country ability
Almost every car can have such a device installed.
In addition, it can be easily mounted on other types of transport:
American inventor B. Soden figured out how to install tracks on wheelchairs. The Mattracks company managed to create a system that was equipped with the T-1 Battle Unit robot shown in the third Terminator. Of course, this is just a prop for creating PR.
Mattracks manufactures 20 rubber models that are installed on SUVs. As a result of this update, the car is able to overcome any obstacle. It turns into a real all-terrain vehicle.
On the Internet you can see a large number of converted cars that have tracks instead of wheels. All these designs are made by hand.
Moreover, they all have characteristic differences.
Transport belt for caterpillar
This material is very common. Therefore, it will not be particularly difficult to find a transport tape. You can purchase it in used condition or, if possible, simply ask your friends.
Manufacturing process:
The conveyor belt may soon deteriorate during operation, so it is necessary to stitch the sides of the material using thick fishing line. You need to do it the way seamstresses sew the edges of fabric using the overcasting method. If you do not do the work, then after some time the edges will turn into rags, therefore, the tape cannot be avoided. To give the rubber strip the appearance of a ring, stitching the ends is used, but the method is not very reliable. It is easier to use a hinge based on the type of piano hinge.
The thickness of the conveyor belt depends on the power of the motor. A strip 1 cm thick shows excellent results. It is used in agricultural machinery. It is allowed to use tape from old Soviet motorcycles.
The advantages lie in the abundance of resources. If a homemade track breaks down, it can be restored in a short time without professional tools. Before purchasing a full-fledged track, you can use the belt version for quite a long time.
Nuances of system installation
Installation of tracked vehicle systems is quite simple. It is very similar to installing wheels. There are several factors that must be taken into account.
How to choose and install tracks for the Niva? Read about this in detailed material from our specialist.
It must be said that the motor power in this case can be any. The track disc is much smaller than the diameter of a conventional wheel. Therefore, the torque begins to increase. As a result, movement speed decreases. The manufacturer of such systems recommends not driving at speeds exceeding 65 km/h.
Track belts
This option is very easy to manufacture and does not require any skills. The material is quite common. There will be no difficulties in purchasing it.
Manufacturing process:
- The belts are wedge-shaped, therefore, creating a single piece of fabric is very simple. And the lugs can be made at your own request. Bolts and nuts or rivets are used as coupling.
- The belts are convenient because they have holes that can easily be adjusted to the snowmobile's drive sprocket. For these purposes, a gap is left between the strips during operation.
- For fastening, it is allowed to use any durable material, for example, a small diameter cable. It is important that the work is done efficiently, otherwise the entire structure will fall apart when driving.
There are actually many more methods for making DIY tracks. It also doesn’t hurt to use your imagination and come up with something better and replace the tires and rubber with a more practical material. But, nevertheless, tire tracks are considered the best solution. They are simple to manufacture, and the time spent on work will be minimal.
Design Features
A modern tracked module for a car is a simple design that is installed instead of wheels. There is nothing fundamentally new in this design - in fact, it is an improved and lightweight Kegress propulsion unit. Typically the module is triangular in shape and consists of a frame, rollers, a drive sprocket and a track similar to a snowmobile.
Thanks to its triangular shape, the device fits easily into the wheel arch, eliminating the need for any modifications to the car. To prevent the module from turning due to excess torque, it is often secured using cables or chains.
The device can have a different shape, and is also designed in such a way that there is no need to even remove the wheels. The car simply drives onto the modules, they are attached and you are good to go. Of course, such tracks on car wheels are not a cheap pleasure. The kit will cost no less than 150-200 thousand rubles. The price of devices from foreign manufacturers can reach up to 700-800 thousand rubles per set, which is higher than the cost of a new UAZ. Of course, many people try to make a tracked module with their own hands, and often they even succeed.
Recommendations
The thickness of the tape is selected according to the engine power. On a snowmobile where a motorcycle engine is installed, there is also enough belt like that used in agricultural conveyors. If truck tires are used as a basis, then you need to select them according to the tread pattern to simplify the work. The beads are cut out of the tires, but areas are left for treadmills.
Important: the knife must be extremely sharp for such work; Wetting the blade in a soap solution helps reduce the complexity of manipulations, although it is better to use an electric jigsaw.
Whatever option is chosen, one must strive to make the entire structure as light as possible. Then traveling on loose virgin snow will not be difficult. To drive homemade tracks from the engine, some enthusiasts take drive sprockets from old Burans. The lugs can be attached to furniture bolts with a diameter of 6 mm; the same distance must be maintained between them. Cutting pipes will work better if you work alternately on both sides and do not try to cut through.
Installation of “barrels” (slides) is optional. Snowmobiles without such an element do not ride much worse. Any drawing or diagram must be adapted to the available consumables. It is advisable to take longer bolts so as not to experience inconvenience. There is also the most radical way to make a caterpillar for a snowmobile with your own hands - cut the standard propeller from the Buran in half.
Engine selection
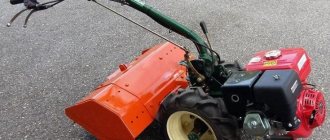
Gasoline engines are used for walk-behind tractors or strollers. Engine speed is controlled by a throttle handle located on the steering wheel. To make a homemade tracked snowmobile with your own hands, the easiest way is to use ready-made small-volume engines for walk-behind tractors with pre-installed:
- Fuel tank.
- Ignition system.
- Reduction gearbox with a ratio of 1:2.
- Centrifugal clutch, automatically activated when the speed increases.
The power of these engines does not exceed 10 horsepower, but they are easy to install: the technician does not need to separately assemble the ignition system, connect fuel pipes, adjust the clutch, etc. There are different options on the market:
| Brand | Model | Power, l. With. | Volume, cm3 | Weight, kg | Approximate price, thousand rubles. |
| Kipor | KG160S | 4,1 | 163 | 15,5 | 20−25 |
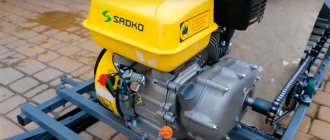
| Sadko | GE-200R | 6,5 | 196 | 15,7 | 15−20 |
| Lifan | 168 FD-R | 5,5 | 196 | 18,0 | 15−20 |
| Zongshen | ZS168FB4 | 6,5 | 196 | 16,0 | 10−15 |
| Nomad | NT200R | 6,5 | 196 | 20,1 | 10−15 |
| Brait | BR-177F-2R | 9,0 | 270 | 30,0 | 10−15 |
| Honda | GX - 270 | 9,0 | 270 | 25,0 | 45−50 |
If it is not possible to purchase a ready-made engine from a walk-behind tractor, then you can use an engine from a stroller. Such engines are 10-15 horsepower more powerful, but require self-assembly. The system includes:
- Engine.
- Clutch.
- Gearbox.
- Gas tank (volume 5-10 liters).
- Muffler.
- Generator.
- Electronic ignition switch and coil.
Some of the elements will come from old motorcycles (“Minsk”, “Vostok”, “Java”, “Ural”). The gas tank is located as close as possible to the carburetor to reduce the length of the pipes.
Making caterpillars from car tires
You can make your own caterpillar using car tires. To carry out the work, you need to select tires borrowed from trucks; it is recommended to use a suitable tread pattern, and you will spend less effort when working with the tire. The manufacture of such a caterpillar must be done by cutting out the sides from the tire, while leaving space for a treadmill.
It is worth considering that this work is quite labor-intensive and requires the application of a lot of patience and effort; in this case, it is necessary to use only a well-sharpened shoe knife.
In order to spend less effort when making a caterpillar for a car with your own hands, you can wet the blade from time to time using a soap solution. As an alternative solution, you can use a device designed for cutting; it is also possible to use an electric jigsaw. On the latter you first need to attach a file with small teeth, the file must also be pre-moistened with water, during the work such manipulations must be done periodically.
What other advantages does the development have?
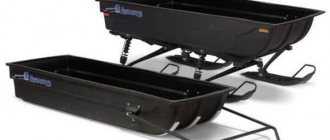
Separately, you can purchase a special trailer to transport cargo from one place to another. The maximum permissible weight is one ton. Thanks to its small dimensions, the tracked module itself easily fits on any aircraft, rail, or road transport, including airplanes.
The special MHD electric generator will become an indispensable assistant for rescue and service services. Thanks to it, rescuers will be able to cut metal using additional electrodes with a thickness of up to five millimeters. This is a machine that has no analogues in the whole world
That’s why videos with her participation constantly attract attention.
Work technology
Do-it-yourself tracks for a car must be made using a technology that involves the initial removal of the tire beads, then, if necessary, you need to remove the excess layers that are located on the wrong side of the formed ring; this is necessary if the track has increased hardness.
If the tread pattern is not suitable, then you need to cut a new structure, which will be necessary so that the structure can cling to the soil.
A snowmobile track made with your own hands according to the scheme described above will have many advantages, even if compared with the option described above. This is due to the fact that it has a closed loop, which indicates reliability. But there are also disadvantages, one of which is expressed in the limited width of the track, but if there is a need, then a double width can be used.
Tracked module on a car
Greetings, friends! Today we’ll look at the seemingly hackneyed topic of increasing a car’s cross-country ability. But let's talk about a very non-standard way to improve the performance of equipment - installing a caterpillar drive instead of wheels. In general, the advantages of the caterpillar as a propulsion device are obvious - low ground pressure and, therefore, high cross-country ability. This is clearly demonstrated in the following video, where the tracked all-terrain vehicle has not only excellent maneuverability, but also decent speed.
A little history
Installing tracks on a regular car is not a new idea. This was done at the beginning of the last century. Adolphe Kegresse, a Frenchman who was the personal driver of Nicholas II until the revolution, achieved significant success in this. The so-called Kegress propulsion system is a tracked module that is attached to the drive axle of the car instead of wheels. Special skis could be installed on non-driving wheels, which turned the car into a snowmobile. Such an off-road tracked propulsion unit (OCT) gained enormous popularity, especially during the Second World War.
Kegress mover
Manufacturing of structural elements
Before starting to manufacture structural elements, prepare a drawing, required materials and tools. You can take ready-made drawings based on the Bullfinch or Vepr snowmobiles. Tools you will need:
- welding machine;
- pipe bender or finished frame;
- hammer;
- screwdrivers.
Since the design of the mini snowmobile is low, the seat is made of durable waterproof material. The fuel tank is made of metal. Its volume should be from 10 to 15 liters. You can use a motorcycle chain as a drive.
Homemade people unite Topic author VLADIMIR
On what basis can you build an all-terrain vehicle (not a pneumatic vehicle)…?
L (Debdan) I’m going to make it on the basis of the Urals, the basis of the frame will be the Ural itself, father-in-law, the rear axle from the VAZ
L (Debdan) wakes up tricyclol
VLADIMIR (Daria) A similar model was produced by the Irbit plant. Only they used an axle from a Muscovite and spoked wheels. It had a body and, like, two seats.
VLADIMIR (Daria) If you ride on asphalt, this model can and will survive. But on off-road it becomes very unstable. I have already experienced this from personal experience
L (Debdan) are you saying that the tricycle is not stable???
VLADIMIR (Daria) I said extremely unstable
VLADIMIR (Daria) Do you recommend making a six-wheel drive?
Andrey (Canan) I had the idea to deploy the engine with the Oka box along a homemade frame, then the axle shafts coming out of the Oka box would become cardan shafts to the Niva axles. Only there will be no interaxle blocking. I already have an Oka engine and gearbox.
Mikhail (Tavaris) gas 71
Mikhail (Tavaris) Or ZIL PKU-1, produced in 1965, look very good.
How to make a snowmobile track
A snowmobile track is created from tires or conveyor belt. The work will be difficult and time-consuming if tires are used as the basis. The sides are cut out of them, so the work requires a sharp shoe knife or an electric jigsaw. To facilitate the process, tires are selected with a suitable tread pattern. Making a homemade caterpillar:
The sides of the tire are cut out with a knife. If the knife blade is periodically moistened in a soapy solution, the cutting process will become easier. When using an electric jigsaw, install a blade with small teeth and moisten it with water.
If, when cutting, the track turns out to be hard or extra layers have formed on the wrong side, they are also cut off.
Cutting a new structure is done when there is a mismatch in the tread pattern. The structure made must cling to the soil, so the structure of the pattern must be correct.
A caterpillar made according to this design is quite reliable due to the fact that it has a closed loop. Its disadvantage is its narrow width. To make a larger size, it is doubled. If the caterpillar is made from a conveyor belt, then it is combined into a single ring.
This can be done in 2 ways:
- like a piano hinge (with a hinge);
- ribbon stripes.
You need to choose the appropriate thickness of the tape if it is sewn on. Its thickness should be suitable for the engine power. A homemade snowmobile from an IZH motorcycle requires the use of a 10 mm thick tape. To increase the service life of the snowmobile, the edges of the conveyor belt are stitched with fishing line. The seams are made according to the method of overcasting the edges with an interval of 1 cm.
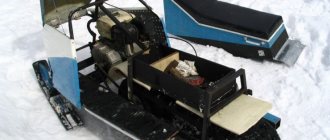
Tackles
A trolley is a movable platform that protects the chassis of equipment from unnecessary mechanical loads. The platform is used when it is necessary to drive a snowmobile into a garage. For its manufacture, a metal pipe of medium diameter (6×6 mm), rollers and a bearing system are used. The wheels are installed with rubber coating and metal discs. Their diameter must correspond to the weight of the equipment.
Snowmobile skis consist of a base, a shock-absorbing part, a rod, a fork and bipod, and a link leg.
Skis can be made in different designs from different materials. If plastic linings are used for the base, they are supplemented with expanders. The extensions are mounted with fastenings to the snowmobile chassis. The plastic design is suitable for small equipment. For large and medium-sized snowmobiles, you will need metal skis.
- To give the skis a shape, cut out the base from a cardboard stencil. At the same time, a bend is formed in front. The amount of bending is done at your own discretion. A ski track with a large bend glides poorly and collects snow. And this creates unnecessary braking. Therefore, you should not make it too large. The approximate size of the ski track is 2.5 cm wide and 100 cm long.
- A pipe is welded along the edges of each part. This gives additional rigidity to the product and protects it from stones that come along the way.
- Where the bend passes, the pipe is welded along the contour.
- Shock-absorbing parts are fixed to the skis. Bolts are used as fastening elements.
- The platform and the nose of the skis are connected by a hydraulic pipe. The top part is ready.
- For the lower part, the hydraulic pipe is fixed at 4 points and compressed.
- Then the polyethylene pipe is attached with self-tapping screws, having previously cut it. Instead of a polyethylene pipe, you can use polypropylene.
Another option for making a caterpillar
Before you make a caterpillar with your own hands, you need to choose a technology for carrying out the work. It is also possible to use the method presented below. The propulsion frame can be welded using pipes that have a rectangular cross-section. It is recommended to connect them using a frame, this will make the structure collapsible. The splined part can be borrowed from the Buran, this will make it possible to make drive shafts; the splined part of the shafts, which are borrowed from the Oka, must be welded to them. It will also be necessary to use brake discs. When working on the front shafts, you need to install brake mechanisms on them. Some part of the gearbox housing needs to be cut off.
Making a caterpillar with your own hands will allow you not only to save money, but also to move through snowy areas without any problems. This design can be used for a long time without the need for repairs.
Conclusion
Tracks instead of wheels are perfect for moving through deep snow and in severe off-road conditions. Ultra-low pressure tires can cope with the same task, but their installation will require major changes to the vehicle design. The tracked module can be installed in less than half an hour on any production vehicle, by the way, not necessarily all-wheel drive, and after overcoming a difficult section, switch back to wheels. This is its main advantage compared to ultra-low pressure tires.
Source