Winter is that time of year when everything around is covered with a “fluffy blanket” in the form of snow. Our country is located in a climate zone where we must be prepared for heavy rainfall every winter. Often snow falls completely unexpectedly and then traffic throughout the city stops.
Fortunately, in big cities there are metro stations where underground trains constantly run, on which you can easily get to anywhere in the city.
The situation is completely different in small towns and villages, where the movement of any transport is not possible during heavy snowfalls.
But even from such a difficult situation you can find a way out, namely, move on a snowmobile. Today we will talk to you about how to make a homemade snowmobile with your own hands.
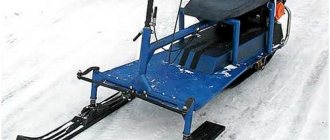
Frame construction
Before you begin building a snowmobile, you will first need to select a material. The easiest way is to make a homemade frame from wooden blocks. The result is a very light and fairly durable structure, which is considered the cheapest and easiest to manufacture. For this you will need:
- Wooden bars.
- Sheet iron.
- Metal scissors.
- Drill and drill bits.
- Hand saw.
- Bolts and nuts.
The advantages of building such a structure are undeniable. In the event of a breakdown, the wooden model will not be difficult to repair far from a populated area. In the forest it is easy to find scrap materials that can be used for repairs. But the main advantage is that this snowmobile rarely falls through the ice and does not sink in water.
Wooden structure
It is known that bars and boards made of wood do not have particular strength in their places
connections. Therefore, before starting construction, it is necessary to make additional metal corners. To do this, take sheet iron and cut square plates with scissors along the width of the bars. The places for the bolts are marked in them with a tape measure, and then four holes are drilled with a drill. After this, the plates are bent in half exactly 90 degrees. These will be excellent devices for firmly fastening wooden blocks in the corners of a homemade frame.
Usually they start construction after making a drawing with exact dimensions. And four bars are cut along them with a hacksaw, and holes for bolts are drilled in the corners with a drill. Then they are placed on a flat floor surface in the form of a regular rectangle. Metal corners are applied to the connection points, bolts are inserted and tightened tightly with nuts.
To mount the engine and track, two additional crossbars made of bars with holes for bolts at the ends are installed on the frame. But before that, the corners for fastening are first made. They are cut out of triangular shaped iron sheets and holes are drilled in the corners .
It’s better to make eight pieces at once and place them on top and bottom. Then the fastenings will be more durable and reliable in operation.
When they are ready, the crossbars are inserted inside the frame and the triangles are placed on top. Holes are drilled into them exactly to size using a drill through the bars. Then long bolts are inserted there and tightened tightly with nuts. At this point, a strong wooden frame will be ready, which will serve for a long time on a homemade device.
Metal frame for snowmobile
It is much more difficult to build homemade metal products. This requires special tools and devices that not everyone may have. Significant costs will be required to purchase or rent them. However, this building will be much stronger and more durable than a wooden structure . Here you will need:
- Welding machine.
- Electrodes.
- Mask.
- Bulgarian.
- Spanners.
- Pliers.
- Hammer.
In addition, to build a metal frame you will need more durable materials. You will definitely have to buy them in the store, since today they are not found anywhere else. And I don’t really want to build a new homemade snowmobile from old parts due to poor reliability. Therefore, only good materials will be used here:
- Metal pipes.
- Iron corner.
- Sheet steel.
- Channel.
As a rule, before you start building a frame, you need to make a simple drawing. Using a grinder, cut the pipes according to its parameters and use a welding machine to connect them into a rectangle. Inside the frame, insert a couple more partitions from the corner to install the engine and track. If you make them from channel bars, the structure will be much stronger and more reliable in operation.
After this, you just need to cut off two small bushings from the metal pipe.
And then weld them to the corners of the front part, where the swivel ski supports will be inserted. The metal frame is ready and you can begin construction, as well as installation of the main units and components.
Why does the rear suspension need modification or replacement?
Whether a snowmobile needs tuning, in particular changes to the rear suspension parameters, is determined by the purpose for which the vehicle will be used.
Are there two types of snowmobile suspensions? connected and unrelated. A connected suspension has two main advantages:
- she shares the toughness;
- controls weight transfer if the vehicle picks up speed.
Often this type of rear suspension is installed in snowmobiles that will be used for sporting purposes or for transporting cargo. This is necessary in order to cope well with sharp turns, strong shaking and frequent redistribution of weight.
Unconnected pendants have their own characteristics. Their front and rear elements are independent. Therefore, if the front part deviates, the rear either deviates only a little or remains in place.
Unlinked harnesses are best attached to snowmobiles that are used in deep snow or have long tracks. They are more capable of increasing traction and also distribute weight well. Also, improving the performance of the suspension may be necessary if the snowmobile engine has been tuned. After all, in order for a vehicle to cope with new loads, a comprehensive modification is necessary, and the suspension in this case? not an exception.
First of all, suspension tuning includes replacing shock absorbers. The main types of shock absorbers for vehicle suspensions:
- simple shock absorber;
- telescopic shock absorber;
- shock absorber for enduro;
- shock absorber for crosses.
In case the main purpose of the snowmobile is? normal riding, then enduro shock absorbers are needed. They are applicable in production 440 Pro vehicles, but the price of such shock absorbers is also considerable. Shock absorbers for tuning sport snowmobiles are often equipped with additional volume gas chambers that allow them to be tuned for specific applications.
Also, the rear suspension often needs adjustment. The choice of adjustment level depends on what kind of physical load is planned for this vehicle, what the weight of the driver and passengers is, how the driver is used to driving the vehicle, what his personal preferences are, the speed mode and the condition of the roads. Each part of the rear suspension is responsible for specific functions. Therefore, in order to know what you will achieve by adjusting the suspension, you need to decide which part needs to be adjusted.
- The job of the rear springs is to ensure smooth movement.
- The purpose of the extension cord? provide reverse movement, taking into account the loads and condition of the snow paths.
- The shackle is adjusted taking into account the condition of the snow path and what the loads will be.
- How comfortable it will be to drive the snowmobile depends on the adjustment of the central spring.
- The tape limiter controls the redistribution of weight.
- Thanks to the shock absorbers, the snowmobile is easy to control and comfortable to ride and sit on.
Hanging equipment
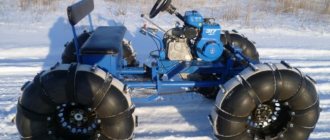
To make a snowmobile fast and strong, you need to put a good engine on the frame. If you install a low-power motor, then such a structure will move poorly. You also need to correctly calculate the caterpillar. If the area is too small, it will drown in large snow and will not pull even on flat terrain. Particular attention should be paid to skis, which should create good stability and safety when moving at high speed.
DIY rubber caterpillar
To easily move through the snow, it is very important to give your homemade snowmobile a good rubber track. It is not easy to make such a device with your own hands and it is better to purchase it in a store completely with rollers. Installing a standard factory track on a homemade structure is not difficult. To do this, you just have to secure the drive shaft and rollers with bearings to the frame. If your financial situation does not allow you to buy the entire device, then the most expensive parts can be easily made yourself. For this you will need:
- Conveyer belt.
- Plastic pipe.
- Bolts, washers and nuts.
A cheap homemade snowmobile track is usually made using a thin conveyor belt. To do this, plastic pipe blanks are sawed off to fit the width of the rollers. Then they are cut lengthwise into two equal parts and holes are drilled for small bolts. After this, the halves of the plastic pipes are secured to the conveyor belt with bolts, washers and nuts. The caterpillar is ready and further construction needs to begin .
Read also: Tl431a transistor characteristics and its Russian analogues
Homemade skis
It's no secret that in winter it is much more convenient to travel on deep snow on skis. They also serve well as a control device on a snowmobile. It is not difficult to make a wooden structure, but only strong boards made of birch or oak are suitable for this. They need to be well dried, planed, and then heated and the ends bent. It's no more difficult to make metal skis. To do this, you will need to cut two plates from sheet steel and weld a thin corner on the sides.
In order for the skis to turn freely, metal pipe stands are welded to them. In working condition, they are held in the front bushings of the frame, where they rotate easily .
Washers or large nuts are welded to the top of the racks, into which rods are inserted to control the snowmobile.
The steering wheel itself is easy to make with your own hands, or it’s easier to remove it from an old motorcycle. Thus, all that remains is to install the motor, as well as the driver’s seat, and you can hit the road.
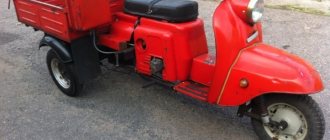
With the arrival of winter, some people successfully replace two-wheeled vehicles with homemade snowmobiles. This equipment is capable of overcoming large snowdrifts and is convenient for moving on snow-covered roads. It is expensive and not everyone can afford to buy it, so many assemble snowmobiles on their own using scrap materials.
Transport belt for caterpillar
This material is very common. Therefore, it will not be particularly difficult to find a transport tape. You can purchase it in used condition or, if possible, simply ask your friends.
Manufacturing process:
The conveyor belt may soon deteriorate during operation, so it is necessary to stitch the sides of the material using thick fishing line. You need to do it the way seamstresses sew the edges of fabric using the overcasting method. If you do not do the work, then after some time the edges will turn into rags, therefore, the tape cannot be avoided. To give the rubber strip the appearance of a ring, stitching the ends is used, but the method is not very reliable. It is easier to use a hinge based on the type of piano hinge.
The thickness of the conveyor belt depends on the power of the motor. A strip 1 cm thick shows excellent results. It is used in agricultural machinery. It is allowed to use tape from old Soviet motorcycles.
The advantages lie in the abundance of resources. If a homemade track breaks down, it can be restored in a short time without professional tools. Before purchasing a full-fledged track, you can use the belt version for quite a long time.
General structure of the snowmobile
A snowmobile is a sled that is powered by an engine. They are agile, agile and capable of speeds in excess of 85 mph. Middle-class equipment can overcome inclines of 20°. Steep slopes up to 65° can be passed by snowmobiles with a higher class. General structure of the snowmobile:
- The equipment is controlled via steering handles. The handles are connected to the skis that stand in front.
- The steering wheel is equipped with drives: gas and brake. These levers control the speed and braking of the snowmobile.
- There are no rear wheels, but instead a solid rubber band (track) is installed that moves the snowmobile. It is connected to the engine through a chain and belt.
- Some models can be made using inner tubes from tractor wheels.
Thanks to their design, snowmobiles overcome difficult places that cars cannot pass. With their help, food is delivered to snowy areas where there are no roads. But most people are used to using them for entertainment.
Drive system
A small diameter drive sprocket is installed on the engine output shaft. From it, torque is transmitted through a chain to the driven shaft, located under the engine seat. On the driven shaft there are:
- Large diameter driven sprocket.
- Gear wheels that drive the tracks.
- Guides for tracks.
The driven shaft is mounted on the frame using bearings. Gear wheels push the tracks, causing the tracks to move. The chain and sprockets are removed from one device. Old motorcycles and snowmobiles (Buran) are suitable donors. Gear wheels for tracks can only be removed from other tracked vehicles.
The guide rollers rotate with the shaft, are attached next to the gears and serve to tension the belt. They are made of wood or plastic and have a layer of soft rubber at the ends. Rubber prevents damage to the track. It is easy to make such rollers yourself by securing the edging with a furniture stapler.
Manufacturing of structural elements
Before starting to manufacture structural elements, prepare a drawing, required materials and tools. You can take ready-made drawings based on the Bullfinch or Vepr snowmobiles. Tools you will need:
- welding machine;
- pipe bender or finished frame;
- hammer;
- screwdrivers.
Since the design of the mini snowmobile is low, the seat is made of durable waterproof material. The fuel tank is made of metal. Its volume should be from 10 to 15 liters. You can use a motorcycle chain as a drive.
How to make a snowmobile track
A snowmobile track is created from tires or conveyor belt. The work will be difficult and time-consuming if tires are used as the basis. The sides are cut out of them, so the work requires a sharp shoe knife or an electric jigsaw. To facilitate the process, tires are selected with a suitable tread pattern. Making a homemade caterpillar:
- The sides of the tire are cut out with a knife. If the knife blade is periodically moistened in a soapy solution, the cutting process will become easier. When using an electric jigsaw, install a blade with small teeth and moisten it with water.
- If, when cutting, the track turns out to be hard or extra layers have formed on the wrong side, they are also cut off.
- Cutting a new structure is done when there is a mismatch in the tread pattern. The structure made must cling to the soil, so the structure of the pattern must be correct.
A caterpillar made according to this design is quite reliable due to the fact that it has a closed loop. Its disadvantage is its narrow width. To make a larger size, it is doubled. If the caterpillar is made from a conveyor belt, then it is combined into a single ring. This can be done in 2 ways:
- like a piano hinge (with a hinge);
- ribbon stripes.
You need to choose the appropriate thickness of the tape if it is sewn on. Its thickness should be suitable for the engine power. A homemade snowmobile from an IZH motorcycle requires the use of a 10 mm thick tape. To increase the service life of the snowmobile, the edges of the conveyor belt are stitched with fishing line. The seams are made according to the method of overcasting the edges with an interval of 1 cm.
Tackles
A trolley is a movable platform that protects the chassis of equipment from unnecessary mechanical loads. The platform is used when it is necessary to drive a snowmobile into a garage. For its manufacture, a metal pipe of medium diameter (6×6 mm), rollers and a bearing system are used. The wheels are installed with rubber coating and metal discs. Their diameter must correspond to the weight of the equipment.
Snowmobile skis consist of a base, a shock-absorbing part, a rod, a fork and bipod, and a link leg. Skis can be made in different designs from different materials. If plastic linings are used for the base, they are supplemented with expanders. The extensions are mounted with fastenings to the snowmobile chassis. The plastic design is suitable for small equipment. For large and medium-sized snowmobiles, you will need metal skis.
- To give the skis a shape, cut out the base from a cardboard stencil. At the same time, a bend is formed in front. The amount of bending is done at your own discretion. A ski track with a large bend glides poorly and collects snow. And this creates unnecessary braking. Therefore, you should not make it too large. The approximate size of the ski track is 2.5 cm wide and 100 cm long.
- A pipe is welded along the edges of each part. This gives additional rigidity to the product and protects it from stones that come along the way.
- Where the bend passes, the pipe is welded along the contour.
- Shock-absorbing parts are fixed to the skis. Bolts are used as fastening elements.
- The platform and the nose of the skis are connected by a hydraulic pipe. The top part is ready.
- For the lower part, the hydraulic pipe is fixed at 4 points and compressed.
- Then the polyethylene pipe is attached with self-tapping screws, having previously cut it. Instead of a polyethylene pipe, you can use polypropylene.
Read also: How to tighten the cylinder head with a torque wrench
Finished skis must be painted.
Slimes
Slides are removable guides along which the snowmobile track slides. They prevent the track from sagging between the wheels and protect it from abrasion. Snowmobile slicks can be purchased at a store or made from a water pipe. The thickness of the pipe should be about 10 mm. Strips are made from it and mounted to the runners.
Rollers
Rollers are the supporting elements of the tracked undercarriage system. They create tight contact between the track and the surface of the ground support. Steel sheets are used as supports.
Variable speed drive
A variator is a special mechanism that allows you to smoothly regulate speed in mini snowmobiles. Safari is the most popular CVT. It consists of 2 pulleys: driven and driving, therefore it is capable of adjusting 2 parameters. These are revolutions and movement resistance. The pulley will operate like a clutch if the engine speed reaches 2200 rpm. In this case, the engine and the reverse shaft are disconnected.
Engine
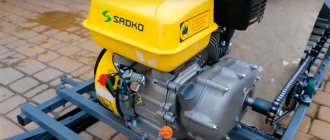
To make a snowmobile powerful, you need to choose a powerful engine. The best engines for assembling a snowmobile are Lifan type engines with a power of 15 hp. With. This model is equipped with a reduction gearbox and has a centrifugal automatic clutch.
Chassis and suspension
The rear and front suspensions are the shock-absorbing system of the snowmobile. The front suspension creates smooth movement for the chassis. At the same time, the driver does not feel any vibrations on uneven roads.
If you choose a suspension based on the principle of operation, then the telescopic one is the most popular.
It consists of a shock absorber and a spring. These parts are located in the rack and eliminate shock loads. Snowmobiles equipped with this suspension are agile in conditions with dense vegetation and trees.
Each snowmobile is equipped with a frame. This part can be borrowed from a moped, scooter or ATV, or welded from pipes. The pipe diameter must be more than 40 mm.
General rules of constructions
Self-made snowmobiles are often completely different. But they are all united by the desire to give the snowmobile the following properties:
- do not fall into the snow;
- move in the right direction and at the right speed.
In order for a snowmobile to satisfy these conditions, its design must contain several mandatory elements:
- supports (wheels, tracks, runners);
- engine;
- steering wheel that changes the direction of the snowmobile;
- frame.
When making a homemade snowmobile, you can use a wide variety of elements and parts from other devices, which greatly simplifies the process.
Simple children's snowmobiles
If you want to make a snowmobile for a child, then you should not use a powerful engine. Homemade products must be created in accordance with the age, weight and height of the child.
It’s worth starting with the support - installing the skis under the frame. To make the process easier, you can use a snow scooter. Then you should install a motor with low power (about 2 horsepower). It can be removed from a chainsaw.
If you are planning a children's snowmobile, then there is no need to further strengthen the frame, but for transporting adults this procedure is required.
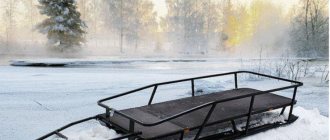
Ice motor sleigh
Movement in winter, especially on ice, is very difficult. Therefore, many fishermen who do not have the budget to purchase expensive equipment are thinking about making ice snowmobiles themselves.
Unlike a children's snowmobile, an adult's snowmobile uses a sled instead of a snowmobile.
Next, attach a chainsaw motor with a power of 4-5 horsepower (you can use a “Friendship” chainsaw). This design is well suited for icy surfaces, but is not suitable for moving on snow (especially loose snow).
Inflatable wheels
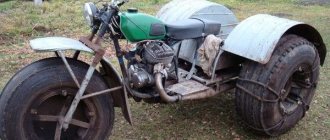
You can also make a snowmobile on inflatable wheels. To do this, take rims from a motorcycle or bicycle and wide inflatable chambers from the wheels of a truck or tractor. Chains or crossbars are attached around their circumference to increase traction. To give the cameras strength, liquid rubber should be applied to their surface or some kind of waterproof material should be glued. For such snowmobiles, you can take frames with engines from motorcycles (Ural or Dnepr).
On caterpillar tracks
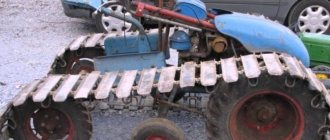
Homemade snowmobiles on tracks have high speed and reliability, which is why they are popular.
Tracks can be made in several ways, for example, from truck tires or from conveyor belts.
Plastic tubes less than an inch in diameter, cut lengthwise, are screwed across the tape. Conveyor belt tracks can be reinforced with a chain.
If you cut the sidewalls from truck tires with winter tread, they can also be used as tracks. To do this, you need to sweep the edges with fishing line in centimeter increments.
Upgrading homemade snowmobiles
After using a homemade snowmobile for the first time, people notice some shortcomings that they want to correct.
To begin with, it is worth making it possible to use a snowmobile not only in the daytime, but also in the dark. You will need a lamp and a generator (you can take a bicycle one).
To prevent the wind from sweeping snow into your eyes, you can install ready-made windshields on your homemade vehicle or come up with something of your own.
Snowmobile assembly
You can make your own snowmobile from a moped, chainsaw or motorcycle. The circuit for a homemade snowmobile made from a chainsaw needs to be developed independently, since each part has its own characteristics. The equipment is assembled in stages, adhering to the drawings:
- First, the frame is assembled. The middle part of the structure is made from steel corners measuring 50x36 cm. The front and rear parts are assembled from steel sheets with a thickness of 2 mm or more.
- To install the track mechanism and guides, 2 holes are made. They must be end-to-end. Tensioners for track wheels are mounted on both sides of the side members. The tensioner helps adjust the track and creates tension in the second stage tensioner.
- To install track rollers, special brackets are required. They are welded to the side members, on the bottom side at the same distance from each other.
- The rollers are installed in the open slots of the brackets. Installation is carried out from the bottom. The rollers are positioned on 5 axes.
- Bushings are made from pipes of suitable diameter and installed between each roller.
- The bracket axes are secured with nuts and locknuts. This fastening will allow you to maintain the required distance between the side members and strengthen the frame.
- Mounting stands are made for the chainsaw gearbox. They are made from 3 metal corners. Then the intermediate shaft of the chain drive is mounted.
- The frame is ready. A seat is installed between the rear and middle parts. You can use a car seat or a simple box as a seat.
- Control handles are welded to the pipe - this will be the steering wheel. It is installed on the front of the frame, after drilling a hole.
- To create additional strength, the area where the racks are attached is equipped with metal gussets.
- The drive shaft is made from a pipe. To attach the gears, a round flange is inserted into it.
- A steering mechanism for a snowmobile is created from an old motorcycle that has a three-lever control.
The finished snowmobile has simple controls and can be used for children's parties. This is a lightweight and compact equipment that can be transported in the trunk of a car. If snowmobiles are made on the basis of a walk-behind tractor, then they are divided according to the material of the snow hooks: “pipe bugs” and “stick bugs”. Here, simple plastic water pipes are used for the tracked structure. This protects it from deformation, but at the same time reduces the level of adhesion between the tracks and snow.
During cold weather, transport on two wheels becomes irrelevant, and sometimes it is impossible to drive through snowy expanses even by car. What to do in a situation where there is no money to buy a vehicle more adapted to the harsh winter?
In this case, you can make a homemade snowmobile. Winter vehicles are most often equipped with a tracked drive and steering skis are installed at the front. The snowmobile has high cross-country ability, light weight (70-80 kg), which allows it to drive both on valuable snow and on hard-packed snow-covered roads. Driving this vehicle is easy and the speed is low. So riding a snowmobile in the countryside in winter is not only convenient, but also safe.
Recommendations
The thickness of the tape is selected according to the engine power. On a snowmobile where a motorcycle engine is installed, there is also enough belt like that used in agricultural conveyors. If truck tires are used as a basis, then you need to select them according to the tread pattern to simplify the work. The beads are cut out of the tires, but areas are left for treadmills.
Important: the knife must be extremely sharp for such work; Wetting the blade in a soap solution helps reduce the complexity of manipulations, although it is better to use an electric jigsaw.
Whatever option is chosen, one must strive to make the entire structure as light as possible. Then traveling on loose virgin snow will not be difficult. To drive homemade tracks from the engine, some enthusiasts take drive sprockets from old Burans. The lugs can be attached to furniture bolts with a diameter of 6 mm; the same distance must be maintained between them. Cutting pipes will work better if you work alternately on both sides and do not try to cut through.
Installation of “barrels” (slides) is optional. Snowmobiles without such an element do not ride much worse. Any drawing or diagram must be adapted to the available consumables. It is advisable to take longer bolts so as not to experience inconvenience. There is also the most radical way to make a caterpillar for a snowmobile with your own hands - cut the standard propeller from the Buran in half.
Features of homemade snowmobiles
A huge number of companies sell snowmobiles in the CIS. But their prices are high even for families with decent incomes. If you don’t want to overpay for advertising and are a hardworking and creative person, then try making a homemade snowmobile.
Read also: What is the difference between a phytolamp and a regular lamp?
A self-propelled gun made by yourself costs 7-10 times less than the cheapest factory-made models.
The success of making a snowmobile yourself depends on several factors:
- your personal skill;
- your engineering and design thinking;
- availability of parts and assemblies from other snowmobiles, motorcycles and other things.
It should be kept in mind that riding a snowmobile, like riding any vehicle, is associated with increased danger. Despite the fact that homemade devices, as a rule, are not capable of reaching speeds of more than 15 km/h, the quality of parts, welding, and bolting of elements should be approached with the utmost seriousness. The issue of operational safety and reliability of the final unit should be the main one for any person who intends to make a snowmobile with his own hands.
Work technology
Do-it-yourself tracks for a car must be made using a technology that involves the initial removal of the tire beads, then, if necessary, you need to remove the excess layers that are located on the wrong side of the formed ring; this is necessary if the track has increased hardness.
If the tread pattern is not suitable, then you need to cut a new structure, which will be necessary so that the structure can cling to the soil.
A snowmobile track made with your own hands according to the scheme described above will have many advantages, even if compared with the option described above. This is due to the fact that it has a closed loop, which indicates reliability. But there are also disadvantages, one of which is expressed in the limited width of the track, but if there is a need, then a double width can be used.
Preparation
Before you start making a snowmobile, you need to calculate the basic parameters of the device. If you are a bit of a design engineer, then it is appropriate to make a drawing of the unit. In principle, all snowmobiles are designed the same and simply. Your task is to make a reliable device modeled after all other variants of this class of vehicle.
What you will need for production:
- Pipe for the frame, for pendants and other frame elements.
It was experimentally found that the optimal pipe diameter is 40 mm. If you are using a profile, then 25 x 25 mm will be enough. Wall thickness – 2 mm. With smaller parameters, the resistance of the device to deformation will be reduced. If they are large, the car will become heavier, which, accordingly, will affect the already not brilliant driving characteristics.
- Wheels with rubber on the axle.
Wheels from ATVs (small models with a wheel diameter of 30-40 cm), some carts, etc. are suitable. A total of 2 axles with 2 wheels on each are required.
- V-belts or conveyor belt.
The main element of the "caterpillars". The optimal thickness is 3 mm. This is enough for stability and wear resistance.
They are used to make lugs - the second element of the “caterpillars”. The optimal diameter is 40 mm with a wall thickness of 5 mm.
- Propulsion system.
As a rule, they use an engine, a carburetor, or a fuel tank from a motorcycle.
- Transmission mechanism.
As a rule, they use sprockets and a chain from a motorcycle, and sprockets from snowmobiles. Drive shaft from any unit, suitable in size.
- Guide skis.
It is optimal to take skis from another snowmobile. Since this element must be as reliable as possible, designed for the load of the unit itself, plus the driver and possible passengers.
As a rule, they use a motorcycle handlebar, respectively, with a gas handle and a cable.
- Platform, seat, body.
In principle, you can do without a platform by attaching the seat(s) and the body (optional) directly to the frame. But sometimes an additional platform is constructed on the frame, for example, from wooden boards, which provide slight cushioning, allow you to place several seats, and at the same time lightly weight the structure.
This element adds additional complexity to the design. Therefore, they often do without it, especially if they plan to drive on uncompacted snow. Shock absorption is installed on the front suspension and driver's seat. You can take it from an old snowmobile or motorcycle.
In addition to those listed above, other standard parts will be required to make a snowmobile: bolts, studs, nuts, hinges.
Other chassis parts
The rest of the units will be easier. For example, components such as axles and rubber wheels, Buranovsky drive sprockets and protected bearings can be purchased at any specialized store. By the way, it is better to buy inflatable wheels. This technique will be softer on the go. The axle can be taken from a simple garden cart (two-axle). If necessary, you can trim it or, conversely, expand it to suitable technology values. If you are unable to purchase a drive shaft in a store, you can try making one on a lathe. When making your own shaft, make sure that it is sized to accommodate the bearings well.
RAS SUSPENSION
This type of suspension found its application on the REV chassis. The design of this suspension is based on double A-arms. The principle of operation of this suspension is as follows - the main part of the shock load falls directly on the spring and shock absorber and only a small part on the chassis itself. Typically, a snowmobile with a REV chassis has a pyramidal frame shape. Due to this, the design of the snowmobile is incredibly durable, capable of withstanding heavy loads and the movement of the snowmobile on the most extreme trails.
Video
Source: topkarting.ru
DSA suspension
This suspension is characterized as the first long-travel system that was used in the construction of snowmobiles. To be more precise, it was installed on the F2000 and S2000 chassis. The shock absorbers and springs are located between the levers (arranged in parallel) and the chassis. The inclination of the springs and shock absorbers towards the central part of the snowmobile is maintained. Due to this, the travel of the suspension itself is greater than that of the shock absorber. The shock-absorbing system consists of a snow frame and a trailing arm to which two transverse arms are connected. Levers located transversely must have the same length. There are snowmobile models on which the length of the levers can be adjusted. This adjustment is relevant when it is necessary to overcome an icy section of the route. There is no point in adjusting the length of the levers when moving in deep snow. The disadvantage of this suspension is the lack of controllability of the snowmobile due to the horizontal movement of the skis.
Is it necessary to register such changes with Gostekhnadzor?
Probably everyone already knows that when purchasing a snowmobile, it must be registered. You also need to have a category A license to drive such a vehicle. Using a snowmobile without a license or while intoxicated is strictly punishable by law. However, are there rules regarding the registration of small changes to the design of a snowmobile, such as rear suspension changes?
The law establishes the rule that owners of any vehicle must present it for technical inspection from time to time. Snowmobile? not an exception. The interval at which this needs to be done is determined depending on the terrain and type of vehicle. If a tracked vehicle is designed for eight or more seats for passengers, then it must be presented for technical inspection every six months. If this is an ordinary snowmobile, then it needs to be inspected every year. When undergoing regular technical inspection, there is no need for additional registration of minor changes in the design. Main ? ensure safe movement on a snowmobile.
Source: motoaria.ru
ADSA suspension
In essence, this is the same DSA type suspension, only in this case the length of the wishbones is different. There are snowmobile models where, due to the use of ADSA suspension, it is possible to adjust the camber angle. This type of suspension found its way onto the S2000 chassis. The ZX chassis already featured the next generation of suspension, called the ADSA ZX. It is characterized by the ability to adjust the camber, and the movement of the transversely located levers has also been significantly changed. Owners of snowmobiles using this suspension system unanimously note a high level of controllability compared to DSA.
Do-it-yourself motorized towing vehicle “motor dog”: diagrams and drawings
Craftsmen have developed various versions of motorized towing vehicles. Below is one of the options for a homemade transport scheme with a description of all components.
The tracked motorized towing vehicle "Seal" consists of the following components and parts:
- 1 — handles for controlling the motorized towing vehicle;
- 2 — driving roller;
- 3 — caterpillar belt;
- 4 — fuel tank;
- 5 - drawbar;
- 6, 12 — support rollers;
- 7 — tension roller;
- 8 — V-50 engine;
- 9 - frame;
- 10 — front roller;
- 11 — exhaust pipe;
- 13 — drive chain for drive rollers;
- 14 — drive shaft sprocket.
The motorized dog is represented by a module on which there is a place for a motorized tractor, and there may be a seat for a person. The walk-behind tractor is placed on tracks.
If your hands are golden
You can assemble a motorized dog from scrap and not so expensive materials with your own hands. How to make such a transport? This will be discussed further.
This will certainly require certain skills, materials, tools and time. You can choose from the available options, but you can create your own drawing of a motorized dog with your own hands. Then pack your transport and get pleasure, convenience and additional time for relaxation by reducing the time it takes to travel through snow-covered fields and roads.
Telescopic suspension
Perhaps this is one of the most common and simplest types of suspension based on the principle of operation. Most often, this suspension is used on snowmobiles of the “utilitarian” class. The design of the telescopic fork consists of a spring and shock absorber, which are located directly in the strut. Thus, the telescopic stand is able to smooth out shock-type loads. It is worth noting that the stroke of this type of suspension is limited according to the stroke of the shock absorber itself. As a rule, snowmobiles with such suspension have incredible maneuverability in dense forest conditions, since the ski base is small.
Also, one of the simplest and most common suspensions is the spring system. This engineering solution was used on the legendary domestic car "Buran". This model has one ski track, as a result of which the equipment does not have the necessary maneuverability. It is generally extremely difficult to enter the required turn at speed. But in general. The suspension performance itself is quite acceptable.