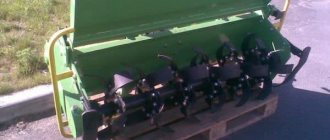
The design of a snowmobile track is quite simple: it consists of a looped synthetic cord tape, around which a rubber layer with molded lugs and holes for drive stars is vulcanized. The holes are reinforced with metal plates crimped along their edges. A number of track models are studded similarly to car studded tires.
During operation, the snowmobile track is subjected to significant loads, which is aggravated by low temperatures. In the cold, the characteristics of rubber change significantly: its hardness increases and elasticity is lost, and therefore deformations when the caterpillar is bent significantly increase the risk of mechanical damage: cracking and peeling of the rubber layer from the cord, breakage of lug fragments. Damage from objects hidden under the snow that can cut through or tear it, as well as working with dry friction can quickly reduce the service life of the track. for example, even short trips to surfaces not covered with snow. At such moments, both the caterpillar itself and the suspension linings wear out greatly.
How to make homemade tracks on a walk-behind tractor
Here we will look at several ways to make tracks with your own hands, with good performance characteristics.
The simplest version of homemade caterpillars
For light all-terrain vehicles and snowmobiles, tracks can be made from a conveyor belt and a bushing-roller chain. To make such tracks, you don’t have to own a special tool; everything can be done “on your knees.”
To extend the service life of the tape, it is necessary to stitch it along the edges with fishing line, observing a step of 1 centimeter, which will protect the tape from fraying. To connect the ribbon into a ring, you can sew the ribbon at the ends, or use a hinge.
When choosing the thickness of the tape, you should proceed from the engine power. If you use engines from domestic motorcycles, it is enough to take a tape 8-10 mm thick, used on conveyors in agriculture.
This DIY snowmobile track has a good service life and can be easily repaired if necessary.
Tools and materials
In the vast majority of cases, snowmobile tracks are formed from a conveyor belt or tires. But making tires is complex, time-consuming and too painstaking. In some cases, the propeller of a snowmobile is made from V-belts. In various versions, tracks are also made from chains and plastic pipes.
To work you will need:
- large knives with a well-sharpened blade;
- electric jigsaw with fine teeth;
- bolts;
- nuts;
- wrenches;
- fishing line (helps strengthen the edges);
- cable or similar material that helps strengthen the track;
- hammer and sharp tool for preparing holes;
- rectangular profile pipe;
- Grover;
- washers;
- fittings
Homemade caterpillar for motorized towing vehicle
It is very common among DIYers to make tracks using car tires. For this purpose, tires with a suitable tread pattern are selected from trucks.
To make such a caterpillar, you need to cut out the sides from the tire and leave the treadmill. This is quite a labor-intensive job that requires a lot of patience, because the tool used is a sharpened shoe knife.
To make the work easier, from time to time the knife blade can be moistened in a soap solution to cut the rubber faster. One option is to use a homemade cutting jig, or use a jigsaw with a fine-tooth file.
After cutting off the sides, if the track is too hard, you can remove the extra layers of rubber inside the resulting ring. If the tread pattern is not suitable for the conditions of use, then a new lug structure is cut.
The undoubted advantage of a homemade caterpillar made from a tire over a caterpillar made from a transport belt is that it is initially a closed loop, and therefore reliable. The disadvantage of this caterpillar is the limited width of the workpiece, which can be corrected by using a double-width option.
Belt tracks
This version of making a caterpillar is attractive for its relative simplicity. To do this, you need to connect belts with wedge-shaped profiles into one whole with screws or rivets, using lugs attached to the belts.
To make holes for the drive sprocket in such a track, you need to make gaps between the belts. You can find many ways to make caterpillars with your own hands - the main thing is to have patience, desire and perseverance - then everything will work out.
Transport belt for caterpillar
This material is very common. Therefore, it will not be particularly difficult to find a transport tape. You can purchase it in used condition or, if possible, simply ask your friends.
Manufacturing process:
- The conveyor belt may soon deteriorate during operation, so it is necessary to stitch the sides of the material using thick fishing line. You need to do it the way seamstresses sew the edges of fabric using the overcasting method. If you do not do the work, then after some time the edges will turn into rags, therefore, the tape cannot be avoided. To give the rubber strip the appearance of a ring, stitching the ends is used, but the method is not very reliable. It is easier to use a hinge based on the type of piano hinge.
- The thickness of the conveyor belt depends on the power of the motor. A strip 1 cm thick shows excellent results. It is used in agricultural machinery. It is allowed to use tape from old Soviet motorcycles.
The advantages lie in the abundance of resources. If a homemade track breaks down, it can be restored in a short time without professional tools. Before purchasing a full-fledged track, you can use the belt version for quite a long time.
The best homemade walk-behind tractors on tracks photo
Related Posts:
- How to make lugs for a walk-behind tractor with your own hands, photo description and dimensions
Motoblock Agros and homemade products for it
Making a homemade all-terrain vehicle from a walk-behind tractor photo, video Hitch to a walk-behind tractor with your own hands, photos, drawings
How to make a homemade gearbox for a walk-behind tractor, photos and drawings
Homemade potato digger for walk-behind tractor - photo, video
Homemade mower for walk-behind tractor (rotary, segmented)
To increase the throughput capacity of a walk-behind tractor and use it as an all-terrain vehicle or snowmobile, you can equip it with tracks. They can be purchased ready-made, but they are expensive, and it is not always possible to choose the right option for your walk-behind tractor. There are several ways to make a caterpillar for a walk-behind tractor with your own hands.
Other equipment equipped with tracks instead of wheels
If you look at it, you can put any equipment on tracks, regardless of its purpose. And if previously only garage craftsmen, of whom there are a great many in Russia, were engaged in such “experiments”, today you can see similar factory-produced equipment.
Not only snowmobiles and swamp vehicles are equipped with tracks, but also mini-tractors, which were not originally intended for these purposes. But production vehicles mounted on caterpillar tracks are of particular interest.
PHOTO: rosvezdehod.ru Swamp vehicles are very popular among hunters and rangers
Tracked vehicle: buy or make it yourself
If we think from the point of view of economy, then making tracks for a car yourself is more acceptable. However, in this case, you should be prepared for the fact that you will have to frequently repair it in the field. But there are also advantages - several breakdowns, and the garage technician knows all the weak points, after which he strengthens them.
The factory version is more expensive. But here you can rely on the tests carried out. Although, as practice shows, even such tracked units break at the most inopportune moment. We invite you to watch a video in which a Niva is installed on tracks (though not with your own hands, but in a factory setting).
DIY snowmobile tracks
A snowmobile a priori must be equipped with tracks - without this it will not be able to move. However, the problem is that they can fail.
In this case, there are 3 options for the development of events.
- If you have time and desire, it is quite possible to use a conveyor belt as a homemade track for a snowmobile. The main thing is to firmly sew the ends and strengthen the sides so as not to remain in some snowdrift away from people when the connections are broken. In winter forest conditions, repairing a snowmobile track with your own hands, although possible, is problematic.
- Contact craftsmen, who can always be found in garage cooperatives.
- Purchase new tracks from a specialty store. This option is good, but it can make a hole in the family budget.
PHOTO: nifhi.mrc51.ru Such tracked snowmobiles are assembled by craftsmen
Homemade mini-tractor on tracks: what to make with your own hands
The best mini-tractor can be called a modernization of a walk-behind tractor. If the owner does not want to install it on a crawler track himself or simply does not have time for this, it is quite possible to purchase the necessary components.
And after the tracks for the Neva walk-behind tractor or any other have been purchased, you can attach various attachments to it (plow, hiller, flat cutters). Prices for small tracks for walk-behind tractors are not too high, unlike long elements used in larger equipment.
We invite you to see in the video review how a walk-behind tractor on tracks looks and works.
Source: https://homius.ru/gusenicy-svoimi-rukami.html
How to make a caterpillar on a walk-behind tractor with your own hands
If you wish, you can independently modify your walk-behind tractor, turning it into a tracked all-terrain vehicle or snowmobile. The main rule is that you should consider what kind of work the tracks are intended for in order to choose the right material, because they must be not only durable, but also extremely light.
Having available materials and correctly calculating the length of the caterpillar, you can make it yourself using simple improvised means.
First of all, you need to equip your walk-behind tractor with an additional pair of wheels. A caterpillar track will be put on each side pair.
The length of each of the two goosenecks will be equal to the circumference of one wheel and the distance between the axles of each pair of wheels, multiplied by two.
Important: the wheels on the walk-behind tractor must be the same diameter.
Materials for homemade products can include:
- conventional conveyor belt and bush-roller chain;
- car tires;
- belts and chains.
So, let's look at several options for making a goose yourself, depending on the material used.
From a conveyor belt
This method is the simplest because it does not require a large number of special tools and auxiliary materials.
- When choosing a tape for a caterpillar, give preference to a strip whose thickness will be at least 7 mm - after all, it bears a fairly large load. The coupling with moving parts will be provided by a bushing-roller chain.
- To give the tape strength and increase its service life, it is recommended to stitch it along the edges with fishing line using frequent stitches in increments of about 10 mm.
- It is also necessary to sew the tape along the ends in order to connect it into a ring of the required diameter, or use hinges reminiscent of a piano canopy for greater reliability.
- Make sure that the additional wheelset that you install on the walk-behind tractor frame is the same diameter as the main wheels on the walk-behind tractor.
From a tire
It’s enough to simply make a durable, reliable gooseneck for a walk-behind tractor from a tire. The manufacturing process from a car tire will not take too much time, since it does not need to be stitched and lugs built up - the tire itself is a closed structure with a tread for traction.
Tires from truck or tractor wheels that have a pronounced tread pattern are best suited for caterpillar tracks.
The manufacturing process is divided into several stages:
- Using a very sharp knife dipped in a soapy solution to enhance the cutting ability on rubber, cut the gooseneck tape to the required width.
- The sidewalls of the tire are cut off with a jigsaw using a fine-tooth file.
- The hard parts on the inside of the tire are also cut off using a knife or jigsaw.
However, here there are several points that you should pay attention to:
- The tread pattern must be clearly defined, since its reliefs are a kind of lugs that increase the adhesion of the moving mechanism to the surface.
- The length of such a caterpillar is limited by the diameter of the tire, so before attaching an additional pair of wheels, you should take this into account.
From belts and chains
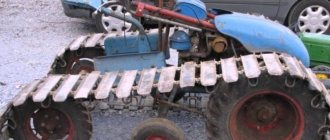
In order to make a tracked all-terrain vehicle from a walk-behind tractor, you can use ordinary belts with a V-shaped profile. The belts are connected to each other by lugs attached to them with rivets or screws. Thus we get a belt track.
To make a track from chains (chain tracks), you need to take two pieces of the same chain of the required length.
- The end links of both segments are unclenched in order to connect them into two closed rings.
- The loosened links are clamped again and then welded to secure the fastening.
- Sections are cut from steel of the required thickness that will serve as lugs.
- The lugs are bolted at both ends to the links of both closed chains, thus forming a raised track on the walk-behind tractor.
How to choose one for your all-terrain vehicle
When selecting a caterpillar for an already built snow and swamp-going vehicle, it is necessary to take into account the length of the supporting plane and the design of the chassis. In utilitarian all-terrain vehicles, it is possible to use tracks made from tires (from wheeled tractors or agricultural machinery) that lack a side part. The treadmill is put on the standard tires of the equipment; to adjust the tension, you need to move one of the axles. The life of a homemade track depends on the correct tension; poor contact causes accelerated wear of the tires on the wheels and the inside of the track.
It is possible to use a caterpillar made using welding technology from individual links that are connected with pins on cotter pins. The design is similar to that used on tracked tractors; the design of the all-terrain vehicle chassis requires the introduction of double road wheels and drive wheels with a ring gear. The disadvantage is the increased weight and noise when moving. To reduce noise levels, rubber pads are installed, which need to be changed as they wear out.
For factory-made machines, original components are offered.
For example, the caterpillar for the Sturm all-terrain vehicle is made of a monolithic elastic tape equipped with symmetrical lugs. The propeller has a width of 500 mm, which allows you to move through mud and snow. The design includes reinforcements that prevent the belt from coming off the wheels during sudden maneuvers. “Strannik” machines use elastic bands made of frost-resistant rubber with an internal reinforcing mesh, and side hooks are provided for holding.
Homemade tracks for caterpillars
Tracks for a homemade goose can also be made independently from any suitable material. The main thing to consider is what load you are going to give to your walk-behind tractor.
From plastic pipes
You can use pieces of plastic pipe as tracks for a snowmobile gooseneck. To do this, cut the plastic water pipe No. 40 into pieces equal to the width of the caterpillar. Using a circular saw, cut each section lengthwise into two equal halves, or use a wood circular saw to do this.
The resulting tracks must be attached at regular intervals to the conveyor belt with No. 6 furniture bolts with large hemispherical heads.
From wooden blocks
Sometimes, if the load on the goose is not very large, you can use birch blocks as tracks. They are not particularly durable for heavy loads, but they are lightweight, affordable, and a track with such tracks can be repaired in any convenient place.
Iron tracks
The most reliable are metal tracks made of high-quality iron. Metal pipes or profiles cut into pieces of the required length are suitable for this purpose. The profiled metal pipe is cut according to the same principle as the plastic one and bolted to the conveyor belt.
However, metal tracks, despite their noticeable strength, also have their drawbacks: they are heavy compared to plastic and wood, and can bend during use. To straighten the track, you will need to remove it from the gooseneck, and this is a labor-intensive operation.
When choosing the material from which the track tracks for your mini-all-terrain vehicle will be made, you should evaluate the degree of load and operating conditions. Light polyethylene or wooden tracks are perfect for overcoming snowy expanses, but to use a walk-behind tractor as a mini-tractor, it is still better to make a caterpillar with metal lugs.
Breakdowns and repair possibilities
The main failures of caterpillar tracks, made independently or in artisanal conditions, include breaking of the elastic base or bending of metal linings. To restore the functionality of the structure, it is necessary to disassemble the bolted connections and replace the failed parts. It is recommended to carry out a preventive inspection of the propulsion vehicle after each trip; storing an all-terrain vehicle with a contaminated chassis is not allowed.
If the alignment of the rollers is disrupted, the load on the chassis and belt increases. The cause of the defect is the destruction of the bearings or weak tightening of the bolts holding the axles to the frame of the all-terrain vehicle. Regular preventive inspection of the undercarriage of a homemade snow and swamp-going vehicle allows you to detect and eliminate faults before the caterpillar track is damaged.
Do-it-yourself caterpillar for a motorized towing vehicle
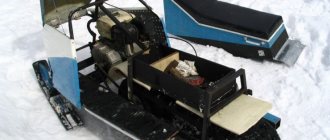
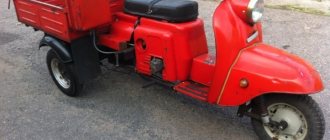
A motorized towing vehicle, popularly called a “motor dog,” is ideally suited for use in northern latitudes with good snow cover. Using a walk-behind tractor, you can independently make an alternative to a dog sled, a high-speed tracked vehicle that can tow a sled with a person or a small load in the snow.
Making a caterpillar for a motorized dog with your own hands is not at all difficult.
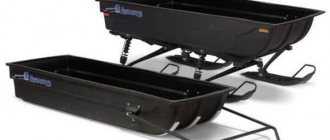
You can use an old gooseneck from a Buran snowmobile. To increase the chassis, you should cut it in half and build it up using inserts. The tracks can be carriages from the old Buran. Three carriages with rollers are enough. They also need to be sawn and extended with inserts.
In the absence of old spare parts, a caterpillar for a motorized towing vehicle can be made from improvised materials using one of the methods described above. For example, from a conveyor belt.
For production you will need:
- conveyor belt with a width of 22 cm;
- metal bars for reinforcement;
- hardwood timber blocks for track tracks.
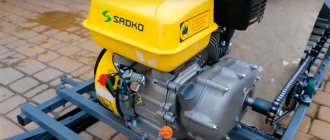
We bring to your attention a video showing the caterpillar manufacturing process.
Making tracks for a walk-behind tractor is a simple process, although it requires a sufficient amount of time. It is also necessary to make every effort and skill to ensure that all links of the goose are located at an equal distance from each other. This will help to avoid distortions and sliding of the caterpillar track from the load-bearing surfaces.
As soon as winter begins in our country, given the climate, two-wheeled vehicles are put away in the garage until spring. It may be impossible to use a car for transportation due to heavy snow. And here, a snowmobile on tracks, which you can make from a walk-behind tractor with your own hands, comes to the aid of all motorists who want to move along a snowy road.
Not everyone has the opportunity to buy an additional vehicle, but everyone can independently construct a homemade tracked snowmobile from a walk-behind tractor.
Recommendations
The thickness of the tape is selected according to the engine power. On a snowmobile where a motorcycle engine is installed, there is also enough belt like that used in agricultural conveyors. If truck tires are used as a basis, then you need to select them according to the tread pattern to simplify the work. The beads are cut out of the tires, but areas are left for treadmills.
Important: the knife must be extremely sharp for such work; Wetting the blade in a soap solution helps reduce the complexity of manipulations, although it is better to use an electric jigsaw.
Whatever option is chosen, one must strive to make the entire structure as light as possible. Then traveling on loose virgin snow will not be difficult. To drive homemade tracks from the engine, some enthusiasts take drive sprockets from old Burans. The lugs can be attached to furniture bolts with a diameter of 6 mm; the same distance must be maintained between them. Cutting pipes will work better if you work alternately on both sides and do not try to cut through.
Installation of “barrels” (slides) is optional. Snowmobiles without such an element do not ride much worse. Any drawing or diagram must be adapted to the available consumables. It is advisable to take longer bolts so as not to experience inconvenience. There is also the most radical way to make a caterpillar for a snowmobile with your own hands - cut the standard propeller from the Buran in half.
Another way to create a snowmobile track with your own hands from a plastic pipe and conveyor belt is presented in the following video.
Source: https://stroy-podskazka.ru/snegohody/gusenica-svoimi-rukami/
Advantages and features of a homemade snowmobile
- The vehicle has a mechanical drive and a tracked walk-behind tractor, when driving which you will not get stuck in snowdrifts.
- Steering is done by the skis and the steering system is located in front so you can control it easily.
- The price when purchasing a particular vehicle is important. Therefore, if you do the math, the cost of making a snowmobile yourself will be five times lower than buying it from a manufacturer. And it will be even cheaper due to the available walk-behind tractor and other parts.
- Reliability – where a person cannot pass and a car cannot pass, the snowmobile will overcome all obstacles with ease.
- If a snowmobile is made by hand, then the designer is very careful in choosing parts. By doing everything yourself, you are responsible for the quality of your design. In addition, by paying great attention to the components of the mechanism, you make the snowmobile all-terrain.
Structural differences
The tracks for the Neva walk-behind tractor greatly simplify the transportation of cargo and the movement of the equipment itself. The tracked module covers a significant surface, the walk-behind tractor drives more smoothly, provides the least pressure on the road and does not slip on difficult soils. The tracked vehicle can operate even in bad weather, and in sunny weather it has excellent maneuverability.
It is not difficult to care for and use the module on tracks, and you can build it yourself. The main thing to understand is that when a walk-behind tractor is equipped with tracks, its speed limit will be lower, but not significantly.
In other respects, walk-behind walk-behind tractors are absolutely no different from standard walk-behind tractors:
- The engine is a 4-stroke engine with the ability to automatically lock the axis so that the technical device can turn around without turning around in a circle.
- There is also a requirement for mandatory water cooling, which can cope with overloads due to which the engine heats up excessively.
- This type of tracked module is more efficient than an air-cooled one.
- The coupling system, gearbox and gearbox are similar to the design of the standard model. It must be controlled by using the handle.
A walk-behind mower will help you quickly and efficiently remove not only grass from your site, but also weeds and even small...
When making tracks for a walk-behind tractor with your own hands, you need to know that if you design them very high, the center of gravity of the walk-behind tractor will change, and it will begin to have problems when turning, and even bending sideways. It is necessary to make the second driven axle longer by 2 cm. Also, by using a bushing, it will be possible to expand the wheel base that is already available in the walk-behind design.
Construction of a homemade motoblock snowmobile
This is a sought-after invention that you can make yourself if you have quality parts. The walk-behind tractor is taken partially (separate parts) or used completely. If you decide to use it not fully assembled, you need to weld a supporting frame with a rear axle, steering fork and wheels onto it. The most difficult stage in this case is the transformation of the working shaft of the walk-behind tractor into a drive gear.
The most practical and universal solution in the manufacture of a self-propelled vehicle would be to use parts from a walk-behind tractor. You only need to remove the steering fork and engine from the finished walk-behind tractor.
The motor can be located at the rear of the structure.
Before you start making your own structure, draw a drawing, collect all the necessary materials, prepare the tools, and you can get started. The design is quite simple and anyone can handle it; technical education and any skills are not required.
If you have not graduated from the Faculty of Engineering and find it difficult to draw up a drawing, use ours.
Drawing of a simple frame for a homemade snowmobile
The drawing shows the frame that you will need when making a snowmobile.
The walk-behind tractor in a homemade caterpillar snowmobile is the main part due to which your vehicle will move.
If everything is done correctly according to the drawing, you will get a snowmobile based on a gooseneck.
Drawing of a snowmobile frame on tracks
GP-N1 triangular caterpillar drive
Universal caterpillar for all types of walk-behind tractors, except heavy ones like MTZ or Agro. It will allow you to move around on your unit and use it all year round, regardless of weather conditions. Moreover, the design is completely ready for use and does not require any additional modifications.
Has the following parameters:
- speed - up to 20 km/h;
- weight - 50 kilograms;
- can pull a trailer with a load over any terrain covered with snow, sand or mud.
Making a snowmobile on caterpillar tracks with your own hands
Before starting work, decide on the tool. We can say with 100% certainty that you will need: various screwdrivers, a hammer, welding, a pipe bender (if you don’t have a ready-made frame).
Before preparing a drawing for making your own snowmobile, familiarize yourself with the standard configuration.
- Frame.
Every snowmobile has a frame: the more complex the design, the more reliable and stronger the frame should be. The best option is to take it from an ATV, scooter or motorcycle. If you don’t have such a part, you can weld it yourself from pipes with a diameter of at least 40 mm. - Seat.
The seat on the snowmobile must be durable, since the structure itself is quite low.
Mandatory condition: the seat must be made of waterproof material.
- Engine.
When choosing an engine, pay attention to its power. If you want a powerful snowmobile, then the engine should be like this. - Tank.
A container with a volume of 10-15 liters, made of metal, is perfect for a fuel tank. - Skis.
If you don’t have ready-made skis that can be adapted for a snowmobile, you can make them yourself from wood. It is better if it is at least nine-layer plywood. - Steering wheel.
When choosing a steering wheel, think about your comfort. It is best if it is borrowed from a two-wheeled unit. - Caterpillars.
Making the tracks is perhaps the most difficult part of the entire self-propelled vehicle. - Drive unit.
In order for the tracks to rotate, you will need a drive - it is best in this case to use a chain from a motorcycle.
Frame
If you don’t have a ready-made frame, you can easily weld it from a profile pipe and shape it using a pipe bender.
If you can’t make calculations and draw up a drawing yourself, then use the drawing from our website as an example.
Once the frame is assembled, treat it with an anti-corrosion compound and cover it with high-quality paint that will withstand both moisture and frost.
Caterpillars
Everyone who has previously designed a caterpillar walk-behind tractor on their own notes: making tracks is the most difficult process in a homemade project.
The easiest way to construct them is from car tires. This option is the most advantageous - high quality and low budget. The part is manufactured in a closed circle, so a tire rupture cannot occur.
Snowmobile tracks made from tires
Instructions for making caterpillars:
- From a car tire: take the tire and cut off the beads (it’s better to do this with a sharp knife). You need to cut so that the flexible part with the protector remains.
In remote areas where it is necessary to travel long distances, fishermen and hunters need to have their own transport. Due to the high price, many today cannot purchase one and are trying to construct a homemade snowmobile with their own hands. It is not easy to build, but if you apply maximum patience and effort, this problem will not be difficult to cope with.
Manufacturing options
The photo below shows a possible scheme for creating a track for a snowmobile. The length of the main section is 5.8 m. In this case, rollers measuring 0.07 m are used. The center-to-center distance is taken to be 0.9 m.
Advanced people may not limit themselves to this drawing and study another version of the kinematic diagram of the snowmobile as a whole.
Making a snowmobile track with your own hands if you have the drawings is very simple. But if you take even the best conveyor belt in its pure form, it will quickly wear out during operation. Stitching along the edges with thick fishing line helps correct the situation. There is no need to come up with anything original here - you just have to act in the same way as when sewing, you overcast the edges of the fabric. It is the perimeter that is the most vulnerable link, and it does not matter whether the caterpillar is made 1 meter, 2 meters or some other length.
The rubber strip must be looped. Some people simply sew the ends together, but this technique is not reliable enough. It would be much better to use a hinge that is matched to a piano hinge.
Important: the thickness of the tape must be selected according to the engine power. In most cases, a thickness of 1 cm is sufficient, as on agricultural machines.
But some people note that tires removed from an old motorcycle (manufactured before 1990) are also suitable for a snowmobile track. True, such a resource is, for obvious reasons, rare. An alternative solution is to make a track propulsion system based on belts. Grousers of their own design are added to the wedge-shaped blade. Most often, rivets or a nut-bolt combination are used for clutch.
The belts are equipped with holes at the factory, which can easily be adjusted to the main sprocket of the snowmobile. You just need to leave a certain gap between the stripes. Fastening of such a structure is done using a cable of small diameters and other durable materials.
Important: do not rush. Otherwise, there is a high risk that the entire assembly will fall apart while moving.
It is useful to consider alternative solutions (of which, in fact, there are a lot). One of the schemes also involves the use of a conveyor belt. Additionally, you will need a profile pipe of rectangular cross-section. Nuts, bolts, engravers and washers are used for fastening. They begin work with a homemade propulsion unit, forming track blanks.
They are simply cut exactly to the width of the track using an angle grinder. When the rough blanks are made, they need to be given a special shape by pressing on a machine.
Recommendation: the edges of the tracks should be lubricated with used oil.
After this, limiting fangs and fittings resembling the letter Y are welded on. The resulting specimens are checked and adjusted to the place where they should fit.
Assembling the caterpillar yourself, once the tracks are made, is no longer difficult. You just need to make holes in the tape using a tube sharpened at the end. The side of the tube is also equipped with a hole, which helps remove crumb rubber and dust. The tracks are drilled with an electric drill; there should be two holes on each edge. Assembly with such blanks is not difficult.
Frame construction
Before you begin building a snowmobile, you will first need to select a material. The easiest way is to make a homemade frame from wooden blocks. The result is a very light and fairly durable structure, which is considered the cheapest and easiest to manufacture. For this you will need:
- Wooden bars.
- Sheet iron.
- Metal scissors.
- Drill and drill bits.
- Hand saw.
- Bolts and nuts.
The advantages of building such a structure are undeniable. In the event of a breakdown, the wooden model will not be difficult to repair far from a populated area. In the forest it is easy to find scrap materials that can be used for repairs. But the main advantage is that this snowmobile rarely falls through the ice and does not sink in water.
Wooden structure
It is known that bars and boards made of wood do not have particular strength in their places
connections. Therefore, before starting construction, it is necessary to make additional metal corners. To do this, take sheet iron and cut square plates with scissors along the width of the bars. The places for the bolts are marked in them with a tape measure, and then four holes are drilled with a drill. After this, the plates are bent in half exactly 90 degrees. These will be excellent devices for firmly fastening wooden blocks in the corners of a homemade frame.
Usually they start construction after making a drawing with exact dimensions. And four bars are cut along them with a hacksaw, and holes for bolts are drilled in the corners with a drill. Then they are placed on a flat floor surface in the form of a regular rectangle. Metal corners are applied to the connection points, bolts are inserted and tightened tightly with nuts.
To mount the engine and track, two additional crossbars made of bars with holes for bolts at the ends are installed on the frame. But before that, the corners for fastening are first made. They are cut out of triangular-shaped iron sheets and holes are drilled in the corners
.
It’s better to make eight pieces at once and place them on top and bottom. Then the fastenings will be more durable and reliable in operation.
When they are ready, the crossbars are inserted inside the frame and the triangles are placed on top. Holes are drilled into them exactly to size using a drill through the bars. Then long bolts are inserted there and tightened tightly with nuts. At this point, a strong wooden frame will be ready, which will serve for a long time on a homemade device.
It is much more difficult to build homemade metal products. This requires special tools and devices that not everyone may have. Significant costs will be required to purchase or rent them. However, this building will be much stronger and more durable than a wooden structure.
. Here you will need:
In addition, to build a metal frame you will need more durable materials. You will definitely have to buy them in the store, since today they are not found anywhere else. And I don’t really want to build a new homemade snowmobile from old parts due to poor reliability. Therefore, only good materials will be used here:
- Metal pipes.
- Iron corner.
- Sheet steel.
- Channel.
As a rule, before you start building a frame, you need to make a simple drawing. Using a grinder, cut the pipes according to its parameters and use a welding machine to connect them into a rectangle. Inside the frame, insert a couple more partitions from the corner to install the engine and track. If you make them from channel bars, the structure will be much stronger and more reliable in operation.
After this, you just need to cut off two small bushings from the metal pipe.
And then weld them to the corners of the front part, where the swivel ski supports will be inserted. The metal frame is ready and you can begin construction, as well as installation of the main units and components.
About the device
Tracked walk-behind tractors are much less common than their wheeled counterparts. The explanation for this is quite clear - wheeled walk-behind tractors Cayman, Patriot, Texas, Foreman, Crosser, Viking, Forza are more suitable for plowing land, i.e. its design is most suitable for working on the ground.
Thus, all conversions of a wheeled walk-behind tractor into a tracked walk-behind tractor involve the additional attachment of one wheel on each side. As a result, we get a 4-wheeled walk-behind tractor, on which you can already put on tracks (homemade or store-bought, for example, Buran caterpillar).
By the way, additional wheels can be made removable so that you can quickly turn it back into a standard walk-behind tractor for working in the garden. This can be achieved by attaching these wheels to an axle that we already have in stock, through a flexible or rigid transmission.
This solution is the most appropriate, because there is no need to weld additional fasteners.
As for the design of such walk-behind tractors, they are completely identical to wheeled walk-behind tractors:
- Engine. Tracked models use a more powerful 4-stroke engine, which has an axle locking function.
This is important because it allows the crawler to turn in place without making a full circle to turn.
Before we begin to describe the method of making tracks yourself, it would not hurt to evaluate the offer of some special stores that sell walk-behind tractors and related materials. In particular, we will estimate the cost of some types of tracks for well-known walk-behind tractors.
Snowmobile attachments for the Neva walk-behind tractor
Thus, the tracks for the Neva walk-behind tractor, the price of which is about 28 thousand rubles, is a full-fledged snowmobile attachment. Seats for drivers can be purchased separately, thanks to which the Neva walk-behind tractor becomes similar to a mini tracked tractor, albeit with lower performance indicators.
- developed speed (with Neva walk-behind tractor) – about 18 km/h;
- total weight of the console – 37 kg;
- length – 100 cm;
- width – 60 cm;
- height – 34 cm;
- number of passengers – one driver and one passenger.
For more information about the caterpillar drive for the Neva walk-behind tractor, watch the video:
In addition, an attachment to a walk-behind tractor on tracks is available for sale, designed for attachment to the Agat and Salyut models. Its cost is 25-27 thousand rubles. This design does not have the ability to attach a driver's seat, which somewhat limits the capabilities of this device.
However, it is quite suitable for off-road and snowy driving. Snowmobile attachments on tracks for walk-behind tractors are quite common, as evidenced by a fairly large number of different models in online stores.
Their distinctive feature is the ability to control them not only with two hands, following the walk-behind tractor, but also while sitting in a folding sled, which, however, must be purchased separately.
Considering that the average price for such attachments is about 30 thousand rubles (plus the price of folding sleds is about 5 thousand rubles), we can say that making tracks yourself is a fairly optimal solution for those who do not have the opportunity to spend extra money on purchasing .
Hanging equipment
To make a snowmobile fast and strong, you need to put a good engine on the frame. If you install a low-power motor, then such a structure will move poorly. You also need to correctly calculate the caterpillar. If the area is too small, it will drown in large snow and will not pull even on flat terrain. Particular attention should be paid to skis, which should create good stability and safety when moving at high speed.
DIY rubber caterpillar
To easily move through the snow, it is very important to give your homemade snowmobile a good rubber track. It is not easy to make such a device with your own hands and it is better to purchase it in a store completely with rollers. Installing a standard factory track on a homemade structure is not difficult. To do this, you just have to secure the drive shaft and rollers with bearings to the frame. If your financial situation does not allow you to buy the entire device, then the most expensive parts can be easily made yourself. For this you will need:
- Conveyer belt.
- Plastic pipe.
- Bolts, washers and nuts.
A cheap homemade snowmobile track is usually made using a thin conveyor belt. To do this, plastic pipe blanks are sawed off to fit the width of the rollers. Then they are cut lengthwise into two equal parts and holes are drilled for small bolts. After this, the halves of the plastic pipes are secured to the conveyor belt with bolts, washers and nuts. The caterpillar is ready and further construction needs to begin.
.
Homemade skis
It's no secret that in winter it is much more convenient to travel on deep snow on skis. They also serve well as a control device on a snowmobile. It is not difficult to make a wooden structure, but only strong boards made of birch or oak are suitable for this. They need to be well dried, planed, and then heated and the ends bent. It's no more difficult to make metal skis. To do this, you will need to cut two plates from sheet steel and weld a thin corner on the sides.
In order for the skis to turn freely, metal pipe stands are welded to them. In working order, they are held in the front bushings of the frame, where they rotate easily
.
Washers or large nuts are welded to the top of the racks, into which rods are inserted to control the snowmobile.
The steering wheel itself is easy to make with your own hands, or it’s easier to remove it from an old motorcycle. Thus, all that remains is to install the motor, as well as the driver’s seat, and you can hit the road.
Is it necessary to go to a workshop?
When deciding to replace a track on your own, you should soberly evaluate the combination of your capabilities with the design features of the snowmobile, since the list of work may differ slightly. The typical procedure for replacing a track using the Arctic Cat 580Z snowmobile as an example looks like this:
- The rear part of the snowmobile is hung on a special lift or using improvised means.
- The track tension is released, after which the cart is unscrewed.
- The driven pulley of the variator (often mistakenly called by many as the “rear variator?”) is removed, and the speedometer cable is removed. A special puller may be required.
- The oil is drained from the gearbox, after which its cover is removed.
- The drive chain tensioner springs, gears and the chain itself are dismantled.
- The bearing cover of the track drive shaft is unscrewed.
Only after this can you pull the drive shaft of the caterpillar inward and remove it, and then, putting the new caterpillar in place, assemble everything in the reverse order. It is important to remember that before installation, the inner surface of the track must be moistened with water? it acts as a lubricant for mucous membranes.
Tensioning the new track should be done after the engine has been cranking it for a while with the snowmobile suspended.
The list of necessary operations can be increased by the presence of a disc brake on the drive shaft, as well as by poor layout of other components. So, on a Ski-Doo TNT you will have to dismantle not only the brake mechanism, but also the battery and muffler. This kind of work can already be difficult for many snowmobile owners, so making the decision to take the machine to a workshop will be a very smart one. For most devices of the highest price category, the cost of tracks for which is measured in tens of thousands of rubles, the answer will be obvious, because the price of the master’s work will be an insignificant part of the costs. Self-replacement in such cases is more of a whim than a necessity.
What kind of homemade caterpillars can there be?
- 1 Methods for making homemade caterpillars
- 2 Home-made caterpillars based on a walk-behind tractor
- 3 Features of the development of a caterpillar mini tractor
- 4 Conclusion
Using a caterpillar is the most common way to increase the maneuverability of any equipment working on unpaved soil. Homemade caterpillars are very popular among the population. There are many developments in this direction. Craftsmen implement various approaches: from well-known, classic solutions, using factory parts, ready-made drawings, and ending with the implementation of their own, non-standard ideas using what is at hand.
A homemade mini caterpillar tractor, compared to its wheeled counterpart, has significantly greater cross-country ability and moving power. This allows you to use mini tractors in any weather conditions, types of terrain, and reliefs.
Design features of the mini tractor
A homemade mini tractor may seem unsightly and disproportionate only at first glance. In fact, a well-assembled mechanism is a rational arrangement of all key components and assemblies of the chassis (suspension, transmission, engine). The main components of the frame are two spars and two cross members.
Homemade mini tractors on caterpillar tracks have a spar of three successive stages: the outer ones are made of a channel, the inner ones are made of a square steel pipe. And the front traverse must be smaller than the rear one (for example, if a 12-size channel is selected at the front, then a 16-size channel must be installed at the rear).
DIY tracked all-terrain vehicle: description, manufacturing plan, tools, video.
How to make a vibrating plate with your own hands is described here.
Power unit
Any motor that matches the required power and torque will do. The optimal solution is a 4-cylinder water-cooled diesel engine with a power of 40 hp.
It can be installed without making any adjustments to the design. That is, to make a crawler tractor with your own hands, you just need to remove the bridge from any suitable domestic truck and integrate it into homemade equipment.
Caterpillar
It is necessary to select the design that will be used and the track itself. The simplest option is designs with rollers made of wheels and tires taken from carts, for example. The wheel size is selected depending on the size of the mini tractor. The caterpillar can be made from a large tire, cut off on the sides.
Other mechanisms
As a gearbox, you can choose, for example, a unit with a GAZ-53 or its alternatives. A device with a GAZ-52 is suitable for clutching.
Finishing the job
Finally, about how to install it on a homemade snowmobile on tracks. In the process of assembling a snowmobile, it is necessary to make two rotary bushings. This will be your steering mechanism. How it's done? You need to weld a water coupling with a 1/3-inch internal thread to the front beam and screw the male threaded pipes into them. The pipes already have ski struts and welded bipods for the steering rod. By the way, you can use skis from an ordinary children's car "Argamak". But before that, first prepare them for installation: attach the corners of the rotary stand and trim the metal. This will significantly improve the maneuverability and control quality of the snowmobile at high speed.
Many residents of northern latitudes and places with poor cross-country ability are engaged in the development and assembly of various equipment with increased cross-country ability. Tracked all-terrain vehicles are no exception. There are a large number of different options for creating such technology. But the most problematic issue for all-terrain vehicle designers is the manufacture of tracks.
You can, of course, use factory-made ones, but having completely assembled an all-terrain vehicle with your own hands, you want to have caterpillars of your own production. Today, there are several options for creating such propulsors, which practically do not differ in their technical characteristics from the factory ones.
A simple version of caterpillars
The simplest option for snowmobiles is made from a conventional roller-bushing chain and conveyor belt. Moreover, its production does not require any special equipment or tools. In this case, the work can be done almost in the middle of the living room.
In order for the conveyor belt to serve for a long time, it is necessary to sheathe its edges with fishing line with a distance between stitches of about one centimeter. This activity is very similar to seamstress stitching fabric. In any case, such firmware will prevent the tape from unraveling while driving. You can fasten the ends together in any suitable way. A swivel joint similar to a piano hinge might work for this, or just sew it together, but it's unlikely to last long.
The thickness of the conveyor belt depends on the power of the power unit. If the all-terrain vehicle is equipped with an engine from a Soviet-made motorcycle, then a tape 0.8–1 cm thick, used on conveyors in agriculture, has proven itself to be excellent. To give the track rigidity, it is necessary to attach a bushing-roller chain to its inner part. This can be done using bolts or rigid steel wire. The main thing is that the chain fits tightly into the surface of the conveyor belt.
Caterpillars made in this way are distinguished by their long-term operation, although they are easy to manufacture. In addition, if necessary, you can easily carry out repairs, even in the field.
Tire propellers
Many owners of snowmobiles use regular car tires as tracks for their equipment. For these purposes, you need truck tires, and you should choose them with the required pattern so as not to complicate your work in the future.
To make a caterpillar mover from a tire, you need to cut off the sides, leaving only the part with the tread. This activity takes a lot of effort and requires patience, since the work requires only a well-sharpened shoe knife.
In order to make manufacturing a little easier, you need to periodically wet the knife with soapy water, which will make the process of cutting rubber easier. Some use specially designed devices for these purposes. You can also use an electric jigsaw with a fine-tooth file attached to it. It also needs to be watered with soapy water.
The first step is to cut off the beads from the tire. Next, if necessary, you need to remove several inner layers in the resulting track. This is done to give it softness. If the tread pattern is not satisfactory, then you should start cutting a new one, which is quite a painstaking task.
This type of track lugs has one undeniable advantage over the previous option. Since it is solid, without joints, its reliability is much higher. One of the negative aspects is the small width of the track, but to increase it, two or three tires can be spliced together.
Belt tracks
The ease of manufacturing of such tracked propulsion systems is increasingly attracting all-terrain vehicle owners to use them on their vehicles. Belts with a wedge-shaped profile are assembled into a single structure using lugs, which are attached to the belts using rivets or screws.
As a result, it turns out that the caterpillar track already has holes for the sprocket. To do this, it is necessary to lay the belts at small intervals.
Making tracks for an all-terrain vehicle
The name all-terrain vehicle refers to a vehicle with increased cross-country ability. These include tractors, snowmobiles, SUVs and tanks. Since often from improvised vehicles. Initially, this involves motorcycles or scooters, but the end result is a vehicle that is not afraid of either off-road or dirt. The increased cross-country ability of an all-terrain vehicle mainly depends on its tracked propulsion units, which are mounted on wheels.
In this version, the caterpillar will have four stripes 5 centimeters wide. They must be cut from a regular conveyor belt. Then connect the sides using a P-shaped profile. Next, you need to make balancers. Using a stamp, you need to make parts for the floor of the wheel from sheet steel. After this, it is necessary to make hubs from bronze. The half wheels should be connected with six bolts. The balancers are ready.
The next step is to produce the shafts for the track support drums. They should have holes for the bearings. Drums can be made from duralumin blanks. When connecting them together, you need to insert a rubber sprocket. It turns out that the caterpillar is driven by a drive sprocket with a chain drive. It is installed on the rear fork. After which the entire caterpillar should be assembled into a single whole.
The vertical arc must be equipped with a steel bushing through which the wheel axle passes. A mechanism is attached to the eye on this bushing that secures the structure of the rear fork. Track balancers are attached to the remaining ears of the all-terrain vehicle. The mover is ready to use.
As you can see, you can make a caterpillar in different ways, the main thing is to have patience and desire.
Figure 1. Drawing diagram of a homemade snowmobile
I attached the lugs to the conveyor belt with two 6 mm furniture bolts with a large semicircular head. When making a caterpillar, it is very important to maintain the same distance between the lugs, otherwise they will “run” onto the teeth of the drive sprockets and the caterpillar will begin to slip and slide off the rollers.
Figure 2. Device for cutting plastic pipes: 1. wooden block; 2. plastic pipe; 3. metal corner.
To drill holes in the conveyor belt for 6 mm mounting bolts, a jig was made. The holes in the tape were drilled using a wood drill with a special sharpening.
Using such a jig, you can drill 6 holes in the conveyor belt at once to attach three caterpillar lugs.
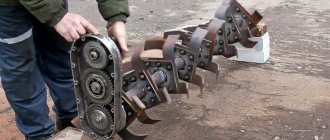
At the store I purchased four inflatable rubber wheels from a garden cart, two drive sprockets from a Buran snowmobile and two sealed bearings No. 205 for the caterpillar drive shaft.
I asked a turner to make the drive shaft of the caterpillar and supports for the bearings. I made the snowmobile frame myself from 25x25 mm square pipes.
Since the axes of the ski and steering hinges are on the same line and in the same plane, you can use a continuous tie rod without ball ends.
Ski turning bushings are easy to make. I welded 3/4″ female plumbing couplers to the front cross member of the frame. I screwed pipes with external threads into them, to which I welded the bipod of the steering rod and ski racks.
I recommend using skis from the Argomak children's snow scooter. They are lighter and more flexible, but they need to be equipped with corners for attaching to the snowmobile's rotating stand and a metal undercut at the bottom - for better control of the snowmobile when moving on crusty or compacted snow.
The chain tension is adjusted by moving the motor.
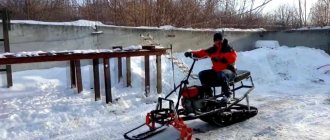
Driving a snowmobile is very easy. When you increase engine speed with the throttle handle located on the steering wheel, the automatic centrifugal clutch is activated and the snowmobile begins to move. Since the estimated speed of the snowmobile is low (only about 10-15 km/h) and depends on the density of the snow, the snowmobile is not equipped with brakes. It is enough to reduce the engine speed and the snowmobile stops.
I’ll share a few tips that may be useful when repeating this design.
1. I cut the pipe for the tracks lengthwise using a hand-held circular saw for wood, first on one side, then on the other. This makes it smoother than cutting both walls at once. It is more convenient to process small workpieces. If you immediately cut a long pipe lengthwise, then the plastic will melt and the saw blade will jam.
2. Caterpillars can be made of any width. And each designer has the right to choose what is more convenient for him: to make a wide but short track or a narrow and long one. Just remember that with a large caterpillar the snowmobile will be difficult to control and the engine will be more loaded, and with a small one it may fail in loose deep snow.
3. Some of my photos show that plastics are installed inside the tracks. These are guide stops for the slide, which should prevent the caterpillar from sliding off the rollers. But during the operation of the snowmobile, the caterpillar did not slide off the rollers even without slipping, so “barrels” can not be installed, which will reduce the weight of the snowmobile.
4. At the end of winter, I completely disassembled the snowmobile to determine its weight. The weight of its individual nodes turned out to be as follows:
- caterpillar - 9 kg;
- drive shaft assembly - 7 kg;
- two pairs of wheels with axles - 9 kg;
- engine and steering wheel - 25 kg; pair of skis -5 kg;
- frame - 15 kg;
- double seat with posts - 6 kg.
In total, everything together weighs 76 kg.
The weight of some parts can be further reduced. Nevertheless, the weight indicator for a snowmobile with a track of this size is quite satisfactory.
The geometric dimensions of my snowmobile are as follows: snowmobile frame length - 2 m; the distance between the axes of the support wheels (rollers) is 107 cm; The width of the caterpillar is 47 cm. The pitch of the caterpillar lugs depends on the thickness of the conveyor belt and it must be selected experimentally (I got 93 mm).
I do not provide exact dimensions and drawings of the snowmobile parts, since anyone who plans to repeat the design will be guided by those parts and components that they can purchase or manufacture on their own.
The photo shows the stages of manufacturing a snowmobile according to the above diagrams and drawings:
- Blanks for the lugs of the future caterpillar.
- Special drive sprocket from the Buran snowmobile.
- Homemade track drive shaft with sprockets installed for the chain and track.
- A jig for drilling holes in the conveyor belt.
- Track rollers with axles and mounting brackets to the snowmobile frame.
- The drive shaft of the track is driven from the engine by a chain from the motorcycle.
- Snowmobile frame with drive shaft and track rollers.
- Ski turning control mechanism.
- On this snowmobile I installed plastic skis from Chinese children's sleds. But the plastic from which they were made turned out to be very fragile and by the end of winter one of the skis broke.
- Skis from the Argomak snow scooter with an installed undercut (skate) and mounting angles for installation on a snowmobile.
- Ski turning bushings. It's very simple: no bearings. You only need to apply lubricant to the threads, and a long service life is guaranteed. In addition, by screwing in or out the pipes, you can change the ground clearance of the snowmobile.
- The axle of the front wheels (caterpillar rollers) is fixedly attached to the frame, and the axle of the rear wheels-rollers can be moved by rotating the bolt to regulate the tension of the track.
How to make a snowmobile on tracks: photo for article
What materials are required
To convert wheel modules into tracks, a powerful engine is required. It must have an axle block. Power is important, since the walk-behind tractor will be driven on difficult roads. Without improvement, it is impossible to achieve good maneuverability. Basic building materials required:
- Motoblock machine with gearbox, 4-stroke engine, axle block option.
- Several extra wheels to put the caterpillar on.
- The track attachments themselves.
Tips for use and after
When using tracked modules for a walk-behind tractor, you should fully check and carefully look at how high-quality the chain tension is, and also systematically treat with machine oil the elements whose friction occurs when the walk-behind tractor moves. In addition, it is necessary to check each time before use to see if there are any breaks in the chain.
After operation, it is also necessary to check the equipment and tracks, carry out a technical inspection in order to promptly find damage or broken load hooks. When using a walk-behind tractor, it is important to avoid driving into the rhizomes of ancient trees and rocky embankments, as well as stumps, otherwise the tracks will break.
- Monitor the level of adjustment and tension of the chain.
- Externally, make sure that when driving a technical device, the chain is intact.
- All contacting parts and mechanisms must be lubricated with machine oil.
Spring is coming soon, and the busy working season for the walk-behind tractor will begin. Bring sand and manure to the site, plow the soil,...
Basic care recommendations will help reduce to zero the risk of failure of finished walk-behind tractors and, in particular, the caterpillar unit. A walk-behind tractor on tracks will become a powerful assistant for accomplishing tasks.
Connecting tracks to a walk-behind tractor makes it possible to significantly change maneuverability and maneuverability. This leads to an increase in the range of potential operations that the device can handle. Tracks outperform traditional wheels in some positions. Regarding the remodeling process, it is quite simple, but you need to have experience, knowledge, prepare materials and tools, and if you wish, be attentive to the work and the task at hand, everything will definitely work out.
Snowmobile repair with on-site technician
Carried out at the location specified by the customer. The cost is calculated from two criteria: fixed and variable parts. An approximate estimate for on-site snowmobile maintenance is preliminarily agreed upon, taking into account the cost of consumables.
Fixed part: a mechanic arrives and works with diagnostics. If repairs are found to be impossible, the equipment is taken to the service center.
Variable part: payment is made for the work performed by the mechanic. It is calculated taking into account the time spent on repairs and the cost of a standard hour. A preliminary estimate for maintenance is agreed upon in advance, taking into account the cost of expenses. materials.
Step-by-step technology
Several reliable technologies for creating a tracked structure with your own hands have been developed. They have shown themselves to be more reliable, so they are used often. Which one to choose specifically depends on the skills and materials that may be needed. You can make tracks for a walk-behind tractor with your own hands, following the recommendations of the masters.
Conveyor belt
The technique is the easiest. In addition to the transport tape, you need to take a bushing roller chain. The ease lies in the fact that creation does not require a large amount of additional materials and tools. To increase the period of use of the machine tape in the module, it is necessary to circle it along the edge with fishing line. Be sure to provide a step of 1 cm.
Particular attention is paid to the height of the material. How long the device can withstand depends entirely on this. It is optimal to take a tape with a minimum height of 0.7 cm. We need to take care of one more wheel on both sides. It will fit from an old car, but it is important that the size is the same as that of a wheel on a walk-behind tractor.
Car wheel
Crawler attachments to a walk-behind tractor made from car tires are a popular solution. The craftsmen say that the design will be more reliable with tracks made from tires. In order for the made device to be practical, it is necessary to take care of the quality of tires. Tractor tires are what you need. The tread pattern plays a role as it is a lug. The process is step by step:
- When the tires are prepared, they are cut into a track.
- This is a difficult job that requires attention. Use a well-sharpened knife for cutting. It is correct to take the one that shoemakers use. Periodically it must be moistened in a soap solution. This makes the rubber surface easier to cut.
- Both sidewalls are cut off from tires. To make the process easier, use a jigsaw with small teeth. Cut off excess parts inside the tire, if necessary. If the path turns out to be hard inside, trimming can be done again.
The operation of gardening equipment begins with its startup. The walk-behind tractor is a design in which…
The advantage of the technique is that a ring connection is not necessary. The tire is already round. Therefore, it turns out to improve the strength indicators of the module, which is important under conditions of serious overloads. And yet such structures turn out to be quite compact. The length will be according to the size of the tire used.
Two more methods
Walk-behind tractors on tracks are often created using V-belts. They are fastened with lugs. The belts are secured with rivets. A popular method is to use chains of the same size. They can be found in the garage, they are often left over from other equipment. The work is phased:
- Take 2 equal chains.
- Break the end links and combine the chains into a single ring.
- Brew.
- Use hooks to fasten the chains together and create a strong fastener. They can be made from steel plates of the required thickness. They are connected with bolts.
The caterpillar drive for the walk-behind tractor requires skills in working with equipment and a welding machine.
Application of the base from Buran
Making tracks for a walk-behind tractor with your own hands is not a problem, but if you don’t have time, you can take a snowmobile attachment. The performance was demonstrated by a walk-behind tractor on a tracked module from Buran. It is rational to use used components, since store-bought components are not cheap.
Additional Tips
Before making a caterpillar drive for a walk-behind tractor, you need to make drawings and determine the dimensions. They do this so that if a very high homemade caterpillar for a walk-behind tractor is made, it will be necessary to change the center of gravity of the walk-behind tractor. This will inevitably cause problems when turning, as the equipment will fall to one side. To avoid this, the second driven axis must be made longer.
In addition to the rules regarding engine power, they also look at the cooling system:
- Air cooling is ineffective under significant overloads, which will damage the engine.
- It is correct to use water cooling, which has proven to be stable.
Attached attachments to the walk-behind tractor can significantly improve the vehicle's cross-country ability. Therefore, you can diversify the range of operations that a homemade device can handle. To put it another way, the created base in some situations outperforms standard wheels. However, reworking walk-behind tractors may not be suitable for owners of these technical devices. It talks about special requirements for the engine.
The motor comes with good traction. Homemade production is suitable for execution in a garage. That's why a block created in a garage is an excellent replacement for tracked monoblock blocks that are on the market.
Features of the development of a caterpillar mini tractor
A homemade crawler mini tractor used for domestic purposes primarily has wheels. But during operation, situations arise when the wheeled version does not cope with the assigned tasks. Then you have to create a new version of the mini tractor or modernize what you have.
A homemade tractor on tracks can give the impression of being a clumsy, crude piece of equipment.
But if you assemble the tractor correctly and do it rationally, then you will get a fairly powerful, efficient mechanism capable of performing almost any task.
Homemade mini tractors are the result of certain design stages. Sequence is important for fitting one part to another. A homemade tractor on tracks is manufactured in the following sequence:
- The frame is being assembled.
- The drive wheels and road wheels are attached to the frame.
- The power unit and gearbox are installed.
- Onboard brakes and differential are attached.
- The necessary components are connected to the gearbox.
- Installation of the control system.
- The driver's seat is being arranged.
- Assembly of caterpillar tracks.
- Fastening the tracks.
- A homemade crawler tractor on tracks is tested, and if necessary, certain components are modified.
To assemble the frame, it is enough to have two spars and traverses. It should be taken into account that the rear traverse must be larger than the front. This is adjustable using channels of different sizes.
To assemble a crawler tractor with your own hands, you need an engine. There are no special restrictions when choosing a motor. The main thing is to select the required power. If a homemade crawler tractor requires a bridge, then it can be taken from any domestically produced truck. All other components (gearbox, control system, brakes, etc.) are installed in the order described above.
The caterpillar is selected based on preliminary calculations. It is highly recommended to make detailed drawings. A homemade crawler tractor is very difficult to create without accurate technical data.
A mini tractor on tracks is not much different from large tractors. The organization of their main working units is the same. The only difference is that the mini tractor on caterpillar tracks has a simplified design of the turning system. This must be taken into account when assembling a mini tractor with your own hands. The turning process can be briefly described as follows:
- One axle shaft is braked, and the second receives torque;
- The second one rotates around the stopped first caterpillar.
It turns out that a mini tractor on tracks does not have a single drive. Mini tractor tracks do not turn in one direction at the same time.
In the simplest design, wheeled rollers with tires from a trolley can be used. Typically, wheels are selected to match the size of the mini tractor. The track itself can be cut from a large tire. It’s easier to assemble a homemade mini caterpillar tractor if you have at least the most necessary large tools: a welding machine, a jigsaw, a lathe, an angle grinder.
Types and options of service
To keep your snowmobile in good condition and eliminate the causes that accelerate the wear of elements, you need to fulfill all maintenance requirements. Maintenance is preventative, so any work in this area must be carried out periodically in full, regardless of the condition of the snowmobile.
To get complete assistance with maintenance or repair issues, most often contact the dealer.
Types of maintenance:
- Regular (daily) - before departure and upon return.
- After running in - after a run of 300 km.
- Periodic (TO-1, TO-2, seasonal when put into use after storage).
Daily maintenance includes inspection operations. It is necessary to press and release the throttle control lever several times to check the serviceability and smooth operation of the throttle valve wire. When released, the lever should return to its original state, which corresponds to the idle speed of the power unit.
Other control operations:
- Press the brake lever and make sure that the mechanism engages until the lever touches the steering column handle. After this, the lever should return to its original position.
- Check the correct operation of the steering wheel. He and the skis should turn without problems, smoothly.
- Check the fuel level.
- Check the quality of fastening of the hood and shells.
- Check the filter contamination status.
- Check the track and suspension.
- Inspect the towbar.
Start the engine to warm it up, check the quality of the headlights during the process, press the emergency stop switch to check the functionality.