KUHN for the rear linkage of a tractor: what equipment can be used
The homemade product installed on a mini tractor with KUN can be of two types:
- Equipment type PF-1, which has its own supporting frame. This homemade KUN is attached to a tractor, which protects the machine from overturning. Such equipment weighs about 900 kg, is driven by hydraulic cylinders, has a load capacity of 1 ton and a speed of 20 km/h.
- The PKU-08, which is a more modern modification of the PF-1, is also installed on the rear linkage of the MTZ 82. It is not difficult to attach a homemade KUHN or a KUHN assembled in a factory to a tractor. But it is worth considering that PKU-08 is distinguished by its ability to carry less cargo than the previous equipment model. The PKU-08 weighs only 700 kg, reaches a speed of up to 20 km/h, and is capable of lifting 800 kg of cargo at a time.
The kuna model on MTZ 80 or MTZ 82 is produced at the Salskselmash plant, which specializes in agricultural machinery. KUN 10 is a functional and practical boom, created specifically for the specified MTZ models. But it can also be installed on a Chinese tractor. Although it is with Minsk technology that the equipment works best. Among the advantages of KUN 10 it is worth noting such characteristics as:
- Versatility. The Belarus tractor is capable of being a loader and performing earth-moving work like an excavator. The machine is also used as a bulldozer or leveler.
- Compactness. The installation of KUN 10 at MTZ allows the equipment to be used in the city and on small construction sites. Therefore, such a tractor is constantly used for landscaping territories, digging holes and trenches, laying communications, etc.
- High level of productivity.
- Reliability.
- Ease of use.
- Easy to use.
KUN for wheeled tractors has the following design:
- The boom, which is controlled by four hydraulic mechanisms, two of them are used to lift loads, and another two are used to adjust the angle of inclination of the bucket.
- The drive that powers the chassis. Its system also has the option of a connector, with the help of which it is connected to the tractor.
- The boom control panel is installed in the tractor cab.
- Buckets can have different volumes, which vary from 0.35 to 1.5 m³.
Characteristics of a homemade unit
Homemade KUN for a mini tractor: installation features. The manufacturer offers buckets of various sizes, fork equipment (needed for agriculture and loading and unloading), rake grids for collecting hay, straw, and mown grass. Grabs for logs are sold separately, so KUNs are used for logging. Additionally there are grippers for bales and rolls. You can also find jaw dumps in stores. The basic equipment for a homemade KUN for a mini tractor may vary.
The dimensions of KUN 10 can be different, depending on the modification of the equipment. The carrying capacity of the rake grid, dumps and grabs is 500 and 800 kg. The equipment bucket rises to a height of 2.5 m, and the rake grid - to 3.5 m. The unloading angle of the bucket, on average, ranges from 55 to 65º. The performance and size of the equipment depend on the chassis that needs to be mounted on a homemade mini tractor or other self-propelled unit.
Buying attachments is expensive, so you can make a KUN for MTZ with your own hands. Assembling and installing such a tool is simple, you just need to draw up a diagram of the equipment and mark on it the place where it will be mounted on the wheeled tractor. A homemade KUN is attached to the rear linkage of an MTZ 80 or 82. This is much easier than installing a KUN 10, which is available in a front modification.
A homemade tractor differs from a factory one and has several significant advantages:
- Ease of mounting.
- Selection of the length and height that is necessary for specific work on the ground or at a construction site.
- You can use scrap materials left over from other equipment.
In order to make a KUN for a homemade or factory tractor, you need to stock up on the following equipment:
- welding machine;
- tools for cutting and cutting metal;
- sledgehammer;
- hammer;
- wrenches.
If you have no welding experience, then you should find a specialist who knows how to work with the machine. This determines the quality and reliability of welding seams, on which the installation and duration of use of the KUN largely depends.
How to make a KUN for MTZ with your own hands
It is imperative to make drawings of a homemade KUN so that there are no problems with cutting the metal into individual elements. Let's look at how to make such equipment yourself:
- You will need profiles and sheet metal. The thickness of the materials must correspond to the load that is planned.
- You will need to purchase several hydraulic cylinders - 2 large ones to lift the bucket, and 2 smaller ones. They are needed to adjust the inclination level and equipment parameters.
- Cylindrical joints, without which it is impossible to assemble the entire structure of the wheel unit.
When you have all the necessary tools and materials, you can begin the process of assembling the KUN with your own hands.
You can find drawings and diagrams on the Internet, on specialized forums and websites, or you can create them yourself.
This will allow you to cut the metal so that there is a minimum amount of waste. You can contact design firms, where employees will help you create a good drawing of the future attachments for the tractor.
The loader must consist of two rectangular frames. One of them - the external one - should be larger. It is this that is aggregated, i.e. attaches to the rear canopy of the tractor. The inner rectangular frame is cut from sheet iron. Large hydraulic cylinders must be welded to the bottom of the frame, and a spacer must be installed on top. It is needed to create a stiffening rib.
The majority of the structure is the boom attachment, accounting for more than 70%. To install it, you will need the help of another person who should know how to install it correctly. The product is placed closer to the frame and connected to the cylinder. Then you need to attach the middle part to it, after which the bucket is hung. It is worth taking into account such an important nuance as the relationship between the length of the boom and the stability of the tractor. If the boom radius is more than 2 m, then a counterweight must be installed on the front frame. This will allow the MTZ to stand firmly on the ground and not tilt in different directions while carrying loads.
The installed bucket is made independently, also from sheet metal. The elements must be welded so that a structure similar to a boomerang is obtained. It should have 3 attachment points - in the center and along the edges.
Are you here
Questions can only be asked after registration. Please login or register.
Who made what type of pitchfork for loading wood? I want to make it, but I can’t figure out where to start.
I think I wrote for loading timber with a tractor and on a coon.
who made what kind of pitchfork for loading timber I want to make it but not how not
I took one vilina 15 cm wide from the cara and cut it into lengths. I use them to move anything.
I took one vilina 15 cm wide from the cara and cut it into lengths. I use them to move anything.
I got caught with punishment when I did it.
looks good. but for this you need horns from a loader where there are such inspirations, I would need everything homemade from scrap materials.
where are such inspirations,
MAYBE WHAT WILL HAPPEN AT THE RYSKAY METAL BASE
where are these inspirations
Ask around at factories and wholesale stores. I have a 60mm round timber. I took it from a potato harvester from metal scrappers. And I found a frame from a cultivator frame with a wall thickness of 10 mm.. In general, I welded whatever I found.
KUHN on MTZ-80, 82: rear linkage
The main differences between the MTZ-80 and MTZ-82 attachments. Main technical characteristics of KUNs for MTZ.
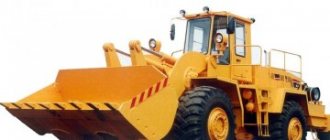
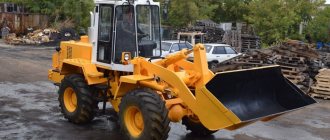
One of the most common and simplest types of special attachments, of course, can be called KUN at MTZ, which has become a kind of popular name - a common name for any similar type of attachments for tractors. KUN is a universal mounted hay hauler, which is essentially a tractor front-end hydraulic loader for moving, lifting and lowering various large loads.
Difference in attachments
If the PKU - 0.8 is attached directly to the tractor frame, naturally disrupting the uniformity of the load during operation and putting pressure on the frame with the entire loaded mass, which leads to premature breakdowns when working with heavy loads, then the PF - 1 is equipped with its own frame, attached under the tractor to the rear axle , which evenly distributes the entire load.
In addition, PF-1 uses slightly more powerful cylinders, while the boom and other parts with mechanisms are made from reinforced (thickened) metal. Consequently, despite all the external similarities, the KUN on MTZ of different models still has significant differences in operation.
Note
Many skilled mechanics make the KUNS they need with their own hands, producing quite working and acceptable attachments. This does not mean that it is necessary and possible to refuse to purchase a high-quality factory product, but it does not exclude this possibility.
However, any homemade KUHN, even one manufactured according to all the rules and regulations, is certainly technically inferior to its factory-made counterparts.
Valentin Kozhedub | Topic author: Rebeca
testing a loader as a crane.
V (Caris) why suddenly? ! the hitch is designed for lifting loads! from the front frontal you can break it faster. and in this version, if you start to take a heavy load, then the tractor just rears up and that’s it.
Maxim (Rebeca) and my papalam was breaking the gap
Read also: Perennial Rudbeckia from seeds
V (Caris) is it really from the rear load? This means the gap was cracked, and the loader finished it off.
Maxim (Rebeca) didn’t stick a knife in the front, but pushed the loaded cart and broke it. Who did I buy this tractor from? I tore out the central screw with a piece of the hydraulic tank; he had a bucket hanging on it
V (Caris) I sympathize... anything can happen...
KUHN for the rear linkage of a tractor: what equipment can be used
The homemade product installed on a mini tractor with KUN can be of two types:
- Equipment type PF-1, which has its own supporting frame. This homemade KUN is attached to a tractor, which protects the machine from overturning. Such equipment weighs about 900 kg, is driven by hydraulic cylinders, has a load capacity of 1 ton and a speed of 20 km/h.
- The PKU-08, which is a more modern modification of the PF-1, is also installed on the rear linkage of the MTZ 82. It is not difficult to attach a homemade KUN or a KUN assembled by your own to a tractor. But it is worth considering that PKU-08 differs from MTZ in carrying less load than the previous arm of the equipment. The PKU-08 weighs only 700 kg, reaches a speed of up to 20 km/h, and is capable of lifting 800 kg of cargo at a time.
The kuna model on MTZ 80 or MTZ 82 is produced at the Salskselmash plant, which specializes in agricultural machinery. KUN 10 is a functional and practical boom, created specifically for the specified MTZ models. Kun can also be installed on a Chinese tractor. Although the equipment works better with Minsk technology. Among the advantages of KUN 10 it is worth noting such characteristics as:
- Versatility. The Belarus tractor is capable of being a loader and performing earth-moving work like an excavator. The machine is also used as a bulldozer or leveler.
- Compactness. The installation of KUN 10 at MTZ allows the equipment to be used in the city and on small construction sites. Therefore, such a tractor is constantly used for landscaping territories, digging holes and trenches, laying communications, etc.
- High level of productivity.
- Reliability.
- Ease of use.
- Easy to use.
KUN for wheeled tractors has the following design:
- The boom, which is controlled by four hydraulic mechanisms, two of them are used to lift loads, and another two are used to adjust the angle of inclination of the bucket.
- The drive that powers the chassis. Its system also has the option of a connector, with the help of which it is connected to the tractor.
- The boom control panel is installed in the tractor cab.
- Buckets can have different volumes, which vary from 0.35 to 1.5 m³.
Device for row-spacing processing
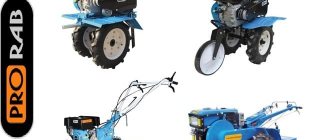
The most common household equipment is the row ripper.
The relevance of using such a product is due to the need to process narrow areas. This, in turn, requires such a cultivator to be compact, simple and easy to use.
The “Hedgehog” model copes well with the cultivation of such plots.
To make such a device yourself, you must adhere to the following sequence of actions:
- Buy a cutting.
- Mount the bracket in the shape of the letter U with holes at the ends.
- Prepare the wheels and shaft.
In this case, the rotating elements can be made with your own hands. Old steel pancakes of small dimensions with welded metal pins are perfect for such products. The last parts can be made from reinforcement with a cross section of 8-10 mm. When installing such spikes, it is necessary to give them a cone shape.
Prepared cutting elements - cutters are mounted on the axis. In this case, the fixation of such a structure is carried out by means of a bolted connection through prepared eyes.
At the moment, the use of special miniature devices is a fairly common activity in suburban areas.
We invite you to watch a video about a homemade cultivator on the MTZ 80 designed for hilling:
Characteristics of a homemade unit
Homemade KUN for a mini tractor: installation features. The manufacturer offers buckets of various sizes, fork equipment (needed for agriculture and loading and unloading), rake grids for collecting hay, straw, and mown grass. Grabs for logs are sold separately, so KUNs are used for logging. Additionally there are grippers for bales and rolls. You can also find jaw dumps in stores. The basic equipment for a homemade KUN for a mini tractor may vary.
The dimensions of KUN 10 can be different, depending on the modification of the equipment. The carrying capacity of the rake grid, dumps and grabs is 500 and 800 kg. The equipment bucket rises to a height of 2.5 m, and the rake grid - to 3.5 m. The unloading angle of the bucket, on average, ranges from 55 to 65º. The performance and size of the equipment depend on the chassis that needs to be mounted on a homemade mini tractor or other self-propelled unit.
Buying attachments is expensive, so you can make a KUN for MTZ with your own hands. Assembling and installing such a tool is simple, you just need to draw up a diagram of the equipment and mark on it the place where it will be mounted on the wheeled tractor. A homemade KUN is attached to the rear linkage of an MTZ 80 or 82. This is much easier than installing a KUN 10, which is available in a front modification.
A homemade tractor differs from a factory one and has several significant advantages:
- Ease of mounting.
- Selection of the length and height that is necessary for specific work on the ground or at a construction site.
- You can use scrap materials left over from other equipment.
Description of work
A set of drawings for self-production of a fork fork for the MTZ-80, MTZ-82, YuMZ tractor and their equivalent. Kuna's drawings were made by a design bureau, have a simple design and are suitable for self-production in a small enterprise or at home. The forks are designed for installation on a factory front hydraulic fork for loading hay or straw in agriculture. The forks have a frame for automatic unloading.
Fork dimensions: working width 1.7 m, height 1.3 m.
Album composition: Beam.cdw Grab for hay. Assembly drawing.cdw Capture. Specification.cdw Needle.cdw Coon for hay. Assembly drawing.cdw Kuhn. Specification.cdw Ski. Assembly drawing.cdw Ski. Specification.cdw Support. Assembly drawing.cdw Axle.cdw Plate 150x80.cdw Plate 150x105.cdw Plate 400x150.cdw Plate 970x50.cdw Plate.cdw Frame. Assembly drawing.cdw Frame. Specification.cdw Coon frame for hay.cdw Frame. Assembly drawing.cdw Pipe with development.cdw Pipe L-1700 mm.cdw Pipe L=448 mm.cdw Pipe L=996 mm.cdw Pipe L=1565 mm.cdw Pipe L=1885 mm.cdw Pipe.cdw Angle L= 300 mm.cdw Eyelet.cdw
How to make a KUN for MTZ with your own hands
It is imperative to make drawings of a homemade KUN so that there are no problems with cutting the metal into individual elements. Let's look at how to make such equipment yourself:
- You will need profiles and sheet metal. The thickness of the materials must correspond to the load that is planned.
- You will need to purchase several hydraulic cylinders - 2 large ones to lift the bucket, and 2 smaller ones. They are needed to adjust the inclination level and equipment parameters.
- Cylindrical joints, without which it is impossible to assemble the entire structure of the wheel unit.
When you have all the necessary tools and materials, you can begin the process of assembling the KUN with your own hands.
You can find drawings and diagrams on the Internet, on specialized forums and websites, or you can create them yourself.
This will allow you to cut the metal so that there is a minimum amount of waste. You can contact design firms, where employees will help you create a good drawing of the future attachments for the tractor.
The loader must consist of two rectangular frames. One of them - the external one - should be larger. It is this that is aggregated, i.e. Attaches to the rear tractor of the tractor. The inner rectangular frame is cut from sheet iron. Large hydraulic cylinders must be welded to the bottom of the frame, and a spacer must be installed on top. It is needed to create a stiffening rib.
The majority of the structure is the boom attachment, accounting for more than 70%. To install it, you will need the help of another person who should know how to install it correctly. The product is placed closer to the frame and connected to the cylinder. Then you need to attach the middle part to it, after which the bucket is hung. It is worth taking into account such an important nuance as the relationship between the length of the boom and the stability of the tractor. If the boom radius is more than 2 m, then a counterweight must be installed on the front frame. This will allow the MTZ to stand firmly on the ground and not tilt in different directions while carrying loads.
The installed bucket is made independently, also from sheet metal. The elements must be welded so that a structure similar to a boomerang is obtained. It should have 3 attachment points - in the center and along the edges.
How to build a KUN on MTZ-82 yourself and is it worth doing?
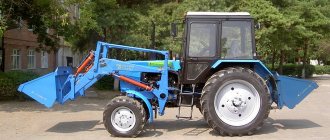
MTZ 82 with KUN is used in construction, agriculture and for loading and unloading operations. KUN at MTZ is considered the most common type of attachment. There are several varieties of this equipment; in addition, folk craftsmen often make homemade KUN. In this article we will tell you what a KUN is, look at popular models and figure out how to make a KUN for the MTZ-82 tractor with your own hands.
This abbreviation stands for universal mounted hay hauler, although in essence it is a front-end loader that operates from a hydraulic system.
Initially, this device was intended for loading hay or silage. But in fact, KUN for MTZ-82 can work with almost any load that is suitable in size. For example, such equipment is widely used for moving goods in warehouses and for performing excavation work.
The MTZ-82 tractor is mainly aggregated with two types of KUN. The difference between these mechanisms is insignificant and lies in the load capacity and the method of attaching attachments. Let's look at each unit in more detail.
This type of front loader has its own supporting frame. The equipment is mounted on the rear axle of the MTZ-82 tractor. This fastening scheme eliminates the possibility of turning the tractor over when working with a large load.
All components are made of high-strength metal, the KUN is driven by two powerful hydraulic cylinders.
This KUN, installed on the MTZ-82 tractor, is a modification of the previous model. The design turned out to be more compact and ergonomic.
Compared to its predecessor, this device has a significant drawback. This is a fastening method and a relatively small load capacity. The unit is attached directly to the semi-frame of the tractor; accordingly, the balancing of the machine is disrupted and the risk of tipping over increases.
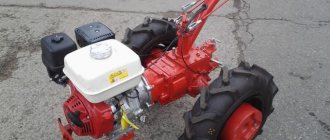
Homemade KUN for the MTZ-82 tractor
Some farmers prefer to make such attachments with their own hands. If you have certain skills, this is quite easy to do.
Among the advantages of self-made KUNs, one can note the minimal financial costs and the ability to independently determine the length of the boom reach. It is worth noting that a long boom and excessive load can lead to the tractor tipping over. Therefore, when the load is heavy, it is recommended to install counterweights on the front half-frame.
Homemade KUNs also have disadvantages; these products are significantly inferior in performance to factory models.
The manufacturing process can be divided into two stages. Let's look at each in more detail.
Having decided to make a KUN for the MTZ-82 tractor with your own hands, you must first take care of the materials and tools. You will need:
1. Sheet metal. The thickness depends on the tasks performed, but it must be taken into account that too thick iron will significantly make the structure heavier.
2. You need to get three hydraulic cylinders. They can be removed from any old equipment. A large cylinder will be responsible for the boom reach, two small ones for the angles of inclination of the bucket.
3. Hinged joints. To determine their number, it is recommended to draw up a preliminary drawing of the entire structure.
4. To make a ladle you will need a welding machine and a gas cutter.
5. Auxiliary tools you may need are wrenches and adjustable wrenches, a chisel and a hammer.
The basis for attaching the KUN to the MTZ-82 tractor consists of two rectangles. The outer rectangular frame will connect to the rear linkage system of the tractor. The internal frame is made of two sheets of metal. A large hydraulic cylinder for the boom will be attached to the lower part, and a stiffening rib made in the form of a spacer will be located at the top.
Then you need to make an arrow with your own hands. This is a composite structure, so the recommended parameters look like this: 70% of the total length is the main part. It should be closer to the frame and connected to the large cylinder.
The middle part is attached to the base using hinge joints, to which, in turn, the loader bucket will be attached. Thus, you should end up with a structure that resembles a boomerang and has three attachment points: at the ends and in the center.
The ladle is made from sheets of prepared metal, the dimensions are determined depending on the intended application. To make the MTZ-82 tractor more functional, you can make a forklift with your own hands, which will replace the bucket if necessary.
If you plan to extend the boom to a height of more than two meters, a counterweight must be installed on the front half-frame. You can make it yourself from concrete blocks or sandbags.
Step-by-step instruction
If you follow the instructions, you won’t have any problems creating your own loader for the MTZ attachment:
- First you need to make the frame of the base of a homemade loader for a tractor. It is a rectangle, the lower part of which extends beyond the edges, since it must be installed on the rear canopy of the tractor. In the center of this frame there is also a rectangular frame, which is made of two plates and welded to the upper and lower edges. A large hydraulic cylinder will be attached to this frame at the bottom, and at the top there will be a strut that is attached to the back and holds the entire frame in place. There should be four hinge joints on the top face: two in the center for the upper cylinders and two outer ones for the boom. The height of the base is determined according to needs.
Drawing of the lifting frame of a homemade loader
1 – stand; 2 – boom lift hydraulic cylinder; 3 – support; 4 – lifting frame; 5 – hydraulic cylinder for tipping the bucket; 6 – ladle; 7, 11 – traction; 8, 10 – bracket; 9 – pointer; 12 and 13 – high pressure hoses; 14 – bracket; 15, 17 – lever; 16 – clamp; 18 – sidewall. The boom is a prefabricated structure. From the side attached to the base, this is the main and longest part, which represents approximately 70% of the total length. An extension is attached to it at an angle of 30 degrees, which should look up. Thus, a shape similar to a boomerang is obtained. You should get two curved profiles, which are connected to each other in three places - at the ends and in the center. Also closer to the central part, but from the side of the base (approximately 25% of the total length), a frame is welded to which the second end of the main cylinder is attached. The central part of the boom is made in the form of a hinged cylindrical joint, since the bucket control lever is attached to it. It consists of two elbows (40 degree bend), to which two small cylinders are attached on one side, and on the other side a crossbar for further connection directly to the bucket. All the described parts are connected on hinges, and the two elbows have one common
It is very important to make the central part immediately assembled with the hinge joint, since it will not be possible to put it on later.
Drawing of a rack for fixing attachments 1 – sidewall; 2, 3, 4 – bracket; 5 – catcher; 6, 10 – lever; 7 – clamp; 8 – rod; 9 – spring; 11 – latch; 12 – axis. Now it's just a matter of the bucket. You can either purchase it or make it yourself according to ready-made drawings. You can also use a forklift for pallets or bales instead of a bucket. If the boom has a reach of more than two meters, it may be necessary to additionally weight the front part. To do this, you will need to weld a basket for sand, concrete blocks or metal weights onto the frame.
The video shows a homemade loader on a tractor in action:
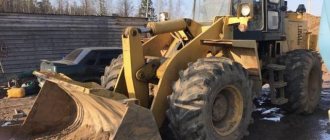
Homemade loader for the rear linkage of an agricultural machine
This homemade bucket is considered the simplest option for use on T-25, T-40 tractors and other units whose design includes a rear linkage mechanism. This kun differs from a front loader in its ease of manufacture and installation on a tractor.
At the first stage of production, you will need to carefully study the drawings. They must indicate the size of each part used, as well as the method and sequence of its fixation in the overall structure.
After studying the diagrams, you will need to prepare the materials necessary for the work.
These include:
- metal profile and steel sheets - these will be used when assembling the base of the loader. The thickness of the metal used should be selected taking into account the size of the kun;
- swivel cylindrical joints – also selected based on the dimensions of the loader;
- 3 cylinders taken from the hydraulic system of any equipment unnecessary on the farm. Two of them must adjust the angle of the bucket. The third and largest cylinder is responsible for raising and lowering the boom.
From those used during work you will need:
- large hammer, mounting bolts, washers;
- screwdrivers, wrenches, pliers;
- powerful welding machine;
- gas cutter or grinder, capable of providing a perfectly even cut of metal parts.
The tractor loader is manufactured in the following order:
- First you need to assemble a base that is reliable and resistant to heavy weight. It should be taken into account that the frame will hold not only the bucket, but also the load it carries. The base of the kun should look like a rectangle assembled from square pipes. The lower part of the frame must be fixed to the tractor's hinged mechanism in such a way that it protrudes slightly beyond its edges. In the middle part of the frame you will need to install another rectangle welded from pipes. Next, you will need to install the largest cylinder on the inner rectangle. In its upper part you will need to first make 4 hinged joints to fix the boom, and a spacer;
- Next, the homemade loader must be equipped with a boom. It is assembled from a metal profile, the parts of which must be attached to each other at an angle of 30⁰. The hydraulic cylinder mount and the ends of the previously created base will need to be welded into the upper part of the boom;
- In the middle part of the boom you will need to install a hinge mechanism with a cylindrical shape. 2 movable joints are mounted into the mechanism, fixing 2 smaller cylinders together, as well as a crossbar used to install the bucket;
- The last step is to assemble the tractor bucket. To make it, you need to use one large steel sheet and 4 smaller parts. You will need to cut out rectangles from them, which, in the future, need to be welded to each other. In this case, the front sheet must be welded to the overall structure of the bucket at a certain angle. The video will tell you more about the manufacture of the loader.
During manufacturing, it must be remembered that a loader whose boom exceeds 2 meters in length will outweigh the tractor. To prevent this from happening, the front part of the agricultural implement will need to be weighted.