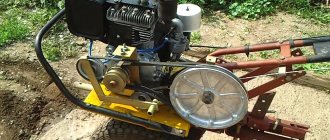
Repair: why the walk-behind tractor stalls under load, shoots into the muffler, works intermittently, and more
A walk-behind tractor is one of the most useful household units. Even a simple and not particularly powerful machine can make caring for your garden and surrounding area much easier. At the same time, a walk-behind tractor is a piece of equipment that tends to break down. Let's look at the most common breakdowns of an agricultural unit, their causes and methods of eliminating them on our own.
Characteristic signs of engine tripping
There are several signs of engine trouble, some of which indicate other problems with the car.
A sure sign of engine trouble is a change in the sound of its operation and the appearance of vibration. At the same time, fuel consumption increases, engine power decreases (especially when accelerating), unstable idle speeds are observed, the car jerks when driving, and carbon deposits or soot form on the spark plug.
Why does the walk-behind tractor stall under load?
Almost every owner of a walk-behind tractor, regardless of the brand and model of the agricultural machine, has encountered a problem in which the walk-behind tractor starts and stalls after 5 minutes of operation. The main reasons for this breakdown lie in problems with the fuel supply and breakdown of the car’s ignition system.
As practice shows, if a walk-behind tractor stalls during operation, its owner should immediately inspect the parts of the fuel supply system. First of all, unscrew and look at the spark plug - if it is completely dry, this indicates that fuel is not getting into the engine cylinder. After this, you need to make sure that there is a sufficient amount of fuel in the fuel tank. If there is gasoline and there is enough of it for work, inspect the fuel valve - it is quite possible that it is in the closed position. To start the walk-behind tractor, just open the fuel tap and continue working with the unit.
Another reason why the walk-behind tractor starts up and then stalls after 5 minutes of operation is a breakdown of the ignition system. It is quite simple to determine that the unit is faulty for this very reason - look at the spark plugs - if they are wet, it means that the fault has appeared in the ignition system of the walk-behind tractor. The best way out of this situation is to re-adjust the unit’s ignition system. All actions must be performed in this order:
- Remove the cover that protects the elements of the ignition system;
- Turn the motor flywheel until the contacts in the magneto open;
- Using a special feeler gauge, measure the gap between the “anvil” and the “hammer” of the walk-behind tractor’s ignition system;
- After this, turn the flywheel until the piston of the walk-behind tractor compresses. In this case, the latter must reach its highest point;
- Turn the flywheel again until you hear a characteristic knock - this means that the overrunning clutch has engaged;
- Then turn the flywheel in the opposite direction so that the mark on it coincides with the mark on the walk-behind tractor body;
- Set the gap between the interrupting contact and the cam - it should be 0.3 mm;
- At the end, fix the cam with a screw located on top of the part and install the protective cover back into the walk-behind tractor body.
Also, the utility unit often stalls when tilted. This indicates an insufficient amount of fuel in the fuel tank. If you put the unit in a horizontal position, pull out the starter cable, and the engine starts, it means that you will need to add gasoline to the tank.
Preparing the walk-behind tractor for start-up
Difficulties with starting the engine can appear not only in used walk-behind tractors and cultivators, but also in new ones just purchased at the shopping center. For this reason, before starting a mini-tractor for the first time, you should read its instructions, then carefully examine all connections and, of course, check the oil level in the internal combustion engine.
You should study the annotation compiled by the manufacturer in order to find out what operating speed the engine has: four-stroke or two-stroke. This is important to understand, since modifications with a two-stroke engine (like the Mole cultivator) require a special combustible mixture, consisting of a mixture of fuel and oil in a special proportion.
Due to the mismatch of fuel, the special equipment will make noise, and the spark plugs and fuel line may also be damaged, which can lead to fuel pump failure, and this is a direct path to expensive repairs at a service station. You can determine whether the fuel is suitable for the motorcycle by the smoke that appears. If the quality of the fuel is poor, it will have a white tone, as happens when the car is tilted too much.
Fuel quality is also important for a diesel walk-behind tractor. It does not start in winter - or it starts, but soon freezes - if summer diesel fuel is poured into its engine, since at low temperatures it begins to thicken and clog the fuel line.
The start-up of motor vehicles both in the summer and in the winter must be carried out in the established order. For example, to start a Krot brand motor cultivator, the following procedure is carried out:
- open the gas tap;
- set the suction motor to the “Choke” state;
- turn off the ignition and turn the engine several times with a manual starter;
- start the motor again and move the motor to the “Run” state.
Conditions often arise when the power apparatus starts up easily, but after a couple of seconds it freezes. In this case, you should check the permeability of the sump. If the reason is that the tap is clogged, then clean it with gasoline.
Starting a motorcycle with a diesel engine will be somewhat more difficult. Starting a diesel engine begins with “de-airing” the fuel path, that is, by ridding it of air accumulations. For this:
- open the fuel supply valve;
- untwist the connections of the outlet channel until fuel appears;
- twist the connections and blow through all the nozzles.
If after the operations the motor does not function properly, and the special equipment begins to smoke, then the reason is the old lubricant, and it must be completely changed. The unit does not start due to insufficient volume of oil fluid, so do not forget to control this parameter.
Starting a motor cultivator after winter or prolonged downtime also has its own nuances. In order to bring the unit into working position, perform the following manipulations:
- open the gas tap;
- check whether the power is turned on;
- check the presence of lubricant;
- let the gas reach about half way.
Before putting the motorcycle into operation, all connections are checked, including transmission sections, clutch, starting mechanisms, and, if necessary, they are adjusted.
Why does the walk-behind tractor work intermittently?
Among other typical malfunctions of a walk-behind tractor, a number of such breakdowns can also be identified:
- The engine of the unit backfires - this indicates the use of low-quality fuel to refuel the unit. In this case, you will have to not only replace the fuel, but also thoroughly rinse the fuel pump and fuel supply hoses;
- The walk-behind tractor operates jerkily - the reason for this lies in insufficient warming up of the engine. Be sure to turn off the engine, wait for it to cool completely, and start the engine again, giving it at least 10 minutes to warm up completely;
- The motor of the walk-behind tractor does not noticeably pull, the engine power has decreased - in this case, you need to check and, if necessary, clean the air and fuel filters. Another reason for this breakdown lies in the wear of the magneto of the ignition system. It is best to replace the part immediately without attempting to restore it.
Engine won't start
— If the engine is tilted , you need to place it horizontally.
— Fuel may not be supplied to the carburetor . The fuel system needs to be disassembled and purged with air.
— The filter may be clogged . The filter needs to be replaced or cleaned.
— The outlet hole in the gas tank cap may be clogged . Needs cleaning.
- Perhaps it's the candle . You need to check the connection of the wires, the engine stop buttons, remove the spark plug and clean it. Replace if necessary.
— Possible magneto failure . Replace.
The walk-behind tractor starts and stalls - causes and repairs
Repairing walk-behind tractors if they start and, after a few seconds, stall, must begin by searching for the main causes of this malfunction. To do this you need to inspect:
- Plugs, wires and electrodes - in most cases, the unit starts and immediately stalls due to too large a gap between the electrodes of the ignition system, poor contact between the wires, and a dirty spark plug. Repairs should begin by cleaning the spark plug. If this does not help, then you need to check the integrity of the wires. If this does not bring the desired result, then you will need to re-adjust the gap between the electrodes of the ignition system;
- Carburetor for contamination and sufficient fuel supply - if you used low-quality gasoline and added too much motor oil to it, you will need to replace the fuel and reduce the amount of oil. In addition, you need to dismantle, disassemble, and thoroughly clean the carburetor;
- The presence of gasoline in the fuel tank - if the walk-behind tractor does not gain speed, this often indicates a lack of fuel necessary for the proper operation of the engine. Very often, owners of walk-behind tractors are faced with a problem in which gasoline spills through a small hole or crack in the fuel tank of the machine. In this case, you need to try to repair the defect, and if this fails, you will need to completely replace the walk-behind tractor tank.
Why might the engine stall?
what consequences?
When the engine “troubles” and shakes, it begins to wear out quickly. Because of this, compression is reduced, creating conditions for the creation of scuffing on the cylinders and pistons. The motor begins to operate in a different temperature regime and begins to overheat. Sometimes it turns out that everything has been checked, but the engine still “troubles.”
Therefore, we will try to analyze the diagnostic procedure point by point under normal conditions, when there are no special devices, in order to look inside and accurately determine the cause.
- gasoline that continues to flow into the “non-working” cylinder does not burn, but settles on the walls (mirror) of the cylinder, mixes with oil and enters the crankcase. Engine oil begins to gradually “liquefy”, its quality deteriorates and after some time it becomes completely the cylinders begin to receive substandard oil. Because of this, engine compression is reduced, “good” conditions are created for the creation of “scuffs” on the “mirror” of the cylinder, on pistons, precision planes of hydraulic compensators and, in general, on everything that “moves” inside the engine and is washed with oil. The engine begins to operate in a different temperature regime, and slowly begins to overheat, because the oil (of normal quality oil) also serves to remove heat from moving parts, and what is already in the crankcase can hardly be called “engine oil”.
READ How to Make a Front Hitch on a Motoblock
Here is an incomplete list of what “troubles” a “non-working” cylinder can bring us. At first glance, the definition of this malfunction is quite simple. At first glance... But sometimes it turns out that everything seems to be checked, and “everything” works fine, but the engine still “troubles”. Therefore, we will try to analyze point by point the procedure for diagnosing electronic fuel injection systems for “missing” in the conditions of an “ordinary workshop” or “just in a garage”. where there are no special instruments to “look inside” the engine during its operation and very accurately determine the cause of the “missing”. The check, as usual, can and should begin with checking for spark formation. That is, check and make sure: “there is a spark or not.” Spark plugs To begin, unscrew the spark plug from the cylinder and carefully inspect it. What will we see? If the engine is running (working) normally and “correctly”, then the color of the side electrode and insulator will be light and slightly brown. Such a spark plug should work. If we see soot on the electrode and insulator, this is a “bell” to us: “something, somewhere is not working correctly.” There is “enrichment” of fuel or “filling” with oil. And because of this “smoking”, the spark plug may also NOT work or work extremely disgustingly, you can even say “irregularly”, because such carbon deposits interfere with the normal flow of spark formation. The causes of carbon deposits can be:
- prolonged operation of the engine at idle and in warm-up mode if a spark plug of the “wrong” heat rating is screwed into the engine.
- check valve malfunction
- reduced compression in the cylinder
- displacement or violation of valve timing
- incorrect operation of injectors (nozzles) - “overfilling”
- incorrect operation of the oxygen sensor (Oxygen Sensor)
Next, let's look at the spark plug housing. It should be white (we DO NOT review some individual spark plugs with dark housings) and should not have any vertical black stripes or black dots on it. The presence of this indicates that the candle is already “breaking through” and will NOT work normally. Such a spark plug is only used for discarding. Well, if we are satisfied with the visual inspection, then we will then directly check the Spark itself when cranking the starter. We insert the spark plug into the tip of the high-voltage wire, place it on the engine ground and, turning the engine over with the starter, see whether a spark “jumps” between the electrodes of the spark plug or not. Does it skip? Fine. But that is not all. Let us remember that the spark plug “works” inside the cylinder, where a pressure is created within 10 kgcm2 (on average). And we checked the “presence of a spark” at normal atmospheric pressure. And in order to try to get closer to the pressure that is created in the engine cylinders, we need to place the spark plug at a distance of 15-20 mm from the “ground” and also crank the engine with the starter. If even under this condition a good “healthy” spark of a “saturated” blue color jumps between the candle and the “ground” - everything is fine. If at this distance the spark “does not jump” or “jumps” but is barely noticeable, then we can say that we have a “weak spark” on the engine and the reasons for this may be:
- increased resistance of high-voltage wires
- ignition coil malfunction
- switch failure
High-voltage wires Let's remove and also carefully look at each high-voltage wire separately. First, inspect the tip of the wire inserted into the spark plug. It must be plain (black or red, depending on the type) and not have:
- light gray coating on the inner surface
- gray-brown dots on the outside (they can be from 1 to 3 mm in diameter)
Both the first and second “tell” us that this high-voltage wire “worked” in “extreme” mode (faulty spark plug, increased gap in the spark plug), which was the reason for such a light gray coating or gray-brown dots (breakdown). From practice, we can say that a light gray coating appears first, and only by looking at it can an “experienced eye” immediately determine that the candle is working in an “abnormal” mode. And if you don’t pay attention in time to this change in color inside the tip of the high-voltage wire, then the high-voltage wire will simply “break through.” The resistance of a high-voltage wire is best measured with a digital multimeter. The values may vary on each specific engine. For example:
- "Mitsubishi" with 4 G 63 engine - from 5 to 9 Kom. With engine 6 G 73 - from 8 to 16 Kom.
- "Toyota" with engine 3 S - FE - here is 7 to 12 Kohm, with engine 1 G - FE - here is 8 to 15 Kohm
The resistance of high-voltage wires depends (naturally) on their length, but should not exceed (on almost any engine) 20 Kom. If the device showed us a resistance of over 20 Kom, we need to look for the reason. What can happen to a high voltage wire? To begin with, of course, you need to disassemble it, that is, remove the rubber (plastic) tip and expose the same metal tip that is directly put on the spark plug. In the above figure, all the “details” of the tip are shown at a slightly increased distance - to make it a little clearer. In fact, the high-voltage wire should fit very tightly to the “penny” of the tip. This is a possible reason for the increased resistance of the high-voltage wire. Due to ordinary “aging”, the contact of the internal conductor of the explosive wire with the “thrust penny” oxidizes and the resistance of the wire as a whole increases very much, sometimes up to 150-190 Kom. It’s easy to check this statement: you need to touch the second probe of the multimeter not only to one tip, but to the central core of the highest voltage wire. In most cases, the multimeter will immediately show normal and “correct” resistance. If this does not happen, we also have the resistance of the high-voltage wire. “Infinity”, then you need to carefully perform the following procedure: I don’t know about anyone, but we have a set of “plus” probe with a very thin needle at the end. When carrying out ordinary measurements, we DO NOT use it, but use it precisely for such cases: we begin to pierce the high-voltage wire to the central core every five to ten millimeters and see whether resistance appears or not. It happens that this very “central vein” simply “burns out” along its length, and with the help of such a simple check we find the break point. Then everything is simple - Cut off the “affected” area and restore the functionality of our high-voltage wire as a whole. However, if the length of the wire is “at the limit” (this often happens on engines of the “3 S - Fe”, “4 A - FE” series and the like), we have to regret it and change the entire wire. If there is nothing to replace the high-voltage wire with, then you can temporarily do this: splice two high-voltage wires. You just need to very carefully connect the central veins of the explosive wires to each other, insulate everything well in the end and try NOT to throw such a “new” wire onto the metal when installing it. Ignition distributor cover We examine it just as carefully and thoroughly both outside and inside. A common “disease” is a “breakdown” of the distributor cap due to increased voltage created by a faulty spark plug or high-voltage wire. If it exists, we will see it in the form of a thin and winding strip of dark or grayish color, usually in the “area” of contacts. We pay attention to the so-called “charcoal” inside the lid: it itself should easily “walk” in its nest (it is spring-loaded and, for prevention, you can pull it out and stretch the spring a little), and not have obvious signs of “burning” - as on it, and around his seat. And the last thing that can be done to check the ignition distributor cap is on a “working” one, that is, starting the engine with a wire, one end of which is well screwed to ground and leads near the distributor cap at a distance of no more than 0.5mm - 1mm. In the event of a “breakdown” of the cover, we will see a spark jumping at the site of this “breakdown”. Distributor with Hall sensors Let's look at the figure: This figure shows the connector of the ignition distributor of the 6 G 73 "Mitsubishi" engine. Location: contact - the one closest to the passenger compartment, contact - closer to the radiator. Wire colors:
- Blue-red
- Blue-yellow
- Red (the thickest of the rest)
- black
READ Carburetor adjustment KMB 5 Motoblock Cascade
Interruptions in spark formation may be due to “unfair” operation of this distributor. We will NOT delve into these reasons, because this is a separate topic; we will only tell you how to properly check the functionality of an ignition distributor of this type.
- With the ignition off, check for the presence of ground (or minus) in the contact. Usually this is a thin black wire.
- Turn on the ignition. We check for the presence of 12 V on the contact. Please note that there should be battery voltage on this contact, and not less or less.
- We “sit down” with the lead (“positive”) of the multimeter on the contact and when the ignition is turned on, we begin to slowly crank the engine , but not with the starter, but “manually” (either along the generator pulley, or by the crankshaft pulley). We look at the scale of the device: when cranking the engine slowly, “0” and “5 volts” will alternate there. Please note that after, for example, 5 volts on the device scale there would be an immediate “0”, and there would not be a gradual decrease in voltage.
- On the contact we repeat the verification procedure described in paragraph
The most important thing here is to find out that the signals from the Hall sensors are “correct,” that is, “logical 0” is always followed by “logical 1,” that is, our 0 and 5 volts.
After this, we will check the reliability of the connections of both the “positive” and “negative” wires. It happens that due to the oxidation of these contacts, interruptions occur in the “work of creating spark formation”. The “slider” of the ignition distributor Checking it comes down to determining the absence of an “internal breakdown”. To do this, we will assemble a “serious structure”, as shown in the figure, and, turning the engine over with the starter, we will carefully observe whether a spark “jumps” between the “manual” and the “slider” itself or No. If it “slips”, the engine will naturally run unevenly (stumble) and have rough idle. Nozzle (injector) The engine may “ triple ” due to the injector in the following cases:
- Malfunctions of the injector itself (the winding burned out, for example, but this is quite rare - you have to “try hard”).
- Due to the use of low-quality fuel or improper use of various types of “fuel system cleaners”, especially the “SUPER-cleaner”, after some time the injector simply “clogs” with foreign impurities (the same as “scraps” from the fuel tank) and stops passing fuel into cylinders.
- The power or control circuits to this injector are broken or shorted.
READ Installing the Lifan Engine on the Ural Motoblock
The figure above shows two common diagrams for connecting injectors to the control unit (ECU), which are used on almost all Japanese-made cars. It should only be noted that a circuit using a current-limiting resistor was used on cars manufactured before 1990 (Toyota, for example). The appearance of the injector is shown in the following figure: Having assembled the above diagram, we can quite easily and quickly check both the presence of “power” at the injector and the receipt of “control” signals to the injector. When the engine is cranked with the starter, the light should blink. If everything is fine here, move on to the next point:
- Using a medical stethoscope with the engine running, listen to each injector, pay attention to the difference (if any) in the sounds between the injectors. If the sounds (clicks) made by the injectors are almost the same on all of them, then look at the following point:
- Unscrew the spark plug on the idle cylinder and the two adjacent spark plugs and place them on the table. carefully examine and try to find differences between the color of the carbon deposits on the spark plugs in the working cylinders and on the spark plug in the non-working cylinder. If it is noticeable that the color of the carbon deposits on the spark plug in the non-working cylinder is lighter than on the adjacent (working) one, you need to remove the injector and check , first of all, the filter at its input (see figure above). It is likely that it is clogged with various kinds of deposits.
There is also a longer, but more accurate check of the performance of the injectors. To do this, you need to completely remove the fuel rail (ramp) and rotate it 180 degrees so that the injector nozzles “look” either up or to the side. The high-voltage wires are mixed up. It also happens, indeed, when because of this one of the cylinders (or several at once) does not work, and instead of immediately paying attention to this and thoroughly checking everything, the master limits himself to the question: “ didn't you touch the wires? ” and having received a negative answer, he calms down on this. Quite often, such a “trouble” happens on Mitsubishi with 4 G 63 and 6 G 73 engines, because although the ignition coils have “numbers” indicating the number of the cylinder for which this ignition coil “works,” but not all of them, firstly, they know about it, and secondly, they are sometimes simply hard to read due to dirt. Below are pictures that indicate “which ignition coil works on which cylinder”:
Vladimir Kucher, Yuzhno-Sakhalinsk http: //www.efisakh.ru
- Reproduction is permitted only with the permission of the author and subject to a link to the source.
— If there is a malfunction of an engine component such as an injector, however, this is quite rare.
— With constant use of poor quality fuels and lubricants or frequent, intensive use of various cleaners or additives for the vehicle fuel system.
— When the injectors are severely clogged, which require immediate cleaning.
— When the power supply circuit for controlling the injector and its elements is broken or shorted.
Payment details FOR SITE SUPPORT (thank you for your help) Webmoney: Z397146189637 (Dollars), R206902974545 (Rubles), E142336847766 (Euros), U115329023466 (Hryvnias)
Payeer (in rubles, dollars, euros): P30960360
Perfect Money: U12834290 (Dollars), E12875044 (Euros)
Walk-behind tractor engine is difficult to start when hot
The question of why the motor of a walk-behind tractor stalls when heated is quite simple to solve. The whole essence of the problem lies in the excess air supplied to the carburetor of the walk-behind tractor. Part of it is mixed with a mixture of gasoline and motor oil, and the second part cools the carburetor. As a result, the carburetor temperature becomes much lower than the temperature of the unit’s engine. This problem is observed only during the operation of the walk-behind tractor. When its engine is turned off, the carburetor, on the contrary, is heated by the hot walls of the engine.
As the carburetor of the walk-behind tractor heats up, the remaining fuel begins to actively evaporate, filling all the voids in the walk-behind tractor, including the air filter and the intake manifold. This leads to the complete disappearance of fuel, which is why the walk-behind tractor will not start when the engine is hot.
To fix this problem, it is necessary to follow a certain algorithm every time you start the walk-behind tractor “hot”. Your main task is to ensure that the mixture combines so that the engine can start. To do this you will need:
- When starting a hot engine, squeeze the throttle trigger halfway;
- Do not try to press the gas trigger over and over again, otherwise you will only aggravate the situation, since when you press the gas trigger frequently, the fuel pump will supply new portions of fuel to the carburetor, which will lead to flooding of the engine;
- After several attempts to start with the gas trigger pressed halfway, you will start the engine of the walk-behind tractor, after which you will need to rev it up 2-3 times and continue working.
All of the above methods will help to effectively cope with typical breakdowns of the most famous manufacturers of walk-behind tractors. They are equally successfully used by owners of agricultural implements of the Honda, Agro, Cascade and Neva brands.
And during your “smoke break” we recommend that you try delicious buckwheat tea, which you can order in the NeBanan online store.
DIY walk-behind tractor repair
Unfortunately, any equipment sometimes breaks down, so its owner needs to be able to troubleshoot problems on his own. Of course, if the car is under warranty, it is better to take it to a service center, where specialists will carry out warranty repairs free of charge.
Often, damage to a cultivator or walk-behind tractor occurs due to improper operation: they fill with bad fuel, allow heavy loads, or do not replenish the loss of lubricant in a timely manner. Then the car begins to stall, stall, pick up speed poorly (especially if it has an electric motor), or even stops starting altogether. But, knowing the structure of the unit and the operating principle of its mechanisms, you can identify the cause of the damage yourself and carry out quality repairs.
Fuel system repair
A breakdown of the fuel system can be confirmed if the engine:
- does not start;
- stalls under load;
- overheats;
- does not function stably at idle speed.
To eliminate the malfunction, first check the condition of all filters, including air and oil. If they are slightly clogged, blow them with compressed air or wash them; if they are heavily soiled, replace them with new ones. Then the carburetor is disassembled, the parts are washed with a special cleaner, and the fuel mixture supply valve, tank and piston system are cleaned with gasoline. After drying, carefully carry out the reverse installation.
After the engine is completely assembled, the crankshaft is cranked by hand - it is important that the piston moves freely and the valves work flawlessly. Then pour in fresh lubricant, start the engine and leave it to idle. Be sure to check the flow of fuel into the cylinder. Perhaps, after such repairs, the cause of the malfunction will be eliminated, and the walk-behind tractor will begin to function without interruption.
Ignition system repair
You can judge the breakdown of devices for igniting fuel assemblies by the signs when the engine:
- starts, but stalls at idle;
- does not start even with good fuel supply;
- It works at idle, but with some interruptions.
To find out the cause, first check the condition of the spark plugs and, if there is damage to the insulator, replace them. Next, inspect the electrodes and, if necessary, adjust the gap between them. The condition of high-voltage wires is checked for oxidation of the tips and damage to the insulation - damaged wires must be replaced with new ones. Without such repairs, the spark may completely disappear or will travel through the insulation, breaking through to the engine body, and will not be able to ignite the fuel assembly.
If at this stage no defect with a spark is detected, then perhaps the reason that the equipment does not start or stalls lies in the generator or coil (for models such as Neva, Cascade, it serves to generate a spark). To check the generator, a measuring device is connected to its terminals. Scroll the starter pulley of the walk-behind tractor and record the readings of the device - they should be in the range of 12-16 W. If the indicators are normal, then the reason lies in the ignition coil, and after replacing it, you can put a load on the engine. Most likely, after such repairs, its functionality will resume completely.
Related Posts
Like any equipment, the walk-behind tractor requires timely maintenance and repair. And it is advisable to entrust them to specialists who have the necessary tools and equipment and know their job well. However, if you are also familiar with the design of internal combustion engines and understand the subjects of mechanical engineering, then you can do many things that are necessary to restore the functionality of the car.
Gearbox related faults
If the equipment operation
accompanied by loud noise, then you most likely need to repair the cultivator gearbox. This phenomenon may indicate a lack of oil mixture. Just pour it inside the gearbox of the device, or better yet, change it completely.
Also, strong noises are observed due to the “looseness” of fasteners: assess their condition and, if necessary, fix them.
In addition, summer residents and gardeners often encounter oil mixture leaking from the gearbox. This happens when the seals are installed incorrectly and worn out, the covers are not fixed tightly enough and the gaskets are deformed. You can get rid of leaks by replacing and correctly installing these elements, cleaning the breather and fixing the fastening parts of the covers.
Remember that the gear elements are larger than others
are subject to wear and tear during equipment operation, so they need timely replacement.
Main malfunctions of outgoing units
Diesel and gasoline engines have different engine life. For the first, the normal value is 4000 m/h, but the second can only provide 1,500 m/h. Despite this, diesel models of walk-behind tractors are not in great demand. After all, they are much more expensive when purchased and during operation. Therefore, most likely, you are working with a walk-behind tractor equipped with a gasoline (carburetor) engine.
All breakdowns that may occur during the operation of mini-agricultural equipment can be divided into two categories:
- Engine faults:
- Problems at startup;
- Malfunctions.
- Malfunctions of other components and mechanisms:
- Clutch malfunction;
- Gearbox failures;
- Chassis problems;
- Control and automation failures;
- Malfunctions of walk-behind tractor systems (cooling, lubrication, etc.).
In many ways, the success of repairing a suddenly broken car depends on the correct diagnosis. As far as maintenance is concerned, it is carried out to identify minor faults that later lead to major faults.
Operating principle and purpose
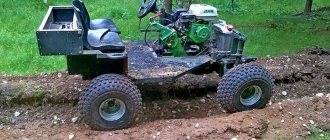
The main purpose of the walk-behind tractor is to plow the field or hill it. Secondary tasks assigned to it may include snow removal and cargo transportation (with an attached trailer). A walk-behind tractor is a device built on the basis of a single-axle frame and developed on the basis of a small-sized tractor device. The user, controlling the movement of the walk-behind tractor, follows him.
Depending on the type of work, the devices are divided into wheeled (tracked) and motor-cultivator. In a wheeled device, the traction force is created by the chassis, while in a motorized cultivator, the tool is installed directly on the axle. Different models of walk-behind tractors use a different set of mechanisms, but, as a rule, a milling motor cultivator is used for household devices, and a plow mounted on wheels is used for professional ones. A processing cutter or weeder is used as a working tool.
The idea of creating a small device that performs the work of a full-fledged tractor when processing arable land arose at the beginning of the 20th century in Europe due to the inconvenience of full-fledged tractors in private fields. Thus, in 1912, the German company Siemens-Schuckertwerke launched mass production of motor cultivators under the name Siemens Bodenfrase. At that time, the company produced both small-sized lightweight devices and heavy, powerful devices that were not inferior in performance to full-fledged tractors.
During the 20s, other concerns, such as SIMAR, British Anzani Iron Horse, Beeman Tractor, became interested in the prospects of producing devices and set up their production. After which competition appeared on the market, developing and improving the production of walk-behind tractors.
Fuel emissions
If an attempt to start the walk-behind tractor fails, this means that there is a malfunction in the engine or starting system. To determine the source of the problem, first check the spark plugs.
If the spark plugs are dry, this means that the fuel mixture is not entering the engine cylinders. There may be several reasons:
- There is no fuel in the tank;
- The fuel supply valve is closed;
- The hole in the gas tank plug is clogged;
- Foreign objects enter the fuel supply system.
To eliminate problems with fuel supply, you must:
- Fill the walk-behind tractor tank.
- Open the fuel valve.
- Clean the drain hole in the gas tank plug.
- Remove the fuel valve, drain the gasoline from the tank and rinse it with clean gasoline. Then remove the connecting hose located on the carburetor side and blow it out along with the carburetor nozzles without disassembling the latter using the fuel pump.
Parts that can break
Each working part of such equipment is subject to significant load during use. Therefore, they require systematic inspection and repair. First you need to configure the fuel pump and ignition system of the cultivator. Since in winter the device stood, as they say, “idle,” which can cause problems with activating the engine. It is also necessary to check the transmission
. Do not forget that carelessness at this stage of work can easily cause significant malfunctions of the cultivator.
Before you begin your own repairs
, you should find out about the main causes of problems. All malfunctions of cultivators can be divided into two categories:
- motor malfunction;
- malfunctions of other equipment elements.
Reviews from experienced home craftsmen suggest that Mole or Texas motor cultivators often encounter problems from the first category.
Faulty engine systems at startup
In this case, if when checking the spark plugs they were wet, that is, fuel flows normally, but the engine does not start, the problem may be as follows:
- Ignition system failure:
- A characteristic carbon deposit occurs on the electrodes of the spark plugs (it is necessary to clean the spark plugs with sandpaper, after which they should be washed with gasoline and dried);
- The gap between the electrodes does not correspond to the manufacturer specified in the engine manual (the gap is adjusted by folding the side electrode to the required size);
- Damaged spark plug insulators or high voltage wiring (faulty spark plugs and wiring must be replaced);
- The STOP button is locked to ground (the circuit must be closed for normal engine starting);
- The contacts in the spark plug squares are broken (the contacts must be put in order);
- The gap between the magnetic shoe and the starter does not correspond to the standard value (the gap needs to be adjusted);
- Defects in the stator of the ignition system (the stator needs to be replaced).
- Air passes through the carburetor seals, spark plugs, spark plug heads and cylinders, and through the connection between the carburetor and the engine cylinders.
So this is what kind of infection you are - JUCK!
The video shows the problem due to which
I wanted to run
the engine
with the choke open.
Engine carburetor is dirty or incorrectly adjusted. It is necessary to remove and clean the carburetor, after which it should be adjusted if this is provided for in the instructions for the walk-behind tractor.
A decrease in engine power can be caused by a decrease in compression due to wear of the cylinder-piston group, the formation of scoring and scratches on the cylinder and piston, “groove” in the grooves or failure of the piston rings. In this case, check the compression by connecting a compressor to the spark plug and turning the engine shaft with the starter. Normal compression is characterized by a value of at least 8 atm (normal compression can be indicated in the engine characteristics). When measuring, it must be taken into account that the presence of a decompressor in the engine may affect the compressor readings. The compression value in this case is about 5 atm. will not mean a low degree of wear of the cylinder-piston group, but the operation of the decompression valve.
Do not start the diesel engine
. For most users, repairing and adjusting a motor unit with a diesel engine is more difficult than repairing a motorized unit with a gasoline engine. Not so much, perhaps, due to the structural complexity of a diesel engine, but due to a lack of experience, since household appliances are usually equipped with gasoline engines.
The most common faults or conditions that may cause diesel engines to fail to start are outlined in the following table. A detailed list of diesel engine malfunctions and methods for eliminating them are set out in the operating instructions for individual diesel walk-behind tractors.
- The nuts are too tight or the cylinder head gasket is damaged.
- Worn piston, cylinder liner or piston rings.
- Piston rings are stuck or broken.
- The correct valve clearance was not correct.
- The valve stem is wedged into the guide.
- Tighten the cylinder head nuts evenly diagonally. Replace the cylinder head gasket.
- Replace worn parts.
- Check the piston rings, wash them or replace them.
- Adjust the gap.
- Remove the valve, clean it and spray it with fuel.
Video: Motoblock Engine Runs Jerky
If the connections are leaking, tighten the mounting bolts, tighten the spark plugs, and check the integrity of the gaskets between the spark plug heads and the cylinders.
- Incomplete closing of the carburetor air valve.
To eliminate this problem, it is necessary to ensure the free movement of the damper by checking the quality of the drive. If jams are found, they must be removed.
Compression and carburetor problems
It happens that the launch is carried out, but the process is much more complicated. At the same time, the walk-behind tractor engine is extremely unstable and cannot develop enough power for normal operation.
This may be due to loss of compression, which can be determined by:
- Soot on the working surfaces of the valves, as well as on the seats of the cylinder blocks;
- Intake valve deformation;
- Wear of piston rings.
Other Possible Problems
When operating the cultivator, problems may arise associated with the appearance of periodic exhausts, and the device begins to smoke. To get rid of smoke, you will need to drain the remaining fuel and replace it with one containing fewer impurities. You should also check for oil leaks, which could get onto the valve and ignite there. The appearance of popping noises indicates an insufficient fuel level or a malfunction in the power system.
If sounds occur in the starter area, then there is an excess amount of lubricant on the ratchet. And the device being pulled to one side during operation is most often associated with different degrees of inflation of walk-behind tires.
Thus, repairing a motor cultivator with your own hands is not so difficult. More than half of the malfunctions are eliminated by cleaning and replacing consumables with high-quality ones. And if you periodically perform maintenance and avoid overloading the work, then you won’t have to repair the device anytime soon.
Originally posted 2018-07-04 08:31:39.
Engine block motor malfunctions during operation
Engine components and parts installed on mini-agricultural machinery are subject to significant loads. They can also fail while the device is running, which can lead to serious problems very quickly.
If during operation the engine begins to pick up speed on its own, that is, “straighten out,” most likely this means that the fastening of the governor and thrust levers has become loose. In this case, the user will need to adjust the motor drive.
Sometimes, when the throttle is wide open, the engine does not accelerate when the throttle is pressed, but instead begins to lose power until it comes to a complete stop. This is a clear sign of overheating, so you need to turn off the walk-behind tractor and wait until its components have completely cooled down. After this, you need to check the oil level in the crankcase, and also check the cleanliness of the ribbed surfaces of the blocks and cylinder heads.
Under high loads on the engine, it may seize. There may be several reasons:
- There is not enough oil in the crankcase;
- The nadir is formed on the lower end of the connecting rod;
- The connecting rod or oil cartridge has failed.
If the walk-behind tractor engine is stuck, it will need to be disassembled and checked for the condition of the main components and components: defective, deformed, burnt out, etc., which need to be replaced.
Walk-behind tractor transmission malfunctions
Malfunctions of the clutch itself depend on its type. If the walk-behind tractor has a belt drive that acts as a clutch, slippage may occur if the drive belt or pulley is oily, the belt is not tensioned or is too worn. The ways to correct these problems are obvious - clean the transmission elements from dirt, tighten or replace the belt.
In a dry disc clutch, the cause of slippage may be the presence of oil contamination on the driven and driving discs. It should be removed by washing the discs with gasoline and drying them.
Regardless of the type of clutch (dry or oil), slippage can be caused by wear of the friction layer of the discs, weakening of the compression spring, or lack of clearance between the pressure element and the release bearing. The method of correction is determined by the nature of the malfunction.
The clutch does not disengage completely. In this case, you should also start by checking the tension of the cable going from the control handle to the clutch.
Incomplete disengagement of the clutch can also be caused by deformation of the friction discs, their jamming on the splines, or non-compliance with the required parameters of the characteristics of the oil poured into the clutch housing. The latter applies to couplings operating in an oil bath. It is necessary to replace deformed discs, eliminate the causes of their jamming on the splines, and change the oil.
Increased noise in the gearbox (gearbox). Noise in the gearbox can occur due to a lack of oil in it or a discrepancy between its quality and the required parameters - brand and cleanliness. It is necessary to add oil to the walk-behind tractor gearbox or replace it.
Transmission components can make noise due to the banal failure to tighten fasteners. You need to look through and tighten them.
Most often, noise occurs due to worn gears and bearings. In this case, they are harbingers of more serious breakdowns. Timely repair of the walk-behind tractor gearbox, which consists of replacing worn parts, will help to avoid them.
Does not turn on, turns off spontaneously, or is difficult to change gears. These malfunctions can occur for a number of reasons:
- Due to wear of the parts involved in gear shifting. Usually, wear (rolling) of the ends of the engaged gears occurs, which leads to incomplete activation and self-disengagement of speeds. In this case, it is necessary to disassemble the walk-behind tractor gearbox and correct the gear teeth by grinding or, if the wear is too great, replace them.
- Due to abrasion of the shaft splines, as well as displacement of the shafts in the axial direction due to wear of bearings and retaining rings. The axial position of the shafts can be adjusted by installing additional locking rings. Excessively worn bearings and rings must be replaced.
- Due to incorrect clutch adjustment, which can lead to difficulty shifting gears. The clutch is not fully depressed (disengaged). This can also be caused by an inexperienced operator who releases the clutch lever too early when changing gears. You need to adjust the clutch and learn how to shift gears correctly.
The gearbox is a rather complex unit. If the operation and design of the walk-behind tractor is a complete secret to the user, you should not start repairing it yourself. It is better to entrust this work to those for whom servicing and repairing machines is a professional matter.
Transmission components get hot. Among the main reasons for this malfunction are worn bearings, insufficient level of transmission oil in the crankcases, and inconsistency of its condition with the required parameters. Corrective measures: replace bearings, add or change oil.
Oil leak from the gearbox (gearbox). This occurs when the bearing seals are worn or incorrectly installed, the caps are not tightened or the gaskets under them are damaged, the air valve (breather) of the oil filler cap is clogged, or oil is poured into the crankcase above normal.
Instability of the walk-behind tractor when moving (yaw). This pattern of movement of the walk-behind tractor is caused by different pressures in the right and left wheels, uneven wear of the tire tread, and incorrect adjustment of the towed devices, in particular the plow.
Increased vibration of the walk-behind tractor. Increased vibration usually occurs when attachments (mills, rotary mowers, etc.) are incorrectly adjusted or loosened. If vibrations occur, you should immediately stop the walk-behind tractor and put the trailing devices in order - secure the cutters or cutting segments of the rotary mower, replace them if they are worn out or broken.
The article lists only the most common faults. The practice of operating walk-behind tractors is replete with a much wider list of faults - both atypical ones, which are sometimes very difficult to diagnose, and those whose nature and location raise no doubt.
If you cannot fix the walk-behind tractor malfunctions on your own, the only option left is to contact a service center for the maintenance and repair of walk-behind tractors.
When using the content of this site, you need to put active links to this site, visible to users and search robots.
A walk-behind tractor is a technique that has many functions and is a faithful and indispensable assistant on any plot of land. With the help of additional attachments, such a unit performs many different jobs. With prolonged use of this or that equipment, it begins to fail. If maintenance is carried out on time, malfunctions may appear only due to wear and tear of parts.
A frequently asked question among users of such equipment is “why does the walk-behind tractor stall under load.” In most cases, it turns out that the problem is in the engine. It is better to entrust troubleshooting of the walk-behind tractor to a specialist, but if you also understand this matter, you can repair it yourself.
Idle cylinder detection
A simple and proven way to determine a non-functioning cylinder without using a tool is to disconnect the high-voltage wires from the spark plugs one by one while the engine is running. When the high-voltage wire is disconnected from the spark plug on a working cylinder, the sound of the power unit will change and even greater vibration will appear. If you disconnect the high-voltage wire from the spark plug on an inactive cylinder, nothing will change in the operation of the internal combustion engine.
High-voltage wires are high-risk parts due to possible electric shock, so when performing diagnostics using this method, you should take care of your safety and follow the rules
- hands and clothes are dry;
- When disconnecting the wire, hold the cap.