What types of potato diggers are there?
With the onset of autumn, gardeners begin to harvest potatoes. This takes quite a lot of time, as it is collected by hand. To make work easier, potato diggers were invented. The principle of operation of the device is to separate potatoes from the ground and collect them, throwing them on top of the garden.
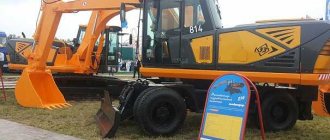
Potato digger
Often such devices are equipped with T 25 vehicles, which belong to the traction class number 0.6. This means that you cannot load the hydraulics in excess of 600 kg. In this regard, a homemade potato digger is perfect. In total, there are 3 main types of homemade potato diggers for the T 25 tractor:
- Screening machines consist of a drive, a table and a ploughshare. The device is highly efficient. The principle of operation is as follows: pick up the soil with potatoes, put everything on a table that vibrates all the time, as a result of which the soil passes through the cracks and spills out onto the garden, and the root crop remains on the surface.
- Conveyor ones are a more complex design. It includes a drum to clean the contents, a conveyor that moves the potatoes inside the device, and a shovel-shaped plowshare.
- Fans, which are lancet devices that are good at extracting potatoes from the soil.
Below we will discuss how to make a potato digger with your own hands for the T 25.
Removal and disassembly of the final drive T-170
Drain the oil from the final drive. Disconnect the track, remove the cab with the fuel tank and wings (see “Repair of the T-170 gearbox”), the final clutch, the drive wheel and the labyrinth seals.
Rice. 247. Final drive of tractor T-170.01
Remove plug 6 (Fig. 247) from the keyway of axle shaft 16. Press out key 7 and remove rubber ring 5 and steel ring 4 from the axle shaft. Unscrew the nuts and bolts securing the final drive housing.
Rice. 248. Final drive sling diagram
Sling the final drive casing behind the hole in the rib (Fig. 248). Screw two release bolts into the M14 holes, slide the casing off the pins and remove it.
Rice. 249. Hub strapping diagram
Snap the hub (Fig. 249) with the gear and remove it from the axle shaft together with roller bearing 8 (see Fig. 247), sleeve 2, ball bearing and outer ring of roller bearing 17.
Use a socket wrench to remove six bolts 14 through hole C in the drive flange. Screw two M12ХК75 release bolts into the bearing housing.
Rice. 250. Scheme for slinging the leading flange
Secure (Fig. 250) the drive flange with the gear and press the bearing housing out of the seat using the release bolts. Remove the drive flange with gear 15 (Fig. 247) from the side clutch compartment.
Rice. 251. Double gear
Sling the double gear. Gear weight 40 kg. Loosen and unscrew the nut (Fig. 251) and remove the clamp 3. Remove the double gear with the inner rings of roller bearings 4 and 9. Unscrew the six bolts 12 and remove the clamp 6. Using a copper mandrel, knock out the bearing housing 10 along with the rod, ball bearing and outer ring of the roller bearing . Press out the ball bearing together with the outer ring of the roller bearing and remove rod 5.
Disassembling the T-170 hub
Rice. 252. Hub
Bend the ends of the locking plates 3 (Fig. 252) and unscrew the nuts from the bolts 5 securing gear 4 and ring 12 to hub 13. Knock out the bolts, remove them and strips 6. Remove the gear and ring. Press out the outer ring of roller bearing 1 with a puller and, if necessary, remove the retaining ring 14.
Turn the hub over with cover 10 facing up. Bend the ends of the locking plates 7 from the edges of the heads of the bolts securing the cover 10 to the end of the hub. Unscrew the bolts and remove the cover. Use a puller to press out ball bearing 9 together with the outer ring of roller bearing 8. If necessary, remove retaining ring 11.
Dismantling the T-170 drive flange
Rice. 253. Leading flange
Unlock and unscrew bolt 14 (Fig. 253) and remove the locking plate. Unscrew the nut 42 from the end of the drive gear 5 and remove the metal ring 13 and the rubber gasket 11. Press the flange 10 from the splines of the drive gear. Remove the cover 9 from the housing and press the cuff 15 and the ball bearing 17 out of it. Press the outer ring 6 of the roller bearing out of the housing 18 with rollers and separator.
Dismantling the final drive casing T-170
Unscrew bolts 11 (see Fig. 247) and remove cover 10 with gaskets 9.
Rice. 254. Final drive housing
Unfasten and unscrew the bolts 6 (Fig. 254) and remove the clamps 7 and locking plates 5. Press the outer ring of the roller bearing 8 with the rollers and separator out of the casing 4 using a puller. Unscrew stopper 9 from the casing. Press out the outer ring of the roller bearing 3 c. rollers and separator.
The housing, pinion hub and double pinion can be removed without removing the cab, fuel tank or final clutch.
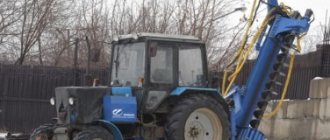
Fan potato digger
DIY potato digger
At home, they often use a mini-tractor to cultivate their garden. For these purposes, you should make a tool for MTZ that works as follows:
- the device clings to the tractor;
- the earth is loosened with a sharp plowshare;
- the potatoes are dug up, laid out on a ploughshare, and moved towards the metal rods;
- through them, soil spills out onto the garden, separating from the potatoes;
- moving further, the potatoes fall onto the soil, from where they are easy to collect.
Fan potato digger
Important! Before harvesting, you need to mow the potato tops.
It is acceptable for the garden to have a small weed growing in sparse bushes.
To make a fan digger yourself, you will need to take a grinder, a welding machine, a drill, and metal drills. The following materials are also needed:
- for the knife, steel in sheets 4 mm thick;
- bolts with a diameter greater than 12 mm;
- for the holder and bracket you will need a steel profile with a cross-section in the form of a rectangle or a thick steel sheet;
- steel rods or non-corrugated fittings with round ends. Its diameter should be up to 10 mm.
You will also need a measuring tape and a pencil for drawing on metal.
How to assemble a potato digger with your own hands:
- You need to drill two holes in the middle of the share so that you can attach it to the bracket.
- Towards the end of the knife, where it expands, you need to weld steel rods. They should fan out. Each one is up to half a meter long. You can also bend them like a marching step.
- Now you need to attach the stand to the plowshare using bolts. Its height depends on what kind of tractor the farmer has. The holder can be welded to the plow, then bolts are not required.
- The bracket needs to have holes drilled in order to subsequently connect it to the tractor. It is welded to the upper end of the post.
- To make the structure more durable, a strip of metal must be welded to the bottom of the knife, which directly enters the ground.
One of the advantages of a fan digger is reliability
One of the advantages of a fan digger is reliability. This unit will serve for many years. The parts here do not rotate, so the device does not fail for a long time. Potatoes are dug up easily, efficiently, and most importantly quickly.
One of the disadvantages is a small passage strip - only 25 cm, so the harvest is lost by 20%. Another disadvantage is that the knife often damages the tubers, which are then unacceptable for sale. Moreover, such root vegetables will be stored for a long time, which means they are not suitable for winter.
How to shorten the bridge from a VAZ?
Sometimes, in order to construct a homemade mini tractor, it is necessary to shorten the building bridge. Let's consider this process using the example of a rear axle from a VAZ. A shortened axle is necessary in order to reduce the width of the wheelbase, thereby making the car more compact and maneuverable.
First you need to carefully prepare for the process. You need the rear axle itself, as well as tools such as a welding machine, grinder, vice, screwdrivers, and more.
You need to trim the rear axle of a VAZ as follows:
- You need to cut off the cup for the spring;
- The end flange must be pulled out;
- The removed axle must be measured, compared with the drawing, and cut to size with a grinder;
- At the tip of the segment, place a notch, which will serve as a mark for the “male” groove;
- Drill a hole inside the cup;
- After this, the axle shaft is joined together and welded;
- The last stage - the finished axle shaft is inserted into the bridge. Welding is done on both sides.
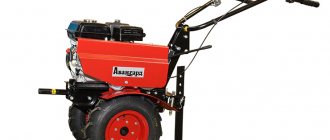
Potato Digger
DIY potato digger for walk-behind tractor
The T 25 ratchet potato digger, also known as a vibration digger, is a homemade or shaking digger. It consists of a knife, a grid that is constantly in motion, and a metal frame.
Potato Digger
It takes a couple of hours to make. But this requires experience and skill in working with agricultural machinery. Have to take:
- grinder;
- welding machine;
- metal drill and corresponding drill bits;
- metal profile with a side of 2.5 cm;
- steel sheet with a thickness of up to 5 mm;
- steel wire with a diameter of 8 mm can be used as non-corrugated reinforcement;
- wheels;
- hinges, bolts, eccentric, levers, consumables and measuring tape.
You also need to have a ruler and pencil on hand. Now you can get started by doing the following:
- Make a drawing, transfer it to a metal profile, cut out the frame for the frame.
- Weld the frame.
- Weld the racks at the bottom where the wheels will be attached.
- Inside you need to weld holders onto which the hinges cling in order to hang the screen there.
- Brackets are welded to the frame to install the gearbox and mechanisms that will create vibration.
- A screen is welded from the rods. It is hung on the frame using hinges.
- Now the gearbox and vibration equipment are attached to the bracket, which is connected to the screen. When the walk-behind tractor shaft is working, vibration will be transmitted through the lever and connecting rod to the sifter, which will create rotation of the eccentric.
- You need to take a sheet of steel and cut it, and then bend it into the desired shape for the knife.
- The share is attached using hinges to the bottom of the frame and the sifter.
- Now all that remains is to put on and secure the wheels.
The T 25 potato digger with your own hands has large dimensions
Important! A ploughshare or knife can be of any shape: pointed and bent, concave and convex.
How does the digging process work:
- The ploughshare needs to be stuck into the ground, from where it will take out the tubers along with it.
- The knife is constantly in motion, repeating noise after noise. When cutting off the soil, he throws it up so that the tubers fall into the sifter. Thanks to vibration, unnecessary soil is removed.
- Given how the unit was assembled, the peeled potatoes fall to the ground behind or to the side of the unit.
Important! The harvesting area is small.
The advantages include:
- large grip up to 40 cm;
- the knife penetrates the ground 25 cm;
- Up to 10% harvest loss.
The disadvantages include:
- vibration that is transmitted to the farmer’s hands, which is very tiring;
- You need to harvest potatoes only in an area cleared of weeds and tops.
The T 25 potato digger with your own hands has large dimensions.
Rotary cutter for mini tractor: types and functions
A rototiller is a multifunctional tool that is designed for cultivating soil. It is worth working with such a canopy on land where there are no thick tree roots or stones. The cutter is divided into several types depending on the shape of its knives:
- Milling cutter with saber knives. This is the most popular type of tiller. Thanks to the shape of its blades, it can easily cope with a large number of tasks and is safe to use. If it hits a stone, the knives lift it and continue their work further. This cutter is made from high quality steel. It is also collapsible, so it will take you minutes to assemble.
- Crow's feet cutter. This type of cutter has become very popular in the market. It is used to destroy weeds and to work on heavy virgin soil. A significant disadvantage of such a canopy is its very low strength. As a result, such a cutter needs frequent repairs.
Conveyor potato digger
Conveyor potato digger
A potato digger for a tractor device is distinguished by its large size, but you can also get very small equipment. For example, use a conveyor digger. To harvest, you need to loosen the potatoes and soil with a knife. After which the soil with tubers is supplied to a belt that moves all the time, where the soil is separated from the potatoes.
Do-it-yourself attachment to a mini tractor
The tape is represented by a lattice made of rods or tubes, which are located parallel to each other. Rods or tubes are made of metal. They are secured in a chain so that they constantly move, making translational movements.
The belt that makes the movement is made of steel in the form of a mesh, as well as rubber, the basis of which is fabric. It is through such a grid that the earth wakes up so that the clean potatoes go to the receiving bunker or simply fall into the garden.
Important! The conveyor moves when it receives torque from the tractor shaft. A gearbox, chain and gear with teeth are used.
The wide knife of the digger goes to a depth of up to 18 cm. Only up to 5% of the harvest is lost. To assemble a knife, it must be cut from a thick sheet of steel and then bolted to a frame that will pull it.
It is difficult to make the unit yourself. To do this, you need to study the drawings and diagrams of factory machines, so experience in doing such work is required.
It’s difficult to make the unit yourself
To create a conveyor potato digger you need to go through several steps. Each master makes individual parts of the device in his own way, so often homemade units are not similar to each other. Equipment manufacturing steps:
- Weld the frame using a steel profile with a square cross-section and also available corners.
- Make a ploughshare or knife from sheet steel.
- Install rollers or wheels into the frame so that the conveyor belt moves.
- Assemble the conveyor belt using chain, steel bars and other material.
- Assemble brackets and fastenings to form a gearbox and gear train.
- Install the conveyor belt and other mechanisms into the frame.
- Finally, install the knife and wheels on the frame.
Thus, you can get a conveyor potato digger. Of all three types, this is the most difficult to assemble, but more economical in terms of harvesting.
When choosing which digger to make, you should consider all the pros and cons. Only after this will it be possible to choose one of them.
0 0 votes
Article rating