2. Use any available method (marker, felt-tip pen) to mark the position of the latch on the hood. 3. While holding the hood latch with a screwdriver, use a key by 17 mm
loosen the tightening of its lock nut.
4. Unscrew the locking nut and washer.
5. Using a screwdriver, remove the lock washer of the safety hook axis.
6. Remove the axle and remove the drive lever from the two plastic holders.
7. Remove the safety hook assembly with the drive lever from the hood.
8. Using pliers or prying it with a screwdriver, remove the upper end of the hood lock spring from the panel hole (shown from the engine compartment).
9. Disconnect the drive rod from the spring and, turning, remove the spring from the body panel.
Rope break
If the lock on the hood of the VAZ-2114 works properly, but the hood still does not open from the passenger compartment, you should assume that the drive cable is broken. You can check this by pulling it (not the winding) with pliers in the interior, making sure the lock opens from the outside.
If a break occurs in the engine compartment, you will have to proceed with the following actions:
- drive the car onto an overpass or into a pit;
- using keys, remove the crankcase protection under the engine;
- loosen the fastenings of the motor boot and bend it back;
- reach with your hand the lock that secures the hood.
Having completed these operations, you need to press the latch to open the lock, after which you can begin to remove the broken cable. To do this, the driver will have to, without touching the spring, disconnect the cable from it and remove it from the mount by loosening the corresponding bolt on the handle.
By sliding the bushing to the side, the cable must be pulled through the engine space. Installing a new drive is carried out in the reverse order.
To extend the life of the cable, it is recommended to lubricate it with silicone grease under the winding. The same applies to the hood lock itself, which also requires protection from mechanical loads and environmental influences.
General view of the hood cable
Before proceeding directly to the issue of opening the hood without a cable, it is worth considering the reasons why a break occurs:
- Wear of the cable itself . A fairly common reason for cars of the 13-15 Lada series. Frequent opening of the hood leads to this effect.
- Cable corrosion can also lead to weakening of the metal from which the product is made. As a result, breakage cannot be prevented.
- The hood cable comes off . In this case, it is also necessary to open the engine compartment without resorting to a cable.
- Other reasons that served as a break in the hood opening cable.
How to open the hood without a cable
The problem of the hood cable breaking was observed in the predecessor of the VAZ-2114, the legendary “nine”. Unlike its older brother, the “fourteenth” model has plastic protection, which was not present on the VAZ-2109. Therefore, the process becomes more complicated, but there is nothing scary or supernatural, everything is much simpler than it seems at first glance.
So, let's consider the sequence of actions aimed at opening the hood in the case when the cable breaks:
- In order to open the hood you will have to crawl from below.
- With the protection installed, you will have to unscrew the “crab” mounting bolts on the right and left. It is on them that the protection is attached.
Unscrew the crab bolts
Unscrew the fasteners and remove the crankcase protection
Pull the lever and open the hood
Now the hood is open, and you can begin to identify and eliminate the causes of the malfunction.
Alternative way
Place a piece of fabric to raise the edge of the hood. Car thieves use a special pillow
You can open the hood with a broken cable using a wire. It's just a matter of touch.
How to unscrew a brake pipe. If it has soured and the edges are torn off! Let's disassemble the hose and cylinder
Not long ago I wrote an article about how to unscrew a stuck bolt, say on a muffler . My readers liked the article, they asked me to tell you about dismantling a soured brake pipe. After all, on used cars this is a real problem, and it is difficult to unscrew both from the caliper or cylinder, and from the brake hose itself. WE WILL solve the problem. Well, today there are some useful tips on installing these tubes, there will be a video, so read and watch...
I myself have encountered brake pipes many times on our VAZs, from 2101 to 2114; of course, if you go to a service station, they will easily and quickly unscrew them for you. But if you climbed it yourself, and have never done this before, and even if the mileage on the car is huge and the brake fluid has almost never been changed! It will be triple difficult to do this.
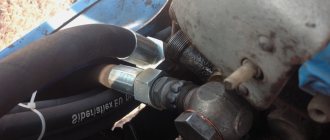
About brake pipes
It itself is usually made of a thin copper tube, at the ends it is flared and covered with metal nuts. It is these nuts that are attached to the calipers , brake cylinders and screwed to rubber hoses. And it is they (in threaded connections) that “sour” or, as many say, “stick”; it is really very difficult to unscrew!
Especially if you are a beginner and go in with a regular wrench, which can tear off the edges and make the nut round, then be careful, it’s not so easy to unscrew. Well, I present to you several methods according to complexity.
Why do they sour so much?
There are several reasons:
- They are located next to the wheels of the car. And this is water, snow, dirt and other delights of our roads, that is, a banal external factor
- Warming up calipers and drums. When braking, a lot of heat is generated, so the elements of the braking system can heat up, and after getting into a puddle they can cool down sharply
- Brake fluid is hygroscopic. If it takes up water more than 3.5% of the total volume, then it urgently needs to be replaced. However, even if the proportion is only 2.5 - 3%, then such brake fluid will oxidize metal parts from the inside
These are the most basic points why sticking and souring occurs so strongly.
Unscrew the loose nut
If the tube has never been unscrewed, then its edges are intact. However, the mileage is high, then there is a 95% chance that it has gone sour! I EXTREMELY DO NOT ADVISE you to climb and unscrew with a regular wrench, be it an open-end wrench or a socket wrench!
What you need to do initially:
- Clean the mounting area. Often there can be so much dirt that the nut is not visible at all.
- Treat the fastening area with liquids like WD-40 ( they made a homemade one here ) and wait 30 - 40 minutes
- We need a special wrench to remove the brake pipes. It has an extra bolt that fits very tightly around the edges of the nut.
Here the principle is simple, throw on the wrench, tighten the bolt on it and unscrew the nut. In 60-70% of cases everything works out quite quickly and easily. Watch the video
However, there are still 30 - 40% of cases. And here it is not always so simple.
The edges are broken, what should I do?
Not everyone reads my articles and, as usual, we go under the car with a regular key. What happens, the oxidation is very strong, we try to unscrew it and “bang” - the edges are torn off, the nut becomes round, it is almost impossible to unscrew it. What to do? There are several ways, but often the only thing that will help you is “breaking off” the tube and removing the caliper, cylinder or hose completely!
No matter how sad it sounds:
- Again, we try to work out the place with WD-40. This product knows its stuff and often helps even problem areas
- We take the key (which I wrote about above), put it on, and tighten the bolt. We try to unscrew it, the whole point is that sometimes some edge remains and it can get caught on it. If it scrolls, you need to cut the tube
Actually, next we break (cut) the tube and remove the caliper or cylinder itself, here again we have several ways:
- You need to take the correct head, in which the force is applied not to the corners of the nut, but to the edges. Let's watch this useful video and you'll understand everything.
- If the case is completely advanced, you can try to grind off a few edges with a file, give it a square look and then clamp it in a vice and try to unscrew it
However, it happens that the nut simply breaks, and a part remains inside; this is an even more complicated case.
Here again there are several options:
- Drill out. That is, take a drill of approximately the same diameter as the hole, then drill out a part of the nut and tube EXACTLY, after that we take a tap and cut the thread. This is a VERY complex and precise process, not everyone can handle it
- This is to weld a washer or a nut of larger diameter to part of the nut and try to unscrew it. It’s also difficult, but you don’t need to cut anything. Again a useful video.
In conclusion, I would like to say that I have had cases when I had to buy a new brake cylinder because the old one just wouldn’t budge. And after drilling out the tube, the drill went in the wrong direction, and it was impossible to cut the thread! Fortunately, for a VAZ, a rear brake cylinder costs a penny, as do brake hoses.
I also want to note - CHANGE THE BRAKE FLUID ACCORDING TO REGULATION (usually 2 - 3 years), do not let moisture accumulate in it! You may not even need to remove anything.
I end here, SINCERELY your AUTOBLOGGER. We like and repost the article.
(
16 votes, average: 4.75 out of 5)
Similar news
Rust converter composition. Can I do it myself?
Brake fluid composition. Basic properties, necessary information
Anti-squeak plates for brake pads. Why are i needed?
Add a comment Cancel reply
TOP articles for the month
The holidays are coming, which means most of our country will be drinking alcohol. Easy: -…
The vehicle battery voltage, as well as its capacity, are the most important indicators of this automotive unit,...
I am often asked about car emissions. Often, newbies, and even experienced drivers, don’t like…
Primary problems with the hood latch
The first malfunctions in the locking mechanism are noticeable immediately. If you pay due attention to them, a simple adjustment will help you repair the lock. The hood lock cylinder on the VAZ 2109, for example, is made of industrial steel and for it to break completely, you need to ignore the first malfunction signals for more than one month.
- Each time you close the hood, you need to slam the lid harder and even put pressure on the frame.
- The lid clangs and rattles on rough roads. Moreover, this can be clearly heard in the cabin.
- The lock does not close the first time.
- When the cable is loosened, you need to pull the handle several times for the lock to open.
- After pressing the hood handle in the cabin, the lid does not lift, forming a gap, but remains in place. The gap between the frame and the cover can only be seen if you lift the cover yourself.
If these signs have just appeared in the car, you can adjust the lock, this will prevent the need to completely replace it.
Other probable causes of failure
Among the common reasons that car owners and technicians encounter in service centers is the hood spring of the VAZ-2114.
This small metal assembly tends to lose its functionality due to normal metal fatigue: as a result, the spring weakens and no longer reliably opens or closes the lid.
Repairing the spring is impossible, so replacement is carried out:
- The hood lid opens up.
- Use a screwdriver to pry off the lock washer.
- The cable is disconnected.
- First remove the axle, therefore the faulty spring.
It is likely that you will additionally have to deal with loose or broken support washers by straightening them or installing new ones.
It may also be necessary to shorten the drive cable, but this must be done carefully so as not to overdo it - usually such operations are left to professionals.
Owners of the “fourteenth” with many years of experience recommend equipping the hood with a device such as a gas stop - it greatly facilitates the finishing of the lid and, in general, the service life of the remaining hood components. True, such a modernization will have to be carried out manually: buy a shock absorber, take measurements in the engine compartment and ensure the optimal piston stroke length (on average, for a VAZ 2114 it is about 21 cm).
Finally, after final finishing, the stops can be installed by aligning the lugs with the technical holes on the amplifier, securing the locknuts and adjusting the angles and travel using additional washers.
With some skill, this operation will not take much effort and time, but such “tuning” will greatly facilitate the operation of the car in the future. However, you should remember that if the shock absorber leaks and loses its functionality, the hood may become jammed so that it will only have to be opened with the help of specialists at the service center.
How to open the hood on a VAZ-2114: step-by-step instructions
If you are among those who do not know how to quickly open the hood of a VAZ-2114 on your own, our guide will help you.
First of all, you need to drive the car into a viewing hole or overpass and arm yourself with pliers and wrenches to remove the engine protection. If the cable breaks, there are two possibilities: it broke inside the car or under the hood itself. In the first case, you can fix the problem without removing the protection - inspect the cable for a break. Take the pliers and grab the inside of it, being careful that you grab the element itself and not the braid. After this, pull the cable towards you until the hood opens. If you did everything correctly, and the rupture occurred inside the car, then your problem will be solved.
If the cable breaks under the hood of the car, you will have to act in a different way. The repair must be done from below so that you can reach the lock, so the car must be on an overpass. While under the vehicle, remove the crankcase guard on the engine using two keys.
Next, you need to perform the following steps to remove the boot from the engine:
- Remove it from the fastenings that you will find in front.
- Bend the boot in the opposite direction.
- Insert a screwdriver into the space near the radiator.
- Try to reach the hood lock.
- Find the latch by touch, press it, and turn it to the left.
If everything is done correctly, the lock will open. After completing these simple steps, you will remember how to open the hood of a VAZ-2114 step by step on your own.
How to unscrew a brake pipe
Have you tried it with a split wrench?
Unfortunately there is no such thing:confused: Friends, neighbors, acquaintances have no:confused:
I unscrewed it with a split wrench, but still the tube stuck to the fitting and was screwed in, so I had to buy a new one, the brake hose also turned out to be cracked - it could be replaced at a cost of 200 rubles, so I think it’s easier to cut it off with a grinder and replace it.
There is a new hose. But it’s a pity for the phone: confused: And probably expensive.
Lubricate generously with diesel fuel (what do we have now - diesel fuel?). Let it sit for an hour or two. and start. No need to twist. Using a wrench or something else, tap lightly with such strikers (it is not the strength that is important, but the number of light strikes). to rest, throw on a wrench, but do not twist, but again briefly and weakly tug, changing forces left and right, while it is advisable to hold the tube itself, for example, with pliers (again, I repeat - no effort, only a light impact, not aimed at twisting, but to move it). It doesn’t work, tap again - in general, you just need patience. A lot of patience... And those who know how to wait will be rewarded.
Ok, thanks:D Off to follow the instructions:D
Ok, thanks:D Off to follow the instructions:D
Kerosene is stronger than diesel fuel, VDshki and other things. You need to wrap it in a cloth and moisten it with kerosene from time to time. In severely advanced cases, it is necessary to drip with hydrochloric acid. It takes oxides well and practically does not touch pure metal. But then rinse with water and soak with kerosene again.
Kerosene is stronger than diesel fuel, VDshki and other things. You need to wrap it in a cloth and moisten it with kerosene from time to time. .
Agree. Kerosene has remarkable permeability. It’s not for nothing that it is used to identify leakage points in welds in pipes.
I unscrewed it with a split wrench, but still the tube stuck to the fitting and was screwed in, so I had to buy a new one, the brake hose also turned out to be cracked - it could be replaced at a cost of 200 rubles, so I think it’s easier to cut it off with a grinder and replace it.
+1 I had the same thing