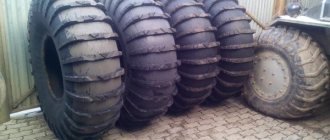
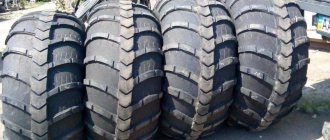
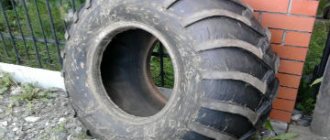
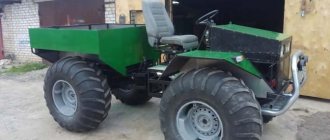
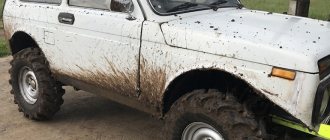
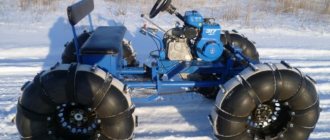
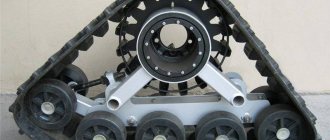
Such wheels are required not only by owners of frame jeeps. They are even installed on passenger cars, because they make it possible to significantly improve cross-country ability and prevent immersion in swamps and mud. These tires are mainly produced without tubes to make it easier to withstand difficult conditions and easier to repair. This rubber is more reminiscent of some kind of cushions, but this is precisely their main advantage - minimal pressure on the ground and excellent off-road effect.
Tube tires with low pressure are being produced less and less often, as they are not as comfortable to ride and are significantly heavier. But at the same time, they are less susceptible to deformation at speed or during maneuvers, and are stronger against mechanical loads.
Design options
Since in our case we are interested in the process of making all-terrain tires with our own hands, we will not dwell on factory design options. Types of low-pressure tires that are available for self-production:
- a tube made from a tire of the required size is used as a base. In this case, you can completely make the disk yourself or retrofit the finished wheel with the necessary stops and fasteners. Since the chamber is very elastic, it needs additional support, which will prevent it from breaking under lateral loads. Along the perimeter of the contact patch, the camera is tied with pieces of dense material or chains, which is necessary not only for attaching the camera to the disk, but also to create the effect of lugs. The ability to cling is important not only on sand, loose soil or snow, but also on water;
- Low pressure hydrators. Truck tires are used as a base, from which part of the tread and profile layer is cut off. As a result, the tire becomes lighter and acquires additional elasticity. To reduce the risk of disassembling the wheels when driving at low pressure, as in the previous case, it is necessary to make an additional side stop. We'll look at how to make the pads, as well as the design of the disc, in the photos and videos below.
Design and properties
The air pressure in such tires is often no more than 1 atmosphere. By increasing the width of contact with the road, the load is evenly distributed between all wheels, and the machine freely overcomes soft snow, clay and sand.
Despite the versatility of this rubber, different requirements may be placed on it. For example, for tractors and other agricultural machinery a negligible load on the soil must be ensured, while for military vehicles increased maneuverability and better overcoming of difficult sections of the road are of greater importance.
The basic principle of their design is based on increasing volume and decreasing pressure. As a result, the buoyancy and shock-absorbing properties of rubber improve, and it becomes possible to easily pass snow and muddy soils. The tread of such a tire has only two patterns: sports “checkered” and mud “herringbone”.
Manufacturing the disk and assembling the structure
For the base of the frame, a ready-made structure is most often taken. As a rule, it is cut lengthwise and an additional metal insert is inserted for expansion or a rigid structure is created by welding a series of pins (or rods).
The wheel is mounted using belts wrapped in rubber rings and a disk. A fire hose, a thin belt from an industrial conveyor, and tarpaulin strips are used as auxiliary means.
Sometimes aluminum is cut into strips. Each of them is secured with bolted connections or rivets. Installation begins on one side of the disc, then goes around the rubber and ends at the other base. The minimum number of tapes is 12.
How to strip tires from GAZ 66 to UAZ
Tires from GAZ 66 are most often useful for this kind of work, since there are few cord layers, and it is not so difficult to make light wheels from them. But many professionals in their field still note that these tires become very shaggy after peeling. These wheels wear out quickly and may not last long. Therefore, when cutting the side strips, you should work more carefully so as not to cut the threads too much. But the tires are not hard, which is very good for an all-terrain vehicle.
How to strip tires for an all-terrain vehicle| instructions - homemade friend
Dear visitors to the “Self-Made Friend” website, today we will walk you through step by step how to strip tires for an all-terrain vehicle. The guys mostly call them obodryshi, pneumatics, low-pressure tires.. Donors for the production of lightweight tires for homemade all-terrain vehicles are mainly used tires from Domestic tractors and trucks, as practice has shown, the best ones are from KRAZ and KAMAZ, tractor T-150. The weight of such tires in normal condition is very large for a small all-terrain vehicle, but if you peel off the top layer of rubber to the braided cord, the weight of the tire is significantly reduced to about 30 kg. Of course, the camera will add 4 kg, the disk 16 kg, in general, a fully equipped wheel will weigh no more than 50 kg, which is quite acceptable for a homemade all-terrain vehicle
Stripping tires is a rather serious and painstaking task; it must be treated with special responsibility and care, because one awkward movement with a knife or saw will send the workpiece to waste.
First you need to mark the wheel with white chalk, then use a utility knife to make cuts. Remove the metal part of the cord at the base using pliers and an electric winch, and then rip off the rubber itself, see how this is done below..
Tools
- electric winch
- cable
- ticks
- stationery knife
- sharpener
- chainsaw
- scrap
- installation
Materials
- tire from a tractor or truck
Step-by-step instructions for stripping tires for an all-terrain vehicle with your own hands.
And so, the first thing you should do is prepare the site where you will work, namely, you need to firmly and securely fasten the electric winch to the floor or wall. During stripping, the wheel must also be fixed; this is done using a crowbar and a hole in the concrete floor, where the crowbar is inserted and holds the tire in place. You will also need pliers and a stationery knife and replacement blades for it. Cutting tool and pliers. Then you need to prepare the tire, first inspecting it for cuts and cracks, and using a wire brush to remove any stones stuck between the treads. Apply markings using chalk. After which you can start using a stationery knife. ATTENTION! We hold the knife at an angle so that the protector is shaped like a trapezoid. The cutting depth is strictly up to the beginning of the braided cord! Pay attention to the knife, the blade should be in this position. After which it is necessary to remove the wire from the base of the wheel, for which you should make a cut exactly in the center and so on around the entire circumference. We retreat from the edge about 1 cm, the mode is the same depth as the protector. To get to the wire, you need to make a window, we also cut it with a knife. We cut off the rubber and see this same wire. Next, you need to pry it off, take a screwdriver and start pulling it out little by little. We pass the baton to the assembly line and trim the rubber with a knife. After a more or less acceptable loop has been pulled out, we hook the hook of the cable from the electric winch, and lock the wheel itself with a crowbar so that the tire is motionless. We tear out the wire using a winch, calmly and slowly, cutting the rubber as we go so that the wire comes out well . Then you should make an incision just above the seat. The pliers are inserted into the incision site and clamped. And also, using a winch, we rip off the ring. Then again, using a stationery knife, we begin to cut the side of the tire along the pre-marked lines. We hook the pliers to the edge and begin to tear it off using an electric winch. We cut along the edges with a knife, but be careful not to touch the cord, work with the knife from the bottom up. Next, we move on to the less labor-intensive work of cutting the tread; this is done mainly with the help of gas or electric saws. These are the kind of encouragement you should end up with. Thank you very much for your attention, we hope this material will help you. If you have experience in this matter, please share with us (comment form below)
Do-it-yourself tire stripping machine
Reading time: 5 minutes
It is quite possible to make lightweight tires for an all-terrain vehicle yourself. In common parlance they are also called tire wheels and pneumatic wheels. The basis for future components of the all-terrain vehicle can be used tractor, KAMAZ and KrAZ wheels.
These tires weigh a lot, so to fit them to a regular all-terrain vehicle, you will need to peel off the top layer. And then the question arises: how to peel off the wheels on an all-terrain vehicle? The procedure is quite complex and time-consuming, so you should immediately stock up on patience and strength. The work will have to be very careful, since any awkward movement can ruin the tire forever.
Tires are good
When the required tire has already been selected, you need to prepare it for work. To do this, you will need to wash and dry it, and use a wire brush to remove any stones stuck in the tread. Another important point in the previous work is the choice of premises. It should be spacious and well equipped. A spacious garage could be an excellent option.
How to make a disc for a refresher
Craftsmen who make all-terrain vehicles with their own hands are often interested in the question: is it possible, and if so, how to make the wheels themselves. An all-terrain vehicle is the kind of vehicle that will get stuck where others can’t get to, so the requirements for disks in this case are the most stringent. Disk requirements:
- Discs must have high anti-corrosion characteristics. Since they are subject to harsh operating conditions, the material from which the disc is made should not become rusty or corroded, even after prolonged exposure to wet conditions.
- Light weight. SUVs and all-terrain vehicles themselves are heavy, so you shouldn’t weigh down the car with too heavy rims.
- Possibility of correction. Operating an all-terrain vehicle in difficult conditions can cause the rims to become bent, so good all-terrain vehicle rims should be repairable.
- Good value for money. Cheap wheels break quickly, while forged ones are too expensive. Therefore, for each specific case there must be an individual approach.
Also interesting: What pressure should be in the tires: a table of values for passenger cars of different brands, as well as for re-rolling, the difference in winter and summer
It is sometimes impossible to buy suitable wheels for all-terrain vehicles, so you should think about making them yourself.
Table: characteristics of off-road tires
| Road conditions | Maximum tire load, kgf | Internal pressure in the tire corresponding to the maximum load, kgf/cm2 | Maximum speed, km/h | Mileage rate within the warranty period, no more, km |
| Paved roads | 600 500 | 0,6 0,5 | 70 | 800 |
| Dirt roads | 600 500 | 0,45 0,35 | 60 | 900 |
| Sand, plowing | 600 500 | 0,3 0,25 | 40 | 1500 |
| Virgin snow | 500 | 0,2 | 20 | 1300 |
How to make wheels for an all-terrain vehicle with your own hands
Dear readers! Our articles talk about typical ways to resolve legal issues, but each case is unique.
If you want to find out how to solve your particular problem, please use the online consultant form on the right or call the numbers provided on the website. It's fast and free!
The process of working on disks can be divided into stages. Stages of work:
- The first step is to make locking rings. They can be made from the lining of a two-hundred-liter barrel. If you manage to find such a barrel with a metal rim, then you are in luck. If you could not find a rim from such a barrel, you can try to bend rings from the corners by 25 mm or from an iron strip of 2-3 mm.
- We prepare the ring so that it fits tightly into the seat of the already stripped tire. Tight - this means so that it can be pounded inside with a hammer.
- The next step is to measure the inner circumference of this ring. This can be done using a flat metal strip. A piece of such tape is cut and used as a template when making a barrel, adjusting it to the inner circumference.
- When the locking rings are ready, you can begin making the barrel of discs itself. To do this you will need a solid sheet of iron.
- Draw a scan with the following dimensions. It will be rectangular in shape, where the length is equal to the inner circumference of the locking ring, and the width is equal to the width of the disk.
- Cut out the resulting rectangle.
- We roll up a barrel from the resulting iron rectangle. Using a control tape, we once again check the outer circumference of the barrel, which will be slightly larger due to the thickness of the metal sheet.
- At the next stage we need to cut off the excess. An error of no more than 1 mm is allowed.
- We weld the seam on the barrel hermetically, after which it must be sanded to remove smudges. It is necessary to grind on both sides - both outside and inside.
- In order to make a cone for the disk, we measure the internal circumference of the finished barrel. Next, we use the formula: outer radius of the cone “R” = “C” inner.b. / 2 pi = “C”int.b. / 6.28.
- We weld the elements.
This way you will have a barrel for the disc.
Stripping tires for all-terrain vehicles
The most necessary ones include:
If all the components are available, then you can start. Applying chalk markings is necessary for future drawing of the tread. Moreover, this can be done as much as your imagination allows. But it’s better to draw the simplest one so that there’s less work.
The winch is prepared first; it should be securely attached to the wall or floor. Not far from the winch you will need to equip a tire fixation area. It must be installed and remain stationary while the electric winch is operating. You can make a hole in the concrete floor and insert a crowbar into it, and then put a tire on it. But if your imagination can come up with a more interesting mount, then you shouldn’t hold back. For a stationery knife, you will definitely need replacement blades, since they become dull very quickly during operation.
Materials for stripping tires
How to make a cone for a disc with your own hands
To make a cone, you first need to calculate, draw and cut out its development. This can be done either from a whole piece of metal or from parts. Most often, the development is made of three parts, which are then welded into a single whole on a stencil.
Cutting a cone scan out of three parts has a great advantage - this method saves metal twice. First of all, we will select the desired cone angle. Experience shows that the most optimal option is an angle of 45 degrees.
You can make a more obtuse angle, up to 60-70 degrees, but this angle is suitable if you need to increase the offset of the disk. There are programs for calculating the cone, but you can do the calculation yourself using a simple calculator.
From the right triangle it is clear that ac = sv / sin “a”, while the outer radius of the sector is equal to the inner radius of the barrel R int.b. /sin "a"; the inner radius of the sector will be equal to the outer radius of the car disk / sin “a”; The sector angle is 360 x sin "a" degrees.
You don’t have to measure the angle, but set aside the inner circumference “C” on the outer radius of the sector. b. The sectors should be cut strictly along the radial line. Important: when working on disks, there is one problem - the weld may burst during operation. This problem can be solved by strengthening the weld using bolts and nuts.
When the disk is completely ready, a thin strip of 2mm steel can be welded to the barrel for reinforcement. It will prevent beading due to the breaking of holes in the barrel through which the locking ring is screwed. If the ring itself is made of aluminum, then in these places it is worth switching to steel. The disk should be painted before use. You can use powder coating for car rims from zahidcolor
And don't forget to check that the ball joint does not rest against the inner cone. This is a common problem when you want to make disks yourself. As a result, the disk has to be shifted to the edge of the barrel, and the inner cone turns out to be almost straight without tilting.
Chamber version
First of all, you need to select or grind your own discs that will fit the parameters of the hubs of your vehicle. What to do if you need to adjust the width of the disk to the camera:
To manufacture the type of low-pressure wheels we have chosen, metal rods will be required (the safe thickness depends on the size of the chamber, as well as the frequency of the jumpers). The side supports are welded to the base of the disk, and then transverse jumpers are attached to them, which will be the seat on the disk for the camera. For improved lateral support, the entire system is reinforced along the inner perimeter of the tire profile with a circular rod.
Some inventors use chains for jumpers that go around the contact patch. The solution is not bad, since it allows you to get additional snow, water and lugs. You can also use tow ropes, which, after tying, will cover the portion of the camera, preventing it from being damaged.
Most likely, it will be superfluous to remind you that all fasteners facing the camera should be fairly flat. Otherwise, when driving over uneven surfaces, there is a high probability of breaking through the camera.
List of events
1. Preparation. For the stripping process of a future low-pressure tire, it must be cleaned, washed and dried. Then its surface is marked with a marker.
2. Cutting the outline. It is easier to cut the sidewall, so work begins from this place. Make a cut to the depth of the first layer of tire cord threads. The wire is cut through it using wire cutters. The metal fibers are pulled out one by one.
Also interesting: Buy Winches in Moscow - online store wholesale and retail
According to the sketch, a wider cut is made, passing through the treadmill and sidewall. Using wire cutters, cut the surface and tear off part of the casing. If there is a winch, the cable tension is gradually increased until the goal is achieved - complete separation of the layered rubber element, called the fang.
The entire surface is treated in this way. Upon completion of the work, the tire must be carefully checked for cutting the base. If such an incident occurs, then time is wasted, and you need to get a new tire for work.
3. The structure is cleaned with emery cloth and lightly straightened with a hammer.
Advantages and disadvantages
advantages over purchased wheels:
- Price. All-terrain wheels are very expensive, which can’t be said about the wheels.
- Such wheels have excellent adhesion to almost any surface, which significantly reduces the risk of accidents.
- The husks weigh relatively little. An “unpumped” passenger car engine will be quite capable of cranking them.
- Low surface pressure due to the large tire area. With encouragement, muddy terrain, quicksand and deep snow become quite passable obstacles. The tire pressure on the surface can be adjusted. They just need to be pumped up or lowered a little.
- Tires with low pressure do not harm the surface soil layers in any way, so you can safely drive an all-terrain vehicle with tires across plowed fields or use it as a tractor in agriculture.
They are also not without some disadvantages:
- You should try to ride less on hard asphalt and concrete surfaces. Otherwise they will have to be changed very soon.
- A car on such wheels is not very stable. It’s better not to make sharp turns on it, and you shouldn’t drive it fast at all.
- Wheels wear out much faster than normal ones.
- Encouragement is a considerable burden. Transmission and suspension parts with such wheels will have to be changed and repaired more often.
- Low pressure tires are very flexible. This increases their permeability. But due to their increased stretchability, tires get punctured more often than regular tires.
- The car will have to be re-registered - “upgraded” to the status of an all-terrain vehicle.
What are buds and what are they for?
Tires (also known as low-pressure tires) are huge tractor, truck or helicopter tires that have been stripped of excess rubber.
Thanks to the large area of such wheels and their low pressure on the surface, an ordinary passenger car equipped with them becomes a real SUV .
With encouragement, Niva and UAZ can overcome a wide variety of obstacles - fields, deserts, rocky and marshy soil.
It is difficult for hunters and simply those who like to ride in difficult terrain to do without wheels with low pressure.
Making such tires yourself is not a problem. For this, the most common tools like a knife or winch . It will still take a little skill.
Before you start creating low-pressure tires, you need to clearly understand what exactly they will be needed for , that is, in what conditions, where exactly they will be used.
- primarily for driving on dirty, bumpy roads and rural roads - then you need to use a self-cleaning tread;
- If we go through swamps on tires, we will need to lower the tread grooves a little so that the grip becomes as good as possible;
- In snow drifts and sand, it is better to drive on tires on which the tread pattern elements are as close to each other as possible.
You need to think about the above in advance.
Ultra-low pressure tires - the car will go anywhere!
Cars on large wheels are increasingly appearing on domestic roads these days. They are used on huge low-pressure tires on both factory-made vehicles (for example, all-terrain vehicles) and homemade ones. In most cases, SNDs for them are manufactured to special order, which, naturally, requires significant financial costs.
If you wish, you can save money and try to make low-pressure tires with your own hands. We will talk about the process of making them yourself below, providing a video of this operation. Now let’s describe the main advantage of SND. It lies in the fact that the low specific pressure on the ground (road) of such SUV tires allows you to create real all-terrain vehicles from ordinary cars that are not afraid of driving over rough terrain.
Cars with ultra-low pressure tires can easily overcome any off-road conditions and swamps; they can be used on country roads and agricultural land.
It has been proven that the cross-country ability of vehicles equipped with low-pressure tires is 20–40 percent higher than the cross-country ability of similar cars with standard tires.
In addition, the described tires (both homemade and made in production conditions on a special order) are characterized by a high rate of contact with the road. Due to this, when the tire hits any obstacle on the ground, it takes on its shape - “envelops” it, thereby increasing the area of contact of the low-pressure motor with the obstacle, which makes it possible to drive through it without difficulty.
Please note that cars with ultra-low pressure tires require special skills from the driver of the vehicle. Driving such a car is more difficult than a car with ordinary passenger tires. It is very important to corner as smoothly as possible to avoid damaging the sidewalls of the tires.
Table: technical characteristics of Trekol tires
| Tire Model/Model | TREKOL |
| Tire Size/The Size Of The | 1300x600x533 |
| Tread Type/Type | Checkered |
| Camera designation | B/C |
| Ply rating | 2 |
| Recommended/permissible rim, mm/Rim | 500-533 |
| Outer diameter, mm | 1300 ± 30 |
| Profile width, mm, no more than | 650 |
| Load, kgf/Maximum load, kg | 400-600 (depending on road conditions) |
| Pressure, atm/Pressure, atm | 0.06-0.58(depending on road conditions and load) |
| Maximum speed, km/h | 80 (depending on road conditions, load, pressure) |
| Minimum ground pressure, kg/cm2 | 0,1-0,5 |
| Operating temperature(°C) | from - 60 to +50 |
| The Appointment Of | Operation in snow, swamp, sand, off-road |
| Load index | 90 - for speed category index F, 84 - for in.-J |
| Grouser height, mm | 12 |
| Tire weight, kg. | 40 ± 2 |
Simple caracat 4x4 “logza”
This caracat was built for fishing and hunting trips, as well as for household needs, such as delivering firewood. The all-terrain vehicle is designed for two people, and can also carry cargo weighing up to 250 kilograms. To build the all-terrain vehicle, the author used the following parts: 1) engine from an IZH-Planet 5 motorcycle 2) axles from a Moskvich 412 car with a gear ratio of 4.22 3) SZD gearbox 4) Tubes and tires from T-150 5) wheels from GAZ-52 6) gearbox from UAZ 7) 20-tooth sprockets and others
chains with a pitch of 19 and 25.4, as well as a chain from an Izh motorcycle
Let us consider in more detail the main stages of building an all-terrain vehicle and the components of its structures.
A transfer case was made from a disabled person's gearbox.
The transition of the CV joint to the flange was made quite simply: a washer was machined, which was put on the cut shaft of the CV joint grenade, and then welded on both sides.
The wheels of the all-terrain vehicle are made of T 150 tubes measuring 530 by 610, and the tires from the same tractor were lightened. The discs were made on the basis of gas 52 discs and 12 inch pipes.
The tire was lightened, leaving 4 layers of main cord. The thickness of the tire along the treadmill and up to half of the sidewall became 6-7 mm. A thickening is left at the place where the belts are attached. The weight of the tire is 36-37 kilograms. the complete wheel itself, consisting of a tube, disk, flipper, and tire, weighs approximately 70 kilograms.
Below are photographs of tire stripping and tread cutting:
This tire was made of radial rubber, the only difference from bias tire is durability. The processing difficulty is approximately the same for both types of rubber. In the photographs of the wheels you can see the old flipper; in the new version it goes under the tire.
The steel beam was cut off along with part of the tire. The effort on the winch is not great. A winch is only needed to wrap the rubber 180 degrees, and then the author used a shoe knife and soapy water. With a time investment of 3-4 hours a day, the author made one tire in a week.
The straps that secure the tire to the rim were made from a drive belt. The thickness of one strap is 6-8mm, width 5-6 centimeters. The belts themselves are attached to M6 bolts. The camera replacement time is even faster than the Trekol wheel replacement time.
Over the long period of operation of the all-terrain vehicle, there were only two punctures in the tubes, both between the disk and the tire. The straps can withstand loads very well and do not break.
This is how the frame fracture unit on an all-terrain vehicle is made: Before the modernization, the caracat had a reverse transfer case, which was assembled from the body of an SZ motorized stroller and the insides of the SZ itself, as well as an Ant motor scooter.
Afterwards, a second box from the UAZ 469 was installed. Thanks to this modernization, the maximum speed of the all-terrain vehicle increased from 40 kilometers per hour to 60 kilometers per hour on a flat surface.
A star from the rear wheel of the Izh-Planet Sport motorcycle is installed on the cardan shaft. It is clamped between the two flanges of the cardan and the axle shank with standard four bolts. The number of teeth on the sprocket is the same as on the standard one. The weak points of the transmission are the strong overhang of the wheel rim. Overloading an all-terrain vehicle also negatively affects the integrity of the axle shafts.
Also interesting: Engine tuning -
