Universal mounted bucket
A homemade KUHN for a mini tractor is one of the types of front loaders. It is indispensable when you need to transport or load large volumes of bulk (and other) materials, such as sand, crushed stone or grain.
The mini tractor itself differs in size from a full-fledged tractor. Using a bucket allows you to turn a simple tractor into a universal vehicle for a wide variety of types of work.
Front loaders have a number of advantages:
- easy maintenance;
- reliability;
- ease of installation and dismantling of equipment;
- serious load capacity for a small-sized tractor;
- ease of control due to enhanced hydraulics.
Making a ladle
You can buy a bucket for a mini tractor at any hardware store, but this is not the cheapest pleasure, so it’s easier to make it yourself. You don't need any special knowledge or materials here. To work, you need to stock up on drawings, a grinder, a welding machine and the material itself.
Advice! A metal sheet with a thickness of 6 mm or more and pipes of various diameters are best suited for these purposes.
- First you need to make the fasteners. It is welded to the box and engine, and a metal corner is welded underneath for reinforcement.
- The KUN itself is made from pieces of sheet metal. There is no point in bending the sheet to fit the shape of the ladle. It is much easier to cut rectangles of the required size and weld them together to form a ladle. The durability of the product depends on the quality of the seams. It is better to use pipes with a diameter of 100 mm for racks, and 50 mm for rods.
- The next stage is the installation of the hydraulic booster. For greater mobility, it is recommended to use a pipe with a diameter of 30 mm (it should not be more than 50 mm, otherwise the pipes will not move well inside each other).
- Now the support is welded to the front of the tractor and combined with the racks; gussets are used for reinforcement.
- A cylinder is used to control the rotation of the bucket. It is usually installed to the right of the bucket.
Safety precautions when working with a bucket
Making a bucket for a mini tractor is not very difficult, the main thing is to have knowledge and experience in working with welding, and be able to work with drawings. In order for the attachments to work correctly, you need to approach the work responsibly and do everything strictly according to plan, otherwise the result may not meet expectations, and the mini tractor itself with KUN will pose a danger to the operator.
Advice! If you have doubts about the success of the event, you should refrain from making the KUN yourself and purchase it in the store.
To ensure safety during operation, you should follow the operating rules:
- KUN can be used only for its intended purpose;
- When working, you should carefully monitor the bucket;
- When driving with a loaded bucket, you need to keep it lowered, that is, near the ground.
How to build a KUN on MTZ-82 yourself and is it worth doing?
- What is KUN?
- Varieties of KUN
- Homemade KUN for the MTZ-82 tractor
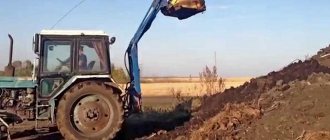
MTZ 82 with KUN is used in construction, agriculture and for loading and unloading operations.
KUN at MTZ is considered the most common type of attachment. There are several varieties of this equipment; in addition, folk craftsmen often make homemade KUN.
In this article we will tell you what a KUN is, look at popular models and figure out how to make a KUN for the MTZ-82 tractor with your own hands.
What is KUN?
This abbreviation stands for universal mounted hay hauler, although in essence it is a front-end loader that operates from a hydraulic system.
Initially, this device was intended for loading hay or silage. But in fact, KUN for MTZ-82 can work with almost any load that is suitable in size. For example, such equipment is widely used for moving goods in warehouses and for performing excavation work.
Varieties of KUN
The MTZ-82 tractor is mainly aggregated with two types of KUN. The difference between these mechanisms is insignificant and lies in the load capacity and the method of attaching attachments. Let's look at each unit in more detail.
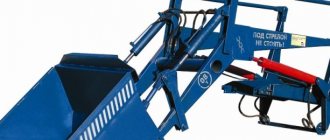
PF-1
This type of front loader has its own supporting frame. The equipment is mounted on the rear axle of the MTZ-82 tractor. This fastening scheme eliminates the possibility of turning the tractor over when working with a large load.
All components are made of high-strength metal, the KUN is driven by two powerful hydraulic cylinders.
Specifications:
| Weight | 900 kg |
| Load capacity | Up to 1,000 kg |
| Boom Reach | 3.5 m |
| Transport speed | 20 km/h |
PKU-08
This KUN, installed on the MTZ-82 tractor, is a modification of the previous model. The design turned out to be more compact and ergonomic.
Compared to its predecessor, this device has a significant drawback. This is a fastening method and a relatively small load capacity. The unit is attached directly to the semi-frame of the tractor; accordingly, the balancing of the machine is disrupted and the risk of tipping over increases.
Specifications:
| Weight | 700 kg |
| Load capacity | Up to 800 kg |
| Boom Reach | 3.5 m |
| Transport speed | 20 km/h |
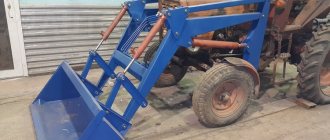
Homemade KUN for the MTZ-82 tractor
Some farmers prefer to make such attachments with their own hands. If you have certain skills, this is quite easy to do.
Among the advantages of self-made KUNs, one can note the minimal financial costs and the ability to independently determine the length of the boom reach. It is worth noting that a long boom and excessive load can lead to the tractor tipping over . Therefore, when the load is heavy, it is recommended to install counterweights on the front half-frame.
Homemade KUNs also have disadvantages; these products are significantly inferior in performance to factory models.
The manufacturing process can be divided into two stages. Let's look at each in more detail.
Preparatory stage
Having decided to make a KUN for the MTZ-82 tractor with your own hands, you must first take care of the materials and tools. You will need:
- Sheet metal. The thickness depends on the tasks performed, but it must be taken into account that too thick iron will significantly make the structure heavier.
- You need to get three hydraulic cylinders. They can be removed from any old equipment. A large cylinder will be responsible for the boom reach, two small ones for the angles of inclination of the bucket.
- Swivel joints. To determine their number, it is recommended to draw up a preliminary drawing of the entire structure.
- To make a ladle you will need a welding machine and a gas cutter.
- Auxiliary tools you may need are wrenches and wrenches, a chisel and a hammer.
Manufacturing of attachments
Buying canopies for a walk-behind tractor will be very inconvenient for a small summer resident. A summer resident or farmer can make all the equipment himself at home, using a little ingenuity. Most of the equipment is quite simple and can be made from almost whatever is on hand.
Before you make a plow for a mini tractor with your own hands, you need to carefully study the drawings and dimensions and choose the most optimal one. It will be easier to make equipment if you have a ready-made factory circuit.
Making a hiller
To do this, you need to take 2 metal disks with a thickness of 2 mm and position them so that they open outward. When the angle is selected, they are secured with bolts or simply welded. Then it is simply secured to the hitch.
Potato planter
The structure of this unit resembles a hiller. It has a bowl on top into which potato tubers are poured. From a special hole they fall into the ground.
To make a homemade potato planter, you need to assemble wheels, an axle, pins, a hopper, sprockets, and an adjustment mechanism. All this is attached to the frame.
The wheels are covered with a metal plate at the front, otherwise the potatoes will fall out of the hopper at times when this is not needed. The bottom of the hopper is covered with rubber so that the potatoes do not fall out.
How to make a bucket for a mini tractor? For this you need tin and internal racks. 2 side and internal racks form a bucket. The rods are screwed to them.
Mills, plow
This is one of the most important equipment. Milling cutters are used for processing soft and constantly cultivated soil. A homemade plow for a mini tractor is more suitable for working with hard soils. To make a homemade plow, you need to take a plate with a thickness of 3 to 5 mm and a pipe with five-millimeter walls.
The plate is sharpened with a knife, like a scythe. Next, the blade is turned out using a grinder. The cutting part is the working element of the scythe, which is beaten on the anvil.
Milling cutters are used for processing soft and constantly cultivated soil
All parts are glued together with obligatory observance of corners. The ploughshare is placed on a steel sheet. These elements must be spot welded on both sides.
Important! The ploughshare and shaft must be joined very tightly. There should be no gaps between them
Making a trailer adapter
The design of this device includes:
- metal frame;
- hitch;
- cross bar;
- braces;
- racks, axle, wheels;
- management tools;
- trailer or cart;
- space for the operator and connection of additional mechanisms.
The frame is made of pipe (length - from 1.5 to 1.7 m). A hitch is welded at one end and a rod at the other. Wheel racks and a brace are attached to the rod.
Levers are used to control devices. By switching them, you can set the optimal position of the attachment. An additional lever is installed to adjust the applied force.
The length of the drawbar depends on the power of the walk-behind tractor. Engine power affects wheel size. Additionally, hydraulics are installed.
The hitch for an internal combustion engine mini tractor and other units can be easily done independently. It fits almost all agricultural equipment, greatly facilitates and reduces the cost of all work in the country or on the farm. Proper use of the equipment extends the service life of the walk-behind tractor.
Kun per t 40
A hay and straw press is necessary not only for large farmers, but also for those who keep a small number of livestock. The presence of this device greatly simplifies the preparation and storage of hay and straw. The device reduces the initial amount of raw materials by more than half, and one cubic meter of hay or straw will weigh up to 250 kg. You can not only buy the device, but also make it yourself.
Hay press for walk-behind tractor
A homemade hay press can be manual, made of boards or metal, or roll-type, which is attached to a walk-behind tractor or attached to a mini-tractor. Compressed hay is more convenient for storage, and compressed straw can be used to make fuel briquettes.
Straw briquettes burn well, and they can be used to heat not only residential but also utility rooms.
A roll press pick-up for a walk-behind tractor has several main components:
- The faceplate, on which all parts are attached,
- The chassis on which the wheels are mounted,
- Devices for picking up straw and hay from the ground,
- Conveyor,
- The working container in which the pressing mechanism is located,
- Mini gearboxes.
When making a press for a walk-behind tractor with your own hands, you need to remember that the greatest attention should be paid to the pressing device.
It includes:
- Shafts,
- Pressure grid made of durable metal
- Steel or metal plate,
- Several steel springs.
A factory-made hay press for a walk-behind tractor, such as prf-145 or prf-750 and other prf models, differs from homemade ones in that it has a hydraulic pressing system instead of a grid with springs.
The performance of a round pick-up will depend on the power of the walk-behind tractor or walk-behind tractor.
Press manufacturing process
To facilitate installation work, it is better to draw up or find a drawing in advance, with detailed indications of not only the dimensions, but also the fastening of parts. Assembling a hay baler with your own hands is as follows. First, the chassis is welded. For its manufacture, a durable metal profile or steel sheets are used.
Length and width are selected based on individual needs. Pneumatic wheels and a front face are installed on the chassis. The picker itself is attached to the front: it can be made from several metal bayonets or rods. Its shape resembles an ordinary pitchfork. The conveyor is attached to the front.
The conveyor is made from chains or strong thick wire.
The next stage is to weld the working container onto the baler. It is made from sheet metal. Some farmers use a finished metal barrel as a working container. At the bottom of the container, several pressing rollers are installed, as well as a welded metal grate.
At the top, a heavy steel plate is secured with several springs. The last thing to assemble is the drive, which is responsible for the operation of the entire device. To do this, the cardan must be connected to a two-speed gearbox. From it, the chain drive will spread to the shafts, as well as to the conveyor.
Homemade hay baler is ready!
Manual straw or hay baler
You can make a baler with your own hands in a simpler way. If you need to bale small volumes of straw or hay, or if it is not possible to use a mechanical device, a manual analogue of the pre-baler is also suitable. Such a device will allow you to avoid high costs, and the materials necessary for its creation are available in almost any household.
A simple hay baler can be made with a metal or wooden body. The lightest and most effortless to make is a wooden hand press. It can be done even without using a welding machine.
How to assemble a hand press
Externally, a DIY hay press looks like a wooden box attached to a frame. A manual hay press is made from ordinary boards, which are fastened with an angle using fastening bolts for strength. The perimeter of the box is lined with metal strips. Special attention should be paid to the hinged lid. The opening for it should also be lined with strips of metal both outside and inside. The hinged lid is also made from boards, and the most convenient way to attach it is to ordinary door hinges.
It is better to make the press itself from metal, but wood can also be used. Those who bale with a metal device note a higher bale density.
A piece of timber is attached to the back wall of the wooden box, one and a half times the height of the box. Two small parallel bars are attached to it. There should be a distance between them that allows you to attach a beam capable of making several half-turns around its axis. At the other end is the press itself, which looks like a flat sole. The press should also freely make a half-turn around its axis. The shape and size of the press are calculated based on the cross-sectional dimensions of the main box.
A roll of twine is also mounted on the back of the box. It is needed to bundle the already received bale. We bale simply: put hay or straw inside, close the lid, turn the press, and tie the resulting bale.
The metal version of the hand press is made according to a similar scheme, with the only difference being that the body is welded from steel sheets.
25
In Kyiv, a police car got into an accident (video)
Growing Lemons - Growing Lemons from Seeds
Girl from the back by the sea on Ava - Girls on Ava - Avatars. — Gallery
Wooden window frames, photos, patterns for decorative
We make a cake from sweets and juice with a Fair surprise
Source: https://aquariumfan.ru/%D0%BA%D1%83%D0%BD-%D0%BD%D0%B0-%D1%82-40/
How to make a blade for a mini tractor with your own hands?
If a person has the desire and time, he can easily design a homemade blade for a mini tractor, just as he can make a clutch for a mini tractor with his own hands. First, he needs to think about the type of future shovel, draw a diagram or use existing drawings.
It is necessary to prepare the following list of equipment:
- drill, grinder, pliers;
- a 200 liter steel barrel or other equipment that will act as a shovel;
- welding;
- steel and rubber strips;
- screwdrivers, keys, fasteners.
Features of creating a shovel for snow removal
- The dimensions of the future blade are selected, which depend on the type of mini tractor.
- The barrel is cut into three even parts, which will become segments of the future blade.
- The two parts are welded along the contour, resulting in a brush 3 mm thick.
- A knife is constructed using a 5 mm thick steel strip.
- The lower part of the device is reinforced with a knife, for which holes with a diameter of 5-6 mm and a pitch of 10-12 cm are drilled into it.
- A safety rubber strip is attached to the knife.
- The attachment of the blade shovel is reinforced with the help of square steel pipes with a cross-section of 40x40; the pipes are welded below the middle of the shovel.
- The lower part of the blade is covered with a rubber casing, which will prevent the equipment from coming into contact with the asphalt.
Important Technical characteristics of Grader GS 14.02 and other common models
The blade can be installed with a lifting mechanism that will raise the equipment to the desired height. For these purposes, it is necessary to weld an A-frame and attach a hydraulic cylinder to it.
To assemble the entire structure together and work fully with a brush, you need to:
- attach the blade at the bottom using two through bushings;
- connect the equipment at the top through the hydraulic center;
- bring the control into the cabin and fix it with a lever or remote control.
You can watch a video on how to assemble the blade.
A homemade blade is a great opportunity to save money and create an effective assistant for working in snowy areas.
Characteristics of a homemade unit
Homemade KUN for a mini tractor: installation features. The manufacturer offers buckets of various sizes, fork equipment (needed for agriculture and loading and unloading), rake grids for collecting hay, straw, and mown grass. Grabs for logs are sold separately, so KUNs are used for logging. Additionally there are grippers for bales and rolls. You can also find jaw dumps in stores. The basic equipment for a homemade KUN for a mini tractor may vary.
The dimensions of KUN 10 can be different, depending on the modification of the equipment. The carrying capacity of the rake grid, dumps and grabs is 500 and 800 kg. The equipment bucket rises to a height of 2.5 m, and the rake grid - to 3.5 m. The unloading angle of the bucket, on average, ranges from 55 to 65º. The performance and size of the equipment depend on the chassis that needs to be mounted on a homemade mini tractor or other self-propelled unit.
Buying attachments is expensive, so you can make a KUN for MTZ with your own hands. Assembling and installing such a tool is simple, you just need to draw up a diagram of the equipment and mark on it the place where it will be mounted on the wheeled tractor. A homemade KUN is attached to the rear linkage of an MTZ 80 or 82. This is much easier than installing a KUN 10, which is available in a front modification.
A homemade tractor differs from a factory one and has several significant advantages:
- Ease of mounting.
- Selection of the length and height that is necessary for specific work on the ground or at a construction site.
- You can use scrap materials left over from other equipment.
In order to make a KUN for a homemade or factory tractor, you need to stock up on the following equipment:
- welding machine;
- tools for cutting and cutting metal;
- sledgehammer;
- hammer;
- wrenches.
If you have no welding experience, then you should find a specialist who knows how to work with the machine. This determines the quality and reliability of welding seams, on which the installation and duration of use of the KUN largely depends.
Homemade KUN for the T 40 tractor – Special equipment
A hay and straw press is necessary not only for large farmers, but also for those who keep a small number of livestock.
The presence of this device greatly simplifies the preparation and storage of hay and straw.
The device reduces the initial amount of raw materials by more than half, and one cubic meter of hay or straw will weigh up to 250 kg. You can not only buy the device, but also make it yourself.
Homemade ladle
You can make a KUN for a mini tractor with your own hands, while saving money on the purchase of this device. You need to acquire a metal sheet (with a thickness of six millimeters), metal scissors, welding, iron pipes of various diameters.
The KUN for the tractor is made according to a simple scheme:
- The fasteners are welded to the box and motor. The structure is reinforced from below with a metal corner;
- The KUHN itself is manufactured. It is enough to cut a sheet of metal into rectangles, which are then welded into one structure. Welding must be of high quality so that the finished structure lasts longer. Pipes and rods with a diameter of 10 and 5 centimeters, respectively, are suitable for the racks;
- Installation of hydraulic booster. For its mobility, a sleeve with a diameter of about 3 centimeters is suitable;
- The support pipe is welded to the front of the unit, then the racks are combined and reinforced with “kerchiefs”;
- For normal rotation of the bucket, a cylinder installed on the right is used.
To make your own bucket, you need to know how to use welding and understand mechanics. If in doubt, it is better to purchase ready-made equipment that can be attached to the Kioti tractor and other popular models of equipment.
Step-by-step instruction
The entire process of manufacturing a homemade bulldozer at MTZ consists of the following steps:
- First, you need to make two brackets that will be connected by a cross beam. This entire structure is attached to the side members with bolts. Secondly, plates with a stiffener and a hinge joint at the bottom are welded to the brackets.
Homemade bulldozer diagram
- Now you need to attach the hydraulic cylinders. It is better to make them parallel to the subframe, since the load on the blade will be greatest in the lower part. The blade is divided into two parts with the center on the hinges of the half-frame. The remaining halves are divided into 3 parts, and 1/3 from the center is selected for attaching the hydraulic cylinders. Another option is to cut out a set of pipes. Two pipes are the same length and two are different. By changing them you can adjust the rotation of the blade. This will cost less than hydraulics and will serve much better than a fixed blade, although it will require more preparation time. The pipes will be attached to the hinges, which will greatly facilitate their installation.
- However, if you do not plan to change the position of the blade, you can use two pipes instead of cylinders, which are permanently welded to the blade and half-frame at the hinge points. The central ones can also be simply brewed.
The video shows a homemade bulldozer in action:
Homemade blade for the MTZ-82 tractor.
Types of buckets for the MTZ tractor
There are several signs by which a bucket for an MTZ tractor can be classified into one category or another. Most often, attachments are divided into groups according to capacity:
- From 0.2 to 0.55 m3.
A small-volume hitch can be installed on the MTZ 320 tractor or full-size machines like MTZ 80, 82, 82.1, etc. But still, aggregating heavy-class tractors with such compact buckets is not very advisable, because the power of special equipment is wasted.
A bucket for the MTZ 320 tractor with a volume of 0.2-0.55 m3 is used for loading operations, various manipulations with bulk and lump materials, and will also be useful in solving municipal problems. Small models will be convenient when working in small areas, for clearing paths, etc.
- From 0.55 to 0.8 m3.
MTZ 80/82 tractors are usually equipped with buckets with a capacity of 0.55 to 0.8 m3 - this is the most rational configuration for tractors of the medium traction class. The scope of application of attachments is the same as in the previous case - loading operations, moving bulk and lump materials, clearing and tidying up areas.
As a rule, the bucket for the MTZ 82 or 80 tractor is intended for performing municipal and agricultural work. In construction, attachments of this volume are used less frequently, since more powerful and productive options are often required.
- From 0.8 m3.
The bucket for a heavy class MTZ tractor must have a large volume - it starts from 0.8 cubic meters and is limited only by the design features and capabilities of the machine. With the help of such attachments, you can quickly reload large volumes of materials – both within the site and into the body of a vehicle. The main area of operation of capacious buckets for the MTZ tractor is construction, although the attachments can also be used in large farms.
Motoblock. Start
The walk-behind tractor is the fruit of the late Soviet period, or rather, the era of the legendary six hundred square meters. In the mid-eighties, the Soviet government was forced to admit that the system of collective and state farms, despite being fully equipped with a fleet of modern equipment, including giant combine harvesters and agricultural aircraft, and the help of the country’s population (who doesn’t remember the “potato growing” trips?), fulfilled its main purpose function is not able to. The country was forced to purchase food from abroad.
It was decided to act on the principle “saving drowning people is the work of the drowning people themselves,” and supplying workers with agricultural products was partially entrusted to the workers themselves. Those who wished were given a plot of land with an area of six hundredths of a hectare (those same six hundred square meters).
To process even such a modest plot with the help of a shovel, a hoe, and the mother of an unknown Japanese at the end of the second millennium in the country of victorious socialism, which proclaimed the Scientific and Technical Revolution, was completely out of hand. And then it turned out that there was practically no equipment in the country capable of solving such problems. Personal plots of collective farmers, as a rule, were part of one field and were processed with one or two passes of “adult” equipment. This method was absolutely not suitable for patchwork “six-hundred” plots.
A fundamentally new type of agricultural machinery was developed, called a “motorized block” or walk-behind tractor. The “Unknown Little Animal” was a heavy motorcycle engine mounted on two coaxial off-road wheels. Working with such a unit was reminiscent of peasant labor at the beginning of the century - the plowman walked behind the horse, guiding the plow and putting pressure on it with his own weight.
Only the place of the horse was taken by a two-wheeled miracle of technology, controlled and directed using special handles. Instead of a plow, a set of attachments was used, thanks to which the walk-behind tractor could plow, harrow, sow, and mow grass. There was even a two-wheeled body with a seat, which turned the walk-behind tractor into a vehicle of unknown purpose: for movement and movement of goods around the village and the surrounding area, a motorcycle with a sidecar (another, almost forgotten relic of the past) or a car was clearly more convenient. And there was clearly no place on the highway for an incomprehensible hybrid moving at the speed of a lame mare.
Important Telescopic cargo and cargo-passenger construction mast lifts
How to make a KUN for MTZ with your own hands
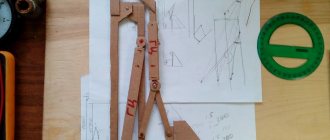
It is imperative to make drawings of a homemade KUN so that there are no problems with cutting the metal into individual elements. Let's look at how to make such equipment yourself:
- You will need profiles and sheet metal. The thickness of the materials must correspond to the load that is planned.
- You will need to purchase several hydraulic cylinders - 2 large ones to lift the bucket, and 2 smaller ones. They are needed to adjust the inclination level and equipment parameters.
- Cylindrical joints, without which it is impossible to assemble the entire structure of the wheel unit.
When you have all the necessary tools and materials, you can begin the process of assembling the KUN with your own hands.
You can find drawings and diagrams on the Internet, on specialized forums and websites, or you can create them yourself.
This will allow you to cut the metal so that there is a minimum amount of waste. You can contact design firms, where employees will help you create a good drawing of the future attachments for the tractor.
The loader must consist of two rectangular frames. One of them - the external one - should be larger. It is this that is aggregated, i.e. Attaches to the rear tractor of the tractor. The inner rectangular frame is cut from sheet iron. Large hydraulic cylinders must be welded to the bottom of the frame, and a spacer must be installed on top. It is needed to create a stiffening rib.
The majority of the structure is the boom attachment, accounting for more than 70%. To install it, you will need the help of another person who should know how to install it correctly. The product is placed closer to the frame and connected to the cylinder. Then you need to attach the middle part to it, after which the bucket is hung. It is worth taking into account such an important nuance as the relationship between the length of the boom and the stability of the tractor. If the boom radius is more than 2 m, then a counterweight must be installed on the front frame. This will allow the MTZ to stand firmly on the ground and not tilt in different directions while carrying loads.
The installed bucket is made independently, also from sheet metal. The elements must be welded so that a structure similar to a boomerang is obtained. It should have 3 attachment points - in the center and along the edges.
Technology for the production of tractor attachments
First you need to prepare the base. It is a rectangle formed by square pipes or corners. Another rectangle is fixed in the center of the base, where a large hydraulic cylinder will be installed. A spacer and four hinges (for the cylinders and the boom mechanism) are fixed on the top edge.
Tractor boom diagram
The boom is made of two metal profiles connected at an angle of 30 degrees. The end of the base and the hydraulic cylinder mount are fixed to it (from above).
A cylindrical hinge is installed in the middle of the boom. Movably fixed sections are also mounted here, connecting small cylinders and a crossbar necessary for attaching the base of the bucket.
A ladle is made from one large and four smaller steel rectangular plates, one of the sheets is welded at an angle.
If the boom is more than two meters long, there is a high probability that the tractor may tip over. To eliminate a possible problem, the front part of the special equipment is equipped with a counterweight.
What it is
Such devices have two half-frames, which are connected by movable hinges. A homemade tractor has the following advantages:
- good balancing;
- excellent maneuverability;
- small turning radius;
- high power.
These designs have 4-wheel drive, which improves stability. A homemade tractor with a breakable frame works like a mini-tractor based on a walk-behind tractor. Tractors can be factory-made, homemade, or modified using tools. Making a tractor is a complex, but interesting task that requires engineering knowledge and skills in assembling and designing moving equipment.
There are several assembly options. But there is an optimal installation method that is suitable even for novice designers. In the frame, all elements are distributed as balanced as possible. It consists of two semi-frames. You need to find out how to make its components before starting work.
In addition to the frame, it will be necessary to manufacture a steering system, install and weld the motor, think over and create the transmission and chassis. The engine must be diesel. Its power is selected in accordance with the desired performance of the tractor. Bridges can be taken from an old car. Wheels are installed with a diameter of 20 inches to improve maneuverability on difficult terrain and uneven rocky soil.
Blueprints
Before you begin assembling the structure, it is necessary to complete drawings and make calculations of the main components of the structure. The drawings should indicate the dimensions of all parts and elements and mark the places where they are welded.
Construction Tools
To make homemade products, you need components and parts from used equipment: walk-behind tractors, cars and other devices. You will need metal sheets, profile steel structures: channels, angles, screws, bolts, various types of fasteners, a screwdriver, a screwdriver, a building level, tools and small parts.
Materials and tools:
- welding machine;
- wrench;
- drill;
- disk plate;
- lathe, metal cutter, wrench.
Manufacturing a front loader for a tractor
The front loader differs from the previous bucket in that it is mounted on a mounted mechanism located in the front of the tractor. In the future, such an excavator can be actively used for snow removal, leveling the site and clearing debris.
As in the first case, before manufacturing the loader you will need to study the drawings. They must be as accurate as possible so that the finished loader is extremely balanced and reliable.
Next, you need to collect all the materials and tools necessary for the work.
The work must be performed using the following raw materials and equipment:
- several sheets of steel - their sizes are selected depending on the dimensions of the loader;
- 2 large and 2 small hydraulic cylinders;
- bolts, nuts and hinge joints;
- grinders and drills;
- welding machine;
- pliers, screwdrivers, wrenches.
The sequence of manufacturing a front loader for a tractor should look like this:
- First of all, metal platforms must be installed under the front linkage mechanism of the tractor to serve as a support for the loader. In the installed platforms, you will need to make recesses for mounting rods;
- The next step is to assemble the arrow. To manufacture it, you will need to make 2 contours from profiles, which must be connected to each other at an angle of 30 degrees. Both circuits must be attached to each other by means of jumpers located in the lower, central and front parts of the structure;
- One vertical support must be welded to each circuit so that each of them protrudes in its upper part. One additional spacer must be welded to each support, the second side of which must be attached to the corner located in the central part of the existing boom;
- Eyelets need to be made in the back of the bucket welded from steel sheets. You will need to attach a boom to the bottom eye, and 2 small hydraulic cylinders to the top eye. The second ends of the hydraulic cylinders must be attached to the angle located in the central part of the boom. Large cylinders must be carried from the central part of the boom to a support installed in a vertical position;
- At the final stage, you will need to install the finished structure on the front linkage of the tractor.
In a self-assembled front loader, front hydraulic cylinders are responsible for its rotation, and large rear cylinders are responsible for bending and extending the boom.
Having studied the procedure for making the front and rear buckets, almost every farmer will be able to make a tractor with two buckets - such a unit will have the highest possible performance and will help in performing various agricultural and household tasks.
Important Truck MAZ-4370 Zubrenok
vote
Article rating
Coon for the rear linkage of the MTZ tractor
What is a KUN on a MTZ tractor? This is one of the types of attachments that is widely used on the MTZ tractor and not only. This device, due to the hydraulic system, allows you to perform various works. The decoding of KUN is as follows - “universal mounted hay hauler”.
One of the most popular models of this equipment is considered to be KUN 10. The model is manufactured at the facilities of Salskselmash, an advanced Russian plant specializing in attachments. The first model KUHN 10 came off the assembly line in 1973. As a result of constant improvement, KUN 10 has significantly increased its functionality. For reference: the versatility of the model allows it to be used on T-40, LTZ and YuMZ tractors.
Advantages of KUHN
The MTZ 80 tractor equipped with KUN is characterized as:
- Universal - can perform partial work instead of a bulldozer, loader and even an excavator. In view of this, KUN is used during construction and installation work in the agricultural industry.
- Productive.
- Reliable unit.
Homemade rear KUN at MTZ
The cost of factory KUN for a tractor is not affordable for everyone. Therefore, it makes sense to cover the topic of making a homemade KUN.
Thanks to the hydraulic system, you can install a homemade KUN on the MTZ tractor, and you will not need many materials and tools. The human factor plays a big role, because not everyone knows how to handle a tool. The main equipment for the technological process is a welding machine. Experience with this equipment is important, because high-quality seams affect the strength and reliability of a homemade kun.
You will also need a metal cutting tool. As a rule, a grinder or even a gas cutter is used. Well, the standard ones will come to the rescue: a hammer, a set of keys, sledgehammers.
About the nuances
- Three hydraulic cylinders are required. Two of which will serve to rotate the bucket. The task of the third (largest) cylinder is to lift the bucket along with the boom. How to choose the power of hydraulic cylinders? — the selection of power depends on the weight of the loads and the length of the boom.
- You need to take care in advance of the metal elements that will represent the basis of the entire structure - these are trusses, corners, plates. The thickness of the listed elements directly depends on the future perceived load.
- As soon as the drawing of the homemade KUHN is ready, you need to purchase hinged cylindrical joints.
- The first step is a drawing, then a search for equipment and parts, tools. Thus, you can save money if you have information in advance about the required amount of materials.
Manufacturing instructions
- Initially, you should weld the frame of the future homemade KUN.
The frame is a rectangle, the lower part of which is below the level of the edges. Installation on the MTZ tractor is carried out by the lower part of the frame. In the center of the KUHN structure there is also another rectangular frame, it consists of two plates. Its fastening is carried out by welding to the lower and upper edges. This frame is designed to hold a large cylinder (at the bottom). A spacer will be permanently attached to the top. Four hinges are installed on the top edge. For cylinders changing the angle, two central hinges are installed. The outer two hinges serve for the boom. The selection of the height of the base depends on the needs, in each case individually. - The arrow consists of several components.
The part of the arrow that is attached to the base is about 65% of the length of the entire arrow. The next part of the arrow is attached to the long part, the angle between them is 30 degrees. People call an arrow of this shape a “boomerang”. The result is two curved profiles with three connection points. Down the center and at each end. Another end of the main cylinder enters the frame, which is secured to the central part by welding seams. - The central part is a hinged cylindrical joint.
Why articulated? – is explained by the need to attach a lever to it, which controls the bucket. The lever consists of two elbows; on one side it is connected to a bucket, and on the other side to two small cylinders. The fasteners of the previously listed parts are mounted on hinges. You need to know: experienced mechanics advise performing the central part together with the hinge joint. Otherwise it will be difficult to put it on. - Let's move on to the bucket.
The ladle can be welded or bought from a factory, which is optional. It is not uncommon to see a forklift instead of a bucket used to pick up bales. - Is it necessary to weight the front part if the stem length is more than 2 meters? - Yes need. In this case, a box or basket is welded onto the frame, where concrete blocks are stacked and sand is poured.
The choice is yours: buy a factory KUHN or start developing homemade equipment.
The final choice depends on financial capabilities and, of course, desire. It is also proven here that it is quite possible to make and install KUN at MTZ. Good luck to you.
Source: https://traktorspec.ru/oborudovanie/kun-na-zadnyuyu-navesku-traktora-mtz.html
Homemade loader for a mini tractor with your own hands. Do-it-yourself loader on a mini tractor
When purchasing any agricultural equipment, every owner quite reasonably strives to use it to perform a wide range of tasks. Mini tractors have become extremely popular today, allowing them to perform a wide variety of work, from land excavation to construction. However, it is not always possible to buy such a mini tractor complete with a loader, the cost of which separately is quite high. In this case, making this part yourself can be a real salvation, since it will allow you to use the vehicle to move various bulk building materials.
Where to begin?
To make your own loader for a homemade mini tractor, you should take into account the model of the vehicle itself, since the weight of the attached unit will depend on this. In addition, it is necessary to find a diagram reflecting the mechanism for lifting the bucket to a certain height and controlling it from the tractor cabin
Considering the sufficient complexity of such a mechanism, this task should be approached very responsibly, having carefully thought out the design on paper.
In order not to reinvent the wheel, it is best to take as a basis the lifting mechanism that is used on many models of domestic tractors. The design itself consists of 3 main parts:
- The actual bucket.
- Hydraulic lift mechanism.
- Systems for attaching a loader to a minitractor and bringing control elements inside the cabin.
Step-by-step production of all structural elements
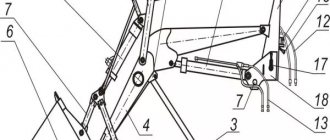
First you need to make a loading bucket (1), which can be made from several steel plates, at least 6 mm thick, welded at the desired angle. According to the given dimensions, it is necessary to weld the side elements, and along the lower longitudinal part - ridges that will well grip bulk building materials of various fractions. Then we proceed to the implementation of the most complex mechanism - the hydraulic lifting system, for which we will need the following elements:
- 4 levers (2) – here it is best to use a square pipe of a suitable cross-section, in which it is necessary to make holes for connecting bushings;
- boom (4) – is made of a U-shaped channel and is attached on one side to the bottom of the bucket, and on the other to the frame of the mini tractor;
- hydraulic lifts (5.6) - they are best purchased ready-made, which can be found on the market for transport parts for tractors.
In addition, this mechanism will also need bushings, pins, brackets, adapters and connecting fingers, which should be sequentially assembled and fastened together
It is very important that a homemade front loader for a mini tractor has the correct center of gravity, which will avoid accidental tipping due to overweight. The sketch under number 3 indicates the location of the vehicle wheel, which will allow you to correctly navigate the loading mechanism location system relative to the tractor itself
Key Findings
When performing the entire complex of work, it is very important to maintain the required proportions, since the slightest inaccuracy can lead to the mechanism not working. To do this, from the very beginning you should carefully approach the project, accurately calculating the dimensions of all parts
The elements used should be made of durable materials, which should preferably be treated with anti-corrosion compounds. Thus, making a loader for a mini tractor with your own hands is quite possible, which only requires attentiveness and skills in working with metalworking and welding tools.
KUHN for mini tractors
This site was created for those who want to assemble a KUN for their mini tractor. The site contains drawings (not all of them yet) of the front loader that I made and tested on my tractors (T-25 and df-244).
This KUN throws snow and sand into a cart to a height of more than 2 m. KUN lifts four people weighing 90 - 110 kg.
KUN was tested in work with tractors KhTZ T-25 and DongFeng df-244.
To cut parts using a CNC laser, you will need to redraw the drawings in dxf format. Or order such drawings from me. A set of drawings for laser cutting on a CNC machine in dxf format costs 10,000 rubles. I take this nominal fee for drawings to purchase metal for my next projects. At the moment, the metal is waiting for a sawmill and a CNC coordinate milling machine, the drawings of which I will also post on the website.
Valentin Kozhedub | Topic author: Rebeca
testing a loader as a crane.
V (Caris) why suddenly? ! the hitch is designed for lifting loads! from the front frontal you can break it faster. and in this version, if you start to take a heavy load, then the tractor just rears up and that’s it.
Maxim (Rebeca) and my papalam was breaking the gap
V (Caris) is it really from the rear load? This means the gap was cracked, and the loader finished it off.
Maxim (Rebeca) didn’t stick a knife in the front, but pushed the loaded cart and broke it. Who did I buy this tractor from? I tore out the central screw with a piece of the hydraulic tank; he had a bucket hanging on it
V (Caris) I sympathize... anything can happen...
Pros and cons of homemade structures
Among the advantages of equipment assembled with your own hands, the following positions can be noted:
- Even a person with low qualifications can make attachments;
- Any mounted unit made in home-made conditions is quite inexpensive;
- to create equipment and repair it, you will need a standard set of tools;
- it is possible to enhance certain features of the device;
- From a safety point of view, attachments can be designed to a very high level.
Among the shortcomings, the following criteria stand out:
setting up and servicing homemade equipment is a painstaking, labor-intensive process that requires skill and proper qualifications from the owner; During the entire service life, special attention is required to monitor the operation of the unit.
Operating rules
During the manufacture of a front loader, manufacturers pay due attention to the safety of the operator during operation.
When using small machines, you need to monitor the overload so that the small equipment does not tip over. This can be prevented by installing protective systems.
It is also worth following simple recommendations when operating a tractor with a bucket:
- When moving, the scoop must be in the down position;
- It is important to ensure that the KUN is lifted correctly during operation;
- Special equipment (including a tractor with two buckets) must be used strictly for its intended purpose.
Pros of installing hydraulics
- The car becomes easy to control. The steering wheel can be turned with virtually no effort, with one hand.
- Hydraulics makes it possible to use various attachments.
- The use of hydraulics allows you to modernize the brake system. Thanks to the hydraulic cylinders installed on the unit, the unit brakes instantly.
You can make hydraulics on a mini tractor if you purchase a ready-made system in advance in a store or use parts from old agricultural machinery.
The main advantage of Coons is their versatility. Other advantages of this type of attachment include:
- installation and dismantling of kuns on a mini-tractor of any model;
- simplicity and ease of maintenance (all components are accessible and easy to change in case of wear or breakdown);
- ease of control due to the hydraulic system of the agricultural machine;
- reliability in operation;
- high load capacity.
This is especially important for farmers and owners of gardening farms, where there are no more powerful tractors and tractors (for transporting bulky cargo, large volumes of grain, bulk building materials). The clutch unit is attached to the gearbox, also taken from a car. You can see how the clutch is installed in this video
You can see how the clutch is installed in this video
The clutch unit is attached to the gearbox, also taken from a car. You can see how the clutch is installed in this video.
The following is a diagram that shows how the standard steering control installed on most self-propelled vehicles works.
Mounted universal hay hauler (kun)
Like other types of attachments, a mini tractor attachment is designed to increase the functionality of an agricultural machine. It significantly expands the farmer’s capabilities and makes it easier to perform various tasks. This arrow-shaped front linkage allows you to:
- load hay bales, silage, straw, rolls of roofing felt, building materials;
- perform earthmoving and road work;
- facilitate suburban construction and renovation.
The equipment is driven and controlled by the hydraulic system of an existing mini-tractor. Hydraulic mechanisms are involved both in lifting loads, operating the boom, and in controlling the front bucket (regulating the angle of inclination).
Fastening and lifting mechanism
Tractor trailer unit 2PTS-4 for mounting the blade
A do-it-yourself blade must have a strong, reliable lifting mechanism and strong fastenings. To do this, it is necessary to make a strong welded structure that looks like the letter “A”, which has additional steel elements located longitudinally and to which a special bracket must be attached by welding in the area of the middle jumper. It is advisable to use a ready-made hydraulic cylinder as a lifting device for the blade; it is best to buy the corresponding unit from a 2PTS-4 tractor trailer.