Hyundai HD 65/72/78 - fuses and relays
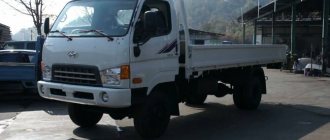
Hyundai HD 65 72 78 is a series of trucks with 3 and 6 seater cabins, produced with various modifications and wheelbases. In this material we will show the locations of fuse and relay blocks with diagrams and assignments for Hyundai hd 78 72 65 models. Let us note the cigarette lighter fuse. In conclusion, we offer for your reference the operating and repair manual for the Hyundai HD 78 72 65.
The execution of blocks and the number of elements in them may differ from those presented. Check the purpose with your diagrams on the back of the protective cover.
In the Hyundai HD , in the lower part, there are 2 blocks: a fuse box and a block with a relay.
Payment via PayPal
After selecting payment via PayPal, the PayPal payment system will launch, where you need to select the payment method: bank card or PayPal account.
Important Recommendations for maintaining the chain for the Husqvarna 140 chainsaw
If you already have a PayPal account, then you need to log into it and make a payment.
If you do not have a PayPal account and you want to pay using a bank card via PayPal, you need to click on the “Create an Account” button - shown with an arrow in the picture.
PayPal will then prompt you to select your country and provide your credit card information.
After specifying the information required to make the payment, you must click on the “Pay Now” button.
Fuse box
General scheme
p, blockquote 10,1,0,0,0 —>
| 1 | 15A Working light |
| 2 | 5A Headlight relay |
| 3 | 10A Fan and Air Conditioner Controller |
| 4 | 10A Brake, tachograph (EC), cold start switch |
| 5 | 15A Glass cleaner and washer |
| 6 | 5A Electronic ABS control unit |
| 7 | 5A Power take-off device |
| 8 | Reserve |
| 9 | 10A Pre-heater |
| 10 | Reserve |
| 11 | 10A Vehicle speed sensor, reversing lights |
| 12 | 10A ETASK, instrument block |
| 13 | 20A Electric glass lift |
| 14 | 10A Stop signal, horn, data connector |
| 15 | 10A Cab tilt switch, hazard warning lamps |
| 16 | 10A Rear fog lamp |
| 17 | 10A Locking (unlocking) the electric door |
| 18 | 15A ABS valve control |
| 19 | 15A Outside mirror heater |
| 20 | Reserve |
| 21 | 20A Fuel heater |
| 22 | Reserve |
| 23 | 10A Tachograph, ETASK, audio system, instrument cluster, interior lighting |
| 24 | 15A Start |
| 25 | 10A Left headlight (low beam) |
| 26 | 10A Right headlight (low beam) |
| 27 | 10A Left headlight (high beam) |
| 28 | 10A Right headlight (high beam) |
| 29 | 10A Left rear light |
| 30 | 10A Right rear light |
| 31 | 10A Fog light |
| 32 | 5A Electrical unit control (EC1)) engine |
| 33 | 15A Condenser Fan Relay, A/C Relay |
| 34 | 15A Heater fan |
| 35 | 10A Voltage Converter |
| 36 | 15A Instrument cluster, audio system, cigarette lighter , clock |
Brake problem
Theme Options
Display
IT'S NOT DIFFICULT THERE. THERE ARE TWO PLUGED HOLES ON THE MODULE, HOSES TRANSFER AND EVERYTHING
On the ABS itself? If you could tell me more about which hoses and where to transfer them, I would be very grateful))
Good day, I’ll try to raise the topic of brakes. Hyundai 78, the brakes are weak, not effective, the pedal goes to the floor when pressed. What I did: Check all the brake cylinders for leaks, everything is dry, line the pads (with two cylinders for each wheel). Boring the drums. Replace the main brake. Bypass the ABS. After each procedure there was bleeding, liner.
Fuse box
General scheme
| 1 | 15A Working light |
| 2 | 5A Headlight relay |
| 3 | 10A Fan and Air Conditioner Controller |
| 4 | 10A Brake, tachograph (EC), cold start switch |
| 5 | 15A Glass cleaner and washer |
| 6 | 5A Electronic ABS control unit |
| 7 | 5A Power take-off device |
| 8 | Reserve |
| 9 | 10A Pre-heater |
| 10 | Reserve |
| 11 | 10A Vehicle speed sensor, reversing lights |
| 12 | 10A ETASK, instrument block |
| 13 | 20A Electric glass lift |
| 14 | 10A Brake light, horn, data connector |
| 15 | 10A Cab tilt switch, hazard warning lamps |
| 16 | 10A Rear fog lamp |
| 17 | 10A Locking (unlocking) the electric door |
| 18 | 15A ABS valve control |
| 19 | 15A Outside mirror heater |
| 20 | Reserve |
| 21 | 20A Fuel heater |
| 22 | Reserve |
| 23 | 10A Tachograph, ETASK, audio system, instrument cluster, interior lighting |
| 24 | 15A Start |
| 25 | 10A Left headlight (low beam) |
| 26 | 10A Right headlight (low beam) |
| 27 | 10A Left headlight (high beam) |
| 28 | 10A Right headlight (high beam) |
| 29 | 10A Left rear light |
| 30 | 10A Right rear light |
| 31 | 10A Fog light |
| 32 | 5A Electrical unit control (EC1)) engine |
| 33 | 15A Condenser Fan Relay, A/C Relay |
| 34 | 15A Heater fan |
| 35 | 10A Voltage Converter |
| 36 | 15A Instrument cluster, audio system, cigarette lighter , clock |
Removing air from the brake system
Precautions when handling brake fluid
The braking system is one of the most important safety systems in a car. Therefore, all work on the brake system must be carried out especially carefully and taking into account these instructions.
1. Keep clean and use only lint-free cloths.
Caution: Do not reuse drained brake fluid. 2
Brake fluid must meet specifications of at least DOT-3. Using a different type of brake fluid than recommended may result in contaminants that may cause damage to the internal rubber seals and/or rubber linings of the hydraulic brake system components.
2. Brake fluid must meet specifications of at least DOT-3. Using a different type of brake fluid than recommended may result in contaminants that may damage the internal rubber seals and/or rubber linings of the hydraulic brake system components.
3. Do not use brake fluid that has been left open for a long time as it absorbs moisture from the air. Excess moisture can cause a dangerous loss of braking performance.
4. Do not drain brake fluid into drains, on the ground or into systems not intended for this purpose. Brake fluid is toxic and failure to do so creates a risk of groundwater contamination.
5. Do not allow brake fluid to come into contact with painted surfaces, electrical connections, wiring or cables. Brake fluid can damage painted surfaces and cause corrosion of electrical components. If brake fluid comes into contact with painted surfaces, immediately flush the area with water. If brake fluid gets on electrical connections, wiring, or cables, wipe the brake fluid off with a clean cloth.
Never allow oil or grease to enter the brake system. Otherwise, the entire system may fail.
6. Brake fluid may be irritating to the eyes and skin. If contact occurs, do the following:
- Eye contact - Immediately rinse eyes with clean running water and consult an eye doctor.
- Skin contact: Wash skin with soap and water.
- If swallowed, seek immediate medical attention.
Removing air from the brake system
1. Before starting work, check the brake fluid level in the master brake cylinder reservoir; to do this, perform the following steps:
- Open the hood.
- Unscrew the cap of the brake master cylinder reservoir.
- We check the brake fluid level in the reservoir: it should be near the top o, which is marked on the wall of the reservoir.
- If necessary, add fresh brake fluid to the reservoir until about.
Attention: The brake fluid level in the expansion tank must always be at about. During the air removal procedure, we regularly check the level and, if necessary, add brake fluid to the system.
2. We remove air from the brake system in the following sequence: first the rear right wheel, then the front left, rear left and finally the front right.
Note: The work below is shown on the front right wheel as an example.
Payment for goods and downloading of the book in electronic form (PDF format) is made on the website.
To do this, you need to find the book you are interested in and click on the “Buy” button. The price of the book is indicated on the button.
For convenience, the price on the website for residents of Russia, Belarus and Kazakhstan is presented in rubles.
For residents of Ukraine in hryvnias, and for all other countries - dollars.
After clicking on the “BUY” button, you will be taken to the payment page, where you can select a payment system with which you can pay for the selected book using any bank card (Visa, MasterCard, MIR, etc.)
Important Types and features of skidders
- Yandex (payment from any bank cards, Yandex Money account, QIWI Wallet, terminals, etc.);
- Portmone (payment from any bank cards, Portmone account);
- PayPal (payment from any bank cards, PayPal account);
- WebMoney (payment from any bank cards, payment from WebMoney wallets).
Mountain brake wiring diagram ⇐ HD65, HD72, HD78, Mighty, County. Electrics
Post by vitaliy.schetilin » Sep 12, 2022, 10:12 am
Post by ivanov.i » 13 Sep 2022, 20:40
Post by vitaliy.schetilin » 20 Sep 2022, 19:46
Post by ivanov.i » 20 Sep 2022, 20:12
Post by vitaliy.schetilin » Sep 20, 2022, 10:06 pm
Post by ivanov.i » 21 Sep 2022, 19:23
Why don't you blame a crack in the membrane of the mountain brake flap? The membrane often fails due to the formation of cracks in it. The housing in which the membrane is located is collapsible. It is difficult to find a membrane separately from the damper, but instead of the original membrane it fits >>> the boot from the Niva CV joint
Sometimes there is also a problem where the exhaust brake does not work. I had and then read similar things a couple of times. The reason was a crack in the bend of the exhaust pipe of the muffler i.e. in front of the mountain brake flap, where the pipe bends upward. The crack was caused by vibration of the muffler. I brewed it and everything was fine.
It also happens that the exhaust brake flap gets stuck and does not close.
Source
Causes of timing belt breakage
The timing belt is one of the main elements of a car that needs to be serviced promptly and efficiently. In this case, the reasons for a broken timing belt may be the following:
- Untimely replacement of the unit. As a rule, the manufacturer recommends replacing the product after 60-70 thousand kilometers.
- But recommendations may differ - each manufacturer can indicate its own time parameters, which are often more or less than the period we mentioned.
- Incorrect operation. The belt can break not only due to natural aging, but due to errors in the operation of the entire unit.
For example, if the tensioners, rollers or pump jam while driving, the resulting impulse can lead to a rupture of the timing belt. It looks strong and doesn't tear. When the rotation of the crankshaft reaches 5-6 thousand revolutions, any sudden impulse can lead to irreparable consequences.
Particular attention should be paid to belt tension. Often the cause of a rupture is its constriction
Important TOP 3 mountain snowmobiles Polaris (Polaris)
On the other hand, weakening the tension can lead to a problem with similar consequences - the belt jumping off the pulley grooves.
There is a high probability of the same situation if there is strong play in one of the pulleys
That is why it is so important to promptly check the timing belt tension and the condition of all system elements. Oil getting on the surface. When the first traces of oil or coolant appear on the timing belt, the product must be replaced. Otherwise, the entire gas distribution mechanism may not operate efficiently, the belt may slip, jump off the pulley, or even break.
Many car enthusiasts make a big mistake - they simply wipe off the existing dirt with a rag and continue to use the car.
As practice shows, once technical liquid gets on the belt texture, it is no longer possible to remove it. Rubber literally absorbs oil and loses its quality. You can only save yourself by replacing it.
Low quality product. When purchasing a timing belt on the market “cheaply,” be prepared for “surprises” during operation. Please note that saving in this matter will inevitably lead to even greater costs in the future.
If you are going to buy parts for a car, they must be original. In this case, you will be absolutely sure of their quality and declared service life. Service station technicians are well aware of situations where, because of a few hundred rubles in savings, car owners spent tens of thousands on repairs.
This is not surprising, because a low-quality timing belt may not last even 20 thousand kilometers. Believe me, driving and expecting the belt to hold up at any time is not the best pleasure.
External damage. Due to natural wear and tear or poor quality, various defects may appear on the belt, for example, indentations, cracks, peeling of threads at the end of the product, and so on.
Such defects cannot and cannot be eliminated. The only solution in this case is to install a new belt.
You shouldn’t ignore the problem either, because at maximum load even a small defect will develop very quickly and cause the belt to break. Subsequently, you can blame yourself for a long time for being slow, but you can’t return the past.
Harsh climate and active driving. Please note that operating a car in conditions of too low or, conversely, too high temperatures requires a special approach to repair.
In particular, sudden and frequent changes in temperature can wear out the timing belt faster, especially if it is of poor quality. As a result, replacement is better done much more often than the manufacturer itself recommends.
Let's summarize. The cause of the rupture may be:
- Oil getting on the timing belt;
- disruption of other nodes;
- external damage;
- natural wear and tear;
- defect (defect);
- operating a car in difficult conditions (for example, severe frosts).
Problems with brakes nd78 d4dd
Hi all! The front wheel cylinder was leaking, I changed it, and at the same time changed the pads. I changed the vacuum seal (bleed it) and the turbocharger. I bled the brakes (3 liters of brake). When you press the pedal, it falls down, the brake fluid goes out of the reservoir and rises back up. Tell me what you think.
I think that THREE liters of brake brake is not enough, it was necessary to fill TEN liters
I’m kidding, of course - there is only 300 ml of brake fluid in the hydraulic brake and clutch drive.
See the picture below. And the problem seems to be that
you didn't let the pads down.
Read how to fit the pads > HERE
Other guides >
HERE
- so that advertising doesn’t bother you, put it there >
THIS
- select for your browser. On each wheel there are two windows for opening each of the two pads separately - I’m writing this because one colleague once wrote that the pads were all connected, but as it turned out later, for some reason he thought that both pads were connected from one window. In short, on each wheel both pads are supplied separately and each pad has its own window (hole) for access to the cylinder ratchet. Near the hole there is an arrow in the direction of where to turn, if you can’t see it, wipe it with a damp cloth.
If the car won't start
If the Hyundai 78 truck stalls and does not start, and no error code appears on the information screen, then there are 2 possible faults:
- the starter turns when you turn the ignition key, but the engine does not start;
- the system does not turn on the starter when the ignition is turned on.
We carry out repair work in the same way as we repair 65 and 72 models. In the first case, the causes of failure are defects in the mechanical components of the machine. It can be:
- fuel injection pump damage;
- mechanical defects of the engine and injectors;
- airing of the fuel system;
- lack of fuel in the tank;
- clogging of the fuel separator and wires;
- check valve deformation.
If the starter does not operate, you should pay attention to electronic mechanisms and electrical equipment, in particular:
- CAN bus short circuit;
- damage to the main relay;
- lack of detachable electrical wiring contacts;
- defects in the starter solenoid relay;
- lack of supply voltage in the motor control system;
- failure of the ignition switch;
- short circuit or break in the wiring cable.
Troubleshooting methods: replacement of parts, diagnostics, programming and parameterization at a service station.